M1dn1ghtN1nj4
-
Posts
43 -
Joined
-
Last visited
M1dn1ghtN1nj4's Achievements
")
Contributor (2/6)
27
Reputation
-
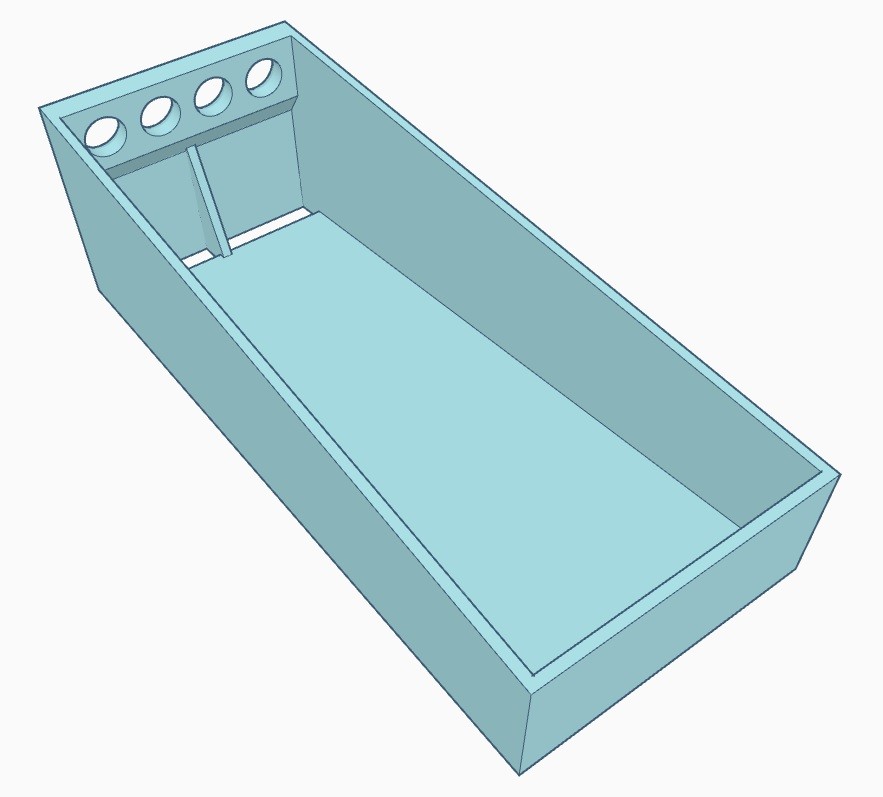
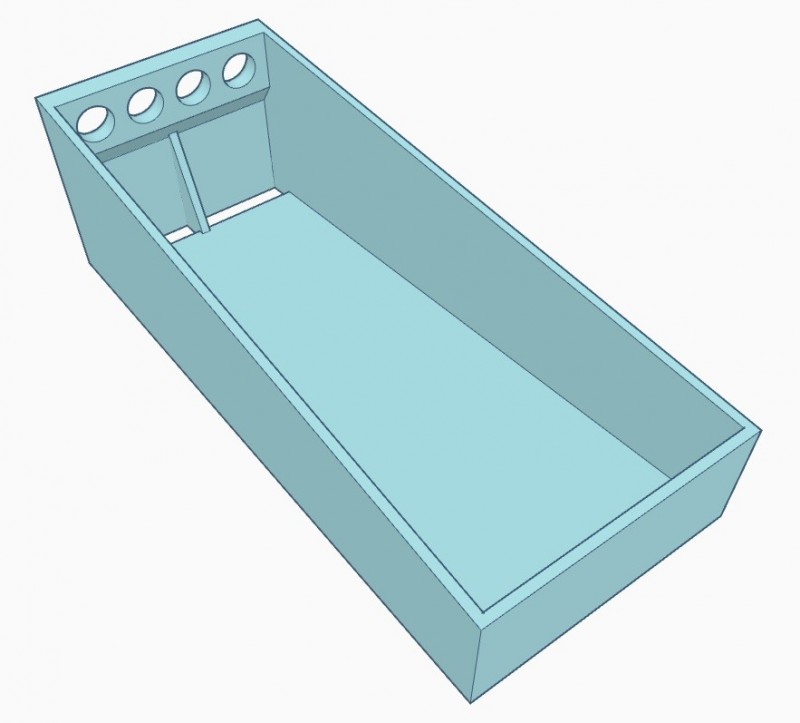
 OK, so I added a feed hopper that takes 4x 16mm ID (19mm OD) hoses running off of a couple of 12V submersible pumps. You don't have to use all the feed holes in the hopper, but you can if you want. I'm headed back to my other house tonight to get my big 3D printer. These won't print on my smaller one that I have here. Once I get them printed, I will set up a video, and test out water flow. Should be self contained with a 5 gallon bucket, so it's recirculating. If any of you have any ideas, suggestions, or possible changes/additions to the modules, let me know. If you'd like to design one to fit the system, I'll forward you an STL of one of the pieces so you have something to work with.
 -
That's actually not a bad idea. I'm going to print versions in both PLA and PETG, see which one will hold up better. If I do get enough people interested, I'll make molds and mass produce, but I'm thinking only 10 or so people will be interested in getting a set. Who knows, I might be surprised. 😄
-
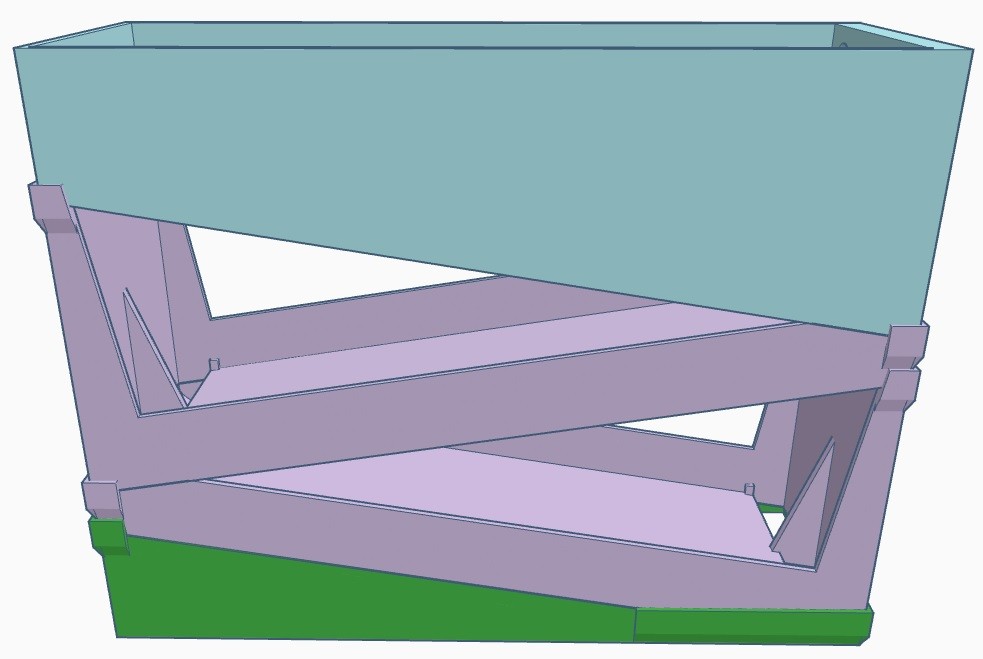
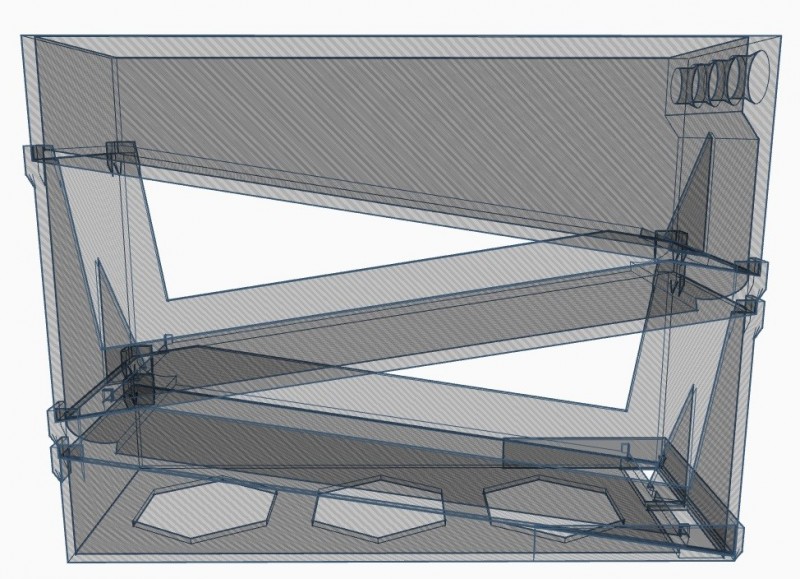
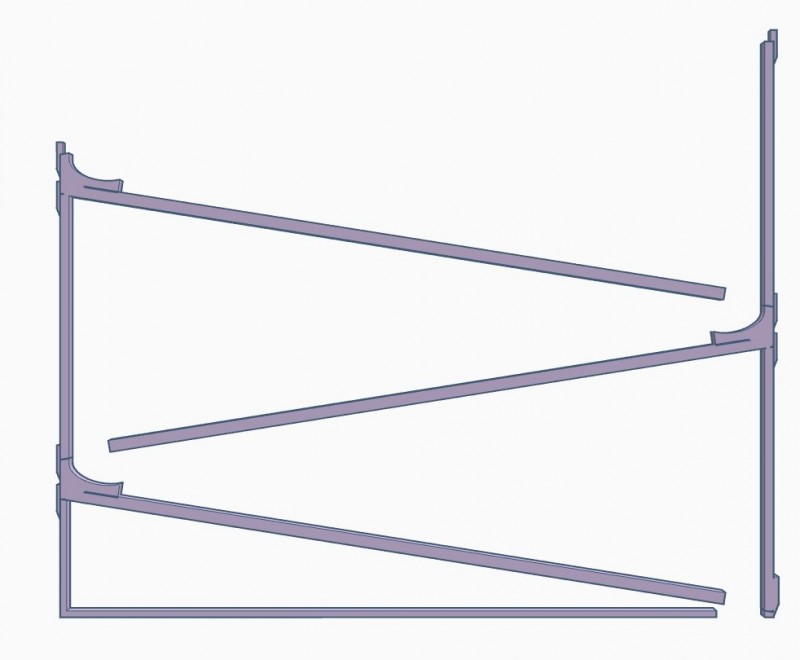
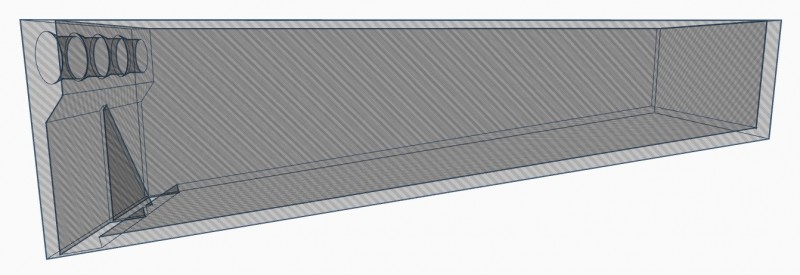
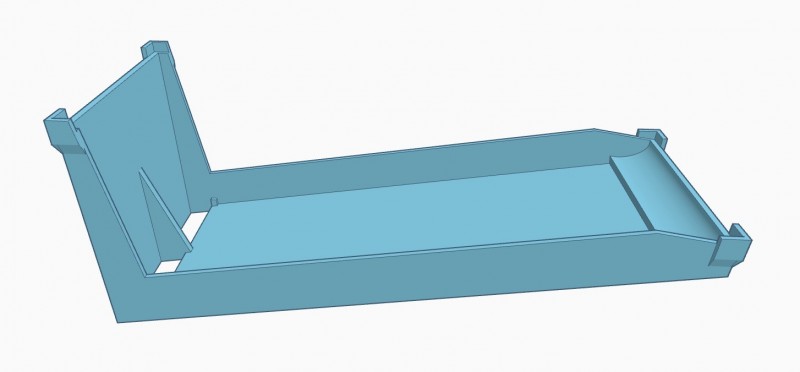
OK, so this time around, I have made things a LOT easier to work with, and expandability is key here. Sure, it's not huge, but for a portable system, this should work great. The key thing here is that I wanted a system that could be printed with little to no waste material, and yet have the structure and strength to hold up for a long time. This is what I have come up with so far. This will likely be my last design for this version. I'm only tweaking a few dimensions here, as well as making new modules that can be added to it. Features: Modules are 276mm long by 104mm wide, max height of 106mm (virtually) unlimited stackability Use modules in any order you want Use whatever sluice mat you want (to a point) Best used with a 5 gallon bucket (self-recirculating water system) Current Modules: Feed hopper Mat tray Bottom Support Key note here is that those modules, even with the tilt, print FLAT on a printer, and unless something drastic changes, will require NO supports. That means nothing to clean up after the print is done. Pull it off the printer, and use it right away! The cutaway view shows you how it currently operates. I did away with the "G-Force" drop whatever that the Gold Cube has. I wanted better flow, and didn't think that part was completely necessary. Some of those angles might change by the time the final version rolls around. I am still waiting on my four 200GPH water pumps so I can physically test flow rates. I know this is still very small compared to a lot of the others that you can shovel hundreds of pounds a day into, but this is meant more for fine cleanup or to run pre-classified material through, although this should be able to do a bit of classifying on it's own. Also, as I design more modules, I might include a couple modules that will spray wash and classify before sending down the smaller material to be run over the mats. I would also like to design a sort of trommel as one of the modules. Would have to be geared to run off of some water pressure, so I don't have to include a motor and all the electronics and extra building parts that come with it. This is one part that would have to be made from metal, as anything printed would get destroyed very quickly, so I'm still contemplating this one. Remember, this system isn't meant to drop boulders into. I'd say you can safely feed in no larger than 8-mesh material. Depending on water flow, you might get away with 4-mesh, but I wouldn't count on it. More info coming as I get more work done, and get a chance to print some physical models.

-
I've actually started redesigning this last week. Much easier printing, fewer parts, more robust, unlimited stackability, interchangeable modules, and uses whatever mat you want to put in it. Similar style to the Gold Cube. Each module (layer) is 100mm wide, 220mm long, 70mm tall, 9° bed tilt. Existing "modules": Wash trough Linear classifier Manual trommel (powered eventually) Regular riffle slope
-
Going to start printing this sometime this week. I need to finish my printer enclosure first. The enclosure just needs sound proofing, an exhaust fan, and my filament holder. Should be a lot of fun.
-
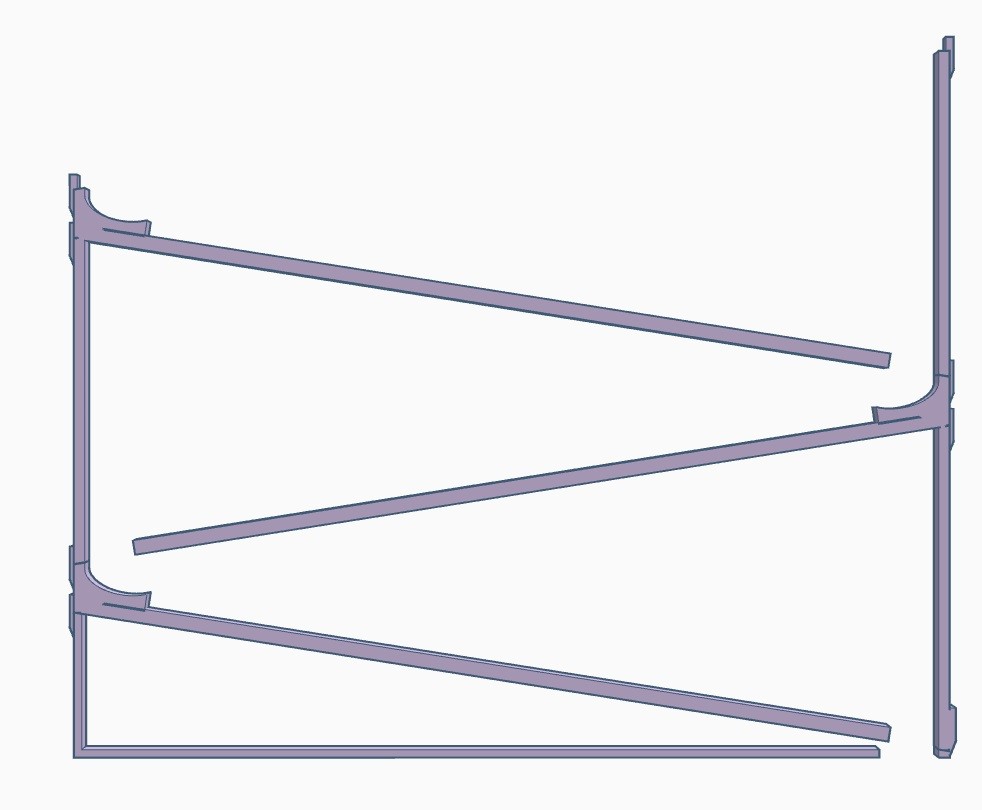
I have a 500GPH pump on it's way. 3/4" ID hose. For those curious and don't want to decipher the screenshot and do math, the total height for one top tray (slick plate) and 2 mat trays total 165mm tall (or 6.5"). Plates are 9 degrees. How do these numbers sound? It's certainly smaller and shorter than a Gold Cube. I have not obviously tested this yet as I don't have the pump. I'm a bit tentative about printing the trays yet, as they take 30 hours a piece to make. If I were to sell these, I'd have a working design, then find a place that make them from injection molded plastic.
-
So mesh is measured by the number of openings in an inch, in ONE direction (not how many are in a "square inch", correct?
-
That what I've been using. Typical window screening is 18 mesh. Maybe I need to buy a mesh classifier that around 60, 80, and 100 also.
-
Another question. When it comes to classifying down to concentrates, what mesh size would be best to use to produce the cons that would be best for this setup?
-
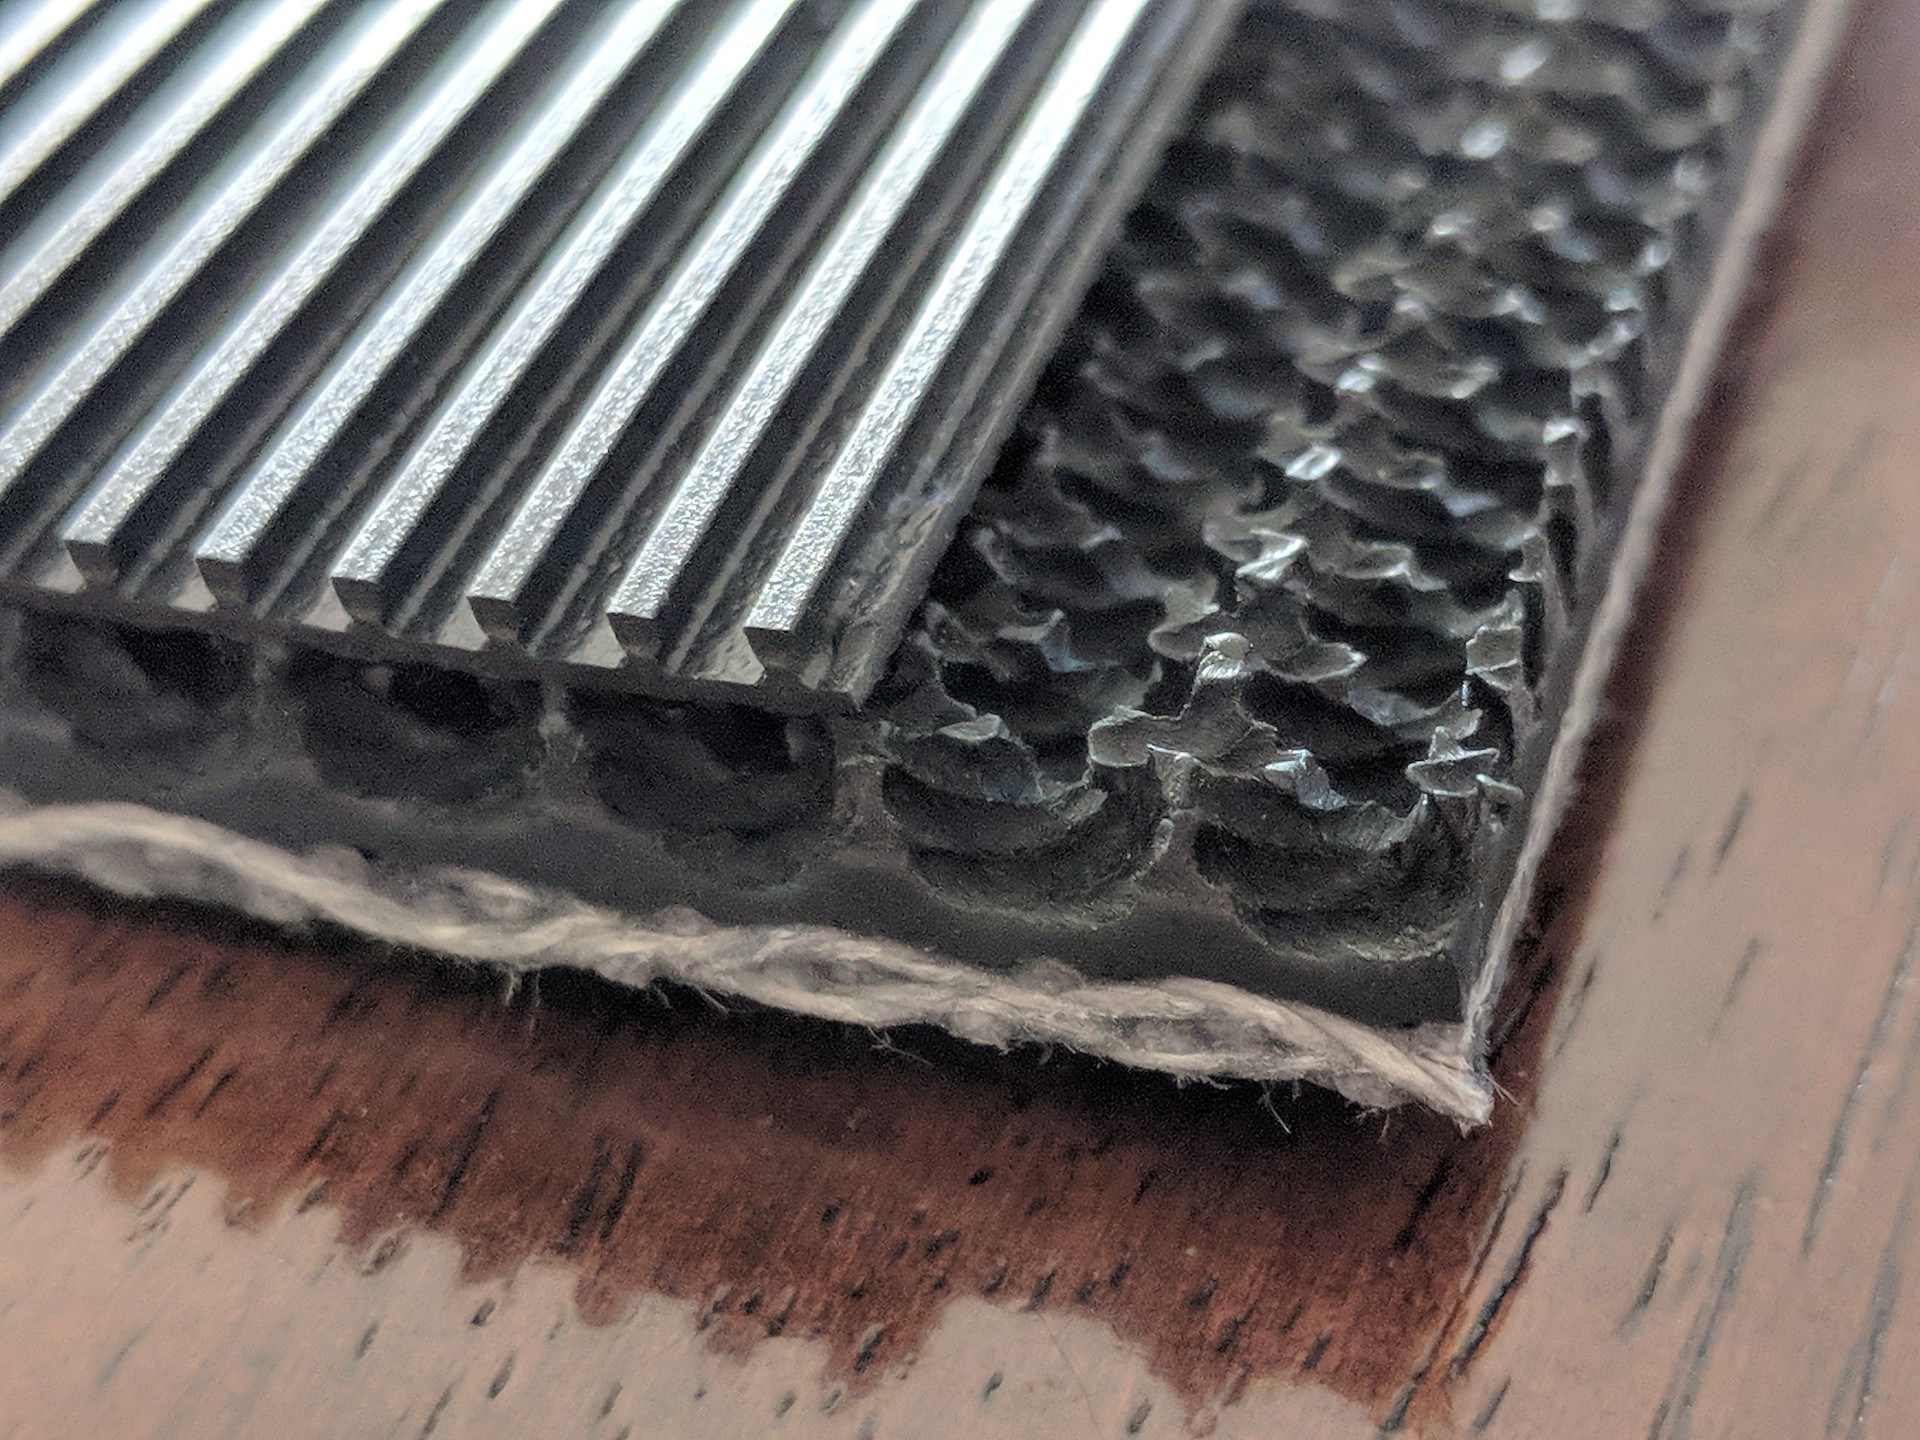
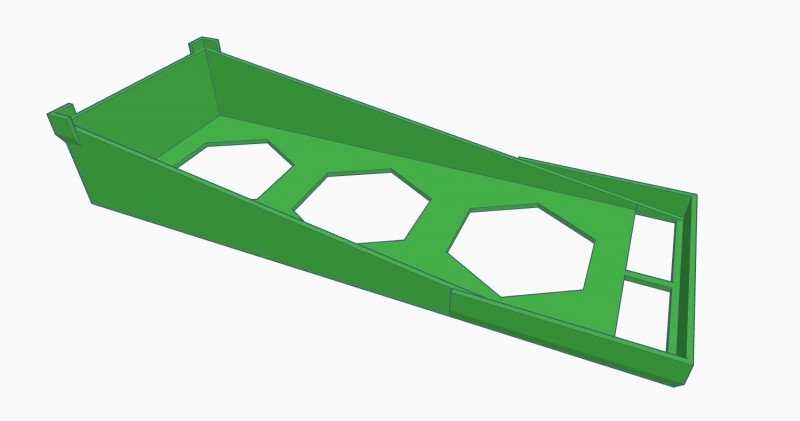
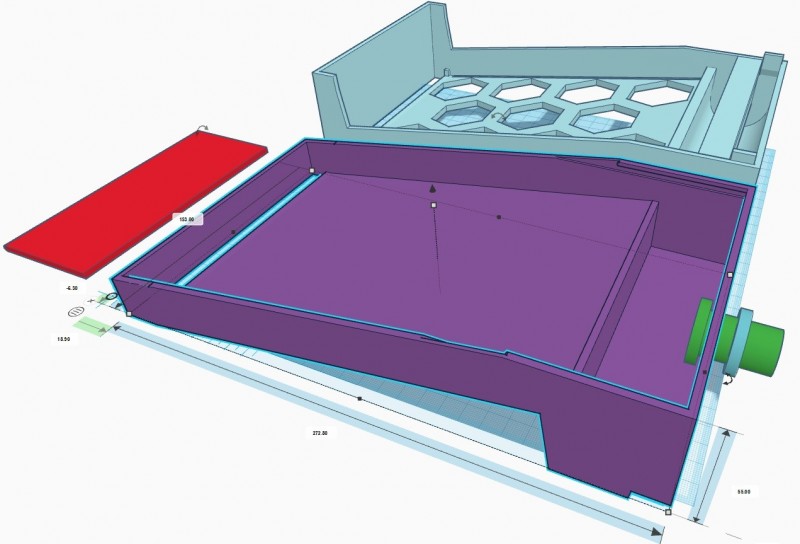
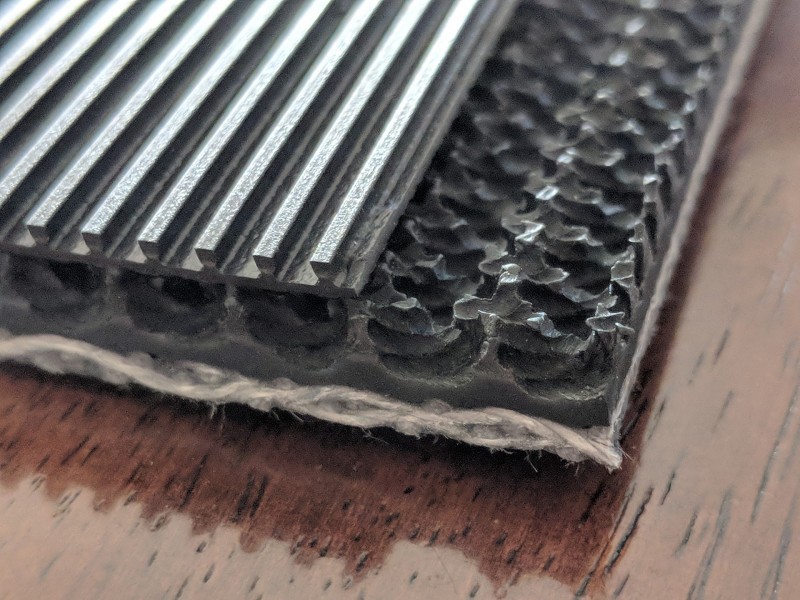
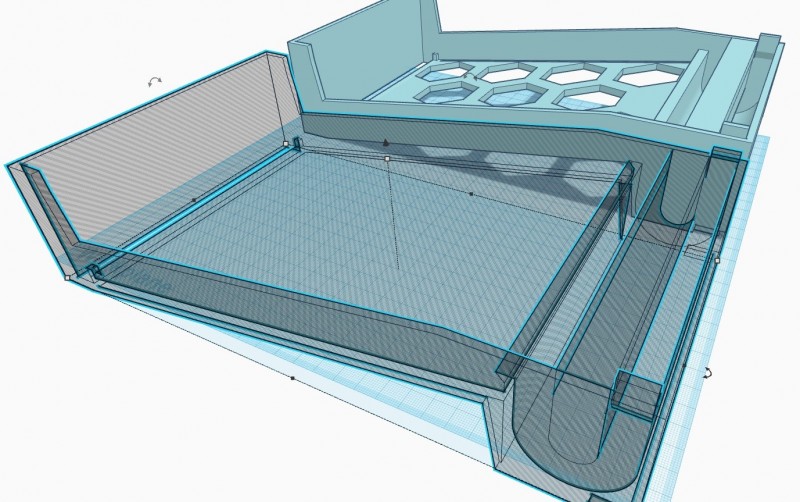
So, after playing around with a few ideas, I figure it's time to go ahead and make a larger scale sluice. No tiny 95GPH flow, this is going to be 500GPH. That's just over 5 times as powerful as my previous "pocket sluice". This is basically a small Gold Cube. Half the width, and scaled down in some areas. This one is designed to take real gold sluice rubber matting. I bought two types, one is generic "High-Low" matting that's 2.3mm tall. The other is "Vortex" matting, and it's 7mm tall. The trays I have are designed to print with minimal supports and material, hence the honeycomb grid. There is a little angular lip at the top of the matting area that keeps the top of the mat in place, and places the water and material flow completely onto the mat. The little pegs at the bottom keep the mat from sliding down, and and small enough to not impede water flow in any meaningful capacity. The underflow section at the top is actually the exact same dimensionally as the Gold Cube, so that the water flow works correctly. Under the foot where the underflow is, is a cutout that fits into the raised pegs at the top of the bottom end, so they can stack neatly. There is only 0.3mm of play between the parts, so that it's a nice, tight fit. The top tray, or "slick plate" is the same general idea, and has a 9 degree angle, just like the matting tray. The red lid slides into the slot around the top, and creates a tight sealed box that directs the water flow. It has only 0.3mm of clearance. The back of it will end up having a threaded tube, 3/4" to allow a bilge pump to be hooked up to it. What's not pictured here is an additional piece that directs water flow down to prevent excess splashing and uneven output.
-
So my next project is nearly complete already. I've designed a "mini gold cube". Same general idea and layout, but each "tray" is only 11" long, and 6" wide. About half the width of the real Gold Cube. The underflow loop is exactly the same dimensions as the Gold Cube as well, to make calculations easier. I've read that the Gold Cube is set to run on 1100GPH. Since mine is half that width, I would assume that 500GPH would be fine. Also, my trays are set at 9 degrees (just how it worked out). Is that an appropriate flow rate?
-
Practical 3d Printed Sluice
M1dn1ghtN1nj4 replied to Creekboy's topic in Gold Panning, Sluicing, Dredging, Drywashing, Etc
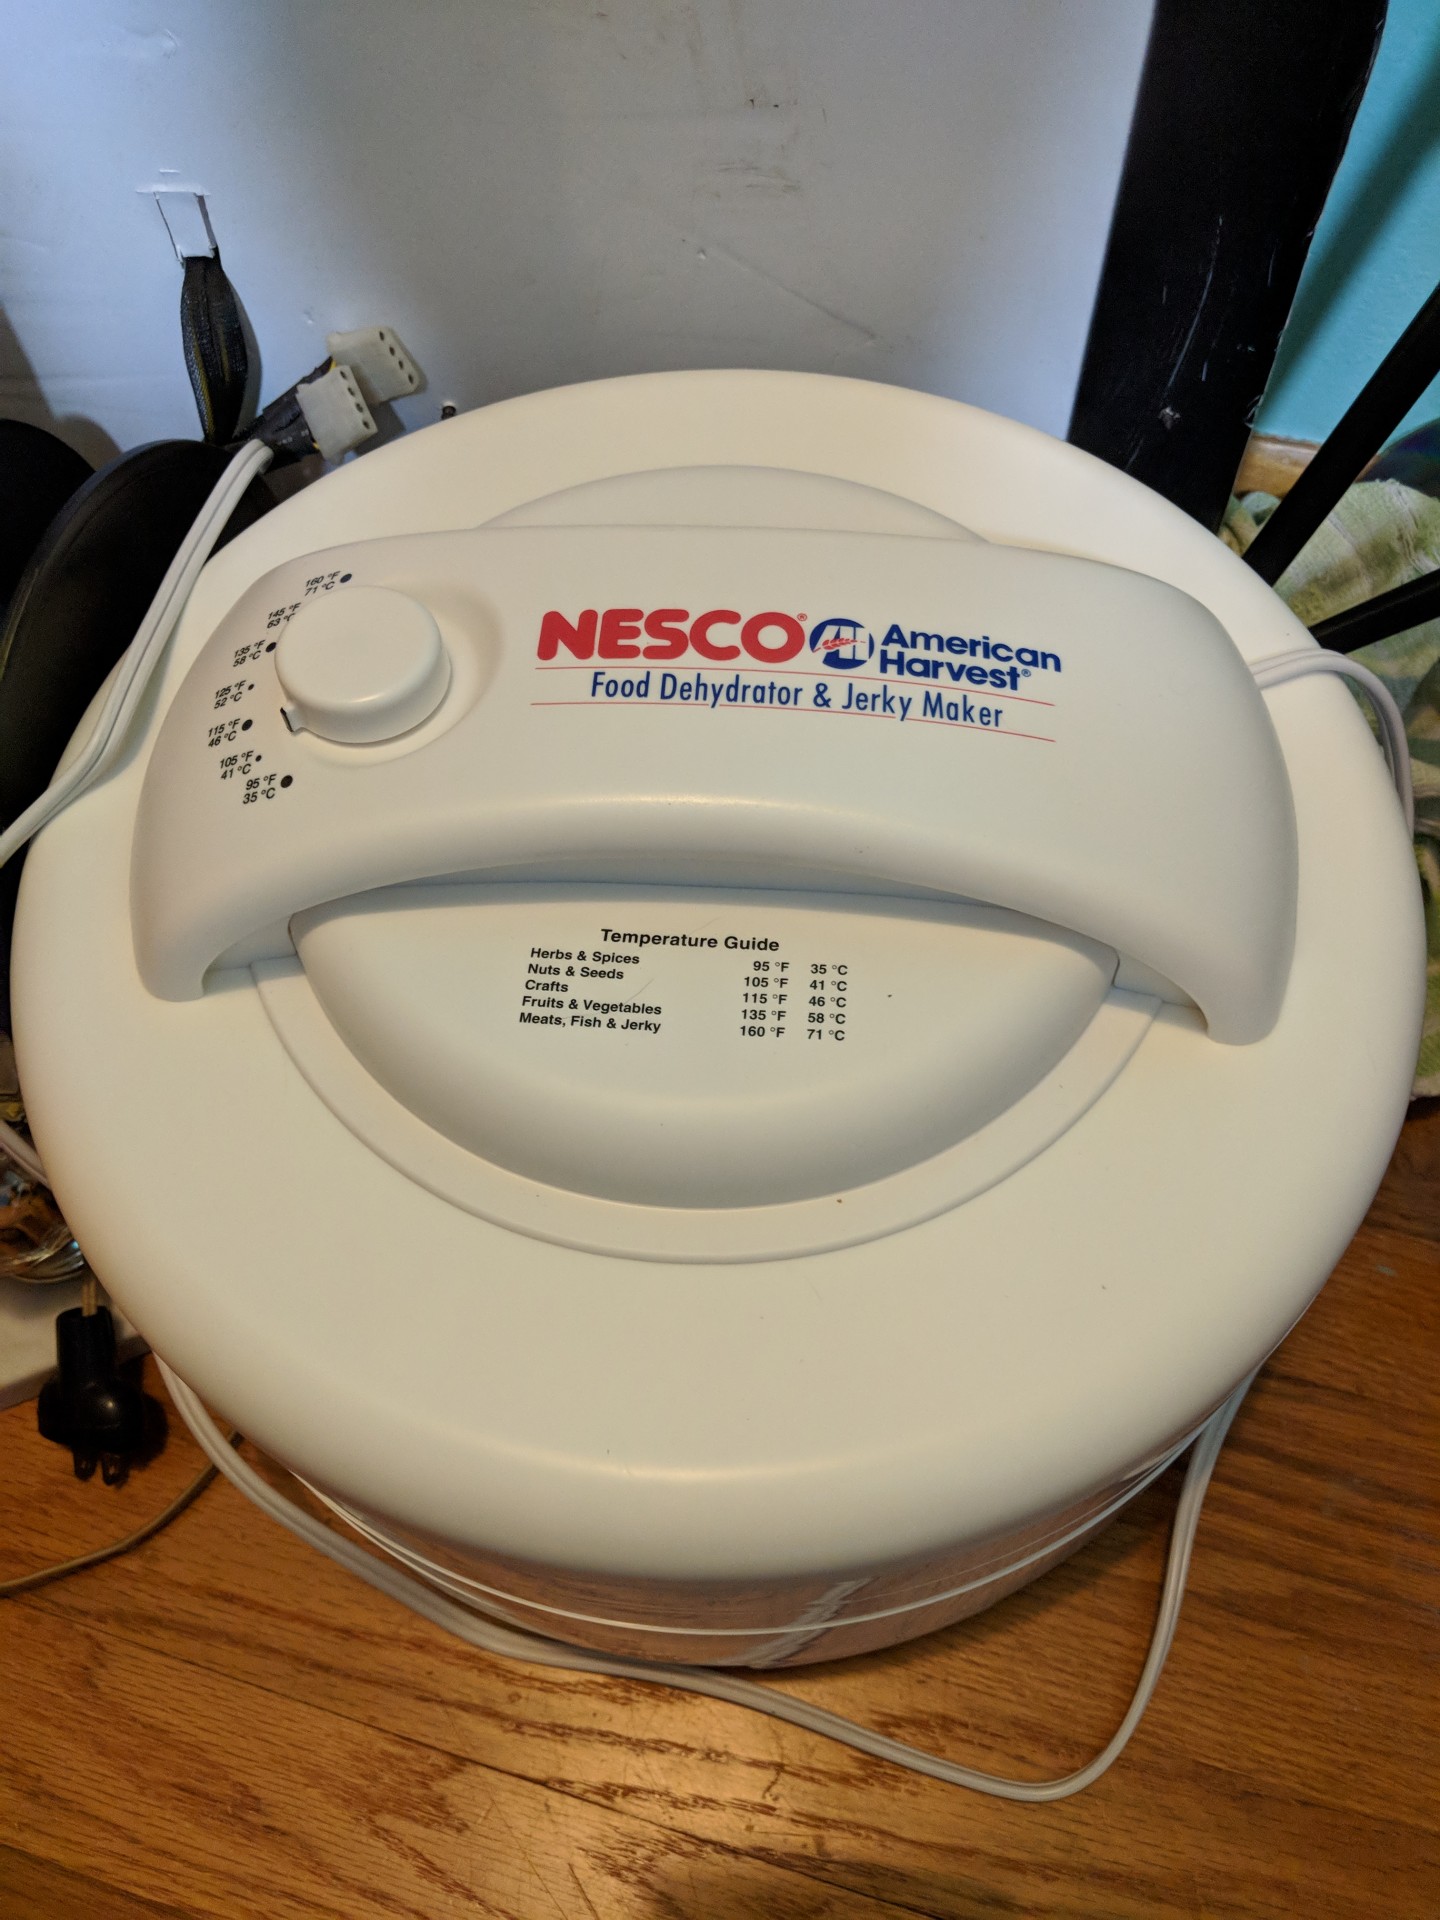
And I use this food dehydrator to dry my filament, which then either gets used immediately, or goes into the bucket for long term storage.
-
Practical 3d Printed Sluice
M1dn1ghtN1nj4 replied to Creekboy's topic in Gold Panning, Sluicing, Dredging, Drywashing, Etc
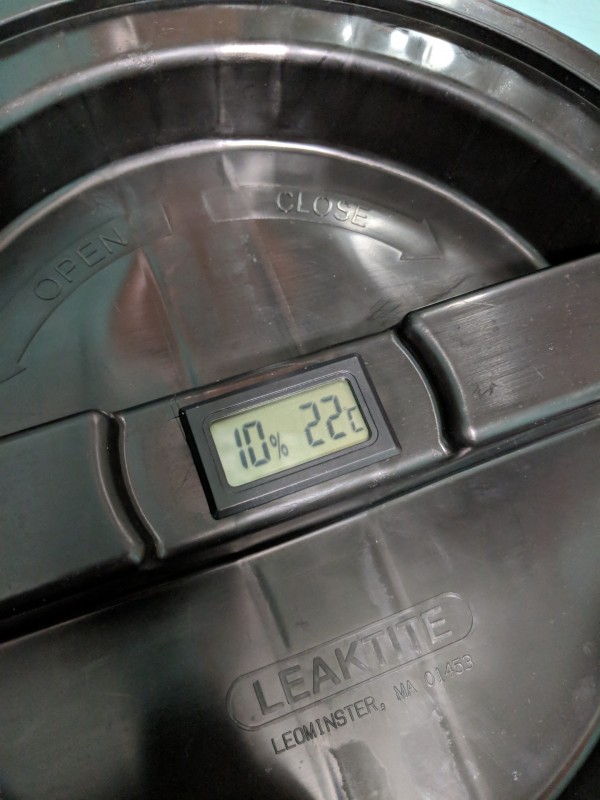
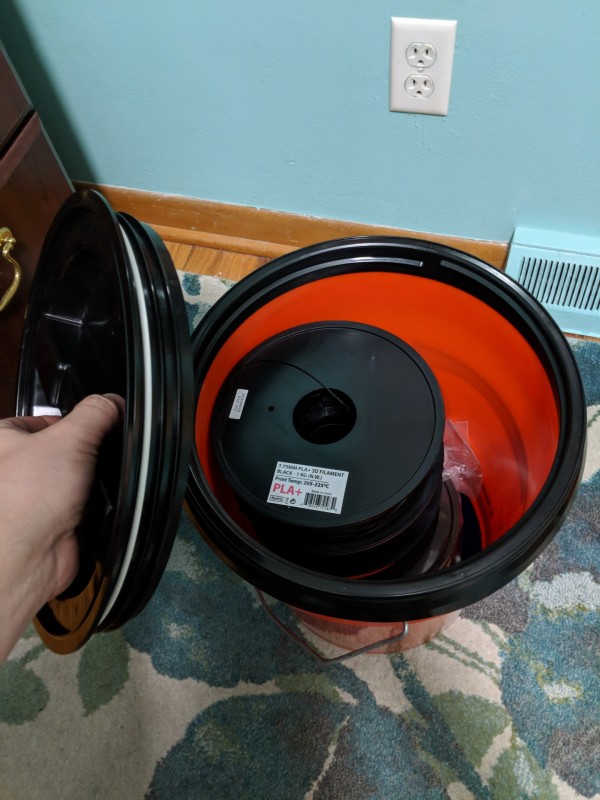
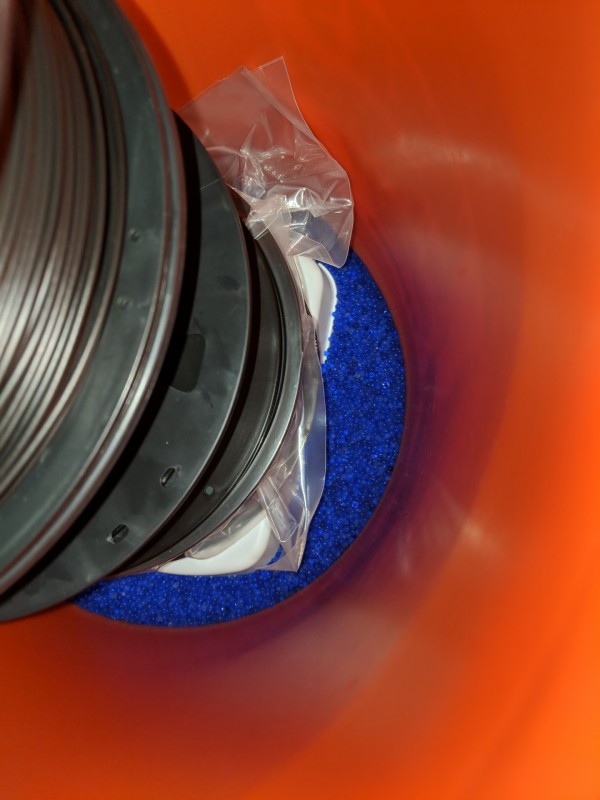
I use a 5 gallon bucket filled with desiccant. Turns pink when it's fully absorbed moisture. Has a screw top lid, with a digital humidity level and temperature sensor. Holds 4 spools of filament. Total of maybe $40, possibly less.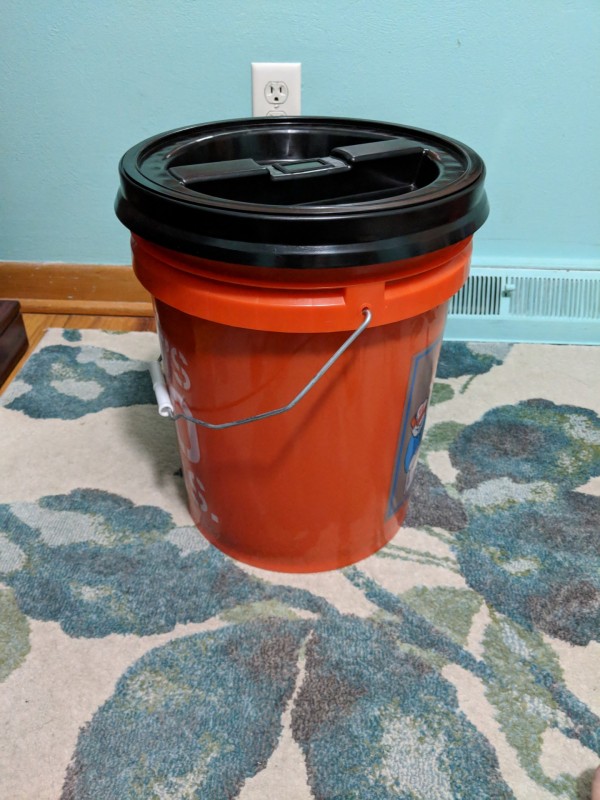
-
Practical 3d Printed Sluice
M1dn1ghtN1nj4 replied to Creekboy's topic in Gold Panning, Sluicing, Dredging, Drywashing, Etc
I've tried PLA on painters tape, and it ends up stuck to the bottom of the print, so I have to sand it to get it clean again, and even that's not enough. I currently use purple Elmers Glue Sticks on my TH3D build mat, and print on it like that. Pops right off, and cleanup is just a rag with water. Zero residue, and comes 100% clean. -
Thanks! I'm headed to Michigans upper peninsula Saturday. Will be there just over a week. I'm taking all my gold sluicing stuff with me. Highly doubt I'll find anything, but it'll be interesting to give my stuff a live test in the wild. If all goes well, I'll post the version that goes on the 5 gallon bucket on eBay. Not sure on price yet. But I want to be sure it's functional. If like to make a much larger version, with a stronger pump, and much larger throughput capacity, but time and money aren't on my side right now.