Leaderboard


.thumb.jpg.a9604472c3cce6d83a8d8fcc887e33bc.jpg)

Popular Content
Showing content with the highest reputation on 06/19/2018 in all areas
-
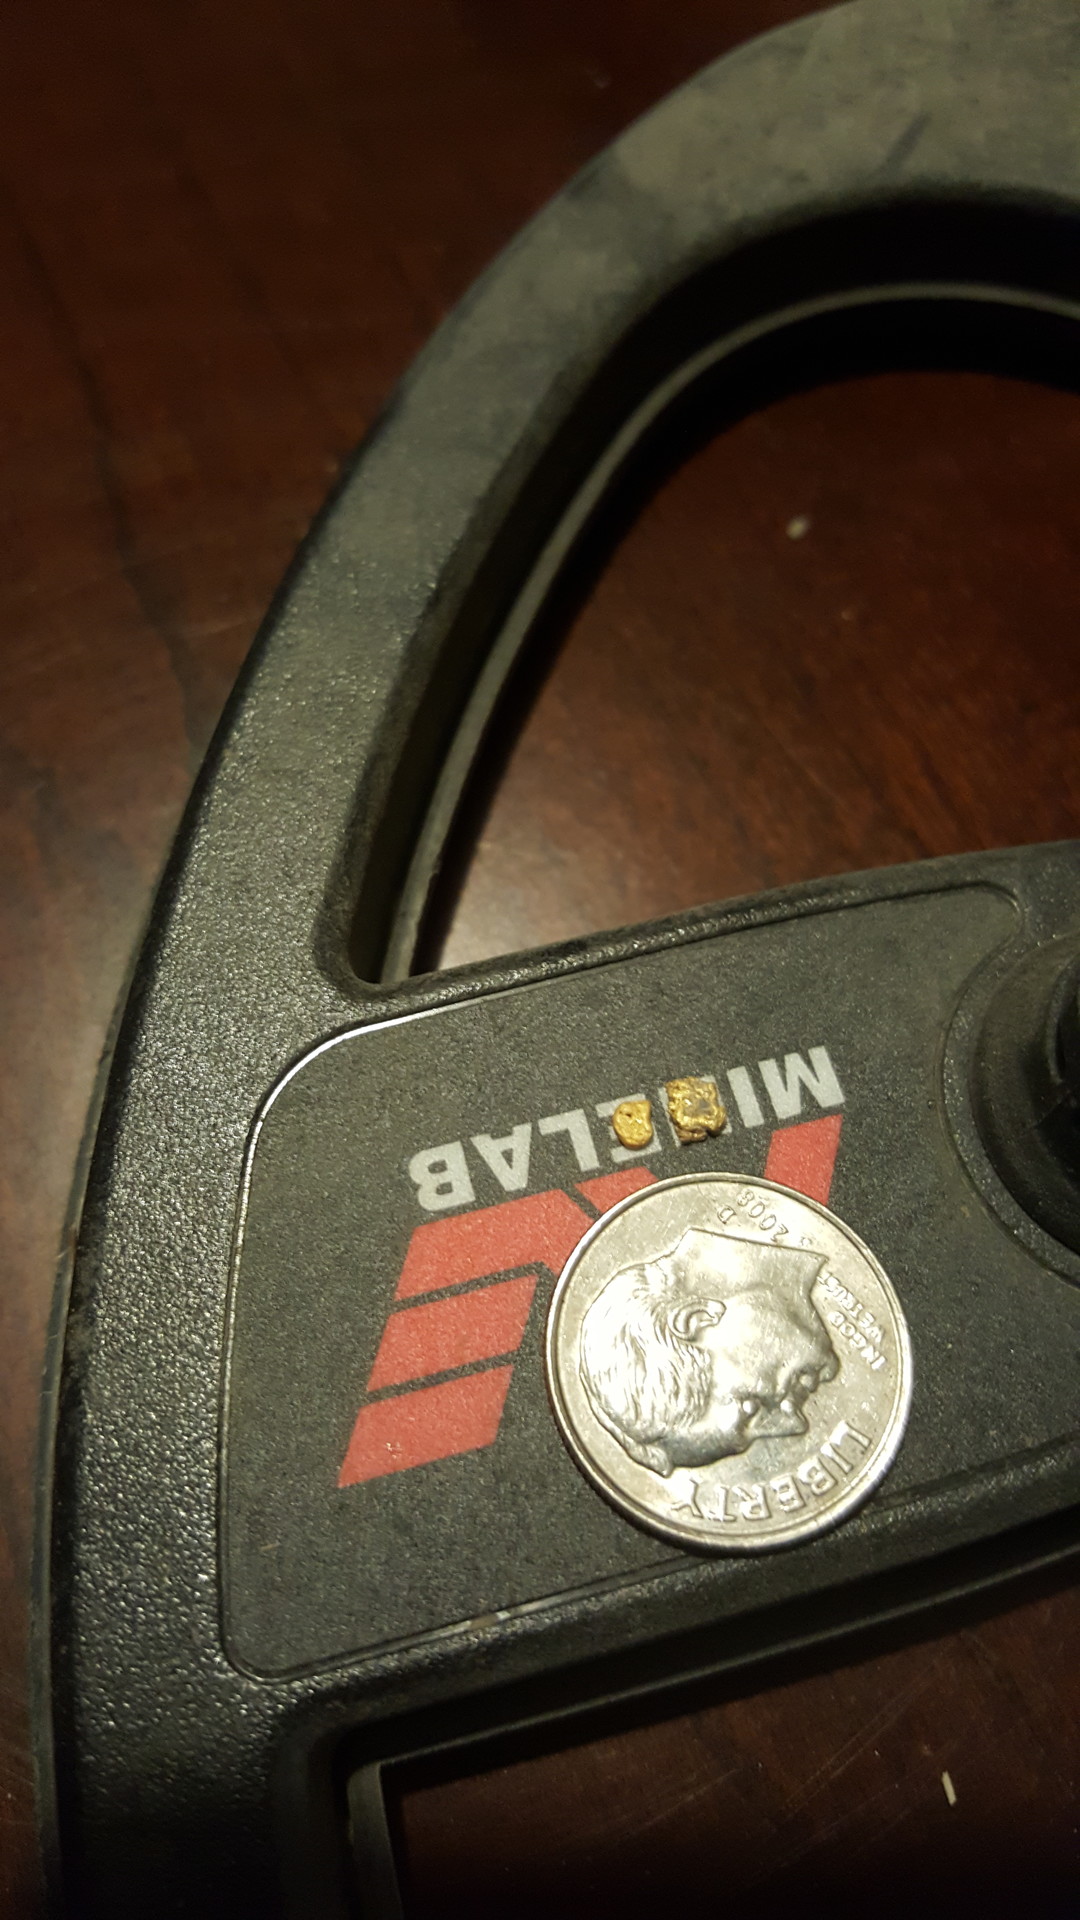
These tips are based on my personal use of the Minelab Equinox 800 at a few locations in Nevada and California. That means you have to take this with a grain of salt for other locations as far as exact settings but the basic process is the same. I will probably update this in the future as I learn more, including hopefully any observations and tips people may provide on this thread. The Gold Mode is only available on the Equinox 800 and features a VCO boosted audio that is quite different than the other Equinox modes. It is very powerful, especially in Multi frequency, and will detect very tiny pieces of gold. The downside is that in highly mineralized ground you will encounter hot rocks and even the ground itself that wants to react and create signals. The basic secret of nugget detecting with a VLF detector is in tuning the detector for the best performance possible, while accepting that air test type results are not possible in bad ground. A balance must be obtained between sheer power (sensitivity) and the false signals generated in difficult ground. The key default settings for Gold Mode 1 are: Frequency: Multi Ground Balance: Tracking Sensitivity: 20 Recovery Speed: 6 Iron Bias: 6 Accept/Reject: -9 through 0 rejected, 1 through 40 accepted When I hit new ground when nugget detecting I want my detector to be running with manual adjustments. Initially knowing how the ground responds is very important and I want to make any settings that affect anything myself. Therefore, the first thing I do is turn off the ground tracking and use the Auto (pump coil over ground) method of ground balancing instead. Ground tracking can also track out faint nugget signals, so my preference is to run with it off if possible. Frankly, I have not experimented with Iron Bias much. In theory at least reducing this setting will reduce the possibility of tiny gold being misidentified as ferrous. Since I am mistrustful of filters I have been running the Iron Bias at 0. Starting out however people may want to leave it alone since adjusting too many things at once may not be productive for beginners. Recovery Speed is highly misunderstood. People latch onto one out of context statement "lower recovery speed equals more depth" and too many people therefore are immediately going to lower settings. Higher recovery speeds allow the detector to better separate trash targets from good and minimises any masking effects. "Masking" is where bad targets overwhelm and hide good targets. Mineralized "hot rocks" are really nothing more than a large target that can mask (hide) nuggets not just under but next to them. Reducing the recovery speed will often add no depth due to ground conditions, and mask nuggets next to hot rocks. Higher recovery speeds will reveal those nuggets, and so you are often getting more "relative depth" with higher recovery speed settings. I basically stick with the default setting of 6 and will not go lower unless the ground is relatively low mineral and free of hot rocks. Most importantly, in some ground you will find that the coil will tend to give false signals when bumped. This is directly affected by Recovery Speed. Going to lower recovery speeds will generate more false signals due to bumping on rocks. With all that said however, reducing the Recovery Speed can add extra sensitivity to very deep or very small targets. A setting of 4 is easily manageable in low mineral ground and can work for the Equinox in higher mineral ground with a skilled operator. It is possible to go even lower though the detector will typically become less stable at the slower recovery speed settings. Sensitivity is one of those “set it as high as you can without making the detector too unstable” type settings. My settings normally range from 18 to 25 but could go lower in bad ground. Now, the extremely important Accept/Reject settings. Weak gold signals in highly mineralized ground will definitely run into the ferrous range. Starting out, I am going to toggle the Horseshoe button to remove all rejected settings so that the detector reacts to everything. My starting point for Gold Mode 1: Frequency: Multi Ground Balance: Auto (pump method) Sensitivity: 20 Recovery Speed: 6 Iron Bias: 0 Accept/Reject: -9 through 40 accepted The first thing I want to do is see how the ground responds with these settings. Find a place hopefully free of trash, and run the coil over the ground and observe what happens. In most gold locations you should see lots of target responses at -9 and -8 plus possibly -7. These are ground responses and are giving you direct feedback on your settings. The first thing I want to try and do is reduce those ground responses as much as possible by employing a mix of ground balance, sensitivity, and recovery speed. Simply ground balancing should cause those signals to alleviate somewhat. You will want to note hot rock readings especially. The ground will balance out (ground noise reduce) at one ground balance setting, but it may make some hot rocks worse. Sometimes you can manually tweak the ground balance to also reduce the hot rock response while not really making the ground itself worse by trying intermediate settings. You can only do this when not in tracking since tracking decides for you where the settings will be. I always will stay in manual until forced to use tracking for this reason alone. Reducing sensitivity is also a good thing to do in many cases, yet people are very resistant to doing so for fear of losing depth. The thing is, unless you can get the detector to settle down and run relatively smoothly you will struggle with hot rocks and false signals. Reducing sensitivity will reduce hot rock signals faster than it will reduce metal signals in most cases, so back it down as needed to get stable performance. If the ground is mild enough you should be able to find settings that reduce or eliminate the readings in the -9, -8, and -7 ground range, plus hopefully alleviating any hot rocks that are present. However, in very bad ground you may still have a lot of signals in that region. If so, try a couple things. First, go ahead and try out the tracking. Tracking has an advantage in that it will typically tune out a hot rock in a single swing or two, while being extremely resistant to tuning out metal objects. If you can get smoother performance over the ground than with any reasonable manual settings, it may be the way to go. In the worst ground and hot rocks the magic ability to switch frequencies can be a serious aid. I have found that Multi is very powerful... more powerful than any single frequency. That does mean that by simply going to 20 khz a lot of ground and hot rocks that are noisy in Multi settle down and become manageable. One of these options may allow you to go detecting without rejecting any target id numbers. That would be ideal. However, do not be surprised if residual signals remain in the -9, -8, and -7 region. If they are still too prevalent, then hit the Horseshoe button again to engage the Accept/Reject function, but go in and open up everything except the offending signals. That for me commonly means blocking -9, -8, and -7 but accepting -6 and higher. Or maybe you need to block -6 also. You have to listen to what the detector is telling you and adjust accordingly. If you do end up blocking out some low negative numbers you may find you can also bump the sensitivity back up a point or two as long as everything stays quiet. Again, the goal is to try and shut down ground and hot rock responses to the greatest degree possible while retaining as much detecting power as possible. It's a balancing act. Tiny nuggets will often read as solid hits at target id 1 and 2. The larger the gold, the higher the target id reading. Gold can appear anywhere on the meter all the way up into the 30's if the nugget is large enough. I have not had it happen yet but be very suspicious of 0 and -1 readings as also being possible gold readings.* This is just an example of where I end up at on my ground a lot so far: Gold Mode 1 Frequency: Multi Ground Balance: Auto (Ground pump method) Sensitivity: 18 - 23 Recovery Speed: 4 - 6 Iron Bias: 0 Accept/Reject: -9 through -7 rejected, -6 through 40 accepted Note: the following works as well on both Equinox 600 and Equinox 800. Since Gold Mode lacks target tones, going to Park 2 and using the solutions above plus the additional possibility of tones is another alternative. Instead of using Gold Mode and blocking the lowest target id numbers they can be left open to signal as ferrous or mixed ferrous targets. And you now have 5, 10, and 15 kHz options that Gold Mode lacks. Park 2 set up properly is quite close to Gold Mode performance and a perfectly acceptable nugget detecting alternative, and actually superior for some situations. You may also use Field 2 as a starting point. Be very careful however because the default rejection pattern for Field 2 rejects target id 1 and 2. This will reject most small gold nugget readings and reduce signal strength on larger gold by blocking part of the signal. I therefore recommend Park 2 to avoid this possibly fatal error. For Park Mode 2: Frequency: Multi Ground Balance: Auto (Ground pump method with manual tweaking) Sensitivity: 16 – 25 Recovery Speed 800: 4 - 6 (default is 6) Recovery Speed 600: 2 - 3 (default is 3) Iron Bias: 0 Accept/Reject: Everything accepted, rely on tones (alternative reject -9, -8, and -7 if too much ground feedback) In closing, I want to say that gold nugget detecting demands far more expertise from the operator than most detecting. People who rely on canned settings provided by others will never be expert unless they really understand what the settings are doing. It is imperative that you be able to observe ground responses as I have noted above, and know how to best alleviate them while losing as little depth on gold as possible. It is a very fine balancing point done correctly and can only be done properly by a person who genuinely understands how the detector operates. The only way I know to become proficient is lots of experimenting in the field with different settings on test targets and hot rocks. The settings above are less important than the methodology, and if you want to truly become a proficient nugget hunter you do need to work at it. I hope that helps somebody out - best of luck to you! Updated Nugget Detecting Tips 9/2018 *This article recommends keeping as many negative numbers set to accept as is possible. It has been confirmed that as I suspected that nuggets range well into the negative numbers. First gold nuggets found with Minelab Equinox from Jonathan Porter report...
 4 points
 -
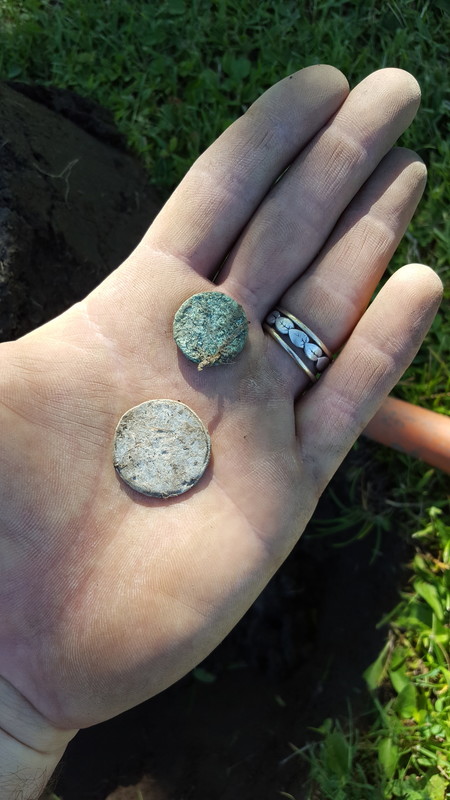
I had another full session out detecting on Sunday 17th June I used the Equinox I had a decent session with some nice finds but the best was an eyes only it is a Neolithic Flint Arrowhead I also had a hammered silver cut half penny a spindle whorl a bit of Saxon chip carving, a flour bag seal and a poor woman's brooch which when I first saw it I thought it was gold. The Neolithic British Isles refers to the period of British history that spanned from circa 4000 BC to circa 2,500 BC, I also had a lead Spindle Whorl these were used for hand spinning wool and can date as far back as Roman times, I also had a Edward II Hammered Silver Cut Half Penny Edward II (25 April 1284 – 21 September 1327)
.thumb.jpg.f588043194d6b927664d01bdaaf17839.jpg)
.thumb.jpg.0ed0c2e8d1e8635fa318a57db80b3b61.jpg)
.thumb.jpg.f500fce1e76eb5eb7bfc7a18b6ff22aa.jpg)
.thumb.jpg.cd7edd1382a35533afb4efb4786e8e31.jpg)
.thumb.jpg.930da8fcaa9e5c1608b9ed6ed65b33de.jpg) 4 points
4 points -
It is me Steve have been registered for quite some time and a bloody lurker.... You brought me out of the shadows. ?4 points
-
Last night I detected under a tree in a rain storm and still found a 1919 wheatie and today I used the Field 2 program with 5 tones, sweep speed 1, sensitivity 23, and horseshoe mode to find 2 IHs and what looks to be a counterfeit quarter. The settings found the pennies @ 9+" I also used the CGTime Golden Plated 3.5mm MONO 1/8 inch Audio Male to 6.35mm 1/4 inch Female Jack Converter Cable Cord Adapter (25CM/10Inch) to connect my more comfortable headphones.
 2 points
 -
I think it's from the "Holsatiamühle". There were many mills located at the "Schwentine" river driven by waterpower or steam engines back in the days. From Google Translate: "The first beginnings of the mill site "Neumühlen" date back to the 14th century. At that time a mill was built for the first time in the area of the lower rivercourse. This was consistently expanded and expanded over the next few centuries. Around the building developed a busy traffic infrastructure. Around 1860, the existing buildings were demolished and built a completely new mill with six floors and sixty mill works. After a devastating fire in 1874, the building had to be completely rebuilt. This was the largest mill in the entire German Reich at the time, with even eighty mill works. Exports spanned the world. As the mill developed, so did the demand for labor. This contributed to the sustainable development of the district. Until 1992, the mill was in operation. This year, mill operations were discontinued because production conditions deteriorated significantly due to the environmental impact on neighboring residential and mixed areas." The "Baltische Mühlengesellschaft AG" took over business in 1881, so your seal will date somewhere in that ballpark. That's where it was located: Google Maps Link I live in "Schönkirchen", so that's almost like down the road ? Nice find!2 points
-
Very interesting finds. One reason i always enjoyed field hunting...... you just never know what you will get. Cant tell you how many HEAD SCRATCHER targets i used to dig up.2 points
-
There is nothing wrong per se with the detector. And whether Minelab deems to modify Park 1 etc is up to them. This wrapping phenomena of Large High Conductors around into the ground mineral and iron ID area is well understood and has been for decades. What can affect this? 1. Choices by the designer of the discrimination circuit. 2. Target signal strength. 3. Ground Mineralization. 4. Coil types. If the Equinox were a one trick pony(beep dig machine) then the user would have to live with the behavior that the designer chose. And in the past that's what a user would have to do. If your Acme 7000 XLT acted this way then tough luck, live with it. But the Equinox is a box full of detectors in one, so push a button and solve the problem. Now in regards to the beaten horse. The horse may be dead but several of it's cousins who are jackasses continue to push this as a big issue. Many consider themselves experts and even own the Equinox, all the while thumping on Minelab for any and every issue. The hypocrisy they exhibit is demonstrated in the fact that they themselves have discussed the topic of the wrap phenomena at length on other forums concerning other brands and models. Yet not one peep from them in criticism of those other brands.2 points
-
Would not be too sure about that being the case, this weekend I took the Nox 800 out on a very trashy site that I had previously gone over with the Deus and Makro racer 2. I had it in Park 2 with recovery speed 5 upped to 6 or 7 when needed and iron bias on 4. I was swinging slow and low and let me tell you the targets that I pulled out of this site were unbelievable, 2 Queen Mary hammered, a Lizzy six pence and many more targets all missed in a trashy site with 2 other machines that are supposed to be capable in trash. At first I thought it was just a case of me not going over these targets with the coil previously so i made a point off going over a patch that I know I had battered with the Deus. I got one of the Queen Mary's from that patch as well as 7 or 8 keepers so i would say that this machine excels in trash but you must take your time. I will be taking my nox back to this site as there are several acres to go at. I cant wait to see what i pull out next and i didnt dig up much trash as the Nox does let you know what is trash you just have to take notice of what exactly it is telling you.2 points
-
Hi Foreverteachable… those coins look to be in pretty good shape. To retain full value, the normal procedure is to not clean coins. Leave it to the experts. However, you’ve indicated that you don’t intend to sell them and have gone ahead with some rudimentary baking soda (sodium bicarbonate) cleaning. Those coins are still encrusted with primarily black sulfide staining, but there is a reasonably mild treatment process that will clean them nicely for you. In my experience, all cleaning methods, whether chemical or abrasive, subtract from the surface integrity of silver coins to some extent. We prefer to minimize any visual damage as much as possible. Since presumably you’d prefer to remove the stains, below is the procedure that I’ve utilized over the years for silver coins that really had limited or no numismatic value. This technique initially involves limited, mild electrolysis followed by a dilute application of silver cleaner paste and water mixture that is gently applied with the fingertips, subsequently rinsed and carefully dried. Electrolysis apparatus can easily be set-up using household items. It requires preparing an electrolytic cell using either a battery or light charger with the silver to be cleaned as the cathode (-ve terminal) and use a stainless steel utensil (spoon) as the anode (+ve terminal). The cathode produces much more bubbles than does the anode, so don’t mistakenly misconnect your apparatus, in fact initially do a test run by cleaning some unimportant small item. A clean nut or screw or whatever is handy will do so that you can clearly see the difference in bubble formation just to confirm you’ve got the electrolytic cell connected properly. If you employ electrolysis many times over the years, you will see that the anode (spoon in this example) will deteriorate and gradually dissolve. Any plastic or glass container of suitable size/volume to accommodate the silver sample can serve as the electrolytic cell. A few tablespoons of baking soda or table salt dissolved in sufficient warm water to cover our sample will do as our electrolyte. For a DC current I prefer a two amp “trickle” charger, but any decent DC power source in the six to twelve volt range is more than adequate. Alligator clips are handy for attaching the lead wires from the power source to the anode and cathode. One point to remember is to always remove your silver coin prior to disconnecting the power source, otherwise you risk plating your silver with whatever +ve ions may be present in solution. Generally coins require a few moments to a half-hour treatment to loosen scaling or sulfide stains, it varies with how encrusted the coin may be. The silver paste / water mixture can then easily lift and remove the stains. When the electrolytic solution becomes “dirty” replace it. My experience is that excessive build-up of metallic ions from the utensil (spoon in this example) can result in plating them on to the silver cathode (coin). Incidentally, do not use the same electrolytic cell water to treat coins of differing metal compositions. Doing so will produce undesirable electrochemical reactions that risk serious damage to your coins. Here’s my understanding of the chemical reactions that take place. An electric current is applied to cause both oxidation and reduction in our electrolytic cell. The positive anode attracts negatively charged ions (atoms with a negative charge are called anions) that move towards it when an electric current is passed through the cell. Oxidation occurs at the anode and oxygen is produced. The negative “silver coin” cathode attracts positive charged ions (called cations). At the cathode, reduction takes place and hydrogen gas is produced. Anions such as sulfide are drawn from the silver and these migrate toward the positively charged anode by electrolytic attraction. Moreover, the hydrogen production at the cathode further acts as a mechanical cleaner to remove incrustations on the silver. Between that action and the loosening or removal of sulfide ions, the silver paste and water mixture can easily complete the cleaning process. Just remember to not use more treatment than absolutely necessary to achieve a satisfactory result. Perhaps others can add their experience here, but I think the foregoing is more than sufficient information if you wish to try this method. As stated earlier, dug coins in good condition would be better left untreated for professional evaluation. All the coin examples portrayed below received the treatment described above. Good luck with your coin hunting, it’s a satisfying and intriguing pursuit that can endure for a lifetime. Jim.
 2 points
 -
I carry my 357 when roaming the wilderness here in Idaho....more to protect my little pup from wolves or coyotes, than anything else(or perhaps from 2 legged weirdos!), but luckily never needed it. In big bear country I prefer a good bear spray. To get this topic back on GOLD, here’s some Gold Monster fun from a new spot I found this week! ?
 2 points
 -
New Member Signup - Click Here! Lost Password - Click Here! Forum Tips & Tricks Advanced Search Tag List/Index Welcome to the DetectorProspector forums! These forums are normally "on topic" only. This forum is the one exception in that it has no real topic except getting to know other people. That being the case you can discuss pretty much anything here but the overriding rules apply more than ever. There is to be no posting of anything that is going to be disruptive (no trolling). While visiting this forum please act as if you are visiting my home. Treat others with decency and respect. Politics is not strictly prohibited but limit it to items of concern such as public meeting notices, comment periods, etc. Other than that, stay away from the heated political stuff. No detector wars - every detector serves a purpose for somebody. For general editorial purposes this forum is treated as if it is a magazine. To reiterate - the Prime Directive on all these forums is decency and respect. If you can't comport yourself like a decent adult, I promise you will not last long on these forums. The main goal of the forum is to share information. If you see something interesting on another forum or anywhere else, please link to it. Mention any brands you like. A note about the Google Ads - I know we all hate ads but they pay for the website. As an Amazon Associate I earn from qualifying purchases. All I can do is to promise not to go overboard with them. Special Note To Dealers - Dealers are welcome here, with minimal guidelines. Please read My Policy Regarding Dealers If you have problems logging in or any other issues while on the forum contact the Forum Staff. Information on other general forum use and features can be found here. Steve Herschbach1 point
-
 The White's MXT was released in 2002 and had a great run, but is no longer in production due to the demise of White's Electronics in 2021. I helped popularize the use of this detector for searching tailing piles for large gold nuggets. Hundreds of ounces of gold have been found at Ganes Creek, Alaska alone by people using the White's MXT. My own largest gold find, a 6.85 ounce specimen, was with the MXT at Ganes Creek. I have a couple stories on Steve's Mining Journal that highlight the MXT. See Infinium & MXT at Ganes Creek and GP 3000 & MXT Get Fortymile Gold. My most recent find of note with the MXT Pro was a 267 AD Roman coin found while on a trip to the UK in 2010. See Metal Detecting Ancient Coins at Colchester, UK The MXT is extremely popular because it does almost everything very well; coin, relic, jewelry, and nugget detecting. Despite being so versatile the MXT is also a bargain priced detector with performance rivaling much more expensive detectors. It is remarkably easy to operate, with a condensed operating guide actually printed on the bottom of the control box. Three knobs and three switches are all the controls you need. The controls have specially marked settings so that if you do not know what the controls do, just set everything at the little triangle marker and you are off and running. A major feature on the MXT is the LCD screen that gives you visual information about the items detected as well as battery readings. White's employs a numeric target identification system that runs from -95 to +95, with ferrous targets reading as negative numbers and non-ferrous targets reading as positive numbers. White's calls these "Visual Discrimination Indicator" numbers usually referred to as VDI numbers. The MXT also comes with one of the best manuals and DVDs of operating tips that I have ever seen come with any detector. The MXT is almost perfectly balanced due to the control box being slung back under the elbow. One simple thing about the MXT also pleases me - it does not fall over on its side like nearly all the other detectors I use when I set them down! The control box is very water resistant. I have used the MXT in the rain all day long with no adverse effects. White's MXT All Pro metal detector for coins, jewelry, relics, and gold nuggets There have been several MXT models. There is the original MXT which comes with a 9.5" round concentric "950" coil. This version of the MXT was discontinued in 2017 and is essentially the same detector as originally released in 2002. The was also an MXT 300, also no longer in production, which was the same detector with a 300 mm (12") search coil and a matte black paint job for $100.00 more. The MXT 300 was replaced by the MXT Pro for the same $899.95 price. The MXT Pro added multi-tones and a meter backlight plus a redesigned pod with a touch pad. The new features do not really add anything needed from a nugget detecting perspective but are popular with coin and jewelry hunters. There is a "Ground Grab" that is nice for nugget detecting but just for convenience. Instead of switching to ground tracking for a minute and back to fixed it is possible to just remain in fixed and hit the grab button to update the ground balance setting. A very good way to compare the MXT and the MXT Pro is to download and read both operating manuals linked to below. You can also find a quick comparison reference chart at Jeff Foster's website here. The target reference in the MXT display above is replaced by three touch pads on the MXT All Pro. An audio pad controls various audio options, the "Ground Grab" button resets the ground balance, and there is a pad to toggle the display backlight on and off. MXT vs MXT All Pro display pod showing new touch pad buttons The MXT came with the 9.5" round concentric coil and the MXT All Pro is offered with either the 9.5" concentric coil or 10" round DD coil. My personal preference is for the MXT All Pro as I do like tone id for general detecting and the Ground Grab button alone is worth the extra money as far as I am concerned. I prefer to leave automatic ground tracking off most of the time and update via the grab function. The ground grab button alone is enough to make me prefer the MXT All Pro for gold prospecting. It is also a little known fact that the MXT was designed to work best with DD coils. Here is a post by Dave Johnson (one of the engineers of the MXT) on the TreasureNet forums 2/3/2013: "Back in the late 1990's and very early 20th century, the MXT was developed around the 10x6 elliptical DD. When you're used to that searchcoil, stick a 950 on and the 950 feels downright clumsy with its muddy response and bad masking characteristics. Downright insufferable. The 950 searchcoil geometry was designed for completely different platforms. But, if you ask "does the 950 work?", well, yeah, it does. Wrong question. I ain't gonna knock the MXT, it may be an old platform but it still works good. More than 10 years after, if you demand "ground tracking" (not that I say you should demand that), the GMT/MXT have the best in the industry. Not even Minelab (!) denies that! And as far as I know, the MXT/GMT are the only VLF-IB machines on the market with active transmitter regulation that makes it possible to work (with reduced performance) in heavy magnetite black sand, a circumstance otherwise left up to PI's. We're talking very good machines here. They may be a bit old in the tooth, but this is an industry that takes time to weed the turnips out of the beet patch. Ain't like celfonz where in 6 months the whole world has decided what kyckes and what szux. It takes time to deliver good beep verdict. MXT. 10x6DD is the foundation. Everything else is an accessory. I am telling you this because if you are a White's loyalist, I want you to spend that extra buck, the folks in Sweet Home are my friends!" Having noted that commentary, many users prefer the concentric coil options for beach use or low mineral parks where bottle caps are common. Concentric coils generally identify flat ferrous targets more reliably than DD coils. The large 12" concentric coil and even the 9.5" concentric coil do not handle extreme ground mineralization very well, and the 12" is too large for many other tasks, like coin detecting trashy locations. The 6" x 10" Eclipse DD coil is possibly the best all around prospecting coil for the MXT for those that do not already have the 10" round DD coil and want to add a DD to the MXT. The solid construction is less likely to hand up on stubble and the narrow profile is good for getting into tight locations. However, if you have an All Pro and already have the 10" round DD coil it is a less useful upgrade. In that case I would tend to recommend the 4" x 6" Shooter DD coil for trashy locations and small gold nuggets. To sum up, I recommend using either the 10" round or 6" x 10" elliptical DD coils for hunting heavily mineralized ground. To get the best performance on small gold, use the 4" x 6" elliptical DD (Shooter) search coil. The 9.5" concentric 950 coil and 12" concentric are best used for hunting tailing piles, beach detecting, or coin detecting in parks. The little 6" round concentric (Eclipse 5.3) is a good little coil for almost any use, including gold prospecting for small nuggets in low mineral ground. The MXT is blessed with a large number of aftermarket coil options due to its popularity. There are so many in fact it is impossible to keep up with them so I will leave that for the reader to discover via Google. White's MXT DD search coil options White's MXT concentric search coil options The MXT Pro does have an undocumented feature it is worth knowing about. The MXT in Coin & Jewelry Mode has a "Pull Tab Notch" feature when the trigger switch is locked forward. Meter readings of VDI +28 to +49 are silenced, knocking out common pull tab responses while still allowing US nickels to signal. The MXT Pro eliminated this function (trigger switch forward locks the pinpoint mode) and instead added the seven tone audio identification used by the White's M6 detector. The intent was to have the option for different tones for preset VDI ranges while in the Coin & Jewelry Mode. The multi-tone feature was not intended for the Relic or Prospecting Modes. However, through a bug that is not documented in the owner's manual you can activate the multi-tone mode by getting your MXT all set up in Coin & Jewelry Mode and then selecting multi-tone by pressing the "Musical Note" button. Now flip the toggle switch to either Relic Mode or Prospecting Mode and the multi-tone function will remain engaged. However, if you touch any of the control pads at any time now the multi-tone function will shut off. White's decided this "bug" might actually be useful so has left it as is for you to experiment with. There is a book written about the MXT that has no equal - The MXT Edge by Jeff Foster. If you have an MXT do not hesitate to get a copy. An interesting note is that the White's GMT and the MXT share a common heritage - see the MXT Engineering report below. Official White's MXT Page White's MXT 950 Owner's Manual White's MXT 300 Owner's Manual White's MXT Pro Owner's Manual Forum Threads Tagged "whites mxt" White's Metal Detectors Forum Unofficial MXT User Support Page MXT Engineering Guide Steve's Guide to White's Electronics GMT versus MXT White's MXT Technical Specifications* Internet Price MXT All Pro $823.00 Technology Induction Balance (IB) Frequency 13.889 kHz Autotune Mode(s) Variable Self Adjusting Threshold (V/SAT) Ground Rejection Tracking and Fixed Soil Adjust (Ground/Lock/Salt) Three position switch Discrimination One turn control, Visual ID, Tone ID Volume Control No Threshold Control One turn control Tone Adjust No Audio Boost No Frequency Offset No Pinpoint Mode Yes Audio Output 1/4" headphone socket & speaker Hip Mount Shaft Mount Only Standard Coil(s) 12" round DD Optional Search Coils Over 15 accessory coils available Battery Eight AA Operating Time 30 - 40 hours Weight 4.3 pounds Additional Technology Notes Alaska's most successful gold nugget detector for tailing piles *Notes on Technical Specifications - Detailed notes about the specifications listed in this chart. Here are a few nugget detecting tips for the MXT. I highly recommend that if you are new to detecting you seek out a sandy location like a freshwater beach or volleyball court or the woodchip area around playground equipment to practice and learn your new MXT. The goal is to set up the detector as if you are nugget detecting and to dig everything that signals. It does not matter what it is, the goal is to learn. You should be trying to find the smallest items possible, and attempting to learn how to separate ferrous from non-ferrous signals. It is always best to dig all targets when nugget detecting, but some areas are so full of ferrous trash that it is something that must be tuned out to some degree. Aluminum is a very common find, and that is good. Aluminum and gold respond identically on a metal detector, and the smaller and/or deeper the aluminum is, the better your detecting skills. Concentrate on the faintest signals. Hours spent practicing like this will save many more hours wasted time and frustration in the field. Normally when looking for gold it only makes sense to use the MXT Prospecting Mode. This pretty much turns the MXT into a GMT although a bit less sensitive to very small gold. Start with the Gain at the preset (small triangle) setting. The Threshold should be set as low as it can go while still being audible. You want to be able to hear variations in the threshold sound but you do not want it so loud as to be annoying when listening to it for hours on end. Set the Trac switch to "Ground" and pump the coil over the ground until the sound caused by this pumping action dissipates. the MXT is now ground balanced, so flip the switch to the "Lock" position. This locks in the current ground balance setting. The "Dual Control" while in Prospecting Mode is not acting as a discrimination control. The inner "SAT" section becomes active and a good starting place is the small preset triangle at the "5" setting. SAT stands for self-adjusting threshold. The threshold sound constantly varies and this circuit smooth's the threshold response. The higher the setting, the more aggressive the smoothing effect. Low settings are more sensitive to faint responses but can allow ground variations to also become to evident. Settings that are too high eliminate faint ground responses but can also cause faint signals from gold to become to faint to hear. In general less mineralized ground calls for lowest SAT settings and higher mineralization call for higher SAT settings. ads by Amazon... The Gain when increased does make the detector more sensitive to gold but also more sensitive to ground feedback and so-called hot rocks. The trick is to run the Gain as high as possible while retaining stable operation. Finally, in low mineral ground a locked Trac setting works best, but in ground that varies constantly running the MXT in the Ground tracking mode will result in smoother operation. Novice may want to stay in Ground Trac mode while learning the machine as it is the safe setting that keeps the machine properly ground balanced. In theory the MXT is most sensitive with the SAT set low, the Gain maxed out, and the Trac setting locked. The reality is that increased Gain settings may also call for increased SAT settings. The goal is to seek the most sensitive balance of settings possible while while keeping the MXT stable and smooth. A small test nugget of small piece of lead can be essential for determining what setting most eliminates ground responses while most enhancing nugget responses. In general leave the SAT control at the preset, Trac in locked, and set the Gain as high as you can while still getting stable operation. If need be, switch the Trac setting to ground for smoother operation. In the worst mineralization advancing the SAT control into the Hyper SAT mode will put the MXT into a very smooth mode able to deal with extreme mineralization while still reporting small gold nuggets. Remember, the key is to seek a smooth, stable threshold sound. It is this stable sound, when it varies, that indicates very deep or very small targets. There are a very few detectors that can be run in what is referred to as "mixed mode". These units have the ability to run in all metal and discriminate at the same time. I am not sure who first came up with this feature but Nautilus has for a long time offered units that put the all metal signal in one ear of your headphones and the disc signal in the other ear. The advantage to this is that pure all metal modes detect deeper than discrimination modes. Hunting in regular all metal requires lots of switching back and forth to check targets. Mixed mode gives you both at once. The White's MXT has the Relic Mode, which is a mixed mode. I wonder how many people use relic mode but really do not understand it. Good targets give a high pitched chirp. Junk targets honk. The split between high chirp and low honk is determined by the setting of the discrimination knob. This should be set to just cause iron and steel items , like a small nail, to honk, generally at a setting of 2 or less. Do not set the discrimination too high! Now here is the important part - there is a third, more subtle audio signal that indicates a target is there but the detector cannot identify it because it is too deep. This is the all metal signal. The meter will be blank. When nugget detecting, you want to hear these, and dig down until the target identification kicks in. I think many people focus so much on the other two audio responses that they ignore the fainter deep all metal signal. It is easy to fall into a habit of just digging only those high pitch targets. Not good. The key to mixed mode is simple. Those targets in a good location that are so deep you get no indication on the discrimination channel are the ones you really want to think about. If the area has produced good finds but is now near to being worked out, these deep signals are the ones anyone running in a normal discrimination mode is going to totally miss. Sure, it could be trash. But really deep targets are often the best, and so digging some of these on occasion can produce some really good finds. Steve with MXT and 6.85 ounce gold specimen found with it at Ganes Creek, Alaska in 2002 Unlike most dedicated nugget detectors it has a LCD based visual discrimination indicator (VDI) system. This is for the MXT coin and relic modes in particular. It turns out that for certain nugget detecting tasks the MXT has extra capabilities due to the visual target identification system. Alaska has huge areas of old mining tailings that provide great opportunities for nugget detecting. The nature of the old operations was such that many of the very largest nuggets were lost into the tailing piles. Unfortunately there is a huge catch. Some of these tailing piles contain incredible amounts of iron junk, and at any depth. Some creeks were mined many times, and old campsites and dumps were churned up and mixed in with the tailings. This junk can be anything from rusted flakes and slivers of steel on up to cans, bolts, washers and nuts, and finally even 55 gallon drums, and various large steel plates, pipes, boilers, or even larger items. Ganes Creek, Alaska is possibly the best known of these locations. New visitors from areas in the western US where the Minelab SD/GP/GPX detectors have reigned supreme have a hard time adjusting to the concept that there is such a thing as too much power when coupled to a poor discrimination system. If you run a Minelab at Ganes Creek here is a likely scenario. You are in a field of fist-sized and larger cobbles. You get a nice little signal and no iron blanking. You start to dig, as best you can in a pile of rocks. After a great deal of effort you are at two feet, signal is louder, but no target. You pull out another cobble and half the hole falls in. You pull all those rocks out, and get another six inches down. Forty-five minutes has passed. You pull out another rock and the hole caves in again. Fifteen minutes later you are at 3 feet again and really tired. Over an hour has passed since you started this hole. The signal is very loud now...too loud really. You dig down a bit more, then some more, and the whole thing caves in again. You walk away in disgust. Or you keep digging and finally find an old quart-sized can. How deep can you hit a large can with a Minelab GP 3000? How about a 2'x 2' steel plate? How about a 55 gallon drum? There answer is very deep indeed, and they are all there waiting! Normally you would just figure it is junk past a certain depth, but the big question always must be how deep could you hit the 35 oz or 80 oz pieces found at Ganes Creek with metal detectors, or the 122 oz chunk found by the commercial miners at Ganes? Because of this huge junk problem VLF detectors have generally been the way to go at Ganes. The low mineral conditions mean they keep you from wasting huge amounts of time going after junk targets. Most any good VLF machine works well for this, but the MXT gives you some extra capability once you learn its tricks. There are four things to know. 1. VDI numbers increase as the nugget size increases. So a 1/4 oz nugget may read around 25 whereas a 1 oz nugget may read around 40 and a 2 oz nugget may read around 50 on the meter. 2. The larger a nugget, the deeper you can detect it. 3. Certain steel items can give positive VDI numbers and 4. VDI numbers are pulled down the deeper the nugget is buried. A 1/4 oz nugget near the surface will read 25, but at depth might read 10, and at max depth may finally read at 0 or lower and actually be identified as iron. This last point is very important, for if you run a Fisher Gold Bug 2, or Tesoro Lobo, or Troy X5 in disc mode to tune out iron, as is common for many people at Ganes Creek, deep nuggets may read as iron. If they are, the machines will reject them; you will get no signal, and walk past the nugget. You will never know it is there. Or at best you have to search in all metal mode, then constantly switch to the discriminate mode to check the target. With the MXT, there is no switching and you hunt completely by ear. With the MXT I like to run the detector in relic mode, with the disc set precisely at 2. Non-ferrous items will give a high tone, and ferrous junk a low tone. If you get a faint low tone, the first thing you do is kick and inch or two off the surface until you get a honk or a chirp. Now dig a little deeper. If the VDI number rises, keep digging. Targets that read iron initially and rise will often turn into non-ferrous readings, hopefully gold. If the VDI number stays the same or goes even lower, you have an iron target. Once again, be careful to listen for audio signals that give no reading on the meter - these are items being detected by the all metal channel at depths beyond what will cause the meter to react with a numeric id. Where the MXT really shines are on 1/4 oz to 1/2 oz nuggets. Let’s say you get a reading of 24. OK, that is about a 1/4 oz nugget. Now, we know that you can hit a nugget this size at 10-12 inches. You dig a foot, and no nugget. A large, deep iron item of a certain type can also give a 24 reading, but these large items can be detected much deeper than a 1/4 oz nugget. Dig them up if you wish, but once you go past that depth at which it is reasonable to find a nugget corresponding to a certain VDI number you are wasting your time. This method eliminates digging those false positive signals from deep items like steel plates. With the other VLF units the lack of VDI number means you have no way to judge the potential nugget size and so you end up digging deep for what may be a very large nugget when with a MXT you would know the VDI number corresponds to a smaller nugget. For the many smaller nuggets that are found at Ganes this method is pretty foolproof once you get the hang of it. Finally, certain non-ferrous items can be found in quantity, particularly things like .22 shell casings. If you get into a bunch of these, they are usually very shallow. You can easily determine the VDI number of these multiple identical targets and then simply ignore them. You would miss a nugget with an identical VDI reading, but chances are a nugget will vary enough to make it stand out. There is no way to do this with a non-VDI unit. The MXT is a very versatile detector, but I do not think anyone anticipated just how much gold it would end up finding in Alaska. I know one prospector alone who has found over 100 ounces of gold with the MXT. ~ Steve Herschbach Copyright © 2004 Herschbach Enterprises1 point
 -
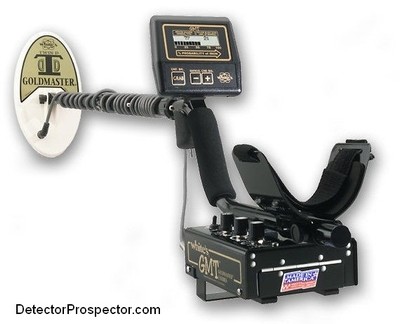 The White's GMT was released in 2000 and is still in production. The GMT has been the best-selling dedicated nugget detector in Alaska for many years. The combination of small gold finding ability, excellent depth on larger gold, and ease of use at a bargain price make it a hard unit to beat. I have used the GMT and its predecessor Goldmaster models to find thousands of gold nuggets in Alaska. See Thirty Years with White's Metal Detectors, White's Goldmaster GMT Rebuild and First Gold Nuggets Found with White's GMT for more information on my use of the GMT. See also Steve's Guide to White's Electronics GMT versus MXT. The GMT is one of only a few detectors available operating at more than 40 kHz (the GMT runs at 48 kHz), making it exceptionally sensitive to small gold nuggets. The GMT is the latest in the new Goldmaster line of detectors that White's introduced in the early 1990's. The Goldmaster name is an old one, and White's produced many old BFO and IB/TR versions of the Goldmaster in the 60's and 70's. The early Goldmasters were old technology and did not ground balance, a key breakthrough in detector technology. These old models usually had large blue control boxes. If you see one of these for sale cheap do not confuse them with newer Goldmasters, all of which come in black boxes. Note that in late 2018 White's introduced the 48 khz Goldmaster 24K. The GMT also remains in the lineup for now, but it is possible that the 24K will eventually replace the GMT. The Goldmaster II was a serious breakthrough detector when it was introduced, operating at 50 kHz, far in excess of other ground balancing nugget detectors at the time, which commonly ran at 15-20 kHz. The Goldmaster II was quickly followed by the Goldmaster V/SAT, and these two models I credit with igniting a metal detector "gold rush" in Alaska. I got the ball rolling by finding thousands of gold nuggets at Crow Creek Mine south of Anchorage, and widely publicizing my discoveries. Crow Creek had produced few nuggets with detectors prior to the Goldmaster release, but the new 50 kHz design crossed a threshold where all of the sudden thousands of nuggets were large enough to be detected that were too small for previous detectors. White's simply could not build the new Goldmasters fast enough. The Goldmaster V/SAT was followed by the Goldmaster 3 and raised the price from $499.95 to $599.95. White's then shifted gears and with the Goldmaster 4/B switched to using the control box design used by its coin machines. They also raised the price again to $699.95. This was not well received, and when Fisher introduced the Gold Bug 2 at about the same time for $775.00 Goldmaster sales plummeted. White's GMT 48 kHz gold nugget prospecting detector The Goldmasters were all analog designs but a shift to digital began with the Goldmaster 4/B. White's started a project for a brand new detector design by hiring Dave Johnson, a well known engineer specializing in gold nugget designs, the ended up as the White's MXT. The GMT was as early spinoff of that project released a couple years before the MXT hit the market. The MXT Engineering guide linked to below tells the story in detail. A key design goal was to have automatic ground tracking, and so the Gold Master Tracker (GMT) was born. The new model also sported a new retail price of $799.95. The GMT is a totally new design from the prior Goldmasters but seems very similar due to the goal of wanting it to be compatible with existing Goldmaster coils. In order to prevent "crosstalk" interference with existing Goldmaster models a 48 kHz operating frequency was chosen, which was still close enough to 50 kHz for old coils to work. However, the GMT was designed with DD coils in mind. Older Goldmasters all used concentric coils but the GMT shipped with a new 6" x 10" elliptical DD coil. One thing all the Goldmasters seriously lacked was a small coil option, and finally after the GMT was released White's came out with a small 4" x 6" coil, commonly referred to as the "Shooter". Much later yet, the concentric 8" x 14" Jimmy Sierra Gold Max coils were converted from concentric to DD. The concentric 8" x 14" coils were white and the newer DD versions are black. White's is currently shipping only the new DD 4" x 6" Shooter, 6" x 10", and 8" x 14" Gold Max coils but until recently the only concentric coils available were the 6" x 10" and 8" x 14" coils on the used marketplace. White's in 2017 introduced a new round concentric coil for the GMT. The old concentric Gold Max coils are easy to identify - they have a white plastic housing whereas the new DD version is black. Concentric 6" x 10" coils are white plastic just like the new DD version, what differs is the decal. Any 6" x 10" Goldmaster coil not sporting the "Twin D" label is a concentric. The early decals came in red and black and later gold and variously were called the Long Scan, Gold Master II, Gold Master, and GM 3 coil. Beware of any round coils marked for use for the Goldmaster series. The only round coil ever produced that is compatible with the newer Goldmaster series is the 12" round Hot Shot coil pictured below. Any other round coils would be for the old "blue box" Goldmasters and will not work on the 48-50 kHz series. 4"x6" Shooter DD coil, 6" round concentric, stock 6" x 10" DD coil for GMT, and 8" x 14" Sierra Gold Max DD coil Old version 6" x 10" concentric and 8" x 14" concentric coils The GMT currently has no aftermarket coils available. Jimmy Sierra used to market a couple coils that may be found on the used market. The Hot Shot was a round 12" concentric coil that in mild ground may have been the deepest coil made for the GMT but it suffered in mineralized ground due to the concentric design. Jimmy Sierra also marketed the 2.5" x 9" Hot Foot coil, a unique rectangular DD design. These coils were made by Jim Karbowski of Applied Creativity and marketed by Jimmy Sierra. Unfortunately Jim has passed away in 2007 and the manufacture of his coils with him. Applied Creativity Hot Shot and Hot Foot coils for GMT As always, when designs shift from analog based to digital, there are always some who regard the analog designs as better in some way. A lot of people nostalgically remember the Goldmaster 3 as the best Goldmaster made. I do myself miss the old control box that could be converted to a hip or chest mount. However, the benefits of the GMT far outweigh any perceived faults. It was for a long time the only VLF nugget detector that allowed the operator to choose between automatic ground tracking and manual ground balance. The "Grab" button was an innovation only now being seen in other detector models over ten years later. The "follow the black sand" feature was also a unique though underutilized feature. The innovative "iron probability" ferrous identification system was unique for many years but has recently been copied by a couple other manufacturers. GMT meter pod and typical meter readings The ground balancing options on the GMT are as good as they get. The unit can automatically track ground conditions and keep the machine as near optimum settings as possible. The GMT has what is regarded as one of the best ground tracking systems available. It has superior resolution, tracks faster, "jumps" into new ground more quickly, has greater resistance to tracking into targets, and tracks over a wider range of soil conditions. This is an obvious advantage for beginners who often have difficulty with manual ground balancing systems. It also benefits experts in locations where the ground varies constantly. This requires constant monitoring and adjustment on a manual system. It can place an undue burden on the operator and if ignored leads to the detector not being optimally tuned for the ground conditions. Simply set the ground balance toggle switch to "Fast AutoTrac®" and let the GMT handle the ground balancing chores. The GMT will automatically track and display the ground balance setting under the "Ground Balance (Mineral Type)" heading on the meter. Ground balance tracking systems can "track into" a faint signal produced by a very small or very deep gold nugget and cause it to fade out as if it is a ground signal. This is especially likely if the operator hovers over the target after it is heard on the initial pass. For this reason the GMT trigger switch has a dual function. It engages the iron discrimination system but more importantly it temporarily locks out the ground tracking system. Whenever a faint target is encountered, squeeze and hold the trigger switch while working the target to insure the tracking system does not cause it to fade away. While automatic ground tracking offers many benefits it can impede finding the very faintest targets. In extreme ground conditions the fact that the machine is constantly adjusting for ground conditions can actually impede a savvy operators ability to discern ground and target signals. Professional operators like having the option of using manual ground balance and the GMT accommodates this is a couple ways. There is the standard ability to toggle the ground balance switch to manual ground balance and then adjust the setting up or down via the plus and minus touch pads. One major benefit of manual ground balance is the ability to purposefully set the ground balance slightly off of the supposed perfect neutral ground balance setting. Many prospectors will set the ground balance slightly positive, or in other words such that the detector signals very slightly when the coil approaches the ground. This tends to prime the system to react more quickly to the faintest targets. The GMT goes one step farther with the introduction of the ground "Grab" button. This unique GMT feature was long overlooked but is now being added as a feature on many other detectors. While in manual ground balance mode the tracking system continues to work in the background. Simply touching the Grab button on the meter touchpad instantly updates the ground balance to what the tracking software thinks is the best setting at that point in time. Pressing and holding the button engages the tracking system momentarily. This offers the best of both worlds in that a prospector can hunt in manual ground balance yet take advantage of the software to instantly update the setting instead of manipulating the plus and minus pads. The Grab button acts like an instant "Coarse Tune" control, which can then be tweaked slightly with the manual touch pad if desired. This is how I prefer to run my GMT most of the time. Run in manual, update with Grab when needed, and tweak if desired. ads by Amazon... The ferrous discrimination on the GMT is far more nuanced than on most detectors, with the meter giving an "iron probability" reading. A LCD bar graph reading starts on the left and builds to the right hand side of the readout and indicates the relative probability that the target is ferrous. A real plus on this system is it always reminds the operator that the ferrous indication is never 100% - there is always a chance that ferrous reading is a gold nugget. The system will never give a reading of higher than 90% or less than 10% ferrous probability. Most systems tend to lull the operator into thinking they are more accurate than they really are, causing gold nuggets to be erroneously identified as ferrous. The GMT forces the operator to analyze the target more thoroughly and when there is any doubt, to dig it. The meter also helps identify iron based "hot rocks". In other words, most ferrous target systems are audio based, with a setting that may or may not be adjustable. Targets deemed ferrous on a single pass are ignored and the operator does not even know the target existed. The GMT alerts the operator to every target to make sure it is thoroughly checked out as a detector is often wrong about a target on a single off-center pass. The downside is that where targets are thick this constant analysis can place more of a burden on the operator than a system that can be set to silently ignore most trash targets. Running the GMT with the trigger switch in the locked forward position engages an audio discrimination circuit that gives an audio "grunt" whenever the iron probability exceeds 85%. This can quickly identify likely iron target without having to refer to the meter. This is a momentary indication that resets on each sweep of the target. It is normal for an operator to approach the target with a slightly different angle and speed on each sweep and so the iron probability indication will vary on each pass. The operator works the target and takes note of the reading on each pass to make a dig or no dig decision. Squeezing the trigger activates a target analysis mode that automates this task for the operator. Each target response is accumulated and averaged building a more consistent response than that generated by the trigger forward setting. Targets will tend to consolidate and build either higher or lower probabilities with multiple passes. This does not mean the final reading is any more accurate however. A small nugget in highly mineralized soil will tend to read as ferrous, and relying on the analyze feature will give a false sense that the GMT is more confident in that erroneous ferrous response by accumulating and averaging many of them. The fact is all ferrous identification systems suffer from the reality that some gold nuggets will read as ferrous if small enough or deep enough. High gain levels also increase the possibilities of inaccurate results. Some gold is actually in magnetite instead of quartz and can be picked up with a magnet! Nuggets of this type have a strong possibility of being identified as ferrous. Whenever possible a prospector should dig all targets. However, with practice a skilled operator of the GMT has a far more informative ferrous identification system at their disposal that if used properly will result if fewer gold nuggets being left behind as trash targets. Even if the GMT says the target is 90% probable ferrous it is still telling you it is a 10% chance it is gold. How lucky are you feeling? 1.89 Oz nugget found with White's GMT chest mount conversion The meter itself opens up many features lacking in detectors without a meter. The battery check reads out on the probability meter indicating the percent battery strength when the momentary toggle switch is activated. If the batteries are not fresh, audio loudness on big targets will not be as great, but there will be no loss of sensitivity or performance because the GMT is voltage regulated to run properly at less that peak battery voltage. You can rest assured the detector is working properly until the meter reads out "SORRY, LOW BATT". Be sure to have backup batteries ready to change out when this occurs. From the MXT Engineering Report referenced below "The GMT's circuitry broke a lot of new ground. It uses a reactive impedance transformation network to boost transmitter voltage for higher sensitivity. It uses an active transmitter regulator to keep transmitter voltage constant even when the search coil is moved over black sand that would blow an unregulated machine off the air." What this means is many detectors can actually go completely non-functional when operated over extremely mineralized ground and the operator will not even be aware of it. The GMT is very resistant to this occurring, but if it does the detector will give a loud audio "squawk" and the meter will read "BAD GROUND REDUCE GAIN". The GMT literally tells you your gain is set too high for the ground condition. Set the control lower until this message goes away for optimum performance. The GMT can also overload on shallow oversize targets in which case the meter will display "METAL TOO CLOSE LIFT SEARCH COIL". The overload condition will correct itself when the coil is moved away from direct proximity to the large metal item. There actually are gold nuggets large enough to overload a GMT so find out what the item is! The GMT constantly displays the ground balance setting, typically in the 70-80 range. This number is telling you what type of mineralization is affecting the GMT and is very much akin to the target VDI number displayed on coin detectors except that here it is a ground reading. The GMT goes one step father and also displays the amount of the mineral being detected. This is called the "Follow Black Sand" reading because it can be used to trace shallow black sand deposits that in turn can be used to locate gold deposits. A reference number in the upper right portion of the display shows this value. The number grows as the coil is pumped up and down over concentrations of black sand. The readings are relative so the idea is to take readings at various locations across a dry wash for example, and then to focus on the highest readings as being the probable location of a black sand deposit. White's GMT control panel When White's introduced the Goldmaster V/SAT it featured "Variable Self Adjusting Threshold" or V/SAT. The Goldmasters were the only nugget detectors for many years that allowed you to vary the rate at which the threshold readjusts itself via a variable control - anything from very fast to very slow. This allows for more control in varying situations. In general, use the lowest SAT setting that allows for smooth operation. As ground variations increase, setting a higher self adjusting threshold can be beneficial. At low settings, the coil can be swept slower without responses being overly smoothed out. High settings demand a faster sweep rate as the detector adjusts rapidly to bring the threshold back to the level set by the threshold control knob. See Steve's Guide to Threshold Autotune, SAT & V/SAT for more details. Finally, the GMT offers an optional Audio Boost setting that amplifies the audio by up to four times. This makes faint signals louder but in bad ground can also amplify ground noise. Still, this is an extremely useful function for eking faint targets out of the ground. All these features added up to the GMT being vastly more popular than the Goldmaster 4/B that preceded it. The GMT remains a best seller to this day. The bottom line is the GMT bears serious consideration for anyone wanting a detector solely for gold nugget detecting. Although the GMT is intended solely as a prospecting unit, it is very popular with meteorite hunters, and it is also one of the best micro-jewelry detectors on the market. Official White's GMT Page White's GMT Instruction Manual GMT Videos and Tuning Tricks Forum Threads Tagged "whites goldmasters-gmt" White's Metal Detector Forum Read the MXT Engineering Report - Features some important notes on GMT design White's GMT Technical Specifications* Internet Price $729 Technology Induction Balance (IB) Frequency 48 kHz Autotune Mode(s) Variable Self Adjusting Threshold (V/SAT) Ground Rejection Tracking, Fixed & Manual w/Grab function Soil Adjust No Discrimination Visual & Audio Ferrous ID Volume Control No Threshold Control Single turn control Tone Adjust No Audio Boost Yes Frequency Offset No Pinpoint Mode No Audio Output 1/4" headphone socket & speaker Hip Mount Shaft Mount Only Standard Coil(s) 6" x 10" DD Coil Optional Search Coils Three accessory coils available Battery Eight AA Operating Time 30 - 40 hours Weight 3.9 pounds Additional Technology One of the first detectors to measure mineralization "amount" instead of "type" Notes *Notes on Technical Specifications - Detailed notes about the specifications listed in this chart.1 point
 -
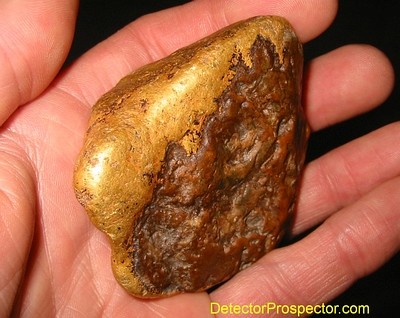 Well, here is a report on my last visit to Ganes Creek, Alaska for the year. I set myself up for this visit this spring by saying I would go to the mine after everyone had been there this year and find gold, just to prove there was still some left to detect. To show that it just can't all be found... no matter how thorough the hunters. I also wanted an opportunity to work with some new machines, and so in addition to my White's GMT I brought along a new White's MXT and Garrett Infinium LS. Brian, Jeff, and I left Thursday morning for a five day visit. We got to Ganes and settled in, then decided what to do. Brian was set on doing some prospecting with the 5" dredge Doug had purchased for visitors to use, so he was off in search of places to use it. I grabbed my new Garrett Infinium LS detector to try out, and Jeff used my White's GMT. Jeff and I headed upstream to where most of the large nuggets have been found this summer, on the theory that more were waiting to be found in the area. We scanned an area that has been heavily hunted. Three nuggets over 5 ounces were detected in the area this year, and I found out it is the same area where the 122 ounce nugget and a 62 ounce nugget were found. Definitely the center of big gold on the creek. The Infinium ran smooth and clear, so much so that I found myself waving my ring over the coil to make sure it was really working. Absolutely no signals from rocks in the tailing piles. Very odd when you are used to constant background sounds back from a VLF detector. The Infinium is a ground balancing pulse induction (PI) detector and as such it excels at canceling out ground mineralization. I got a signal now and then, and dug either a shell casing, or an iron trash target. The discrimination on PI detectors is crude at best, and so iron targets that might be rejected with a VLF (Very Low Frequency) will often be signaled as "good" on a PI detector like the Infinium LS. The basic idea with PI detectors is to go ahead and dig everything, although this can be problematic at a place with so much junk as Ganes Creek. I found the shell casings encouraging however, as that meant that not everything had been detected. I figure if non-ferrous items like bullets and shell casings are being missed, then some gold has also been left behind. Still, the area had been well searched, and the finds were few. I finally located a 13.8 dwt (dwt = pennyweight) nugget, and then a 3.8 dwt nugget (20 pennyweight per ounce). Two very nice, relatively solid gold nuggets. The Infinium had done its job. Jeff, although he tried his darndest, came up with no nuggets. The area has been hammered pretty good. We also tried some old tailings upstream farther, but found no more gold that day. Gold nuggets found with Garrett Infinium at Ganes Creek Day Two dawned under rainy skies. We decided to stay near camp, and see if there were more nuggets waiting to found around the cabins. I grabbed the new White's MXT, while Jeff stuck with the GMT. The rain got going pretty good, but we stuck with it. Lots of bullets and shell casings were dug, again, a good sign. But by the end of the day we had no nuggets. We headed up to the bench deposits above camp and found some small nuggets, just so we could say we did not get skunked. Jeff found a nice little nugget over a pennyweight with the GMT, and I got a few tiny bits. The MXT is a brand new detector from White's Electronics. Steve Houston from White's had a prototype MXT along on his visit to Ganes Creek in the spring and I had a chance to use it then. We both agreed then it had all the right stuff for finding gold at Ganes Creek. We did not use it much, however, as time was limited and we stuck with more familiar detectors. I have to note that I was very impressed with the MXT around camp. I used the 6" elliptical coil, and ran the unit in the relic mode. This mode, when set up a certain way, gives a high tone on non-ferrous targets, and low tone on iron targets. A setting right at "2" seemed to be the point where ferrous and non-ferrous sorted out with low and high tones. It was easy and efficient around camp, and all I dug were non-ferrous items. It has very good trash separation with the small coil, and easy id with the dual tone system. Great for places where trash is literally inches apart. Brian had set up in the ditch near the big nugget area, but was plagued with start-up problems with the gear, especially a leaky pump intake hose. He spent most of his day just getting set up and getting the dredge operating. Brian running suction dredge at Ganes Creek The weather cleared up the third day. Jeff again ran the White's GMT, and I the MXT with small coil as I had been impressed with it the day before. We started in camp, and I found a small nugget just behind the cabins. Then we tried some of the dragline piles above camp near where I found my 4.95 ounce nugget last year. I switched the MXT to the 950 9.5" coil. Both Jeff and I came up with nuggets weighing several pennyweights each. So far we were not exactly knocking down the nuggets. Frankly, we were both both a bit puzzled, as our constant digging of bullets indicated nuggets were still to be found. You simply can't dig all the gold while leaving the bullets in the ground. But results were lean, and our enthusiasm was flagging. I'm a big fan of aerial photos, and had some new ones showing an area downstream opposite the old bucket line dredge machine shop. Long rows of old bucketline tailings ran far back away from the road, and so I suggested we go down and check them for a change of pace. Jeff was running the White's GMT with the Sierra Max 14" coil, and I ran the MXT with stock 950 coil. The more I used the MXT the more I liked it. On the cobble piles I ran in prospect mode, with full gain, minimum V/SAT setting, and in automatic ground balance. The 14 kHz frequency ran smoother on the mixed rocks of the the cobble piles than a higher frequency detector like the White's GMT or Fisher Gold Bug 2. They tend to get weak signals of rocks because of their higher operating frequencies. The MXT was definitely smoother in the cobble piles than the GMT. We followed an old trail we had followed last year. I concentrated on the edges, off the main trail in the edges of the cobble piles near and in the brush. I got a good, clean signal, and gave a couple digs with my pick. The moss and rocks flipped back, and there lay a large gold nugget! I did not get as excited over this one as my 4.95 ounce nugget last year, as I was not sure exactly how large it was. Jeff, however, knew immediately it was something to jump up and down over. And he was right, as upon weighing it came in at 6.85 ounces. My largest nugget ever, and the largest found at Ganes Creek by visitors with metal detectors this summer. Sorry guys, but you left a big one for me to find! 6.85 ounce "Ugly Nugget" gold specimen from Ganes Creek - found by Steve H with White's MXT The nugget is strange, with very dark, lustrous quartz encasing a solid gold core. The quartz is almost like agate. Fingers of dendritic (leaf) gold reach up from the gold core into the quartz shell. It's a very unique nugget, but I'm hard-pressed to say if I like the looks of it. It has more quartz showing than gold. Some people say it really looks good, others say it's ugly. Oh well, all I know is it weighs more than any other found this summer. And that's remarkable considering the number of people over the ground, proving you just can't get them all. Side view of "Ugly Nugget" showing wispy dendritic gold Brian's initial dredge hole in the ditch near the big nugget area did not get him excited. A bit of small gold, but no bedrock, and no large nuggets. So he decided to move to a point of bedrock sticking out into the current location of Ganes Creek. The creek has been moved to the north side of the valley, which is reputed to have poor gold, but Brian wanted to check it out. At least there was bedrock showing he could get at. The next day (Day Four) Jeff took the MXT, and I went back to the Garrett Infinium LS. I wanted to put its ground canceling capabilities to use on the cobble piles, and Jeff wanted to see why I had grown so infatuated with the MXT. What's not to like about a machine that had found me my largest nugget ever? We searched far into the edges of the cobble piles along the creek. Our search led us way out on the dredge cobbles as far from the road as we could get, opposite the old dredge machine shop. There were no signals for some time, as many of these old cobble piles are relatively trash free. I was ahead of Jeff a bit, and so sat down to wait while he scanned up to me. Then he gets a signal in the middle of the cobble piles. The MXT said only 10% chance it was iron. VDI number of 55, exactly what it called my large nugget. No signal for some time, in big cobble pile... man, this looked good. He dug and dug. Got to over a foot. All indications were still good. I was getting excited, and came up to take pictures of the big find. And literally cheer him on, as he was getting a bit grumpy about the depth of the hole. The cobbles kept caving in, which can be very frustrating. And I'd exclaim "But Jeff, this is just how digging the two-pounder will be"! Jeff excavating large "gold nugget" that turned out to be a rusty can So at two feet, there is the quart paint can. Oh well, such is nugget detecting. Those large steel targets at depth really baffle discrimination systems. What is interesting, however, is I tried the Infinium out on the can, and it did call it an iron target! It seems the PI discrimination system does work well on some items that have problems on the VLF systems. The thing about VLF discrimination is it will sometimes call ferrous items non-ferrous so you dig some junk. With PI discrimination the problem is more serious - a gold nugget can easily be identified as iron, especially the large nuggets, so it is dangerous to use PI discrimination where large nuggets lurk. In any case, I sure like to see other people find gold. I always get excited when anyone finds gold, because it tells me there is more for me to find also. It's when nobody is finding gold that I get worried, and today was turning into one of those days. One the other hand, if I go out with Jeff one more time and find a big nugget, I'd best not turn my back on him. I'm likely to get hit over the head with a detector! Since we were having no luck for the day so far we decided to switch gears. Back to the old reliable airstrip to find nuggets. I've found if I'm just patient, dig lots of bullets, I can always find gold on the airstrip or around camp. But since the Infinium has minimal discrimination, and digging the compacted airstrip material is a lot of work, I switched to the GMT. Jeff stuck with the MXT. Before an hour was up Jeff found a 12.2 dwt nugget. Shortly after I found a 2.7 dwt nugget with the GMT. We both had nuggets for the day. Jeff's was a very nice, nearly solid gold piece. Mine was a broken, very quartzy nugget. Still, that seemed to be it, although we dug a small pile of bullets and shell casings. We headed up to the bench deposits above camp once again to look for smaller gold. The MXT is a great detector, but the difference in operating frequencies was obvious. We scraped areas free of overburden over the bedrock, and checked them with the detectors. The White's GMT with it's 48 kHz operating frequency had an obvious edge over the 14 kHz White's MXT, even considering the fact that the MXT was using the more sensitive 6" elliptical coil versus the 10" elliptical coil on the GMT. We dug a couple pennyweight of small nuggets, but the GMT clearly got better signals on the small gold. Small gold nuggets found with White's GMT Brian again found little gold with the dredge, and decided to wrap it up for this trip. He had his work cut out for him pulling the dredge out of the creek and getting all the gear put away. Day Five dawned a bit cloudy and cool. The only real good thing about this time of then year is the lack of mosquitoes. The cool nights have driven them off, and so our days were relatively mosquito free. A few biting flies replaced them, but not so many that I ever had to use a head net this trip. Cold weather has it's advantages. Since we were leaving that afternoon, we made a short day of it. I had pulled my left arm out of joint, and so was down to digging only targets that gave perfect id. We did a little detecting in the pile of material near the ditch in front of camp. This pile has produced several nice nuggets, and been heavily detected. But Brian is short order found a nice weighing several pennyweight with the White's GMT. It ended up weighing more than all the gold he got dredging on the trip. The weather cleared as the day went on, and I decided to spend my last few hours up in the big nugget area near the ditch. I ran the GMT again while Jeff used the MXT. I hit the road itself real hard, as I saw no signs that it had been detected much. But Ganes had given us all the gold it was going to this trip, and we went in early to pack and clean up our cabins. It may be I missed out this last day simply because I passed up lots of targets I normally would have dug. Well, it was a fun trip, with over 9 ounces of gold found. Even discounting the big nugget I found over an ounce of nuggets, with the largest being 13.8 dwt. Jeff found about an ounce with his largest at 12.2 dwt. Good-sized nuggets remain to be found, and even a few clunkers. Still, the easy pickings are gone, and it will take patient detecting to get results at Ganes Creek now. There are actually many miles of undetected tailings running upstream above the more recent workings. The areas are generally lightly brushed over, with some large open areas. A few brief exploratory runs into these upper areas have produced no real finds, but the area is vast in extent, and worth attention in the future. A talk with Doug revealed that next season there will be a lot more work done with bulldozers to make areas "fresh" again. The good news is many worked areas will be rejuvenated in this way. The bad news is you guys that did not dispose of your trash properly... well, it's just going to be there to dig up again. The future at Ganes creek is more likely to be a mixture of working material freshly turned over, and then wandering off searching for those missed areas. Finally, the detectors themselves. I like the Garrett Infinium LS. It has great bang-for-the-buck in the PI department. Its current lack of accessory coils is the only thing really holding it back at the moment. I see the Infinium as being the machine I will turn to when my normal VLF detectors won't do the trick. Ganes Creek is really not the best area for PI detectors, as the low mineralization and lack of hot rocks means the PI units have no real edge over VLF detectors. The White's GMT is slowly becoming my primary nugget detector. I've favored the Fisher Gold Bug 2 the last few years, but the extra versatility of the GMT is causing me to use it more and more. The extra depth on large gold versus the Gold Bug 2 is the big plus at Ganes Creek. The machine that really wowed both Jeff and I was the White's MXT. It's the first detector I've ever used that I really think "does it all". Now, while it bench tests well on small gold, frankly it does not hold a candle to the GMT when it comes to very small gold under actual field conditions. If small gold is your bread and butter, the GMT or Gold Bug 2 are still the way to go. Not only do the higher frequency detectors have an innate edge, but the manual ground balance offers better control for small gold. The MXT must be auto ground balanced, then "locked". The GB point is then fixed, but it cannot be manually adjusted. The GMT has automatic and manual ground balance, while the Gold Bug 2 is manual only. Steve's Gold - 8.15 Ounces Total But the MXT does do very well on nuggets weighing a few grains or more, and the bigger the gold gets, the less difference there is between the MXT and GMT. Frankly, for nuggets weighing in pennyweights or more, I actually prefer the MXT. It operates smoother than the GMT in mineralized ground, and has depth as good as, and maybe under some circumstances better than, the GMT. It's a great machine for large nugget hunting. Combine that with the fact that it has a vastly superior id system, with both iron readout and conductivity measurement, and you can actually do things like tell most gold nuggets from a .22 shell casing. I actually used the relic mode with the small coil on the MXT to work extreme trash areas to good effect. This machine has lots of potential to explore, and yet is very easy to use. Add in the the fact that it has a 6.5" x 4" elliptical DD, 5.3" round concentric, and 10" x 5.5" elliptical DD coils available as options, and I think the MXT is now the machine to beat for all-around use. And despite it's wealth of features, it's list price is only $799.95. I think we will be hearing a lot more about the MXT in coming years. ~ Steve Herschbach Copyright 2002 Herschbach Enterprises1 point
 -
Just registered but have been browsing these forums for quite a while and it has helped me a lot. Only started detecting a year ago with a Garrett Euroace and I've really enjoyed my new hobby. Just recently decided to upgrade and I've ordered an Equinox 800. I'm looking forward to it arriving and then putting into practice what I've learned here. Many thanks for all the helpful information that you've all took the time to post.1 point
-
Good hard days of work ( at 63 they are very hard days ), and then WHAM Mother Nature takes over again !!!
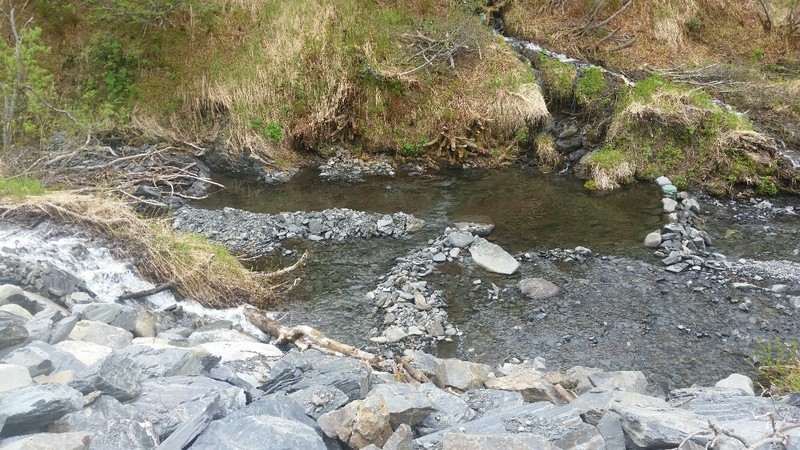

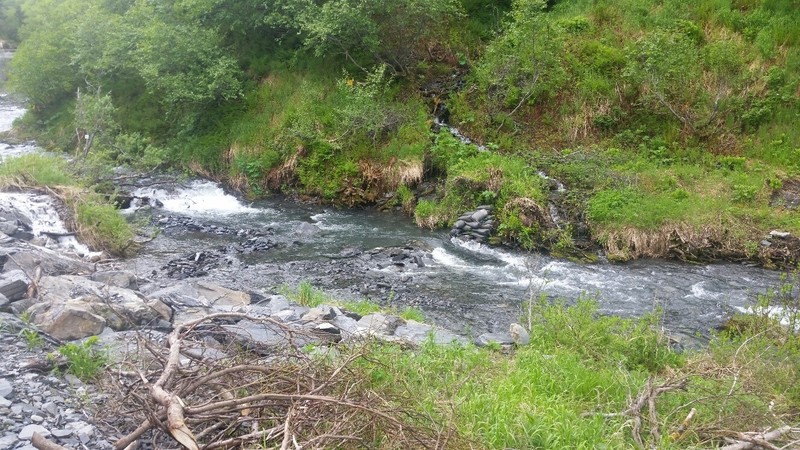 1 point
 -
I used baking soda and water to clean the coins since I don't plan on selling them.

 1 point
 -
Small world foreverteachable, and thank you for your service. This metal detecting thing that all of us are into here , is a ton of fun!! Steve has put together a terrific forum for us to be a part of. Have fun out there!!! Semper Fi ...... Joe1 point
-
Hello Sinclair Here in the UK we find many different flour bag seals from various country's but most originate from Germany and the Kiel one's date as far back as the mid 1600's. I have posted a photograph of the front and back of the one I found on Sunday, over the years I have found many "Flour Bag Seals" also here below is an article about the same seal which I found, you might be able to relate the location of the flour millers. http://www.bagseals.org/gallery/main.php?g2_itemId=31&g2_page=65 German, Flour Bag Seal, Baltische Mühlehn Gesellschaft One side has a raised circular border with NEW PROCESS curved around the top inside of the border and FLOUR straight across the centre and a diamond at the bottom. The other side can be found on other seals and consists of a continuous raised line circular border with the following German words around the inner edge: BALTISCHE MUHLEHN GESELLSCHAFT . with NEUMüHLEN curved above a dash dot dash centre piece and KIEL straight across below it. A flour bag seal from Neumühlen (= New mills), a suburb of Kiel in Northern Germany.
.thumb.jpg.aaee75839cb75a04b199a6e6be994333.jpg)
.thumb.jpg.9ec43b7fcb6fd7f9f133edb9416a571d.jpg) 1 point
1 point -
Really awesome finds! Over here we have 200-250 years worth of finds in many areas and it is rarely a boring day. It must be incredible to have the opportunity to detect metal items close to 10 times that old.1 point
-
Randy! You must be kidding ... that "KIEL" thing seems to have its origin ~2km from where I live.. crazy! Google Maps Link1 point
-
Thanks for the reply Joe and for your service. I served 4 years with First Tanks 7th Marines. We had the M1A1 Tanks and 120mm rounds. I will measure the diameter of the shell tonight. For now though I'll share what TnShooter shared on another forum, " Kind of looks like a US - 75mmSee link to pic below for comparison.https://goo.gl/images/LFQqrFhttps://images.google.com/imgres?imgurl=http%3A%2F%2Foldguns.net%2Fpix%2F17708G.jpg&imgrefurl=http%3A%2F%2Foldguns.net%2Fcatho.htm&docid=ryqMcwKJej1a7M&tbnid=bW_hC9tjJ8pxzM%3A&vet=1&w=1062&h=998&source=sh%2Fx%2FimHope it helps." Semper Fi! I did see the letters and numbers but can't make out anymore but there were some in the center around what looks like a primer. I said, "old round" because the tanks in the Marines that I worked on had a round made of powder with a cap at the end of it. I thought this might be a tank or artillery round cap.1 point
-
Field 2 is a better choice in the DRY sand for depth/sensitivity than Gold mode unless you are working volley balls courts. Once the sand gets damp...... even from the mist it gets chatty..... beach 1 works best at that point down to the waters edge. You can use beach 1 in the water.... but by time you reduce the sensitivity i just switch to beach 2. There i use AM to help adjust the sensitivity........if you hear a lot of iron chatter back it off. Its a very sensitive machine..... especially if you are running any mode but beach and the sands damp..... really lights it up. For the most part im not digging a foot or two for a tin can......i know golds not there. Most of the gold will be recent drops on active beaches. Is there a beach tractor at your location? I hunt a very busy beach ...... that tractor can make it pretty quiet. DONT overlook hunting in the water........ fewer targets and the majority of them are worth investigating.1 point
-
foreverteachable, You certainly got my attention with those two pics!! I am a former Marine Corps tank commander, I left Vietnam and was honorably discharged in 1968. Hard to believe it has been fifty years now. Hard to say for sure, but you have got the primer end of a shell casing from a fairly good sized round. It could have been a actual live round or a blank, but it was fired, as you can see where the firing pin struck the primer. It looks like the casing was machined , possibly to be used as an ash tray or change cup? If from a Marine or Army weapon, I would say possibly 75MM, 90MM, or 105MM. If Navy, it might be something like a 3"/50 caliber naval gun. Have you tried a magnet on it? The 90MM main gun on my tank fired six different types of rounds, only one of those rounds had a brass casing (white phosphorus), all of the other rounds had steel casings. Hope you can pin it down as to what it is, curious to know what you come up with!! Semper Fi ....... Joe1 point
-
All I can tell you is I knew none of this throughout the testing phase, and grabbed just any old USB charger I had around, and had no problems with any of them. Chargers do not force a charge - the device draws the charge, so a higher rated charger will not blow the detector up. Lower rated chargers typically just take longer to charge. I have not heard a single person yet complain of having issues with chargers, so I think Equinox is pretty forgiving here. Still, Minelab had to cover their posterior legally (the fine print) and so the stuff they recommend is to make sure you have no problems, In other words, having the symbols is a good thing, but them lacking does not mean the charger will not work. If you read the stuff I posted again, you will see they are warning you more about damaging the chargers than the detector.1 point
-
I assume we are talking saltwater? Was the sand wet a foot down? Dry has got to mean DRY when running Gold Mode on a saltwater beach. If conductive wet sand is within reach of the detector it will signal in Gold Mode. If I was there with my Equinox running in Gold Mode Multi, I would start at sensitivity 1 and work my way up or if you wish, start higher and work your way down. There should be a point where the sensitivity is low enough you can get the machine to behave. You could also try 20 kHz to mellow the machine out because Multi is turbocharged in Gold Mode. The only reason I would ever run Gold Mode on a saltwater beach would be to hunt micro jewelry. I would want to be high up the beach, and even then I would back it down until the machine behaved. Nobody detects micro jewelry a foot deep, so all you are really trying to do is hunt the top few inches for that tiny stuff. If the targets you are hunting have any size at all, most any mode will be more applicable on the beach than Gold Mode.1 point
-
Yeah, I will let it go now. There were issues with some people not getting along and I wanted to make sure everyone knew about this. It is something most people will never figure out on their own, but I will highlight it when I get my new forum help files built.1 point
-
The video of the Manta PI being tested in France shows it being tested with 2 fat bags of black volcanic Basalt sand - one from Lanzarote in the Canary Islands and one from Reunion Island in the Indian Ocean. Like PI’s typically do, it sees right through the bags and hits the gold ring underneath. The 2 multifrequency VLF IB detectors tested on the sand are totally blocked by it. Ihttps://m.youtube.com/watch?feature=youtu.be&v=G8sdp4RG73g1 point
-
1 point
-
Got it in the right spot so we are good. Thanks.1 point
-
I think this is a pretty awful title to greet me every time I open this forum. Is there any way to get it off of the top and the first thing I see?1 point
-
The coins although discolored look to be in great condition with sharp definition - great finds! And excellent cleaning tips from Jim. Some prior "cleaning" threads.... Best Method For Cleaning Unrecognisable Coins Question Regarding Cleaning Equipment After You Find The Coins And Relics Cleaning Old Silver Beach Finds How To Clean & Preserve Your Metal Detecting Finds Cleaning Old Silver, Copper & Bronze Coins & Relics1 point
-
Another 2h on 2 beaches yesterday.. Here's the trash I found including surface finds (at least 2-3 crown and 1 aluminium bottletops), which I always take with me: Coins I've found: Still no summer holidays over here.1 point
-
Where I live in remote Alaska, the bears are so big they can kill you just by looking at you.1 point
-
You are right Fred. I lived in Alaska for almost forty years. The places I lived were a bit remote, in that they were not close to any town. So you could step out your door and possibly run into a bear or belligerent moose. It is true that people in Alaska that live in or very near towns and cities may not feel the need to go armed, but in most other places they do have a need to go armed. If you want to enjoy the outdoors in places like this you should take into consideration that you may run into trouble and need to defend yourself. Self defense is natural for all living things.1 point
-
So today I chose to test another aspect of the mighty Nox. So to set the stage I had 4 to 4.5 hrs to detect. It was out in the Nevada desert around lovelock/ rye patch area. The area is dry for the most part. Which means we can run hot on the settings. I ran the Nox on gold 1, all metal, 22 on the sensitivity. So I also had my Gold Racer with me to test my replacement 7.5 x 4 coil. I started with my Gold racer as a way to test the new coil and find a target to test the Nox on. I found a target in about 3 mins. Was a 1.1 grain gold nugget. I then tested this nugget with the Nox and it hit on it hard. Now I did have to put it back as I first recovered it with the Gold racer. The ground was dry and not really packed so putting it back was the same as finding it with the Nox in the first place. The area was dry and the nugget was about an inch down maybe a little less. Now this area has been hit hard by me and others with my gold racer sniper coil, the gold monster sniper coil last time I went out. Plus gold bug2 and a SDC2300. In the hands of people that know how to use them. This is our claim so we know it well. Yet this one was missed after 2 seasons of heavy detecting. Right near the surface. The Nox hit on this nugget harder then my Gold racer did. I used this target to test the other modes on the Nox. I found that park would not hit on it. Nor did beach. I tried out the fields as well. They didn't really want to hit on it solid like. Last mode I tested was gold 2. It hit on it but was kind of weird on the sound side. TID bounced around a little, but so did the gold racer. Fact is i dug the target only because it repeated and on this claim you dig what repeats period. That is about it for this target. I placed the gold racer in the truck and went full time with the Nox. I scanned the rest of the hot spots on the claim, finding nothing. So I went over the ridge to our other claim which has been pounded harder then the first. Got down in the wash and on the bedrock. It is shist bedrock. Think thin Domino's shoved against each other standing on edge. I got a good hit. The TID was hitting -9 -8 with a 2 mixed in. But the sound was a clean zip, both directions. I cleaned the over burden of the top, taking it down to close to clean bedrock. The sound got louder and the TID stayed the same. I was starting to wonder if it might just be a good hot rock. But I cleaned a few grains of dirt out of between the schist and there was a little yellow flake. It weight .5 grains. That is a flake (check the pic). It was an inch down and between schist fingers. After taking out the nugget I scanned the area again and still had the hot rock signal. The nugget was sitting on top of a section of hot schist. That is impressive. Remember I said this was a heavy detected area. I personal used the gold monster over the top of this area. As did my gold buddy with his SDC2300. Less than a month ago. A few other things I wanted to note. I found that you can tell a hot rock by moving the coil slow in two different directions. A hot rock or mineral ground will zip only one of the two directions. But a nugget will zip both directions slow or fast swing speed with the Nox. Bottom line, would I replace my gold racer with the Nox probably not. But if I could only keep one detector I own, it would be the Nox no question. If you are truly looking for a one detector unit it has to be the Nox. If you want to be able to swing on the beach one day in the water, the park that evening and the gold fields the next morning, all with the same detector the Nox fits that bill. The fact that the Nox can hit on a .5 grain flake in schist under an inch of overburden, Is awesome and it was not a weak sound ether.
 1 point
 -
Just when I started to learn more about the AT Pro my buddy recently gifted me, I received my 600 from Fedex. I brought it out in the backyard after charging it and buried a penny down 8-9" deep. I heard a good signal up to 4" above the ground. I went over it with the AT Pro and 8x6 coil and heard it an inch above the ground. I am armed and dangerous now :-). It has been a long time since I've had a top-of-the-line detector and now I have two of them. Life is good ?
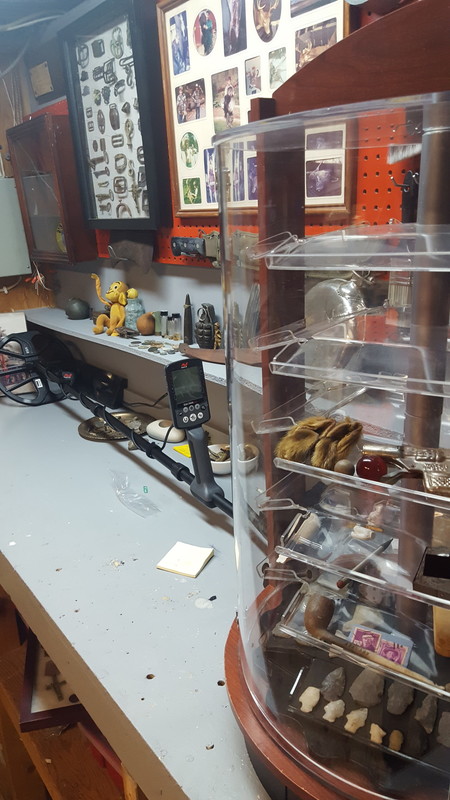 1 point
 -
Been about a month since I've found any but this little guy gave me some redemption...finally!!!!! Supposed to rain hard all weekend so I aborted a trip. Don't get too wet Reese and good luck over there!!!!!
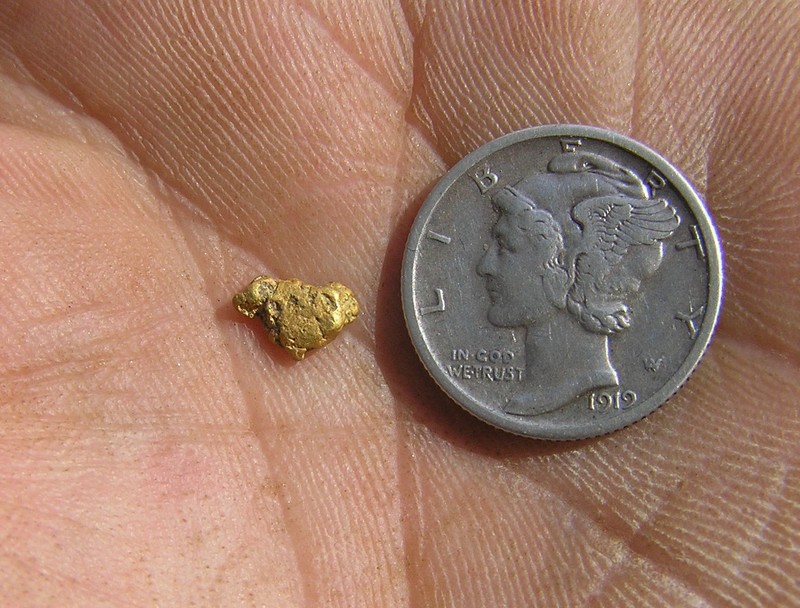 1 point
 -
I decided to take the plunge but with the slightly upgraded/newer Pro Voice model which is actually cheaper than the older BTS Pro by about $40US on Amazon. The newer version appears to be the same as the BTS Pro (including APTX LL) but has Alexa Voice integration built in (which I plan to immediately disable - lol), but more importantly, has blue highlights vs. the flourescent green or orange (fan of neither) colors of the BTS Pro. See: https://www.66audio.com/pro-voice/buy And 66 AUDIO - PRO Voice - Bluetooth Wireless Headphones with Amazon Alexa Voice Recognition Technology https://www.amazon.com/dp/B079J34T9L/ref=cm_sw_r_cp_apa_ZOwjBbAAH0ZQK1 point
-
That pc got me stumble, too. It is so thin, it doesn‘t really matter anyway Did a short hunt today at my nearest beach.. ~12€ and finally a wedding band in the scoop: Figured it‘s just a pretty much worthless tungsten ring, nice find though1 point
-
Thanks everyone for such an amazing information. I really like this form if a member has a question a comment or a concern there's a lot of feedback and it's very helpful and a lot of effort is put into it into helping each other out. Thanks again everyone and I look forward to going out again today after we grade exams1 point
-
Nice Merc! You've gotten some excellent advice on the iron falsing question -- much better than I could have done. (Still learning, as are all of us.) Regarding the ergonomics, I noticed similar discomfort the first time out. Coming from the Fisher F75, it's a difficult bar to reach. In particular after many 10's of hours I was still bothered by the loose forearm cuff of the Equinox. I know many detectorists use straps (most detectors have these in either the base package or as an extra cost option) but since I wear a watch on my swinging (left) hand it always gets caught on the strap when I put my arm back in. The F75's adjustable forearm cuff is brilliant (at least compared to the competition I'm aware of) and certainly that has spoiled me. My solution for both the Fisher Gold Bug Pro and the new Equinox is to add weather stripping foam strips -- available at any hardware store, lumber yard, and even Walmart, which come with adhesive on one side. Add enough layers to take out the slop and problem solved. This solution is also reversible -- something I try to always achieve in case things don't work the way I expect (and likely when cold weather arrives this winter and I'll be wearing sweatshirts and coats I'll be doing some reconfiguring). Regarding the toe weight, at first this bothered me but after a couple times out I realized I no longer noticed it. For operating without a forearm strap it actually keeps the detector tight against my arm better than a perfectly balanced detector. I'm pretty picky when it comes to ergonomics, so the fact that I've gotten used to the toe heaviness should give you hope.1 point
-
The more you use the Equinox the more you'll get used to the way it identifies a good target. I hunt iron infested relic sites and have had the same issues you are talking about with the iron falsing. Chase has some good info in his posts, take the time to read them and others on the subject. I still primarily use my Deus with the HF coil because I recognize falsing on it better. However, one thing I have done to get a better understanding of the Equinox is take both my Deus and Equinox to a site and compare signals. It's a lot of work and takes away from your detecting time but I would encourage you to do the same thing with a detector you know well. You will learn a lot and find that in some cases the Equinox will find targets your other detectors can't. One thing I've noticed with the Equinox is that when you get over a good target the numbers stay tightly grouped even when next to iron. For example, if you had a dime next to a nail and you circled the target, for the most part you would get 25-27 TID with an occasional null/iron grunt or TID jumping into the 30's. If you're over iron or junk the numbers are all over the place and change as you circle the target. This is where 50 tones is helpful because if you're in 2 tones or 5 tones the signal can sound great but the numbers could be anywhere in the tone break range. With 50 tones if it's junk the signal sounds crappy, if it's good the tone as well as the TID stays tightly grouped with an occasional odd tone. Also, to reinforce what Chase already said, ground balance when needed and this being a high gain machine, reduce the sensitivity when you get in thick iron to cut down on the noise.1 point
-
You are too kind Norm - thank you. Not the best but in a few years who knows. The website lets me combine several interests under one roof and is a passion project for sure. You guys are not seeing but 1% of what has been going on behind the scenes the last couple months. For those with an interest in such things here is what’s going on. This started as your basic html website with the forum tacked on in a subfolder. No worries but then Invision started dramatically adding to the forum software capability, with the intent that it drive an entire website. The problem was my installing the forum software in a subfolder. That was common at the time just to run a forum, but for it to drive the whole website efficiently I needed to move it to the root or home folder. That turned into a huge undertaking due to the sheer size and number of files involved. After one aborted attempt I finally got that part accomplished. The last few weeks I have been copying all those old html files into the forum side of things. I am about half done with that part of the project, should get wrapped over the next week or two. Why all this effort? If you look at this page you are on, it is driven by the forum software. It automatically adjusts to any device and any screen size - it’s “mobile friendly”. Now here is an old html page. It does ok but when you go to a phone screen all that happens is everything gets really small. Not mobile friendly, and any change I make tends to break it. Right now the mobile renditions are not “locking on” properly due to a change I made some time ago. I started trying to fix it, then realized I was wasting effort better put to eliminating the html pages entirely. Once I get all the old pages copied over, the whole website will be mobile friendly, and that will boost the Google results. The next step is the whole site will be upgraded and converted to https secure communications protocol. It’s not really needed per se but Google now insists any site that has log in and password structure run off https or get downgraded search results. Since everything will eventually be in the forum database, the search function will be more efficient at finding things. Currently I was jumping through hoops trying to get the html pages to appear in searches done using the forum search function. With those steps in place, I can then do a couple things to boost website performance for faster page and image delivery, snappier performance overall. Then, once all that gets done, I can actually forge ahead adding more information and capabilities to the website! Right now it’s more about shuffling everything around to get more efficiency going forward. Suffice it to say I would not be going to all this effort if I did not have plans for the future. Not the best site now perhaps but if I get my way someday that will be an undisputed fact. Thank you everyone for your interest and participation! New Steve's Reviews Index (work in progress) New Website Home Page New Meet & Greet Forum New Updated Steve's Mining Journal Index New Updated Steve's Guides Index1 point
-
Guilty as well. I ment to Check the Nox on a target before digging it. But failed. I had to put my other unit in the truck lol.1 point
-
Great videos. Tells the truths of nugget hunting. strick1 point
-
JW Like you said if left in the ground would have been a true test of the Equinox on gold . The trouble is that little word if . What I really want to see is that 6” coil in action like Bill was talking about. Being we live in a in perfect world how can I expect Bill’s video to be any different. i’m Looking forward to his next video he makes. Bill I thank you for your hard work and just seeing that pretty face is a pleasure to behold . That’s the way it is Bill and that is some got it others got to go get it. Chuck1 point
-
I am kind of tempted by these. I am quite happy with the Minelab supplied wireless phones. There are times however I might want to wear a wide brim hat or merely look a little less geeky with full size phones. The improved sound quality and longer run time over regular headphones is appealing. Not sure about the “headphone on ear” design though, pretty much a crapshoot when it comes to comfort, and no real way to know without doing the order and try routine. Thanks for posting, I will have to mull this one over.1 point
-
The ML80s are overpriced, their clone equivalents (Miccus SR71s et al) can be had for less than half the cost of the ML offerings and there are other capable over the ear APTX LL phones that are available. But none are water, weather, or even sweat resistant. But you are right about the backphones style, no other APTX LL offerings out there like that. I wish the price was a little lower because otherwise they would be just the ticket as I have been looking for some at least sweat resistant if not weather resistant APTXLL phones. There are plenty of WP or sweatproof BT APTX earbuds, but no easily obtainable APTX LL buds. APTX is barely satisfactory as far as lag is concerned, so I really would prefer APTX LL. Furthermore, I prefer the backphones style to the earbuds style, so here's to hoping the price will come down on the 66 audio backphones. Thanks again for the info.1 point
-
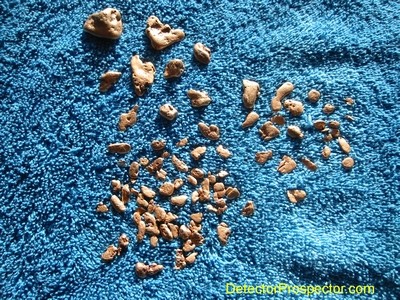 This ended up being one real busy trip. I blew out of here about 7PM last Friday night and got to Mentasta by midnight. I sacked out in the front seat of my truck, and was back on the road by 5:30AM. Had breakfast in Tok, then on to Chicken to deliver gold pans to Sue Wiren in "downtown Chicken". Then off to Boundary at the Canadian border. I spent several hours chasing down miners to get permission to hunt land. Permission had been lined up in advance from a couple but one in particular I was trying to find. He was around, but I kept missing him. It was worthwhile as I got to talk to a couple other guys in the area. The area looks interesting so once I get permission I will have to head back up for another try. I finally headed to one of the fallback locations I had lined up, and by 10PM had found just over an ounce of gold with my new Minelab GP 3000. The largest nugget was just shy of 1/4 oz and the rest were nice chunky pieces. The area was pretty brushy and so I ran the 11" DD coil instead of something larger. I like the GP 3000... it ran smooth as silk and lacks the faint "warble" of earlier Minelab units. Steve with Minelab GP 3000 hunting gold in Fortymile area, Alaska I camped out in the truck again, and was up early again the next morning. By afternoon I had just under an ounce of gold with the GP. I wanted to hit the magic one ounce mark and so grabbed my White's MXT with 10" elliptical DD coil and headed back to the spots where I had found gold with the GP. I found another pennyweight of smaller nuggets that put me over the ounce mark. I had to meet my father and brother at the Chicken airstrip by 5PM and so I hightailed it back to town. They were there when I arrived. My father had flown up while my brother and sister-in-law had driven up. We loaded up the plane and flew over the hill to Napoleon Creek to visit Judd and his son David. "Downtown" Chicken, Alaska My brother had never detected gold before so I hooked him up with the MXT to start with. But as usual his beginners ear interpreted the threshold ground noises as signals. Nugget detecting requires more expertise in interpreting signals than most other types of detecting, especially when using VLF detectors. So I set him up with the GP 3000 instead. The Minelab SD/GP detectors are Pulse Induction (PI) detectors and by virtue of their design essentially ignore ground mineral and mineralized rock signals. What this means is they generally do not have a variation in the faint threshold sound unless an actual target is under the coil. This can be much easier for a beginner than learning the sounds a VLF detector puts out in highly mineralized ground. The GP 3000 does have a lot of control settings that can overwhelm a beginner, but using the suggested stock settings works just fine. I made a few extra adjustments for Tom (my brother) and sent him detecting. And he started finding nuggets! I always get a kick out of helping someone detect their first nuggets, and it was just that much better in that it was my brother. He decided he really liked the Minelab. Still, to prove a point I grabbed the White's MXT, and started finding about two nuggets for every one he found. Expertise does count, and in trained hands the MXT is a very capable detector. I thought it did quite well indeed in the admittedly mineralized soil conditions. Steve with White's MXT metal detecting for nuggets on bedrock exposure My father was having no luck at all. He has fairly poor detector technique, and I just can't convince him to slow down and keep the coil close to the ground. I have no doubt he walks right over many nuggets as his coil is often several inches off the ground. Coil control is one of the real secrets of nugget detecting. If you only have a few inches to play with, giving them up by running the coil high over the ground really makes it hard to find gold. But he insists on doing it his way, as he eventually always finds some gold. But he could find more. Judd put us up for the evening. We got some more time in the next morning, and Tom and I found some more gold. I ended up with about 3/4 oz with the MXT while Tom got just over 1/2 oz with the GP 3000. Dad still came up dry. Our real reason for being in the Chicken area was that we had volunteered to survey a lot for the 40 Mile Miners District. We had to meet a State survey team in Chicken in the afternoon, and so flew back to Chicken. We hooked up with them and planned the lot survey. It is amazing how something that years ago would have been very simple can turn into a major project these days. We got the planning done and then my bother and sister-in-law drove back to Anchorage. I had planned on heading back to Anchorage that night also, but the time was late, and my father still had no gold. So he talked me into going back to the border to my earlier digs to score a few nuggets. A good decision, as I came up with four fat nuggets that totaled over an ounce in weight. One round chunk weighed over 3/4 oz plus three other nice pieces. I had set my father up with the Troy Shadow X5. It was getting quite a lot of ground noise in the all-metal mode, so I set it up in the silent search discriminate mode with the discrimination set at 3. Dad ended up finding two round nuggets weighing in at over 8 pennyweight (20 pennyweight per ounce). So he was happy... he had his gold for the trip. Over 4 ounces of chunky Fortymile gold found with metal detectors I ended up with the gold above for the trip. 4.27 ounces of nice, solid nuggets. The larger ones on the left were found with the Minelab GP 3000, and the smaller nuggets grouped to the right were found with the White's MXT. I had a 9 hour drive ahead and so took Dad back to the airport and sent him on his way. A 2-1/2 hour flight for him, and an 8-1/2 hour drive for me. But well worth the drive, with gold in the poke and lots of visits with friends and miners in the Fortymile! 2011 Update: As great as this gold and outing were it turned out to be the end of this stretch of Fortymile gold adventures. In 2003 something else came along that diverted my attention for years to come - Moore Creek, Alaska. ~ Steve Herschbach Copyright © 2003 Herschbach Enterprises1 point

.jpg.e63ebde9a8464312cc772911710de7ed.jpg)
.jpg.62997afccc332d19da5eaa359f20fe26.jpg)
.jpg.ac4c2eb773bedc8b40d4318bc8d1ac9b.jpg)
.jpg.61890f029e98b91590f72e5d9d4594b2.jpg)
.jpg.2ec47dd4e33623e09701a1f3f45ea154.jpg)


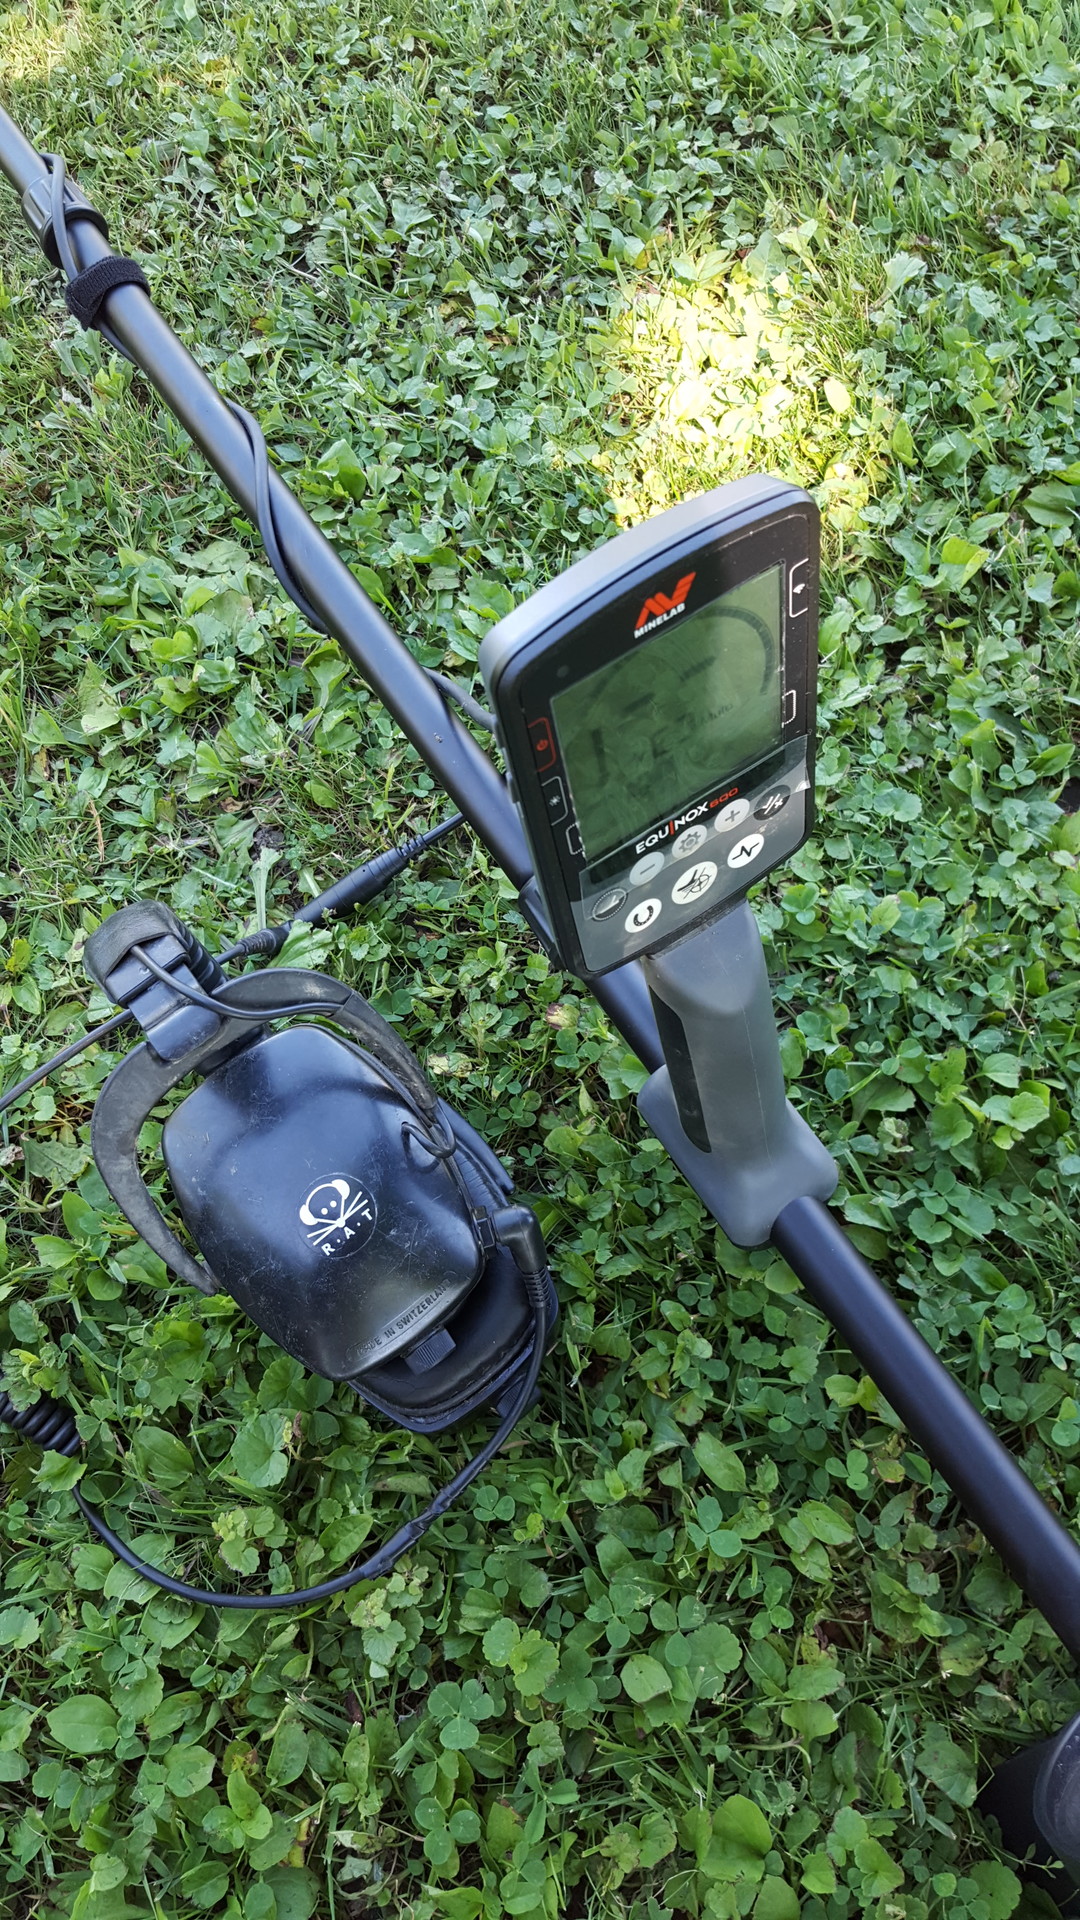


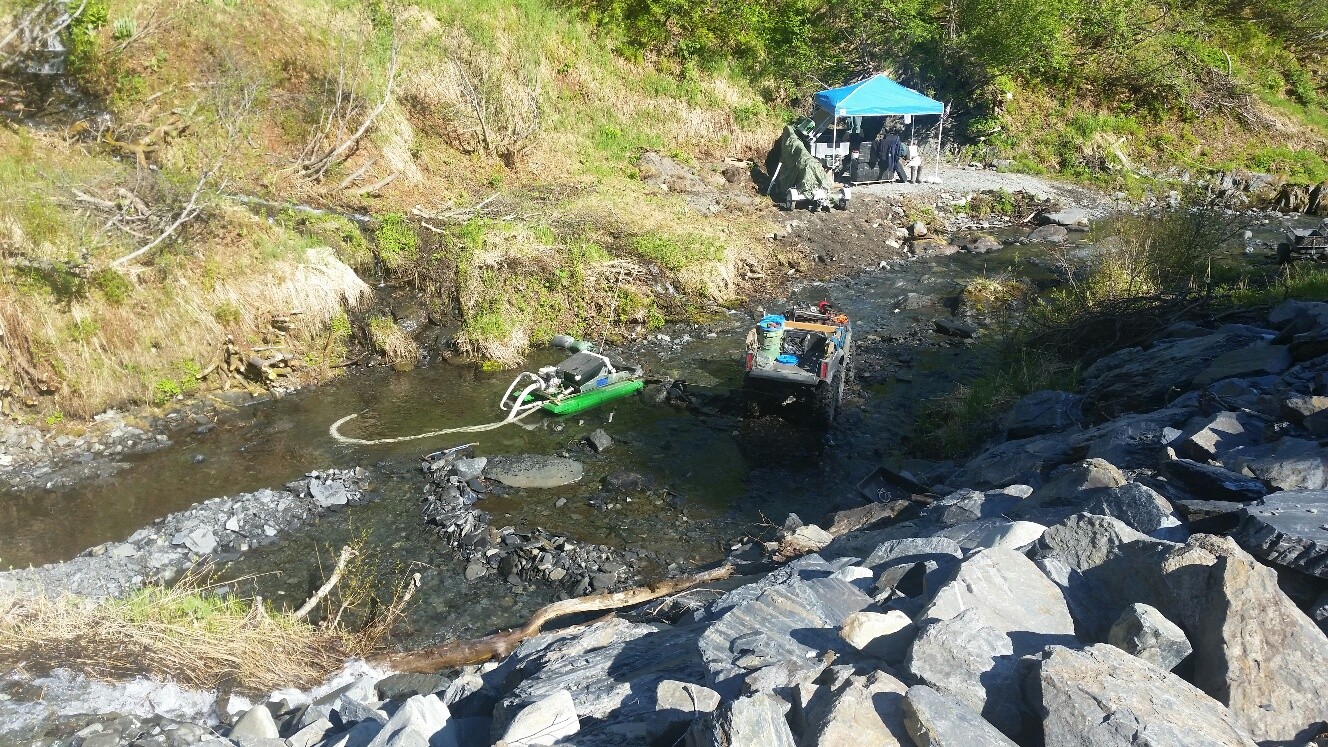

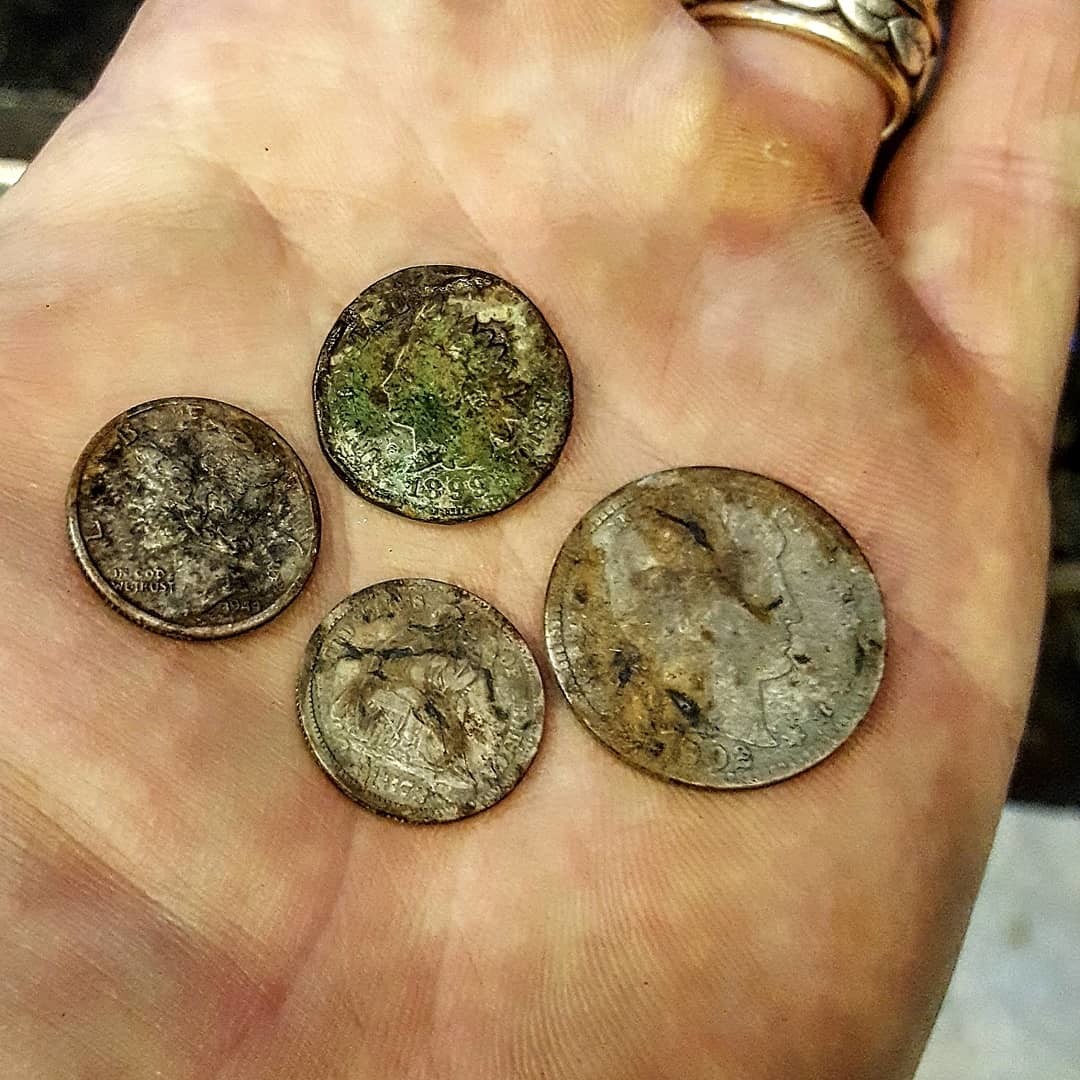
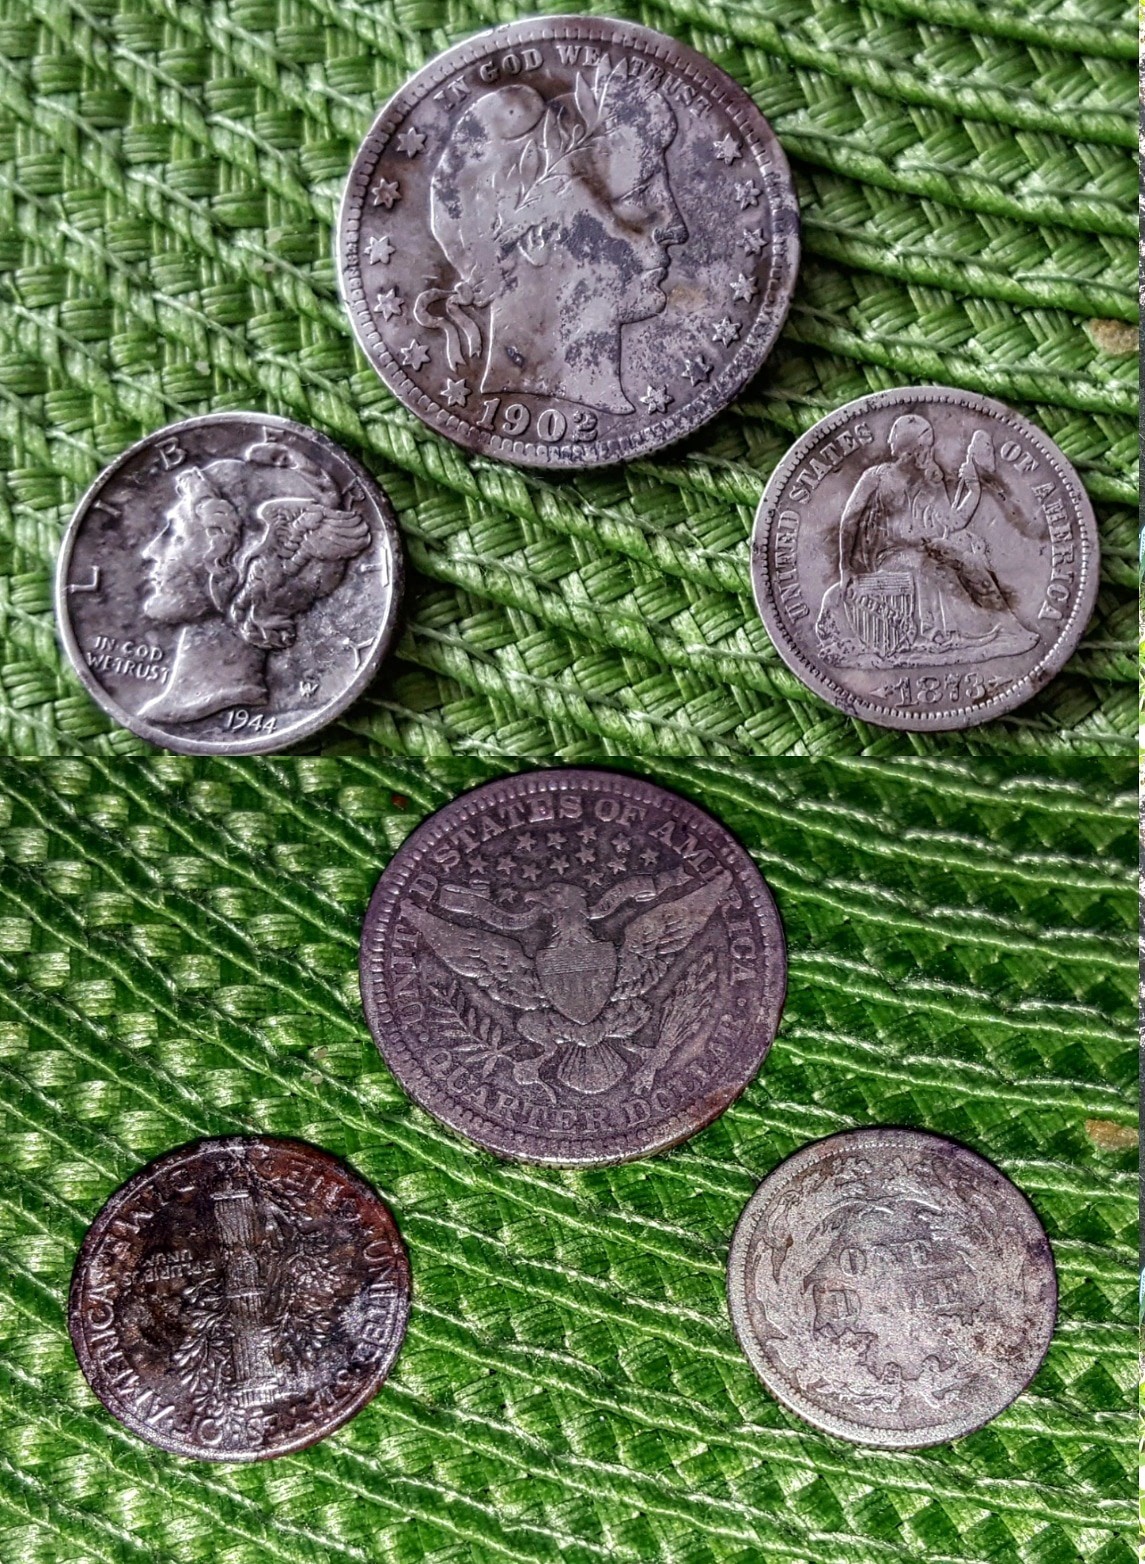

.jpg.f45cd25282545ca1440b868b8a9566cf.jpg)
.jpg.34928575430804c6b991a754e69aecc3.jpg)