-
Metal detecting and gold prospecting related books, manuals, and catalogs for free download. Category Index
Member Submissions - 3D Printer Files
Download files and build metal detector and gold prospecting items with your 3D printer, laser cutter, or CNC.
6 files
-
Deus 2: Heavy Duty Coil Balancer for the 13"x11" Coil
By Rattlehead
This will relocate the shaft mounting point closer to the center of the coil, making it much more balanced and easier to swing.
This one ONLY works with the 13x11 coil. If you need a balancer for the 9" or 11" coil, check my other uploads in this section.
Print using PETG. 100% infill. No supports needed.
You'll need to use the spare bolt, nut and cap that came with your detector. If you don't have it, you can find them on Amazon or eBay for just a few bucks.
9 downloads
(0 reviews)0 comments
Updated
-
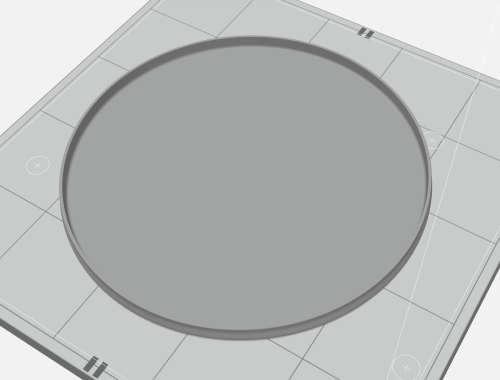
8 INCH X-COILS SKID PLATE - GOODAMOUNT V1-1
By GoodAmount
This skid plate adds extra material to the leading edge of the skid plate to allow greater wearability when scrubbing the coil on rocky terrain.
3 downloads
(0 reviews)0 comments
Submitted
-
Heavy duty flat-folding coil balancer for the Deus 2
By Rattlehead
Several of these balancers can be found on Thingiverse and for sale on eBay. The attachment point (wings?) on most of those are kind of thin and not very durable. I've already broken a couple of them. I tried one that I found on eBay which was thicker, but it was designed in a way that it didn't allow the coil to be folded completely flat against the shaft. So with this in mind, my coworker and I decided to design a new improved version of the balancer solving both of those issues. The wings are thicker AND it allows the coil to be folded completely flat. All edges have been smoothed so that it looks and feels nice. We designed this to work with the 9" coil, but I believe it'll work fine for the 11" coil as well.
Print using PETG so that it can withstand heat. 100% infill. No supports needed.
TM-DP-BALANCER-v2.STL
16 downloads
(0 reviews)0 comments
Submitted
-
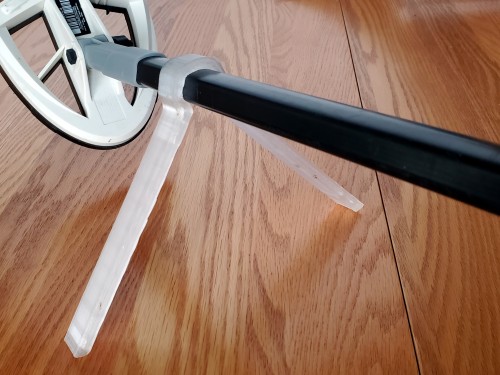
Deus easy clip on Bipod
By rexhavoc
This Bipod twists on and off of the unique Deus shaft profile. Takes seconds to snap on and off, can be slid up and down the shaft to whatever height suits your fancy. It elevates the coil enough to wave a scoop full of materials easily.
I printed it in PETG to give it some flexibility. PLA might be a bit brittle.
4 downloads
(0 reviews)0 comments
Submitted
-
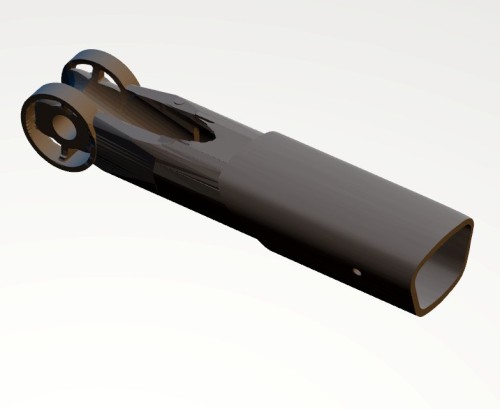
Captain Hook's Deus HF Shaft Repair Kit
By rexhavoc
Broke the shaft of the 9" HF elliptical just behind the knuckle. It's weaker than the standard shafts because of the port for battery cable going to the shaft. The OEM replacement wasn't outlandishly expensive - but the shipping sure was! So, I designed this to slip on over the remainder of the bucked off shaft. Sort of like Captain Hook's peg leg, but with all the functionality of the original.
It's a press fit, so I didn't actually have to pin it with the hole. I did it in resin, so YMMV.
Let me know if it needs tweaks. Thanks again Steve for the space to post these files.
6 downloads
(0 reviews)0 comments
Submitted
-
Deus Short Stand
By Rattlehead
This stand adds just enough height and width to keep the detector from toppling over, without adding too much bulk. Print from PETG. General Supports, density @ 7%. Infill 75-100%.
11 downloads
(0 reviews)0 comments
Updated
-
See All Download Categories....
Copyright Disclaimer - These digitized collections are for purposes of education and research. All items are available freely from other sources on the internet - all that has changed is the storage location. Upon request by emailing steve @ detector prospector . com (remove spacing) we will remove material from our storage location and replace it with a link to the original location. Steve Herschbach does not claim to control any rights for any materials in this collection. These rights include, but are not limited to: copyright, privacy rights, and cultural protection rights. The User hereby assumes all responsibility for obtaining any rights to use the material in excess of “fair use.” Steve Herschbach makes no intellectual property claims to the products created by individual authors in the manuscript collections. Steve Herschbach is not responsible for the accuracy of the records, information, or opinions that may be contained in the files.
-


