
Leaderboard


Popular Content
Showing content with the highest reputation since 12/18/2013 in Articles
-
 This is my latest "Nugget Detector Guide", now published for over twenty years, updated January 2024 with some of the latest model information. Each model has a short description, followed by a very PERSONAL OPINION. Copyright 2002-2024 Herschbach Enterprises - Please do not reuse or repost without my express permission. This is offered as a simple guide for those wanting a comparison of the various nugget detectors available new with warranty, along with some kind of real opinion about them. That's all it is, folks, so take it or leave it for what it is worth. It's just that listing specs is of little help to people, and so I take my best stab at providing some guidance for those newer to detecting. These are only my opinions based on my experience with various detectors over the years. While I do have a lot of experience, I must throw in the caveat that I have not used all detectors under all conditions. What may be considered a good detector at one location may not be so good at another location due to differences in ground mineralization and the gold itself. Detector performance is site specific and so your mileage may vary. Never forget that when reading comparisons on the internet. Although many detectors sold today can potentially find gold nuggets, I've chosen to only list current models from major manufacturers that are sold and marketed primarily as prospecting detectors or that at least have a specific prospecting mode. I no longer list general purpose VLF detectors running under 18 kHz because they are too common and that being the case they offer nothing special to the potential gold prospector. If you are interested in other general purpose detectors that might make good prospecting machine but are not listed here, look at my more comprehensive reviews list. Many discontinued prospecting detectors are also listed there. Various popular VLF gold nugget prospecting metal detectors Please, if you own one of these detectors, and I call it like I see it, don't take offense. Any nugget detector made will find gold in capable hands, and the owner is far more important than the detector model. I'll put a good operator with almost any detector on this list up against a novice with whatever is deemed "best" and bet on the experienced operator every time. The person using the detector finds the gold. The detector is actually one of the less important factors in nugget detecting success or failure. A quick note to those who know nothing about these machines. These are metal detectors. There is no such thing as a "gold only" detector. These detectors will also find lead, copper, aluminum, and other metals. These units are best used to look for relatively larger pieces of gold at relatively shallow depths. Concentrations of gold dust are not detectable. Some of these units can hit gold that weighs as little as a grain (480 grains per ounce) or less but only at an inch or two. Only the larger nuggets can be found at depths exceeding a foot. Only world class nuggets weighing many ounces can be detected at over two feet. The vast majority of nuggets found are found at inches, not feet. About Long Range Locators (LRLs) WARNING ON COUNTERFEIT DETECTORS - The market for nugget detectors far outsells coin and relic detectors worldwide, with huge sales in third world countries. This has made many of the models below very popular with counterfeiters. Here are some Fisher and Minelab examples. If you shop these models there are two simple rules. First, you are safe if you stick with approved dealers. Second, if the price seems too good to be true, beware! All legitimate dealers have a limit on how low they can advertise, the Minimum Advertised Price (MAP). Review prices at the approved dealer list, and if you find the detector advertised as new at a significantly lower price by somebody not on the list, the odds are very high you are looking at a counterfeit detector. Legitimate dealers are prohibited from advertising at those kind of prices, and a price too good to be true is your number one warning you are about to be ripped off. The detectors are listed in order based on the lowest price normally advertised on the internet as of the date below. Steve's Guide to Gold Nugget Detectors - Updated January 2024 Before I start, a quick note about recent events in the metal detector industry. A few years ago we lost a major manufacturer in the form of Tesoro. That lead to the Tesoro Lobo SuperTRAQ being dropped from this list. 2020 saw one of the true industry stalwarts fall by the wayside. White's Electronics was acquired by Garrett in October of that year. I am therefore dropping the White's nugget detectors from this list as no longer available new with warranty. For now, see my detailed reviews for information on White's models. Bounty Hunter Time Ranger Pro / Fisher F19 ($399, 19 kHz) - This detector is a later, more advanced version of the Fisher Gold Bug Pro (see below), with added features. There is an excellent threshold based all metal mode plus a dual tone discrimination mode. The F19 has both ground grab and manual ground balance, plus adjustable tone break, just like the Gold Bug Pro. Extra features are added to enhance the coin, relic, and jewelry capability, such as notch discrimination with adjustable notch width, volume control, separate ferrous tone volume, and a LCD meter backlight. These extra features may even find use while gold prospecting. The Fisher F19, and the Bounty Hunter Time Ranger Pro, can use any Gold Bug compatible coils plus those made for the Teknetics G2 series, providing for a huge number of possible accessory coils. This detector can be had with several stock coil options, including a 7" x 11" DD coil, or 5" x 10" DD coil. Weight including a single 9V battery is 2.6 lbs. Steve's Opinion - If you can afford it, look at other options below. If you want the lowest price detector worth even looking at for nugget detecting, you can look no farther than here at $399 (or less). First Texas, the manufacturer of Bounty Hunter, Fisher, and Teknetics metal detectors, sells quite a few identical or near identical metal detectors under different brand names and model names. Due to oddities in their marketing scheme, some more powerful models are often available at lower prices than other less capable models. Currently the 19 kHz Gold Bug name carries a premium price, while other identical or more capable models, sold under other names, can often be had for less money. That is currently the case with the 19 kHz Fisher F19 models, and the identical Bounty Hunter Time Ranger Pro model. The bottom line is this. If you can find a BHTRP/Fisher F19 with 5" x 10" elliptical coil for under $500 at a legitimate dealer (see counterfeit note above) it is easily my current recommendation for an extremely capable, entry level, VLF nugget detector with general purpose capabilities. I recommend this detector over the Fisher Gold Bug and Gold Bug Pro models below, not only because of the extra capability, but because it can be had stock with the 5" x 10" DD coil, the best general nugget hunting coil for the FT 19 kHz series. It can only be had as an accessory coil on the Gold Bug models, driving their out of pocket cost even higher. Nokta Gold Kruzer ($549, 61 kHz) - Nokta/Makro started shipping the new Gold Kruzer model in June 2018 and with a change in the company name is now simply the Nokta Gold Kruzer. The Gold Kruzer is a variant of the old Makro Gold Racer that has been boosted to 61 kHz from 56 kHz and put in a waterproof housing good to 5 meters (16.4 ft). The Gold Kruzer comes with a 10" x 5" concentric coil and a 4" x 7.5" DD coil. The weight including LiPo batteries is 3.0 lbs. There are four coils available for the Gold Kruzer. Steve's Opinion - The Makro Gold Racer was one of my favorite detectors because until recently there was nothing running in this frequency class that had full target id and other options normally seen only in coin detectors. The Gold Kruzer takes it all to the next step by being waterproof in excess of ten feet. There are no other detectors running at a frequency this high that are fully submersible with built in wireless capability and therefore this detector may find favor with freshwater jewelry hunters as well as prospectors. The Gold Kruzer is worth keeping an eye on, and is a better value than it appears at first glance due to the dual coil packaging. 2024 Note: The Gold Kruzer has been reduced in price from over $600 to only $549 which seriously upsets the cart. This is an incredible value for what you get and well worth consideration. Fisher Gold Bug Pro ($599, 19 kHz) - Essentially the same as the Gold Bug above with the addition of manual ground balance. The target ID makes the Gold Bug Pro good for more than just nugget hunting, and it will find favor with jewelry and relic hunters. The manual ground balance gives expert operators the control they desire to get the best depth possible. This unit normally comes with a 5" round DD coil to enhance the sensitivity to small gold but other standard coil packages are available. Weight including a single 9V battery is 2.5 lbs. Many accessory coils are available for the Gold Bug Pro. Steve's Opinion - The Pro is the final version in this series which saw several early variations including the Gold Bug above. It is a excellent choice for prospecting, relic, or jewelry detecting and does fine as a coin detector also. However, you are now paying a premium for the Gold Bug name, and the more capable Fisher F19 at the top of this list can be had in a better configuration at a much lower price. The Nokta. Unless you just want the name, pass. XP ORX ($599, 14, 28, 56, 80 kHz) - The XP ORX emphasizes gold prospecting and coin detecting in the promotional material. The XP ORX appears to be a version of the "Africa only" Depar DPR 600 made for sales in Europe, the U.S., and elsewhere. The ORX has been refined from that early effort by the addition of the ability to use the new X35 coils. Steve's Opinion - The XP ORX went through some teething pains with coils before settling into its final role as XPs gold nugget detector. I think the ORX is a great little nugget hunter personally (I love the compact design), but it seems to be overlooked my most serious prospectors, and getting more attention as a low cost alternative to the XP Deus for coin and relic detecting. The new lower price makes the ORX a serious contender, a big step up in capability from the Fisher 19 kHz models above, and a little less money than the Garrett 24K below for a more full featured detector. Garrett AT Gold ($639, 18 kHz) - The AT Gold was a totally new concept in metal detecting from Garrett Electronics when it was introduced. This full featured detector has everything you would expect from a dry land detector - LCD display, full control set and functions, speaker, interchangeable coils, and lightweight. But it is submersible to 10 feet! Even the speaker is waterproof. Note that the unit itself may be submerged but if you want to put your head underwater you will need optional submersible headphones. Weight including a four AA batteries is 3 lbs. The stock coil is a 5" x 8" DD elliptical. Many accessory coils are available for the AT Gold. Steve's Opinion - The Garrett AT Gold was an innovative concept when it was introduced, and was the only waterproof nugget detector option at the time. The nugget hunting world has moved past the AT Gold now, and unless it comes down in price it's hard to recommend for somebody interested primarily in a nugget detecting VLF. Only for Garrett fans really, and even then more for the relic hunting crowd. For a much better option, see the Garrett Goldmaster 24K below or one of several less expensive models above, like the Nokta Gold Kruzer. ads by Amazon... Minelab SDC 2300 ($3599, Pulse) - This model is unique as Minelabs first waterproof pulse induction metal detector. A key feature is that the detector is physically packaged in the proven F3 Compact military housing that is waterproof to ten feet and folds down into an incredibly compact package only 15.7" long and weighing 5.7 pounds including four C cell batteries. Steve's Opinion - I have used the Minelab SDC 2300 and I must say I was impressed. The waterproof compact design is perfect for hardcore backpack style prospecting. The main thing however is that the SDC 2300 comes as close to VLF type performance on small gold as you can get while being almost impervious to the ground mineralization, and hot rock issues, that plague said VLF detectors. In fact, the SDC 2300 will find gold nuggets smaller than most good VLF detectors can detect in mineralized ground. The SDC 2300 is also one of the simplest detectors to use and master on the market. The main caveat is that the detector is optimized for small gold with the hardwired coil, and so other ground balancing PI detectors are a better option for large nuggets at depth. It is also nearly twice the price of the Garrett ATX above, and so you are paying quite a premium for a little better performance on small gold. Still, the SDC 2300 is almost impossible to beat for the price, if the goal is just to go find some gold, any gold at all. If the budget allows, however, at this point I would pass, and go to the new Garrett Axiom below, which offers a much more sensible design, with many more coil options, and better capability for larger gold at depth. Garrett Axiom ($3995, Pulse) - A new pulse induction gold nugget detector, just announced for 2022, available by the end of the year. The Garrett Axion is the first pulse induction nugget detector to truly reflect 21st design options and capabilities. The Axiom is a sleek, modern design, perfectly balanced at only 4.2 lbs with the 11" x 7" mono coil. The detector is fully weatherproof, with waterproof coils. The Garrett Axiom is available in a couple package options, but the most popular will include the 11" mono coil, 13" DD coil, and Garrett Z-Lynk high speed wireless headphones. The Axiom has a perfect balance of controls, giving experts more options than more simplistic designs, while still focusing on only the controls really needed, to keep things easy for beginners. Steve's Opinion - Well, I have to admit I'm biased on this one. I lobbied Garrett every way possible for almost a decade, to make a detector like the Garrett Axiom. So it is literally a dream come true for me, a powerful pulse induction detector in a really great, ergonomic package, and at a price that won't break the bank, but honestly still more expensive than I was hoping for. I have used the Axiom already enough to know that it is very competitive although it is not that it is the most powerful option available. For that I refer you to the Minelab GPZ 7000 below. The Axiom goes head to head with the GPX 6000 and basically offers 90% of the performance of that machine for two thirds the price. Minelab GPX 5000 ($3999, Pulse) - This Pulse Induction (PI) unit essentially ignores ground mineralization and most hot rocks. The GPX 5000 is designed specifically for nugget detecting and so it has many adjustments for mineralized ground not available on other PI detectors. The GPX 5000 is the culmination of over 10 years of innovation in pulse induction technology. The GPX weighs 5.3 lbs. not including the harness mounted battery, which weighs another 1.7 lbs. The detector comes with both an 11" round mono coil and 11" round DD coil. Over 100 accessory coils are available for the GPX 5000 (Minelab, Coiltek, Nugget Finder)! And more coils are being released every year. Steve's Opinion - The Minelab GPX 5000 can at this point be considered the reliable, well proven option, for just about any pulse induction task a person wants to consider. It has found a wide audience not just with nugget hunters, but with beach and relic hunters. This is in large part due to the incredible coil selection. For general nugget hunting however, the GPX 5000 faces new competition in the form of the Garrett Axiom above, for almost the same price. The Axiom is a better package from a physical perspective and more capable than the GPX 5000 on bread and butter small gold nuggets. However for 1/2 ounce and larger nuggets the GPX 5000 still has the edge due to it's superior large coil selection. personally I lean Axiom for the ergonomics but a case can be made for either machine depending on the user. Minelab GPX 6000 ($6499, Pulse) - The Minelab GPX 6000 is a new pulse induction model that is just now getting into end user hands. The GPX 6000 is exceptionally light and well balanced compared to previous Minelab models, and promises to set new standards for ease of operation. The GPX 6000 weighs 4.6 lbs. and has three coils available at launch, an 11" round mono, 14" round DD, and 17" elliptical mono. The detector has built in Bluetooth wireless headphone capability and quick release Li-Ion batteries. Steve's Opinion - Minelab beat Garrett to the punch in making a very ergonomic metal detector for the 21st century. The GPX 6000 is an excellent choice for gold prospectors, with out of box sensitivity on smaller gold that exceeds the Minelab GPZ 7000. Sadly, what should have been rave reviews by users, has been muted by persistent issues regarding bad coils and hardware based electrical interference. I admit I feel like I have a little egg on my face, as I raved about the GPX 6000 a lot when it came out since mine had none of the problems that far too many people have been experiencing. Regardless of that, I still think when it is running like it should, the GPX 6000 is a superb detector. The closest competitor is the Garrett Axiom for $2500 less. I do think the GPX 6000 retains a small performance edge over the Axiom but whether it is worth the 50% higher price will depend on the user. The more you use a nugget detector, the less the price difference matters. Minelab GPZ 7000 ($8999, ZVT) - The new Zero Voltage Transmission technology from Minelab takes gold prospecting to the next level. The new platform represents a break from the past SD/GP/GPX series in more ways than one, with a new weatherproof housing design based on the Minelab CTX 3030. The GPZ 7000 weighs 7.32 lbs. and comes with a waterproof 14" x 13" coil. There is one official accessory coil available at this time, plus one officially sanctioned aftermarket coil, but more are coming as I type. Brave souls can check out numerous hacked Russian coil options. Steve's Opinion - It's pretty simple. If you want the most powerful metal detector made for finding gold nuggets, get a Minelab GPZ 7000. The GPX 6000, Garrett Axiom, and even SDC 2300 can beat it out of box on the tiniest gold nuggets. But the 7000 will hit stuff plenty small, and more importantly, deliver the goods on the bread and butter gold that matter most to genuine prospectors who want to put weight in their pocket. The difference in small gold capability can be made up with options aftermarket coils, meeting or exceeding what the other models mentioned can do. Yes, it is heavy, and it is expensive, but most really serious gold prospectors are using the GPZ 7000 for a reason - when it comes to sheer performance, it's the best machine for the job. A Steve's Opinion summary - So maybe all the above is still too much information, too many choices. And you want to ask "what would you do Steve?" Well, I'm not trying to speak for anyone but myself, but here is my current thought on the situation. If you want a really great VLF nugget detector in 2024 at a great price the Nokta Gold Kruzer and XP ORX are standout values at under $600. Both are excellent VLF nugget machines and both can be used for more than just nugget detecting. The Gold Kruzer coming with two coils and being fully waterproof would be my choice. As far as PI goes for me it's either GPX 6000, or Garrett Axiom. If money is no object and you only ever intend to use the machine for nugget detecting, then the 6000 wins the day. For me I do more than just nugget hunt so I find the Axiom to be a better general purpose PI for my uses, even though I am giving up a small edge on small gold nuggets. If sheer power is all it's about, weight, price, nothing else matters, just performance, I still think a person has to go GPZ 7000. Yeah, for specific situations other machines might be better. Heck, a Gold Bug 2 might be better in the right spot! But overall, if I had to pay my bills with gold found, I'd be using a GPZ 7000. If I can offer one final word of advice, it would be to pay particular attention to what experienced nugget hunters are using in any particular region. Do not assume you are going to outsmart them, and find some model they have not already tried, and set aside, as less than optimum. Serious prospectors in any particular location will end up focusing on certain units that do the job. In areas of extreme mineralization this is usually a PI detector. In areas with less mineralization and lots of ferrous trash VLF units often are preferred. If you can discover what models the locals prefer, it will give you a head start in knowing what to use yourself. Above all, whatever detector you finally choose, dedicate yourself to mastering it. It takes at least 100 hours of detecting to become proficient with a detector model. Any less, and you are still practicing. Knowing your detector well is more important than what particular model of nugget detector you own. So there you are. Hopefully this helps some people out. I can be found daily on the Detector Prospector Forums and would be pleased to answer any questions you have on metal detecting and prospecting. Also check out Steve's Guide to Metal Detecting for Gold Nuggets. Sincerely, ~ Steve Herschbach Steve's Mining Journal Copyright © 2002 - 2024 Herschbach Enterprises - Please do not reuse or repost without my express permission.48 points
 -
Well, here I am, another year older, and 48 years of metal detecting and gold prospecting under my belt! 2020 has been an odd year for many reasons, the main being the pandemic that has wrecked havoc on life around the planet. The resulting shutdowns and social distancing requirements made this a challenging year for everyone, whether they caught the virus or not. Once I saw where things were headed, I decided to gracefully accept that 2020 would be a good year to just kick back and relax. I did get in some metal detecting during the year, but it has been more about trying out some new detectors than making actual finds. I had a good time and learned a few things, but this was the first year in a long time that I had no specific "adventure" planned for the year. If you look back over my journal, you will see I have done well over the years at making some sort of special prospecting or metal detecting trip each year. This year however it was short day trips, or at most a few overnight outings. Travel did not seem like a good idea this year, especially anything involving airplanes. Some gold found by Steve while metal detecting in 2020 I made finds for the year; gold nuggets, coins, and jewelry. There was no one find however that stands out at all in my mind, more a reflection of how spoiled I am than anything else. In some ways it was a very nice year for me, just taking it easy and having fun. However, I would like to ramp it up for 2021, and I will make the effort in the coming year to try new places and locations more than I did in 2020, which was mostly revisiting old haunts. Happy New Year! ~ Steve Herschbach Copyright © 2020 Herschbach Enterprises Go To Prior Story Journal Index Page22 points
-
Welcome to my free "book" about metal detecting and gold prospecting. Each chapter is a "how to" or explanatory guide, on metal detecting and gold prospecting themes. Many were written in response to questions asked on this websites forum. Each article focuses on a single subject, and they are meant to be relatively short, but to also cover the topic well. In many cases you will not find more in-depth coverage of any of these topics anywhere else. The answers were created expressly to eliminate having to answer common questions repeatedly, creating this reference for use in future threads. There is information both for beginners, and advanced topics for the pros. All articles are copyrighted, and may not be duplicated in any form without my express permission. Steve Herschbach Metal Detecting Steve's Guide to Headphones for Metal Detecting Steve’s Guide to How Deep Metal Detectors Can Go Steve’s Guide to VLF Metal Detectors and “More Depth” Steve’s Guide to Testing Metal Detectors Steve's Guide to Metal Detector "Air Tests Steve's Guide to Metal Detector Search Coil Compatibility Steve's Guide to VLF Concentric vs DD Search Coils Steve's Guide to "Search Coils Are Not Antenna" Steve's Guide to Variations in Coil Performance Steve’s Guide to Detecting Depth Vs Coil Size and Shape Steve’s Guide to Metal Detector Sensitivity Steve's Guide to Sensitivity vs Target ID Stability Steve's Guide to Threshold Autotune, SAT & V/SAT Steve's Guide To Why GB Numbers Do Not Indicate Mineralization Levels Steve's Guide to Metal Detector Mixed Modes Steve's Guide to Metal Detectors with Reliable Target ID Numbers Steve's Guide to the Best Target IDs For Rings Steve's Guide to Detecting Gold Jewelry Versus Aluminum Steve’s Guide to Why Detecting Thin Gold Chains Is Difficult Steve's Guide to Detecting Tiny Gold Jewelry In Saltwater Steve's Guide to Small Item Testing "The BIC Pen Test" Steve's Guide to Testing Weak Gold Targets & Ground or Salt Settings Steve's Guide to Selectable Frequency & Multifrequency Metal Detectors Steve's Guide to Why Target ID is About Size, Not Type of Metal Steve’s Guide to Metal Detector Discrimination Basics Steve’s Guide to Recovery Speed Steve’s Guide to Target ID Normalization Steve's Guide to Target Masking Differences Euro vs U.S. Steve’s Guide to Why Weak Non-Ferrous Targets Read As Ferrous Steve's Guide to Why Some Ferrous Reads Non-Ferrous Steve’s Guide to Iron Bias (Bottle Cap Reject) Steve's Guide to Waterproof VLF Metal Detectors Steve's Guide to Beach Detecting For Gold Prospectors Steve’s Guide To Why Detecting Tiny Gold In A Bottle Is Difficult Steve's Guide to VLF vs PI Depth Difference Steve's Guide to Pulse Induction Ground Balance Steve's Guide to Pulse Induction Discrimination Steve's Guide to Ground Balancing PI and "The Hole" Steve’s Guide To More About The PI “Hole” Steve's Guide to Long Range Locators (LRLs) Steve's Guide to the Fisher CZ Series Metal Detectors Steve's Guide to Fisher Gold Bug Models Steve's Guide to The F75 Ferrous Tone Quirk Steve's Guide to Minelab BBS, FBS, FBS2, and Multi-IQ Steve's Guide to Minelab E-trac, CTX 3030, Excalibur, and Equinox Steve's Guide to Differences Between Minelab SD, GP, & GPX Steve's Guide to Minelab GPX Timings Steve's Guide to Tuning the Minelab GPX 5000 Steve's Guide to Insanely Hot Settings For The GPZ 7000 Steve's Guide to Ground Tracking As A Filter Steve's Guide to White's Goldmaster Models Steve's Guide to White's SignaGraph Display Steve's Guide to White's Electronics GMT versus MXT Steve's Guide to White's TDI Coin Settings Steve's Guide to Rebuilding The White's GMT Steve's Guide to Some Nugget Detectors of Note Metal Detector Database with User Reviews Prospecting Steve's Guide to How to Pan for Gold Steve's Guide to Suction Gold Dredges Steve's Guide to Where To Prospect For Gold Steve’s Guide to Getting A Mining Job In Alaska Steve’s Guide to Metal Detecting for Gold Nuggets Steve's Guide to Gold Nugget Detectors Steve's Guide to a Brief History of Gold Nugget Detectors Steve's Guide to Gold Nugget Target ID Numbers Steve’s Guide to Glaciers & Gold Steve’s Guide To Detecting Gold In Quartz Rock & Mine Dumps Steve's Guide to Finding Gold Veins With A Metal Detector Steve’s Guide to Nugget Detecting Kits Gold Prospecting Research Material For Alaska General Steve's Guide to Successful Rock Tumbling Metal Detecting & Prospecting Library Catalogs, Brochures, User Guides, & Owner's Manuals Thread Hall of Fame Nail Board Tests & Sensitivity21 points
-
 The secret to the Minelab GPX series is thoroughly understanding the timings and when to use each one. Timings are variations of the basic pulse induction technology at work in the GPX series that gives you far more flexibility than exists in other pulse induction detectors. Unfortunately this extra flexibility also adds complexity, and so it is not unusual that some people may not be using the optimum settings in many cases. It is very important when investing in a Minelab GPX detector to take the time to read the manuals and study until you fully understand what the settings do and how to adjust the detector for the best performance. Otherwise you will not be getting all the potential out of your investment. The chart below shows the timings and what GPX models they are available on along with a general description. The descriptions are from the owners manuals that are available by download at the bottom of the page. In general you should always use timings as near the top of the chart as possible, with the exception of the Salt settings. Those are for alkali flat and salt water beach areas only. Using timings designed for more mineralization than is actually required may result in less depth on desired targets. Imagine the timings as another sort of ground balance setting. Low mineral settings are more powerful than high mineral settings and should be used whenever possible. Some confusion is the result of the timing names. Some people assume the Fine Gold timing is best for fine gold. This does make a sort of sense, but the fact is Fine Gold is just better than other high mineralization timings on smaller gold. In milder ground Sensitive Extra will obtain better results on small shallow gold. It is also very important to know that some timings work better with one coil type or the other. Minelab GPX Timings Chart Little or No Mineralization Coin/Relic (GPX 4800, 5000 ONLY) Coin/Relic is for use in lightly mineralized soils including many beaches and loamy soils. It offers maximum detection depth on a range of target sizes, significantly greater than any other timings. However, if the ground is any more than lightly mineralized, the detector may not ground balance properly. On ocean beaches containing significant quantities of black sand, better results may be had by using Normal or Salt settings. Mild Mineralization Sharp (GPX 4500, 4800, 5000) Sharp is similar to Normal but creates a more powerful detection field. It is capable of an improvement in depth, but is more susceptible to interference and will increase the severity of false signals in difficult grounds. This timing is best used in quiet conditions and can work well in combination with Deep Search Mode with a reduced Rx Gain setting. Sharp is an excellent tool for pinpointing faint signals due to the very "sharp" signal response. Sharp will work best with DD coils in most gold field locations. Medium Low Mineralization Sensitive Extra (GPX 4000, 4500, 4800, 5000) This timing may increase the signal from certain hot rocks near the surface, but can actually help smooth out the Threshold in certain ground types, particularly with Double-D coils. In mild ground conditions Sensitive Extra will provide the best signal response on a small, deep target. Medium Mineralization Normal (GPX 4000, 4500, 4800, 5000) Normal gives you the best performance on a wide range of soil conditions, and it will provide the best depth on a wide variety of target sizes. It works particularly well with the supplied 11" DD search coil for general detecting. You should always use Normal in new areas where you are unsure of the soil mineralization and the depth of targets. Medium High Mineralization Salt Coarse (GPX 4000, 4500, 4800) The effect of alkaline salt mineralization is vastly different to the effect of ironstone and mineralized clays. Normal should be tried first in these areas, but if the Threshold is too unstable then better performance will be obtained in Salt-Coarse. Using the Salt-Coarse timing may result in a loss in signal response to smaller targets. However, the response on larger items remains relatively unaffected and ground noise is usually minimized. Medium High Mineralization Salt/Gold (GPX 5000 ONLY) Provides the best signal response on small to large gold in salt saturated and mineralized ground conditions. It should work well on dry inland salt lakes, high salt concentrated goldfields, and mineralized saltwater beaches. Extremely salt saturated soils may still need to be searched with the coil switch in Cancel (using a Double D coil). High Mineralization Fine Gold (GPX 5000 ONLY) Fine Gold is sensitive to smaller targets in highly mineralized ground. It provides a sharper signal on small gold compared to Enhance, and improves the detectability of rough/flaky gold and specimens, while ignoring most hot rock signals and false ground noises. Shallow, highly mineralized ground where gold has been found previously should be re-examined with Fine Gold, and best results will be had by using the optional 8” and 11” Commander Monoloop coils. Note: Sensitive Extra will provide superior results on small gold in milder ground. Very High Mineralization Enhance (GPX 4500, 4800, Improved in GPX 5000) Runs quietly in most heavily mineralized, variable and "hot rock" infested grounds using a monoloop coil. It is more sensitive and detects deeper than Sensitive Smooth but can be slightly more affected by severe ground mineralization. Severe Mineralization Sensitive Smooth (GPX 4000, 4500, 5000) Sensitive Smooth is optimized for an improved response on smaller, shallow nuggets in severe soils. There is a loss of depth on bigger targets; so you should not use this setting when seeking out large, deep nuggets. Sensitive Smooth is best suited for use with monoloop coils in difficult soils. It eliminates most false signals from hot rocks, and ground mineralization, whilst retaining excellent sensitivity to small targets. The example below shows three common timings and where they should be used. It also highlights why using the wrong timing for the conditions can result in missed targets. Minelab Mineralization and Timing Example The following chart illustrates the procedure for finding the correct timing for each situation. In general, always start with the Normal timing. If the detector is stable and quiet, try timings on the left - Sensitive Extra, Sharp, or in rare cases, Coin/Relic. If ground noise or hot rocks present problems in Normal, then try timings on the right - Fine Gold, Enhance, or Sensitive Smooth. Salt settings should generally only be used on alkali ground (salt flats) or salt water beaches, but may have applications in other ground. The goal is always to find the most powerful setting that allows for stable operation. Each timing can be adjusted within certain parameters, primarily through the use of the Gain and Stabilizer settings. Adjusting for a lower Gain, for example, may be preferable to going to a less powerful timing. Minelab GPX Timing Selection Chart - Click on image for larger version Finally, each timing may work best with a certain type of coil (DD or Mono) and the timings have varying level of resistance to Electro Magnetic Interference (EMI). The matrix below attempts to show which timings offers which benefits and strengths/weaknesses. Minelab Timing Coil EMI Matrix - Click on image for larger version The simple chart below can be printed out and taped or glued on your detector shaft as a reminder in the field as to which timing may be best. Click on the image to download a large version. Minelab Timing Decal - Click on image for larger version Minelab GPX 4800/5000 Instruction Manual Download Here Minelab GPX Series Quick Start Guide Download Here Beginner's Guide to Tuning the Minelab GPX 5000 Minelab GPX 4800/5000 Product Brochure Download Here Minelab Commander Coil Brochure Download Here Minelab GPX 4500 Instruction Manual Download Here Minelab GPX 4000 Instruction Manual Download Here ~ Steve Herschbach Copyright © 2011 Herschbach Enterprises16 points
 -
When Minelab started developing our EQUINOX detector, we looked very closely at all of the current market offerings (including our own) to reassess what detectorists were really after in a new coin & treasure detector. A clear short list of desirable features quickly emerged – and no real surprises here – waterproof, lightweight, low-cost, wireless audio, and of course, improved performance from new technology. This came from not only our own observations, but also customers, field testers, dealers and the metal detecting forums that many detectorists contribute to. While we could have taken the approach of putting the X-TERRA (VFLEX technology) in a waterproof housing and adding a selectable frequency range, this would have been following the path of many of our competitors in just rehashing an older single frequency technology that had already reached its performance limits. Another option would have been to create a lower cost waterproof FBS detector, but that also had its challenges with FBS being ‘power hungry’, needing heavier batteries, heavier coils, etc., and relatively high cost compared to the more recent advances that our R&D team have been making with the latest electronics hardware and signal processing techniques. When Minelab develop a new detecting technology we aim to create a paradigm shift from existing products and provide a clear performance advantage for our customers. Our Technology History The multi-frequency broad band spectrum (BBS) technology that first appeared in Sovereign detectors in the early 1990’s provided an advantage over single frequency coin & treasure detectors. This evolved into FBS with Explorer, all the way through to the current CTX 3030 (FBS 2). The multi-period sensing (MPS) PI technology that first appeared in the SD 2000 detector in the mid 1990’s gave a significant advantage over single frequency gold detectors. This key technology exists in the current GPX Series detectors today. Zero Voltage Transmission (ZVT) is our latest gold detection technology implemented in the GPZ 7000 and is a recent example of Minelab’s continued innovation beyond ‘tried and true’ technologies to achieve improved performance. Further to our own consumer products, our R&D team also has significant experience working with the US and Australian military on multi-frequency technologies for metal detection. Introducing Multi-IQ Multi-IQ is Minelab’s next major innovation and can be considered as combining the performance advantages of both FBS and VFLEX in a new fusion of technologies. It isn’t just a rework of single frequency VLF, nor is it merely another name for an iteration of BBS/FBS. By developing a new technology, as well as a new detector ‘from scratch’, we will be providing both multi-frequency and selectable single frequencies in a lightweight platform, at a low cost, with a significantly faster recovery speed that is comparable to or better than competing products. We have come out with a very bold statement that has captured a lot of market attention: “EQUINOX obsoletes all single frequency VLF detectors” Multi-IQ achieves a high level of target ID accuracy at depth much better than any single frequency detector can achieve, including switchable single frequency detectors that claim to be multi-frequency. When Minelab use the term “multi-frequency” we mean “simultaneous” – i.e. more than one frequency is transmitted, received AND processed concurrently. This enables maximum target sensitivity across all target types and sizes, while minimizing ground noise (especially in saltwater). There are presently only a handful of detectors from Minelab and other manufacturers that can be classed as true multi-frequency, all of which have their own advantages and disadvantages. How does Multi-IQ compare to BBS/FBS? Multi-IQ uses a different group of fundamental frequencies than BBS/FBS to generate a wide-band multi-frequency transmission signal that is more sensitive to high frequency targets and slightly less sensitive to low frequency targets. Multi-IQ uses the latest high-speed processors and advanced digital filtering techniques for a much faster recovery speed than BBS/FBS technologies. Multi-IQ copes with saltwater and beach conditions almost as well as BBS/FBS, however BBS/FBS still have an advantage for finding high conductive silver coins in all conditions. “* 20 kHz and 40 kHz are not available as single operating frequencies in EQUINOX 600. The Multi-IQ frequency range shown applies to both EQUINOX 600 and 800. This diagram is representative only. Actual sensitivity levels will depend upon target types and sizes, ground conditions and detector settings.“ Questions & Answers What actually is Multi-IQ technology? What does the name stand for? What frequencies does it use? Is “Multi” the same or different for the various Detecting Modes? Is Multi-IQ the same or different for EQUINOX 600 and EQUINOX 800? Why use a single frequency? How does EQUINOX perform in certain environments? How does EQUINOX perform compared to other Minelab detectors? How does EQUINOX perform against other brand detectors? These are some of the myriad of questions we have seen since we published our EQUINOX Product Notice in mid-September. Some of the answers will have to wait until Minelab publishes reports from our field testers and/or you get your own hands on a detector to try yourself. In the meantime, let’s look further into the aspects of Multi-IQ technology. Multi-IQ is derived from: Simultaneous Multi-Frequency In-phase and Quadrature Synchronous Demodulation. We can go to a statement from Dr Philip Wahrlich, our principal technology physicist, about a key difference of Multi-IQ compared to the demodulation taking place in conventional single frequency VLF detectors: “Within the Multi-IQ engine, the receiver is both phase-locked and amplitude-normalized to the transmitted magnetic field – rather than the electrical voltage driving the transmitted field. This field can be altered by the mineralization in the soil (in both phase and amplitude), so if the receiver was only phased-locked to the driving voltage, this would result in inaccurate target IDs and a higher audible noise level. Locking the receiver to the actual transmitted field, across all frequencies simultaneously (by measuring the current through the coil) solves these issues, creating a very sensitive AND stable detector” Precisely measuring these extremely small current variations is quite remarkable if you consider the levels involved. It’s actually parts per billion, or nanoamp signals, we are talking about here! With Multi-IQ, we can derive much greater target ID accuracy and increased detecting performance, especially in ‘difficult’ ground. In ‘mild’ ground, single frequency may perform adequately, BUT depth and stable ID’s will be limited by ground noise; whereas the Multi-IQ simultaneous multi-frequency will achieve maximum depth with a very stable target signal. In ‘strong’ ground, single frequency will not be able to effectively separate the target signal, giving decreased results; whereas Multi-IQ will still detect at depth, losing a minimal amount of target accuracy. This is how we would generally represent the multi-frequency advantage, based on our engineering test data. Let’s hear more from Philip Wahrlich about the technical details: “For each frequency the detector transmits and receives there are two signals which can be extracted which we refer to as I and Q. The Q signal is most sensitive to targets, while the I signal is most sensitive to iron content. Traditional single-frequency metal detectors use the Q signal to detect targets, and then use the ratio of the I and Q signals to assess the characteristics of the target and assign a target ID. The problem with this approach is that the I signal is sensitive to the iron content of the soil. The target ID is always perturbed by the response from the soil, and as the signal from the target gets weaker, this perturbation becomes substantial. With some simplification here for brevity, if a detector transmits and receives on more than one frequency, it can ignore the soil sensitive I signals, and instead look at the multiple Q signals it receives in order to determine a target ID. That way, even for weak targets or highly mineralized soils, the target ID is far less perturbed by the response from the soil. This leads to very precise target IDs, both in mineralized soils and for targets at depth.” “How many simultaneous frequencies?” you may ask, wondering if this is a critical parameter. Minelab has been carrying out detailed investigations into this in recent years. Just as you can color in a map with many colors, the minimum number to differentiate between adjacent countries is only 4 – a tough problem for mathematicians to prove, over many years. Similar to the map problem, it’s perhaps not the maximum number of frequencies needed to achieve an optimum result, but the minimum number that is more interesting. When it comes to frequencies in a detector, to cover all target types, how the frequencies are combined AND processed is now more important, with the latest detectors, than how many frequencies, for achieving even better results. Efficient new technology = lower power = lighter weight = higher performance. The above diagram is intended to be a simplified representation of how different frequencies of operation are better suited to different target types; i.e. low frequencies (e.g. 5kHz) are more responsive to high conductors (e.g. large silver targets) and high frequencies (e.g. 40kHz) are more responsive to low conductors (e.g. small gold nuggets). The EQUINOX 600 offers a choice of 3 single frequencies and the EQUINOX 800 offers the choice of 5 single frequencies. Both models also have simultaneous multi-frequency options that cover a much broader range of targets than any one single frequency can – and they’re different across the Detecting Modes! Our goal was to develop a true multi-purpose detector that could not only physically be used in all-terrain conditions, but also be suitable for all types of detecting for all detectorists, and particularly those not requiring a specialist premium flagship detector optimised for only one aspect of detecting – e.g. coins, beach, gold, jewelry, water, discrimination, artefacts, etc. This multi-purpose requirement is something that could only be achieved by going beyond single frequency and creating the next generation of multi-frequency technology. Equally adaptable to all target types and ground conditions – just select your detecting location and go! An important update on the Detect Modes… Previously we have stated that Park, Field and Beach would run in multi-frequency and that Gold would only use the single frequencies of 20kHz and 40kHz, giving better results for gold nugget hunting. Our ongoing collaborative field testing feedback from around the world has resulted in further improvements to Multi-IQ to the point where multi-frequency is now the best option for Gold Mode as well, and will be the default setting. Please refer to the revised Getting Started Guide for updated product functions. Now, back to the technology: looking into our Multi-IQ diagram further… a single frequency is most sensitive to a narrow range of targets and multiple frequency is equally sensitive to a wider range of targets (e.g. the orange curve versus the white curve below). According to Philip Wahrlich, “From our testing, the Multi-IQ deployed in EQUINOX detectors has shown no significant trade-offs relative to the best single-frequency detectors and exceeded performance benchmarks in many important attributes, especially discrimination. And, for good measure, EQUINOX can also be operated as a single-frequency detector” While we could delve into this aspect further, many of our readers are likely more interested in what happens within the white Multi-IQ band itself, rather than single versus multi. What has Minelab developed new, and uniquely, with frequencies to give better performance across the whole range of targets for different conditions? The Multi-IQ transmit signal used in EQUINOX is a complex waveform where multiple frequencies are combined in a very dissimilar way than our proven BBS/FBS technology in Excalibur II / Safari / E-TRAC / CTX 3030 detectors. If you view the BBS signal amplitude on an oscilloscope, it looks something like this: In comparison, Multi-IQ looks something like this: Hence – Multi-IQ is not a derivative or evolution of BBS/FBS. Multi-IQ is a DIFFERENT method of simultaneous multi-frequency metal detection. We could also debate “simultaneous” versus “sequential” semantics; however the real detection ‘magic’ doesn’t happen with what is transmitted to and received from the coil alone. Remember, in Part 2, we discussed how frequencies are “combined AND processed” as being important for achieving better results? Let’s assess Multi-IQ for the different Detect Mode search profiles: Park 1 and Field 1 process a lower weighted frequency combination, as well as using algorithms that maximise ground balancing for soil, to achieve the best signal to noise ratio. Hence being most suited for general detecting, coin hunting, etc. Park 2 and Field 2 process a higher weighted combination of the Multi-IQ band while still ground balancing for soil. Therefore they will be more sensitive to higher frequency (low conductive) targets, but potentially more susceptible to ground noise. Beach 1 also processes a lower weighted combination, BUT uses different algorithms to maximise ground balancing for salt. Hence being most suited for both dry and wet sand conditions. Beach 2 processes a very low weighted frequency combination, using the same algorithms as Beach 1 to maximise ground balancing for salt. This search profile is designed for use in the surf and underwater. Gold 1 and Gold 2 process the higher weighted combination of the Multi-IQ band while still ground balancing for soil. However, they use different setting parameters better suited for gold nugget hunting. Earlier we discussed the different Multi-IQ “frequency weightings” for the different search profiles. Now let's explain further why it is not a simple matter of just referring to specific individual frequencies for learning more about Multi-IQ technology. Let’s now consider one of the key practical detecting outcomes and then discuss how this was achieved… “A lot of people are going to be surprised at how well the machine works in saltwater. At the outset we weren’t sure whether reliably detecting micro-jewelry in a conductive medium was even possible, but – with the help of our field testers and the subsequent fine-tuning of the Multi-IQ algorithms – we’ve found the EQUINOX to be more than capable.” Dr Philip Wahrlich Background and considerations While Multi-IQ may appear as ‘magic’ to some, to our team of signal processing experts, it’s the result of a significant number of man-years of development. So where did they start? By assessing the metal detectors and technologies available in the market at that time, along with typical customer perceptions about their practical applications; and actual detecting results achieved: So, an important goal with developing Multi-IQ technology was to retain the above simultaneous multi-frequency advantages AND greatly improve performance in the two key areas where many single-frequency detectors typically excel – fast recovery in iron trash and finding low conductors in all conditions. Speeding up the process Most comparable low-power Continuous Wave transmit-receive detectors (for the same coil size) will have a similar raw detection depth at which the transmit signal penetrates the ground and has the potential to energize a target. To increase detection depth significantly typically requires higher power and Pulse Induction technology. This has advantages for gold prospecting, but discrimination is poor for identifying non-ferrous targets. While we continue to push for depth improvements, Multi-IQ also aims to provide substantial speed improvements, resulting in being able to better find ALL non-ferrous targets among trash in ALL locations. You could therefore say “fast is the new deep, when it comes to EQUINOX!” Let’s start with considering signal processing not as a ‘black box’ where ‘magic’ happens, but more as a complex chain of applied algorithms, where the goal is to more accurately distinguish very small good target signals from ground noise, EMI and iron trash. Now, ‘fast’ by itself is not enough – you can have fast with poor noise rejection and poor target identification, giving no great advantage. Fast is also not just a result of microprocessor speed. Processors operate at much higher speed than is needed to ‘do the signal processing math’. You can think of the signal processing chain broadly as a set of filters and other processes which are applied to the metal detector signals to convert these signals into useable, informative indicators, such as an audio alert or a target ID. For Multi-IQ, keeping the ‘good’ properties of these filters, while keeping them lean and removing unnecessary processing, was an important step towards achieving ‘fast’ for EQUINOX. It’s also important to recognize that these filters are not the coarse filters of the analogue electronics hardware of last century – it all happens in software these days. Perhaps think of the older analogue TV standards versus current digital TV. (Standard digital HDTV has approx.10 times the resolution of analogue NTSC.) With metal detectors, a fast higher resolution filter set will result in improved target recognition. Factoring in the ground conditions However, speed without accuracy is not enough to produce a “game changer” detector – and improved accuracy cannot be achieved with a single frequency alone. Why? – “multi-frequency has more data-points” Philip Beck, Engineering Manager. This is worth explaining in more detail… All transmit-receive detectors produce in-phase (I) and quadrature (Q) signals that can be processed in various ways depending upon the response received from targets, ground and salt. This processing happens through ‘channels’ that have different sensitivities to the different signals received. It is important to recognize that channels are not exactly frequencies. This is why it is more complex to explain than just correlating optimum frequencies to specific target types. With a single frequency detector there are two basic channels for information (i.e. I and Q) that respond differently to good and bad signals, depending upon the frequency of operation and whether you are looking the the I or Q signal. It is also possible to scale and subtract these signals, while taking ground balance into account, to best maximize good signals and minimize bad signals. You could thus think of single-frequency being Single-IQ, with a limited set of data (e.g. I, Q, I-Q, Q-I) that works well for a particular set of conditions. To further enhance performance for a different set of conditions, you need to change frequency and detect over the same ground again. Therefore a selectable single frequency detector has an advantage with more data available, but not all at once (e.g. I1, Q1, I1-Q1, Q1-I1 OR I2, Q2, I2-Q2, Q2-I2 for as many frequencies that you can select from). Now, getting back to Philip Beck’s “more data-points”, and just looking at two frequencies, a simultaneous multi-frequency detector would be able to process (for example) I1, Q1, I1-Q1, Q1-I1 AND I2, Q2, I2-Q2, Q2-I2 AND I1-Q2, Q2-I1, I2-Q1, Q1-I2 to give better detection results. Increase the number of frequencies further and the number of extra data-points also increases accordingly. What Multi-IQ does is process different optimized channels of information (not just individual frequencies) for the different modes. We have previously explained this as “frequency weighting” (in Part 3), where the various EQUINOX Search Profiles are matched to the respective ground conditions and target types. Here is a very simplified example where you can see the result of processing more than a single channel of information (remember, a channel is not a frequency): Channel 1 has a strong target signal, but the salt signal is stronger still. Channel 2 has weaker signals for soil, salt and the target. If the detector just responded to either Channel 1 or Channel 2, the target would not be heard through the ground noise. If the detector processes a subtraction of the channels (e.g. ch.1-ch.2), then it is possible to ignore the ground noise and extract a strong target signal. Now, think back to the high number of possible combinations of I and Q for simultaneous multi-frequency compared to single-frequency and the frequency weightings for the modes. All of the EQUINOX Park, Field, Beach and Gold Search Profiles have dedicated signal processing to best suit the conditions and types of targets being searched for. Conclusion Multi-IQ = more data-points = sophisticated processing = better ground noise rejection = more finds Just as targets are more sensitive to certain frequencies, so is the ground – an important reason why air testing has inherent limitations when comparing detector performance. As soon as you have ground to consider in the signal processing equation, it can greatly impact on the ability of a single-frequency detector to accurately identify a target. Also, the deeper a target is buried, the weaker the target signal is, relative to the ground signal. The most difficult ground response to eliminate is the salt response, which varies greatly between soil, dry sand, wet sand and seawater. It is not possible to eliminate the salt response and the soil mineralization response (e.g. black sand) with just one frequency. However, within the carefully calibrated Multi-IQ channels, EQUINOX is able to identify both signals and therefore mostly ‘reject’ them (just as you would notch discriminate an unwanted target) BUT still detect gold micro-jewelry. The above article is a compilation of a series of blog entries taken from Minelab's Treasure Talk. More will be added here as available.15 points
-
I became involved in metal detecting and gold prospecting at an early age and have been at it now for over 45 years. My quest has taken me all over the world and this journal documents many of those adventures. I hope to offer an idea of what can be done by one person with relatively inexpensive equipment. Keep in mind I have been doing this most of my life, and that I am familiar with the areas I am working. I don't want to imply you can just jump right in and have the same results I have. On the other hand, if one works at it, the rewards can be immense. I'm not talking about just the gold and other finds, but the sheer fun and adventure of the search! So here we go, with the successes, and occasional failures, of a prospector and detectorist from Alaska. Steve with 14.1 Dwt Nugget found at Ganes Creek, Alaska The reuse of these stories and images is strictly protected under the copyright laws. You may not do so without my express permission. Image reuse on other websites will normally only require a credit and a link back to this page... but only if I am notified in advance for permission. This Journal is dedicated to my wife for encouraging and supporting my adventures, and to my father for getting me started on the search for gold. ~ Steve Herschbach 2023 - Over 50 Years of Metal Detecting & Gold Prospecting Garrett Axiom in Australia September 2022 2020 - Year of the Pandemic Hunting Ancient Gold in England October 2018 Minelab Equinox Finds Silver Fall 2017 Minelab GPZ 19 Gets First Gold June 8, 2017 Gold Specimen With GPZ 7000 November 1, 2016 Garrett ATX Return To Hawaii April 10, 2015 Nevada Gold With The Garrett ATX September 9, 2014 California With Nokta FORS Gold October 11, 2014 Minelab SDC 2300 Finds Tiny Gold August 24, 2014 Detecting Hawaii With Garrett ATX February 4, 2014 Gold Detecting with Garrett ATX November 20, 2013 Fisher F75 Strikes Gold in Alaska! June 2013 Alaska Gold Dredging 2013 January 2013 2011 Australia Gold Adventure Ganes Creek with F75 and GPX 5000 June 2011 Alaska Gold with Minelab GPX 5000 September 2010 Detecting Micro Gold at Crow Creek September 13, 2009 Minelab X-Terra 50 at Cabo Spring 2006 Beach Detecting with GP 3500 Fall 2005 White's Surf PI & Platinum in Hawaii December 18, 2004 Coin Detecting with Garrett Infinium 2004 MORE STORIES BELOW THE AD Garrett Axiom in Alaska August 2022 Steve’s 2019 UK Adventure September 2019 The Chisana Story 1973 - 2018 XP Deus 74 Khz Elliptical Coil July 22, 2017 Gold With Minelab Gold Monster May 7, 2017 Nevada Gold With GPZ 7000 June 29, 2015 Minelab GPZ 7000 Eureka Moment March 11, 2015 Nokta Scores Gold Specimen Fall 2014 Sore Feet And Gold September 3, 2014 Steve's 2014 Alaska Gold Adventure Steve's 2013 Alaska Gold Adventure Gold and Silver with the Garrett ATX November 2013 Making Lemonade Out of Lemons May 2013 Last Visit to Ganes Creek June 2012 Fisher F75 & Gold Nuggets June 2011 Ancient Coins at Colchester, UK October 1, 2010 Moore Creek Gold Treated with Acid May 2010 White's TDI at Moore Creek, Alaska Summer 2008 White's M6 & Surf PI Pro in Hawaii December 20, 2005 Bulldozer Adventure (Moore Creek) Fall 2004 & Spring 2005 George's Moore Creek Nugget July 2004 Moore Creek Permits & Gold June 2004 MORE STORIES BELOW THE AD ads by Google... Garrett Infinium at Moore Creek Fall 2003 Moore Creek, Alaska June 28, 2003 GP Extreme in the Fortymile May 23, 2003 Shadow X5 at Crow Creek September 18, 2002 Detector Reps at Ganes Creek June 17, 2002 First Gold with White's GMT May 11, 2002 Minelab SD2200D at Fortymile August 18, 2001 Exploring Petersville, Alaska August 5, 2001 Gold Layers at Crow Creek June 15, 2001 Fall Mining at Mills Creek September 16, 2000 Where Gold Comes From August 13, 2000 GPAA Claims at Mills Creek June 24, 2000 Spring Gold Dredging at Crow Creek May 2000 Sniping for Gold at Mills Creek October 24, 1999 4" Subsurface Dredge at Crow Creek October 9, 1999 Gold Dredging at Mills Creek October 2, 1999 5" Subsurface Dredge at Mills Creek August 21, 1999 Mills Creek Cooperative July 17, 1999 About Subsurface Gold Dredges June 24, 1999 Tesoro Lobo at Crow Creek May 23, 1999 Origin of Gold at Crow Creek May 8, 1999 Canyon Dredging at Crow Creek April 24, 1999 Winter Dredging at Crow Creek Fall 1996 Minelab GP 3000 at Moore Creek August 7, 2003 GP 3000 & MXT Get Fortymile Gold June 6, 2003 Garrett Infinium in Hawaii February 18, 2003 Infinium & MXT at Ganes Creek August 29, 2002 Memorial Day at Ganes Creek May 25, 2002 30 Years with White's Detectors 1972-2002 Lode Gold at Hatcher Pass August 12, 2001 Detecting Gold at Ganes Creek June 22, 2001 Crow Creek Nugget Rescue November 4, 2000 Detecting Gold in the Fortymile September 1, 2000 Detecting Gold at Chisana July 21, 2000 Minelab SD2200D at Crow Creek June 10, 2000 Gold in Hawaii Winter 1999 Sluicing Gold at Crow Creek October 17, 1999 Metal Detecting at Mills Creek October 5, 1999 Gold Mining at Mills Creek September 5, 1999 4" Subsurface Dredge at Mills Creek August 15, 1999 Old Stream Layers at Crow Creek July 10, 1999 Detecting Small Gold at Crow Creek May 30, 1999 Flooded Out! of Crow Creek Goldmaster & SD2200D Detectors May 15, 1999 What's Placer Gold Worth? May 1, 1999 First Nugget with a Metal Detector 1973 - 198914 points
-
 I recently treated myself to a metal detecting holiday to the area around Colchester, England. This was a reprise to a trip I made to the UK in 2010 in search of Celtic gold. Gold was not in the equation for that trip, but I did find the oldest coins and artifacts I have ever found.... as in 2000 years older than anything I have found before! Colchester has history reaching back into prehistoric times, and is generally acknowledged as the location of Britain's first city. Celtic tribes were active in the area, leaving behind many Celtic gold coins to be found by modern day detectorists. The Romans were also very active in the area, as were other invaders, leading to finds from many cultures across the centuries. I made a return visit to Colchester in 2018, this time relying heavily on the new Minelab Equinox metal detector as my detector of choice. I also had the opportunity to use the new Minelab Equinox 15" x 12" DD coil while on this trip. Not only did I have a very successful trip, but I got to observe other great finds made by the other detectorists in the group. All in all this was a very exciting metal detecting experience that I enjoyed thoroughly. The links below outline both my own experiences and the same trip told from the perspective of another person on the same adventure. Steve's 2018 UK Adventure by Steve Herschbach My UK Trip .... Double Ancient Gold! by Ill Digger Steve Herschbach finds ancient UK gold!14 points
 -
 There are a few key things to know about headphones for use with metal detectors. The most important thing is to know that some detectors operate in mono, and some in stereo. If you mismatch headphones you can end up with audio in one ear only, or none at all. In fact, this has happened to me. I took my White's DFX out to do a little detecting, and grabbed an old pair of Fisher Phones I had around, and when I got out I found the phones would not work on the DFX. So most detector phones have a stereo/mono switch, or are specially wired to work either way. Make sure your headphones match your detector for stereo or mono operation. But best case is to only use headphones that can do both so you can use them with any detector. You never know when they might get put to use on a different machine. In a situation where you are determined to use a mono headset on a stereo detector or vice-versa plug in adapters can be purchased at most electronics supply houses. 99% of the detectors out there have a 1/4" headphone plug, but many generic headphones have a 1/8" plug. Sure, you can use an adapter, but it just adds a weak spot in the system. So get a 1/4" plug unless your detector is one of the rare 1/8" models. Again, pay attention to the mono versus stereo issue. The good news is that if you make a mistake there is almost always an adapter that will fix the problem but it is best to try and get the correct match. Does your detector have a volume control? Many do not. It is best to buy headphones that have their own volume controls, so you can use them with detectors that do not have a volume control. Again, you never know when you might switch detectors. Ohm matching can be important, and generally higher ohms is better. This is not always true however and some detectors do work better with lower ohm rated models. It is usually easy to determine what the headphone ohm is but almost impossible to know what the detector rating is. I therefore recommend that you should have your detector in hand and be trying the headphones before you buy them instead of going by specs on this point. Things to look for: 1. How do they sound? Are targets sharp and clear to your ear? If not, you can now pass on this set and try another. Different headphones match up with different machine and different ears in such a way that nothing short of trying them can sort this point out. They either sound good to you personally, or they do not. It does not matter what your friend likes. Some detectors allow you to change the pitch from high to low. Try different pitches with your detector to see what sounds best. How do faint targets sound to your ear? People have different frequency responses, some like low tones and some high, and the type of speaker wired into the headphone can make this sound vary a lot. Get a set of headphones that make faint signals as clear as possible to your particular ear. 2. Assuming they sound good, how adjustable is the volume? A good match will give you the ability to fine tune the sound with the volume control on the headphone. In other words, the volume control will have some range. If you have very high ohm headphones and use them on a high volume machine that has no volume control, the headphones may be so loud you have to set the volume on the headphone nearly off. And then tweak it within a fraction of a turn. Some headphones are too powerful for some detectors! The volume control should run from off at one end and too loud at the other, with lots of adjustment in between. 3. How many volume controls are there? Some people like two, one for each ear. This can be great if you have poor hearing in one ear and need to compensate. I personally prefer a single control that works both ears at the same time, so I do not need to fiddle two controls. So this is a personal preference thing, but your headphones should have one or two headphone volume controls. A note on setting your headphones. Turn the detector volume all the way up, if it has a volume control. Turn your headphones all the way down, then turn on your machine and wave it over a large metal item. Turn the headphones up until the loudest sound you will get over a large item is not so loud as to damage your hearing. Now, set the threshold sound on your detector for a faint buzz. You should now be able to hear faint variations in the threshold, but going over a 55 gallon drum will not damage your hearing. Metal detector headphones showing 1/4" 90 degree jack, coiled cord, padded muffs, and dual volume controls 4. How well do the phones exclude outside noises? Normally, get a set of headphones that will exclude outside noises like running water, wind in the trees, or anything else that might distract you from the detector sounds. Sometimes it may be advantageous to use phones that let you hear outside noises, like in bear or snake country. Or maybe in real hot climates bulky units get too warm. But from a pure detecting standpoint sound excluding headphones are best. Earbuds are perfectly acceptable however for quieter locations. 5. How well do the headphones fit and feel? Imagine they are going to be on your head for 12 hours. Something that feels good initially can feel pretty bad in a few hours. Beware of headphones that are too tight or that have too little padding. I prefer phones that completely cover my ear and seal to the side of my head. I do not like the kind that squash my ear but people's preferences vary. Make sure your headphones are comfortable for long hours of use. 6. How tough do the headphones appear to be? This can be hard to gauge sometimes, but in general avoid anything that looks to have cheap construction. The number one failure point is the cord, so make sure it is strong and well anchored so it cannot pull out. Headphones that feature a 90 degree plug are often desired to reduce strain and prevent the plug from pulling out due to a simple tug on the cord.Some top end models feature replaceable cords so you can carry a spare. I prefer to simply carry a complete spare set of headphones. 7. Finally, be aware that the newest metal detectors are coming equipped with built in wireless headphone capability. Early versions have either been standard Bluetooth, which is too slow, or some faster proprietary method. Standard Bluetooth has a significant lag between detecting a target and the actual audio response heard in the headphone which is bothersome to most people. The problem with proprietary is that you are stuck with very limited options as to headphones. The best option currently for most people is aptX Low Latency (aptX LL) Bluetooth, which is fast enough that most people are satisfied with the speed, and options abound in the choice and style of headphones. To sum up, if buying headphones at Big Box Inc. at the least you'd probably want a set with a stereo/mono switch, 1/4" jack, and volume control/controls just to make sure it will work on most any detector. But remember that headphones are like tires for an expensive sports car. They are one of the only important items on a detector you can customize for optimum performance, the other being search coils. Finding the set of headphones that is just right for you can make a real difference in detecting success, so it deserves some effort in getting the right set. This is where a local dealer with a good selection who is willing to let you try them all out on your detector can really help you out. ~ Steve Herschbach Copyright © 2009 Herschbach Enterprises13 points
 -
White's MXT Engineering Guide David E. Johnson, engineering consultant This Engineering Guide is written to provide dealers and customers greater insight into what kind of product the MXT is, from an engineering perspective. It does not attempt to provide complete information on the features and use of the MXT: for that, please consult the MXT user's manual. A BIT OF HISTORY In January 1998, White's decided to develop a true multipurpose metal detector, with the kind of sensitivity it takes to be a real gold prospecting machine, and with computerized ground tracking for ease of use. White's in-house engineering staff was tied up on the project which eventually became the DFX. Therefore, in February White's asked me if I might be interested in taking on a new protect. I had a good track record on gold machines so it seemed like a good fit. I agreed. A month later at a dealer seminar in Sacramento, California, Jimmy Sierra announced the project, and said if the engineer didn't deliver, the engineer would have to go into hiding in Mexico. I was sitting in the back. We ran into one problem after another along the way. Jimmy, good chap that he is, didn't sic the thugs on me, though there were periods he was frustrated enough that the thought must have run through his mind. Although the project took longer than we expected we got two products out of it - the GMT and the MXT. The first major hurdle was to get the basic circuit and software system running, with a first class ground tracking system. The system architecture was totally new, not a revision of the existing Goldmasters. In early spring of 1999 an ugly prototype was up and swinging, and Larry Sallee became involved in field-testing. By April the ground tracking system was working so well that since that time very few changes have been needed. At that point we knew we had a solid foundation, so work began on the display, discrimination and target ID features. During the fall of 1999, we decided to tackle the problem of desert heat head-on. A lot of gold prospecting is done in desert heat in full sun. I set up a crude but effective, thermal engineering laboratory, measuring the temperatures reached inside housings of various configurations and colors in full sun. Then began the task of finding an LCD, which would handle the heat. Because the LCD display is an important feature of the MXT, we revisited the whole issue of display. The manufacturers of LCD display had expanded their product offerings. We found a larger one, and changed the mechanical design of the MXT to accommodate it. A FSTN 0160 F was selected, (there are more to choose from nowadays, so we used a bigger one than the GMT in the MXT.) In early 2000, White's decided to bring out a new Goldmaster based on the work that had already been done, while development of the multipurpose unit continued. So we modified a prototype to work with the Goldmaster search coil at about 50 kHz, and you know the rest of that story - the GMT "tracking Goldmaster" was introduced in early spring of 2001. As work continued on what eventually came to be called the "MXT", we spent a lot of time on the discrimination and target ID system. There are many different ways to do discrimination and ID, each with its own advantages and disadvantages, which aren't always known until you've had the thing in the field being tested for a while. A lot of work got thrown out as we found deficiencies in what had already been done, and discovered ways to improve things. As the project got closer to production, more people became involved with it, and offered their own ideas to improve it. The reason the MXT is as good as it is, is because of that long process of field-testing and revisions. While the MXT was still under development, the DFX was introduced. The MXT design was then revised to run at about 14 kHz in order to take advantage of the DFX loops. When it was finally time to call it "good" in June 2002, the MXT went into production quickly and smoothly. CIRCUIT DESIGN The circuitry of the MXT is almost identical to the GMT, which has already been on the market for a year and a half and has proven to be rock-solid. The GMT's circuitry broke a lot of new ground. It uses a reactive impedance transformation network to boost transmitter voltage for higher sensitivity. It uses an active transmitter regulator to keep transmitter voltage constant even when the search coil is moved over black sand that would blow an unregulated machine off the air. The differentiator-filter circuits usually found in metal detectors are eliminated. Those functions are now done in software, which is made possible by the use of a high-precision 16-bit A/D converter used in a way that makes it equivalent to 17 1/2 bits. All the controls are digitized, their function actually performed via software rather than in circuitry. The audio system is temperature compensated in software to eliminate threshold drift. For the MXT, we chose an operating frequency of 13.889 kHz. This is high enough to give good sensitivity to gold, low enough to give good target ID on typical coin, trash, and relic targets, electrically compatible with search coils derived from the DFX and halfway in between power line harmonics to minimize electrical interference. SOFTWARE The MXT uses a Microchip PIC 16C76 micro controller, chosen for its low power consumption and its set of features, which was a good match for this application. The software that runs in this chip is based on that in the GMT, but almost all of it is new or has major revisions, except the device drivers and the ground tracking system. Much of the new software is for target ID and discrimination, features that were not present in the GMT. Even the iron probability and VSAT systems in the MXT are new, despite their apparent similarity to the GMT. The MXT/GMT does as much of the signal processing as possible in software rather than in circuitry, using what we call "low-speed DSP architecture". The demodulated signals are digitized, and processed and analyzed in software. Control positions are also digitized and made part of the data in software. The desired audio signal is computed, and then converted back to voltage using a 12-bit D/A converter. The circuit board communicates with the LCD and trigger switch in the "pod" via a custom-designed serial link. In the MXT the filters, differentiators, and sample-and-hold functions are performed in software, not in circuitry. This eliminates the problems of channel mismatch and drift, which are often encountered in such circuits. The discrimination system is a second derivative ("two-filter'') design for quick response over a broad range of sweep speeds. The analysis system for determining what kind of target is present has special features which reduce interference from ground minerals, and which automatically scale target ID confidence according to the mineralization level. GROUND TRACKING SYSTEM The ground tracking system comprises two subsystems: a ground analysis engine, and a ground balancing system. The ground analysis engine continuously monitors incoming signals to determine whether the signals probably represent ground, or may be something else such as metal targets or electrical interference. Signals, which seem to be ground only, are put into a data analysis subsystem, which analyzes the data for a number of variables. Then it can be determined what the balance point of the ground matrix is and how fast that balance point is changing. It'd be nice to describe all this in detail but we'd rather not teach our competitors how to do it. The ground balance system does the actual balancing of the signals, doing in software somewhat the same job as a ground balance knob does on a manually balanced machine. When the TRAC toggle is in the "ground" or "salt" positions, the ground balancing system follows the output of the ground analysis engine. When the toggle is in the center "lock" position, the ground balance subsystem stops following the output of the ground analysis engine, which is still chugging away in the background continuing to gather ground data. The ground analysis engine can do a good job of telling the difference between ground matrix and anomalies such as hot rocks and metal targets. In order to tell the difference, it has to see matrix by itself during at least part of the sweep. When you're not in "lock", keep your sweeps broad, and don't loiter over the top of a target when checking it out. Otherwise the analysis engine may lose the ground matrix and start tracking into the target. However, if the target is strong enough to register on the VDI readout, the target ID system will tell the analysis engine to halt, allowing you to check the target without tracking into it. In all three programs, pulling the trigger to pinpoint a target also tells the ground analysis engine to halt. Some users will hunt with the tracking toggle in "lock", occasionally updating the ground balance by flipping into "ground" or "salt" momentarily when they start hearing too much ground noise. The resolution of the ground balancing system is 1 part in 4,000, and most of that resolution is concentrated in the range where high mineralization occurs. Therefore, the individual resolution steps are below audibility under all conditions. THE VSAT SYSTEM The VSAT system on the MXT is similar in a general way to the one on the GMT. The VSAT function is done entirely in software. Up to about 2/3 rotation, the SAT is of the conventional (first derivative or auto tune) kind, giving a "zip" sound on a nugget and a "boing" sound on a negative hot rock (cold rock). As you approach maximum rotation, the MXT goes into "HyperSAT". HyperSAT is a completely different type of SAT system with different sounds and target responses. The background threshold sound is a little rattier, but nuggets are crisper, the ground is quieter, and negative hot rocks vanish when you slow down your sweep. For all but the most experienced users whose ears are calibrated to hear every little nuance of a regular SAT signal, HyperSAT gives more effective depth in bad ground than normal SAT. THE DISCRIMINATION CONTROL The discrimination control does pretty much what you'd expect. Unlike some discriminators, when the control is at zero, there is no discrimination at all - i.e., "true zero discrimination" - and all targets will be detected. Below about 2, the discrimination is based on a combination of both signal phase, and signal strength relative to the strength of ground mineralization. This feature allows the user to get good rejection of shallow iron with minimal loss of deeper targets. THE GAIN CONTROL The gain control knob controls two things at once: the preamp circuit gain, and the software gain. The following is a simplified explanation which is not technically correct in all its details, but will serve to give a general picture how the gain control works. As you advance the gain control from 1 to 10, the preamp circuit gain steps through five levels of gain: xl, x2, x4, x8, and x16. On most machines (depending on minor variations in search coil alignment) you can hear a momentary blip as the machine switches from one gain level to the next. The recommended preset (marked by the triangle) corresponds to a preamp gain of x8. In mild ground conditions where there is no electrical interference, you may want to advance the gain control into the crosshatched region. In this region, the signal data in software is multiplied by successively larger numbers, increasing the loudness of the signals. It is somewhat similar to the "audio boost" function found on some other models of metal detectors. It's particularly useful if you're using the speaker rather than headphones and there's a lot of noise from traffic or wind, or if you're demoing the machine to someone else. BASIC SENSITIVITY PERFORMANCE Since this is a multiple-purpose machine, a U.S. Nickel coin is the most appropriate standard test target. With the gain cranked up, and in the absence of electrical interference, a nickel will typically "air test" beyond a foot using the standard 95O search coil. Your actual "air test" distance will depend on your hearing, the sweep speed, what search coil is used, how much electrical interference is present, and how you have the controls set. In comparison to other machines in this price range, the MXT is extremely hot on low-conductivity items. On gold, it's right in there with the more popular gold machines, being especially hot on the larger, deeper nuggets. It will compete with all comers on low-conductivity , relics and on nickels. On high conductivity coins such as quarters and silver dollars, it is still an excellent performing machine, but there are several other products in the same league for sensitivity. GROUND TRACKING PERFORMANCE The ground tracking system is nearly identical to that in the GMT, which is widely regarded as one of the best tracking systems on the market. Compared to most other trackers, the MXT has superior resolution, tracks faster, "jumps" into new ground more quickly, has greater resistance to tracking into targets, and tracks over a wider range of soil conditions. The MXT allows tracking to be inhibited if desired. DISCRIMINATION PERFORMANCE All discriminator designs are compromises. Here's how the discriminator in the MXT stacks up against other machines. AIR TEST "DEPTH": generally well beyond 10 inches, because of high sensitivity, with effective discrimination to within 0-3 inches of the basic air sensitivity of the target. Most discriminators will discriminate in air to within 0-3 inches of the target air depth on most targets, but most don't have the sensitivity of the MXT. QUICKNESS & TARGET SEPARATION: among the best, because of medium-speed second derivative ("two-filters") design. Initial field reports indicate that the MXT's mixed-mode tone system gives indication of adjacent ferrous/nonferrous targets, superior to that obtainable through discrimination. IRON REJECTION: Because of its high sensitivity and a slight preference in the software for not losing questionable targets, it'll be a little chattier than some less sensitive machines. Reducing sensitivity by cutting back on gain, or by reducing the threshold control setting to minimum, will help quiet it down when necessary. DEPTH IN MINERALIZED GROUND: Although the MXT is a two-filter system, it incorporates special techniques which reduce ground interference and which reduce the "chopping & popping" which plague most other two-filter machines. This, together with its high basic sensitivity, makes it an excellent machine from the standpoint of discrimination depth. FAST SWEEPING: Many discriminators tend to lose good target signals, even shallow ones, when quickly sweeping the search coil. The MXT is tolerant of moderate search coil sweeps, that is to say good at both faster and slower search coil paces. SUMMARIZING: The MXT has the responsiveness and sensitivity of a first-rate 2 filter machine, combined with the discrimination accuracy of a first-rate 4-filter machine. TARGET I.D., ETC. With its small medium and large blocks on the target ID screen, the ID system in the MXT bears a superficial resemblance to the "Signagraph" of the Spectrum XLT. It should be realized that the traditional White's Signagraph system is typically (optionally) set to accumulate data over multiple passes over a target, and displays the accumulated average. The MXT displays fresh data on each pass and scales the size of the block according to how strong the signal was relative to the ground conditions on that specific pass over the target. The visual ID system on the MXT is fast, easy to read, generally more accurate than the discriminator, and gives a visual indication (via block size) of how reliable the identification is. It is going to change the minds of many beeper enthusiasts who previously thought visual ID to be of little practical use outside typical coin shooting. CASCADE THE CASCADE OF EFFECTS OF GROUND BALANCE SETTING: In order to know what the ground balance setting is; flip momentarily to the gold program if you were in another mode. Electronic ferrite material and most "negative hot rocks" (cold rocks) will usually read in the 75-88 range. Most soils will read somewhat lower. Readings will almost never go below 25 except in salt or moist alkali soils. When readings indicate smaller numbers than 50 you may notice some reduction in sensitivity. Below 35, some rusty iron may give unpredictable responses. Below 25, iron objects may give unpredictable responses and/or may disappear entirely and the sound on nonferrous objects may become slightly more abrupt. MANY THANKS To Kenneth White and Alan Holcombe for having sufficient confidence in me to put food on my table through the good times and the rough times on this project. To Jimmy Sierra for having the patience to argue with me about all the stuff that needed arguing about, for being so passionate about the need for this product, and for being willing to compromise when that's what it took to keep the project moving. To Larry and Sue Sallee, for their personal hospitality and for field testing prototypes. To Keith Zorger, Randy Smith, Mike Brighty who field-tested and helped develop the MXT. To Bob Canaday, for being such a competent technical/engineering liaison, doing a lot of not glorious but necessary work well and managing the project during its sometimes difficult phases. To Rick Maulding, for overseeing the project, for technical contributions to the discriminator and to the salt system, and for committing White's engineering department's finest minds to engineering review during the "slow SAT isn't hot enough" crisis, which led to a major system revision that made the whole machine better. To John Earle and Dan Geyer, for diligently hacking away at problems until they became non-problems. To Steve Howard and Pam Godell of White's. There were other people involved in this project whose contact was primarily or exclusively with White's and not with me. The risk of printing credits is that one may inadvertently omit a name that belongs there; so, if I missed someone whose name belongs on this list, I'm sorry, it was an unintentional oversight. - D.E.J. P/N 621-0468 published 8/2002 by White's Electronics12 points
-
 This is not intended to get into every nitty-gritty little detail, but instead is a brief overview for those unfamiliar with the Minelab Pulse Induction (PI) detectors. The units released so far are the SD2000, SD2100 (and V2 variant), SD2200D (and V2 variant), GP Extreme, GP 3000, GP 3500, GPX 4000, GPX 4500, GPX 4800, and GPX 5000. The Minelab SD2000 was the first of the series, a genuine breakthrough in metal detector technology. It is the basis on which all the other models were developed. It was the first true prospecting pulse induction metal detector and it had a major impact in the Australian goldfields for which it was designed. The main drawback was a definite lack of sensitivity to nuggets weighing under a gram or two. The SD2100 and SD2100v2 are fairly simple manual ground balance units that refined the SD2000. The frequency could be manually adjusted to avoid interference from outside sources, such as a nearby detector. The SD2200d and SD2200v2 offer automatic ground balancing or a fixed/locked ground balance. They also introduced an iron disc feature of dubious reliability, audio boost, and automatic frequency offset. The GP Extreme offered enhanced sensitivity to small gold that was lacking in the earlier units. Much of this came about from Minelabs patented dual voltage technology (DVT) which was introduced with the GP Extreme and is featured on all subsequent models. There were quality control issues with the unit however and so performance varied on GP Extreme detectors. The GP 3000 is essentially just a refined GP Extreme and the GP 3000 performance is more consistent between units than was seen in the GP Extreme. Threshold smoothness was improved to be less erratic. The GP 3500 offered manual frequency tuning to help eliminate electrical interference and three tracking speeds for the automatic ground balance system. A button was added to the handle to allow for easy switching between the manual and automatic ground balance modes. The GP 3500 was the last of the analog models in the series. Where it all started - the Minelab SD2000 "Super Detector" The GPX-4000 was a break from the past, going to a digital control system. This allows for more adjustments but also more complexity. The GPX models can attain smooth thresholds on par with the best VLF units. A major advance is in the form of various optional "timings" that allow the detector to be customized for various types of ground mineralization and hot rocks that might be encountered. The earlier SD and GP models used a sealed lead acid battery with a 4 pin battery cable. GPX models feature a Li-Ion battery with 5 pin cable that is not compatible with the earlier models. The GPX-4500 is a basically a refined 4000. A pattern develops by now in that Minelab tends to make a major model revision, then follow up with another model that is just a refinement of the earlier unit. Model releases come about every two years with major changes about every four years. The Minelab GPX 4500 was extremely popular and the next model release was delayed to the point that two models came out. The Minelab 4800 was intended as the next release, but before it hit the market developer Bruce Candy came up with a couple new refinements different enough to warrant yet another model, the GPX 5000. The 4800 therefore became a sort of "non-model" as most dealers and users focused on the GPX 5000 as the new top-of-the line detector. The main change is a wealth of new timings allowing the GPX 5000 to get optimum performance in many varied ground conditions. The new Fine Gold timing in particular offers the ability to pull gold out of ironstone hot rocks that previous models missed. Minelab SD2200v2 pulse induction (PI) metal detector I disagree with those that say you can get more depth on large gold from earlier SD units than from the latest models. Having used all the models the largest improvement I've seen over time is vast improvements in threshold stability and the ability to adjust for more varied circumstances. It may be that in a particular location an SD will do just as well as a GPX. But not where I hunt. My SD units all had the famous Minelab "warble" whereby the threshold constantly wavered. This meant that small nuggets or very deep larger nuggets had to give enough of a signal to break through the waver. A far cry from listening to a rock solid threshold for the faintest whisper or "break" in the threshold. You can get just such a rock solid threshold with the GPX units. It is not that the GPX goes deeper, it is that you can hear nuggets you would miss with an SD as they could not be discerned as clear signals. More important on my ground was that my SD units could not tune out the intense magnetic basalt cobbles we have to contend with. The cobbles give a faint gold hit. So you either dug them all (impossible) or ignored the faint signals. But some of them were small nuggets or very deep larger nuggets. When the GPX arrived at my property I saw so many more small nuggets and deeper large nuggets come out of areas well hunted to the point of being "hunted out" that it was obvious the GPX had a significant edge. I'm not talking a nugget or two - I'm talking pounds of gold. The new GPX timings can allow for a clean solid threshold in areas where that was impossible with earlier units. Those that do not hunt such locations do not see the value in a GPX. Those that do know what I'm talking about. There is no way I'd go back to using an earlier model than the GPX-5000 by choice. Minelab GPX 5000 - pulse induction metal detector technology refined It should be noted is there are quite a few people modifying older SD units to get better performance on par with later units, and I'll admit these modified units are a wild card. Some swear by them and I'm not going to doubt them. But modifying older detectors is beyond where most people want to go so I think there is little doubt these units will only see use by a certain hardcore group of knowledgeable detectorists. The GPX 5000 has refined the platform to the point where realistically it is hard to think of ways the unit can be improved from a detecting standpoint. The only obvious deficiency is the ferrous discrimination system. While it does have its uses the ferrous discrimination on the Minelab PI detectors is notoriously unreliable and only to be used when absolutely necessary. Its use will inevitably cause gold nuggets to be left in the ground, misidentified as iron or steel. This area has been so resistant to improvement, however, that I look more for advances in the physical package as my most desired area for improvement. The general control box and rod design with backpack mounted battery has not changed since the original SD2000. Development of a GPX type detector housed in a package more reminiscent of the new Minelab CTX 3030 would be a major advance in the usefulness of the lineup with no actual change in performance aspects of the electronics. It has been well over two years since the GPX 5000 was released, and so I do not think it will be too long before we see what Minelab has in store next for nugget hunters. ~ Steve Herschbach Copyright © 2013 Herschbach Enterprises P.S. When I wrote this article in 2013 I had no idea that two more years would pass before we saw what Minelab had up next - the Minelab GPZ 7000. It turned out that Minelab also thought the GPX 5000 had taken the pulse induction as far as it could go, so the GPZ 7000 features new ZVT technology. The biggest surprise for me however was that Minelab may have paid attention to my "GPX in CTX housing" comment above. That may or may not make some people happy! And the GPX 5000? Still in production as the top-of-the-line PI from Minelab!11 points
 -
 The White's MXT was released in 2002 and had a great run, but is no longer in production due to the demise of White's Electronics in 2021. I helped popularize the use of this detector for searching tailing piles for large gold nuggets. Hundreds of ounces of gold have been found at Ganes Creek, Alaska alone by people using the White's MXT. My own largest gold find, a 6.85 ounce specimen, was with the MXT at Ganes Creek. I have a couple stories on Steve's Mining Journal that highlight the MXT. See Infinium & MXT at Ganes Creek and GP 3000 & MXT Get Fortymile Gold. My most recent find of note with the MXT Pro was a 267 AD Roman coin found while on a trip to the UK in 2010. See Metal Detecting Ancient Coins at Colchester, UK The MXT is extremely popular because it does almost everything very well; coin, relic, jewelry, and nugget detecting. Despite being so versatile the MXT is also a bargain priced detector with performance rivaling much more expensive detectors. It is remarkably easy to operate, with a condensed operating guide actually printed on the bottom of the control box. Three knobs and three switches are all the controls you need. The controls have specially marked settings so that if you do not know what the controls do, just set everything at the little triangle marker and you are off and running. A major feature on the MXT is the LCD screen that gives you visual information about the items detected as well as battery readings. White's employs a numeric target identification system that runs from -95 to +95, with ferrous targets reading as negative numbers and non-ferrous targets reading as positive numbers. White's calls these "Visual Discrimination Indicator" numbers usually referred to as VDI numbers. The MXT also comes with one of the best manuals and DVDs of operating tips that I have ever seen come with any detector. The MXT is almost perfectly balanced due to the control box being slung back under the elbow. One simple thing about the MXT also pleases me - it does not fall over on its side like nearly all the other detectors I use when I set them down! The control box is very water resistant. I have used the MXT in the rain all day long with no adverse effects. White's MXT All Pro metal detector for coins, jewelry, relics, and gold nuggets There have been several MXT models. There is the original MXT which comes with a 9.5" round concentric "950" coil. This version of the MXT was discontinued in 2017 and is essentially the same detector as originally released in 2002. The was also an MXT 300, also no longer in production, which was the same detector with a 300 mm (12") search coil and a matte black paint job for $100.00 more. The MXT 300 was replaced by the MXT Pro for the same $899.95 price. The MXT Pro added multi-tones and a meter backlight plus a redesigned pod with a touch pad. The new features do not really add anything needed from a nugget detecting perspective but are popular with coin and jewelry hunters. There is a "Ground Grab" that is nice for nugget detecting but just for convenience. Instead of switching to ground tracking for a minute and back to fixed it is possible to just remain in fixed and hit the grab button to update the ground balance setting. A very good way to compare the MXT and the MXT Pro is to download and read both operating manuals linked to below. You can also find a quick comparison reference chart at Jeff Foster's website here. The target reference in the MXT display above is replaced by three touch pads on the MXT All Pro. An audio pad controls various audio options, the "Ground Grab" button resets the ground balance, and there is a pad to toggle the display backlight on and off. MXT vs MXT All Pro display pod showing new touch pad buttons The MXT came with the 9.5" round concentric coil and the MXT All Pro is offered with either the 9.5" concentric coil or 10" round DD coil. My personal preference is for the MXT All Pro as I do like tone id for general detecting and the Ground Grab button alone is worth the extra money as far as I am concerned. I prefer to leave automatic ground tracking off most of the time and update via the grab function. The ground grab button alone is enough to make me prefer the MXT All Pro for gold prospecting. It is also a little known fact that the MXT was designed to work best with DD coils. Here is a post by Dave Johnson (one of the engineers of the MXT) on the TreasureNet forums 2/3/2013: "Back in the late 1990's and very early 20th century, the MXT was developed around the 10x6 elliptical DD. When you're used to that searchcoil, stick a 950 on and the 950 feels downright clumsy with its muddy response and bad masking characteristics. Downright insufferable. The 950 searchcoil geometry was designed for completely different platforms. But, if you ask "does the 950 work?", well, yeah, it does. Wrong question. I ain't gonna knock the MXT, it may be an old platform but it still works good. More than 10 years after, if you demand "ground tracking" (not that I say you should demand that), the GMT/MXT have the best in the industry. Not even Minelab (!) denies that! And as far as I know, the MXT/GMT are the only VLF-IB machines on the market with active transmitter regulation that makes it possible to work (with reduced performance) in heavy magnetite black sand, a circumstance otherwise left up to PI's. We're talking very good machines here. They may be a bit old in the tooth, but this is an industry that takes time to weed the turnips out of the beet patch. Ain't like celfonz where in 6 months the whole world has decided what kyckes and what szux. It takes time to deliver good beep verdict. MXT. 10x6DD is the foundation. Everything else is an accessory. I am telling you this because if you are a White's loyalist, I want you to spend that extra buck, the folks in Sweet Home are my friends!" Having noted that commentary, many users prefer the concentric coil options for beach use or low mineral parks where bottle caps are common. Concentric coils generally identify flat ferrous targets more reliably than DD coils. The large 12" concentric coil and even the 9.5" concentric coil do not handle extreme ground mineralization very well, and the 12" is too large for many other tasks, like coin detecting trashy locations. The 6" x 10" Eclipse DD coil is possibly the best all around prospecting coil for the MXT for those that do not already have the 10" round DD coil and want to add a DD to the MXT. The solid construction is less likely to hand up on stubble and the narrow profile is good for getting into tight locations. However, if you have an All Pro and already have the 10" round DD coil it is a less useful upgrade. In that case I would tend to recommend the 4" x 6" Shooter DD coil for trashy locations and small gold nuggets. To sum up, I recommend using either the 10" round or 6" x 10" elliptical DD coils for hunting heavily mineralized ground. To get the best performance on small gold, use the 4" x 6" elliptical DD (Shooter) search coil. The 9.5" concentric 950 coil and 12" concentric are best used for hunting tailing piles, beach detecting, or coin detecting in parks. The little 6" round concentric (Eclipse 5.3) is a good little coil for almost any use, including gold prospecting for small nuggets in low mineral ground. The MXT is blessed with a large number of aftermarket coil options due to its popularity. There are so many in fact it is impossible to keep up with them so I will leave that for the reader to discover via Google. White's MXT DD search coil options White's MXT concentric search coil options The MXT Pro does have an undocumented feature it is worth knowing about. The MXT in Coin & Jewelry Mode has a "Pull Tab Notch" feature when the trigger switch is locked forward. Meter readings of VDI +28 to +49 are silenced, knocking out common pull tab responses while still allowing US nickels to signal. The MXT Pro eliminated this function (trigger switch forward locks the pinpoint mode) and instead added the seven tone audio identification used by the White's M6 detector. The intent was to have the option for different tones for preset VDI ranges while in the Coin & Jewelry Mode. The multi-tone feature was not intended for the Relic or Prospecting Modes. However, through a bug that is not documented in the owner's manual you can activate the multi-tone mode by getting your MXT all set up in Coin & Jewelry Mode and then selecting multi-tone by pressing the "Musical Note" button. Now flip the toggle switch to either Relic Mode or Prospecting Mode and the multi-tone function will remain engaged. However, if you touch any of the control pads at any time now the multi-tone function will shut off. White's decided this "bug" might actually be useful so has left it as is for you to experiment with. There is a book written about the MXT that has no equal - The MXT Edge by Jeff Foster. If you have an MXT do not hesitate to get a copy. An interesting note is that the White's GMT and the MXT share a common heritage - see the MXT Engineering report below. Official White's MXT Page White's MXT 950 Owner's Manual White's MXT 300 Owner's Manual White's MXT Pro Owner's Manual Forum Threads Tagged "whites mxt" White's Metal Detectors Forum Unofficial MXT User Support Page MXT Engineering Guide Steve's Guide to White's Electronics GMT versus MXT White's MXT Technical Specifications* Internet Price MXT All Pro $823.00 Technology Induction Balance (IB) Frequency 13.889 kHz Autotune Mode(s) Variable Self Adjusting Threshold (V/SAT) Ground Rejection Tracking and Fixed Soil Adjust (Ground/Lock/Salt) Three position switch Discrimination One turn control, Visual ID, Tone ID Volume Control No Threshold Control One turn control Tone Adjust No Audio Boost No Frequency Offset No Pinpoint Mode Yes Audio Output 1/4" headphone socket & speaker Hip Mount Shaft Mount Only Standard Coil(s) 12" round DD Optional Search Coils Over 15 accessory coils available Battery Eight AA Operating Time 30 - 40 hours Weight 4.3 pounds Additional Technology Notes Alaska's most successful gold nugget detector for tailing piles *Notes on Technical Specifications - Detailed notes about the specifications listed in this chart. Here are a few nugget detecting tips for the MXT. I highly recommend that if you are new to detecting you seek out a sandy location like a freshwater beach or volleyball court or the woodchip area around playground equipment to practice and learn your new MXT. The goal is to set up the detector as if you are nugget detecting and to dig everything that signals. It does not matter what it is, the goal is to learn. You should be trying to find the smallest items possible, and attempting to learn how to separate ferrous from non-ferrous signals. It is always best to dig all targets when nugget detecting, but some areas are so full of ferrous trash that it is something that must be tuned out to some degree. Aluminum is a very common find, and that is good. Aluminum and gold respond identically on a metal detector, and the smaller and/or deeper the aluminum is, the better your detecting skills. Concentrate on the faintest signals. Hours spent practicing like this will save many more hours wasted time and frustration in the field. Normally when looking for gold it only makes sense to use the MXT Prospecting Mode. This pretty much turns the MXT into a GMT although a bit less sensitive to very small gold. Start with the Gain at the preset (small triangle) setting. The Threshold should be set as low as it can go while still being audible. You want to be able to hear variations in the threshold sound but you do not want it so loud as to be annoying when listening to it for hours on end. Set the Trac switch to "Ground" and pump the coil over the ground until the sound caused by this pumping action dissipates. the MXT is now ground balanced, so flip the switch to the "Lock" position. This locks in the current ground balance setting. The "Dual Control" while in Prospecting Mode is not acting as a discrimination control. The inner "SAT" section becomes active and a good starting place is the small preset triangle at the "5" setting. SAT stands for self-adjusting threshold. The threshold sound constantly varies and this circuit smooth's the threshold response. The higher the setting, the more aggressive the smoothing effect. Low settings are more sensitive to faint responses but can allow ground variations to also become to evident. Settings that are too high eliminate faint ground responses but can also cause faint signals from gold to become to faint to hear. In general less mineralized ground calls for lowest SAT settings and higher mineralization call for higher SAT settings. ads by Amazon... The Gain when increased does make the detector more sensitive to gold but also more sensitive to ground feedback and so-called hot rocks. The trick is to run the Gain as high as possible while retaining stable operation. Finally, in low mineral ground a locked Trac setting works best, but in ground that varies constantly running the MXT in the Ground tracking mode will result in smoother operation. Novice may want to stay in Ground Trac mode while learning the machine as it is the safe setting that keeps the machine properly ground balanced. In theory the MXT is most sensitive with the SAT set low, the Gain maxed out, and the Trac setting locked. The reality is that increased Gain settings may also call for increased SAT settings. The goal is to seek the most sensitive balance of settings possible while while keeping the MXT stable and smooth. A small test nugget of small piece of lead can be essential for determining what setting most eliminates ground responses while most enhancing nugget responses. In general leave the SAT control at the preset, Trac in locked, and set the Gain as high as you can while still getting stable operation. If need be, switch the Trac setting to ground for smoother operation. In the worst mineralization advancing the SAT control into the Hyper SAT mode will put the MXT into a very smooth mode able to deal with extreme mineralization while still reporting small gold nuggets. Remember, the key is to seek a smooth, stable threshold sound. It is this stable sound, when it varies, that indicates very deep or very small targets. There are a very few detectors that can be run in what is referred to as "mixed mode". These units have the ability to run in all metal and discriminate at the same time. I am not sure who first came up with this feature but Nautilus has for a long time offered units that put the all metal signal in one ear of your headphones and the disc signal in the other ear. The advantage to this is that pure all metal modes detect deeper than discrimination modes. Hunting in regular all metal requires lots of switching back and forth to check targets. Mixed mode gives you both at once. The White's MXT has the Relic Mode, which is a mixed mode. I wonder how many people use relic mode but really do not understand it. Good targets give a high pitched chirp. Junk targets honk. The split between high chirp and low honk is determined by the setting of the discrimination knob. This should be set to just cause iron and steel items , like a small nail, to honk, generally at a setting of 2 or less. Do not set the discrimination too high! Now here is the important part - there is a third, more subtle audio signal that indicates a target is there but the detector cannot identify it because it is too deep. This is the all metal signal. The meter will be blank. When nugget detecting, you want to hear these, and dig down until the target identification kicks in. I think many people focus so much on the other two audio responses that they ignore the fainter deep all metal signal. It is easy to fall into a habit of just digging only those high pitch targets. Not good. The key to mixed mode is simple. Those targets in a good location that are so deep you get no indication on the discrimination channel are the ones you really want to think about. If the area has produced good finds but is now near to being worked out, these deep signals are the ones anyone running in a normal discrimination mode is going to totally miss. Sure, it could be trash. But really deep targets are often the best, and so digging some of these on occasion can produce some really good finds. Steve with MXT and 6.85 ounce gold specimen found with it at Ganes Creek, Alaska in 2002 Unlike most dedicated nugget detectors it has a LCD based visual discrimination indicator (VDI) system. This is for the MXT coin and relic modes in particular. It turns out that for certain nugget detecting tasks the MXT has extra capabilities due to the visual target identification system. Alaska has huge areas of old mining tailings that provide great opportunities for nugget detecting. The nature of the old operations was such that many of the very largest nuggets were lost into the tailing piles. Unfortunately there is a huge catch. Some of these tailing piles contain incredible amounts of iron junk, and at any depth. Some creeks were mined many times, and old campsites and dumps were churned up and mixed in with the tailings. This junk can be anything from rusted flakes and slivers of steel on up to cans, bolts, washers and nuts, and finally even 55 gallon drums, and various large steel plates, pipes, boilers, or even larger items. Ganes Creek, Alaska is possibly the best known of these locations. New visitors from areas in the western US where the Minelab SD/GP/GPX detectors have reigned supreme have a hard time adjusting to the concept that there is such a thing as too much power when coupled to a poor discrimination system. If you run a Minelab at Ganes Creek here is a likely scenario. You are in a field of fist-sized and larger cobbles. You get a nice little signal and no iron blanking. You start to dig, as best you can in a pile of rocks. After a great deal of effort you are at two feet, signal is louder, but no target. You pull out another cobble and half the hole falls in. You pull all those rocks out, and get another six inches down. Forty-five minutes has passed. You pull out another rock and the hole caves in again. Fifteen minutes later you are at 3 feet again and really tired. Over an hour has passed since you started this hole. The signal is very loud now...too loud really. You dig down a bit more, then some more, and the whole thing caves in again. You walk away in disgust. Or you keep digging and finally find an old quart-sized can. How deep can you hit a large can with a Minelab GP 3000? How about a 2'x 2' steel plate? How about a 55 gallon drum? There answer is very deep indeed, and they are all there waiting! Normally you would just figure it is junk past a certain depth, but the big question always must be how deep could you hit the 35 oz or 80 oz pieces found at Ganes Creek with metal detectors, or the 122 oz chunk found by the commercial miners at Ganes? Because of this huge junk problem VLF detectors have generally been the way to go at Ganes. The low mineral conditions mean they keep you from wasting huge amounts of time going after junk targets. Most any good VLF machine works well for this, but the MXT gives you some extra capability once you learn its tricks. There are four things to know. 1. VDI numbers increase as the nugget size increases. So a 1/4 oz nugget may read around 25 whereas a 1 oz nugget may read around 40 and a 2 oz nugget may read around 50 on the meter. 2. The larger a nugget, the deeper you can detect it. 3. Certain steel items can give positive VDI numbers and 4. VDI numbers are pulled down the deeper the nugget is buried. A 1/4 oz nugget near the surface will read 25, but at depth might read 10, and at max depth may finally read at 0 or lower and actually be identified as iron. This last point is very important, for if you run a Fisher Gold Bug 2, or Tesoro Lobo, or Troy X5 in disc mode to tune out iron, as is common for many people at Ganes Creek, deep nuggets may read as iron. If they are, the machines will reject them; you will get no signal, and walk past the nugget. You will never know it is there. Or at best you have to search in all metal mode, then constantly switch to the discriminate mode to check the target. With the MXT, there is no switching and you hunt completely by ear. With the MXT I like to run the detector in relic mode, with the disc set precisely at 2. Non-ferrous items will give a high tone, and ferrous junk a low tone. If you get a faint low tone, the first thing you do is kick and inch or two off the surface until you get a honk or a chirp. Now dig a little deeper. If the VDI number rises, keep digging. Targets that read iron initially and rise will often turn into non-ferrous readings, hopefully gold. If the VDI number stays the same or goes even lower, you have an iron target. Once again, be careful to listen for audio signals that give no reading on the meter - these are items being detected by the all metal channel at depths beyond what will cause the meter to react with a numeric id. Where the MXT really shines are on 1/4 oz to 1/2 oz nuggets. Let’s say you get a reading of 24. OK, that is about a 1/4 oz nugget. Now, we know that you can hit a nugget this size at 10-12 inches. You dig a foot, and no nugget. A large, deep iron item of a certain type can also give a 24 reading, but these large items can be detected much deeper than a 1/4 oz nugget. Dig them up if you wish, but once you go past that depth at which it is reasonable to find a nugget corresponding to a certain VDI number you are wasting your time. This method eliminates digging those false positive signals from deep items like steel plates. With the other VLF units the lack of VDI number means you have no way to judge the potential nugget size and so you end up digging deep for what may be a very large nugget when with a MXT you would know the VDI number corresponds to a smaller nugget. For the many smaller nuggets that are found at Ganes this method is pretty foolproof once you get the hang of it. Finally, certain non-ferrous items can be found in quantity, particularly things like .22 shell casings. If you get into a bunch of these, they are usually very shallow. You can easily determine the VDI number of these multiple identical targets and then simply ignore them. You would miss a nugget with an identical VDI reading, but chances are a nugget will vary enough to make it stand out. There is no way to do this with a non-VDI unit. The MXT is a very versatile detector, but I do not think anyone anticipated just how much gold it would end up finding in Alaska. I know one prospector alone who has found over 100 ounces of gold with the MXT. ~ Steve Herschbach Copyright © 2004 Herschbach Enterprises11 points
 -
 The White's Goldmaster 24K has been announced and has just started shipping to customers. The Goldmaster 24K is an alternative to the White's GMT updated for the 21st century, with advanced ground tracking technology and increased power. XGB technology is a patent-pending automatic ground balance system. It is purpose-built for operating a high-frequency VLF gold nugget detector in the worst ground conditions. Traditional VLF detectors struggle to balance rapidly changing ground mineralization. Historically this has been where Pulse Induction machines fared much better. With XGB technology, the Goldmaster 24k is able to track small changes in soil composition as well as longer-term shifts in both ground phase and strength. This allows it to operate in ground that traditional VLFs struggle in. Users have extended control over the range of XGB in the Goldmaster’s All-Metal mode. Simply enable Iron Cancel to expand the ground filter in moderate soils. In very challenging soil conditions, hold the Iron Cancel button and select the 2-bar setting for maximum performance in variable ground. New 9/12/18 - Detailed Review Of White's New Goldmaster 24K White's Goldmaster 24K metal detector - new for 2018 The new White's Goldmaster 24K also features a full backlit LCD target id screen and control suite. The potential target id is displayed on the screen whenever possible - the higher the number, the better the chance of a non-ferrous target. There is dual tone capability that reports a low tone for ferrous objects, and a high tone for all non-ferrous targets. White's Goldmaster 24K Features SENSITIVITY - Set the sensitivity at a level that does not result in false signals from the ground. Very strong ground may result in the symbol on screen and a loud sound - this means the sensitivity is too high. GROUND BALANCE - With the default setting, the detector will use XGB to automatically ground balance. Tap to lock the ground balance to the current setting. Tapping when the ground balance is locked will update the current ground setting to what is under the coil. GROUND SCAN - Hold to put the detector into Ground Scan mode. The top bar displays the ground strength and the two digit numbers display the ground type (phase). Useful for tracing paystreaks. IRON CANCEL - Tap to silence hot rocks, trash and mineral changes in both audio modes. Hold to select the Iron Cancel setting (1 bar is default). Note that this setting may decrease the detector’s sensitivity to very small gold, but is necessary in difficult ground conditions. VOLUME and THRESHOLD - Tap to adjust the volume with the up and down buttons. Hold to adjust the threshold with the up and down buttons (“th” displays on screen). Set these to a comfortable level for your hearing and preference. AUDIO MODE - With the displayed on screen, the detector is in “BEEP” audio mode (high tone = good target, low tone = bad target). The default setting (without on screen) is a traditional All-Metal audio mode with greater sensitivity to small targets. SAT - SAT can smooth out ground inconsistencies. Hold to adjust it (“Sa” displays on screen, 2 is the default setting). PINPOINT - Hold for non-motion pinpoint mode. In difficult ground this mode may be affected by mineralization. BACKLIGHT - Tap to enable the backlight (this reduces battery life). FREQUENCY SHIFT - Hold when turning the detector on to shift frequency (useful when there is EMI). Power off to save the selection. FACTORY RESET - Hold the down arrow when turning the detector on. FD will display on the screen when the detector powers on. Now press the pinpoint crosshair button. The FD will clear from the screen, and the detector has been reset to default factory values. Not only does the new White's Goldmaster 24K features a new ground tracking system, but the gain has been boosted with an increase of voltage to the coil. From the Advanced Guide (link below): "When our engineers set out to build the GM24k, the goal was simple: improve the user’s chance to find gold without hurting their wallets. The obvious way to achieve this goal is increased sensitivity. The GM24k features a 54% increase in coil voltage over the GMT. You will see this in increased sensitivity to small nuggets. While testing this machine in Brazil, this was shown in a tiny, 0.4 grain crystalline nugget we found encased in quartz. In some cases this much power can be counter-productive if the ground is very challenging, so use it with caution! Even at lower gain settings the GM24k is an extremely “hot” machine on small gold and specimen nuggets." The new White's Goldmaster 24K comes with both rechargeable batteries and a holder for AA batteries. The GMK comes standard with the 6" x 10" DD search coil. Currently the is one accessory coil available, a 6" round concentric coil. Both a 14" x 8" DD and 6" x 4" DD coil are possible in the future but have yet to be offered for sale as of March 2019. White's Goldmaster 24K display and controls Here is a video released August 8, 2018 that goes over the basic features and operation of the Goldmaster 24K... Official White’s Goldmaster 24K Page White's Goldmaster 24K Quick Start Guide White's Goldmaster 24K Owner's Manual White's Goldmaster 24K Color Flyer White's Goldmaster 24K Advanced Ground Tracking Explained Detailed Review Of White's New Goldmaster 24K White's Goldmaster 24K & GMT Compared Forum threads tagged "whites 24k gmx" White’s Metal Detector Forum White's Goldmaster 24K Technical Specifications* Internet Price $729 Technology Induction Balance (IB) Frequency 48 kHz Autotune Mode(s) Variable Self Adjusting Threshold (V/SAT) Ground Rejection Tracking & Fixed w/Grab function, Ground Balance Offset Soil Adjust No Discrimination Visual & Audio Ferrous ID Volume Control Yes Threshold Control Yes Tone Adjust No Audio Boost Yes Frequency Offset Yes Pinpoint Mode Yes Audio Output 1/4" headphone socket & speaker (Headphones Included) Hip Mount Shaft Mount Only Standard Coil(s) 6" x 10" DD Coil standard Optional Search Coils 6" round concentric coil Battery Rechargeable NiMH plus Eight AA Pack Included Operating Time 20 - 40 hours Weight 3.5 pounds Additional Technology XGB Ground Tracking Technology, Ground Scan mode for tracing black sand deposits, Meter backlight Notes IP54 Rain & Dust Resistant *Notes on Technical Specifications - Detailed notes about the specifications listed in this chart. From this thread: GOLDMASTER 24K WHITE'S PAPER XGB - A New Way To Ground Balance The biggest challenge we face as electronic prospectors is highly mineralized ground. Simply increasing the gain on the current VLF platforms might help prospectors in very mild ground conditions, but what about more difficult areas with concentrations of black sand, maghemite, serpentine, or alkali salts? On a trip to Brazil we witnessed a combination of these conditions, with soil that ranged from red to black to purple, and exhibited a combination of ferrous and alkali properties within a 4 ft square section. We saw first-hand VLFs from each manufacturer fail to balance out the combination of minerals. Even the top-of-the-line pulse induction machines struggled in this area - machines which cost the garimpeiros (the local term for gold miners) several years’ wages. Our goal was simple: a nice even threshold in challenging ground conditions without giving up sensitivity. The theory is that the main battle most electronic prospectors fight is being able to discern a potential gold signal from ground noise. A smooth threshold would allow users to use more gain and increase their odds of finding small gold where it likes to hide - in mineralized ground. The issue with other VLF detectors on the market is that they were tracking a single ground balance point. When the ground type changes quickly, the machine gives off a false signal. For a user the result is ear fatigue, frustration, and less positive signals dug. One easy way to mask variable ground is implementing an auto-gain feature that automatically numbs the detector. This does not solve the issue, only hides it. The Goldmaster 24k’s XGB is a new automatic ground tracking system that works by tracking multiple ground points simultaneously and quickly. Where other VLF’s track one ground balance point, the Goldmaster 24k tracks several, and can determine an optimal “ground window” based on ground history and strength. This is very useful in rapidly changing ground conditions, where other VLF machines may struggle to track the mineralization changes. Combine this with the speed at which the Goldmaster 24k is able to grab ground samples, and you have a superior ground balance system for a prospector’s VLF. XGB Ground Balance versus legacy methods With any automatic process, there are some concessions. Take vehicles for example - manual gearboxes are still preferred by car enthusiasts. That’s why we felt strongly about including a TracLock® ground option. When used with the Ground Grab, a locked ground balance setting allows users to set the ground balance in an area and lock it until they need to re-ground balance. For users after the tiniest bits of gold, this option allows for the maximum sensitivity to small signals. One technique we observed from field testers was allowing the XGB to automatically track, and then after getting a solid hit or finding a patch, locking the ground balance for target location and retrieval. For many users this combination will be the best of both worlds - the strength of XGB, but only when you need or want it. The net result of an overhauled automatic ground balance system is a VLF gold nugget detector that can be used in wider variety of ground conditions with a nice stable threshold. Operating a machine with a smooth threshold allows for a user’s ears to tune into those slight variations that just might be the next nugget. Our goal is that our customers are able to have success with the Goldmaster 24k in areas that other VLF’s struggle, and at a price that allows more people to get a taste of electronic prospecting. Tom Boykin White's Project Manager Gold nuggets found with new White's Goldmaster 24K - smallest under 1/10th grain11 points
 -
This page has links to a collection of online "books" about prospecting and metal detecting subjects of interest. Most of these were actual printed books or brochures that are now available as html or pdf documents. In the case of pdf documents especially you can download and save these creating your own library of essential information. Many of these are out of print and hard to find so we are very lucky they are being scanned and made available on the internet. Be sure to also visit Steve's Guides - articles about basic metal detecting and gold prospecting subjects collected from forum posts on this website over the years. Metal Detecting How Metal Detectors Work by Mark Rowan & William Lahr - Originally published by White's Electronics as a booklet P/N 621-0395. Basic technical information on how induction balance and pulse induction metal detectors work. Metal Detector Basics and Theory by Bruce Candy - Bruce is a co-founder of Minelab and the man behind their most advanced designs. This information delves into much greater detail than the above link and has many more illustrations and diagrams. Metal Detecting Terminology - Metal detecting terminology and definitions, with an emphasis on Minelab technology wording and descriptions. The Sport of Coin Hunting by Charles Garrett. The basics of finding coins with metal detectors. The author designed and built his own metal detectors, and Garrett Electronics was established in 1964 to manufacture and market his inventions. How To Search Sand & Surf by Charles Garrett. Treasure recovery at the beach including coins and jewelry. Introduction to European Metal Detecting by Charles Garrett. Metal detecting for coins and relics in Europe. The author designed and built his own metal detectors, and Garrett Electronics was established in 1964 to manufacture and market his inventions. Gold Prospecting with a VLF Metal Detector by Dave Johnson. Dave is the Chief Designer for First Texas Products and has been involved in designing most of the VLF gold prospecting detectors sold over the last 30 years. This is an excellent primer on using VLF detectors to prospect for gold. Coil Size vs Detection Depth by Carl Moreland, on this website forum. A chart with notes from PI guru Eric Foster illustrates the relationship between coil size and depth on PI detectors. The History of Metal Detectors, with Emphasis on Gold Prospecting from First Texas (Bounty Hunter, Fisher, Teknetics) by Dave Johnson. A talk given to the El Paso Chapter of the GPAA February 12, 2008. Metal Detecting Technologies for Gold Prospecting from First Texas (Bounty Hunter, Fisher, Teknetics) by Dave Johnson. A short essay of key technologies for gold nugget detecting. Understanding the PI Metal Detector by Reg Sniff. An excellent, understandable primer on pulse induction metal detectors. Metal Detector Information - Get lots of great answers to basic detecting questions along with info and field reviews of Tesoro detectors. Common Questions About Metal Detecting from White's Electronics. Fisher Intelligence 5th Edition by Thomas Dankowski. Thought provoking articles on aspects of metal detecting not often talked about. Advanced Nugget Hunting with the Fisher Gold Bug Metal Detector by Pieter Heydelaar and David Johnson. This out-of-print book is a good basic text on nugget detecting. Although it uses the original Fisher Gold Bug as an example the information applies to most nugget detectors. Part 2 by David Johnson is an excellent primer on hot rocks. The Painful Truth by Thomas Dankowski - There is more good stuff left to be found but hidden from current technology - read why. A follow up to Dankowskis classic Beneath The Mask article. Head-To-Head Comparison Testing by Thomas Dankowski. It is not as easy as it looks! Why people get different results testing metal detectors, and how to do it properly. Halo Effect & Related Ground Oddities - from Fisher by Dave Johnson. An explanation of factors that can possibly enhance detector depth - myth or reality? White’s MXT Engineering Guide - by Dave Johnson. An inside look at the metal detector design process, with details about the White’s MXT and GMT models. An Engineers Guide to the Spectrum XLT - by Mark Rowan. The details behind the design of the innovative White’s SignaGraph display, first used in the Spectrum XLT detector. Steve's Guides - Articles about basic metal detecting and gold prospecting subjects. Metal Detector User Guides & Catalogs - User guides, catalogs and brochures from various manufacturers. ads by Amazon...10 points
-
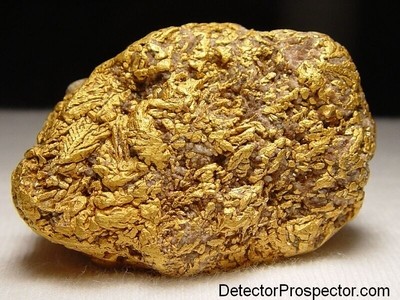 Our first trip of 2004 to Moore Creek got a lot accomplished, but the big jobs remained ahead. I was contacted by my friend George, better known on the internet forums as seeker. He has a background with heavy equipment and offered to help out with the generator and bulldozer. George is a very accomplished and well traveled detectorist and this trip would give him a chance to try out his brand new Minelab GP 3000. And so we scheduled a another trip up to the mine. Our first attempt was aborted at Rainy Pass due to bad weather. It was some of the poorest flying conditions I have experienced in some time. We sat and drank coffee in Skwentna hoping for the weather to lift, but it never did. This is one of the frustrations of flying in Alaska that one faces from time to time. There is nothing much to be done about it but try again in the future. But the false starts are disappointing and you never get back the lost time. Yet another trip was scheduled for a couple weeks later, and this time we made it. My brother Tom was able to break away from work for this short weekend trip, and so it was my father, George, Tom, and I. This time the weather was better and so we made it into the mine with no problem. Then came the usual task of hauling our gear to camp and opening the place up. Every time we leave we have to try and “bear-proof” the place by covering all the doors and windows with steel. Every time we return we have to open everything back up. I want to make some heavy-duty hinged steel doors for covers to speed this process up. For now it is lots of work with hammer and nails. George took a look at the generator and after a bit of work with the fuel system got it going. The previous owners had rigged it to auto feed with a fuel pump out of a barrel. George hooked the original fuel tank back up and bled the fuel system and it finally fired up. We now had electricity to add to our propane stove and propane refrigerator/freezer amenities. Suddenly Moore Creek was starting to feel civilized; the microwave even worked! Aerial view of Alaska Range on way from Anchorage to Moore Creek Arrival days are always short days. We decided to look for a little gold. I gave Tom my Minelab GP 3000 and I tried the White’s MXT I had brought along just to see how it worked in the hot rocks. George had his new GP 3000 and my father his Tesoro Lobo. It was a bit of fun at the end of the day, but only Tom came up with gold, a nice 0.55 oz specimen. Tom has always had a knack for detecting although he has done relatively little detecting over the years. It must run in the family. The next day we got more serious. George wanted to try and start the old D9-18A bulldozer that we have sitting in camp. This unit had been sitting next to the trail going from the airstrip to the cabins during all those early years when we had made visits to Moore Creek. It apparently was abandoned as dead but in the last couple years the previous owner had finally got it running. A piston was replaced and they got a little trail work done before the unit started shaking badly again. They thought it might have a bent crankshaft, which would be bad news. Still, it was running when it was parked, so we figured we might as well try and get it started to see how bad it was. The fact that it is parked in camp makes it easier to work on than the one located over four miles by trail out of camp. These old bulldozers have a small gasoline engine referred to as a “pony motor” that acts as a starter for the main diesel engine. The first thing to be done is to get the pony motor running. They use a six volt battery instead of a twelve volt to run their own little electric starter motor. We hooked up a battery with a charge and determined the starter worked. We then checked for fuel… and there was none to the carburetor. It turned out the fuel line from the little gas tank to the pony motor was plugged up with rust particles. The line was so well plugged it was hard to believe they had used the pony motor to start the dozer. Nothing all that hard to fix but time consuming taking all the lines apart, cleaning them out, and reassembling everything, especially since many of the fittings were stripped or otherwise in poor condition. D9-18A bulldozer in camp The throttle controls were disconnected from the pony motor, so George sat up top and ran the starter while I worked the choke and throttle manually. The pony motor started and I immediately wished I had hearing protection on. That little motor was loud. It also became immediately apparent we had a coolant leak in the head. But it did not look too bad for a short try, and so George kicked in the clutch and turned over the big diesel. It cranked and my brother shot some starter fluid in the air intakes while I kept working the pony motor throttle. The big motor turned and we got some smoke puffing. It looked ready to start. So we backed off. We wanted to let the pony motor cool down as the short effort had it pretty hot. We also looked the big motor over and checked for coolant and found none. Off to the creek with buckets we went. We dumped the water into the system, and it promptly ran right back out of the bottom of the radiator. Well, we looked but the radiator is fairly well enclosed. We think there is a drain open or hose pulled. We sure hope so, and that the radiator is not cracked. I have to believe they drained it before walking away. We were tired of fighting with the unit, and decided a set of manuals would be very helpful at this point. The dozer seemed like we could start it, but I had no desire to hurt things more by running the unit without better information about the recommended oils, coolants, etc. We decided to round up manuals before making another try at starting the dozer so we could run the unit through a full pre-start checklist. And find out where that drain is. My father and I figured to start trail work up to the other bulldozer outside of camp and it was decided that George and Tom should go hunt for gold. It was hard to say when Tom would get a chance to visit again, and George had already done well in getting the generator going and a start on the dozer in camp. Dad and I figured we would go off and do some work and let them have a little fun. Prospecting can actually be pretty tough work, but looking for gold always beats working on equipment or clearing trails since you just might find gold. There is an old bulldozer trail up to the unit that the operators were following when they got the dozer stuck about three miles from camp. It is about 4.25 miles by trail to the dozer along the trail itself. It starts out in the woodlands at camp, rises above tree line into that nasty alder and willow zone one runs into in Alaska, and then up onto the clear areas above. The small mountains around Moore Creek rise a couple thousand feet above camp, to total elevations of around 3000 feet for the tallest. Once you get above the alders it is very open terrain and very easy travel whether by foot or ATV. Old dozer trail in wooded area above Moore Creek camp The old dozer trail was in pretty good shape but alders had grown into some lower stretches and willows choked off some upper stretches. These two plants are like giant weeds in Alaska, and the alders in particular grow at amazing rates in the long daylight hours. They are the bane of the Alaska hiker due to their propensity to grow outward horizontally from a slope before curving upward. Along trails they curve in from both sides and crisscross in the middle. You don’t hike through alders; you climb over and under them, and so they really slow travel. It is impossible to drive an ATV through them, and they rapidly grow into and shut trails off to ATV access unless a trail is constantly maintained. One secret of locating old trails in Alaska is to look where the alders are thickest. They love disturbed ground, and old trails and ditches are easily spotted by looking for lines of alders and willows on hillsides. My father and I headed up the trail with chainsaws. He walked on up ahead and I followed with the Honda 200 three-wheeler. He was pretty much just scouting ahead, while I followed up at a slower rate, making sure the trail was clear enough to easily get through on the three-wheeler. With the dozer over four miles away by trail and over a couple 2000 foot hills, we wanted to be able to drive there with fresh batteries, tools, oil, etc. We could have just bushwhacked on up and got to work, but it would be a case where something would be needed, and then you would be looking at a long hike to camp and back. The trail needed to be cleared for ATV access to the dozer. This proved to be a very wise decision. My father disappeared up the trail while I worked along. I would park the ATV, then clear on up ahead with the chainsaw. Then set the saw down, walk back tossing brush aside, and get the ATV to drive it up to the chainsaw. There was lots of back and forth but I was making pretty good time. There were long stretches that needed no clearing, and so after slowly getting though a thicket a sudden advance would be made for some distance. I was bringing the three-wheeler forward at one point, when the unit made a loud squeak and stopped like the brakes were on. A long period of rolling back and forth and cutting logs to get the rear off the ground and I determined a rear axle bearing was seizing up. I decided to hike down and get George to seek advice as I had no tools on me anyway sufficient to tackle an axle. I was about a mile out of camp but it was all downhill and therefore a short hike. I found George by the ponds above the cabins with his new Minelab GP 3000 metal detector. I told him what had happened. Then I finally asked him if he was having any luck. He said he thought so and dropped a heavy rock in my hand. I could tell by the heft this was more than one of our regular gold/quartz specimens. Amazingly, George has not washed it off yet. Gold was glinting thought the yellow mud caked on the nugget. I headed over to the pond and washed it off. I think I was almost more excited than George. It was a fantastic gold nugget about the size of a golf ball! Not just any nugget, but one with small fingers of gold creating a delicate pattern over the entire surface of the nugget. George's amazing museum quality gold nugget from Moore Creek Moore Creek has lots of smaller nuggets that are predominately just gold, but the gold here is very close to the original source. Even the smallest gold is not worn or rounded, but just as it appeared as the rock that enclosed it rotted away. This also means that much of the gold has quartz attached, and the larger multi-ounce pieces have generally been about half gold and half quartz. I had come to expect this, and was surprised and very happy to see such a large relatively solid chunk of gold come from Moore Creek. The fact that George found one means that more are out there to be found in the future, and that made me very excited indeed. We went back to the cabin, and the nugget weighed in at 3.74 ounces. This surprised George somewhat as it was heavier than he thought and so he was thrilled. Not a bad find for his very first nugget with his new Minelab GP 3000 and his first at Moore Creek! Bottom view of George's Nugget Another very good sign for the mine is that the nugget was found in virgin soil on the edge of what we suspect is a large chunk of virgin ground. The fact is that I and others had missed the nugget by the smallest of margins. We had all hunted the area getting just smaller gold. I’m sure I’d been within a couple feet of the nugget, and it was only a few inches down. Anyone could have found it, but George was the first to get right over it. In any case, that virgin area is looking pretty good right now. I figured George would be hot to go look for more gold after a find like that. But on hearing the problem with the three-wheeler he put his detector aside and we hiked up to the Honda. After a brief consultation we decided I should just get on it and ride it back to camp. It needed more work then we wanted to tackle there in the woods. So I got on and went. It squeaked, and would seize up but I would roll it backward to free it up and go on again. Then it seemed like it decided to work again and I cruised into camp without pause. We drained the oil out of the motor and got the Honda turned upside down. We got it apart enough to determine there was really not much we could do without a new rear axle assembly. One wheel had actually been welded onto the axle and the rest was in poor shape. We drilled a hole in the bearing carrier and pumped it full of grease. Then got it back together and I drove it around camp a bit. It seemed better, but it was obvious we had not repaired it. The bearing could totally give out at any time. Honda 200 ATV with trailer at old cabin in Moore camp Tom finally showed up and he had quite a pile of gold to show. He actually had not been doing very well, but got into a hot spot and found several specimens in a fairly small area. He had 0.19, 0.43, 0.53, 1.06, and 1.78 ounce pieces and so was feeling pretty good about it, but his eyes about popped when he saw George’s nugget. George was playing it all kinds of humble and stuff but we assured him we’d trade twice the normal type of gold finds at Moore for a fantastic museum quality piece like he had found. It is truly a find to be proud of. It was late and we all were tired so we cooked up some food and waited. It was starting to get darker, which tells you how late it was, and still no sign of dear old Dad. I learned a long time ago not to worry about Bud Herschbach in the wilds of Alaska, but still as it got even darker I started to wonder at what point we should go out looking. But then he finally showed up, and just as well as it was getting dark enough to be hard walking. My father can out-hike most people half his age, and had decided to go all the way up to the stuck bulldozer to check it out. He reported that a half mile up the trail from where I had stopped there was a very thick patch of willows where he lost the trail. He calmly described literally crawling through these willows and having “something very large” jump up a few feet in front of him and make a huge amount of noise moving off in the brush, but he never did figure out if it was a bear or a moose the brush was so thick. It was probably a moose. He is telling this and I’m thinking I would have had a heart attack right about that time but he refused to make much of it. He has run into a lot of animals in the woods in his years as one of Alaska’s pioneer surveyors. He finally made it up to the bulldozer and reported it looked in a lot better shape then he had expected and certainly better than the one in camp. It was buried to the top of the track on one side and to about half a track on the other side. On his return trip he found looking downhill that he had gone through far more willows then need be, and had picked out what he thought was the shortest route possible through the thicket and marked it with flagging on both ends. There was one day left to go on our three day weekend trip. After a good night of sleep Dad and I hiked up to do more trail work. We decided to save the Honda for now for the critical task of hauling heavy loads to and from the airport, like the big empty bottles of propane we planned on backhauling out this trip. I had decided to go on a hunt for more three-wheelers to fly into the mine. Honda three-wheelers are still pretty common in Alaska and can be had for very little money. Most importantly, we can fly them in easily in the Cessna 206. Being dependent on a single three-wheeler that could break down any moment did not seem like a good idea. I wanted some redundancy and more spare parts. We could also use more ATVs for the upcoming bulldozer project to make it easier to get multiple people with loads up to the site. This trip wound down with little excitement to report. We got the trail cleared all the way up to where the willow thicket started, and once through that it would be clear sailing. My father and I had had enough clearing for the day and so we figured we’d leave that last small but tough stretch for later. Tom and George had prospected most of the day, but the luck had run thin and only Tom had found a 0.35 ounce piece. Funny how quick you get spoiled finding gold that I now say things like that. Not long ago a third ounce nugget would have really seemed like a big nugget. Just over 8 ounces gold nuggets and gold specimens found at Moore Creek, Alaska Overall the nugget detecting was quite productive. Tom and George did most of the detecting and found over 8 ounces of specimens between them. George's 3.74 ounce nugget is his largest ever, and Tom's 1.78 ounce piece surpassed his previous largest of 1.64 ounce, found at Moore Creek on his last visit. While this nugget detecting is fun it serves a very serious purpose at Moore Creek. First, 50% of detected nuggets go to the LLC to help fund operations. Or, as in George's case, the finder has the option of purchasing back the LLC percentage which achieves the same goal. More importantly, every nugget find is plotted on maps. As of this trip almost 70 specimens and nuggets have been located totaling over 50 ounces of finds. The map is revealing certain "hot" areas on the creek. Certain zones are producing more nuggets than others. Some tailing piles have produced multiple finds, some none at all, and some just a single piece. Any finds at all increase the probability of a particular pile containing more gold from mere speculation to almost total certainty. Some areas that look very good have turned out to be not so good and vice versa. At Moore Creek it can truly be said that metal detectors are a vital part of our initial exploration program. Our short but really productive trip wrapped up and we flew back to town. Our generator is running, old dozer puffing, trail nearly cleared to the stuck dozer, and more. But this particular trip will always be remembered as the one when George found that beautiful 3.74 ounce gold nugget. It truly is a find of a lifetime and the nicest at Moore Creek so far. ~ Steve Herschbach Copyright © 2004 Herschbach Enterprises Steve's Mining Journal Index9 points
 -
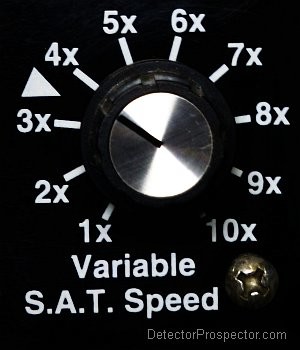 What is metal detector “autotune” or automatic tuning? Not automatic ground balancing or automatic ground tracking. Autotune is something so common now it is taken for granted, but it is a key feature when considering how detectors work, especially those designed to work with a faint threshold sound, like most nugget detectors. Prior to the 1980's most detectors had to be ''tuned''. You held them at a fixed height over the ground and manipulated a ''tuner'' until you got a bare threshold sound. A very faint sound you could barely hear. An increase in this sound meant you had a target. You could hold the detector over the target when you found it, and the increase in sound held steady. When the detector was moved off the target, the sound went away. No motion was required to get a signal, and so this mode of detecting is referred to as the ''non-motion mode''. There were two problems. First, the detectors of that day ''drifted''. The faint sound you set would either get louder or fainter. As the machines adjusted to temperature differences, or as the batteries ran down, the threshold changed. It did so rather rapidly, and so you constantly had to adjust the faint threshold setting manually to keep it on that vital edge. Also, the machines of the day could not ground balance. So if you raised the coil you got a false signal. If you lowered it the detector ''detuned'' and the threshold went away. Faint targets were lost. This was mostly an issue with small depressions in the ground. If you had the detector tuned to a fine edge, going over even the slightest depression gave a false positive signal. What I did myself was hold the detector an inch over the ground, tune it, and then lower it to the ground. This slightly detuned the detector and gave up the fine edge, but eliminated false signals from small depressions in the ground. Early 1970s "Mineral - Metal" ttuner control The first solution to this issue was push-button retune. If the faint threshold you had set got too loud or went away for any reason you just pushed a button, and you went right back to the original threshold setting. It was a great advance in its day, as pushing a button was much easier than turning a knob to get back the correct threshold. The detector “remembered” where you set the threshold, and a push of the button instantly returned it to where you had previously set it. This also made for better pinpointing of targets, as you could get close to the target, hit the button to detune the detector, and then zero in on the sharpest signal. Some detectors today still feature this form of ''non-motion pinpointing''. The next advance was electronic. The detector took note of the threshold you set, and circuits attempted to maintain the same threshold level. Since the original idea was to ''tune'' your detector, autotune was born. The detector automatically tuned the threshold. But a side effect was that if you held the detector steady over a target it was ''tuned out'', as the machine sought to return to the ideal threshold level. You had to keep the coil moving over the target to hear it, and so the “motion mode” was born. The original Gold Bug is the best example of all this. It is a pure all metal circuit with absolutely no discrimination. If set in the ''No Motion'' mode you can hold the detector over a target and get a louder sound that does not fade away. The closer you are to the target, the louder the sound. Great for pinpointing. But if you set the Gold Bug in this mode, it drifts. The threshold sound tends to get louder and louder. A Retune button is provided to reset the Gold Bug to the original threshold sound as adjusted by the threshold control. You must hit it about once a minute. The Gold Bug also has an ''Auto Tune'' mode. This is the mode you would normally use. The detector now reads the threshold setting in a feedback loop and keeps it steady. The side effect is that if a target is held steady under the coil, it is ''tuned out'' rapidly. The coil must be kept in motion over the target to get a signal, otherwise the autotune circuitry adjusts it out. It does not matter what causes the threshold to vary. The circuitry just attempts to keep it steady. Nothing is being tuned other than the threshold sound. Finally, there is a "Motion" mode, that is the same as the Auto Tune mode but with no threshold sound (silent search). Fisher Gold Bug controls, with Auto Tune in lower left The Gold Bug is an instructive model because discrimination is not part of the equation and you can see versions of all three basic detector modes at work. Threshold based non-motion mode, threshold based motion (autotune) mode, and silent search (no threshold) motion mode. Here is an excerpt from the Gold Bug manual that describes the three modes in more detail: NO-MOTION MODE: This is the most difficult mode to use. It is more prone to false signals, requires more retuning and must be re-ground adjusted more often than the other modes. However, the search coil does not have to be in motion for target response so it's the preferred mode in tight spots or situations where you just can't keep the coil moving back and forth. Furthermore, the problems of tuning, ground adjust and false signals lessen considerably at lower sensitivity levels or in non-mineralized ground. The No-Motion mode is most often used however for precise pinpointing once a target has been located in one of the other modes. MOTION MODE: In this mode the search coil must be moving, at least slightly, to detect a target. This is the easiest mode to use under moderate soil conditions. There is no threshold tone to worry about so you don't have to use the THRESHOLD control or listen to a constant hum. It's more sensitive than the Auto-Tune and doesn't require retuning like the No-Motion mode. On the other hand, the Motion mode is more sensitive to electrical interference and it's harder to identify false signals and bad targets (hot rocks, ground minerals, trash). AUTO-TUNE MODE: Also a motion mode requiring at least slight coil movement. Target response is smoother than in the Motion mode and, with practice, it's easier to tell the difference between nuggets and hot rocks and there are fewer false ground signals. Since most nuggets are found among hot rocks in extremely mineralized soil this will be the mode of choice for many nugget hunters. Various detectors were introduced with these features. What varied was the rate at which they autotuned. A slow autotune meant that the detector would not adjust as rapidly to variations in the threshold sound. The slow autotune had less of a tendency to ''tune out'' small targets or very deep targets. A fast autotune was more forgiving of variations in the way the detector was operated, in particular as regarding the distance of the coil over the ground and false signals, but is more prone to tuning out very small or very deep targets. Whatever autotune rate is chosen, it is a compromise. And what works well in one location does not work so well in another. When nugget detecting became popular a new variable was introduced. Ground mineralization, and more importantly, variations in ground mineralization, was something coin hunters rarely had to deal with. It was something a nugget hunter commonly encountered. Detectors at this time developed the ability to ground balance, or adjust out the ground effect that caused early detectors to give a false signal if the distance over the ground varied. Depth of detection dramatically increased. The ground balance control initially was a manual control, and so could be set for a certain ground condition. Any change in the ground mineralization tended to produce false signals. Autotune once again came to the rescue, as evidenced by its use in the original Gold Bug model. Units with a slow autotune had fewer tendencies to tune out small gold nuggets, or very deep gold nuggets. The downside is they had to be operated very slowly to allow the autotune to keep up with ground variations. Units with a fast autotune could handle variations in the ground conditions better, but had more of a tendency to tune out small or deep targets. Overall depth was usually decreased with faster autotuning but ease of operation increased. Another split in the technology came along. Many detectors, especially coin detectors, opted for a “silent search” mode. This mode eliminates the threshold sound entirely, very much like taking a detector with a threshold control and turning the threshold down until it cannot be heard. This makes for a quiet machine and became the preferred mode for many coin detectors. But it gives up a fine edge and so top performing units continued to offer a threshold control. Detectors that are silent search units do not need an autotune circuit. You can test a detectors autotune rate on detectors that have a threshold setting by holding a coin under the coil, and noting how fast the threshold adjusts back to its original level. This can vary from a couple seconds to almost an almost instant adjustment. An interesting side effect of autotune is ''overshoot''. If the detector is swept to one side and encounters a target, it attempts to ''tune into'' the target. If the target is a ''positive'' target, in other words the threshold increases, then the autotune circuitry immediately reads the increase and attempts to adjust lower. As the coil passes the target, there is a brief moment of silence as the autotune now has to turn around and increase the threshold back to its original level. In practice, you normally do not hear this. You hear the increase in tone, but not the decrease that follows. The target goes ''beep-beep'' as you swing back and forth over it. The ''beep'' is centered over the target. Move the coin back and forth under the coil and you will hear the sound. Now hold the coin under the coil until the threshold steadies, then remove the coin. The machine will go silent for a short period, again depending on how fast the autotune circuit is. However, if the target is an iron mineralized rock, most commonly a rock with a high magnetite content, then the threshold ''detunes''. The threshold is reduced and goes silent. So as you pass over the hot rock the threshold sound goes silent. The autotune circuit attempts to adjust by raising the threshold sound. But at this point you have passed over the ''negative'' target. A distinctive ''boing'' sound results since the threshold sound is now too high, and the autotune immediately attempts to adjust back down. The ''boing'' sounds occur to each side of the target as you sweep back and forth over it. The quiet spot, or ''null'' at the point between the opposing boings indicates the actual location of the target. To reiterate, autotune creates two types of signals. A beep-beep signal with the beep centered as the coil sweeps over it in both directions. Or a boing-boing signal, with the apparent target dancing back and forth as the coil sweeps over it. The null between the two boings is the actual location of the target, usually a hot rock. When White's introduced the Goldmaster V/SAT it featured "Variable Self Adjusting Threshold" or V/SAT. Self Adjusting Threshold is White's term for autotune. It is a more appropriate term as it explains what is really happening. People tend to confuse autotune with automatic ground balance. Unfortunately, White's fondness for acronyms is such that most people do not know what SAT or V/SAT stands for. The latest acronym is iSAT by Nokta/Makro for "Intelligent Self Adjusting Threshold". White's GMT Variable SAT Control The Goldmasters for many years were the only nugget detectors that allowed you to vary the rate at which the threshold readjusts itself via a knob - anything from very fast to very slow. Only recently has this control become available from other manufacturers. It allows for more control in varying situations. In general, use the lowest SAT setting that allows for smooth operation. As ground variations increase, setting a higher self adjusting threshold can be beneficial. At low settings, the coil can be swept slower. High settings demand a faster sweep rate or the circuit will tune out signals as fast as they are created. The Gold Bug 2 has a “High”, “Normal”, and “Low” mineral modes. These are actually three preset autotune adjustments, with Low being the slow autotune and High being the fastest. Normal of course is in the middle. With the vast majority of the nugget detectors you have no ability to vary the autotune rate. A few programmable coin detectors offer the adjustment but usually relate it more to sweep speed so the detectors can be set for a slow sweep speed or a fast sweep speed. To sum up, it is very important to know how fast your detector is autotuning. If it has a fast autotune and you move the coil too slowly, you will lose very small and very deep targets as the machine tunes out the faint signal before you hear it. Conversely, if your detector has a very slow autotune rate (rare these days, but common on old detectors like the Compass Gold Scanners) then moving the coil too quickly will also cause very small or very deep targets to be lost. The best way to observe this is to bury a target, and sweep the coil over it. Go real slow, go real fast, and try something in between. You will find a certain speed will produce the loudest and sharpest signal. Going much faster or much slower will muffle the target. Detector engineers try to shoot for a normal sweep speed, and newer detectors are much more forgiving than older units. But sweep speed does impact the performance on many detectors. One thing that sets the pro apart from the novice is that the pro keeps the coil moving at the optimum rate that produces the best signal. When autotune is combined with auto ground tracking, this awareness of optimum sweep speed is even more critical. As a rule single frequency machine can handle faster sweep speeds. Multi-frequency and pulse induction (PI) detectors benefit from slower sweep speeds. People used to one type of detector often have a hard time adjusting. It is very common for operators of single frequency fast sweep detectors to swing PI detectors far faster than they should, resulting in significant lost performance. Do not be one of those people. Experiment with your detector to find the optimum sweep speed, and in the case of the few machines that allow for adjustments, experiment to see how slower and faster settings affect the performance. It can make all the difference between finding that gold nugget and missing it. ~ Steve Herschbach Copyright © 2010 Herschbach Enterprises9 points
 -
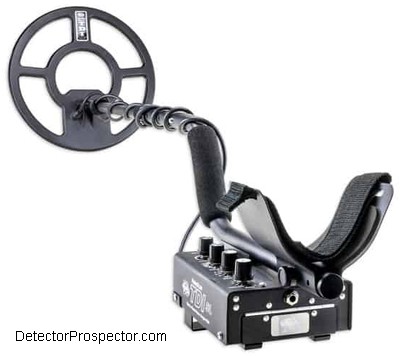 The White's PulseScan TDI was released in 2008 and is still in production as the TDI SL. Prior versions have been discontinued. I was one of the original users of the TDI and still dabble with them to this day. See my story White's TDI at Moore Creek, Alaska for pictures of lots of TDI gold nugget finds. I also have extensive notes on using the TDI for coin detecting at Steve's Guide to White's TDI Coin Settings. The TDI is a unique detector and is seeing use in many applications unforeseen when it first came out. The TDI has been available in several versions but all are basically the same detector as far as how they work. October 2019 Note: White's has a model called the TDI Hi-Q, which is a TDI SL with straight rod, new coil, and tan or camo paint job. See the details here. I am a big fan of competition as I always want more and better detectors from the manufacturers personally, and I think competition is the best way to get better detectors. After Garrett got into the ground balancing pulse induction (GBPI) game with the Infinium people including myself were really after White's to make an entry into the field. I went so far as to visit White's Electronics personally to lobby for such a detector with suggestions on how to get there. Alan Holcomb, the CEO at that time, flew me down at White's expense for discussions on how to proceed with such a project. In particular, I advised that rather than developing something from scratch, it might make more sense to license the existing Goldscan technology from Eric Foster, widely known as "the father of pulse technology" for his early work in the field. Eventually White's did decide to pursue the matter, and I was therefore aware early on that White's was working on a new detector, In 2007 I was sent a prototype unit to evaluate while I was on vacation in Hawaii. I was very impressed not only with the power of the detector but more importantly for me in Hawaii I was very impressed with how stable the detector was in salt water. It was also virtually immune to electromagnetic interference (EMI) issues that had dogged my use of other detectors in Hawaii. White's TDI SL with closeup of control panel (compare to original TDI controls below) My use of previous GBPI detectors, the Minelab models and the Garrett Infinium, made me familiar with how they respond to targets with various tones. Each target generates a dual tone that varies depending on whether the target is above or below the ground balance point that has been set. You will hear either a high tone followed immediately by a low tone (hi-lo), or a low tone followed immediately by a high tone (lo-hi). This dual tone system is effective for most uses but if you get into a target rich location it in effect doubles the number of audio signals coming from the detector. I also had an opportunity in Alaska to visit with Brent Weaver, the main engineer at Garrett responsible for the development of the Infinium. While testing a prototype Infinium I asked him about the dual tones (Garrett now refers to them as "echos") and whether they could be suppressed. He told me the dual tones were integral in how the Infinium worked and that it was not practical to produce a single tone result on the circuit they were working with. White's did end up working with Eric Foster on the development of the TDI. His method is one I like because instead of the dual tone responses generated by the Minelab and Garrett models (hi-lo or lo-hi) the TDI generates one of two tones, either a low tone, or a high tone. The tone depends on whether the target is above or below the current ground balance setting, and therefore there is only a tone difference when the ground balance system is engaged. The ground balance off, straight PI mode has monotone responses. Also, because the ground balance can be set manually on the TDI, this tone "breakpoint" can be shifted by the operator. This allows targets to be separated broadly into two distinct groups. On one hand there are high conductor type targets, like most coins and large steel items, that on the TDI produce a low tone response. The other group is comprised of low conductor type targets, and includes most gold items, US nickels, aluminum, and small ferrous trash. These all produce a high tone response on the TDI. There are far more high tone targets than low tone targets in most locations. I really liked the prototype TDI that I used in Hawaii, in particular the fact that it generated half the audio responses compared to a Garrett or a Minelab. Once again I wondered if one tone or the other could be suppressed. I sent an email to Eric Foster, and was surprised when he told me that not only could it be done, but it would be a very simple thing to implement with a basic toggle switch arrangement. This came about very late in the TDI development, and I lobbied hard for just such a feature to be added. A last second vote was taken by those involved, and probably the last major change on the TDI before it went into production was the Target Conductivity switch. There was no such switch on the tan prototype models. Prototype White's TDI Used by Steve Herschbach in Hawaii Now, I do not want to give the impression I was some kind of major player in the development of the TDI. I was just one of many voices pushing at White's for years to develop a ground balancing pulse induction (GBPI) detector. I am pretty sure though my last second inquiry and little push was what made the tipping point to getting the Target Conductivity switch included, and I think to this day it is one of the most useful and intriguing features on the TDI. It allows for a vast reduction in the number of audio responses in certain situations and in conjunction with the manual ground balance and pulse delay offers a degree of discrimination on the TDI not seen on any other pulse induction detector made today. This makes the TDI a pulse induction machine that can be used effectively for coin detecting, if the operator knows what they are doing and employs some smarts in site selection. I wrote an article entitled Steve's Guide to White's TDI Coin Settings on this very subject. I will not repeat the information here in the interest of keeping this page from getting too long so check out the link. Suffice it to say the TDI has the ability to play tricks and discern targets far beyond what most PI detectors can achieve. Another major feature on the TDI is the ability for the ground balance system to be shut off. The method used to ground balance the TDI in effect subtracts the ground reading from the total readings returned by the detector. This subtractive method does actually steal some depth, which is easily shown in air tests on targets with the ground balance turned on and the ground balance turned off. The closer the target is in relation to the ground balance setting, the more depth is lost. People find this very confusing, as the whole point of ground balancing a PI is to get better depth, right? Original White's TDI Control Panel The way it works is this. In low mineral ground a PI gets maximum depth without using any ground balancing. However, as mineralization increases, depth is affected. The more mineralization, the more depth is lost. Also, ground effects increase. In low mineral ground, the coil may be raised off the ground with little response. In highly mineralized ground, raising the coil even slightly off the ground produces a false signal. Nearly all PI detectors have an audio retune circuit that slowly retunes the audio response to keep it at the set threshold level. Otherwise circuit drift and minor ground variances would require constant retuning. In high mineral ground, the ground produces a response, but the detector compensates as long as the coil is kept at an exact height over or on the ground. If the coil is raised quickly, the audio overshoots when the ground signal is removed and a false signal occurs. This can be a real problem in even ground or in the water where it is difficult to maintain a steady distance above the ground or sea bottom. Hot rocks or wildly varying ground mineralization present an even greater issue. Again, the detector does well as long as the conditions are constant, but when a hot rock or mineralized ground condition like a clay seam enter the picture, a false signal is heard. In areas with lots of hot rocks PI detectors that cannot ground balance are almost useless due to the overwhelming number of false signals. So imagine a PI with no ground balance in low mineral soil. All is well, maximum depth is achieved. Pretend we have the ability via a magic dial to turn up the ground minerals and/or hot rocks in the ground. A point is reached where performance and efficiency is greatly impacted. It becomes impossible to discern good targets from ground signals and false hot rock signals. At such a point, engaging the ground balance circuit gains back the lost performance and efficiency. It does this by eliminating the ground signal and hot rock signals. White's search coils for TDI (from 2018 product catalog) This leads to situations occurring where people use a GBPI detector in low mineral ground and decide they are no better than a VLF. That actually often is true, in that a good VLF in all metal mode will do about as well as a Ground Balancing PI in low mineral ground, if both have similar coil sizes. A GBPI does not come into its own until the ground conditions or hot rocks are such that a VLF operator wants to toss the detector in a gully in frustration. This has been a very long lead explanation to the TDI secret weapon. In low mineral ground, turn the ground balance off! The detector will become extremely stable with a very smooth threshold and become more resistant to electrical interference. Gain may be boosted and a great deal of extra depth achieved in situations that allow for this type of operation, and they are actually very common. This would be the preferred beach mode on most beaches, the exception being beaches with a lot of black sands. The White's TDI in pure PI mode is one of the most powerful straight PI detectors available. The tone differences between targets disappear, and sometimes the ability to differentiate targets is more important than the depth gained by shutting the ground balance system off. But do not overlook this ability to run without ground balance in situations that warrant doing just that as it can really pay dividends to the knowledgeable operator. In 2018 White's responded to long standing demand from customers and released a version of the TDI that is waterproof to 25 feet - the TDI Beachhunter. This is basically a TDI SL in a Beachhunter ID control box. The model weighs more at 5.2 lbs for obvious reasons. The TDI Beachhunter has all the same controls as the TDI SL with the exception of the conductivity switch. This means the TDI Beachhunter signals on all targets, but the dual tone scheme remains to allow the operator to differentiate targets by the sounds. In order to help insure waterproof integrity the coil on the TDI Beachhunter (12" Dual Field coil) has been hardwired into the control box. Forum thread with more information on TDI Beachhunter. White's Electronics TDI Beachhunter - new for 2018 ~ Steve Herschbach Copyright © 2010 Herschbach Enterprises Official White's TDI SL Page White's TDI SL Data & Reviews White's TDI SL Instruction Manual White's TDI SL Special Edition Data & Reviews White's TDI BeachHunter Data & Reviews White's TDI Pro Instruction Manual White's Original TDI Instruction Manual White's TDI Field Manual Forum Threads Tagged "whites tdi" White's Metal Detector Forum Great Post on Batteries For the TDI SL White's TDI Coin Settings Some Commentary On TDI Tuning & Discrimination White's TDI Technical Specifications* Internet Price TDI SL $1189 (Special Edition $1049) (Beachhunter $1199) Technology Ground Balancing Pulse Induction (GBPI) Frequency 3250 - 3370 Pulses Per Second Autotune Mode(s) Slow Motion Ground Rejection Manual, one turn control Soil Adjust Ground Balance On or Off (two position switch) Discrimination Conductivity switch*, 10 - 25 Pulse Delay Volume Control No Threshold Control One turn control Tone Adjust No Audio Boost No Frequency Offset One turn control Pinpoint Mode No Audio Output Speaker, 1/4" headphone socket Hip Mount No (TDI Beachhunter - Yes) Standard Coil(s) 12" Round Dual Field Optional Search Coils Over 100 accessory coils available (TDI Beachhunter has hardwired coil) Battery Rechargeable NiMH & AA Operating Time Up to 6 hours Weight TDI SL 3.5 pounds ( TDI Beachhunter 5.2 lbs) Additional Technology The TDI was designed specifically to be able to use Minelab SD/GP compatible coils. However, performance can vary and the pulse delay may have to be advanced to compensate for coil differences that result in overload readings. TDI Beachhunter is waterproof to 25 feet. Notes *The TDI is unique in that it can suppress audio responses into two different classes. Targets have a high tone or low tone audio depending on how the target relates to the ground balance setting. In general high conductive targets give a low tone and low conductive targets a high tone. The TDI can be set to allow for one response or the other. See White's TDI Coin Settings for more details on this control. *Notes on Technical Specifications - Detailed notes about the specifications listed in this chart. White's TDI SL High-Q Tan metal detector8 points
 -
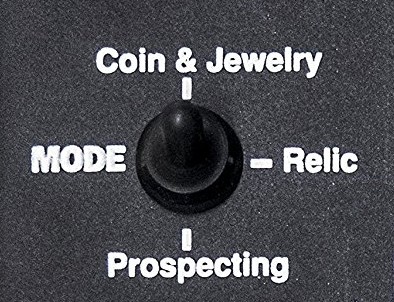 Modern induction balance (VLF) detectors usually can operate in two basic modes. A true detect everything all metal mode or a discrimination mode. Discrimination modes use various filtering methods to help separate desired targets from the trash. The filtering takes away from overall depth and the target identification gets less reliable with depth. In nearly all cases a detector operating in a pure all metal mode will find targets deeper than a unit running in a discrimination mode. It is possible to take a detector running in discrimination mode and set it to accept all targets. You are now running with zero discrimination, and the detector now sounds off on all targets. The problem is that some detector manufacturers are labeling this zero discrimination mode as an "all metal" mode since all metals are being detected. Unfortunately, you have not really turned off the discrimination. A true all metal mode employs no filtering at all, it directly reports a target. In zero discrimination the target is still being filtered, but you are telling the machine to report all filtered targets as good targets. The bad news is you still are losing depth and sensitivity compared to the true all metal modes. Most metal detectors are made for coin detecting, and so most only run in a discrimination mode. You can set them to accept all targets, to run zero discrimination, but these units simply do not have a true all metal mode. All metal detectors designed with serious prospecting in mind have a true all metal mode. The reason is simple. True all metal nearly always hits hard to find targets, either very deep items or very small, better than detectors running in a discrimination mode, even when set to zero discrimination. This is so important to me that I will rarely ever consider purchasing a detector that does not have a true all metal mode. Be careful when buying a new detector that if you want a true all metal mode you do not end up with a detector that really is offering only a zero discrimination mode. One clue is that a detector with a true all metal mode will also have a threshold control to set the audio in the all metal mode to a barely perceptible sound level. Zero discrimination modes are usually what is referred to as "silent search" modes without a threshold sound and therefore no threshold control. It is possible for a detector to run in all metal and discrimination modes at the same time. This is referred to as mixed mode Very cool! I am not sure who first came up with this feature but Nautilus has for a long time offered units that put the all metal signal in one ear of your headphones and the discrimination signal in the other ear. More common are detectors that put the all metal output through the speaker and the discrimination signal on the meter. The White's MXT has the Relic Mode, which is a mixed mode. I wonder how many people use Relic Mode but really do not understand it. Good targets give a high pitched chirp. Junk targets honk depending on where the discrimination knob is set. But there is a third, more subtle audio that indicates a target is there but the detector cannot identify it because it is too deep. This is the all metal signal. The meter will be blank but there will be an audio signal. When nugget detecting, you want to hear these, and dig down until the target id kicks in. I think many people focus so much on the other two audio responses that they ignore the fainter deep all metal signal. It is easy to fall into a habit of just digging only those high pitch targets. Not good. White's V3i Mixed Mode program option The various Fisher F75 and new Gold Bug models have a basic single tone in all metal, but the meter is still active in discrimination mode. So you get the signal, then check the meter. If within range, you will see a target id. If deep, the meter will be blank. It is very similar to the old Compass Gold Scanner Pro, which had a target id meter that functioned while in all metal. The White's V3i has a very powerful programmable stereo mixed mode setting. The DFX also offers mixed mode. The new Garrett AT Gold has a true audio all metal mode while the meter is still working in the discriminate mode. The same thing can be achieved with many detectors by running in all metal mode and then, after a target is acquired, switching over to discriminate mode to check the target. The obvious downside is that this requires lots of switching back and forth, and a mixed mode detector eliminates the switching. The key to mixed mode is simple. Those targets in a good location that are so deep you get no indication on the disc channel are the ones you really want to think about. If the area has produced good finds but is now near to being worked out, these deep signals are the ones anyone running in a normal discrimination mode is going to totally miss. Sure, it could be trash. But really deep targets are often the best, and so digging some of these on occasion can produce some really good finds. I have found from my personal experience that detectors often run smoother and targets are easier to hear in all metal mode. I tend to prefer a detector that has an audio all metal mode coupled with a metered discrimination mode. I just listen for the target, and once I hear it I stop and analyze it with the meter. When in doubt, dig it. Some people prefer to dig only targets that read as probable good targets as they do not like digging junk. I tend to dig anything unless it is almost sure to be junk. In other words, I dig the iffy targets. That means I dig more trash but it also means I make finds others miss. It does depend on how patient I am feeling though, and some days I will just dig those really good targets. Those are getting harder to find these days. The only place mixed mode does not work well is in very trashy locations, especially the units that generate multiple tones. It just gets real noisy. But for many experienced detectorists mixed mode is a sort of secret weapon. Now you know why! ~ Steve Herschbach Copyright © 2010 Herschbach Enterprises8 points
 -
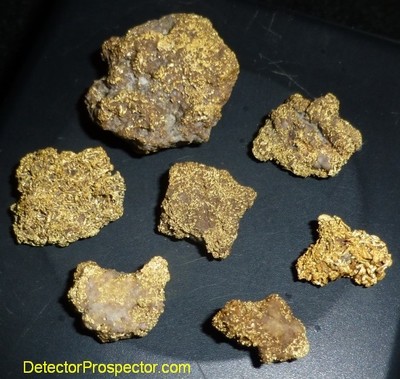 Many people have seen the ad copy in the Minelab GPZ 7000 brochure where I am quoted about how amazing the new GPZ 7000 is. Now you get to hear the rest of the story. This is a more detailed version of an email I sent to Minelab last fall regarding the new GPZ 7000. The background is I had been using the GPZ prototype for some time, but was underwhelmed. I was initially put off by the weight, and frankly it was just not my trusty old GPX 5000, and I was slow to shift gears. Yes, the machine performed, but I had not seen anything that particularly knocked my socks off, and had not been shy in saying so to Minelab. I had an opportunity to return to a location in northern Nevada I had hunted gold previously in 2013. On that visit a portion of hillside was pointed out as the location of several nice nugget finds, including some delicate specimen gold. I did what any prospector would do and concentrated on hunting this area hard with my GPX 5000. I knew I was dealing with an area hunted hard with previous Minelab PI detectors and hot VLF detectors like the Fisher Gold Bug 2. I was the first there with a GPX 5000 however so figured I was going to find something others had missed. I was running a 14” x 9” Nugget Finder mono and set it up in Sharp at Gain of 16 which is a reasonably hot setting. I was disappointed to find nothing but bullets, and so I switched to a used White’s GMT I had just acquired. This high frequency VLF detector was able to find two small and very porous gold specimens. Having found these, I again scoured the area but there appeared to be nothing else to find. I was not the only person to detect this location of course and so I just figured it was pretty well detected out. Delicate Nevada gold specimen found by Steve with White's GMT The Minelab SDC 2300 came out in 2014, and Chris Ralph and I both had units which we were using with great success on gold the GPX was weak on. Small, porous, prickly gold. An invite came to visit the property again in the fall of 2014, and Chris and I figured the SDC would be just the thing to succeed where the GPX 5000 had failed. We were field testing the GPZ 7000 prototype also by this time. Chris was tied up but I had a chance to leave earlier, and camped out a couple days in Humboldt County hunting with the GPZ. I was really pleased finding just shy of a half ounce (15.5 grams) of nice gold, including a solid 6 pennyweight (9.4 gram) nugget which was my largest with the GPZ to date. I was now starting to warm to the machine which seemed particularly well suited to the wide open spaces of northern Nevada. 15.5 grams of Nevada gold found by Steve with GPZ 7000 prototype - largest 9 grams The GPZ was of course a super secret project at that point, and so when I met Chris at the miner’s claims I had it carefully stowed away, and pretty much forgot about it. The plan was to hunt with the SDC detectors. I pointed out the location where I had hunted with the GPX and GMT to Chris Ralph so he could give it a go with the SDC. Frankly, I did not think he would find a lot at this point, but the new SDC 2300 certainly had a chance of making some finds there. I hunted another hot spot nearby, and my own SDC 2300 found four or five nice little specimen pieces. I was really pleased when Chris showed up and showed me two fat specimen pieces, weighing about one quarter ounce in total. Everyone was very impressed with the SDC 2300, and the gold it was finding in areas hunted over and over with PI detectors, and hot VLF detectors like the Fisher Gold Bug 2. The Minelab GPZ 7000 brochure quote by Steve We stayed the night but Chris had to leave the next day and it was good he went home with gold in his pocket. One of the claim owners also left, and it was down to just me and one claim partner. I stayed and hunted, finding another small specimen with the SDC 2300. I went a couple hours with no finds, and decided to wander over to the area where Chris had scored to see if I could do anything there. The claim owner and I puttered around awhile there then he decided it was time to go back to camp and grab some lunch. I was about to get going again with the SDC 2300 when I realized I had the new GPZ prototype still in my truck. The claim owner was over the hill out of sight, and since he had just left me I figured it was pretty safe to get GPZ out and give it a quick go. So I went back to my truck, switched out detectors, and headed to where Chris had marked his gold finds. Chris had hunted right where I had found the two specimens the year before with the GMT. I was a bit surprised I had missed two nearly 1/8th oz pieces, but they were deeper than the GMT was going. His two specimens were found only ten feet apart, and I could tell he had hammered the location. Every square inch of the dusty ground was covered with footprints. I fired up the GPZ and gave it a few swings, and was surprised to almost immediately get a nice signal exactly between the two little rock piles marking his find locations. I gave a few digs and revealed a nice specimen weighing about 3 grams! I know I had been over this location with a GPX 5000 and a GMT. Chris is very methodical when on a patch, and I know the SDC 2300 is more capable than the GPX 5000 when it comes to small specimen gold. How could this be? I suddenly realized I had something very special indeed in my hands. I wandered down slope, and right at the bottom of the hill where it started to flatten out I got another signal, and another couple gram specimen. Then only about 20 feet away I got another one. Now I was really getting excited. Less than ten feet away I got a real boomer signal, but it proved to be a bullet. Then a few feet, and another large signal. I dug deep into the hardpan, and knew at that point it has to be gold. I dug carefully so as not to damage it, and finally recovered a solid lump quite a few inches down. It was an 11.2 gram or just over one third ounce gold specimen! Gold specimens fresh out of the ground perched on GPZ 7000 The property owners were very gracious, and had told Chris and I we could keep all the gold we found. I appreciated that, but I also know that is easy to say when you do not think people will find very much, and the owners thought the ground pretty well detected. I was thinking at that point I needed to give them a share of the gold, but truthfully I did not want to part with this big lump, so I told myself I needed to find more gold. The problem was time was running out and I was worried the claim owner might come looking for me soon, and see me with the GPZ. So I started scanning with 7000 as fast as if I was in a VLF competition hunt. My goal now was to just cover as much of this area as I could in a short amount of time. Apparently speed does not hurt the GPZ all that much, because in short order I found another couple gram specimen. More frantic scanning, and another nice piece popped out of the ground. This was crazy – I know I had hunted this area! I expanded the area of the hunt, but the gold seemed to be on a very tight line heading down the slope. Some time passed, and another two or three gram specimen saw the light of day. Now I was getting really worried the claim owner would show up and see me with the GPZ. I had a pouch full of gold specimens, and was really amped up at that point. I had not found that many large chunks of gold that fast in very many years. To say I was stunned would be an understatement. I had to quit though, and so I hunted up the slope so I could go back and show the claim owner my finds, and bring him back to hunt some more. I just figured I would put the GPZ away, and go back to using the SDC 2300. I made a bee line up the hill to where my truck was parked, swinging all the way, when I got another good signal. I dug and it got louder. And louder. I was into the hard material now and knew it had to be gold, so I slowed up and worked the edges of the hole carefully. The last thing I wanted to do was ruin a nice specimen. Finally, about a foot down I grabbed a handful of loosened soil that screamed when I waved it over the coil, and I felt a lump drop into my other hand when I went to separate it. This one was at least twice as large as the big one I found earlier!! 0.79 ounce gold specimen just rinsed, found by Steve with Minelab GPZ 7000 I was having a Eureka Moment. This whole experience was mind blowing. I was finding gold right and left as if this location had never seen a detector before. The GPZ 7000 was working some serious electronic magic, and it seemed it was particularly effective on porous specimen gold at depth that other detectors have a hard time seeing. The GPZ 7000 was hitting this stuff not with weak, but with strong signals, like the SDC but with a coil size much larger than that on the SDC 2300. It was able to not only detect the kind of gold once only found with hot VLF detectors, but hit it at depths far exceeding what one of the best hot VLF detectors, the White’s GMT, could attain in this soil. I was literally shaking I was so excited. The large specimen looked to be all gold, with no rock showing, but was very porous in appearance. Not like steel wool but more like a lot of tiny pieces of gold all lightly stuck together. I could tell it was going to be spectacular when cleaned up, and it later weighed in at just over 24 grams or nearly eight tenths of an ounce. I decided then and there I had found the chunk I would give to the property owners. They certainly deserved it and I still had about an ounce of specimen gold I could take home with me. Steve's share of GPZ gold after initial cleaning - 0.85 ounce Photo emailed to Steve of 0.79 ounce specimen after cleaning People may wonder at this a bit that I would volunteer this piece up when I did not have to, but I believe in taking care of people that take care of me. The day I was having was as good as it gets for metal detecting. I just found 1.6 ounces of gold in less than three hours, was on cloud nine, and wanted everyone to share as much as possible in that experience. To say the property owners were surprised and appreciative would be the understatement of the century. It really just does not get better than that. All this happiness and great times were facilitated through the magic of metal detecting and the extreme capability of one detector in particular. Not to be overlooked however is the SDC 2300, which also shined very much along with the GPZ. My only regret is that I could not tell the claim owners the complete story at that time. Sorry friends, I hope you understand, but now you know the rest of the story! This article started as a thread on the DetectorProspector Forum. Extra information and details may be found there. ~ Steve Herschbach Copyright © 2015 Herschbach Enterprises Steve's Mining Journal Index7 points
 -
 I've been a longtime fan of the White's Goldmaster series, but I was really annoyed when White's put the machine into the XLT packaging. I like to keep weight off my arm, but more importantly I work some very steep hills where putting a machine down can be a problem. The unit will simply roll to the bottom of the hill. I also work in muddy conditions a lot and so I do not want to set my detector down in the soup. A little history. Prior to 1990 the White's Goldmaster was a simple T/R detector housed in a blue aluminum box. Those old obsolete models should be avoided by all but collectors because they could not ground balance. Around 1990 White's introduced the Goldmaster II, which featured a new black paint scheme. These black box models since 1990 are all quite capable 50 kHz nugget hunting detectors. The Goldmaster II used a S rod design that allowed the control box to be mounted in several locations on the rod, plus removed completely and either chest or hip mounted. This design was popular with prospectors. I still remember clearly the huge fuss when White's introduced the Goldmaster 4/B around 1998 and put it in the same one piece control box as was used in White's coin detecting models. This was no doubt partly a cost saving measure but also to accommodate a much larger circuit board as the Goldmaster series made the move from analog to digital. The Goldmaster 4/B was an hybrid analog/digital design that preceded the microprocessor based White's Goldmaster GMT. The dealer network raised a fuss and Jimmy Sierra in particular was incensed by the design change. He prevailed on White's to make a run of "chest mount only" models that basically took the handle and pod assembly and stuck it in the middle of the control box. A cumbersome design if there ever was one. It was also basically kept secret from anyone but Jimmy's dealers and so the chest mount only model is a rare Goldmaster indeed. This move coincided with Fisher introducing the Gold Bug 2, which at 71 kHz was hotter than the 50 kHz Goldmasters, plus had the hip and chest mount options with an even more compact design than the Goldmasters. Goldmaster sales plummeted and the Gold Bug 2 took over. The very unpopular Goldmaster 4/B was replaced by the 48 kHz GMT, a totally new microprocessor design. White's Goldmaster 3 (GM3) - last analog model, last with removeable control box Starting about 1990 the sequence was: White's Goldmaster II (1990) - new 50 kHz model, on S rod with removeable control box. White's Goldmaster V/SAT (1994) - added Variable Self Adjusting Threshold (V/SAT) control, on S rod with removeable control box. White's Goldmaster 3 (1996) - Added frequency offset, boost options, three piece rod standard (optional in previous two piece models), on S rod with removeable control box. New DD coil replaces concentric coil used on previous models. Widely considered the best analog Goldmaster. White's Goldmaster 4/B (1998) - Added meter on a pod for iron discrimination, non-removable coin detecting type box design. White's GMT (2000) - Completely new 48 kHz microprocessor model, non-removable coin detecting type box design. White's Goldmaster 4/B with the new "coin detecting" control box design I really wanted a new White's GMT. The automatic ground balance and LCD iron readout are very good. So I thought about what I might do to get what I wanted. A GMT to chest or hip mount. White's makes a chest mount version, but it has the darn handle/pod sticking out the front where it blocks vision and is prone to getting hit while digging. And for hip mounting it bumps into things. White's Jimmy Sierra GMT chest mount I went ahead and bought the chest mount version, but the following conversion can be applied to the standard model as well. I went with the Jimmy Sierra special chest mount model as a starting place since the rod assembly is already a separate item. 2011 Update: White's does not make their chest mount version any longer. First step... take it apart! Here is the unit in parts, with a close up of the main board: White's GMT components disassembled White's GMT circuit board White's GMT pod contents The main board is clearly marked with what plugs where. Nice for reassembly. I took the pod apart, and ground the touchpad mounting down to just the pad itself as it was glued on too well to pry off. The LCD plugs into a mini circuit board in the pod, along with the trigger switch. Then a long cable runs through the handle and to a plug in the center of the main board. I wanted to chest mount the unit with the coil cable and headphones running out the right side. This meant the LCD would have to be mounted on one side. That particular side does not have enough room to flush mount the LCD into the case, so I decided to cut a hole in that side and mount the LCD on the outside of the case. This meant the mini circuit board would have to be mounted inside the case lid where the speaker resides. I am a headphones guy anyway, so out came the speaker. You could flush mount the LCD on the other side and retain the speaker, but then the coil cable will exit on the left. Good for lefties, however! You might even be able to do it the way I did and keep the speaker, but my fingers are not the most adept, and I figured I could use the extra work room. Mounting the pod circuit board The picture above shows the positioning of the mini circuit board inside the lid. The white ribbon cable runs out to the LCD. The green ribbon cable runs out through a hole I cut in the lid to the touchpad. I glued the touchpad on the outside of the case. More on that in a minute. The wires run to the new trigger switch location. I mounted the board on short spacer posts. Mounting the touchpad and LCD display The picture above shows you where we are heading. The LCD is mounted outside the case. The LCD was mounted using the hardware that originally mounted it to the mini circuit board. A D-Ring has been repositioned to the left. The touchpad is glued down partially covering the speaker holes. The rectangular hole in the case was left after removing the handle. You can see the new trigger switch location. I'm going to replace this switch with one of the rubber capped types. The touchpad covered the battery check/audio boost switch, so it was relocated to a position below the trigger switch. I had to lengthen the wires to do this, the only soldering involved. As I look down at the LCD, I can easily operate the switches and pad with my left hand. The switches are set so I can push down on them to activate the battery check or iron id accumulate mode. Relocated touchpad I cut an aluminum faceplate to cover all the leftover holes and glued it in place. Painted it all black so it would look halfway ok. If I had it to do over again, I would make the faceplate at the same time as I was mounting the touchpad. It was hard to make the faceplate after the fact, and I had to dismount and remount the mini circuit board to drill the bolts mounting it through the faceplate. Better to glue down the faceplate and pad as a unit, THEN drill the holes for mounting the mini circuit board. Relocated LCD display This turned out to be the hardest part. I originally figured I would be able to find some kind of clear plastic box to glue over the LCD to protect it. I cruised aisles in Lowes, Kmart, and Fred Meyer for hours looking for any kind of little box I could cut down and use. Finally I decided to make one. I got a piece of oak trim about 3/8" thick and made a bezel. I found a piece of thin plastic and made a window for it, and glued the window onto the bezel. I cut the original LCD stick-on window (the one that says "% probability of iron") down and glued it in place over my window. Finally, I glued the whole assembly over the LCD. Imagine my surprise when I tested it out after the glue had set up and the LCD was missing half its pixels! I was bummed. I took the case apart and wiggled everything. The unit was working fine, just the LCD was acting funny. Finally I pried my carefully placed cover off and looked the LCD over. No obvious problems. It was still just barely readable, however, so I figured the heck with it, and glued the cover back on. After it set up, I tried it again, and now the LCD was almost totally blank! I was using a glue called E6000 that bonds most anything. I decided that somehow the fumes from the glue had somehow "poisoned" the LCD. So I put a lamp on the unit and blew air in it periodically. And behold, the LCD slowly came back to life! Whew!! I cruised the net looking for info on this weird problem, but never did find anything. GMT conversion chest or hip mount So here is the final product. Actually, as you can see, I took these before I did the trim work. The chest mount is just for show. I need to rig up a full harness. But I'll tell you what... I really liked it. Everything right there where I need it, but well out of harms way. The alternative hip mount setup is better than the original by far, but I liked the chest mount so much I will only use it like this where there is no trash to deal with. I'm still looking for that spot! So there you go. This is not for the faint of heart. It was the first time I had done a mod this extensive, and it was a somewhat scary feeling to be tearing a brand new detector apart. Kiss that warranty goodbye! But now I have a unit I really like that will work well on steep slopes and other odd spots. Not to mention give my arm a break. The GMT is very well balanced, but every ounce counts when you are at it for 10 or 12 hours at a time. A final note. You could leave the pod on the handle and route a longer cable from it up the coil cable and to the control box. But I wanted the pod off the handle entirely, and adding more cables seems like a way to ask for more problems down the road. I know another guy that has now done this mod after seeing mine, and a third is at work on his. Maybe some people going to all this effort will tell White's that their old box design was better. Postscript: After the above post was made I took my new White's GMT chest mount to Ganes Creek, Alaska for a real world nugget hunt. The unit worked as I hoped and then some. Here is a picture of it and the 1.89 ounce gold nugget it found for me! 1.89 Oz nugget found with White's GMT chest mount conversion ~ Steve Herschbach Copyright © 2002 Herschbach Enterprises7 points
 -
This section focuses on gold prospecting for individuals and small time operators. Equipment used may include metal detectors, suction dredges, gold pans, and sluice boxes. You will find articles here to help you for both beginners and pros. There is location information, equipment reviews, and more. Steve's Mining Journal - Real life gold prospecting and metal detecting stories spanning over 40 years. Gold Prospecting & Metal Detecting Guides - Basic and advanced information to get you started. Recreational Mining Sites, Parks, Museums, etc. - Locations available to the public to look for gold and other rocks & minerals. Where To Prospect For Gold - How too locate your own areas to look for gold in the United States. State Specific Information - General gold locations, geology, and history. Mining Claims For Sale in Alaska - Mining claims and leases in Alaska that are being offered for sale. Gold Prospecting & Metal Detecting Library - Online books and other reference material about gold prospecting and metal detecting. Steve's Guide to Gold Nugget Detectors - updated now for over 20 years, Steve gives honest opinions regarding various metal detectors past and present. Steve's Reviews - Equipment reviews focused on metal detectors for gold prospecting, much more in depth than the previous summary. Detector Prospector Forums - Forums on metal detecting for gold, gold panning, rocks & minerals, gold dredging, geology, plus coin, relic, jewelry, and meteorite detecting. Metal Detector Database - Metal detector feature and specifications database with user reviews.7 points
-
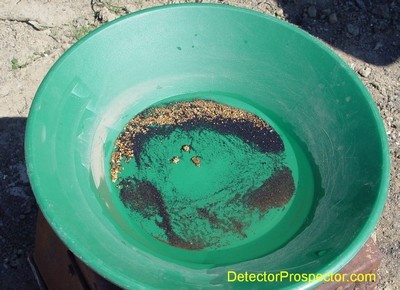 Where Do I Begin? by Ron Wendt You’ve developed an interest in prospecting for gold. A couple friends have told you how much fun they’ve had looking for gold. In this article I’ll point out the pros and cons about this activity and in the end you’ll probably have decided to what degree you want to pursue your search for gold. To begin with, it must be pointed out, there are several types of prospectors: 1 - Those who wish to dig right in as a recreational prospector. 2 - One who is serious about learning about the finer aspects of geology related to precious metals and would pursue possibly developing potential income from this endeavor. 3 - A hardcore, hand miner “give me a bulldozer, I wanna gamble.” Of course mining can be a gamble and the biggest mistake some folks make is getting too serious about it. Many times most of the fun goes right out the window when it becomes serious. What happens is the deep desire for gold becomes elusive and discouragement sets in when there are no results. Looking for gold can be hard work with few rewards. Years ago an old timer once told me; “the fellows that got rich during the gold rush were just plain lucky!” Napoleon once said that too: “I want good generals, but I also want lucky ones!” Yes, there is a lot of luck in this business. The old timer and Napoleon were right. A lot of it is luck, but a lot of it is hard work to. You can choose to enjoy it with a little reward or to not enjoy it with little reward. The truth is the odds are you won’t get rich, but you might get lucky! We all know about luck. You can go to the gambling hall and pull on the “one armed bandit,” all day and not make a dime. Such is mining and prospecting. I’ve been lucky and I’ve been unlucky. I’ve been rich and I’ve been poor. I like rich better, and I like getting lucky. Shoveling gold bearing dirt into power sluices To be a prospector you must be willing to take a risk to a certain degree. There are those who think they can go out and simply put their shovel into the ground and there it is! They believe they’ll strike it rich. I have known some who have struck it big their first few times out. They didn’t have a clue, but were in the right place at the right time. There are several things in your character you should be aware of. 1 - You should be the type of person not easily discouraged. 2 - You should not be afraid of getting dirty and not afraid of hard work. 3 - You should have a keen interest in exploring, prospecting things that are related in this field because it is all connected. 4 - Be frugal. Don’t mortgage the farm. It doesn’t take much in the way of investment to get into this “field of study,” as I call it. 5 - You should not be afraid to get wet, camp out, or endure the elements. 6 - Attitude is a major in this business of mining/prospecting. This probably goes along with “don’t be easily discouraged.” 7 - Don’t be afraid to fail. Failure is a great learning experience. 8 - Have some curiosity about what could be over the next hill or under the next rock. 9 - Be optimistic. If you’re not, you probably shouldn’t be in this business. 10 - Most of all enjoy it. Enjoy it even though you don’t get rich from it. Your reward is experience and experiences many will never have the opportunity to do. Where do I begin? First off don’t go out and buy a bulldozer, when a gold pan can simply do the trick. In other words, start out learning the basics. Those basics are the gold pan, pick, shovel, sluice box, and perhaps a sniffer bottle to suck up gold from cracks. It would be good to go along with a veteran, not only to see how it’s done but to see if you like it. I have seen many times where folks will go out and buy a $1,500 suction dredge only to sell it the next year because they probably got discouraged, when a gold pan and hand tools would have sufficed. A big majority of prospectors I know will tell you they started out small, by that I mean, small mining tools which would include sluices, gold pans, picks and shovels. Once you decide you will make prospecting your side line, one can eventually branch out into other methods. Dredging for gold There are some who will head out into the world of nugget detecting. Here’s something to think about. When you spend $600 to $1,000 on a brand name detector, before you even make a decision to buy it, ask yourself this; “Where will I use it?” This may seem like a funny question, but in Alaska and the Yukon Territory, we may have a lot of gold scattered around up here, but is it detectable and accessible? Will I be able to drive somewhere during my time off from my regular job and spend enough time detecting nuggets? Is there a location close by where gold is detectable? Am I willing to invest this kind of money to use this machine in a proven area? There’s nothing worse than buying a piece of mining equipment and not be able to get into areas that are productive. For instance, the mountains behind my house generally yields mostly fine gold and some hardrock gold. For me to get any bigger gold I must travel south of my house about two hours down the highway or 5 to 10 hours to the north to get into productive ground. I am willing to spend times going to my favorite remote spots in search of gold. So you must determine how much am I willing to put into this to get results? It’s the same with going from your gold pan/sluice operation to a high banker or a suction dredge. Are you planning on a few choice trips to areas to get results, which by the way aren’t guaranteed? My recommendation is build up your knowledge of prospecting over 2 or 3 years before investing in bigger toys. This way once you’ve established a good, possible gold source, you might feel it’s now time to go for higher production. Large scale industrial miners work in much the same way. I have a good friend who suction dredged for a few years on a creek. After taking out numerous ounces of gold, he made a decision to go bigger. From there he bought a small D-6Cat to feed a sluice box, then eventually he added a backhoe. Today he has a D-9, a bigger backhoe and a dragline. He’s been seriously at it for over 25 years. In the off season he has another job to support his “sickness” called “gold fever.” Gold found by a prospector I’ve met a few folks who complained: “Yeah, I went out for a couple hours, and didn’t get a thing. There’s nothing out there!” He immediately was very skeptical there was any gold at all out there.” I said that was fine. There’ll be more for the rest of us! I told this fellow, a couple hours does not do the trick. You have to work at it. It won’t jump up into your pan, and no one will tell you exactly where it is because they don’t know themselves where it is exactly. We have an idea, but we can’t always pin point it. Most of the time we walk right over it. I remember an old prospector from up on the Yukon River was once asked where he kept all his gold, to which he replied; “Its in a safe place in the creek!” He knew he could dig it out anytime he wanted to, but he had to make the effort. No one would get it for him. He took out enough gold to survive on most of his life. It was his lifestyle and sole occupation. Finally, recapping everything, I can’t stress enough: 1 - Start small, then gradually increase your devices to accommodate your potential production. You might advance from a sluice/gold pan to a nugget detector. You might eventually obtain all the tools of the trade, short of buying a bull dozer. The bull dozer purchase would probably indicate you’re pretty serious or you’ve got money to blow! 2 - Enjoy this endeavor. If you don’t enjoy it, get out of the business. You probably should not have gotten into it. 3 - There’s no room for discouragement. If you’re easily disappointed then prospecting is probably not for you. 4 - Expect to work hard at it. Be patient. Patience is a virtue. You will put in time of no rewards, but when they come, it’s worth it all. 5 - Don’t get greedy. If you hit it big, a few ounces here and there or bigger, consider it your much deserved reward. 6 - Don’t mortgage the farm. Never, never do this! I’ve known miners to put all their eggs in one basket and they all cracked! Unless you like living in tents on the edge of town, never gamble with your stability. 7 - Enjoy prospecting. Its one of the most fascinating occupations I can think of. What better way to enjoy the outdoors, splash around in cold water on hot days, explore old ghost towns, collect rocks, view big game, there are folks that would give their right arm to do this. A word of encouragement to those in search of gold: Practice patience, be optimistic. Always learn from your mistakes and always keep enough bug dope in your pack! by Ron Wendt 2005 Note from Steve Herschbach - Ron was a dear friend who left this world too soon. He donated this article for use on the website not too long before his health finally failed. We all miss you Ron! R.I.P. Ron Wendt 1956 - 2007 From the obituary: Ron Wendt was born April 24, 1956, in Fairbanks, in the Territory of Alaska. He was raised on his family’s homestead on Chena Hot Springs Road outside of Fairbanks and his father’s mining claims in the Circle gold fields. He developed an early interest in Alaska history by exploring ghost towns and mining camps and talking with old-timers from the gold rush era. Ron worked as a gold miner, newspaper reporter, photographer, college instructor, construction worker and custodian before starting his own publishing business, Goldstream Publications, in Wasilla. He wrote about gold rush history, modern day mining and prospecting, and many tales of Alaska. He was a member of the Alaska Miners Association, an avid baseball fan and loved to travel the roads of Alaska with his wife, Bonnie.7 points
 -
 Introducing the Makro Gold Kruzer metal detector, new for 2018. The Makro Gold Kruzer is available now from select dealers. The 61 kHz Gold Kruzer breaks new ground by being the lightest weight highest frequency waterproof detector on the market. Be sure and read the detailed review by Steve Herschbach at the bottom of this page below the specifications list. The Makro Gold Kruzer comes standard with a 10" x 5.5" concentric coil plus a 4" x 7.5" DD coil and has one optional coil available at launch. The Gold Kruzer has proprietary 2.4 Ghz wireless headphones included. The big announcement of note however is the very high 61 kHz operating frequency, making this one of the hottest machines available on tiny non-ferrous targets, and the only one waterproof to over 5 meters (16.4 feet). There are already a number of detectors on the market operating in the over 40 kHz region and the basics of this high frequency detection have been covered well for at least twenty years. In other words, if all a person wants is a detector running in a high frequency threshold based all metal mode, there are quite a few options to choose from. What makes the Gold Kruzer interesting is that as far as I can recall, nobody has made a detector before where the primary design intent is jewelry detecting. More to the point with the Gold Kruzer - detecting for micro jewelry. Micro jewelry has no exact definition but basically just means very small, hard to detect jewelry. Things like thin gold chains, or single post earrings. Most standard coin type detectors are weak on these sorts of small targets, if they can even detect them at all. Up until now people had to choose between coin detectors that have the features but are weak on micro jewelry targets, or use dedicated gold prospecting detectors hot on small targets, but very limited in features. What that usually means is little or no discrimination features. Makro Gold Kruzer for detecting jewelry, gold nuggets, and more Makro has gained attention as a company that listens to its customers. The new Gold Kruzer model is the perfect example of that, creating a unique machine based almost solely on feedback provided by customers in the last couple years. The Micro Mode on the new Gold Kruzer is a direct nod to those who want a detector for hunting micro jewelry and possibly even for gold prospecting, but who do not wish to give up the features available on most detectors today. In fact, Makro goes a step beyond, with the Gold Kruzer sporting features not included on many detectors today. These would include being waterproof to ten feet of more (16.4 feet with the Gold Kruzer), built in wireless headphone capability, and the ability to receive firmware updates via the internet. The result is a new detector with a unique feature set. There is literally no other detector made right now operating over 40 kHz that is fully submersible. Built in wireless and internet updates are frosting on the cake. Official Makro Gold Kruzer Page Makro Gold Kruzer Full Color Brochure Makro Gold Kruzer Instruction Manual Forum Threads Tagged "makro kruzer" Makro Metal Detectors Forum Makro Gold Kruzer Technical Specifications* Internet Price $636 Technology Induction Balance (IB) Frequency 61 kHz Autotune Mode(s) iSAT Intelligent Self Adjusting Threshold Ground Rejection Grab, Manual, & Tracking Soil Adjust Yes Discrimination Visual ID & Tone ID, Tone Break Adjustment Volume Control Yes Threshold Control Yes Tone Adjust Yes Audio Boost Yes Frequency Offset Yes Pinpoint Mode Yes Audio Output Speaker & Waterproof Headphone Socket Hip Mount Shaft Mount Only Standard Coil(s) 10" x 5.5" Concentric & 4" x 7.5" DD Optional Search Coils Yes Battery LiPo Rechargeable (optional external AA pack available) Operating Time Up to 19 hours Weight 3.0 pounds Additional Technology iMask noise suppression technology, backlit screen, save settings Notes Includes 2.4 Ghz wireless headphones, waterproof to 5 meters (16.4 feet) *Notes on Technical Specifications - Detailed notes about the specifications listed in this chart. Detailed Review Of Makro Gold Kruzer by Steve Herschbach I was asked to review a new gold detector in the fall of 2014 from a company I had never heard of before then – the FORS Gold by the Nokta company based in Istanbul, Turkey. I was pleasantly surprised to find the Nokta FORS Gold to be a very capable 15 kHz VLF detector that could serve well not just for nugget detecting, but almost any detecting tasks. The FORS Gold did have some odd design quirks, like the use of mechanical rocker switches instead of touch pads. I listed a few of these things, expecting that would just be the way it is. I was almost shocked when within a short period of time Nokta fixed or changed every item I had mentioned in my review as possibly needing improvement. This was unusual as normally once a machine has gone into production manufacturers are extremely resistant to design changes, especially changes in the physical design. It was a sign of what people have now found to be fact – that this company is serious about listening to their customers as a prime driver for product improvement. New Makro Gold Kruzer It was revealed that Nokta had a sister company called Makro, and the two officially combined forces shortly after I made my review. In other words, both Nokta and Makro now share the same ownership and management, but continue to be marketed separately under the two brand names. The detector models that each sell are unique, but there is an obvious sharing of the underlying technology between some models that the two brands sell. I had commented at the time that I would prefer a more standard configuration for a LCD based detector rather than the non-standard configuration as presented by the FORS Gold. By the fall of 2015 I was using the new Makro Gold Racer, which incorporated many ideas I had lobbied for over the years with detector manufacturers. I had been trying for some time to get somebody to create a metal detector that ran at nugget detecting type frequencies over 30 kHz but with a full target id system. It seems strange now but at that time nobody made such a detector. The Makro Gold Racer was quite unique in 2015 by offering a detector running at 56 kHz that also offered a full range LCD based target id system and dual tone based audio discrimination modes. This made it a detector useful not just for nugget detecting, but low conductor hunting in general for relics and jewelry. It is even a halfway decent coin detector for regular park type scenarios. The versatility and well thought out control scheme scored points with me, and I still have the Makro Gold Racer even after selling most of my other detectors. It seems that the moment the Makro Gold Racer hit the streets, that everyone else was working on similar ideas, as other detectors running over 30 kHz but with a full feature set started to appear on the market. High frequency detecting is suddenly in vogue for more than just gold nugget detecting. The one thing obvious now about the Makro / Nokta partnership is that they never sit still, but continue to work on and release new models at a pace that puts all the other manufacturers to shame. The companies are also big believers in seeking public feedback and then implementing the suggestions to create better products for their customers. This is readily apparent in the progression I have personally witnessed in going from that original Nokta FORS Gold to the new 61 kHz Makro Gold Kruzer just now hitting the market. In less than four years the company has gone from “catching up” to meeting or surpassing detectors made by other companies. ads by Amazon... It should be obvious that the Makro Gold Kruzer is all about gold. This explains the shift from dual tone to monotone audio in the Fast and Boost. Dual tones as employed in the Makro Gold Kruzer can be problematic when hunting the smallest gold targets, especially in highly mineralized ground. It is hard for a detector to get a clean separation of ferrous and non-ferrous targets when the targets are very small. This is because the actual dividing line between ferrous and non-ferrous is not a line at all, but a zone. The Makro Gold Kruzer uses a fairly standard discrimination scale that ranges from 0 – 99. The range from 0 – 40 is considered to be the ferrous range, and 41 and above non-ferrous. Yet the discrimination default for both the Fast and Boost modes is 25. This is because if you bury small gold in highly mineralized ground or large gold extra deep in mineralized ground, the ferrous ground signal can overwhelm the very weak non-ferrous signal. It really is not about the object size. A deep large nugget is a very weak signal just the same as a shallower small nugget, and either can end up reading as a ferrous target. The solution is to lower the discrimination setting into the ferrous range and accept that you have to dig some ferrous items to get all the gold items. This actually applies to any metal detecting. If you dig absolutely no ferrous trash, you are almost 100% guaranteed to be passing up some non-ferrous items reading incorrectly as ferrous. This can be acceptable of course depending on what you are doing, but passing on a deep six ounce gold nugget because it reads ferrous can be an expensive mistake. The Gold Kruzer default discrimination setting for Fast and Boost is 25 instead of 40 for this very reason. Dual tones have issues for this same reason, with decisive results on the weakest targets difficult if not impossible to obtain. The difference is quite small, but monotone is slightly more stable and proficient at working with the tiniest and faintest of signals right at the dividing line between ferrous and non-ferrous, wherever you have set the control to tell the Gold Kruzer where that line is for your particular situation. There is no pat answer as the where to set the discrimination control. It is a judgment call based on experience, but when in doubt, use less discrimination and dig more trash. Welcome to gold detecting! Makro chart showing gold occurring in 0 – 40 ferrous range The Makro Gold Kruzer has a new control that relates to this overlap between ferrous and non-ferrous readings. The Extra Underground Depth (E.U.D.) control acts to directly impact the tipping point between ferrous and non-ferrous readings. The E.U.D. control only works in one of the three discrimination modes and when used on a suspect target that is reading ferrous may reveal by a different tone that it is actually non-ferrous. It is noted in the manual that it can reveal some targets misidentified as ferrous, but it will also give more false positives on ferrous targets. I was unable in the time allowed to figure out just how efficient this control is. In theory you can just set the discrimination lower, digging more ferrous but getting those missed non-ferrous items. Or set the discrimination a little higher, and now examine suspect targets individually by engaging the E.U.D. control momentarily. Finally, you can run E.U.D. on at all times. Is higher disc with E.U.D. on at all times going to get better results than just using a lower discrimination setting? Sadly, I just do not know at this time. I do know it is no magic bullet so the efficiency of employing the E.U.D. control will have to be determined over time by users around the world What? You say you wanted tones? Well, the Makro Gold Kruzer has you covered. The new Micro mode is a three tone mode similar to that on other company models, but running at that hot 61 khz. The 0 – 40 target id range produces a low tone. The 41 – 66 range produces a medium tone, and 67 – 99 range a high tone. Micro mode allows the “ferrous break point” to be adjusted. This is that magic point where you decide what is going to read as ferrous and what reads as non-ferrous. Note that unlike the Fast and Boost modes, the default ferrous breakpoint is set at 40 instead of 25. This is good for coin type detecting but again may be too high for other types of detecting. While in Micro mode you may use the Tone Break control to vary this all important setting. You could mimic the other two modes by setting the Tone Break at 25. Now 0 – 25 will be a low tone, 26 – 66 a medium tone, and 67 – 99 a high tone. Tone Break can only be used to set the ferrous breakpoint. The upper high tone region of 67 – 99 is preset and fixed by the factory with no adjustment possible. You may use the Ferrous Volume setting to control how loud the low tone response is. The medium and high tone responses are set with the main volume control. The discrimination control still functions in Micro mode, with a default setting of ten. Hot rocks and ground responses occur this low on the scale, and so having at least some of the low end blocked or rejected with reduce the number of low tone responses generated by the ground itself. The control can be set as high as you want and will override the other settings, blocking all targets below the desired target id setting. The Makro Gold Kruzer does have a tone control, but it does not allow the tones to be changed in Micro mode. Those are factory preset, with the Tone Break between ferrous and non-ferrous plus Ferrous Volume as the two adjustments you can make. The Tone setting allows the tone of the audio response and threshold to be changed in Gen, Fast, and Boost modes only. Micro was designed first for hunting micro jewelry. Micro jewelry is a loose term that applies to all very small jewelry items, like very thin chains, single post earrings, tie tacks, etc. Micro is perfect for hunting tot lots and beaches and focusing on the “gold range” targets represented by the mid tone reading in Micro mode. Many jewelry hunters consider digging coins a waste of time, and so ignoring high tones can save digging pocket change when the real goal is a woman’s diamond and platinum ring. The Makro Gold Kruzer has a nominal non-ferrous range of 41 – 99 which is a 59 point spread. Normal U.S. coin responses are 63 for a nickel, 83 for a zinc penny, 84 for a copper penny, 86 for a clad dime, and 91 for a clad quarter. The high 61 kHz operating frequency acts to push target id numbers higher and most coins will respond at 83 and higher. I was surprised a zinc penny and copper penny for all intents read the same. The good news is the low conductor range is expanded, which offers the ability to help discern different pull tabs and other trash items over a wider range. This in turn may help eliminate at least a few pesky trash items while hunting gold, although ignoring gold range items of any sort can be risky. Still, with a U.S. nickel reading at 63 and most women’s rings reading under the nickel, you get the 40 – 63 zone as a 23 point range where much of the most valuable jewelry will turn up. The default high tone breakpoint of 66 – 67 is clearly focusing the Gold Kruzer mid-tone on this very important gold range. Do note that large men’s rings and nearly all larger silver jewelry will read above 66 and therefore give a high tone reading. The Gold Kruzer has some obvious applications but there are a couple catches. First, it is running at 61 kHz, which means it is very hot on low conductors, but that it will have just adequate performance on high conductors like silver coins. Second, its extreme sensitivity to low conductors means it will not work well if at all in saltwater or on wet salt sand. Saltwater is a low conductor and will respond quite strongly on the Gold Kruzer, and getting it to not respond to saltwater gives up all the sensitivity to small gold. The Gold Kruzer will work very well around freshwater or on dry sand, it is not intended as a detector for use in or near saltwater. I would suggest the new Makro Multi Kruzer as an alternative to those who want to hunt in and around saltwater on a regular basis. Makro Gold Kruzer with optional 5” x 9.5” DD coil There are many features I could delve into but at over six pages this report is getting long, so I will again refer people to the User Manual for the details. Suffice it to say that the Makro Gold Kruzer has a full set of features like frequency shift for reducing interference, temporary audio boost for the Gen all metal mode, adjustable backlight, and the ability to save settings when the detector is powered down, and more. I got the Gold Kruzer prototype during a period when I was quite busy and the weather was not helping. I did have time to do a few tot lot hunts plus make a trip to the goldfields to evaluate the machine. The Gold Kruzer is well behaved in urban locations, with only a little static from electrical interference sources. I found the new Micro mode to be just the ticket for quickly blasting through a tot lot recovering prime gold range targets. I dug everything as is my practice when learning a detector, and ended up with the usual pile of aluminum foil, junk jewelry, and coins. Nothing special found but no doubt in my mind that the Gold Kruzer acts as intended in this type of setting. There were no surprises in the goldfields. At 61 kHz and in Gen mode the Gold Kruzer is a real pleasure to run, with all the response and nuance one expects from a great threshold based all metal circuit. Boost Mode also works very well as an alternative for small nugget detecting. I had no problem at all finding a couple little bits of gold weighing under a grain (480 grains per Troy ounce) on my first and only nugget hunt so far with the Gold Kruzer. Two tiny gold nuggets found with Makro Gold Kruzer To sum up, the new Makro Gold Kruzer once again ups the ante at Makro. It comes standard with two coils and is fully waterproof for about the same price as the Makro Gold Racer so I would have to assume the Gold Racers days are numbered. The one thing I am not sure about at this time is that the Gold Racer has a 15” x 13” DD coil option. The Makro Multi Kruzer has the 15” coil option, but no such accessory has yet been announced for the Gold Kruzer. This is probably not a concern for very many people, but it bears mentioning. May 2019 Note: The Makro Gold Racer is still in production but the price was lowered to $509. Nokta/Makro have also produced a 15.5" x 13" coil option for the Gold Kruzer. I have no problem at all recommending that anyone interested in a detector with a focus on gold take a very serious look at the new Makro Gold Kruzer. It’s performance on low conductors of any type means that the Gold Kruzer is not just for prospectors and jewelry hunters but may also see favor with some relic hunters who focus of low conductor targets like buttons and bullets. This is a solid detector with 21st century features at a very attractive price. Makro Kruzer Color Brochure ~ Steve Herschbach Copyright © 2018 Herschbach Enterprises7 points
 -
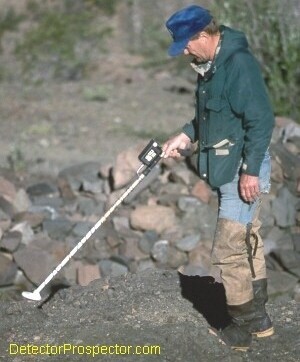 Metal detecting for gold nuggets is perhaps the most difficult type of metal detecting. That is partly because simply having an excellent gold nugget detector does little to insure success. The operator not only needs to be extremely proficient with a capable metal detector, but also needs to have general knowledge about gold prospecting and where gold is likely to be found. This short guide is intended to focus on some of the most important aspects a person should consider when starting out new in the nugget detecting game. Metal detecting for gold nuggets is the gold mining equivalent of big game hunting. Many areas produce fine gold and small flakes, but these areas will not usually prove productive with a metal detector. Only areas with larger gold nuggets will be of interest, and so many locations that are fine for panning and other types of mining will not be worth your time if you plan on going for the big nugget. Researching the area to confirm that large nuggets have been found there in the past will help make your hunt successful. While detecting may limit you to fewer sites and more time between each nugget you find, the fact is that successful detector operators tend to find gold nuggets far larger than the finds of the average recreational miner. Detecting is not nearly as physically demanding as most types of mining, and lends itself well if you enjoy roaming freely rather than working hard at a single site. Steve metal detecting for gold with White's MXT metal detector Here are a few facts and tips to get you started: Today's machines can detect gold weighing under a grain with ease. There are 480 grains per Troy ounce with nuggets under a grain quite literally being pinhead size objects. The depth of detection grows with the size of the target. A one grain nugget may be found at two inches, a match head size nugget at four inches, and a quarter ounce nugget at ten inches. Only the largest nuggets will be found at depths over a foot. Metal detectors will not normally find buried accumulations of fine gold directly. The higher the operating frequency of the detector, the more sensitive it will be to small gold, but with the penalty of also being more sensitive to iron minerals. This can result in more false signaling and difficulty of operation in highly iron mineralized areas. Lower frequency detectors are generally less sensitive to small nuggets, but handle iron ground better. Frequencies on today's nugget detectors range from a low of 3 kHz to a high of 71 kHz. Pulse induction (PI) detectors are a special type of unit that act like they are extremely low frequency detectors. PI detectors main strength is in ignoring the worst ground mineral conditions and finding large gold nuggets at maximum depths though a few models also do well on the smaller gold. Most models feature manual ground balance controls, which allow the machine to be adjusted for the general iron content of the ground. When the ground being searched is relatively homogenous, these controls require minimal adjustments and work well. When the ground being searched has wildly varying iron content or many out of place mineralized stones (referred to as "hot rocks") then these manual controls will have to constantly be adjusted to maintain proper performance. Detectors that feature automatic ground balance will require less adjustment and will have less false ground noise. The best option is to have both manual and automatic ground tuning options in one detector. Nugget detectors find all conductive metals. Most units have the ability to tune out many common iron and steel trash items. Pulse induction detectors are not so good at discriminating out trash items and should generally be considered as "dig-it-all" type detectors.. Any gold located should be treated as an indicator, since rarely will a nugget occur by itself. It is much more likely that more nuggets are nearby, and gold smaller than the detector can locate or beyond its immediate depth of detection is present. Such leads should be followed up with further excavation and sampling with gold pans or other mechanical methods, A metal detectors greatest advantage is that it needs no water, a near-universal requirement for most methods of placer sampling. Use this to your advantage to easily check material that is far from water, such as arid locations or deposits located well uphill from the stream. Large nuggets sing out with a loud signal, but since most targets will be small, train yourself using the smallest detectable nuggets your machine can find. Learn the faint but very distinct sound that small or deeply buried nuggets make. Small aluminum or lead targets can be used as an acceptable substitute for gold. Always use headphones to enhance your ability to hear these faint targets. Coil control is one of the most important aspects of proper metal detector technique. Small items may only be detected at a few inches or fractions of inches. Hovering the coil any appreciable distance over the ground is one of the most common reasons for gold nuggets being missed. The detection field projected underground resembles an inverted cone, with the deepest depth of detection in the center of the coil. At maximum depths only a tiny area is seen by the detector, and so overlapping the sweeps is important when detecting a productive area or "patch". To find gold go where gold is found! Metal detectors can be used to prospect new areas but do not expect to find much gold in areas where gold has never been found. Instead, research and frequent areas with past known production of the kind of gold you want to find. Research is a real key to success. Remember to always obtain permission to detect on mining claims or private property and be aware of any possible restrictions on public lands. Commit yourself to learning your detector. Do not make the investment if you do not plan on spending some time to properly give the method a chance. It will be time profitably spent. The one thing that sets successful detector operators apart from the crowd is their patience and persistence. They enjoy the hunt itself, and consider the day well spent even if no gold is found. Consistent success will only come with practice. I strongly believe there is no one best detector for all conditions. The best detector for each area will depend on how much ground iron is present, how large the gold is, and how much trash is in the area. Operator expertise has by far the greatest effect on success. If you purchase a second detector, having a low frequency model and a high frequency detector will give you more versatility. Identical detectors will also interfere with each other electronically and must be kept far apart, whereas differing models can work side by side. The most important accessory item you can own is a quality set of headphones. A good set will muffle outside noise, enhance the faint sounds most nuggets make, and be comfortable for hours on end. Audio quality is of extreme importance. Insist on trying several headphones with your detector before you buy. The differences can be amazing. Make sure that the headphone has its own volume controls and matches your detector for mono or stereo operation. Several ounces of gold detected at Ganes Creek, Alaska in 2010 by Steve Herschbach Other important accessories include a stout digging tool, such as a stainless steel trowel or a short handle pick. A magnet can easily pick up small steel trash items that may be found and are hard to locate exactly. A plastic scoop or cup is indispensable in helping to separate a small nugget from the soil by scooping and waving the soil over the detector search coil. Snap plastic search coil protectors over the bottom of your search coil to protect it from wear. Carry spare batteries and a plastic bottle for your finds. Check into the possibility of using a belt or chest harness with the detector control box to protect it and remove the extra weight from your arm. Do not overlook accessory search coils. Smaller search coils will be more sensitive to smaller targets while giving up some overall depth. Larger coils will produce more depth of detection on larger targets, but will lose the ability to find some smaller nuggets. Small coils are more popular and will pay off in bedrock areas in particular. They can make a detector of moderate sensitivity perform like a higher frequency detector. Large coils work well for finding oversize nuggets discarded in tailing piles. Coils are not interchangeable between models; only coils made for your machine will work with it. The chart below shows the advantages of using both smaller and larger accessory coils. Coil Size vs Depth Fisher Gold Bug 2 Source - Field Testing the Gold Bug 2 by Gordon Zahara The most important goal is to put yourself on nugget bearing ground. These areas are well documented and can be researched. Check the land ownership and contact claim owners if need be for permission to nugget hunt. If you frequent areas that have not produced coarse gold, do not be surprised at a lack of success. For information and reviews of specific metal detectors see Steve's Guide to Gold Nugget Detectors. A huge resource for questions asked past and present is this website's Metal Detecting & Gold Prospecting Forums. Be responsible! Fill your holes behind you, and remove any small trash you excavate. Proper and responsible practices will keep more areas open to us all. Do not remove gold from mining claims without permission. It is theft and may result in that claim being made off-limits to other nugget hunters. Protect our hobby so we can all continue to enjoy it in the future. Good Luck & Good Hunting! ~ Steve Herschbach Copyright © 2009 Herschbach Enterprises7 points
 -
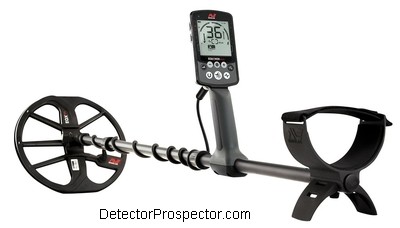 The Minelab Equinox 800 was announced in 2017 and has really made an impression in the detecting world. Never before have so many features been packed into a lightweight metal detector at such a low cost. Key items include waterproof to 3 meters (about ten feet), genuine multifrequency operation, extremely fast recovery speed, built in wireless headphone capability, and the ability to run one of several different frequencies separately from the multifrequency mode. All this and more at the stunningly low announced price of $899.00. Visit the new Minelab Equinox Forum! 9/5/18 - New Equinox Software Version Download Announcement This website tends to focus on metal detectors that have some sort of included gold prospecting capability. The Equinox 800 is of interest due to a dedicated prospecting (Gold) mode and it's ability to run at either 20 kHz or 40 kHz. The 40 kHz frequency in particular is clearly in the realm normally only available in detectors made specifically for gold prospecting. Minelab has actually released two Equinox models, the Equinox 800 (US$899) and the lower price (US$649) Equinox 600. Both have identical performance in the modes they share, but the Equinox 800 offers one extra mode (the Gold Mode) plus other advanced audio tuning features. Minelab Equinox Series Metal Detectors Minelab Equinox 600 basic features: 3 Detect Modes (Park, Field, Beach) 4 Frequency Options (5kHz, 10kHz, 15kHz, Multi) Wired Headphones Supplied Minelab Equinox 800 basic features: 4 Detect Modes (Park, Field, Beach, Gold) 6 Frequency Options (5kHz, 10kHz, 15kHz, 20kHz, 40kHz, Multi) Bluetooth Headphones and WM 08 Wireless Module Supplied As can be seen the main difference is the Equinox 800 adds the ability to employ the 20 kHz and 40 kHz frequency settings separately that could enhance the ability of the detector to find very small items. These could be small jewelry items or small/thin silver hammered, cut coins, gold nuggets, or micro jewelry. ads by Amazon... Introducing Minelab Multi-IQ Multi-IQ is Minelab’s next major innovation and can be considered as combining the performance advantages of both FBS and VFLEX in a new fusion of technologies. It isn’t just a rework of single frequency VLF, nor is it merely another name for an iteration of BBS/FBS. By developing a new technology, as well as a new detector ‘from scratch’, we will be providing both multi-frequency and selectable single frequencies in a lightweight platform, at a low cost, with a significantly faster recovery speed that is comparable to or better than competing products. Minelab Multi-IQ Simultaneous Multi-Frequency Range Multi-IQ achieves a high level of target ID accuracy at depth much better than any single frequency detector can achieve, including switchable single frequency detectors that claim to be multi-frequency. When Minelab use the term “multi-frequency” we mean “simultaneous” – i.e. more than one frequency is transmitted, received AND processed concurrently. This enables maximum target sensitivity across all target types and sizes, while minimizing ground noise (especially in saltwater). There are presently only a handful of detectors from Minelab and other manufacturers that can be classed as true multi-frequency, all of which have their own advantages and disadvantages. How does Multi-IQ compare to BBS/FBS? Multi-IQ uses a different group of fundamental frequencies than BBS/FBS to generate a wide-band multi-frequency transmission signal that is more sensitive to high frequency targets and slightly less sensitive to low frequency targets. Multi-IQ uses the latest high-speed processors and advanced digital filtering techniques for a much faster recovery speed than BBS/FBS technologies. Multi-IQ copes with saltwater and beach conditions almost as well as BBS/FBS, however BBS/FBS still have an advantage for finding high conductive silver coins in all conditions. Minelab Equinox 800 Controls Explained Note from Steve Herschbach - I have never seen a detector release that has come so close to matching up with my list of desired features. There are certain things I want in a genuine "do-it-all" metal detector. I like to hunt just about anything that can be found with a metal detector so when I think of multipurpose I really mean it. My desired detector would be waterproof and able to handle saltwater well, and that calls for multifrequency. Yet I want the detector to be hot on small gold, and that calls for a high single frequency mode. So far getting both multifrequency and a hot single frequency in a waterproof detector has not been possible. Now, in theory at least, I can use the same detector to surf detect on saltwater beaches and while looking for gold nuggets on dry land. Multifrequency also means highly accurate target id capability, but this has usually come at the cost of recovery speed. The Equinox promises recovery speeds as fast or faster than the competition. Long story short I have had to have multiple detectors for what I do as even today's so-called multipurpose detectors fall short in one way or another. The Minelab Equinox looks to truly be able to do it all and do it well, and as such represents a definite break with what has been available in the past, especially at the prices quoted. Official Minelab Equinox 800 Page Minelab Equinox Color Brochure Minelab Equinox Getting Started Guide Minelab Equinox Full Instruction Manual Equinox 600 vs Equinox 800 Minelab Equinox Essential Information Gold Nugget Detecting With Equinox 800 Forum Threads Tagged "minelab equinox" Minelab Equinox Forum New Equinox Software Version Download Announcement Minelab Equinox 800 Technical Specifications* Internet Price $899.00 Technology Induction Balance (IB) Frequency 5, 10, 15, 20, 40 kHz plus Multifrequency Autotune Mode(s) Adjustable Detect Speed Ground Rejection Manual & Tracking Soil Adjust Four Tuned Modes (Park, Field, Beach, Gold) Discrimination Variable with Visual ID, Tone ID, Notch ID Volume Control Yes Threshold Control Yes Tone Adjust Yes - High Level Of Tone Controls Audio Boost No Frequency Offset Yes (Manual & Automatic) Pinpoint Mode Yes Audio Output 1/8" Headphone Socket, Speaker, APTX Bluetooth Wireless, Minelab WiStream (aptX LL Headphones Included) Hip Mount Shaft Mount Only Standard Coil(s) 11" Round DD Optional Search Coils 6" Round DD and 12" x 15" DD Battery Built In Li-Ion Rechargeable Operating Time Up to 12 hours Weight 2.96 lbs Additional Technology Multi-IQ Technology, Screen Backlight, Minelab WiStream Low Latency Wireless Audio, Waterproof to 10 feet Notes Battery can be charged while in operation. The Equinox 800 comes with both APTX Bluetooth wireless headphones and the new Minelab WM08 WiStream low latency wireless module that may be used with any detector headphones *Notes on Technical Specifications - Detailed notes about the specifications listed in this chart.7 points
 -
These are reviews on metal detecting and prospecting equipment I have personally used over the years. In the last 50 years I have used a lot of metal detectors and prospecting gear! A lot of items are not made any longer but may be found used. In each instance my goal is to provide details and commentary not found anywhere else. For more user reviews of metal detectors visit the new Metal Detector Database. Do not miss Steve's Guide to Gold Nugget Detectors for honest opinions on gold nugget detectors updated on a regular basis. Visit the Detector Prospector Forums for expert advice. User Guides & Catalogs here. Fisher CZ Models - Some old favorites. Fisher CZX - Speculative new detector model.... Fisher F19 - General purpose VLF detector with prospecting mode. Fisher F75 - Flagship VLF model with prospecting mode. Fisher Gold Bug 2 - Dedicated VLF prospecting detector, extremely hot on small gold. Fisher Gold Bug Pro - Excellent value general purpose VLF prospecting detector. Fisher Manta - New pulse induction beach detector in the works at First Texas. Garrett AT Gold - Excellent value waterproof VLF prospecting detector. Garrett ATX - High performance pulse induction beach and prospecting detector. Garrett Infinium LS - Pulse induction beach and prospecting detector. Minelab Equinox 800 - General purpose detector with prospecting mode. Minelab Eureka Gold - Dedicated VLF prospecting detector, three selectable frequencies. Minelab Gold Monster 1000 - Dedicated VLF prospecting detector, extremely hot on small gold. Minelab GP 3000 - High performance pulse induction prospecting detector. Minelab GPX 4500 - High performance pulse induction prospecting detector. Minelab GPX 5000 - High performance pulse induction prospecting detector. Minelab GPZ 7000 - New high performance professional prospecting detector. Minelab SDC 2300 - Pulse induction prospecting detector, extremely hot on small gold. Minelab X-Terra 705 Gold - General purpose detector with prospecting mode. Nokta/Makro AU Gold Finder - Dedicated VLF prospecting detector, extremely hot on small gold. Nokta/Makro FORS Gold - General purpose VLF detector with prospecting mode. Nokta/Makro FORS Gold Plus - Excellent value VLF prospecting detector. Nokta/Makro Gold Kruzer - General purpose waterproof gold prospecting detector. Nokta/Makro Gold Racer - General purpose gold prospecting detector. Nokta/Makro Impact - Flagship VLF detector with prospecting mode. Nokta/Makro Racer - General purpose detector with prospecting mode. Teknetics T2 - Flagship VLF detector with prospecting mode. Tesoro Lobo SuperTRAQ - General purpose VLF prospecting detector. White's GMT - Dedicated VLF prospecting detector, very hot on small gold. White's GMZ - Dedicated VLF prospecting detector, hot on small gold. White's Goldmaster 24K - Dedicated VLF prospecting detector, extremely hot on small gold. White's MXT - General purpose VLF detector with prospecting mode. White's MX Sport - General purpose waterproof VLF detector with prospecting mode. White's TDI - Pulse induction beach and prospecting detector. White's V3i - Flagship VLF model with prospecting mode. XP DEUS V5 - Flagship VLF model with prospecting mode. XP ORX - New model from XP with an emphasis on gold prospecting. Comparison Reviews Garrett ATX vs Minelab GPX 5000 Waterproof Pulse Induction Detectors Compared For more user reviews of metal detectors visit the new Metal Detector Database.6 points
-
 OK, that thing on the end of a metal detector rod that goes over the ground, what do we call it? Inside that shell there is a coil of wire, some might call it a loop of wire. So you tend to hear two terms. White's Electronics liked calling them "loops" for many years but now most companies refer to them as "search coils" or simply "coils". Search coils are nothing more than an antenna built to both transmit and receive a signal. As such they are usually tuned to work on specific detectors at specific frequencies. Single frequency machines need a coil designed to work at the specific frequency they operate on. There is a bit of wiggle room, like plus or minus a couple frequencies, but not much. There are some detectors that operate in multiple frequencies, and they need special coils also. Coils made for the White's DFX, for instance, are tuned to work at 3 kHz or 15 kHz, or both. The Minelab X-Terra series is unique in that they operate at a single frequency, but that frequency can be changed by changing the coils. The detector "talks" to the coil, finds out the frequency the coil was made for, and switches to that frequency. The coils are specially made for the X-Terra. Manufacturers will often try to leverage a set of coils by making a series of detectors that all operate on the same frequency or frequencies. This is very common in coin detectors. More specialized detectors have coils that work just on that particular model and not even other detectors made by the same manufacturer. The thing is you really need to know what detector you have (manufacturer and model) to get a coil for it. Coils almost never are interchangeable between makes, so don't think about using a Tesoro coil on a Fisher. But even if you are talking one manufacturer, only a few models can interchange coils. So the White's M6, MXT, and DFX can all swap coils. But gold machines in particular tend to run at higher frequencies, so only coils made for a White's GMT will work on a GMT. Fisher is owned by First Texas as is Bounty Hunter and Teknetics, so they are a special case where a few coils can be swapped between brands, because they are all really First Texas detectors sold under three different brand names. Like GM and Chevy, the parts are often the same. Manufacturers do not always make all the coils end users want, and so aftermarket coils are common. The same rule applies however - be very sure of what detector a coil is meant to work with. Whenever checking out a detector, check out how many coils are available for it. Some nugget detectors have only two or three coils available, including the stock coil. Some have more, and more is better, as it gives you more options. For many, the only coil they will ever need is the one that comes on the detector. I'm just the opposite. I invariably run coils that are either larger or smaller than the stock coil, depending on what I am doing, so coil availability is a big deal to me. It should be to you also. Tech notes - Coil Basics by Carl Moreland About Search Coils by Dave Johnson Search Coil Field Shape by Dave Johnson ~ Steve Herschbach Copyright © 2010 Herschbach Enterprises Metal Detector Search Coil Basics Video6 points
 -
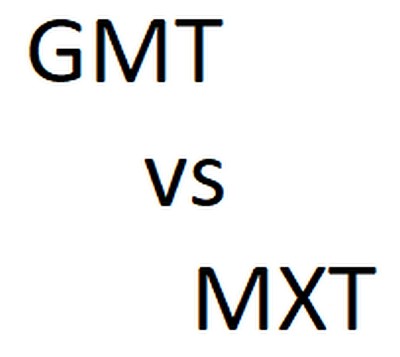 The two best-selling professional metal detectors in Alaska over the last twenty years are probably the White’s Electronics GMT and White’s Electronics MXT. This is because a set of local circumstances favored these two detectors. These two machines are based on the same circuitry, but have very different design goals and therefore features which determine which might be the best choice. Since the sole purpose of the GMT is prospecting, it operates at a high 48 kHz for extreme sensitivity to small metal items... hopefully gold nuggets. It is not a "gold-only" machine in that it picks up all metals. The "gold-only" detector has yet to be invented. It does however have a very efficient system for separating ferrous (iron or steel) items from non-ferrous items (gold, copper, silver, lead, aluminum, etc.) In theory the GMT could be used for other types of detecting, but it has a couple serious problems. First is the fact that it is so sensitive to small metal! Any attempt to use it for typical coin detecting would leave a detectorist quickly frustrated. Imagine a foil gum wrapper sucked into a lawn mower, shredded, and spread about. Parks and other areas popular with coin hunters are full of tiny aluminum trash. Every one of these items will sing out loudly on the GMT. Coin detectors are purposely designed not to pick up these tiny non-ferrous items as 99% of the time they are trash. The GMT also is very sensitive to wet salt sand, and so is useless for most beach detecting. It would not be impossible to use the GMT for other detecting tasks, but in general it really should not be considered for anything other than nugget detecting. The MXT was built using the GMT circuitry. An advanced LCD readout discrimination system similar to that on top-of-the-line coin detectors was added. The frequency was lowered to 14.7 kHz to increase the sensitivity to coin type targets and to moderate the problem of being too sensitive to tiny trash. But the frequency is still well above that of standard coin detectors which work around 6 kHz so the MXT retains much of the GMT ability to hit gold targets. The MXT has three distinct modes: Coin & Jewelry, Relic, and Prospecting. Each mode dramatically changes both the sounds and the LCD readouts generated by different targets. The Coin & Jewelry mode is very much like any standard coin detector, but with a better than normal sensitivity to gold coins and gold jewelry. The Relic mode is a rather unique dual tone mode that operates in both all-metal and discriminate modes at the same time. That alone is subject for another article! The Prospecting mode in effect turns the detector into a GMT, but one that runs at a lower frequency and that lacks a manual ground balance. And the MXT has a special Salt setting to allow it to work on those beaches. White's GMT versus White's MXT The GMT is admittedly superior when it comes to picking up small gold. It can hit specks weighing less than 1/10th of a grain (480 grains per Troy ounce) while the MXT will need nuggets weighing 2-3 grains to get a decent signal. But on the flip side, the MXT may very well be the superior unit for large nugget detecting. The lower frequency actually is smoother in mineralized ground, and in particular does not produce as many weak variations in the threshold in mixed cobbles as the GMT. The drawback of higher frequencies is that while small gold produces a sharper response, so do hot rocks. The manual ground balance on the GMT is very helpful for hitting those tiniest specks, but less useful for larger gold. If larger gold nuggets are the goal, then the MXT is every bit equal, if not better than the GMT in overall performance due to the smoother ground handling capability. It’s not that the MXT goes deeper, it just has less issues with hot rocks while still being able to hit those larger nuggets. In milder ground the GMT reigns supreme. For Alaska those wanting to go places like Crow Creek or Mills Creek and have a chance of getting gold, any gold at all, will be best served by the GMT, especially if paired with the little 4” x 6” Shooter coil. It will get the gold in these heavily hunted areas, and will hit gold the MXT will miss. But if versatility is important, or chasing large gold nuggets in tailing piles at Ganes Creek is the goal, the MXT is the way to go in my opinion. It is simply one of the best all-around detectors I have ever used. The White’s MXT Engineering Guide is full of interesting information on the development of the GMT and MXT and provides a rare look at what goes on behind the scenes at a metal detector company. ~ Steve Herschbach Copyright © 2010 Herschbach Enterprises6 points
 -
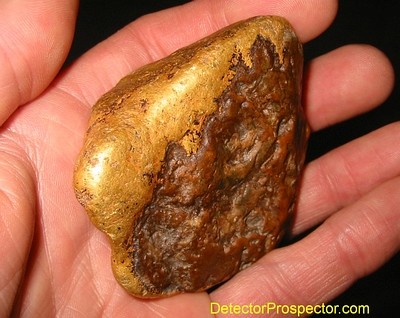 Well, here is a report on my last visit to Ganes Creek, Alaska for the year. I set myself up for this visit this spring by saying I would go to the mine after everyone had been there this year and find gold, just to prove there was still some left to detect. To show that it just can't all be found... no matter how thorough the hunters. I also wanted an opportunity to work with some new machines, and so in addition to my White's GMT I brought along a new White's MXT and Garrett Infinium LS. Brian, Jeff, and I left Thursday morning for a five day visit. We got to Ganes and settled in, then decided what to do. Brian was set on doing some prospecting with the 5" dredge Doug had purchased for visitors to use, so he was off in search of places to use it. I grabbed my new Garrett Infinium LS detector to try out, and Jeff used my White's GMT. Jeff and I headed upstream to where most of the large nuggets have been found this summer, on the theory that more were waiting to be found in the area. We scanned an area that has been heavily hunted. Three nuggets over 5 ounces were detected in the area this year, and I found out it is the same area where the 122 ounce nugget and a 62 ounce nugget were found. Definitely the center of big gold on the creek. The Infinium ran smooth and clear, so much so that I found myself waving my ring over the coil to make sure it was really working. Absolutely no signals from rocks in the tailing piles. Very odd when you are used to constant background sounds back from a VLF detector. The Infinium is a ground balancing pulse induction (PI) detector and as such it excels at canceling out ground mineralization. I got a signal now and then, and dug either a shell casing, or an iron trash target. The discrimination on PI detectors is crude at best, and so iron targets that might be rejected with a VLF (Very Low Frequency) will often be signaled as "good" on a PI detector like the Infinium LS. The basic idea with PI detectors is to go ahead and dig everything, although this can be problematic at a place with so much junk as Ganes Creek. I found the shell casings encouraging however, as that meant that not everything had been detected. I figure if non-ferrous items like bullets and shell casings are being missed, then some gold has also been left behind. Still, the area had been well searched, and the finds were few. I finally located a 13.8 dwt (dwt = pennyweight) nugget, and then a 3.8 dwt nugget (20 pennyweight per ounce). Two very nice, relatively solid gold nuggets. The Infinium had done its job. Jeff, although he tried his darndest, came up with no nuggets. The area has been hammered pretty good. We also tried some old tailings upstream farther, but found no more gold that day. Gold nuggets found with Garrett Infinium at Ganes Creek Day Two dawned under rainy skies. We decided to stay near camp, and see if there were more nuggets waiting to found around the cabins. I grabbed the new White's MXT, while Jeff stuck with the GMT. The rain got going pretty good, but we stuck with it. Lots of bullets and shell casings were dug, again, a good sign. But by the end of the day we had no nuggets. We headed up to the bench deposits above camp and found some small nuggets, just so we could say we did not get skunked. Jeff found a nice little nugget over a pennyweight with the GMT, and I got a few tiny bits. The MXT is a brand new detector from White's Electronics. Steve Houston from White's had a prototype MXT along on his visit to Ganes Creek in the spring and I had a chance to use it then. We both agreed then it had all the right stuff for finding gold at Ganes Creek. We did not use it much, however, as time was limited and we stuck with more familiar detectors. I have to note that I was very impressed with the MXT around camp. I used the 6" elliptical coil, and ran the unit in the relic mode. This mode, when set up a certain way, gives a high tone on non-ferrous targets, and low tone on iron targets. A setting right at "2" seemed to be the point where ferrous and non-ferrous sorted out with low and high tones. It was easy and efficient around camp, and all I dug were non-ferrous items. It has very good trash separation with the small coil, and easy id with the dual tone system. Great for places where trash is literally inches apart. Brian had set up in the ditch near the big nugget area, but was plagued with start-up problems with the gear, especially a leaky pump intake hose. He spent most of his day just getting set up and getting the dredge operating. Brian running suction dredge at Ganes Creek The weather cleared up the third day. Jeff again ran the White's GMT, and I the MXT with small coil as I had been impressed with it the day before. We started in camp, and I found a small nugget just behind the cabins. Then we tried some of the dragline piles above camp near where I found my 4.95 ounce nugget last year. I switched the MXT to the 950 9.5" coil. Both Jeff and I came up with nuggets weighing several pennyweights each. So far we were not exactly knocking down the nuggets. Frankly, we were both both a bit puzzled, as our constant digging of bullets indicated nuggets were still to be found. You simply can't dig all the gold while leaving the bullets in the ground. But results were lean, and our enthusiasm was flagging. I'm a big fan of aerial photos, and had some new ones showing an area downstream opposite the old bucket line dredge machine shop. Long rows of old bucketline tailings ran far back away from the road, and so I suggested we go down and check them for a change of pace. Jeff was running the White's GMT with the Sierra Max 14" coil, and I ran the MXT with stock 950 coil. The more I used the MXT the more I liked it. On the cobble piles I ran in prospect mode, with full gain, minimum V/SAT setting, and in automatic ground balance. The 14 kHz frequency ran smoother on the mixed rocks of the the cobble piles than a higher frequency detector like the White's GMT or Fisher Gold Bug 2. They tend to get weak signals of rocks because of their higher operating frequencies. The MXT was definitely smoother in the cobble piles than the GMT. We followed an old trail we had followed last year. I concentrated on the edges, off the main trail in the edges of the cobble piles near and in the brush. I got a good, clean signal, and gave a couple digs with my pick. The moss and rocks flipped back, and there lay a large gold nugget! I did not get as excited over this one as my 4.95 ounce nugget last year, as I was not sure exactly how large it was. Jeff, however, knew immediately it was something to jump up and down over. And he was right, as upon weighing it came in at 6.85 ounces. My largest nugget ever, and the largest found at Ganes Creek by visitors with metal detectors this summer. Sorry guys, but you left a big one for me to find! 6.85 ounce "Ugly Nugget" gold specimen from Ganes Creek - found by Steve H with White's MXT The nugget is strange, with very dark, lustrous quartz encasing a solid gold core. The quartz is almost like agate. Fingers of dendritic (leaf) gold reach up from the gold core into the quartz shell. It's a very unique nugget, but I'm hard-pressed to say if I like the looks of it. It has more quartz showing than gold. Some people say it really looks good, others say it's ugly. Oh well, all I know is it weighs more than any other found this summer. And that's remarkable considering the number of people over the ground, proving you just can't get them all. Side view of "Ugly Nugget" showing wispy dendritic gold Brian's initial dredge hole in the ditch near the big nugget area did not get him excited. A bit of small gold, but no bedrock, and no large nuggets. So he decided to move to a point of bedrock sticking out into the current location of Ganes Creek. The creek has been moved to the north side of the valley, which is reputed to have poor gold, but Brian wanted to check it out. At least there was bedrock showing he could get at. The next day (Day Four) Jeff took the MXT, and I went back to the Garrett Infinium LS. I wanted to put its ground canceling capabilities to use on the cobble piles, and Jeff wanted to see why I had grown so infatuated with the MXT. What's not to like about a machine that had found me my largest nugget ever? We searched far into the edges of the cobble piles along the creek. Our search led us way out on the dredge cobbles as far from the road as we could get, opposite the old dredge machine shop. There were no signals for some time, as many of these old cobble piles are relatively trash free. I was ahead of Jeff a bit, and so sat down to wait while he scanned up to me. Then he gets a signal in the middle of the cobble piles. The MXT said only 10% chance it was iron. VDI number of 55, exactly what it called my large nugget. No signal for some time, in big cobble pile... man, this looked good. He dug and dug. Got to over a foot. All indications were still good. I was getting excited, and came up to take pictures of the big find. And literally cheer him on, as he was getting a bit grumpy about the depth of the hole. The cobbles kept caving in, which can be very frustrating. And I'd exclaim "But Jeff, this is just how digging the two-pounder will be"! Jeff excavating large "gold nugget" that turned out to be a rusty can So at two feet, there is the quart paint can. Oh well, such is nugget detecting. Those large steel targets at depth really baffle discrimination systems. What is interesting, however, is I tried the Infinium out on the can, and it did call it an iron target! It seems the PI discrimination system does work well on some items that have problems on the VLF systems. The thing about VLF discrimination is it will sometimes call ferrous items non-ferrous so you dig some junk. With PI discrimination the problem is more serious - a gold nugget can easily be identified as iron, especially the large nuggets, so it is dangerous to use PI discrimination where large nuggets lurk. In any case, I sure like to see other people find gold. I always get excited when anyone finds gold, because it tells me there is more for me to find also. It's when nobody is finding gold that I get worried, and today was turning into one of those days. One the other hand, if I go out with Jeff one more time and find a big nugget, I'd best not turn my back on him. I'm likely to get hit over the head with a detector! Since we were having no luck for the day so far we decided to switch gears. Back to the old reliable airstrip to find nuggets. I've found if I'm just patient, dig lots of bullets, I can always find gold on the airstrip or around camp. But since the Infinium has minimal discrimination, and digging the compacted airstrip material is a lot of work, I switched to the GMT. Jeff stuck with the MXT. Before an hour was up Jeff found a 12.2 dwt nugget. Shortly after I found a 2.7 dwt nugget with the GMT. We both had nuggets for the day. Jeff's was a very nice, nearly solid gold piece. Mine was a broken, very quartzy nugget. Still, that seemed to be it, although we dug a small pile of bullets and shell casings. We headed up to the bench deposits above camp once again to look for smaller gold. The MXT is a great detector, but the difference in operating frequencies was obvious. We scraped areas free of overburden over the bedrock, and checked them with the detectors. The White's GMT with it's 48 kHz operating frequency had an obvious edge over the 14 kHz White's MXT, even considering the fact that the MXT was using the more sensitive 6" elliptical coil versus the 10" elliptical coil on the GMT. We dug a couple pennyweight of small nuggets, but the GMT clearly got better signals on the small gold. Small gold nuggets found with White's GMT Brian again found little gold with the dredge, and decided to wrap it up for this trip. He had his work cut out for him pulling the dredge out of the creek and getting all the gear put away. Day Five dawned a bit cloudy and cool. The only real good thing about this time of then year is the lack of mosquitoes. The cool nights have driven them off, and so our days were relatively mosquito free. A few biting flies replaced them, but not so many that I ever had to use a head net this trip. Cold weather has it's advantages. Since we were leaving that afternoon, we made a short day of it. I had pulled my left arm out of joint, and so was down to digging only targets that gave perfect id. We did a little detecting in the pile of material near the ditch in front of camp. This pile has produced several nice nuggets, and been heavily detected. But Brian is short order found a nice weighing several pennyweight with the White's GMT. It ended up weighing more than all the gold he got dredging on the trip. The weather cleared as the day went on, and I decided to spend my last few hours up in the big nugget area near the ditch. I ran the GMT again while Jeff used the MXT. I hit the road itself real hard, as I saw no signs that it had been detected much. But Ganes had given us all the gold it was going to this trip, and we went in early to pack and clean up our cabins. It may be I missed out this last day simply because I passed up lots of targets I normally would have dug. Well, it was a fun trip, with over 9 ounces of gold found. Even discounting the big nugget I found over an ounce of nuggets, with the largest being 13.8 dwt. Jeff found about an ounce with his largest at 12.2 dwt. Good-sized nuggets remain to be found, and even a few clunkers. Still, the easy pickings are gone, and it will take patient detecting to get results at Ganes Creek now. There are actually many miles of undetected tailings running upstream above the more recent workings. The areas are generally lightly brushed over, with some large open areas. A few brief exploratory runs into these upper areas have produced no real finds, but the area is vast in extent, and worth attention in the future. A talk with Doug revealed that next season there will be a lot more work done with bulldozers to make areas "fresh" again. The good news is many worked areas will be rejuvenated in this way. The bad news is you guys that did not dispose of your trash properly... well, it's just going to be there to dig up again. The future at Ganes creek is more likely to be a mixture of working material freshly turned over, and then wandering off searching for those missed areas. Finally, the detectors themselves. I like the Garrett Infinium LS. It has great bang-for-the-buck in the PI department. Its current lack of accessory coils is the only thing really holding it back at the moment. I see the Infinium as being the machine I will turn to when my normal VLF detectors won't do the trick. Ganes Creek is really not the best area for PI detectors, as the low mineralization and lack of hot rocks means the PI units have no real edge over VLF detectors. The White's GMT is slowly becoming my primary nugget detector. I've favored the Fisher Gold Bug 2 the last few years, but the extra versatility of the GMT is causing me to use it more and more. The extra depth on large gold versus the Gold Bug 2 is the big plus at Ganes Creek. The machine that really wowed both Jeff and I was the White's MXT. It's the first detector I've ever used that I really think "does it all". Now, while it bench tests well on small gold, frankly it does not hold a candle to the GMT when it comes to very small gold under actual field conditions. If small gold is your bread and butter, the GMT or Gold Bug 2 are still the way to go. Not only do the higher frequency detectors have an innate edge, but the manual ground balance offers better control for small gold. The MXT must be auto ground balanced, then "locked". The GB point is then fixed, but it cannot be manually adjusted. The GMT has automatic and manual ground balance, while the Gold Bug 2 is manual only. Steve's Gold - 8.15 Ounces Total But the MXT does do very well on nuggets weighing a few grains or more, and the bigger the gold gets, the less difference there is between the MXT and GMT. Frankly, for nuggets weighing in pennyweights or more, I actually prefer the MXT. It operates smoother than the GMT in mineralized ground, and has depth as good as, and maybe under some circumstances better than, the GMT. It's a great machine for large nugget hunting. Combine that with the fact that it has a vastly superior id system, with both iron readout and conductivity measurement, and you can actually do things like tell most gold nuggets from a .22 shell casing. I actually used the relic mode with the small coil on the MXT to work extreme trash areas to good effect. This machine has lots of potential to explore, and yet is very easy to use. Add in the the fact that it has a 6.5" x 4" elliptical DD, 5.3" round concentric, and 10" x 5.5" elliptical DD coils available as options, and I think the MXT is now the machine to beat for all-around use. And despite it's wealth of features, it's list price is only $799.95. I think we will be hearing a lot more about the MXT in coming years. ~ Steve Herschbach Copyright 2002 Herschbach Enterprises6 points
 -
 From original forum post 5/27/2008 updated 2/14/2010, 1/13/2013 and 1/3/2014 The White’s PulseScan TDI is a ground balancing pulse induction (GBPI) metal detector and as a rule these detectors are considered “dig-it-all” type detectors. The TDI, however, has a number of manual controls that can be adjusted to allow for a degree of discrimination not normally found in PI units. Most normal pulse induction (PI) detectors have a monotone audio response on targets. In other words, the soft threshold tone simply increases in volume in relation to the target strength. All target sound more or less the same, the only difference being a stringer or weaker audio response. This makes things real simple - you just dig everything. Ground balancing pulse induction, or GBPI detectors, employ a method of ground rejection that in current models has an audio side effect. Tones are produced in relation to the current ground balance setting. In the case of the Garrett and Minelab models, a dual tone is produced by a single target. Either a high-low tone or a low-high tone, depending on the target and how it relates to the current ground balance setting. The White's TDI has a simpler response on a single target, either a high tone, or a low tone. The targets and the tones they produce fall into two broad categories. In general one category has low conductive items, like aluminum, US nickels, most gold, and small ferrous trash. On the TDI these items produce a high tone. The other category has highly conductive items including clad, copper, and silver coins, silver rings, some large gold rings and very large gold nuggets, and large ferrous items. The ground balance varies depending on the ground itself but usually is around the same as zinc pennies, and therefore these may read in either category. Other settings, such as the pulse delay on the TDI, can also cause items to vary. The following photo shows how the two target categories break down digging around school yard playground equipment. Coins found with GBPI detector Left side high tone targets, right side low tone targets As you can see in the photo the vast majority of targets produce a high tone response. What is lacking at this location is large nails. Large nails will give a low tone response and so would end up with the coins on the right. Still, by digging low tones only, the vast majority of trash targets can be passed up and excellent results had on deep copper and silver coins. The following photo shows what might result digging low tones only in a park setting. Coins and nails detected with PI Low tone only targets The icing on the cake with the TDI is the Target Conductivity switch. Normally you would have to listen to all the tones the detector produces, the vast majority of them being high tone, to pick out the much rarer low tones that would possibly indicate a deep coin. The Target Conductivity switch allows one response or the other to be suppressed, and by selecting for high conductive low tones only, the TDI operates very quietly in very trashy environments. This value of this feature cannot be overstated, and it makes the TDI a secret weapon for pulling coins out of extremely mineralized ground where VLF detectors would fail. The TDI can go even farther, because unlike the Garrett and Minelab models it features a manual ground balance. This means that in milder ground conditions the ground balance control can be purposefully misadjusted to directly affect target tone responses. This method was passed on to through comment from Reg Sniff and George Kinsey so credit goes to them for turning me on to this. The method involves purposefully misadjusting certain controls to get results and I’m not saying these are the best settings per se. I would encourage more experimentation to see what you can coax from the Whites TDI as I have not seen a detector so prone to experimentation and yet with relatively few controls. This is not a VLF detector and so lessons learned with VLF detectors often do not apply, and in fact could get in the way of understanding the TDI. Have an open mind and experiment. I highly recommend the use of a PI pinpointer with the Whites TDI. You need some serious pinpointing power. The DetectorPro Uniprobe units are very good, but you may need to switch the TDI off when employing the Uniprobe pinpointer if the TDI interferes with the Uniprobe. Coiltek makes a 1” probe with switch box that can use the TDI itself as the pinpointer as another option, along with the more common self-contained pinpointers like the Garrett Pro-Pointer. With the unit powered off, set the TDI Gain at 12, Pulse Delay at 10uS, Ground Balance knob at 1.5, GEB switch On, Target Conductivity On, and then turn the unit Power On. Set for a faint Threshold. If you are getting any interference (uneven threshold, warbles, and funny noises) slowly run the Frequency knob through its range seeking the quietest setting. Then flip the Target Conductivity switch to High. The threshold should go extremely smooth. If you get spikes or noises breaking through the normally rock solid threshold you may need to reduce the Gain. But usually at this point the threshold will be so smooth and solid you will find you can reduce it so low as to be barely heard. Now try waving various steel items and coins a few inches under the coil and note the responses. You will see that most steel and iron, aluminum, and bottle caps will not signal. Beyond that, there are three basic responses. First, hold a coin 6-8 inches from the coil. Note the soft, sweet tone, woo, woo. Listen to it over and over, as this is your deep coin signal. Now run a coin or larger steel item within 1 inch of the coil. You will get an overload signal, a strong baaaaawo, baaaaawo. This is the shallow item overload signal. If you are trying a steel or iron item, increase the distance from the coil. Note that at a certain distance it abruptly cuts off. Now try a coin and slowly increase the distance from the coil. It will gradually turn into that sweet coin tone. The way you tell shallow coins from shallow junk is to slowly raise the coil. If the target just cuts off – junk. If it slowly mellows out – dig! OK, let’s go detecting. What follows is the results of an outing using these settings. Listen for that sweet, deep coin sound. Those are the oldies and you main goal. In some hunted out parks this may be about the only signal you get as there are no shallow targets to generate to overload tone. Just go dig coins. Walk around each target and insure it gives a good, clean response from all angles. Be sure and use proper digging practices to leave the ground undamaged. Please protect our hobby. In other places you will get lots of overload signals. If all you care about is deep coins, ignore them. If you want, however, just raise the coil while sweeping, and if the signal cuts off, skip it. If it fades to the deep coin tone, use your pinpointer and there should be a coin within an inch or two of the surface you can just pop out. The Target Conductivity switch can be set too All to investigate questionable targets and to size targets. A pipe buried horizontally will have a high tone its entire length but a low tone at each end. When you walk around these in the High setting you will only hear the low tone and think it is a coin, but they tend to fade in one direction as you walk around them. If the target seems iffy, switch to All and see if you are picking up the end of an elongated iron or steel item. This false positive can occur well off the end of the pipe and so if you dig and nothing is there you may be off the end of a pipe or rebar. This is where a top notch pinpointer comes in handy. The Pulse Delay seems to be most critical, and if you set in much higher than 10uS the ability to ignore iron is lost. But when it is working right the iron rejection is amazing. Try walking up to a garbage can or other large steel item. You will get no signal until you get close enough to overload the unit. Not only does the unit ignore iron, but nearly all aluminum and bottle caps. The only ferrous target I found was a very rusted bottle opener buried vertically in the ground. If flat it is rejected but the TDI does pick it up if held vertically. I never did dig a bottle cap. I did get two aluminum screw tops that gave the shallow overload and that then sounded like shallow coin when the coil was raised. I got one older aluminum screw cap that was not deep or shallow so I checked it out. I also got positives on two copper wires, two chunks of broken heavy aluminum, an aluminum grommet, and a copper screw cap. Coins found with White's TDI Oh yeah, I found 39 coins. Including three silver dimes and three wheaties so they were not all recent drops. That is 39 coins to 10 trash targets using a PI detector in a turf setting. That is a four to one ratio, and when hunting the deepest targets no worse than a VLF. Better yet, the targets that fooled me were not exactly bad targets by deep detecting standards. There was a time I would have said this was impossible with a pulse induction metal detector. I really did feel most of the junk was iffy but I wanted to check as I am learning. Coins sound oh so sweet and when I’m 100% sure it is a coin it almost always is. What else to say? The GB control is in effect the discrimination control. It is all about setting the Pulse Delay, the GB control, and the Target Conductivity switch to get the best balance of depth and iron rejection. The iron rejection tends to be best at low GB settings, and in high mineral settings best depth is at high GB control settings. If you have no clue what I’m trying to say, you are not ready for the Whites Pulsescan TDI. In high mineral conditions you are trading max depth for max iron rejection. You have to set the unit for the best balance for your conditions. But if you get it right, hold on. This detector is like no PI you've ever used. I have been able to run the Gain very high. I’m sure not everyone can based on where they are. So experiment, experiment, experiment! What about coils? Things might change depending on the coil you use. To summarize the TDI can find coins using two different methods. The simplest is to just run the detector tuned for best depth and dig low tones only. In high mineral ground this will produce coins VLF detectors have been unable to reach while passing on most common trash. The second method makes the TDI into a very effective coin detector, but the misadjustment of the ground balance ends up giving up the extra depth attained with the first method. Still, it does something no PI has ever been able to do before, and that is to find coins with nearly as much efficiency as a VLF detector. I do not want to give the impression I am pushing the TDI as a coin detector. If you want a detector strictly for coin detecting I suggest you get one to do just that. The real point of this article is to highlight that the TDI is a unique detector prone to experimentation. It is a machine for more serious detectorists willing to think outside the box. For those willing to dig some junk and having locations that favor the method, digging low tone targets will find deep coins missed by the best VLF detectors. The main use for the TDI is still nugget, beach, and relic detecting, make no mistake about that. But if you have a TDI , it can pay to experiment with it as there is really nothing else quite like it on the market. Thanks to Eric Foster and White's Electronics. White's TDI Information Page ~ Steve Herschbach Copyright © 2008 Herschbach Enterprises6 points
 -
 The Fisher Gold Bug Pro was released in 2010 and is still in production. It is the final version of a series of new digital Gold Bug releases intended to replace the older analog Gold Bug models. The easiest way to tell the new Gold Bugs from the old Gold Bugs is that the new models sport a prominent digital readout. The model is also marketed separately by First Texas, Fisher's parent company, as the Teknetics G2. The G2 has a different rod and handle assembly and comes standard with the 11" elliptical DD coil for slightly more money. The Gold Bug Pro comes standard in three versions - with a 5" round DD coil (actually 4.7" diameter), or with the 7" x 11" elliptical DD in which case it is called the Fisher Gold Bug Pro DP. Finally, there is a dual coil package the includes both the 5" round DD coil and the 5" x 10" DD coil. In addition to the three coils mentioned here DeTech markets the 13" Ultimate DD coil for the G2 that will work on the Gold Bug Pro. For more information see the Guide to Different Versions of the Fisher Gold Bug. I have come to rely on the Gold Bug Pro as my general purpose prospecting detector for when I want a unit that can handle trashy areas. I appreciate its light weight and simplicity in getting the job done. I prefer to run the detector in all metal mode for the best depth and sensitivity. The nice thing is that the meter always displays possible target ID information to help make digging decisions without having to switch or toggle to another mode. This is far more efficient in the field not to mention wear and tear on switches. I prefer the 5" x 10" DD coil for general use - it is too bad Fisher does not sell the Gold Bug Pro with that as the stock coil. The only way you can get it is as a package deal or as a separate accessory item. The only thing I wish was that instead of displaying the ground phase as a large number while in all metal mode the Gold Bug Pro instead displayed the possible target ID number. The target ID is displayed on a small "racetrack" display above the ground phase number. I rarely if ever need to know what the ground phase is but I constantly refer to the target ID. Hopefully this will be addressed in future versions. Fisher Gold Bug Pro - Gold Bug DP variant (7" x 11" DD coil) I normally hunt in all metal. The detector hits all targets with the same audio signal except the stronger the target, the stronger the signal. There is a little "speedometer" target id readout in all metal above the big ground phase reading and so after hearing target I work it and eyeball the reading. If you get no target id it is target deeper than disc can hit (all metal prospect mode goes deeper than discriminate mode) so dig until you get target id or target. You need to decide on what target id to dig and what to pass. In theory all 40 and above is non-ferrous so in theory just dig all 40 and higher. Reality is small gold or very deep gold can read iron. I usually opt for digging some iron, and so depending on types of ferrous trash and ground mineralization the actual number I choose may be 35-39, usually 38. Then, and this is key, work the target. If the number bounces even once to or above your chosen break point, dig. The numbers bounce around, and if they consistently read at or below your chosen reject number, for example 38, if the number is always 38 or lower pass it up. If it bounces even once to 39 or higher dig it. Again, number picked depends on actual ground conditions. Start lower, maybe 35, then adjust upwards after digging targets. As long as you are not digging too much ferrous stay put but is too much digging adjust higher. VLF discrimination can and will lie on small or deep gold so better conservative and digging at least some ferrous than leaving gold. Fisher Gold Bug Pro with 5" x 10" elliptical DD coil Ok, let's assume too much trash, to many signals to analyze each one. Go to disc mode. Immediate depth loss! But now we can set target id audio break point. The unique tone disc system has three tones, mid tone, low tone, and no tone (target rejected). You can move range but it is not totally adjustable. The low tone area compresses as the disc is set higher. If you set low tone cutoff at 30 all target below 30 make no sound at all and all passed up. You never know they are there. 30 to about 55 will be low tone, meaning most gold and small ferrous, 56 and above will be mid tone, usually brass but maybe big nuggets. There is no high tone on the GBP. You can adjust this potential gold tone range to a certain extent. Set at 35 and nothing below 35 reports, 35 to maybe 60 (doing this from memory so may be off a bit on the numbers) will be low tone, above 60 mid tone. Or if trash really is bugging you set at 39 so only 40 and above beeps. But because some targets read mostly ferrous but bounce non-ferrous at times it is a fuzzy choice. If you set for 40 and above and small nugget reads 38 on first pass, you miss it and never know it was there. At the end of the day it depends on trash level and how much target analyzing you want to do in the fuzzy zone. Most small nuggets actually read around 50 but again all depends on gold size, shape, purity, ground mineralization and other factors. ads by Amazon... Lots of nuance in what is a deceptively simple detector. The more I use it the more I appreciate it. In all metal with 11" x 7" DD it approaches PI depths on most average size gold in moderate to mild ground. I very much like having the dual ability of hunting in all metal while having visual target id. No toggling back and forth. I not only use the Gold Bug Pro for prospecting but for jewelry detecting. It is a not the best coin detector in the world but does well, especially in trashy areas with the little 5" coil. All in all a great little machine, one I can swing high and low all day long with little fear of arm strain. I highly recommend the Gold Bug Pro for anyone looking for their first nugget detector or for old pros like myself wanting something light, simple, and effective. Official Fisher Gold Bug Pro Page Download the Fisher Gold Bug Pro Instruction Manual Here Guide to Different Versions of the Fisher Gold Bug Forum Threads Tagged "fisher gold bug" First Texas (Fisher) Metal Detectors Forum Fisher Gold Bug Pro Technical Specifications* Internet Price Basic Gold Bug $499 / Pro $549.00 (5" coil) or $599.00 (7" x 11" coil) Technology Induction Balance (IB) Transmit Frequency 19 kHz Autotune Mode(s) Pre-Set Slow Motion Ground Rejection Manual Touch Pads with Grab Function Soil Adjust No Discrimination One turn control, Visual ID, Tone ID Volume Control No Threshold Control One turn control Tone Adjust No Audio Boost No Frequency Offset No Pinpoint Mode Yes Audio Output 1/4" headphone socket & speaker Hip Mount No Standard Coil(s) Choice of 5" round DD or 7" x 11" DD Optional Search Coils Many accessory coils available from Fisher and aftermarket Battery One 9V Operating Time 15 hours Weight 2.5 pounds with 5" coil Additional Technology Continuous ground phase readout Notes Also available as 5" plus 10"x5.5" DD two coil package for $749 *Notes on Technical Specifications - Detailed notes about the specifications listed in this chart.6 points
 -
 The Garrett ATX was introduced by Garrett Electronics in 2013 and is still in production. It is a pulse induction metal detector waterproof to ten feet. It is unique in that it is one of the few metal detectors retailed to the general public in a housing developed for military applications. Garrett makes a military land mine detector called the Recon Pro AML-1000. It was developed and marketed after the Garrett Infinium, the only underwater ground balancing pulse induction (GBPI) metal detector made by a major manufacturer at the time. The Recon is notable for the waterproof telescoping compact design with hidden coil cables. The new ATX is a highly refined detector combining the best of the Garrett Infinium and Garrett Recon AML-1000 into a single package. The actual housing is almost identical to that used by the AML-1000. The electronics has attributes from both detectors. It is a considerable improvement over the much older Infinium electronically and folds into a remarkably small package without disassembly. I was one of the first individuals to obtain a Garrett ATX when they came out as I had been waiting for a new waterproof ground balancing pulse induction metal detector ever since the Infinium came out over ten years ago. I honestly was a bit surprised Garrett came out with a second generation waterproof GBPI before the competition has released any at all. Ground balancing PI detectors have the ability to work in a combination of salt water and black sand/hot rock environments in unique ways. VLF and even standard non-ground balancing PI detectors suffer under these extreme conditions. The Infinium showed me what might be possible in Hawaii but it suffered from issues common in first generation detectors. There was room for improvement, and I am hoping the ATX addresses the electromagnetic interference (EMI) and salt water instability problems that plagued the Infinium. My first impressions were positive, with my first detailed report at Gold and Silver with the New Garrett ATX. I have a separate article on prospecting with the ATX at Gold Nugget Detecting with the Garrett ATX. The ATX is a versatile detector and will see use prospecting, relic hunting, jewelry detecting (above water and under) and even coin detecting. I have two beach detecting articles on the ATX - Beach Detecting in Hawaii With The ATX and Garrett ATX Return To Hawaii. Garrett ATX waterproof pulse induction (PI) metal detector with 10" x 12" coil The Garrett ATX is uniquely versatile in its physical aspects. It can be extended longer than most people need yet can collapse into a very short diver configuration due to the three piece lower rod design. Garrett ATX collapsed for diving use For storage or backpacking the ATX folds even shorter yet to only 20" in length due to the rotating/folding coil design. The ATX coils are rather unique in that they are integrated with the lower rod with the wires running through the rod and a rear mounted hinge on the coil. This allows the coil to fold back completely over the rod and/or detector body. The rod/coil assembly can be rotated 90 degrees for hunting walls and to enable a more compact stowed configuration. Garrett ATX folded for storage or backpacking All the ATX functions are accessed through a top mounted control panel with rubber topped touchpad buttons and LED indicators. A shift button allows each button to have at least two functions allowing for a full feature set in a simplified layout. Garrett ATX Control Panel Quick Guide to Garrett ATX controls from Owner's Guide - Click image for larger version The Garrett ATX comes standard with a 10" x 12" DD search coil. Optional 8" round and 15" x 20" mono coils with integrated lower rods are also available. New for 2017 are 11" x 13" enclosed coil options in both mono and DD designs. The ATX does have a built in waterproof speaker and so does not require headphones. It does come with land headphones that use a waterproof connector, the same connector that Garrett uses on the Infinium and AT Pro/AT Gold models. The same waterproof headphones available for those models work on the ATX and are required if it is desired to put the headphones underwater. The included headphones have a waterproof cable that can be submerged but the headphones themselves must be kept dry. A short adapter dongle is also available to convert the ATX waterproof headphone connector to the standard 1/4" female receptacle so standard metal detector headphones may be used. See the Garrett ATX Accessory Page for details on headphones, search coils, and other accessory items available for the Garrett ATX. There is information there on using Garrett Infinium coils on the ATX, and notes on how to chest mount or even backpack mount the ATX control box. Finally, the ATX runs off eight standard AA batteries, eliminating any shipping or airline issues that can be a problem with some PI detectors. The detector comes complete with both alkaline and NiMH rechargeable batteries plus a 110V and 12V charger system. The detector runs approximately 10-12 hours on a charge when using headphones, less if running off the speaker. The best method is to use the rechargeable batteries and carry the alkaline set as backup. Garrett ATX search coil options I have had the Garrett ATX now since the fall of 2013 and so have had a solid year with the detector. It really does take about a year for me to settle down my thoughts about a detector. I tend to be all giddy with the new toy at first, having fun, and discovering new things. The strong points and weak points are revealed with use over time, and now I think I can offer up a fair summary of the detector. The ATX is a bit difficult in that Garrett started with the premise of using an existing housing designed to military specifications, and then decided to put a detector in it for consumer retail sales. On one hand this is really great as we get this very unique detector design that would never have been developed just for consumer sales. On the other hand it means for some uses the ATX is just not a very good fit. For other uses it works pretty well. It just so happens I am an avid prospector and an avid beach hunter. I do not beach hunt as much as I like but when I do it I really go after it. Because of this the ATX hits a particular sweet spot for me personally. I really do need a good pulse induction metal detector that can be submerged in saltwater. I would keep the ATX for that purpose alone. I am very happy with its performance as a beach detector especially on beaches where there is black sand mineralization or volcanic rock to deal with. The fact it also does very well as a prospecting PI is almost a bonus for me. From a straight up prospecting perspective Garrett also scores though nobody needs a seven pound detector waterproof to 10 feet while desert prospecting. However, if all I had was a couple thousand dollars to invest in a brand new, full warranty PI for gold prospecting it would be a Garrett ATX. I believe the ATX is superior to the White's alternatives in overall performance and it is far less money than a new Minelab PI detector. I will not speak for the Australians but in the U.S. the ATX holds its own for PI performance and I feel quite comfortable using it gold prospecting. I could wish for a lighter package but the fact is it works and a person who puts in the effort should do just fine with the ATX. I know I can. The ATX does well for relic hunting applications and I have even found I can cherry pick coins halfway well with it. I have always been partial to pulse induction detectors and Garrett has won me over with the ATX. I enjoy using the detector and I can make good finds with it, and that is all I can ask of any detector. Some of Steve's finds with the Garrett ATX in the first year of use In retrospect I have actually done remarkably well with the ATX since I got it, considering it is only one of several detectors I have been using and not the one with the most hours on it. I have found about 3 ounces of gold and platinum jewelry with the Garrett ATX plus about two ounces of gold nuggets with it. I have found gold nuggets in Alaska, Arizona, California, and Nevada with the ATX under sunny skies and in pouring rain. My ATX has spent a couple weeks of days underwater in rough surf and is none the worse for wear. Many thanks and a hat's off to Garrett for producing my all time favorite Garrett detector. ~ Steve Herschbach Copyright © 2015 Herschbach Enterprises Official Garrett ATX Page Garrett ATX Instruction Manual Garrett ATX Color Brochure How To Disassemble and Clean the ATX Coil Shaft & Camlocks Garrett ATX Accessory Page Report on new 11" x 13" Search Coils Forum Threads Tagged "garrett atx" Garrett Metal Detectors Forum Garrett ATX vs Minelab GPX 5000 Garrett ATX Technical Specifications* Internet Price $2120.00 Technology Ground Balancing Pulse Induction (GBPI) Frequency 730 pps Autotune Mode(s) Slow Motion and Non-Motion Ground Rejection Four Tracking Speeds and Fixed Soil Adjust Can ground balance into salt soils Discrimination Dual Tones, Iron Check & Reverse Disc Volume Control Volume Limiter plus headphone controls Threshold Control 25 level push button setting Tone Adjust No Audio Boost No Frequency Offset Automatic Pinpoint Mode Yes Audio Output Proprietary headphone socket, Headphones supplied plus Waterproof Speaker Hip Mount No Standard Coil(s) 12" x 10" Open Spoke DD (Or Optional 11" x 13" Coils) Optional Search Coils 8" Round Mono, 20" x 15" Mono, 11" x 13" Enclosed DD, 11" x 13" Enclosed Mono Battery 8 AA rechargeable and disposables supplied Operating Time 10 - 12 hours Weight 6.9 pounds Additional Technology 13 level adjustable gain control Notes Waterproof to 10 feet (requires optional submersible headphones) *Notes on Technical Specifications - Detailed notes about the specifications listed in this chart.6 points
 -
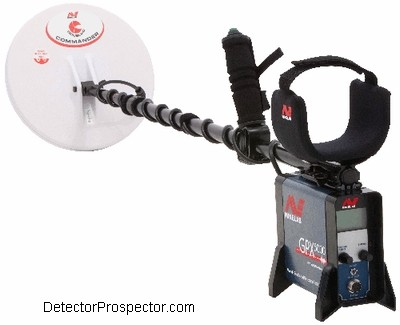 The Minelab GPX 5000 detector was released in the fall of 2010 and is still in production. I got one the same year - see First Alaska Gold with the Minelab GPX 5000 at Steve's Mining Journal. The Minelab series of pulse induction (PI) metal detectors starting with the SD 2000 are widely acknowledged as being some of the most powerful gold nugget prospecting detectors currently available. The GPX 5000 is the latest and most refined in the series. I can say that having used all the models the changes from model to model were gradual, but the difference between a Minelab SD 2000 and a Minelab GPX 5000 is nothing short of astounding. Minelab has dramatically refined this technology over the years. See Steve's Guide to Differences of Minelab SD, GP, & GPX for details. I believe that Minelab has really squeezed about all the performance I think I can expect out of a pulse induction (PI) with the GPX 5000. The stability, depth, and sensitivity are superb, as is the ability to adjust the machine to handle almost any ground mineralization or hot rocks that may be encountered. There are only two things that I can see that realistically can be improved on at this point. First, the the iron discrimination system, which is unreliable in general and of no use at all on deep targets. Second, the overall physical package, which has changed little since the SD 2000 first came out. The harness and bungee system is actually quite effective and comfortable for long hours of detecting but the separate battery and lack of speaker are an issue. However, it is possible with modern high capacity batteries to eliminate the separate battery/cable system and add an external speaker. Minelab would then be doing for people what many are now doing with aftermarket add on equipment. Still, there is no doubt at this point that for the serious, dedicated prospector, the Minelab GPX 5000 represents the current state of the art in pulse induction detectors. It is the detector of choice for many prospectors around the world. Minelab GPX 5000 - state of the art in pulse induction metal detecting My own GPX 5000 was exceptionally good to me, helping me locate the best gold nugget find I have ever made. I spent a month metal detecting in Alaska in 2013 in the Fortymile area. The month was about up and from July 22 to July 28 six days of metal detecting had netted me only three gold nuggets. That is a lot of detecting and digging for just three happy moments! I was getting burned out plus missing my wife and new home. My wife had also let me know one of my dogs was not doing well. It all just added up to time to go home. Besides, I had about 5.5 ounces of gold, not bad at all and better than I had hoped for. Good weather, good gold, good times with friends, it really had been a near perfect trip. Therefore on the morning of the 29th of July I wandered up to Chris and Bernie's camp and told them I was done. I was paid up at Chicken Gold Camp through the 31st so my plan was to be packed up and hit the road for Nevada early on August 1st. I had just a few days left so had to decide what to do. There is an area on upper Jack Wade known to have produced big gold in the past. Like nuggets weighing pounds, and a 10 ounce nugget had been found there by a dredger the previous season. It was on the ground owned by a miner I had a deal with. I had of course hunted it previously but only found a few small nuggets and lots of little ferrous trash. It was a gorgeous sunny day and the area was relatively open and level so easy hunting. I fired up the Minelab GPX 5000 with Nugget Finder 14" x 9" mono and crossed over the creek to give it a go. I was really relaxed because mentally I was done working and just happy to be out beeping a couple more days. It was really a nice feeling knowing I would soon be heading home. I barely had got started when I crested the top of a small ridge of tailings and got a massive boomer signal. Just a huge descending low tone, the type you might get if you buried a huge bolt or some other large ferrous target not too far down. There was a recent dig hole on the target, and I thought "well, let's see what he left in the hole" and gave just a couple big scoops. It was sandy easy digging stuff, and as it slid down the hill I glimpsed gold. I thought "no way!" and as I grabbed it could feel the weight. I stood there looking at 6.5 ounces of solid gold in my hand! The Selfie We All Want To Take - Steve With 6.5 Ounce Gold Nugget There is no doubt in my mind about the addictive nature of nugget detecting. It is not easy to do and the gold is not easy to find. There can be lots of false starts and disappointments along the way. It is all that however that makes it so sweet when gold is finally found, when all the hard work and effort is rewarded. I get a thrill out of every nugget I find, no matter how small, because I work hard for every one of them. The really big finds are much rarer yet, so much so that few people ever get to say they found a nugget weighing one ounce or more. The feeling of accomplishment is indescribable because it verges on feeling like a miracle has occurred. Once you get a taste of that feeling you want to feel it again, and it is that quest that powers me and others through days, months, and years of effort. The thrill of finding gold! Just Out Of the Ground, Unwashed, And On The Scale After an hour of photos and just plain soaking up the moment I proceeded to hunt that area extra well, because as you can imagine after a find like that visions of piles of nuggets enters your mind. If one got lost, might there not be others? Unfortunately it does not seem to work like that, and continued careful hunting of the location only produced one more nugget, a clean little 1 gram piece. No surprise there. How even one nugget like this gets lost is something we all wonder about. How does a half pound of solid gold end up in a tailing pile? Who knows, I am just happy it did. For a combination of size and the solid gold content it is the best nugget I have ever found. Minelab GPX 5000 With 6.5 Ounce Nugget At Dig Location The biggest question of course is who started to dig that nugget and then quit? The material was easy digging, about as easy as you could ask for. I surmise it had to be a Minelab operator. If you run a Minelab long enough you get huge boomer signals very often, and they are almost always a can or bolt or some other shallow, large junk target. They can also be very large gold nugget but if you get that signal enough times and dig it up, only to find junk, your brain gets trained to think that is all it could be. "Too big to be gold" - have you ever thought that? I wonder how many people have done like this unknown person, got a target, and then decided nope, it has to be junk, and walked away? I know I have done it and I am pretty certain it has cost me. It may be that a small percentage of the very biggest nugget signals are still out there, having been detected and left for junk. In fact, I am willing to bet that is the case, though there are a couple less now. View Of Both Sides, Just Rinsed In Creek I first went and showed the nugget to the claim owner and then Bernie and Chris. However, I asked them to keep quiet about it. The trip had been so enjoyable, and finding something like that right at the end, well, it was obvious I was going to be back in 2014. There was a lot of public area left to hunt on the creek still, and I saw no reason to possibly start a little gold rush to the area before I got the chance to come back and give it another go. That trip has now come and gone at Steve's 2014 Alaska Gold Adventure and so now finally you get to hear the rest of the story. Speaking of the public area, Bernie and I went and hit it the very next day. We had mostly taken advantage of our access to areas not available to the general public while we could and had been leaving the public area for later. There is information about it at the 2104 tale. We both started out with our GPX units but I could tell Bernie was less thrilled than I to be digging junk, so I suggested we go back to the truck and grab our VLF detectors. We did just that, and I no more than got my Gold Bug Pro swinging when it made a loud beep, and up pops a 5.9 dwt nugget practically off the surface! It was just another over the top easy nugget after all the days of digging nothing but junk. Even wilder is that fact that in 2014 several days detecting by several people including myself in this same location produced no gold at all. It is liked I walked up and banged the only nugget there. The next day and a half produced no other nuggets but I am certainly not complaining about that. My trip had gone from great to off the charts fantastic with just over a Troy pound (12 Troy ounces) of gold found. 12.3 ounces actually found in exactly 30 days of time spent actually nugget detecting. Not a get rich quick scenario by any means but not bad at all either. All the gold except a few smaller nuggets were found with the Minelab GPX 5000. Overall the time spent in the Chicken area during the summer of 2013 will go down in my memory as one of my best times ever. There are many more photos from this trip in the Photo Gallery. ~ Steve Herschbach Copyright © 2014 Herschbach Enterprises Troy Pound Of Gold Nuggets From Jack Wade Creek, Alaska 2013 Official Minelab GPX 5000 Page Minelab GPX 5000 Instruction Manual Beginner's Guide to Tuning the Minelab GPX 5000 Minelab GPX 4000-5000 Timings Charts Difference Between Minelab SD, GP, and GPX Models Forum Threads Tagged "minelab gpx" Minelab Metal Detectors Forum Minelab GPX 5000 Technical Specifications* Internet Price $3999.00 Technology Ground Balancing Pulse Induction (GBPI) Frequency 1100-4500 PPS? Autotune (Motion) Mode(s) Very Slow, Slow, Medium and Fast Ground Rejection Slow, Medium, Fast Tracking, Fixed, and Off Soil Adjust Eight settings (timings) - see chart below Discrimination Variable 1-10 and Off in Menu Volume Control Variable 1-20 in Menu Threshold Control One turn control Tone Adjust Variable 1-100 in Menu Audio Boost Quiet, Normal, Deep, Boost in Menu Frequency Offset Automatic Tune plus Manual 0-255 in Menu Pinpoint Mode No Audio Output 1/4" headphone socket (No speaker) Headphones supplied Hip Mount Shaft Mount Only Standard Coil(s) 11" round DD and 11" round Mono Optional Search Coils Over 100 accessory coils available Battery Rechargeable 7.4VDC 9.2A/hr Lithium Ion Operating Time 14 - 15 hours Weight 5.3 lbs (w/11" coil, excluding battery (1.7 lbs) Additional Technology Multi Period Sensing (MPS) Dual Voltage Technology (DVT) Smart Electronic Timing Alignment (SETA) Numerous Audio Adjustments via menu Coil (Double D/Mono/Cancel) - 3 pos. switch Notes The GPX 5000 employs an external battery carried on a backpack harness and connected to the control box via a power cord. The detector is normally suspended from the harness with a bungee cord, allowing for nearly weightless operation in level ground. *Notes on Technical Specifications - Detailed notes about the specifications listed in this chart.5 points
 -
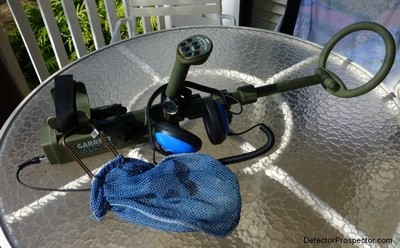 Well, back home safe and sound after a couple weeks in Hawaii with my wife. We visited the island of Kauai for the umpteenth time. We like the laid back vibe, made even more so by being familiar with everything. We do what we both like - she relaxes in the sun and I go metal detecting. And lots of walks and dinners together. The back story is told at Steve's Mining Journal about prior trips made to the same location over the years. Hawaii has always been a pet project of mine as it is the most difficult environment I have even encountered for a metal detector. There is of course the salt water. There is also literally military grade electromagnetic interference (EMI) from military installations plus missile and satellite tracking stations. Finally, there is a mix of non-magnetic coral sands and volcanic basalt derived sands and cobbles. Throw in the heavy surf and out of control tourists on surf boards trying to kill you... things can get interesting! If you stick to the tan to nearly white sands you can get decent performance from many detectors. But when the basalt gets involved is where things get fun. Most prospectors are familiar with basalt rocks and the challenge they present in gold prospecting. Well, just take the same hot rocks and douse them in really salty water and heavy duty EMI and you have Hawaii. Multi frequency VLF detectors like the Fisher CZ or Minelab Excalibur do ok in in the stuff but lack any real punch. They do best in the whiter sands, but the basalt sands and cobbles really leave them feeling gutless. I went to PI detectors early on, and overall probably had my best results with the various White's Surf PI models. Again, however, they worked best in homogenous materials. Places where the white sands and basalt cobbles mixed gave the Surf PI fits as it hit on the basalt cobbles. In darker sand beaches it was near impossible to keep the machine steady over the bottom in the surf, leading to lots of false signaling. I tried several Garrett Infinium detectors in Hawaii and got tantalizingly close to the detector I wanted. The Infinium as a ground balancing PI could tune out the black sands and hot rocks and eliminate many of the false signals. But it introduced just as many if not more by an inability to play well with salt water and EMI. The interference in particular made the Infinium almost unusable at times. I really wanted a stable Infinium, and confirmed this idea by using the White's TDI in Hawaii. It seemed to solve the issues I was having with the Infinium and so I waited for White's to make a waterproof TDI. And waited. And waited. I waited so long that Garrett had time to take what they learned from the Infinium and another model, the Recon, and build a next generation PI, the Garrett ATX. I was cautiously hopeful that all the noise I had made over the years had been heard, but frankly, I was not getting my hopes up too much. On top of that, the good old days are gone. I used to spend a couple weeks in Hawaii years ago and never see anyone with a detector. This trip I saw people every day! Ok, often the same guy but also more different people detecting than probably all my previous trips combined. The competition has gotten fierce by comparison to the old days. Hawaii treasure of another sort - beautiful beaches lit up at sunset! The Garrett ATX is the best PI detector I have ever used for difficult water hunting. Hands down, no comparison. I have to qualify that by saying that what makes it shine is the severity of the conditions. A person buying it and using it on clean white sands in Florida would probably have a less enthusiastic reaction. There is a lot of confusion regarding ground balancing PI (GBPI) detectors like the Garrett Infinium or White's TDI. They do not air test well against good VLF detectors and indeed do not really perform all that well against them in mild ground. People never really understand what detectors like these are all about until they get into difficult ground. The kind of ground where the best VLF detectors lose half their depth, the GBPI detector just keeps plugging along, and all the sudden now have a big depth advantage. Not because they go so deep to start with, just that VLF detector fare so poorly in really bad ground. GBPI detectors only really shine in the worst conditions. Let that sink in because it is very important. Anyone reading this should not get the idea these detectors are the be all or end all for all circumstances. But when the going gets tough, when other detectors fall on their face, a GBPI detector like the Garrett ATX can be the answer. Tuning a detector like the Garrett ATX can really bother some people. There is this resistance to doing anything that reduces the theoretical max depth of the detector. As soon as you start getting into reducing settings the feeling is that "well, yeah, but now it does not go as deep". The reality is that any machine that can be run maxed out in bad conditions has left some performance on the table. You may be able to max settings in benign ground, but you should have to back off of max settings in really bad conditions. That is why the controls exist - to compensate for bad conditions. The goal is to be set as high as possible while getting stable performance. The ATX is a powerful detector, and so it should be expected the machine has to be dialed back in severe conditions. The ATX has three adjustments that affect the depth. The Gain control is the simplest. You decrease the sensitivity of the detector to help compensate for conditions that are introducing too much noise. Just like the Gain or Sensitivity control on a VLF detector. This control was lacking on the Infinium and is a major reason why the ATX is superior. There is the pulse delay, which Garrett labels as a discrimination control. It is, sort of. Without getting all technical on you it is also a sort of sensitivity control, in that increasing the delay or discrimination also eliminates signals from weak conductor targets like foil, hot rocks, or salt water. This is really the only control you have on the Infinium to deal with false signals and it serves a similar function on the ATX. Finally, you have the ground balance. The ground balance is basically another type of discrimination circuit or filter. The signal produced by the ground is determined and then eliminated. However, this comes at a cost. Items that read the same as the ground signal are also eliminated, and items near to the ground signal will exhibit reduced signals. The White's TDI makes it easy to demonstrate this. You can turn the ground balance completely off, and when you do so the machine air tests far better than it does when you turn the ground balance on. This is because of the subtractive nature of the ground balance circuit on the TDI. Also, because it has a manual ground balance, you can see the effect of tuning the ground balance control closer to and farther from a particular target response. Instead of tuning out the ground the control can be manipulated to tune out other items instead. It is just a basic discrimination circuit. Different ground balance methods can affect items to greater and lesser degrees so the example shown by the TDI should not be taken as being the same with all detectors. But the effect is real and does exist to some degree on all ground balancing detectors, both VLF and PI. So why use ground balance? That should be obvious - to tune out ground responses. If there is no detectable component in the ground you would be better off without the ground balance circuit. Such conditions rarely exist, but they do exist. Absolute pure white coral based sands are one of them. The ATX at its hottest will detect salt water however, and new to the ATX is the ability to ground balance out the salt signal instead of the ground signal, but you are trading some sensitivity for stability doing it. Long round about way to explain that when the Garrett ATX is turned on with factory default settings the ground balance setting is at a minimum. The ATX should be tried first with the factory default setting and on many beaches you will not want to ground balance it. Just leave the discrimination (pulse delay) at zero, set the gain as high as possible while still allowing the machine to be stable, do a frequency scan, and go. In Hawaii at my location however I could not do this. I could on clean sand but not in the cobbles I wanted to hunt. But first, a total surprise. My ATX was almost totally immune to the EMI that I had previously experienced on Kauai without even doing a frequency scan. The frequency scan was basically redundant. That one thing made the ATX a huge advantage for me before I did anything else. I would not have believed it had I not had a White's Surf PI along for backup and sure enough, when I fired it up, the EMI was there. It was discernible in the ATX non-motion mode but even then nothing to worry about. I. Do not know what Garrett did or if I have a magic ATX but this one thing alone really floored me. It absolutely eliminated my number one problem with the Infinium. Basalt cobbles in sand on Kauai A detector with all controls set to max is in theory getting the best depth. But if it is not stable you cannot work with it, so you have to adjust back to find the best balance. The ATX is a very powerful detector and so I found a combination of settings that worked for me to get quiet, stable performance. This is in no way being advertised as a setting to for you to use! It is what I did for this location and other locations will take different settings. In general, the more powerful all your settings can be the better while still being able to have a stable running detector. So the ATX with factory default (minimum) ground balance, zero discrimination (pulse delay), and max gain would be at its most powerful. The worse the conditions, the more you may need to dial the settings back. The problem is with all the settings maxed out the ATX is very sensitive to small gold, but that also means it picks up salt water and hot rocks. I played with the gain control and the pulse delay (disc) control looking for a balance that left the detector running quiet. A discrimination setting of three and a gain of seven made the ATX submerged in salt water run like a VLF. I periodically reduced the disc setting or bumped the gain higher and noise was introduced, so settled on the 3 and 7 setting for my Kauai beach. Then I found a fat basalt rock buried in the sandy bottom and ground balanced over it, eliminating the signal. I would be the first to admit these settings were probably aggressive and of course costing me some depth in theory, but I got what I have always wanted in Hawaii. A PI detector running quiet as a VLF and by that I mean just purring along with a threshold sound, and when it made a noise, it was because I had a target under the coil. Here is another way to look at it. A very hot detector will detect salt water. It will detect hot rocks. And it will detect things you want. EMI can also be an issue. The trick is to reduce the signals from the things you do not want to hear as much as possible while enhancing the good signals as much as possible. It may be letting unwanted signals through will also increase depth on desired targets a bit. It may also be true that too many signals from undesired targets will inhibit success. You have to decide for yourself where the balance lies. If maximum depth is the goal then digging more undesired targets may indeed pay off. In my case I had plenty of targets, so the goal was quiet, efficient operation. I would not hunt clean white sand set like this. I would have the settings maxed out. I had a strategy in mind here, and my goal was to detect in the basalt cobbles. I was not tuning the machine for maximum performance in the easy stuff, but for maximum performance in the worst stuff. I wanted to detect the places where targets were more likely to have been missed by other detectors. Finally, after one go with the stock coil, I switched to the 8" mono coil. A few reasons. First, it is easier to handle underwater and fits in depressions better. It can be pushed through sand ridges and is less likely to move on the shaft. And I could find items edge on with it easier than with the stock coil. By that I mean turn the coil on edge and drag it in the sand and it acts like a pinpointer on small surface targets. The edge of a mono coil is very sensitive. A smaller coil is easier to pinpoint with to start with anyway. And honestly, I used the 8" mono because I was worried about sand getting in the twist locks and giving me problems, possibly even seizing up the rod assembly. The 8" mono and shaft assembly was my sacrificial lamb. If it got totally screwed up my stock coil would still be fine. Garrett ATX with 8" mono coil (goodie bag attached to arm strap, waterproof watch on handle) I may as well relate now that I did have issues with sand in the twist locks but not as bad as anticipated. The lower two twist locks seemed just loose enough that at the end of every outing I just worked them back and forth and the rod in and out and they cleared. But the upper one gave me problems. It got sand inside that refused to come out, even after taking it off and working on it under running water for a half hour. For some reason that upper most twist lock was just a bit tighter to start with and the sand would not clear out. Yet it never quit 100%. I lost most of the ability to twist the lock but it still twisted just enough to hold the rod in place. I am asking Garrett for advice on where to drill a couple holes or maybe slots to see if we can get these things clearing sand a bit better. Overall I actually am ok with them but they need improvement. In other types of sand it could be a big problem. I am going to see if I can get my upper lock to loosen up similar to the lower two and will report back later. The rod assembly got scored up quite a bit from being extended and collapsed with sand in the assembly. I will post photos later. Nothing that bothered me but some might hate seeing their expensive detector getting ground up like this. I have to say at the end of the day the physical design and the rod assembly in the water were nothing short of brilliant. I have given the ATX low marks for prospecting as being a duck out of water. The waterproof design adds weight, complexity, and expense not required for most dry land prospectors. But in the water the ATX felt really, really good on my arm. It is slightly negative so will settle on bottom if released. But not much; it is essentially weightless on your arm underwater. The rod assembly was a dream. I was working in heavy surf with 40 lbs of lead weight on. I steadied myself many times by leaning on the ATX with absolutely no fear it would break, and the rod never slipped. I could get in the shallows on my knees and shorten the rod down as short as I liked. And just right, no fumbling for the right holes, just loosen a twist lock or two and put it right how I wanted it. Better yet, due to the three piece design, I could also extend the ATX to be longer than any detector I have used underwater. I was in 6 foot of water with just my snorkel in the air, and easily detecting around me. I do a lot of breath hold recovery in deeper water and the ATX was just so easy to adjust for whatever depth I was working at. So easy and so solid and tough that I 100% forgive any little work needed to sort out the twist lock situation. This is one really great handling detector underwater in rough surf conditions that would leave other detectors in serious danger of breaking. The 8" mono was perfect for me. It stayed where I put it and I pushed it around a lot. I learned quickly if I wanted to adjust the coil position to be flatter all I had to do is turn the detector over and push down on the nose of the coil. Maybe not as easy as pushing down on the heel of a coil with a rod mounted in the center instead of the rear but no big deal, mainly because the coil stayed put. After two weeks of heavy use I never had to adjust the coil tension and it showed no signs of having any issue with all the sand it ran through. I had no scuff cover, and the coil shows no sign of cracking, just your normal scuffing from use. The epoxy appears much improved from the old Infinium days. A weak point - that tiny spring loaded rod lock, the one you flip to disengage the rod and coil assembly. The tiny spring popped out on me once. I took it apart, made the spring end ninety degrees again, and it worked for most of trip, but slipped out again last day. Not a big deal but needs beefing up. Be sure when twisting the rod and cams while cleaning to not hold the detector body. You will be twisting against that little lever. Hold onto the rods themselves and twist the cams. We need to find out what the part number is for the coil and headphones connector covers. Everyone should have a couple extra. Better yet, a couple spare caps like are fixed to the back of the ATX to cover the male headphone connection when not in use. One of these to put over the male coil attachment point inside the housing would be very helpful when rinsing and cleaning the ATX. Take the coil off, put the cap on, and now no worries while cleaning. I will find out the part numbers and pricing for those and get some and suggest ATX owners do also. I saw no point on beach hunting with all the competition. One guy in particular walked the beach a couple times every day with a Surf PI. I saw a couple Surf PI detectors at work, a Minelab Excalibur, and a Tesoro Sand Shark or Piranha. They all walked the beach and only the Excalibur guy ventured into the trough when it was calmer once. I spent all my time in the surf or deeper water with a weight belt and mask and snorkel. I recover targets by fanning or digging. And I went looking for mixed coral/basalt harder bottoms instead of deep sand. I played on the beach a bit and hit deeper sand underwater but basically all my finds came off of more solid bases. I am not going to say the ATX was some kind of super depth monster. That would be misleading and really missing the entire point. I have no doubt it was getting as good as depth as could be wrung out of the conditions. I was easily getting nickels down to ten inches in the basalt, maybe a tad deeper but honestly it is hard to tell recovering targets underwater while holding my breath in the surf. The real thing I am trying to relay here is the ATX was rock solid, just like using a good VLF above water, but in the worst detecting conditions I have ever encountered. It allowed me to just get on with the business of detecting targets and recovering them. If I was lacking for targets maybe fighting for another inch would be the name of the game but I never ran out of targets. Steve's Finds in Hawaii with Garrett ATX (Click on photo for larger version) The rings just banged! Nickels hit hard. By virtue of the ground balance system large junk goes low tone and I ignored many low tone targets. That cost me some dimes, copper pennies, and quarters but that is ok. Nickels, zinc pennies, and rings go high tone. As do sinkers, bottle caps, hair pins, and aluminum. Still, being able to ignore low tone targets upped my odds some. Though I dug a lot of low tones also just to learn more and frankly, because I have a hard time passing targets. You just never know for sure until you dig them and I was there to dig targets. Still, this photo shows my target mix skewed to high tone targets. With the exception of a few large items discarded at the trash can this is every item I dug over the two week period and about 50 hours of detecting time in the water. Another benefit with the ATX is the adjustable target volume and threshold, a real boon in an underwater detector. I had brought Gray Ghost Amphibian phones with me that started out loud enough but then got too quiet to hear, so I had to FedEx a set of Garrett phones in quick. I like the sound of the Ghosts better but not if I can't hear them. I surmise the sound chamber was filling with water and so will return them to get checked out. First time DetectorPro phones ever let me down. The Garrett phones have a lower tone but worked just fine. The volume and threshold control on the ATX makes them much nicer to use since they can be set comfortably for both above and below water use even though they have no volume control themselves. You can even set the volume on the fly easily while underwater. This is a very nice thing that most underwater detectors lack. I have read a few posts by people very concerned about the placement of the headphone connector. Total non-issue for me. It is under my right elbow and was never a concern at any time. Icing on the cake? The ATX retains all settings when turned off. Once I found my magic settings I was so happy with how the ATX was running I was afraid to change anything and did not have to. Just turn it off, turn it on, and ready to go. Everything is just the way you left it. This is very important with the ground balance setting. It is the one setting you have no idea where it is set. I wish and am suggesting that when the detector is manually ground balanced the LED indications reflect the entire range and show you where you end up at for future reference. Right now the LEDs simply follow to audio and reduce to nothing when the unit is ground balanced. But where am I and can I get back there? You have no idea and neither did I. All I knew was my ATX was running great and recovering targets at what I thought was good depth so I left it be. I used rechargeables exclusively. I kept rough track of detecting time and charged up about every ten hours. Again, it was nice being able to pull batteries out, charge, reinstall, and when the detector was turned on again no tuning was required due to the retained settings. I carefully looked for water in the battery compartments each time but never saw a drop. I have total faith in the waterproof integrity of the ATX after what I put it through. I just got back and blasted this report out but will probably edit it a bit to smooth it up over the next couple days. I will also post a more story like version with more details and photos on my journal in the next couple days. I am cleaning up a few of the rings. There is one very old class ring I thought was junk but is encased in sand and lime I am dissolving away and I have a couple silver rings to clean up. Once again the big diamond eluded me but no complaints here, it was my best haul ever for a beach hunting trip. In no small part due to the Garrett ATX but I will take some credit also for really hitting the water hard. So here are the rings. The bottom line is I just had my most successful trip to Hawaii ever. I recovered over a couple dozen rings with the ATX and half of those were gold or platinum. Some silver rings, a nice 14K bracelet, and a pile of coins and the inevitable PI junk. This despite bad weather early on and all the extra detecting competition. Eight Gold and Two Platinum Rings Found by Steve Herschbach with Garrett ATX in Hawaii Another view later after the better silver rings were cleaned up, and that fabulous bracelet Again though, do not take this as some kind of crazy ATX testimonial. Pay attention to my caveats. Beach hunters in clean white sand with tons of hair pins have less to be excited about here. But if you have black sand beaches or worse, the ATX is a machine to at least be aware of. I just can't help it though, I really like a detector that puts gold and platinum in my pocket! Things I most wanted? An indication of what the ground balance setting is and an ATX version of the 14" Infinium mono coil. Thing I liked most? The way the ATX handled in the water and the way it adjusted up to handle the conditions. My last detecting nut cracked - thanks Garrett and especially Brent Weaver for obviously listening to my suggestions all these years! I would like to learn more about this detector as there is much it is capable of. How exactly does it compare with factory default minimum ground balance mode versus PI detectors that have no ground balance at all? I tried the no-motion mode a bit but saw no real value for what I was doing - there has to be more to it that is of value in other situations. Most importantly, what combination of pulse delay, gain, and ground balance is optimum for various locations and targets? I found some that worked for me but I am not swearing they were the best settings possible. I admit to focusing more on detecting than fiddling and so it is hard to get me to stop and do comparative tests when detecting time is at a premium. I look forward to seeing what works for others and will add what I can as I learn more about the ATX myself. This article was promoted from a thread on the DetectorProspector Forum and those interested in the article will find additional information in the posts on that thread. ~ Steve Herschbach Copyright © 2014 Herschbach Enterprises Steve's Mining Journal Index5 points
 -
 My wife and I finally took a long-awaited vacation to Hawaii. We returned to the same location we had visited previously on the island of Kauai as it was really our kind of place. My wife mainly likes to lay in the sun and read. I like metal detecting the beaches and surf. So it works out well... she parks herself on the beach and I wander around nearby with my detector. My last trip to Hawaii three years ago produced only one gold ring in two weeks. See the story here for details on that trip. I was determined to do better this time. I took two detectors, my Garrett Infinium LS, and a new Minelab Excalibur 1000. I have a Fisher CZ-20 that I have been very fond of for freshwater hunting, but many have advised me they thought the Excalibur might do better in saltwater than the CZ-20, although the two machines are very close in performance. My main goal was to use the Infinium, but I wanted a back up unit. In particular, I had discovered some beaches off Kauai have lots of iron trash due to the two hurricanes that hit the island in the last twenty years. PI detectors like the Infinium tend to find iron items while VLF detectors are good at tuning it out, and the Excalibur is particularly good in this regard. I was most anxious to use the Infinium after my success with it nugget hunting in Alaska, but the first time in the water with the Infinium it binged and bonged and made all sorts of noise. I thought, "This is a heck of a note" and went and got the Excalibur. I had no patience at that point; I wanted to find stuff now. I found lots of coins with the Excalibur and finally a gold ring. The Excalibur was very quiet and handled the salt water environment about as well as I think a VLF detector can. But the fact is that a salt water/volcanic soil environment like Hawaii severely impacts the performance of VLF units, and so the depth of detection I was seeing with the Excalibur was not what I would be expecting with a PI detector. Detecting heaven - Poipu Beach, Kauai, Hawaii I gave the Infinium a try on the beach to see what the story was there. I found I was getting noise off the salt sand at the end of my swings, and remembered the note in the owner’s manual about this very thing. It is instructed that the discriminate control be advanced to reduce these signals. I was about to say "false signals" but they are nothing of the sort. The Infinium is a particularly sensitive pulse induction detector. If you tune PI detectors up for their best sensitivity to small gold items you run into the area where saltwater, being a low conductive item, also starts to be detected. The Infinium at its zero discriminate setting picks up wet salt sand and saltwater. It is not a false signal, just a response to a low conductive target a less sensitive unit would not detect at all. This effect is enhanced by the 14" coil, which "sees" a large volume of material. By advancing the discriminate control to the point at which the salt effect is tuned out you will get stable operation. In theory this also means that some depth of detection or target strength will be lost on smaller low conductive targets like gold earrings. One thing I need to do in the future is test the Infinium at various disc levels to ascertain the effect on target responses. As a practical matter it does not matter. Just as the sensitivity of a hot VLF detector like the Fisher Gold Bug 2 must be backed off to compensate for high mineral ground, so to the disc control on the Infinium must be set to compensate for the conditions encountered. Hot VLF units cannot be used on wet salt sand at all since they see the salt water as a target and no amount of tuning will get a high frequency VLF to work properly on wet salt sand. Steve with Garrett Infinium on the beach trying 10" x 5" elliptical DD coil I did much like I would with the sensitivity control on a VLF detector. I adjusted the disc control to where I was on the edge of stable operation. In other words, I was running with a bit of background noise. Some people might prefer to go farther to eliminate such noises entirely, but I am used to running "on the edge" so to speak. I found the Infinium with 14" coil set at 3-4 disc level gave not quiet but acceptable background sounds on the beach. I proceeded to dig coins and a small toe ring. As I have found in the past the Infinium really likes nickels. I seem to always find a higher percentage of nickels than I would normally find with a VLF detector when I use the Infinium. This is because it is optimized for targets that fall in the nickel range, like most gold items. Armed with my newfound knowledge I gave the Infinium another try in the surf. And I do mean surf. I had on 40 pounds of weights to help me stay put as the waves crashed into and over me. When I get a target the weights allow me to duck to the bottom and stay put while excavating the target. I use the “fanning” method of blowing sand away with my hand. I’ve tried scoops for this but frankly I’ve got my hands full just hanging on to the detector while working. In high-energy surf the scoops just seem to get in my way. One thing I have heard speculation on is that the 14” coil might be a problem in the water due to its size. That did not prove to be the case for me. The Infinium is weightless underwater and the feel was good. I had no problem using it in very rough surf and in fact often was forced to brace myself on the bottom with the detector. We are talking adverse conditions at their worst, and the Infinium did fine. I found a disc setting of 5-6 was required underwater, and even then the coil needed to be kept parallel to the bottom. When I ducked to the bottom to get a target, the coil would turn up and point off into the water. It could then “see” more salt water, and start to signal. But I was so busy holding on and digging targets I really did not notice this much after a while. Steve suited up for metal detecting in heavy surf But lo and behold, the deep targets started coming… and the rings! First real surf dive of about three hours with the Infinium produced three beauties. An 18K gold and platinum ring was first, followed shortly by a 14K gold ring. Then a lull while I dug a few coins and nails (the Infinium does pick up large elongated iron objects the Excalibur ignores) and then a GREAT BIG GOLD RING! I was over a foot down, and expecting a big chunk of trash, when up pops a large class ring - 1963 U.S. Air Force Academy. It is a 14K gold ring with a large synthetic blue star sapphire. It looked incredibly large underwater, and is the most massive ring I have found to date. I'm working on finding the owner of this one. I was really stoked, but this was Sunday morning, the day before I was to leave. Some beach work with the Infinium and water work with the Excalibur had up until this point produced about 100 coins and one gold ring. But now that I had the Infinium figured out I had three great rings in less than three hours! The surf really beats me up, so I took a break and spent time with my wife. But that afternoon I hit the water again, and up comes an 18K gold ring with a deep blue faceted sapphire and a platinum band. The depths were all in excess of what I feel I was attaining with the Excalibur. I do not want to give the impression I’m knocking the Excalibur. It is a well proven and well thought of detector, and may in fact have the best performance in salt water of any VLF on the market today. But I just do not think a VLF detector with a 10” coil has much chance versus a PI detector with a 14” coil in saltwater environments. We had to check out at noon the next day, but I got up early and gave it one last go. A few more nails, some coins, and on last extra wide 14K gold band. I was ecstatic… it just seemed like I could not miss with the Infinium. In two days I found more nice rings than I've found in any other water detecting I've undertaken. My only regret is I did not try harder with the Infinium right off the bat. I found the Infinium to be a very good saltwater unit, but not having run any pulse units other than the White’s Surfmaster PI in salt water I certainly cannot say how it compares to other PI water detectors. Even the Surf PI I used three years ago has been upgraded to the Surf PI Pro model for enhanced sensitivity to gold items. That fits with what I experienced with the original Surf PI. It got the coins but left me with little gold to show. I would like to try the PI Pro as it is lighter and more streamlined than the Infinium. At $699 list it is also quite the bargain for someone wanting to try a PI detector for water detecting. But the Surf PI Pro also lacks the ground balancing capability and interchangeable coils that make the Infinium so versatile. The key for anyone using the Infinium around salt water will be to get the disc control set properly. I cannot overemphasize this point. It is the single most important adjustment for making the Infinium work in salt water, and my initial lack of knowledge in that regard cost me precious hunting time. I really think the Infinium disc control can be more properly thought of as a sensitivity control, and the key is to back the sensitivity down to a level that gives stable operation. Do not be concerned about lost sensitivity. I think I proved the machine retains plenty of power. But if you are picking up the saltwater itself you certainly will have little luck in detecting anything else. Still, I should add a cautionary note here. The Infinium WAS noisy! That means different things to different people. For me, as a long-time detectorist, it is just a thing to be dealt with, and I am used to running detectors "on edge". In other words, I often tune detectors to their limits, which many times results in noisy and erratic performance. The difference is that I can tell the difference between "good sounds" and "bad sounds". But someone else listening to what I am doing might not hear the difference, just lots of noise. So lest this story sound like a glowing reason to run out and get an Infinium do take note of its noisy performance here. I obviously made it work for me, but some people may not like either the noise, or the amount of discrimination required to reduce the noise to normal levels. For dry land use, especially while nugget detecting, I feel the Infinium is a very good detector. In salt water the results are mixed, and will depend a great deal more on the expertise of the detectorist. The White's Surf PI was a much smoother and easier to operate detector by comparison, and may suit the casual operator more than the Infinium if salt water is the sole intended use. The Excalibur is the only VLF detector I have ever used in salt water. It was much quieter in operation than the Infinium, although it constantly gave multiple tones on each target instead of locking on a single tone. It did a superb job of ignoring iron targets, and if there were enough iron targets it would certainly be the way to go. But the amount of iron I dug with the Infinium was nowhere near the level it would take to discourage me, and the bit of extra depth I feel I was getting with a PI made me feel more than happy to dig the few iron targets. The ratio was no worse than one iron target for every two or three non-iron targets. I think that unless iron trash is a problem PI is the way to go. I'm surprised that Minelab, manufacturer of what many believe are the most powerful PI units in the world, does not build an underwater PI unit. On the other hand, I have some fresh water lakes I hunt in Alaska that are full of iron trash, and I am anxious to use the Excalibur in those lakes. Iron junk, rings, coins, aluminum trash, and lead weights found metal detecting The picture above shows a typical mix of finds, although some of the oversized trash items have already been discarded. The first place I usually head after getting out of the water is the nearest trash can. In fact, I try to make a spectacle of myself disposing of the trash, especially the sharp glass I retrieve. It helps promote the image of detectorists as public servants. Hey, we are just getting this dangerous junk out of here. The iron items were all found with the Infinium. The Excalibur ignores iron better than any detector I have used. The majority of the coins were found with the Excalibur, although the Infinium got its share, especially nickels. Almost all the pull tabs were found with the Infinium, again confirming its power in the gold range. Many rings are identified by metal detectors as pull tabs because of their similarity electronically, and so the Infinium likes them also. Notice also the large fishing sinkers found by both detectors. I gave these to the dive shop I rented my dive gear from. If you are planning on doing some surf detecting in Hawaii, here is how I outfit myself. Obviously you need some kind of underwater detector. I prefer two, as I have had two different underwater detectors leak on me over the years. The chances are slim, but vacations like this are few and far between. It's cheap insurance. I use a neoprene shorty suit while in the water. The water in Hawaii is warm, but it can get chilly if you are fully submerged for some time. I also find the suit helps cushion the weight belts to prevent chafing. I used two weight belts totaling about 40 pounds. The weight belts and suit were rented locally. Each item was $18 for the week, for a total rental of $54.00. Next time I plan to have a suit with long legs to protect my knees while down on the bottom. I wore an old pair of tennis shoes and socks while in the water. There are lots of rocks and coral that can chew your feet up, not to mention spiny animals like sea urchins. This seemed to work very well and I would do the same thing again. I have a mesh bag that I attach to the arm of the detector for targets I retrieve that also has worked very well. It has a hooped metal opening that makes it easy to drop items in the bag, and yet I have never had a problem with anything getting out of the bag. I have a mask and snorkel that I have used for dredging and diving for many years that continues to give good service. The snorkel is a U.S. Divers model that features a water catch and drain system near the top that sheds water caught by waves going over the top. A good idea for surf work. Finally, a good pair of neoprene gloves to protect my hands while digging holes or holding on to coral. The only item I wished I had was a small rock pick. Every once in awhile I would find items that worked down into deep holes in the dead coral bottom. I had to abandon some of these as the items were too far down in the small cavities. A small rock pick would have allowed me to open the holes up to find those items... whatever they were. Time for a safety warning. Surf conditions can be dangerous and working over weighted can be particularly hazardous. It is important to be completely comfortable in the water and to have a realistic knowledge of your limitations. I have made hundreds of SCUBA dives and have thousands of hours on hookah diving systems. I am extremely comfortable in the water and there is little that could happen that would cause me to panic. Do not attempt rough surf conditions without being sure of yourself and your equipment. All found with Garrett Infinium except small gold ring on pinky finger Index Finger - Two 14K gold bands Middle Finger - Platinum band and 18K gold w/faceted sapphire Ring Finger - 14K Class Ring w/synthetic star sapphire and 18K gold & platinum band Pinky Finger - Stainless steel toe ring and 22K gold band (Excalibur) As far as where to hunt? Well, on the beach itself there is a zone up above where everyone sits. Lots of coins there. But if jewelry is the goal you need to get into the body-surf/boogie board zone. And that is pretty much where the waves are breaking. A rock or coral base with no more than about a foot of sand on it would be preferred. You do want some sand to hide items when dropped, but too much and items sink beyond detector range. The sand gets stirred a lot in this zone, and so stuff gets deep pretty fast. Areas where lots of tourists are in the water will generally be more productive than areas the locals frequent. It's a more affluent crowd and one that is more ignorant of the effects of water on jewelry. Just make sure you take time to watch people a lot. Just sit on the beach and watch people at play and where they are doing it. Any of those areas have potential, and the more vigorous the play, the better the potential. It was a great trip, albeit too short. I’m chomping at the bit for another go. I have often gone on nugget hunting trips where it seems like I spend 3/4 of my time getting my bearings, and then really start to score just before I run out of time. This was one of those trips, and between my trip three years ago and this one I think I’m getting a handle on surf detecting now. I can guarantee it won’t be three years before I next hit the surf in search of gold. ~ Steve Herschbach Copyright 2003 Herschbach Enterprises Postscript 3/25/03 - A happy ending to the 1963 U.S. Air Force Academy Class Ring story. The class is celebrating their 40th reunion in 2003, and by contacting the reunion organizer I was able to find the owner of the ring. He lost it 17 years ago while body surfing in Hawaii and sure was surprised to hear his ring had been found. I hope he gets it refinished and wears it to that 40th reunion!5 points
 -
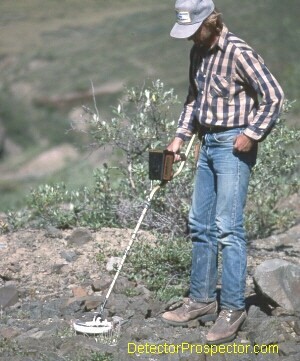 People talk about how long it took to find their first nugget with a metal detector. Usually the discussion revolves around how much trash they had to dig before they found their first nugget. Well, I probably come close to setting some kind of record for the number of years involved. My problem was not finding lots of trash, it was not finding gold! My first nugget hunt in 1973 taught me one thing about detectors at the time... they were nearly worthless for finding gold. I had my first metal detector, a White's Coinmaster 4. These old units could not ground balance, and had very poor sensitivity to small gold, even with the so-called Gold Probe accessory coil. I was panning 1/2 pennyweight nuggets from the little gully pictured at Moore Creek, and found I could not get a reading from those nuggets when they were placed directly under the coil. My next detector was one of the early White's Goldmasters. I figured I needed a nugget detector instead of a coin detector. Imagine my surprise when I discovered all the Goldmaster was in those days was the Coinmaster circuit board in a larger box! If you are shopping for a used Goldmaster do not buy one of these old ones by mistake. They were blue and about the size of a mailbox. And about as useful for finding gold. I was getting into dredging at the time, and decided detectors were a waste of time for gold. I got into business in 1976 selling mining gear and as a White's dealer. But my stock answer for people coming in looking for a gold detector was "Don't waste your money, you'll find more gold with a $5 gold pan". That was good advice at the time. We concentrated on selling metal detectors for finding coins and relics. My bias caused me not to keep up with changes in the technology, however. Reports of a large nugget finds would appear every once in awhile. I chalked them up to "Yeah, sure you can find gold with a detector, if it's big enough"! And the nuggets found were usually pretty big, not something likely to be found in my immediate area. Steve's First Nugget Hunt 1973 White's Coinmaster 4 with 4" Gold Probe Moore Creek, Alaska The first commercially available detector with ground balancing capability was the White's Coinmaster 5 Supreme. I was seriously into coin hunting, and purchased one of these new units. It was a very low frequency detector, and I found to my dismay that it really liked nails. One nice thing about the very old detectors was that they pretty much ignored nails, They Coinmaster 5 loved them and I was finding so many nails I took a dislike to the detector. But the depth of detection was amazing for the detectors of that time. I sold it to a friend who was a heavy equipment type miner. He found a gold nugget weighing several ounces with it at his mine. This should have clued me in, but once again I chalked it up to being a lucky find of a very large nugget. I went on about my dredging, sluicing, and panning. Finally in the 1980's I was also selling Compass detectors, and I hauled a Compass X-80 up to my claims and gave it a try. It had the capability, as my tests on smaller gold nuggets revealed it was pretty good. We were selling them now as nugget detectors, and some finds were being made with them. Unfortunately, I was not lucky enough to find any gold with the unit the one time I gave it a try. And it just reinforced my feeling about detectors as being a waste of time. It was not until June 18, 1989 that I decided to give metal detecting for gold another try. Compass had repackaged the X-80 as a nugget detector called the Gold Scanner Pro. Here is my log entry for that day: "Went to Crow Creek and used Compass Gold Scanner Pro. Found my first gold nuggets ever with a metal detector! Two nuggets within 10 feet of each other between Area #1 and Area #2 below old tailing pile at lower end. One nugget at 9 grains and the other at 4 grains, total of 13 grains. Also found two bullets." I was hooked! I COULD find gold with a metal detector. It only took me 16 years to find my first nugget with one!! I planned my first real nugget hunt. The destination was high in the Wrangell Mountains of Alaska on some bench deposits above a creek named Bonanza Creek. I had been visiting this area for years and had found lots of nice gold sniping the bedrock in the area. It seemed like a perfect spot to try my new detector skills. I used the Compass Gold Scanner Pro and I set my father up with a Fisher Gold Bug. I used the stock 8" round coil on the Compass, and outfitted my father with a 3-3/4" round coil that used to be available for the Gold Bug. We had a weekend to see what we could do, and so off we went on our first real nugget hunt. Bedrock Exposed by Oldtimers Bonanza Creek has several bench deposits high above the current creek level. These are remnants of stream deposits left high and dry as the stream eroded deeper into the valley bottom. They can often be spotted as flat areas on the valley sides above gold-bearing creeks. In some areas there is more gold in the bench deposits than in the creek itself. The problem for the oldtimers was in getting water up to these locations to work the gold deposits. Ditches many miles long were often dug to bring water along the valley walls from places father upstream to the deposits. They usually used "giants", a term for very large water nozzles fed by pipes with water from the ditch systems to wash the gold free of the hillside gravels. Large areas could be worked in this fashion, with the material being funneled into sluice boxes running down the hill. Much gold was lost in these sluicing systems due to the large volumes of material being washed through the boxes. However the best target for the metal detector operator is not the tailing piles, but the large areas of bedrock exposed by these operations. Nuggets lodged in cracks and crevices as the material was being washed down the hill, and original concentrations of gold in the bedrock were often missed. The only way for the old miners to get this gold would be to tear up all the bedrock and process it. The amount of gold to be had for this extreme extra effort was not much compared to what they would get just going on with their large scale washing operations. And so that gold is left to this day, waiting for someone to find it. Trying to scrape and pan crevices can produce some of this gold, but it is a needle in the haystack kind of search. Metal detectors are the perfect way to locate deposits of gold left in these old workings. The picture above shows a dark area of exposed bedrock we searched with our detectors. Bud Herschbach with Fisher Gold Bug & Steve with Compass Gold Scanner Pro We actually wasted quite a bit of time on bedrock along the creek before heading up to try the bench areas. We only found a few nuggets, and I now attribute this to the fact that most mining activity goes on near the water. People pan and sluice the material along the edge of the water, and dredgers work in the water. The area nearest the creek is the area receiving the most attention. One of the first things an experienced miner must do when getting into metal detecting is to lose this natural desire to stay near the water. What really makes detectors great is you need no water to find the gold, and so working away from the water actually will increase your odds of making finds overlooked by others. You have no choice in desert areas, but in stream valleys do not let the water distract you. Any exposed bedrock or material from the highest ridge on down has potential. We started finding gold, but it was one particular hump of a dark slate bedrock that really started producing gold. My years of coin hunting paid off as I have much better detecting habits that my father. I always keep my coil as close as possible to the ground, and do not raise it on the end of my swings. I am methodical and carefully overlap my sweeps if I feel I am in the gold. My father tends to have his coil off the ground a lot, and wander around with no set pattern. The number one thing he could do to improve his finds would be to slow down and develop better coil control. But as he has often noted, he does not have the patience I do with a metal detector. And he makes good finds nonetheless. Still, technique is important. My father was scanning along up a steep rise in the bedrock. He stepped up the rise with just a couple sweeps over the bedrock. I followed behind, carefully scanning every inch. The bedrock was nearly vertical at one point, and as I scanned the face I got a nice signal. My father was about 20 feet ahead of me when I yelled at him to look at the flat 4 pennyweight nugget I popped out of a crevice in the rock! It turned out to the largest nugget of the weekend, and in fact the largest nugget I had ever found up to that point prospecting for gold. Gold Found by Bud & Steve - from my notes: Large Flat Nugget - 4 dwt 2 grain Fat Pendant Nugget - 2 dwt 8 grain Dad's Big Nugget - 1 dwt 5 grain Sitting Bird Nugget - 16 grain Chunky Nugget - 16 grain Long Flat Nugget - 14 grain plus others total of 11 dwt 6 grain Grand Total 1 oz 4 dwt 12 grain "Great weather, great gold, GREAT TRIP!" Gold nuggets Steve found with Compass Gold Scanner Pro I had a fantastic time. Probably the most fun I'd ever had looking for gold. Metal detecting really appeals to my desire to just get out and walk around the hills. I went nugget hunting regularly after this trip. I tried new machines as they came out, and kept getting better results as the technology improved, allowing me to go back and rehunt old areas many times. My finds close to home really took off when the White's Goldmaster II was introduced, as the local creeks had lots of smaller gold on which the Goldmasters excelled. Still, gold dredging produced the bulk of my gold yearly. I dredged locally, and large nuggets suitable for detecting were rare, although I did finally dredge a 1 ounce nugget at Crow Creek in 1998. Then in 2000 a few things happened to make me really get serious about nugget hunting. First, I finally started getting bored with dredging. I had been doing it so many years it was becoming mechanical. It was mostly an equation. Run the 6" dredge for X hours at X location and get X gold. Dredging was also causing me to stay at the same locations for years at a stretch. I wanted to start moving around more and doing more pure prospecting. I was also finding my body was beginning to suffer from the years of cold water dredging. But the most important thing was those big nuggets. I decided that if I really wanted to see lots more really good-sized nuggets I'd better change my tactics. One 1 ounce nugget in 25 years of dredging meant I was going to die before I found a couple more! So I consciously set dredging aside and concentrated on metal detecting. I sold my 6" dredge and used the funds to buy a Minelab SD2200D. Paired with a White's Goldmaster I figured I could handle most anything. The Goldmasters are very hot on smaller gold, but suffer in highly mineralized ground. The SD2200D is not very good on small gold, but excels on larger gold in the worst of mineralized ground conditions. So the two make an excellent combination for varying gold and ground conditions. Finally, and most importantly, I started contacting miners I've met over the years looking for access to big gold creeks. The payoff was immediate. I found more pennyweight range nuggets in 2000 than I ever had in one year and found my largest ever with a detector at just over 8 dwt. Then in the summer of 2001 at Ganes Creek, Alaska I found a slug of 1/4 to 3/4 ounce nuggets and my largest nugget ever, a 4.95 ounce gold and quartz nugget. I was one of the happiest guys on the entire planet when that nugget came out of the ground! In 2002 I bettered it with a 6.85 ounce nugget and over 2 pounds of detected gold. So there you go. It took me the longest time to warm up to these 21st century prospecting methods. But I am ready now to let the past go and put my pan, sluice box, and gold dredge aside to concentrate on this exciting field of electronic prospecting. I'm more excited now about prospecting than I have ever been, and cannot wait for my next opportunity to test my skills in the field. ~ Steve Herschbach Copyright © 2002 Herschbach Enterprises Steve's Mining Journal Index5 points
 -
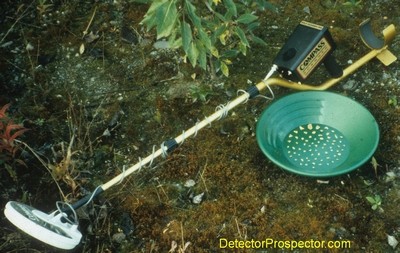 The Chisana area of Alaska was the site of the last major gold rush in Alaska in 1913. As a young man researching areas to look for gold I found a reference to this remote location in the Wrangell St. Elias Mountains. It is accessible only by air and for short periods of time each year. I started visiting this area in the early 1970's and then off and on again over the decades that followed. The area is high above treeline and frozen for most of the year. It was mined with simple shovel into sluice box type operations along the creeks followed up by hydraulic mining on bench deposits. The remote location, lack of water, short season, and generally small area of the gold deposits meant this district never saw anything more complex than hydraulic mining operations. In later year operations have been confined to smaller scale hand operations plus gold dredging and metal detecting. I told a couple stories about this area as part of my Steve's Mining Journal but kept fairly low key about the location. This was mostly because the claim owners were not looking for publicity. However, the mine owners decided to sell a couple of their claims. They had to advertise them to sell them. That in turn gave me the excuse to finally tell more about my visits to the place over the years, and to share the many photos I have of this rather unique part of Alaska. I am telling the tale as part of an on-going episodic thread on the Detector Prospector Forum - The Chisana Story - check it out! Steve Herschbach with gold creviced from bedrock at Chisana, Alaska5 points
 -
 Here is a question I received via email, with personal references removed. I prefer to answer these on the forum so everyone gets the benefit of the answer plus others can offer their opinions also. "I am new to metal detecting and, your site here has really helped me out. I have a couple questions that maybe you can help me out with. What are some of the geologic indicators that you look for to determining where to prospect for nuggets? I try to study some of the geology maps but I could use some further pinpointing. I have also been looking at the National map of Surficial Mineralogy. Using the aster and minsat7 maps what are some of the indicators that may point you to higher gold bearing ground? Any help would be deeply appreciated. Could you point me to some old places where you have found gold? I'm not asking to be shown active patches. Just areas that you feel are worked out. I just want to see what gold bearing ground looks like. This would help me to start to learn the commonalities and characteristics of gold bearing grounds. Still looking for that first nugget! Thanks again for any info you can provide." My method is much simpler than that. I basically look for gold where gold has been found before. Think of it like fishing. If you want to go catch salmon you have two options. You can go to where people have caught salmon before - pretty good odds here. Or you can go where nobody has ever caught a salmon before. Very poor odds! So call it prospecting using history to determine where gold has been found before, and then getting as close as I can to those places. History and proximity. Finally, I may then employ geology to narrow that search in a given area if it turns out the gold is confined to certain rock types. The first place I normally turn as a rough guide to any new location in the U.S. is: Principal Gold Producing Districts Of The United States USGS Professional Paper 610 by A. H. Koschmann and M. H. Bergendahl - A description of the geology, mining history, and production of the major gold-mining districts in 21 states. This 1968 publication obviously lacks the latest production figures but it still is a great overview to where an individual prospector can look for gold in the United States. It is a 283 page pdf download so be patient. Pay particular attention to the listed references in the extensive bibliography for doing further research. You can download this here and find many more useful free books on this website at the Metal Detecting & Prospecting Library Principal Gold Producing Districts of the United States So just for fun let's say I want to go look for gold in New Mexico. The section on New Mexico starts on page 200 and here is a quick summary of the opening paragraphs: "The gold-producing districts of New Mexico are distributed in a northeastward-trending mineral belt of variable width that extends diagonally across the State, from Hidalgo County in the southwest corner to Colfax County along the north-central border. From 1848 through 1965 New Mexico is credited with a gold production of about 2,267,000 ounces; however, several million dollars worth of placer gold was mined prior to 1848. Mining in New Mexico began long before discoveries were made in any of the other Western States (Lindgren and others, 1910, p. 17-19; Jones, 1904, p. 8-20). The copper deposits at Santa Rita were known and mined late in the 18th century, and placer gold mining began as early as 1828 in the Ortiz Mountains south of Santa Fe. In 1839 placer deposits were discovered farther south along the foot of the San Pedro Mountains. The earliest lode mining, except the work at Santa Rita, dates back to 1833 when a gold-quartz vein was worked in the Ortiz Mountains. In 1865 placers and, soon afterward, quartz lodes were found in the White Mountains in Lincoln County; in 1866 placer deposits were discovered at Elizabethtown in Colfax County, and silver-lead deposits were discovered in the Magdalena Range in Socorro County. In 1877 placers and gold-quartz veins were found at Hillsboro, and in 1878 phenomenally rich silver ore was found at Lake Valley in Sierra County. The mineral belt of New Mexico is in mountainous terrain that lies between the Colorado Plateau on the northwest and the Great Plains on the east. It is a zone of crustal disturbance in which the rocks were folded and faulted and intruded by stocks, dikes, and laccoliths of monzonitic rocks. Deposits of copper, lead, zinc, gold, and silver occur locally throughout this belt. Some deposits of copper and gold are Precambrian in age, but most of the ore deposits are associated with Upper Cretaceous or Tertiary intrusive rocks. The gold placers were probably derived from the weathering of these deposits. In later Tertiary time lavas spread out over wide areas of the State, and fissures within these rocks were later mineralized. These fissure veins are rich in gold and silver, but in most places they are relatively poor in base metals. In New Mexico, 17 districts in 13 counties yielded more than 10,000 ounces of gold each through 1957 (fig.19). Figure 19 is a handy map showing us where you want to look in New Mexico and also where looking is probably a waste of time. Click for larger version. Gold mining districts of New Mexico The map shows what the text said "The mineral belt of New Mexico is in mountainous terrain that lies between the Colorado Plateau on the northwest and the Great Plains on the east." Sticking to this area is going to be your best bet. Based just on this map I see two areas of general interest - the central northern area, and the southwestern corner of the state. The text mentions that placer deposits were discovered at Elizabethtown in Colfax County, and the map shows that as the Elizabethtown-Baldy mining district. Following along in the text we find this: "The placer deposits along Grouse and Humbug Gulches, tributaries of Moreno Creek, each yielded more than $1 million in placer gold and silver. Another $2 million worth of placer gold and silver was recovered from the valleys of Moreno and Willow Creeks (Anderson, 1957, p. 38-39), and some gold also came from the gravels along Ute Creek. Graton (in Lindgren and others, 1910, p. 93) estimated the placer production of the Elizabethtown-Baldy district prior to 1904 at $2.5 million, and C. W. Henderson (in U. S. Bureau of Mines, 1929, pt. 1, p. 7 40) estimated the production through 1929 at about $3 million (145,138 ounces). The total placer production through 1959 was about 146,980 ounces." The reference material from the passage above is in the back of the book and is where we can get real details. Google is our friend. This stuff used to take me lots of visits to libraries! Anderson, E. C., 1957, The metal resources of New Mexico and their economic features through 1954: New Mexico Bur. Mines and Mineral Resources Bull. 39, 183 p. Lindgren, Waldemar, Graton, L. C., and Gordon, C. H., 1910, The ore deposits of New Mexico: U.S. Geol. Survey Prof. Paper 68, 361 p. Henderson, C. W., 1932, Gold, silver, copper, lead, and zinc in New Mexico: U.S. Bur. Mines, Mineral Resources U.S., 1929, pt. 1, p. 729-759. That is more than enough, but let's also Google placer gold new mexico Lots of great links there, but two jump out: Placer Gold Deposits of New Mexico 1972 USGS Bulletin 1348 by Maureen G. Johnson Placer Gold Deposits in New Mexico by Virginia T. McLemore, New Mexico Bureau of Mines and Mineral Resources May 1994 Notice the source of the last one. Most states with much mining have a state agency involved that can be a good source of information and in this case it is the New Mexico Bureau of Mines and Mineral Resources. That last one is a real gem and contains this passage: "All known placer deposits in New Mexico occur in late Tertiary to Recent rocks and occur as alluvial-fan deposits, bench or terrace gravel deposits, river bars, stream deposits (alluvial deposits), or as residual placers formed directly on top of lode deposits typically derived from Proterozoic, Cretaceous, and Tertiary source rocks (eluvial deposits). During fluvial events, large volumes of sediment containing free gold and other particles are transported and deposited in relatively poorly sorted alluvial and stream deposits. The gold is concentrated by gravity in incised stream valleys and alluvial fans in deeply weathered highlands. Most placer gold deposits in New Mexico are found in streams or arroyos that drain gold-bearing lode deposits, typically as quartz veins. The lode deposits range in age from Proterozoic to Laramide to mid-Tertiary (Oligocene-Miocene) (Table 2). There are some alluvial deposits distal from any obvious source terrains (Table 2). Eluvial deposits are common in many districts; some of the larger deposits are in the Jicarilla district." So now we have a lifetime of ideas on where to go and a basic idea of the geology. And an even better map! Click for larger version. Placer gold deposits of New Mexico Let's look for specific site information. 1. Go to http://westernmininghistory.com/mines 2. Click on New Mexico Mines 3. Click on Colfax County Mines 4. Click on Elizabethtown - Baldy District Here you will find basic site information, references, and a zoomable map with alternate satellite view. An alternate site... 1. Go to https://thediggings.com/usa 2. Click on Browse All States 3. Click on New Mexico 4. Click on Browse All Counties 5. Click on Colfax At this point note you can browse mining claim information or deposit information. Researching mining claims, land ownership, etc. is another topic but here is one source of mining claim location information. For now.... 6. Click on Browse All Deposits or Use The Interactive Map 7. Click on Elizabeth - Baldy A little more detail than the previous site, including this note "SOME FAIRLY COARSE NUGGETS IN WILLOW, UTE, SOUTH PONIL CREEKS, GROUSE AND HAMBURG GULCHES, MORENO RIVER" One more... 1. Go to https://www.mindat.org/loc-3366.html 2. Way down at bottom click on New Mexico 3. Way down at bottom click on Colfax County From here you can dig into all kinds of specific site information but the navigation is a real mess. Have fun! Historic claim staking activity can be a clue. You can get the Big Picture by looking at Mine Claim Activity on Federal Lands for the period 1976 through 2010 OK, that really should have answered your question. As far as places I have been, they are nearly all in Alaska and can be found here Now, I did all the above from scratch with no real prior information on New Mexico in about 2 hours. You can do the same for any state. However, finding where the gold is really is the easy part. The hardest part by far is finding out who controls the land and getting proper permission for access. In Alaska everything is covered by thick ground cover, so opportunities for metal detecting are strictly at creek level, and nearly always claimed. The process there is simple - find out who owns the claims and get permission for access. In most of the western U.S. there is far less or no ground cover, and so getting in the vicinity of and searching around or near mining claims without being on them is a far more viable option than in Alaska. Or you can try and get permission to access the properties. You still need to be able to track down property locations and owners however. For private property I subscribe to and use OnXMaps for my PC, Google Earth, iPad, and iPhone. It quickly maps private property and gives you access to tax roll information about the owners. Tracking down mining claims is easy in the big picture and harder in the details. The Diggings referenced before has interactive claims maps. I subscribe to Minecache for their Google Earth overlay. However, the most comprehensive source with the deepest repository of Land Ownership information is Land Matters. They have online claim mapping with direct links to claims owner information. Note that all online sources have a lag time between the actual staking of a claim on the ground and when it reaches the online systems, if ever. I say if ever because some claims exist solely at the county or state levels and there is no good way to find them short of visiting local recorder's offices or eyeballs on the ground. Prior thread on finding claims information. Finally, I am not the last word on this subject by any means. This is just how I go about it - I hope it helps somebody else. This article was promoted from a thread on the forums. Additional details may be found there via follow up questions and posts. ~ Steve Herschbach Copyright © 2017 Herschbach Enterprises5 points
 -
 The Minelab Gold Monster 1000 was introduced in 2017 and is still in production. The GM1000 was created as a relatively inexpensive, easy to operate, high performance metal detector. The Gold Monster 1000 is designed specifically for gold prospecting but may have applications such as micro jewelry detecting. At 45 kHz with both automatic ground tracking and automatic sensitivity settings, the Minelab Gold Monster 1000 is not only very sensitive to small gold but it is relatively easy for beginning detectorists to use. I am fortunate to have been involved in the testing of the new Minelab Gold Monster 1000 prior to its release. One benefit is that I have seen the questions that others have posed about the detector, and now I can answer a few of them. When I use new detectors I always have a goal in mind. I am not trying to pick the detector apart for what it cannot do. Instead, I believe most well designed detectors have something they excel at. My goal is to determine how to use a new detector for maximum benefit. The best way to make that happen is to use the detector in the way it was intended to be used, instead of trying to force it to be something it is not. The key is to be realistic. The Gold Monster 1000 is sold as an entry level single frequency metal detector. Expecting it to outperform detectors costing many times its price is unrealistic. Engineers face a very important choice when designing a single frequency metal detector, especially as regards gold prospecting. What frequency should the detector run at? That choice determines nearly everything else about the detector. In general, low frequencies below 20 kHz handle mineralized ground better, and offer good performance on larger gold nuggets. Higher frequencies over 20 kHz enhance the sensitivity to small gold nuggets, but unfortunately ground handling suffers. The number one question I see asked on the internet is how the Gold Monster stacks up as compared to this detector or that detector. Minelab has actually tried to answer that question directly via the following illustration: Minelab Gold Monster Frequency Range Compared The majority of the single frequency nugget detectors on the market today operate at or near 18 kHz. These detectors handle ground relatively well for non-PI detectors, and have good sensitivity on gram size and larger gold nuggets. They can detector smaller gold, but the smallest gold is not where they excel and the chart attempts to illustrate that. Other single frequency detectors running as high as 71 kHz have superb sensitivity to the smallest gold nuggets, but tend to suffer when it comes to depth on larger gold in highly mineralized ground. Again, the chart attempts to illustrate this fact. The Minelab Gold Monster 1000 engineers decided to concentrate on a frequency that offered the best attributes of the lower and higher frequency extremes. The goal was to design a machine that would attempt to acquire in a single pass the bulk of the gold that machines operating at either extreme could recover if operated together – and yet do it with just one detector operating as efficiently as possible. The catch is that the Gold Monster is still a single frequency detector and it cannot possibly capture 100% of the gold that two detectors operating separately at two vastly different frequencies can capture. If you study the illustration carefully, you will see there is still some gold the 18 kHz detector will do better on, and some gold the 71 kHz detector will do better on. Minelab is not claiming to be able to outperform every other detector under all other circumstances. The goal here is to capture as much of the obtainable gold as is possible with a single detector operating in the most efficient manner possible. Minelab Gold Monster 1000 nugget prospecting detector I have mentioned efficiency because there is more that goes into designing a gold prospecting detector than just the operating frequency. This is where Minelab is attempting to not only make a wise choice in the operating frequency, but to extend the efficiency of that frequency by optimizing the other parameters. First, electrical interference is detected and automatically rejected as much as possible when the detector is first turned on. This helps alleviate interference that could result in less than optimum performance. A great deal of effort has been made into designing a sensitivity control that offers the ability not only to manually tune the detector but to deliver excellent results automatically. The automatic operation is important in ground that varies dramatically from place to place in such a fashion that it becomes difficult – inefficient – to constantly be readjusting the machine manually to retain the best overall performance level. Novices in particular tend to set and forget the sensitivity, leading to a situation where the detector could be running better if the control were optimized more often. The crowning glory of the Minelab Gold Monster 1000 however is the automatic ground tracking system. The 45 kHz frequency is considered to be a high operating frequency, and as such it is subject to possible issues from highly mineralized ground and hot rocks. Manual tuning detectors can have great difficulty dealing with these problems… here is that word again… efficiently. The operator must be on top of and constantly adjusting the machine manually. It is very easy for the operator to be out of sync with the ground conditions and operating at less than optimum performance. At high frequencies having the proper ground balance is extremely critical. Manual ground balance versus automatic ground tracking I will admit I have always tended to distrust automatic ground tracking systems. The theory is they can track out good signals resulting in missed targets. The reality however is the risks entailed by not being properly ground balanced are even greater, especially for novices. The illustration below attempts to show what happens when the operator of a manually tuned detector falls out of sync with changing ground conditions, and then “catches up’ by retuning the machine. The automatic tracking or continuous ground balancing detector however maintains optimum conditions at all times. Even given this evidence in the past however I was a skeptic, and always preferred to manually adjust my detector ground balance controls. That is until I obtained first a Minelab SDC 2300 and then a GPZ 7000 detector. The SDC forced me to use automatic ground balance by offering no other option. A surprising thing happened – I liked it! It worked and it worked extremely well, so much so that when I got my GPZ 7000 it also remains in automatic ground balance mode. The fact is that Minelab has always been a leading developer of automatic ground balancing systems, and I do not think it is being unreasonable to state that they may have the very best ground tracking systems available. The company really has had no choice being based in Australia and developing machines for ground conditions considered to be among the worst in the world. Can the Minelab Gold Monster 1000 go up against the hottest high frequency detectors made and hold its own? Yes. I have personally used the Gold Monster with its 5” coil to easily find nuggets (flakes?) weighing under a grain. Not grams, grains - there are 480 grains per Troy ounce. Remember however that even Minelab in that first chart is telling you that a machine tuned specifically at a much higher frequency will have an edge on at least some tiny gold nuggets. Eleven small nuggets 14.9 grains total, largest 4.4 grains - Smallest at bottom 0.6 grain and 0.3 grain The difference and the serious advantage I believe with the Gold Monster 1000 is in the combination of the superior Minelab ground tracking system and the automatic sensitivity system, designed specifically for the GM1000. In all but the mildest ground operators will find that the Gold Monster is a much more efficient detector that allows more ground to be covered while keeping the machine tuned for the best performance possible. My advice to the old pros that get their hands on the GM1000 is that rather than try and force the machine into operating like your favorite manually tuned machine, seek out instead conditions where that machine struggles. Then trust in the Minelab automatic ground balancing system to compensate for and deliver superior performance under those conditions. Use manual more for targeting specific small areas. Case in point, I took the Gold Monster to a location where hot rocks had given my GPZ 7000 some difficulty. Much to my surprise the Monster was able to automatically compensate for and allow me to operate in those hot rocks and find a couple tiny nuggets too small for the GPZ 7000 to find. The machine was far smoother and I was able to cover ground far more efficiently with automatic ground balance. I followed this up with a visit to a location with wet alkali ground where a high frequency machine would normally fail. I struggled with manual sensitivity for a bit, then threw in the towel and went to the highest Auto+ sensitivity setting. The machine quieted right down and I found a nice little nugget shortly thereafter. Nugget embedded in lump of dirt If the ground allows you can certainly use manual ground balancing to get that hot edge on tiny gold nuggets. The Gold Monster 1000 lacks a standard threshold, but it is easy to set up a pseudo threshold by advancing the sensitivity to where the machine produces some light feedback from the ground. Those who like a threshold can run it this way – others may wish to back down just one notch for silent operation. Old timers like me rebel at the thought of running without a threshold but with the GM1000 it works. The normal reason for running a threshold is to be sure the detector does not fall out of proper ground balance. Here however you can put a superb automatic ground balance to work for you, eliminating that concern. For the very worst conditions, the automatic sensitivity system can augment the automatic ground tracking to allow for efficient ground coverage under conditions that will bring other detectors in this class to a crawl, if not a complete stop. Frankly, if you can’t get the Gold Monster to handle the ground, it is time for a Minelab PI detector or a GPZ 7000. To sum up, I do not want to leave you with the impression that the Gold Monster is the be all and end all of single frequency nugget detectors, and that it will under all circumstances get better performance on every single gold nugget than other single frequency detectors. That is not possible given the limitations imposed by having to choose a single operating frequency. I do believe however that the engineers at Minelab have come as close to this as is possible. The real secret to getting good results with the Minelab Gold Monster 1000 versus the competition will be in leveraging its superb ground handling capability to get the best overall gold nugget performance possible from a single frequency detector. ~ Steve Herschbach Copyright © 2017 Herschbach Enterprises Official Minelab Gold Monster 1000 Page Minelab GM1000 Color Product Brochure Gold Monster 1000 Getting Started Guide Forum Threads Tagged "minelab gold monster" Minelab Metal Detectors Forum Jonathan Porter On Mastering The Minelab Gold Monster Understanding The Sensitivity Control On The Gold Monster 1000 Reports Of GM1000 5" Coil Touch Sensitivity My GM1000 Methodology - Manual Versus Auto Sensitivity Minelab Gold Monster 1000 Technical Specifications* Internet Price $849.00 Technology Induction Balance (IB) Transmit Frequency 45 kHz Autotune Mode(s) Pre-Set Slow Motion Ground Rejection Automatic Ground Tracking Soil Adjust No Discrimination Iron Reject Mode plus Visual Indicator Volume Control Yes 1 - 6 Threshold Control No Tone Adjust No Audio Boost Yes (Always On) Frequency Offset Yes - Automatic On Power Up Pinpoint Mode No Audio Output Speaker & 1/8" Headphone Socket - Headphones Included Hip Mount No Standard Coil(s) 10" x 6" elliptical DD & 5" round DD Optional Search Coils N/A Battery Li-Ion Rechargeable Included, 8 AA Optional Operating Time 20 Hours Weight 3.2 lbs. (with rechargeable battery and 10" coil) Additional Technology The GM1000 automatic sensitivity setting is a feature not seen before in prospecting detectors. Notes Unique rod mounting system allows use of broomstick or other items as a rod. *Notes on Technical Specifications - Detailed notes about the specifications listed in this chart.5 points
 -
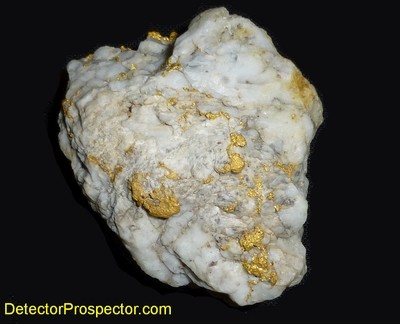 This discovery was made earlier in 2016 but I did not get around to publishing details about it until now. I was detecting near some small hydraulic pits in California and wandering around in the area below one of the pits. At first I thought I was on virgin ground but the ground slowly revealed itself as a tailing outwash area from the pit above. The material is now so overgrown with trees and covered with a thick layer of duff (pine needles, bark, branches) that it gives the appearance of unmined ground. I got a massive boomer signal on the GPZ and I honestly thought it was a can. A quick dig with my pick revealed instead a large chunk of gold and quartz. The first sight of the nearly 9 ounce piece about stunned me but I soon determined that what I had found was mostly quartz, but still, a pretty nice find. There are around a couple ounces of gold embedded throughout the white quartz. In theory this is the largest "gold nugget" I have ever found, but obviously the fact it is mostly quartz takes a little of the shine off that. Still, absolutely no complaints from this kid on making this find! The large specimen was obviously washed through whatever sluice and riffle system the oldtimers were employing, and washed down to end up resting on top of the tailing outwash fan. At one time it was just sitting there in plain view, although it would have taken a sharp eye to have spotted the gold if a person was just walking by. Then a forest grew on the tailings and a century of pine needles and branches fell and obscured the piece. Steve at location where 8.75 ounce gold specimen was found I of course had visions of even more finds to be made in this apparently overlooked location, but very diligent hunting for quite a few hours turned up nothing but some trash and one little bit of rock with gold in it. In Australia specimens like this are usually just crushed (dollied) and the gold panned out. We have a better market for specimen gold and so this could be sold as is. Unfortunately the mass of quartz hides most of the contained gold so this is not a prime specimen. It would be better with less quartz showing more of the gold. If the quartz were pure white it also would be more valuable but it has darker mineral inclusions. Still, I have considered slicing it up to see if any good cabochon material can be obtained for jewelry purposes. I have also considered just soaking it in Whink as an experiment to see how many months it would take for very weak hydrofluoric acid to completely dissolve the quartz, leaving loose crystalline gold. For now doing nothing has been the easy option. Close up of 8.75 ounce gold specimen found by Steve Herschbach I would like to say the Minelab GPZ 7000 had something to do with my finding this specimen, but the truth is I think there is enough lumpy gold in it that nearly any decent detector would have found it. The GPZ 7000 is remarkably sensitive to specimen gold containing finely dispersed gold, but that is not a problem with this specimen. The warning for some however is that as a shallow and very loud response it is easy to assume a trash target like a can. Always be aware that there are still large gold nuggets and specimens out there at very shallow depths, and the faint "zip-zip" sound so many ears are trained to find can initially be thrown off by what seems to be a junk signal. I seriously thought I was excavating a can so that I could properly dispose of it! I get irritated by all the aluminum cans I see discarded when I am out detecting and end up packing them all out. I wish I could say the same for all the steel cans and trash I find, but that simply is not practical, though I haul out what I can. The California Mother Lode country is criss-crossed with gold-bearing quartz veins large and small. Most were too small to be developed into mines and many were small enough to be completely overlooked. Even quartz veins that for the most part are barren may have one small section that is rich in gold. What this means is that chunks of quartz like this can be found almost anywhere in Mother Lode country. Clark, William B., “Gold Districts of California;” Bulletin 193, California Division of Mines and Geology Sacramento, California, 1970 This article originated as a post on the DetectorProspector Forum. Additional details may might be found there in follow up posts. ~ Steve Herschbach Copyright © 2015 Herschbach Enterprises5 points
 -
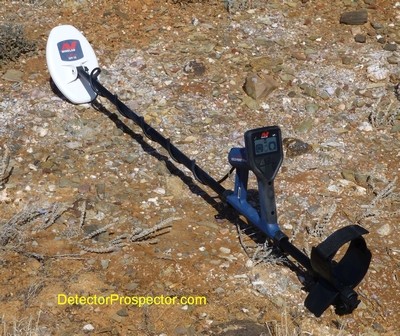 This outing was part of my testing of the Minelab Gold Monster 1000, a new high frequency (45 kHz) VLF detector for gold nugget detecting. The Gold Monster 1000 was designed for use in Africa and other third world countries and therefore has some unique design features. The key design goal is ease of operation, and the control set is kept minimal, with everything possible done automatically. The GM1000 is the first nugget detector I have ever used that even has an automatic sensitivity tracking function. All this adds up to the Gold Monster 1000 being an extremely easy detector for beginners to learn. Yet the latest twist of high gain, high frequency circuitry means the Minelab Gold Monster 1000 has enough power to satisfy long-time detectorists like myself. Frankly, when I first saw the Gold Monster 1000 I thought it was an odd looking thing. The lack of normal threshold based operation in particular takes some getting used to for somebody who has an ear trained to listening to a threshold. The GM1000 is silent search, which is definitely disconcerting at first. However, the boosted audio and very good external speaker quickly won me over. The Gold Monster 1000 bangs out so loud on even the tiniest gold that this a machine you can use without headphones unless there is a lot of background noise. The near automatic operation makes the machine great for quick grab and go detecting. Between the automatic ground tracking and automatic sensitivity I found I could get the GM1000 to handle almost anything I threw at it, including some wet alkali ground that would quickly shut down most detectors of this type. I found I liked covering ground more quickly with the Gold Monster than would normally be the case with manual tune detectors. It is a terrific detector for quick and dirty scout work. Minelab Gold Monster 1000 on red Nevada soil dusted with salt particles - hot alkali ground! The problem with a silent search machine while in manual ground balance mode is that without a threshold you can end up leaving some performance on the table. If a setting of eight generates a little ground feedback, and you decide to go with 7 to make the machine completely silent, there is nothing wrong with that per se. However, if the ground changes and gets milder you may have the ability to run at a higher level of sensitivity, and without a change in the audio to alert you to a change in the ground, you will just leave the setting where it is. In my case if a setting of 7 is completely silent, I will bump to a setting of 8, and this almost always gives me that little ground feedback I want. If 7 is too noisy, I will drop to a setting of 6 and this will probably do the trick for me. The range between each setting seems about perfect for a person to settle on a range of three settings, too little, too much, and just right. For my areas 6 - 7 - 8 are the magic numbers. For worse ground the range may shift lower, to 5 - 6 - 7. Nugget embedded in lump of dirt excavated from ground while using Minelab Gold Monster 1000 Try and picture this. At sensitivity 7 I am just scanning along, coil lightly on the ground, with soft ground feedback, waiting for that hard little signal that even the tiniest target will generate. Then all the sudden the machine goes dead quiet. I have entered less mineralized ground. One thumb tap to sensitivity 8, and I get my "false threshold" back. Or, at a setting of 7 the machine gets noisier. Maybe a little alkali patch or more mineralized ground. A quick tap down to 6 reduces the feedback to my desired minimal level. What I am doing is letting the ground tracking do its job, and then just bumping the sensitivity up or down a notch to ride the ragged edge of best performance for the ground. Quick guide to Minelab Gold Monster 1000 functions / controls I for all intents and purposes always use the all metal deep seeking mode, and use the iron discrimination meter to decide whether the target is worth digging or not. The disc mode gives up significant depth, and items can be missed entirely whereas the all metal mode will always give a signal if at all possible. Personally I would only use the disc mode to shut down very troublesome hot rocks or for areas where the trash is so dense that analyzing each target would be too inefficient. I much prefer the 10" coil over the 5" coil for doing anything but chasing the tiniest bits. The 10" elliptical coil really will hit gold nearly as tiny as can be had with the 5" coil, but with double the ground coverage and much better depth on larger nuggets. To sum up, I will normally always run the Minelab Gold Monster 1000 in all metal mode, let the ground tracking handle the ground, and bump the sensitivity up or down within whatever three number range seems to work best in any given area. For me and northern Nevada 6 -7 - 8 does the trick very well. I have an article that explains the settings in much more detail here. Eleven gold nuggets found by Steve with GM1000 - 14.9 grains total, largest 4.4 grains, smallest at bottom 0.6 grain and 0.3 grain I found it deceptively easy to find some sub-grain bits of gold (480 grains per Troy ounce) in areas I have previously hunted. I went from skeptical about this funny looking little detector to being quite pleased with it, and currently it is one of my favorite detectors. A warning however. The Minelab Gold Monster 1000 handles ground as well as a hot VLF can, but it is in no way a substitute for a pulse induction detector in the worst ground and hot rocks. Anyone expecting that of an inexpensive little VLF is expecting too much. To sum up, I am having a terrific time with the GM1000 and am glad I got involved in the project. Thanks Minelab! This article started as a post on the DetectorProsepctor Forum. More information might be found there in follow up posts. ~ Steve Herschbach Copyright © 2017 Herschbach Enterprises5 points
 -
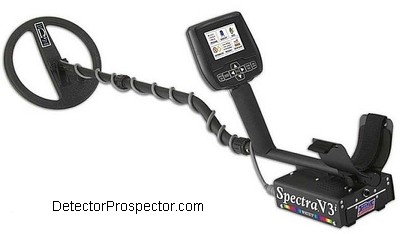 The White's V3i was introduced in 2009 and ceased production in 2020. The V3i was originally released as the White's Spectra Vision or simply White's Vision. Due to a name conflict with another company the name was changed to White's Spectra V3. The original Vision and V3 models both suffered from software issues. Updates were issued and finally consolidated into the final White's Spectra V3i model which is still being manufactured today. All previous models could be updated to the latest V3i software by returning the detector to White's Electronics. This all leads to quite a bit of model confusion when buying used versions of these detector because it is not always clear if a model has been updated or not. The V3i was also later released in a feature limited model called the VX3. There are several things that make the White's V3i unique. One of the most obvious is the use of a very bright high contrast color screen, still ahead of its time compared to anything else on the market. The V3i takes screen customization to a level that quite frankly is unlikely to be exceeded in the near future if ever. There is a reason for that that I will explain shortly. The V3i was also one of the first metal detectors to incorporate a proprietary wireless headphone system designed to overcome the lag issues common in aftermarket solutions at the time. It was initially promised that the wireless system would also enable communication via a plug in dongle that would allow the V3i to be programmed via software on a PC. This ended up being one of the never realized disappointments of the White's V3i. The headphone system ended up working well enough after initial problems were ironed out but the proprietary nature of the system limits the choice of headphones to a single model. White's V3i multifrequency metal detector The V3i is the direct successor to the White's DFX, a dual frequency metal detector that could run at 3 kHz and 15 kHz, either separately or both at once. The V3i took this another step, by running at 2.5 kHz, 7.5 kHz, or 22.5 kHz, again either separately or all three at once. This is very unique on the market today. Most multifrequency detectors either let you selectively choose a single frequency to run at from several choices, or they run several frequencies at once. The V3i is unique in letting you do it either way. The V3i comes with a 10" round DD coil. One of the design goals was that is was to be able to use the coils already in existence for the White's DFX and MXT models, the so-called Eclipse series. The V3i did achieve this goal, but the ability to use a transmit boost function was generally limited to newer versions of those coils that are "V" rated. Coils that are not V rated may overload when transmit boost is employed. This is honestly a bit of a non-issue as there is little reason to ever employ transmit boost but it does seem to worry a lot of people that non-V rated coils might not be performing up to specs. White's coils are individually serial numbered, with the serial number stamped into on mounting ear of the coil. Serial numbers that start with "V" indicate the coil is V rated. Aftermarket coils would be especially suspect in this regard. For more information on Spectra coils some excellent information has been compiled here. D2 10" Round DD coil, 6" x 10" DD coil, and 4" x 6" DD "Shooter" coil The 10" round DD coil that comes with the V3i is a decent coil. The 6" x 10" Eclipse DD coil however is possibly the best all around prospecting coil for the V3i. The solid construction is less likely to hand up on stubble and the narrow profile is good for getting into tight locations. The 4" x 6" Shooter DD coil is great for trashy locations and small gold nuggets. The large 12" concentric coil and even the 9.5" concentric coil do not handle extreme ground mineralization very well, and the 12" is too large for many other tasks, like coin detecting trashy locations. One aftermarket coil is worth mentioning, because it is one of the only reasons I own a White's V3i. A company called Applied Creativity made some coils marketed by famed White's dealer Jimmy Sierra. One of these coils was a 3" x 18" model with a special "figure 8" winding called the Bigfoot. This coil was actually made for the DFX and is an exceptionally light weight coil yet capable over covering large areas quickly and efficiently. The Bigfoot does not get a lot of depth, but for recovering shallower targets like recent coin drops and jewelry it is unmatched in performance. Unfortunately this coil is no longer made and used ones easily go for several hundred dollars if you are lucky enough to find one. Several types were made and not all will work on the V3i, only those made for the the MXT and DFX are compatible. Original White's Spectra Vision model from 2009 with Bigfoot Coil Compatible being a relative thing. The Bigfoot is not V rated and some will not work properly on the V3i. Almost any of them will exhibit highly skewed target id numbers in the 22.5 kHz range, but oddly enough this can be used to good effect for some jewelry detecting. The bottom line is I had a Big Foot for my DFX and kept it for use on my V3i. The Big Foot / V3i combo is my number one dry land jewelry detector. White's V3i - My Third Try. The White's V3i does have a 22.5 kHz Prospecting Mode and other features that in theory make it a proficient prospecting detector. The machine is hot on small gold in the 22.5 kHz mode. When the original Vision came out I did some bench tests on it versus the MXT using a 0.7 grain test nugget (480 grains per Troy ounce). An MXT with a 4" x 6" Shooter coil at max Gain would barely signal on the nugget within 1/4" of the coil. The same Shooter coil was used on the Vision in Prospecting Mode (22.5 kHz only), with no tweaks except max RX Gain. The threshold a bit ratty but no worse than MXT at max Gain. The Vision got a good hit at 2" and whisper at 3". I then engaged the TX (transmit) Boost, raising voltage to the coil from 10V to 30V. I then got a good hit at 3" and whisper at 4". That is a 50% increase on a tiny nugget by engaging TX Boost. This is easily better than MXT performance and actually closer to what I'd expect from a GMT. This was an air test and ground conditions are unlikely to allow running at full gain with TX Boost engaged but it would work in milder ground. In fact Transmit Boost will work against you in bad ground and it also cuts battery life dramatically. Still, this test shows there can be benefits on small gold items in particular. Of interest also is that the test was done with an old coil from my MXT, proving that not all coils need to be V rated to work properly. 0.7 Grain (480 grains per Troy Oz) Gold Test Nugget There have been some good gold nugget finds made with the V3i in the mild ground at Ganes Creek, Alaska. My friend Marko used the V3i there for at least two visits and reported to me that he thought the V3i was unexcelled at identifying deep ferrous junk versus gold nuggets in the relatively mild ground at Ganes Creek. He had quite a few ounces of gold to prove it! He used the stock Prospecting mode exclusively. The bottom line is that the V3i is first and foremost a detector designed for coin and jewelry detecting, and I would not recommend it specifically for somebody looking for a gold nugget prospecting detector. Other machines like White's own GMT or MXT can be had for half as much money that are far more practical as nugget detectors. However, if you do own a White's V3i, rest assured it can be used to find gold nuggets. It would in particular be useful in milder ground with copious amounts of ferrous trash where its advanced discrimination capabilities can be put to good use. In more mineralized ground the V3i the V3i may struggle however because it's ground balancing system is not up to tracking in bad ground and manual adjustments can be difficult to make due to the way the ground balance system is controlled. The tracking must be "locked" and the only manual adjustment that can be made from that point forward are small offsets to the locked setting. Don't worry about this for regular metal detecting - I am specifically talking about gold prospecting in highly mineralized ground. If the V3i has a weak spot this is it. ads by Amazon... I said earlier in this article that the V3i takes customization to a level unlikely to be exceeded now or in the future. The V3i is very much metal detector engineers dream detector, with direct access to many machine functions that are hidden in other detectors. This in theory allows the user to create almost any detector they want with the right degree of programming. What has been revealed in actual use however is that the number of functions and their interactions create layers of complexity that overwhelm most people. The V3i can be operated quite well with its factory preset programs and a bit of tweaking, but at the end of the day it represents feature overkill. It is a great detector for people who love to fiddle with the detector itself, but for most metal detecting the average users prefer something simpler that just gets the job done. The VX3 was a response to this by offering similar functionality in a more feature limited way. I think the V3i will be a high water mark when it comes to this type of feature overload and it is unlikely anyone will in the future try to outdo it, for the simple reason doing so is not the sure way to sales success. For me personally the V3i is one of the most capable jewelry detectors ever made, especially when coupled with the Bigfoot coil. The ability to customize both the screen and audio responses combined with expanded target VDI ranges on jewelry type targets at higher frequency ranges makes the White's V3i a jewelry hunters dream machine. That said, similar results can be had by people with simpler and less expensive detectors. The V3i is just a machine for the true detector nerd, and I have to say I guess that is what I am! Official White's V3i Page White's V3i Instruction Manual White's V3i Advanced User Guide White's V3i Information Page White's V3i & VX3 Master Reset Selectable Frequency And Multiple Frequency Forum Threads Tagged "whites v3i" White's Metal Detector Forum White's Spectra V3i Technical Specifications* Internet Price V3i $1349.00 w/Wireless Phones $1555.00 Technology Induction Balance (IB) Frequency 2.5, 7.5, & 22.5 kHz, together or separately Autotune Mode(s) Varied Motion Settings Ground Rejection Tracking, Fixed & Manual Soil Adjust Beach Mode Discrimination Visual, Tone, Notch - Ultimate Customization Volume Control Yes Threshold Control Yes Tone Adjust Yes Audio Boost Yes Frequency Offset Yes Pinpoint Mode Yes Audio Output 1/4" headphone socket & speaker Hip Mount Shaft Mount Only Standard Coil(s) 10" Round DD Optional Search Coils Over 15 accessory coils available Battery Eight AA Operating Time 8 - 10 hours Weight 4.5 pounds Additional Technology Wireless headphones, exceptional color screen, ultimate in programmability Notes A machine for true "detector nerds"! *Notes on Technical Specifications - Detailed notes about the specifications listed in this chart. V3i example screens - click image for larger version4 points
 -
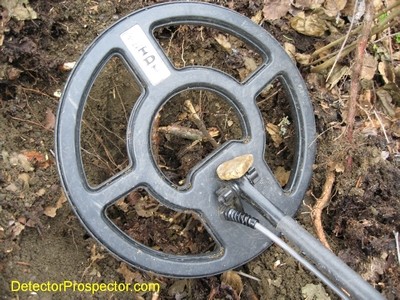 In 2007 I was sent a prototype of the White's PulseScan TDI to test, and I was so impressed that I decided to put the new model into service at my "pay-to-mine" operation at Moore Creek, Alaska as soon as it was available. Moore Creek has mixed hot rocks that severely impede the performance of regular metal detectors. I lobbied for and got four of the very first units off the production line in the spring of 2008 and those detectors were provided to visitors at Moore Creek that had no detector of their own or who needed a backup. These people by nature often have little or no detecting experience. I was happy to find some stock settings for the TDI that worked well at Moore Creek. I could basically set the detector for somebody and as long as they did not touch the controls it worked well. Just turn the detector on and go. Still, experience counts for much and novices have a tough time finding gold nuggets, just due to lack of basic detecting skills. We had found in the past that regardless of the detector used we were happy if novices could just find any gold at all metal detecting during their visit. So I was very pleased that many new detectorists at Moore Creek found their very first nuggets metal detecting with the White's TDI. The unit is not only very capable but also quite easy to operate and so really the only task left to the novices was to get over a nugget. Mike and Karl were pretty typical of many of our visitors. Never really done any metal detecting for gold and no detectors of their own. I sent them out with the TDI and they each found by far the largest gold they had ever found in their lives. The small stuff at Moore Creek is larger than many people will ever find and so I had the opportunity to create some real life experiences for a lot of people. It really is a good feeling seeing people make their first finds and knowing you made it happen. Mike's gold specimen weighed in at 0.28 ounce and Karl got two, 0.12 and 0.25 ounce respectively. Mike B. & Karl E. of Anchorage, Alaska with Moore Creek TDI finds Close up of Mike and Karl's gold specimens I was doing some bulldozing at the mine to stir up some nuggets for our visitors. I got to one little knob of gravel and after I flattened it out I thought "that looks like a good spot". I had not done any detecting in a couple weeks and figured it was about time. So when I got the dozer back to camp I got a TDI out and headed to the location. A guy had just come into camp as I was leaving and so I told him to head up the same way. I got to the spot and started detecting. First down one row and up the other. After about ten minutes I got a nice signal, and dug up a great 0.31 ounce specimen. It is a little section of a quartz vein with a nearly solid gold core of gold running through the middle. 0.31 ounce Gold Specimen found with White's TDI I turned off the detector and headed back to camp. The other guy was now just arriving and asked me what was wrong. I told him nothing was wrong, but that I'd got my nugget and so was done. You should have seen the look on his face! Poor guy had been looking for gold for days and I walk right out and find a nugget in ten minutes. We had an 82 year old gentleman in camp that week who was not having much luck detecting so I gave the specimen to him to take home to Florida. So what were the settings, etc. we used with the White's TDI at Moore Creek? The Pulse Delay was always at 10, the most sensitive setting for gold, and we were always able to run the maximum Gain of 12. The Ground Balance was tight as we have both a positive and negative hot rock at Moore Creek. A bit one way and the positive rocks signaled and a bit the other way and the negative rocks signaled. Negative hot rocks are by far the more prevalent. In general a setting of about 9 eliminated nearly all the hot rocks. But no matter how much I tweaked there were faint hits on some hot rocks. This is not surprising as the Minelab PI detectors also hit the hot rocks at Moore Creek. The ground is a weird mix of fairly neutral soil made up of the underlying decomposed shale bedrock with basalt and monzonite hot rocks eroded from the nearby hills. However, I determined a couple things with the TDI that really helped with the new people. First, virtually all gold at Moore Creek gives a high tone, even multi-ounce pieces. I believe this is because of the generally high silver content combined with the specimen nature of the gold. Surprisingly, when silver is added to gold it lowers the conductivity instead of increasing it, and so low purity gold is more likely to give low conductor high tone responses on the TDI. You can figure with 99% certainty that a low tone is an iron target or hot rock at Moore Creek. I ended up with the novices ground balancing to kill the high tone hot rock responses and did not worry about low tone hot rocks. Then I set the very unique to the TDI Target Conductivity switch to eliminate low tones and only sound off on low conductivity high tone targets. This made the TDI a real no-brainer to run. Dead quiet, no false signals at all. Then get any high tone at all, and it was always a bullet or shell casing (rare at Moore Creek), some small ferrous trash that reads low conductive, or gold. The ferrous trash that reads low conductive tends to be shallow easy to dig stuff. Being set up this way almost totally eliminates the PI tendency to have a person digging deep, tiring pits only to find a big piece of steel junk. The only problem I had was people fiddling with or accidently knocking a control out of adjustment. The setting was so perfect I actually considered just gluing the controls in place to prevent people from messing with them! Another problem happens when you loan people stuff to use - it not only gets used it gets abused. Luckily the TDI is able to take a licking and keep on ticking, just like the old ads. This TDI got strapped on the back of an ATV and then the driver forgot about it as he roared through the mud holes and brush. Having too much fun I guess! Not only did the unit get covered in mud he managed to bend the middle rod section. A little careful work with a water hose and a little bending and the detector worked just fine. I eventually ordered a new rod section to replace the bent one. White's TDI Covered with mud! I ran the 7.5" coil a bit and found a 1 pennyweight nugget with it. I was surprised at how stable the smaller coil was, as I expected it would be more prone to hitting hot rocks, but instead it seemed to be more immune to the hot rocks than the larger coil. At Moore Creek though the stock 12" coil is the better way to go not so much for extra depth but for ground coverage, which really is the name of the game at the mine. The person that covers the most ground digging the most targets has the best shot at finding the gold at Moore Creek. But for many nugget hunting tasks I think I would very much like using the smaller coil. Here is Moore Creek visitor Pete W from Paducah, Kentucky. Pete hunted hard with the TDI but was having little luck. I was out with him at one point and was sitting nearby when he got a signal. He started to dig with his scoop but the target was deep, and so I came over with my pick to help. I scooped a pretty deep hole, but when he checked the target was still in the ground. The TDI got this one at respectable depth. So I dug some more and out popped a really good looking nugget! A very nice piece weighing 0.27 ounce that put a huge smile on Pete's face. Pete W. and TDI gold Close up of Pete's nugget found with TDI And here is a great photo of Moore Creek visitor Jens S from Hupstedt, Germany with nuggets he found with the TDI. The larger nugget is 0.62 ounce and the smaller 0.37 ounce. Jens found the smaller nugget first within ten minutes of turning the TDI on for the first time. Jens really liked dredging and highbanking more than metal detecting and so spent most of his time at Moore Creek doing just that. From what I saw though he was a natural with a metal detector and so who knows how he would have done if he had concentrated on that more. He went home with a lot of gold anyway and a very happy visitor to our country, with an experience most will never have. Jens with 0.37 oz and 0.62 oz gold specimens found with White's TDI You would be surprised how little detecting I did while at Moore Creek. Running a pay-to-mine operation is a full time job and then some. Still, I did have my chances to get out now and then and having the new TDI around certainly gave me reason. A couple of our visitors, Keith M and Bob D and I decided to hit some tailing piles downstream and across Moore Creek, making them hard to get to and so less hunted by others. We loaded our detectors and waders up on ATVs and headed down to the general location. After crossing the stream we hiked down to the lowest tailing pile which I've been eying from afar the last couple years. It has a lot of brush on it, and I figured a nugget might be lurking unfound in that brush. The tailing piles are very steep, and so I hip mounted the White's TDI to keep the weight off my arm while side-hilling. The only issue I found in the brush was a tendency for controls to get knocked off their settings and so I was alert for changes in the detector's response. I found a good ground balance setting that minimized the response from both the positive and negative hot rocks. This ended up being about 8 on this tailing pile. I ran at the gold sensitive 10uS setting and was able to run the gain up to max. I set for a quiet, faint threshold. I do run the Target Conductivity switch on All myself as I prefer to hear the hot rocks and sort them out myself. I do not mind digging a few rocks if need be but usually they have a consistent sound I can learn. In this instance though the TDI was running real nice. There seemed to be less of the bad hot rocks on this side of the valley. Bob, Keith, and I spaced ourselves around the tailing pile and proceeded to hunt. I started low on one end, hunted around that end, and then worked up the hill into the brush. They were both running Minelabs. Minelabs can be set to run pretty close to each other, but we discovered that the TDI does not play well with Minelab detectors. The TDI does not pick up the Minelabs at all, but the Minelabs go nuts with a TDI anywhere near, and they cannot tune the TDI out at all. So I took pains to stay as far away from both Keith and Bob as possible. I ended up in a little spruce tree thicket on one end of the pile. Soon I got a nice, clear, high tone signal. A bit of digging revealed a nice 1.93 ounce gold quartz specimen down in the roots! It was a typical Moore Creek "oreo cookie" nugget with a solid gold core sandwiched between two thin layers of quartz. But very solid in the middle - this chunk had a very nice heft. Not only did it make my day (week? month?) but actually paid for that TDI in a single find. It certainly gave me a real warm fuzzy about the TDI being able to make a find like that with it. We hunted most of the rest of the day and although we found many targets my nugget proved to be the only find of the day. That happens so often it does make me wonder at times. I have seen myself and others bang into a great find like that early on, and then find nothing the rest of the day so often that when it happens now I joke about it. The feeling is if you get a great one like that right off the bat you may as well quit for the day. But of course nobody ever does. 1.93 oz gold nugget found by Steve Herschbach with White's TDI Here is the rest of the story on the nugget. I have a rule at Moore Creek that any gold our crew finds while we have paying customers in camp goes to the customers. So at the end of the week we had a drawing. Everyone got 5 tickets, and for every ounce of gold a person had found we took away one of their tickets. We wanted to handicap the hot detectorists. Although we had 15 visitors in camp, it was Bob who was with Keith and I when the nugget that got found that won it. Which was nice as he is one of our regular visitors and had not had much luck detecting. There was some pretty serious karma at work that week! Just a reminder, gold was running around $700 per ounce in 2008, so I gave away a $1400 nugget. I did this a lot at Moore Creek and in fact no visitor ever went home without gold. I always found enough hunting on the side to be able and make sure people who got skunked got a going away present. I think I found and gave away about a pound of gold, which must set some kind of record. I was figuring there is no way anyone is going to beat my 1.93 ounce nugget for awhile. After all, not many nuggets get found over an ounce, and this one is almost two ounces. Well, I figured wrong. After all our clients left for the summer I invited a couple friends up to the mine to hang out while we shut the mine down for the winter. Husband and wife detecting team Bernie and Chris came to Moore Creek for the first time. Both are expert with VLF detectors having found pounds of gold between them with the White's MXT. Pulse induction detecting was new to them however and at Moore Creek I convinced them to set the trusty MXT aside in favor of PI detectors. Well, no worries about these two running new detectors. Bernie and Chris scored some real nice gold. In fact, Chis got the best find of the week with the TDI, and really gorgeous 2.07 ounce gold in quartz specimen. It is actually one of the more attractive pieces I saw found at Moore Creek. Instead of the usual solid layer of gold wafered between quartz this specimens has gold laced evenly and very attractively throughout the quartz. Chris not only beat me for overall weight by a bit but for sure in the specimen good looks department. 2.07 ounce gold specimen found by Chris P with White's TDI at Moore Creek, Alaska This story is a compilation of various posts made on the internet at the time and finally added to my journal. I wanted to add a lot of missing detail, and in the process it sure brought back a lot of great memories. The Moore Creek gig will go down as the best time of my life. Not only was a lot of gold found, but many great new friends and fabulous adventures were made there. The mine now belongs to other people and the pay-to-mine operation has long since ended, but the memories will be cherished as long as I live. The White's PulseScan TDI is a detector I still own. It has some interesting features no other detector has and in some ways is an underappreciated machine. I like the easy hip mount capability and the unique Target Conductivity switch in particular. The main problem I see is people using it in locations where a VLF is a better choice, and then complaining the TDI is no better than a VLF. Stuff like that makes me shake my head. If a location is suitable for a VLF by all means use a VLF. Pulse induction detectors like the White's TDI are for locations where the ground or the hot rocks are such that a VLF operator wants to quit in frustration. Ground Balancing PI (GBPI) detectors are meant solely to handle extreme ground or hot rock conditions, and it those conditions do not exist, then the entire reason for using the PI detector also does not exist. In low mineral ground the only real advantage GBPI detectors have is in their ability to run very large coils, and that can aid in finding deep large targets. But if no deep large targets exist to be found a VLF is often the better choice in low mineral ground, especially given the superior ability of a VLF to sort out trash targets. As always it is about using the proper tool for the job, and a location like Moore Creek is a perfect spot for a detector like the White's TDI. You can find more details on the TDI on this website at the White's PulseScan TDI page. ~ Steve Herschbach Copyright © 2008 Herschbach Enterprises4 points
 -
I have added two new sections to the website that cross link to each other. The first is a Metal Detector Database with User Reviews. Most current name brand metal detectors are listed with basic specs like price, weight, water resistance, etc. You can sort the listing by these basic specifications and you can leave your own review of each detector. Discontinued models are now being added. The new area is accessed in the menu under "Reviews" The second area is a revamped Downloads Area. Various manufacturer catalogs are collected there for historical reference to models, specifications and prices. More importantly, each detector in the Reviews database has it's user guide listed for download plus any other pertinent documents like sales flyers. Basically the Reviews area links to the Downloads area and vice versa. This is all under construction still and will be for some time as regards discontinued models. I am adding cross links and new listings almost daily. Hopefully this will allow people easier access to information and manuals now scattered across the internet. Please do your part by leaving reviews of any metal detectors you have used. Thanks!4 points
-
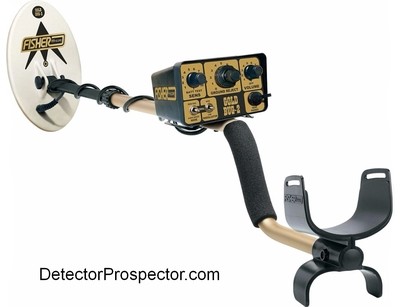 The Fisher Gold Bug 2 was released in 1995 and is still in production over 20 years later. I had the first Gold Bug 2 in Alaska and to this day it is one of my all time favorite detectors - a true classic. Amazingly, nobody has come out with a better detector for hitting tiny gold after all these years. Quite a few models have tried to challenge the Gold Bug 2 on the tiniest gold, and while many can be said to give the "Bug" a run for its money it is debatable if any have really exceeded it. There is a specialized tool called the Falcon Gold Probe that will actually hit smaller gold than a Gold Bug 2, but it would be more properly termed a pinpointer than a normal metal detector. What makes the Gold Bug 2 special is the 71 kHz operating frequency. It was the highest operating frequency in a commonly available ground balancing metal detector for a long time. When paired with the 6" elliptical concentric search coil, the Gold Bug 2 easily detects small pieces of gold weighing less than 1/10th grain. There are 480 grains in an ounce so we are talking less than a 4800th of an ounce! I have a set of digital powder sales that weighs to 1/10th grain, and I regularly found single flakes of gold that will not register on the scale with the Gold Bug 2. Don't think such small gold is found at any depth. I get these tiny bits by literally scrubbing the small epoxy filled coil into the soil. The coil is tough and immune to false signals from being knocked around so the goal is to get that coil right down on the gold. The 6" epoxy filled concentric coil perfectly tuned to the Gold Bug 2 is no doubt part of the magic since other detectors in this class normally run DD coils. The Gold Bug 2 is a perfect detector for "scrape and detect" operations where the surface is carefully scraped away to expose more soil for detecting. It is also ideal for checking quartz for tiny gold, like when hunting around old mine dumps. The Gold Bug 2 will hit specimens with wire or sponge gold that other detectors cannot detect. There are only three coils for the Gold Bug 2, a 6.5" elliptical, 10" elliptical, and 14" elliptical. All three are concentric coils - there has never been a DD coil produced for the Gold Bug 2. I am a little surprised there have never been any aftermarket coils produced for the Gold Bug 2 due to its enduring popularity. I have always wanted a probe for it that would basically turn it into a Falcon Gold Probe type unit, but with more adjustment and iron discrimination. The coils are all waterproof and come with extra long seven foot cables for use when the control box is chest or hip mounted. The coils are among the best I have ever used and are immune to false signals from bumps and knocks. The chart below illustrates a common misperception. People often ask which coil gets the most depth, and it is assumed bigger coils go deeper. That is definitely not true. Coil size has to be matched to probable target size for best depth, and the chart clearly shows how running too large a coil can cause gold nuggets to be missed entirely. The normal 10" coil is a compromise but better depths can be obtained using not only larger coils but smaller coils. Since I normally hunted small gold with my Gold Bug 2 the small coil rarely came off it. Coil Size vs Depth Fisher Gold Bug 2 Source - Field Testing the Gold Bug 2 by Gordon Zahara Despite the high operating frequency the Gold Bug 2 can be made to work in the worst ground conditions. I took one to Australia recently and was surprised how well it did in tough ironstone country. It has a very good iron discrimination setting intended for rejecting man made ferrous trash. This also acts as the setting of last resort for highly iron mineralized soils and hot rocks. When in iron discriminate mode common hot rocks will be ignored or at most pop and click, but they will not sound like gold. Some sensitivity is lost in iron disc mode, but the Gold Bug 2 is so sensitive to small gold it will still hit small nuggets in disc mode that other detectors would miss. The design is very compact and tough, and with what is getting rare these days, a removable control box. The box can be slid off the rod, and slipped on a belt with the integrated belt slots. There is plenty of extra cable, and a chest mount can easily be made with just a belt and a camera strap. This is ideal for working in deep water or heavy rain since the control box is protected and better yet creates a detector so light it can be used for very long hours with no arm strain at all. I usually have the Gold Bug 2 set at full volume and full sensitivity, with the mineralization switch set to low and audio boost engaged. I run this way until I can't due to hot rocks or ground, and then usually go to iron disc mode. However, if you do stay in all metal mode the proper way to deal with mineralization issues like hot rocks is to reduce the sensitivity, mineralization switch settings, or both. Disengaging the audio boost also moderates the responses generated by tough ground. Audio boost does just that - it boosts the audio so that faint signals are louder and more distinct. It also boosts spurious ground signals and so in some cases you may want to run the detector in Normal audio. I have found in practice I very rarely take the Gold Bug 2 out of audio boost mode. Fisher Gold Bug 2 nugget prospecting detector I should note here that the Gold Bug 2 employs VCO (voltage controlled oscillator) audio. Responses not only get louder but they increase in pitch ,producing very distinct "zippy" responses on non-ferrous targets. Large targets literally squeal. Some people think this means the Gold Bug 2 employs some sort of audio discrimination because they can tell a coin response from small trash responses due to this. All that is really happening is that strong signals sound different than weak signals, and so a deep coin will sound just like a shallower, smaller target. The mineralization switch adjusts the threshold auto tune rate, with the low setting being a slow auto tune and high being a very fast auto tune. This is similar to White's Variable Self Adjusting Threshold (V/SAT) control but instead of variable you get three preset selections to choose from. A fast auto tune setting dramatically impacts performance but can be an aid in very uneven ground conditions. Experiment with it to see what I mean but for me in most places it stays set in low. You can find more information on auto tune at Steve's Guide to Threshold Autotune, SAT & V/SAT. Fisher has gone this one better by also adjusting the gain (sensitivity) via these settings at the same time as the auto tune rate is adjusted. The Low Mineral setting not only slows down the auto tune rate but it boosts the gain above and beyond where the sensitivity control is set. The high mineral setting speeds up the auto tune rate and attenuates the gain. Fisher Gold Bug 2 control panel There is an undocumented trick that may or may not work on any particular Gold Bug 2 in iron disc mode. The threshold control usually has no effect when the unit is in iron disc mode. However, some units display a distinct difference in iron disc performance between the threshold being set low or being set high. This ability to "supercharge" a silent search disc mode by turning the threshold up is not unheard of in other detectors and it appears some Gold Bug 2 models have this ability. Several of us used this ability to good effect at Ganes Creek. The detector pops and clicks a lot when supercharged in this fashion but adds considerable depth on large gold nuggets. After awhile the popping and clicking is mentally tuned out as nuggets have a distinctly clearer beep. This ability may have been an accident on some units, as more recent Gold Bug 2 models display no change in the disc mode when the threshold control is manipulated. A simple air test between low and high threshold settings while in iron disc mode will reveal if your Gold Bug 2 has this ability to be supercharged. The iron discrimination on the Gold Bug 2 is unique compared to most detectors in that it is either on or off. There is no direct adjustment of the setting. In theory the Gold Bug 2 in iron discriminate mode rejects signals from ferrous man-made iron and steel targets plus many ferrous based hot rocks. It does this by simply ignoring and producing no signal on items deemed ferrous in nature. The setting is designed to be conservative, and so it does produce a signal on many ferrous items, but the audio response is choppy and more often a "click" than a "beep". Practice with a nugget and various ferrous targets will make the differences clear. ads by Amazon... The more mineralized the ground, the more chance there is of gold nuggets being accidently rejected as ferrous. Borderline targets will often be rejected if swept one way and sound good if swept another way. It is therefore not a good idea to hunt directly in iron discriminate mode, as a bad call on the first sweep will cause you to miss the target and not even know it was there. It is better to hunt in all metal, then flip to iron disc to check the target. This can be an undue burden in thick trash though and sometimes it is simply more efficient to hunt directly in disc mode, but the likelihood of missing nuggets goes up dramatically. As noted above the threshold setting may have an effect on the responses generated in the iron disc mode. The sensitivity setting will also affect the setting, and by enhancing ferrous ground mineralization response it may also lead to more gold nuggets being identified as ferrous. the ground response overwhelms the nugget response leading to a false iron reading. Reducing sensitivity may produce more accurate iron disc readings in bad ground. If you are switching back and forth from all metal to iron disc mode constantly it can prematurely wear out the switch. I have seen several examples of the switch getting so loose as to be inoperable due to the nut on the backside of the control panel becoming loose or even falling off inside the control box. The control panel can be removed and the nut tightened if this is the case. I have found many thousands of gold nuggets with the Gold Bug 2. Granted most were small but not all. The largest I have found with the detector is a 4.95 ounce specimen at Ganes Creek, Alaska. I have numerous stories on Steve's Mining Journal that highlight the Gold Bug 2. See Detecting Small Gold at Crow Creek, Detecting Gold at Ganes Creek, Lode Gold at Hatcher Pass, Memorial Day at Ganes Creek, and Detecting Micro Nuggets at Crow Creek. The Gold Bug 2 is a very specialized detector usually used solely for gold nugget detecting. Recently people have taken note of its extreme sensitivity and have pressed it into service searching for very small jewelry items that others detectors normally miss. Simple post earrings and thin gold chains are difficult if not impossible to detect and the Gold Bug 2 excels at finding these small targets. Thomas Dankowski coined the term "micro-jewelry detecting" to describe this type metal detecting. The Gold Bug 2 does have limitations. The extreme sensitivity that makes it signal on hot rocks that other detectors would ignore. This can be very problematic in some locations, although somewhat offset by using the iron disc control in places where the hot rocks are iron based. More serious is that in highly mineralized ground the Gold Bug 2 has very poor depth on pennyweight and larger gold nuggets compared to most nugget detectors. The high frequency air tests very well but loses that depth quickly on in ground targets. Depth losses of 20-25% are not unusual with the Gold Bug 2 in highly mineralized ground when compared to detectors running in the 12-20 kHz range. The Gold Bug 2 is often best used when paired with another detector for depth on large gold while it serves as the small gold sniper. The Gold Bug 2 also gives a strong response on wet salt sand and so when used for micro-jewelry detecting on salt water beaches wet sand must be avoided. Despite these caveats, I consider the Gold Bug 2 to be a unique and essential detecting tool that even after 20 years is worth consideration by gold prospectors wanting the hottest metal detector possible on tiny gold. ~ Steve Herschbach Copyright © 2008 Herschbach Enterprises Fisher Gold Bug 2 Instruction Manual Control Box Cover for Gold Bug 2 Hip Mount / Chest Mount For Gold Bug 2 Changes To GB2 Rod & Coil Design Forum Threads Tagged "fisher gold bug" First Texas (Fisher) Metal Detectors Forum Fisher Gold Bug 2 Technical Specifications* Internet Price $699.00 Technology Induction Balance (IB) Frequency 71 kHz Autotune Mode(s) Fast, Medium & Slow Autotune Rate Ground Rejection Manual - Course and Fine Tune Knobs Soil Adjust (High/Normal/Low) Three position switch Discrimination Iron Disc setting (On or Off) Volume Control One turn control Threshold Control One turn control Tone Adjust No Audio Boost Yes (On or Off) Frequency Offset No Pinpoint Mode No Audio Output 1/4" headphone socket & speaker Hip Mount Hip, chest, or shaft mount Standard Coil(s) Choice of 10" or 6" elliptical concentric Optional Search Coils 14" concentric accessory coil available Battery Two 9V Operating Time 25 - 35 hours Weight 2.9 pounds with 10" coil Additional Technology Notes Extreme high frequency detector for sensitivity to the smallest gold. *Notes on Technical Specifications - Detailed notes about the specifications listed in this chart.4 points
 -
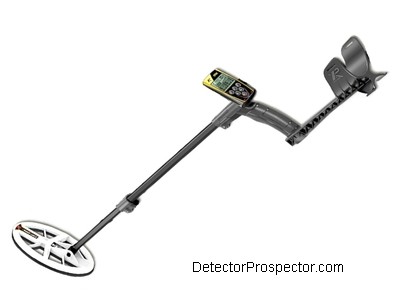 The XP metal detector company has announced a new model for late 2018 called the XP ORX. This new model appears to be a refined version of the XP manufactured Depar DPR 600. The DPR 600 was made to take advantage of the African gold rush by offering a model designed primarily as a gold prospecting detector with other uses taking a back seat. I personally think the Depar DPR 600 was used as a proving ground for the new high frequency (HF) coils while also offering an opportunity to fine tune the Gold Field program. My expectation all along is that XP would eventually release a similar model for sale outside of Africa. It looks like after almost two years that new refined version of the DPR 600 is available for purchase as the XP ORX. This introduction is so new that information at this time is limited - everything here is subject to change as new details emerge. For now what we know for sure is that the XP Orx will be available in two configurations. The versions are basically the same, with a wired headphone version for 700 Euro, and a wireless headphone version for 800 Euro. U.S. pricing is unknown at this time but $799 and $899 is probably in the ballpark. You can choose either the 9" round HF coil or 5" x 9.5" elliptical HF coil. There is no exact word on availability yet, but presumably we will be seeing this model available for purchase in early 2019. XP ORX gold prospecting metal detector It is possible hints about the new XP Orx can be gleaned by reading the DPR 600 User Manual. One main difference is in the User Modes. The DPR 600 and XP Orx both have four preset programs plus two user custom program slots for saved programs. The programs on the DPR 600 are designated as 1. General 2. Large Gold 3. Fine Gold 4. Iron Discriminate. The XP Orx is designed for a bit wider appeal, and so it looks like the General and Iron Disc modes have been recast as coin hunting modes. The modes on the XP Orx are 1. Gold 2. Fine Gold 3. Coin Fast 4. Coin Deep ORX Key features: HF coil technology (21 Frequencies ranging from 13 to 81kHz). Extreme sensitivity to small targets with high frequency 50kHz and 81 kHz. 4 factory programs: Gold Prospecting (x2) – Coins and Relic (x2), + 2 user. Trusted XP fast wireless technology: Coil – Remote – Headphones – MI-6. The all new “WS Audio®” compact wireless headphone receiver. Re designed ultra-light Telescopic “S” stem. The lightest machine on the market at only 770grs (remote hip mounted). Easy to operate with a user-friendly interface. Wireless connectivity to the MI-6 pinpointer + advanced remote settings. Lithium batteries, giving up to around 20 hours of detecting. Easy to charge with any certified USB charger or via computer (XP USB charger optional only) Available with a choice of HF coils – 22cm (9") Round or 24/13cm (9.5"x5") Elliptical. Compatible with the X35 coil range (22, 28, 34/28cm). Software Update (remote control via USB cable). Go terrain mobile app compatible (coming 2019). 5-year warranty – Made in France. Affordable price – Suggested maximum retail price: 699€ including taxes – 799€ including taxes with wireless headphone (WSA). Note that the upper armrest area of the rod has been redesigned and is different than the existing Deus rod assembly. XP ORX Controls & Settings ORX settings: 99 levels of sensitivity 21 frequencies (13 kHz to 81 kHz). 99 levels of discrimination + 5 levels of IAR Discrimination in Gold programs. 20 levels of Threshold. 4 levels of Reactivity. Iron Tone with Pitch audio (ON/OFF) Ground balance: manual adjustment from 60 to 90 or automatic (fast grab). Salt mode ground rejection: 00-25 4 factory + 2 user programs. Target ID/ Iron probability. Pinpoint function with target zoom. Go-Terrain compatible (smartphone app coming soon). ads by Google... XP ORX MI-6 Compatibility Advanced remote settings when the ORX is paired with the MI-6 pinpointer: 50 levels of sensitivity Audio tone from 120 Hz to 1582 Hz 2 audio modes: PITCH or PULSE 3 factory + 1 user program Recover a lost MI-6 (even when switched off) Target zoom screen Battery life indicator I don't think there is much mystery here except for how many people will opt for this new model versus the new X35 coil based Deus models. In my opinion by extending the top end frequency of the new X35 coils to 28 khz has inadvertently removed some of the demand for this higher frequency version. Small gold sensitivity gains over 30 khz are quite minimal and with the extra features the Deus offers many people may continue to prefer it as their detecting solution. A lot may boil down to the price difference between a 9" round X35 Deus package and the 9" round HF Orx package. No matter what I am very confident this new high frequency XP model will do very well for gold prospecting. I do not expect performance to be any different than that I observed while testing the XP Deus with elliptical HF coil on small gold. XP Orx Data & Reviews XP Orx Owner's Manual Forum Threads Tagged "xp orx" XP Metal Detector Forum XP ORX Technical Specifications* Internet Price estimate $649 wired headphones or $795 wireless headphones Technology Induction Balance (IB) Frequency 14, 28, 56 kHz (round 9") or 14, 28, 70 kHz (elliptical) Autotune Mode(s) Multiple "Reactivity" Settings Ground Rejection Grab, Manual, Tracking Soil Adjust No Discrimination Variable, Visual ID, Tone ID, Notch Volume Control Yes Threshold Control Yes Tone Adjust Yes Audio Boost Yes Frequency Offset Yes Pinpoint Mode Yes Audio Output 1/8" headphone socket & speaker, wireless headphones Hip Mount Yes Standard Coil(s) 9" round DD or 9.5" elliptical DD Optional Search Coils new X35 coil series Battery Built In Rechargeable Operating Time 20 hours Weight 2.0 lbs Additional Technology Wireless coils, control box, headphones; firmware updates via internet Notes Probably based on "Africa Only" Depar DPR 600 *Notes on Technical Specifications - Detailed notes about the specifications listed in this chart.4 points
 -
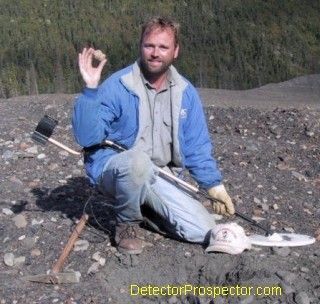 My father, two friends, and I flew northwest to the Interior Alaska town of McGrath Friday morning. I have permission to hunt several creeks in the area, but have had a hard time getting there the last couple summers. Bad weather or scheduling has kept me away. Everything finally came together this year, so off we went. My father is a classic Alaska bush pilot with a Cessna 206, so I'm luckier than most when it comes to access. The destination for this trip was Ganes Creek, owned by Doug Clark and Dan Wiltz. Ganes Creek has produced over 250,000 ounces of gold, and some of the largest gold nuggets ever found in Alaska. Some very large nuggets have been found here with metal detectors, and I have wanted to visit the creek for years. After reaching the mine and settling in, Doug pointed us to some old tailing piles. A friend of his, who knew little of detecting, had found a half-ounce nugget in the vicinity, so it seemed a good place to start. I had brought my Minelab SD2200D along, but found the ground to have low mineralization. Bedrock around McGrath is mainly slate/shale. There are lots of igneous cobbles in the overburden, but nothing real hot. Easy detecting ground. The main problem with the tailings was lots of iron trash. I decided to give my Fisher Gold Bug 2 with 14'' coil a try. Since we were hoping for large nuggets, I put it in Iron ID mode, which I normally have not used before. I did find that the machine chattered a lot until I turned the threshold knob down. It appears the threshold control does affect the machine in the iron id mode, although you cannot actually hear the threshold. Tailing Piles Along Ganes Creek Everyone else was using the Tesoro Lobo SuperTRAQ, all outfitted with the 11'' DD coil. Again, due to iron trash, they all ran the discriminate mode instead of all-metal. The Lobo is one of the rare nugget detectors with a full range discriminator. This proved valuable this trip. The control is adjustable, and it is very important that it be set no higher than needed to tune out nails and other small iron items. We ended up finding all the nuggets on this trip while employing iron discrimination. Our theory was simple. There were large nuggets in the area, and we wanted them. Tuning up for the little ones was not the idea. In fact, no one wanted to waste time trying to recover small nuggets and digging lots of worthless iron trash would definitely be a waste of time. I started chasing gold in the early seventies. I've dredged and detected all over Alaska, but spent most of my time in areas where large nuggets are rare. I've always wanted to find a big one, something over an ounce, but it has eluded me. I have made numerous detecting trips to large nugget locales, and detected literally pounds of gold over the years. I have no problem finding 5-7 pennyweight nuggets, but nothing larger has come my way. I finally dredged a .98 ounce nugget in 1998 at Crow Creek Mine, but even then felt like I had not really done it. .98 ounce is close enough to generally say I found a 1 ounce nugget, and I do. But I still did not feel I had hit the big one. So I went ahead and decided to back off on spending so much time dredging, to spend the time chasing hot areas to detect for large gold. A trip to the Wrangell Mountains last year netted me an 8 dwt nugget, my largest with a detector. Then off to the Fortymile last fall. That expedition turned up a 3/4 ounce nugget. Things were looking up. So this adventure was a part of my new game plan. Big nuggets the goal... heck with the little ones! Bud, Steve, Brian, and Jeff My father is always game to go mining, but does not have my passion or patience for it. I bought him a Lobo last year, as the automatic ground balance is right up his alley. The machine is very forgiving. Still, he has sloppy habits, mainly a very poor swing. He is only near the ground directly in front of his feet. I've tried to get him to do better, to no avail. We've searched lots of tailing piles before, with little success. We all start detecting, and in less than 15 minutes Dad gets a beep and kicks the ground. In a very surprised voice, he exclaims, ''I'll be damned... I found a gold nugget!'' There lay a nice 13.1 dwt piece, his largest ever. That got us fired up!. It was the end of the day, but in short order I found a 7.5 dwt nugget, a 1.1 dwt nugget, and .7 dwt nugget. Jeff hit a 2.6 dwt piece. We got some sleep, figuring to strike it rich the second day. But it was not as hot as we had thought. About noon I finally found a quartzy 14 dwt nugget. Since these are nuggets lost by the original operations, many of them have lots of quartz. The nuggets with higher gold content were generally caught. I found a 1.8 dwt, and Jeff hit a 1.3 dwt piece, but nobody else had any luck by 2PM. It was sunny and about 90 degrees. We are not used to such temperatures in Alaska, and everyone of us was suffering. Dad, Brian, and Jeff rolled up and announced it was time to head back to camp for a break. ''Leave me here; I want to keep hunting'' was my reply. Jeff decided to keep hunting. Dad and Brian gave in and decided to stay, but sat down to rest. Jeff and I hit the tailings again, and in maybe 20 minutes Jeff found a nice solid 17 dwt nugget. This rejuvenated the troops and the hunt was back on! Jeff With 17 dwt Nugget Found With Tesoro Lobo We wandered down back trails through the tailing piles, and Jeff finds another 5.6 dwt nugget. Some time later we were detecting some tailings next to the creek, and I hit a nice 15 dwt piece. Jeff and I are pretty happy at this point, but Dad and Brian had no gold for the day. Brian had not found any gold at all yet, and this can be very hard on someone relatively new to nugget detecting. It was nothing but bad luck, as he basically was doing everything right. He simply had not put the coil over a nugget yet. After dinner Brian, Jeff, and I headed for the tailings off the end of the runway. After less than an hour, the mosquitoes were bothering me enough that I headed back out to the runway. Nobody was in sight, so I wandered down the shoulder of the runway swinging my detector. The runway is made out of flattened tailings, so I figured it was worth a shot. Besides, there were fewer mosquitoes in the open! One hundred feet down the runway I get a beep and a 1.7 dwt quartz pebble with a couple chunks of gold in it. I met Brian and Jeff back at camp; they had found no gold. My father returned from exploring up the creek. He also found no gold. Steve With 14 dwt Nugget Found With Gold Bug 2 The third and final full day started with rain. We did some exploring upstream, but with no success. The mosquitoes were out in force, so Jeff and I donned headnets and searched more tailing piles. Dad explored up a side creek, while Brian indicated he wanted to search in the camp vicinity. The rain let up, but not the mosquitoes. They liked the cooler, damper conditions. Jeff and I searched tailings without luck for some time. We finally wandered back to the runway. Jeff finally picked up a couple nuggets on the runway shoulder near where I found the one the day before. I then hit a nice one also. Jeff was hot to get with it, but I convinced him we should go find our partners and tell them about the new finds. I was anxious for Brian to find a nugget. As we got to camp, up wanders Brian with a big grin. He had obviously found gold. A beautiful 7.8 dwt nugget that everyone agreed was the best looking nugget found. Solid gold with just a spot of quartz, and a bit of twisted wire appearance. The find really raised Brian's spirits, and he was raring to go now. Brian's 7.8 dwt Gold Nugget My father was way up a side creek exploring, so we hooked up with the Doug and his crew and did a little instructional detecting. They were getting the idea that maybe these things were good for something after all. My father wandered up as the group headed up the creek. He said he was too tired to go with us, but when I mentioned we had found some nuggets on the end of the runway, he decided to head that way. Jeff could hardly stand it, but we wanted to spend the time with the miners in appreciation of the opportunity they had given us. We finally explained we wanted to go try the end of the runway, and headed that way. We asked Dad how he had done. He says, ''Well, I found one. It's ugly, but kind of heavy. Maybe it weighs an ounce''. He pulls a palm-sized nugget out of his pocket. Our eyes grew wide and we explained to him that the nugget was at least 2-3 ounces. It had a lot of quartz, so it was hard to tell. It turned out to weigh 3.5 ounce. Unfortunately, it appeared to have been run over by a bulldozer. One edge was a clean break with ragged edges of gold hanging out. It is hard to tell, but I'm guessing it is one half of a 7 ounce nugget. Bud excavating a target - is it a bullet or a gold nugget? Gold nuggets Bud found with Tesoro Lobo ST at Ganes Creek We figured the other half was waiting to be found. It was also our last full day, as we were flying back around noon the next day, so we detected late into the evening. All told, we found about 15 nuggets in the runway material, mostly in one area. Brian found a second nugget weighing 2.4 dwt. I ended up with five nice nuggets ranging from 1.3 to 7.5 dwt. Jeff found six from .9 to 4.5 dwt. But we did not find the other half of that big nugget. It was late, so off to bed. Everyone had gold; Brian’s was the biggest he had ever found, Jeff’s was his largest, and my father had hit the jackpot. I was happy, but my largest nugget was a tie for the one I detected in the Fortymile, and still not larger than that .98 ounce nugget I had dredged. Jeff was also been hoping for something over an ounce, but at this point time was running out. I slept poorly that night, waking constantly. I woke a 4AM, and after an hour awake decided to get up. It was light (all night this time of year) and time passes slowly staring at the ceiling. I figured I might as well do a little detecting while I waited for everyone else to get up around 7AM. I wandered off up the creek, mainly wanting to get far enough away so as not to disturb anyone. I went to the first big tailing pile I came to, and covered it pretty well. Nothing at all. So I wandered up the road a bit, and came to a wide set of tailings that appeared to have been pushed up in a pile by a bulldozer. From the looks of it a sluice had been set up, and the bulldozer was pushing tailings to one side. I started scanning along, and near the top of the pile got a strong signal. I dug it up, and peeking out of the soil lay a little gold potato! I gazed at it in disbelief, and picked it up. It was caked in dark soil, but I knew I had finally found the big one I had been looking for all these years! 4.95 ounce nugget found by Steve at Ganes Creek It was still only about 6AM, so I looked an hour longer. I did find another 2.9 dwt nugget a few feet away, but that seemed to be it for this pile of dirt. About 7AM I headed back to camp. Dad and Brian were up, but Jeff was still snoozing away. We got him up, and I did show and tell with the nugget. After washing it up, it came up at 4.95 ounces on the scale. Literally the find of a lifetime, as no other nugget will mean as much to me as this one does. I showed the guys where I had found the nugget, took some photos, and started packing up to leave. I decided I was perfectly content to kick back and relax. The rest of my crew searched my magic tailing pile for a while, but did not find anything. Maybe my find was luckier than I know. In any case, they headed back to the end of the airstrip to search, but only Jeff found a nugget, 1.5 dwt and the last of the trip. Time to go home, so we packed up and flew back to Anchorage. I’m back to work now, and it is hard to believe I found that nugget just yesterday morning. In retrospect, what was so wild about the whole thing was that I had essentially given up on finding the big one this trip as we were basically out of time. Talk about the early bird catching the worm! I found every nugget but one with my Gold Bug 2 set in Iron ID mode. It ignored most trash except for old rusted cans and larger steel items, such as oversized bolts. I dug a pocketful of bullets and shell casings, but they were not so common as to be annoying. I did run my batteries dead at one point, and spares were at camp, so I fired up the SD2200D and found one nugget with it. A nice 1/4 oz nugget at about a foot. But I soon grew frustrated digging trash, sometimes at extreme depth. I have been getting pretty good at reading targets with the SD, but it is nowhere near as good at discrimination as other detectors. I was happy to put new batteries in the Bug and get back to using it. 18.5 Ounces of Nuggets Detected Ganes Creek, Alaska For the low mineral ground we were in, and the desired goal... pennyweight plus nuggets, any good discriminating detector will do the job. My Gold Bug 2 worked well and the Lobo did a great job for the other guys, and is a hard machine to beat for all-around detecting. But all in all, the name of the game on this trip was ''keep your coil low, and keep it moving''! ~ Steve Herschbach Copyright © 2001 Herschbach Enterprises4 points
 -
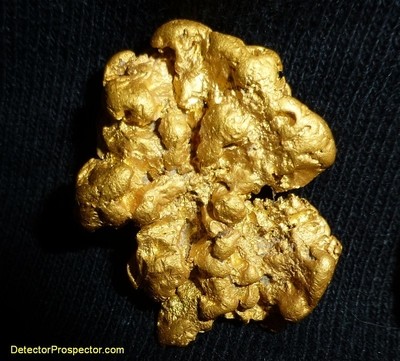 This year has not been going exactly as I imagined it would. My stated goal for the year was to set a new record for days in the field detecting. So far however, it has been anything but that. No complaint - I have been devoting myself to visiting family and other things that took precedence over prospecting. Weather has also been a bit dodgy this spring leading me to sit out things a little waiting for better conditions. What time I have had for prospecting has mainly been spent in northern Nevada. I am really taken with the desert and am very partial to the sagebrush and grassland country. It reminds me a lot of the time I spent in Australia with huge wide open spaces to wander. I enjoy the idea that gold can be found nearly anyplace, the exact opposite of Alaska, and I love just wandering from valley bottom to hill top because, well, you just never know. There is some old and interesting geology here that leaves nuggets in what might seem to be pretty unlikely locations. I did find one nice little patch that produced about half my gold this spring, but the rest were just strangely random isolated nuggets. I would find one and get all excited, then after several hours of methodically gridding the area wonder why that one nugget ended up there all alone. My largest nugget, at 3/4 oz, was just such a find. I wandered out of what looked to be the "good area" and just lucked into this nugget all by itself on a hillside far above the valley floor. Where did it come from? Why nothing else near it? I like to wander around freely but due to the nature of the gold deposits I am relying heavily on the GPZ 7000 map screen and GPS track to attack areas in chunks. I just start someplace and then use the GPS mapping screen to fill in all the pixels as completely as I am able in a given area. My goal is to completely hunt that area and then write it off forever as being hunted. Each hunt area is dumped to X-Change building my master map of hunted areas. I am approaching it much like building a jigsaw puzzle, each planned hunt taking in a segment and filling it completely. I still like to wander around a lot but the main focus is long term - the many years I have ahead of me hunting these areas. I could just do what I have always done and hunt piecemeal but I decided it is time to switch gears and get more methodical about things. I figure there is a lot of that random "scattered gold" out there and that a slower long term goal to gather it up is a major part of my plan going forward. Using GPS mapping is key to getting good coverage while eliminating the chance I might waste time hunting and rehunting the same locations over the years. The GPZ is also critical to this effort as I have great confidence in its ability to sniff out almost any gold that finds its way under the coil. Small gold, flat gold, wire gold, deep gold - the GPZ is my gold vacuum. All detectors miss gold, including the GPZ. But right now if I have to hunt an area once and once only, and have my best shot at finding what might be there, I do not know of a better option for me than the GPZ 7000. One detector, one coil, one pass over the ground ever - what are you going to use? Steve's Minelab GPZ 7000 going deep for the gold! If gold is found a person of course has the luxury of coming back with different coils and different detectors and trying to find gold missed before. The problem is finding that first nugget. If it does not get found, you just wander on, never knowing that maybe you just missed a great patch, for the lack of finding that first, most important nugget. I am convinced there are many undiscovered patches out there still. The patches with the big easy to find solid gold may be very rare now, but "weak" patches comprised of smaller, or deeper, and harder to find specimen type gold surely exist. They will be found by people hunting outside the commonly known popular areas. That is what I have been doing. Hunting locations where other prospectors are rarely if ever seen. I honestly think I have been a bit lucky as of late but the methodology is sound and it is what I will be doing for as long as I have left to swing a detector. GPZ 7000 gold fresh out of the ground I continue to follow the various posts around the world about the GPZ 7000 and people's experiences with it. Mine are pretty boring. I turn the machine on, maybe do a quick ground balance routine, and go detecting. I may not even go through the ground balance motions. I just turn it on and pick up from where I left off the previous day. I usually run in High Yield, Normal Ground, Gain of 12, Smoothing Off, Ground Tracking On. I leave most audio settings alone. The detector will often run noisy with these settings, especially in alkali locations. I may lower the threshold to 20 to knock out some excess noise, or just lower the overall volume level using my headphones. The GPZ lacks a master volume control that lowers all sounds at once, and so benefits from the use of an external booster with master volume control. The problem for me is that is one more battery operated gizmo, and so I often just use my headphones instead to gain the overall volume control I crave. I tend to run my detectors noisy but like it to be quiet/noisy not loud/noisy. 2.14 ounces of nice Nevada gold found by Steve with Minelab GPZ 7000 Beautiful 3/4 ounce gold nugget found in northern Nevada by Steve with GPZ 7000 When the ground responses get a bit much, as is the case with ground salt, I react more by slowing down and modifying my swing than changing detector settings. So far I would say about half the gold I found was pulled out of fairly high salt response ground with the attendant moaning/groaning or hee/haw responses the GPZ produces in that type of ground. That seems to be a show stopper for a lot of people but I don't pay much attention to it myself. I have this theory that killing those responses might kill my gold finding capability on this ground to a certain extent, as I know some of these locations have seen other detectors that ignored the salt. They also missed the gold. Coincidence? Maybe. I have plans for more experiments regarding this but have had a hard time tearing myself away from my limited detecting time to do more comparative tests. Later. Anyway, I have quietly picked up just over a couple ounces of gold with my GPZ 7000 so far this spring. The largest nugget is 3/4 oz and there are several other nice pieces I am very happy with. Nice solid, clean gold, my kind of stuff. An odd mix from very worn appearing to rough. I am unfortunately getting waylaid again with things I must attend to before I can go prospecting again and so I decided I may as well post this update now. It could be weeks before I get out prospecting again. Until then, here are some happy pictures to enjoy! This article started as a thread on the DetectorProspector Forum. Additional information may be found there in follow up posts. ~ Steve Herschbach Copyright © 2015 Herschbach Enterprises4 points
 -
 I walked a little ahead of my detecting buddy Jeff as we searched along the bulldozer trail for gold nuggets. The bulldozer had pushed little berms of material along each side of the trail as it made its way through the old tailing piles. I swung off the trail to one side where the tailing pile sloped down into the brush. Sweeping my White's MXT over a moss covered cobble pile resulted in a loud beep. I peeled the moss and cobbles back with my pick and looked down at the largest gold nugget I have ever found! This story actually starts in 1972. That is when I purchased my first metal detector, a White's Coinmaster 4. I put in lots of hours with that detector, finding thousands of coins in Anchorage, Alaska, in the days before metal detectors became more common. I was already doing a little gold prospecting and so I just had to try my new detector out for finding gold nuggets. I purchased a little 4 inch coil touted by White's as being the hot ticket for finding gold. They actually called it the "Gold Probe". However, after a couple outings I discovered that the detectors of the day were just not up to the task. The inability of the early units to compensate for ground mineralization made it impossible to find all but the largest nuggets. I am sorry to say that these large nuggets were very uncommon in my area, and so the chances of my finding gold with the early model detectors were slim to none. Steve in 1973 on very first nugget hunt - Moore Creek, Alaska & White's Coinmaster 4 This early experience caused me to overlook metal detectors as a practical mining tool for many years. In fact, when my partner Dudley Benesch and I got into business in 1976 we sold metal detectors from the start but strongly downplayed their usefulness for prospecting. My standard line was "you can probably find more gold with a $5.00 gold pan than a $500.00 metal detector". During the 1980's, I was heavily involved in gold dredging, so much so that I did if full-time for a couple of years. The amount of gold I thought I might find with a metal detector seemed trivial compared what I was producing with my suction dredges. I continued coin detecting from time to time but did not spend as much time at it as I had previously. It was at this time that stories of fabulous gold finds in Australia started to appear. My attention returned to using metal detectors to find gold nuggets, and I finally found my first nuggets with a Compass Gold Scanner Pro in 1989. I was still selling metal detectors as a dealer and it was about 1990 that White's introduced its breakthrough Goldmaster II. At an operating frequency of 50 kHz, it was by far the most sensitive detector available for smaller gold nuggets. The Anchorage area has lots of gold but it is mostly in match head size and smaller nuggets. Nuggets weighing up to one-quarter ounce are very rare and nuggets weighing an ounce or more are almost unheard of. The Goldmaster II opened up the local area to nugget detecting with its small gold sensitivity and ease of operation. Put all this together with its bargain retail price of $499.95 and the Goldmaster II quickly became one of the fastest selling metal detectors ever. It is one of the only detectors I ever sold that quite literally could not be produced fast enough to meet demand. I contributed to this electronic gold rush by taking my new Goldmaster II to local gold mining sites and finding thousands of gold nuggets with it. One popular site, Crow Creek Mine, had produced only small numbers of nuggets with other metal detectors. However, the Goldmaster II and its successor, the Goldmaster V/SAT, appeared be the perfect detectors for Crow Creek. The creek has only moderate mineralization and tremendous amounts of the smaller gold the White's units could find so easily. All of a sudden it seemed like gold was pouring out of the mine, all due to the introduction of the Goldmaster models. Steve with White's Goldmaster II in 1992 Jeff was managing our Mining Department at that time, and if anything, he was even hotter than I with the Goldmaster. We were both having a great time finding gold and posting photos of our finds at the store. The Goldmaster models got so popular at Crow Creek that problems started occurring with so many people running the same frequency unit in the same area. Detectors running at the same frequency interfere with each other electronically, and it got to where people would have to take turns running the detectors at some of the more popular locations at Crow Creek. This problem was finally solved with the introduction of the Goldmaster 3 and its frequency shift control. Despite these successes, gold dredging still occupied the majority of my free time in the 1990's. I was using a 6-inch dredge as my production unit, and the consistency with which I produced gold with it could not be matched by the more sporadic success one has with a metal detector. That, and the finds at Crow Creek and other local sites were depleting and so more and more time and effort was required to be successful detecting gold in these areas. A couple things about my dredging bothered me however. One was that I was finding good quantities of gold but I was finding very few large nuggets. It was not until 1998 that I finally found a 1 ounce gold nugget while gold dredging. My use of larger dredging equipment was tying me down to local areas where large nuggets are very rare. I really wanted to be able to find a monster nugget like I would read about other people finding. Second, I was spending all my time going to the same nearby areas, over and over again. Days, if not weeks, were spent working in the same stretch of creek. I wanted to get out and spend more time exploring remote areas of Alaska. I became convinced that if I wanted to get serious about gold and prospecting I needed to get away from the local area. Therefore, I made a conscious decision in 2000 to focus on metal detecting as a prospecting method instead of suction dredging. I sold my mining claims near Anchorage and my 6 inch gold dredge and invested the money in new metal detectors. I have used all the various brands over the years and found each one has strengths and weaknesses. In my opinion one key to successful nugget detecting is to have a variety of machines with differing capabilities. I invested in several makes and models of metal detectors that I use depending on particular nugget detecting tasks. I was amazed with the results of my new strategy. Not only did I see no real decline in the amount of gold I was finding each year, but my nugget finds blew away decades of dredging results. I was finding more gold nuggets weighing over an ounce than I had thought possible. My previous record of a 1 ounce gold nugget from Crow Creek Mine was totally eclipsed by 4.95-ounce nugget from Ganes Creek in 2001. Finding that nugget was one of the biggest thrills of my life! The real secret proved to be the freedom afforded by my metal detectors. With only a few pounds of gear to pack, it became far easier to go to remote Alaskan sites where large gold nuggets are found. It helped tremendously that I have developed many contacts with miners in my years of business and as a member of the Alaska Miners Association. These contacts are helpful when it comes to getting access to nugget producing mining claims. The fact is that most of the good locations for nugget detecting Alaska are on mining claims and so getting permission from the claim owners is critical. Ganes Creek is in west central Alaska near the town of McGrath. Ganes Creek has produced some of the largest gold nuggets ever found in Alaska, including a 122 oz monster. The creek has a long mining history and so has many miles of tailing piles from old bucket line dredge operations, and from more recent heavy equipment operations. It was at Ganes Creek that I found my 4.95-ounce nugget and numerous other gold nuggets in the 1 to 2 ounce range in 2001. Fall colors and old tailing piles at Ganes Creek, Alaska With some prodding on my part the owners of Ganes Creek decided to give a "pay to detect" operation a try. Opportunities to metal detect at places like Ganes Creek are rare, especially for people from outside Alaska. As part of the effort to get the word out about the operation, I received permission to bring a couple "key players" in the detecting industry up to Ganes Creek for a short visit. The idea was that once they saw the potential firsthand they would no doubt spread the word to others. In the spring of 2002 I decided to organize a Gold Show at Crow Creek Mine near Anchorage. We had never done this type of show in Alaska before and I thought it would be fun for all involved. Little did I know the work that goes into making a show like this come together. It proved to be a massive undertaking, but a rewarding one. One key to a successful gold show is to try to convince manufacturer representatives into making the expensive trip to Alaska. We received a lot of support from various suppliers but that shown by White's Electronics and its Alaskan distributor Renton Coin Shop was truly exceptional. Many accessory items and gold coins were donated as prizes to be given out for various activities of the gold show. Most impressive was the latest version of the White's Goldmaster, the new GMT, which was donated as grand prize in the detector hunt held during the show. This was very fitting, as there have probably been more Goldmasters at Crow Creek over the years than any other single model of metal detector. The generous donations were greatly appreciated by everyone attending the show. I would like to offer particular thanks to Mary Gladding of Renton Coin Shop for her enthusiastic support. Steve Houston of White's Electronics had come up for the gold show, and so I took the opportunity to arrange a trip up to Ganes Creek. Steve is an avid nugget hunter and so he jumped at the opportunity. I arranged for a visit immediately after the Gold Show ended. Steve had never been in a small airplane before, and so the bush plane flight into Ganes Creek from McGrath was an adventure in itself for him! Having flown in small planes my whole life, I underestimate the effect swooping low over the terrain and landing on small runways has on the inexperienced flyer. After we arrived at Ganes Creek, we did a bit of metal detecting in the immediate camp area, as quite a few gold nuggets had previously been found right around the cabins. The whole camp is built on old tailing piles that have been flattened out. After a little time spent with no results, we decided to head upstream. The first group of 10 visitors was already at the mine, and two nuggets weighing over 5 ounces each had been found the day before. The nuggets were found just upstream of a large drainage ditch that had drawn my attention the last time I had visited the mine. The ditch is piled high on both sides with excavated material. I reasoned that the piles might contain some nuggets, since the material from the bottom of the ditch was from deep below the surface. We started detecting the area, and in an amazingly short time, I heard Steve yell that he had found one. Sure enough, scanning the sides of one of the piles with his GMT produced a chunky 3.2 oz gold nugget! Well, that was so easy we figured there must be a bunch of nuggets along the ditch. However, as much as I tried I could not find a nugget myself, and Steve's initial find remained his only find. As if he really cared! I finally wandered away and found a small gold nugget on a large tailing pile nearby but that was it for the day. Steve Houston with 3.2 ounce gold nugget found at Ganes Creek with White's GMT This was a very short trip and so we only had the following day to try and find more gold. I found a few more small nuggets and Steve found none. Searching tailing piles for gold nuggets is literally like looking for the proverbial needle in a haystack. Entire days go by with no finds, but when gold is found it tends to be worth the wait. I was grateful Steve Houston found a nugget as large as he had in our limited amount of time. It was the largest nugget he had ever found, and better yet, larger than anything his regular hunting buddies had found. More than 30 people visited Ganes Creek in the summer of 2002. Over 10 pounds of gold was found, with many nuggets weighing over an ounce and several in the 5-ounce range. The success rate was amazing; with a large majority of the visitors able to say they found the largest gold nugget of their lives at Ganes Creek. Still, people started to wonder if the creek was "worked out" and that all the nuggets had been found. I scoffed at this idea, as I have seen even small parks produce old coins missed by decades of diligent metal detecting. The idea that a few dozen people could find all the nuggets to be found in many square miles of tailing piles is not something experienced detectorists would worry about. To prove the point, I put the word out that I would make a visit to Ganes Creek after all the visitors had been there that summer and go find some gold. OK, I have to admit there was a certain amount of bravado in this. The fact is that detecting tailing piles is very much a hit and miss proposition. In general, sheer hours of diligence will pay off, providing the nuggets are there to be found at all. However, there also is a bit of luck involved, and sometimes even the most dedicated person will get skunked. If it was easy we would all be out swinging a detector looking for gold nuggets for a living, but that is not the case. So, although I was talking big I certainly had my doubts about how much gold I would find. It was late in the season when Jeff, Brian, and I made that final 2002 visit to Ganes Creek. Brian is an avid gold dredger and so his focus for the trip was to do some exploratory gold dredging. Jeff and I were both hot to go detecting for gold, however. As I noted before, Jeff is a very accomplished detectorist, and we usually have a cheerful competition going while nugget detecting. We brought along several different detectors to try. I had my GMT but also White's new MXT model. I was intrigued with this machine that combined the basic Goldmaster circuitry with the features normally found on high-end coin detectors. I figured its exceptional target ID features might prove useful in the trashy tailing piles, and especially around the camp area. Jeff and I traded machines back-and-forth to get a feel for how the different detectors worked at Ganes Creek. Jeff in particular was in the market for new unit, and so was most interested in trying them out comparatively. Jeff with White's MXT at Ganes Creek, Alaska We first headed back up to that ditch area where many of the large nuggets were found, including Steve Houston's. The area had been hammered hard all summer, but we figured there might be some gold left to be found. I located a 13.8 dwt (dwt = pennyweight) nugget, and then a 3.8 dwt nugget (20 pennyweight per ounce) the first day. Jeff, although he tried in earnest, came up with no nuggets. We also tried some old tailings upstream farther, but found no more gold that day. The second day dawned under rainy skies. We decided to stay near camp, and see if there were more nuggets waiting to be found around the cabins. I grabbed the new White's MXT, while Jeff used the GMT. The rain poured, but we stuck with it. Lots of bullets and shell casings were dug, which I consider a good sign. You cannot get all the nuggets and leave bullets in the ground. However, by the end of the day we had no nuggets. We headed up to the bench deposits above camp and found some small nuggets, just so we could say we did not get skunked. Jeff found a nice little pennyweight nugget, and I got a few smaller bits. Nothing to brag about, but at least we could say we found gold. I have to note that I was very impressed with the MXT around camp. I used the 6" elliptical coil, and ran the unit in the relic mode. This mode, when set up a certain way, gives a high tone on non-ferrous targets, and low tone on iron targets. It was easy and efficient around camp, and all the targets I dug were non-ferrous items. It has very good trash separation with the small coil, and easy target ID with the dual tone system. The machine was great for places where trash is literally inches apart. The weather cleared the third day. Jeff again ran the White's GMT, and I the MXT with the small coil. We started in camp, and I found a small nugget just behind the cabins. We then tried some of the dragline piles above camp near where I found my 4.95-ounce nugget in 2001. I switched the MXT to the 950 9.5" coil. Both Jeff and I found nuggets weighing several pennyweights each. So far we were not exactly knocking down the nuggets. Frankly, we were both a bit puzzled, as our constant digging of bullets indicated nuggets were still to be found. If an area were thoroughly detected we would be digging nothing at all. Nevertheless, our nugget results were lean, and so our enthusiasm was flagging. I am a big fan of aerial photos, and had some new ones showing an area downstream opposite the old bucketline dredge machine shop. Long rows of old bucketline tailings ran far back away from the road, and so I suggested we run down and check them for a change of pace. Jeff was running the White's GMT with the Sierra Max 14" coil, and I ran the MXT with stock 950 coil. The more I used the MXT the more I liked it. On the cobble piles I ran in prospect mode, with full gain, minimum V/SAT setting, and in automatic ground balance. The 14.7 kHz frequency ran smoother on the mixed rocks of the cobble piles than the higher frequency GMT. High frequency detectors tend to get weak signals from mineralized rocks because of their extreme sensitivity. The MXT seems well suited for searching areas of mixed mineralization due to its lower frequency and fast automatic ground balance. We followed an old bulldozer trail back towards the area I had spotted in the aerial photos. I concentrated on the edges of the main trail near to and in the brush. My goal was to cover obscure areas others may have missed. I finally got a good clean signal and gave a couple digs with my pick. The moss and rocks flipped back, and there lay a large gold nugget. I did not get as excited over this one as with my 4.95 ounce nugget of the previous year, as I was not sure exactly how much the nugget weighed. Jeff, however, knew immediately it was something to jump up and down over. And he was right, as upon weighing it came in at 6.85 ounces! My largest nugget ever, and the largest found at Ganes Creek that summer. I also had the satisfaction of proving that finds always remain for those willing to look. This particular nugget is strange, with very dark, lustrous quartz encasing a solid gold core. The quartz is almost like agate. Fingers of dendritic (leaf) gold reach up from the gold core into the quartz shell. It is a unique nugget, unlike any I have seen before. And at 6.85 ounces it gives me entry into a very exclusive club. Few people can say they have found a gold nugget weighing over one-half Troy pound without heavy machinery. Steve with 6.85 ounce gold specimen from Ganes Creek found with White's MXT My White's MXT had paid for itself rather spectacularly. It is hard not to like a detector that finds a big gold nugget. However, while it bench tests well on small gold, frankly it does not hold a candle to the White's GMT when it comes to very small gold under actual field conditions. If small gold is your bread and butter, the GMT is still the way to go. Not only do higher frequency detectors have an innate edge on tiny gold nuggets, but also the manual ground balance on the GMT offers better control for small gold. The MXT must be auto ground balanced, then "locked". The GB point is then fixed, but it cannot be manually adjusted from there. The GMT has both automatic and manual ground balance. The MXT does do very well on nuggets weighing a few grains or more, and the bigger the gold gets; the less difference there is between the MXT and GMT. Frankly, for nuggets weighing in pennyweights or more, I actually prefer the MXT. It operates smoother than the GMT in mineralized ground, and has depth as good as, and maybe under some circumstances better than, the GMT. It is a great machine for large nugget hunting. Combine that with the fact that it has a superior target ID system, with both iron readout and conductivity measurement, and you can actually do things like tell most gold nuggets from a .22 shell casing. I used the relic mode with the small coil on the MXT to work extreme trash areas to good effect. This machine has lots of potential to explore, and yet is very easy to use. Add in the fact that it has a 6.5" x 4" elliptical DD, 5.3" round concentric, and 10" x 5.5" elliptical DD coils available as options, and I think the MXT is now the machine to beat for all-around use. Coin, nuggets, relics, and jewelry... it does it all. Moreover, despite its wealth of features, the list price is only $799.95. This article may seem like a White's ad, as I have purposely made the brand a centerpiece of the story. The fact is that I have owned and used all the major brands of detectors and continue to do so. I think all the major manufacturers make good units; Nevertheless, White's will always hold a special place in my heart as being the first brand I ever owned. It was that White's Coinmaster 4 that got me started metal detecting all those years ago. To come full circle 30 years later and find the largest nugget of my life (so far) with a White's detector is particularly fitting. You may contact me online at the DetectorProspector Forum if you have questions regarding this article. ~ Steve Herschbach Copyright © 2004 Herschbach Enterprises4 points
 -
 The gold pan is the basic miner's tool. They are used for prospecting and testing of deposits for heavy minerals. The final cleanup of most sluicing and dredging operations is done with a gold pan. For some, gold panning is a mining method in itself. To find gold, a beginner needs nothing more than a gold pan and some basic tools. While many associate steel pans with gold mining, steel pans today are mostly sold to the arts and crafts market and as souvenirs. Plastic pans are molded with riffles that aid panning and are colored to help show the gold. Green is considered the best color as it not only shows gold well but also the blacks sands that one is attempting to separate from the gold. Some pans feature a recessed bottom referred to as a "drop center". This creates a catch trap around the bottom of the pan to hold the gold. Some panners prefer this design while others feel it also holds undesired material so both styles are popular. Plastic pans can be molded with "cheater riffles" that make it easier to pan and still not lose the gold. A 14" gold pan is about the right size for most adults, while most children would probably be better served with a 10" gold pan. The ''standard'' steel gold pan of old was 16'' wide at the top, 10'' wide at the bottom, and 2.5'' deep. When full, and level with the top (a ''struck pan''), it would hold about 336 cubic inches, or 0.0072 cubic yard. In theory, this means that 140 pans equal a yard of material. In reality, packed gravels ''swell'' when removed from the ground. A swell of 20 to 25 percent is average. It can therefore take from 150 to 200 pans to process a yard of material. The figure used most often is 180 pans per yard. Assuming about ten pans per hour, a good panner should be able to pan about a half-yard a day. A very proficient panner working easy material may be able to pan up to a yard a day. Needless to say this would be back-breaking work! In good hands, the pan is one of the most efficient gold recovery devices available. In fact, panning samples that show substantial amounts of extremely fine float gold has misled many a miner. This is gold so small that although it can be recovered with a gold pan, it will wash out of most simple sluice boxes and gold dredges. Anyone wishing to mine for gold needs to become proficient with a gold pan. It is an invaluable tool for testing, and for the cleanup of larger scale equipment, such as sluice boxes. There is some skill involved in gold panning, however, and the big mistake most people make is in not learning how to pan before going out for the first time. Gold pans old and new - classic 16" steel pan (rusted) and square riffled plastic LeTrap pan Find a tub large enough to move the pan around inside the tub. Obtain a few flakes of gold, or lacking gold, use small flattened lead shot. The gold or lead flakes should be about 1/16" in diameter or smaller. Fill the tub with water, and fill the pan level to about 1" short of the top with sand, gravel, and small rocks. Some actual stream gravels are best. Carefully count out a number of lead or gold pieces and push them into the material in the pan. This is the key thing about this process. It is necessary to start with a known number of pieces in order to gauge how well the panning process is going. Ten flakes is a good number to use. There are lots of ways to pan, but all that is important is getting rid of that sand and gravel while keeping those sample pieces. Submerge the pan just below the surface of the water, and allow the water to soak into the material. It may be necessary to stir the material up somewhat to wet all the material in to pan. Pick out any larger rocks at this time. Then shake the pan vigorously side to side and front to rear, all the while keeping it just under the water and basically level. The goal is to get all the material in the pan moving vigorously and very soupy. The gold or lead is much heavier than an equal size piece of sand, and so with all the material moving around the test samples will quickly sink to the bottom of the pan. The next step involves taking the pan of material and tilting it forward, away from the panner, and scooping some water up out of the tub. The goal is to try and make a wave similar to that seen on a beach. Scoop the pan into the water and then lift the pan while tossing the water away. The water should ride up the tilted pan, and then as the water flows back out of the pan it will carry some material out with it. Getting comfortable while panning can be challenging! The secret is in keeping the material in the bottom of the pan stationary and letting the water wash off the top layer in the pan. Do not dump the material out of the pan; wash it out of the pan. Three or four of these washing actions take place. Then the pan goes back to the level/submerged position for another round of vigorous shaking. Then back up, tilt forward, and scoop/wash the material. And that is it, over and over, until only a few spoonfuls of material remain in the pan. Watch the material carefully while washing for a glint of gold or lead. If a piece is seen, stop and shake it back down into the bottom of the pan. If the pieces are seen often, it means the shaking action has not been vigorous enough to sink the samples to the bottom of the pan. More care must be used when washing as the last bit of material remains in the pan. One wrong scoop and everything in the pan will go in the tub! When only a spoonful of material remains, swirling the material around in the bottom of the pan with a small amount of water will reveal the pieces of gold (or lead). A very handy tool at this point is the snuffer bottle. The snuffer bottle is a plastic squeeze bottle with a tube inserted into in such a fashion that small items can be sucked into the bottle but cannot escape. This makes it easy to spot your samples, and then suck them up while getting as little sand as possible. When all the pieces have been captured, dump material still in the pan into the tub. Then take the cap off the snuffer bottle and dump out the captured pieces back into the pan. It should now be very easy to separate the test samples from the tiny amount of sand remaining. Now count them! All the original test pieces should be captured. If not, rinse everything out of the tub into the pan and start all over. The first goal is to get to where the test pieces are reliably recovered every time. When that point is reached, the next goal is to try and pan faster, to speed up the process. Beginning panners take incredible amounts of time on a single pan when they are learning, sometimes 15-20 minutes or more. But with practice it should take no more than a few minutes to work a pan of material. Gold panning championships are measured in seconds, not minutes. If this kind of practice does not take place before going out to do some actual gold panning, the chances for any kind of success are very minimal. The new prospector will have no idea if there was gold in the material they have chosen to pan. When nothing is found, they will have no idea if it is because of poor panning technique or just because there was no gold to start with. It is very important to have confidence so that when a particular spot is sampled with a pan a few times and nothing is found, the decision is then made to try panning somewhere else. Video - Basic Panning Equipment & Panning Techniques One item that can really help the panning process is a screen. Screens are used to remove rocks from material before panning, aiding considerably in the panning process. Screens are designed to fit into or over the pan. Choose a screen size that will eliminate most material while not being so small that gold will not pass through the screen. A screen with a 1/2" hole size is safe for most locations. If all you anticipate is small gold, a 1/4" hole size will eliminate more worthless material quickly. Consider carefully before using a screen any smaller than 1/4". It is good practice to thoroughly wash material through the screen with vigorous shaking, then to quickly flip the screen over and dump it out where you can take a quick look at the discarded material, in case a large nugget has been accidently screened out. The last thing you want to do is toss the screened material out into deep water, and see what you think is a large nugget flying out with the rocks! Other items handy for gold panning are rubber gloves for protection from cold water, rubber boots, a small shovel or large scoop, a small pry bar and of course a snuffer bottle. And a bottle to put the gold in. Do not use glass, as it can be too easily dropped and broken. Next is the question of where to go gold panning. Always attempt to go where gold has already been found, as stumbling on an unknown gold deposit is not likely to happen. Be sure that the area is open to the public, or that permission is obtained from whoever has jurisdiction over the property. For most visitors with limited time it will be best to stick with known public sites. For a list of panning sites in Alaska visit ourPublic Mining Sites page. When panning, it usually will make more sense to spend extra time and effort filling the pan with quality material. For example, splitting bedrock crevices and cleaning them thoroughly can take some time, but the material produced will usually have a better chance of producing a good showing of gold than simply filling the pan with a couple shovels full of bank material. Panning can produce substantial amounts of gold, but the material must be chosen carefully for good results. Good Luck and Good Panning! ~ Steve Herschbach Copyright © 2009 Herschbach Enterprises3 points
 -
 The Makro Gold Racer metal detector was introduced in 2016 and is still in production. I very much anticipated the Gold Racer as something unique on the market at the time - a 56 kHz high frequency gold prospecting detector with all the extra discrimination and other features to make it versatile enough for other uses. What follows is a basic description with a very detailed review starting below the specifications chart. Note that Makro has introduced the 61 kHz Makro Gold Kruzer in 2018 and there is a possibility the Gold Racer will be discontinued soon in favor of this new model. The Makro Gold Racer comes standard with an 10" x 5.5" DD coil and has optional 5" round DD, 10" x 5.5" concentric, and 15.5" x 13.25" DD coils. The Gold Racer has been changed slightly from the original Racer design to make the handle grip more comfortable based on customer feedback. The original Bluetooth dongle and wireless headphones have been replaced by a proprietary 2.4 Ghz design to help reduce the audio lag that was occurring with the regular Bluetooth design. The main item of note however is the very high 56 kHz operating frequency, making this one of the hottest machines available on tiny non-ferrous targets. The Makro Gold Racer shares many features with the original Racer plus has added many more. The new iSAT control from the Nokta FORS Gold+ is visible as is another new feature called iMask. The Gold Racer adds a Tone Break feature often requested by Racer and FORS owners and the Gold Racer has the ability to save its settings when shut off, unlike the Racer. The layout of the control panel has also been simplified making what features are available in what modes much more obvious. Makro Gold Racer metal detector Makro is fast gaining attention as a company that listens to its customers. The new Gold Racer model is the perfect example of that, creating a unique machine based almost solely on feedback provided by customers in the prior year. Official Makro Gold Racer Page Gold Racer Color Brochure Makro Gold Racer Instruction Manual Ray Mills (TrinityAU) Makro Gold Racer Review Makro Gold Racer vs Racer 2 Forum Threads Tagged "makro gold racer" Makro Metal Detectors Forum Makro Gold Racer Technical Specifications* Internet Price $509 Technology Induction Balance (IB) Frequency 56 kHz Autotune Mode(s) iSAT Intelligent Self Adjusting Threshold Ground Rejection Grab, Manual, & Tracking Soil Adjust No Discrimination Visual ID & Tone ID, Tone Break Adjustment Volume Control Yes Threshold Control Yes Tone Adjust Yes Audio Boost Yes Frequency Offset Yes Pinpoint Mode Yes Audio Output 1/4" Headphone Socket & Speaker Hip Mount Shaft Mount Only Standard Coil(s) 10" x 5.5" DD Optional Search Coils 5" round DD, 5.5" x 10" concentric, 13.25" x 15.5 DD" Battery Four AA Operating Time 25 - 30 hours Weight 3 pounds Additional Technology iMask noise suppression technology, built in LED flashlight, backlit screen, save settings Notes Optional 2.4 Ghz wireless headphones *Notes on Technical Specifications - Detailed notes about the specifications listed in this chart. Detailed Review Of Makro Gold Racer by Steve Herschbach Makro Gold Racer finds small Nevada gold The Makro Gold Racer has been one of my most anticipated new VLF metal detectors in years. This completely new model represents something I have wanted for a very long time – a high frequency VLF metal detector that does not skimp for features, in particular as regards discrimination options. A little background. First, I have been testing prototypes of the Makro Gold Racer, and this review is based on those prototypes. The final version due soon has a completely new LCD display layout, audio boost, refinements to other settings, and physical refinements like a change in the handle angle, etc. That being the case this review should be considered preliminary and final specifications are subject to change, as well as details you may see in my photos regarding the physical design of the detector. Second, what is the intended market for the Makro Gold Racer? The machine looks deceptively like many other detectors aimed at general purpose metal detecting. I want to emphasize that first and foremost this is a gold prospecting detector. There are only a few other detectors that directly compare to the Gold Racer which is running at a very high frequency of 56 kHz. Comparable detectors would be the White’s GMT at 48 kHz, the Minelab Eureka Gold running in its 60 kHz setting, and the Fisher Gold Bug 2 at 71 kHz. The intent with very high frequency detectors is to sharpen the response on extremely small metal targets. High frequency detectors are in a niche all their own when it comes to finding the tiniest of gold nuggets. This sensitivity does come at a cost however, in that the detectors are also responsive to ground mineralization and hot rocks that less sensitive, lower frequency detectors might ignore completely. There is no free lunch in detecting, and I want to caution anyone thinking that the Makro Gold Racer is going to be a magical solution to all their detecting desires to be realistic about things. Inevitably when new detectors come out people fall victim to wishful thinking, and I would like to try and avoid that here. When it comes to reviewing detectors I do the best I can to describe detectors to help people decide if they might be interested in them or not. Do realize again however that this review is based on preliminary information. Also, I honestly do not want people buying new metal detectors based solely on my reviews. There will be some of who want the latest and greatest right now, and I appreciate that, but being a first adopter does have its risks. My normal advice to people is to never buy anything based on a single review, but to wait for more of a consensus opinion to emerge. I have used the Gold Racer in the field, and I have found gold with it. Right now though if it is just a matter of you wanting to know if the Makro Gold Racer can find gold then I refer you to the excellent field review with photos posted by Ray Mills at the Detector Prospector Forum. In outward appearance the Makro Gold Racer resembles its immediate predecessor, the Makro Racer, but this really is a new detector, not just a Racer running at a higher frequency. Feedback on the original Racer has been incorporated as well as extensive testing and commentary from prospectors around the world. Besides the obvious color difference, major physical changes include completely redesigning the layout of the LCD display to better differentiate what are all metal functions and what are discrimination functions. All metal functions are on the left, and discrimination functions are on the right. I think the new display is more intuitive and better accommodates the extra functions implemented on the Gold Racer. The angle of the bend in the S rod handle grip has been relaxed based on feedback from Racer owners. The vibration mode was eliminated, shaving a tiny amount of weight and freeing up room on the display menu. The Gold Racer with stock 10” x 5.5” DD coil and NiMH batteries installed weighs in on my postal scales at exactly three pounds. Coils available at launch are the 10” x 5.5” DD that is stock on the detector. Optional coils include a 10” x 5.5” concentric coil, 5” round DD coil, and a lightweight 15.5” x 13” DD coil. Makro Gold Racer with 5" round DD coil Let’s take a look at the functions. Under All Metal on the left side of the meter are the functions that apply only to the All Metal mode. On the right are the functions for the two Discrimination modes. The settings are independent in each mode, and once set can be saved when the detector is powered down. This simple and intuitive setup is also part of the power of the Makro Gold Racer. It is incredibly easy once each mode has been customized to flip quickly between the three modes, cross checking target responses to make a dig/no-dig decision. All Metal is the heart and soul of nugget detecting, and the Makro Gold Racer has an extremely powerful, smooth, and sensitive threshold based all metal mode. The Sensitivity setting is familiar to anyone who has used a metal detector, except that there are three base levels of sensitivity or gain. Significant boosts occur between 39 - 40 and again between 69 - 70. Most detectors max out at what is a setting of 69 on the Gold Racer. Settings of 70 and above are a type of hyper gain setting that takes the machine above and beyond, but in extreme ground overload signals may occur. Overload signals are indicated by a “warning siren” audio and the machine is telling you that there is either a large metal object under the coil, or that you are encountering extreme mineralization. In the case of mineralization, either raise the coil slightly while scanning, lower the sensitivity setting, or both. Overloads occurring at 70 will almost always be eliminated by dropping to 69. Rest assured very little is lost by lowering sensitivity to 69 or below, again, because many detectors cannot be set as hot as the Gold Racer even at their maximum setting. Do you ever run detectors and have the distinct feeling some performance has been left on the table, because the detector can always be run at maximum settings? Makro has given you that extra power for where it can be used, but in doing so they expect you will lower settings in places where that extra power works against you. Luckily, the audio alert makes it easy to know when this is. Most people do not know it but many detectors simply shut down and quit working under similar conditions with no indication at all to the operator, a situation referred to as “silent masking”. ads by Amazon... The threshold setting is the normal control that sets the volume of the slight audio tone that is key to any experienced nugget hunter finding the tiniest or deepest gold nuggets. The most minute variations in the threshold tone can indicate a gold nugget, and the ability to read the threshold is what sets most really good nugget hunters apart from everyone else. Makro has added a feature to the Gold Racer called iSAT, for “Intelligent Self Adjusting Threshold”. This setting consists of several levels of adjustment that vary the rate at which the threshold tone steadies itself. Higher levels of iSAT smooth the threshold more aggressively which aids in maintaining a smooth threshold in rapidly varying ground. Lower levels allow for faint variations to be heard more clearly in milder ground for extra depth and sensitivity. The Gold Racer can be ground balanced three ways. Holding the trigger switch under the control pod in the forward position activates an instant automatic ground balance. Just pump the coil over the ground a couple times, release the trigger, and you are done. There is a short delay when you release the trigger, and during this delay you may manually adjust the ground balance setting. The instant ground balance is neutral to slightly negative. Those that like a slightly positive ground balance need only perform the instant balance, then tap the right hand control button three of four times. The Tracking function on the control panel engages and disengages automatic ground tracking. This is most useful where the ground conditions vary wildly, a perfect example being mixed cobble piles or river bars. The tracking is very quick yet resists tracking out genuine gold signals as much as possible. This can also be an aid to anyone new to ground balancing detectors as it makes the process entirely automatic. The Backlight setting adjusts the illumination level of the backlit screen. The FD/Save setting allows adjustments to be saved when the detector is powered off, while the FD function resets Factory Defaults. There is also a Frequency Shift setting to help eliminate outside electrical interference from power lines, or another Gold Racer being operated nearby. This is set through a combination of control buttons but not visible on the menu. Finally, although this is a true threshold based all metal mode, the meter acts independently in discrimination mode at all times and indicates target id information when the signal strength is sufficient to do so. Easy to read well designed screen Under the Discrimination menu are settings that are completely separate from the All Metal settings and also saved or reset separately. Disc 1 is a standard two tone mode with low tone ferrous and higher tone non-ferrous. Disc 2 is a similar but deeper, more powerful mode. Quick switching between these two modes, each with fully independent settings, creates a many layered and subtle approach to target discrimination. Both discrimination modes are silent search, no threshold based systems. However, new to Makro models is the ability to set the point at which low tones flip, or “break” over into being higher tones. Typically 39 and lower target id will cause a low tone, and 40 and above a higher tone. This ability somewhat replaces the three tone mode on the original Racer because by increasing the Tone Break setting it is possible to create various coin detecting scenarios. For instance, all targets with an id number below copper penny could register low tone, and therefore copper pennies, dimes, quarters, and dollar coins a higher tone. Conversely, lowering the Tone Break setting would create a more conservative approach for nugget detecting by accepting a little more ferrous digging in return for possibly finding another nugget or two. The Sensitivity control on the Disc menu is the same as but independent of the All Metal setting of the same name. ID Filter is a variable discrimination control, with higher settings eliminating or blanking out id numbers lower than the current setting. This setting is independent for each Disc mode, and again flipping back and forth can create some interesting scenarios for comparing targets at completely different sensitivity and ID Filter levels. This quick mode switching between All Metal, Disc1, and Disc2, all with independent settings, is a very powerful tool once you get used to it. Also new with the Gold Racer is the iMask setting. I noted at the start of this review that all metal detector designs involve making trades of some sort. Extreme high frequency sensitivity to small metal targets does increase chatty false responses in extreme ground when in the discrimination modes. iMask attenuates or suppresses weaker target responses in the discrimination modes and provides a secondary level of adjustment separate from and in addition to the Sensitivity and ID Filter settings. If the detector is producing lots of quick, spurious signals in the discrimination modes, reducing sensitivity or increasing ID Filter settings or both is the first line of attack. If this does not work, go back to the original settings on those functions, and try increasing the iMask setting. If this does not work, again lower sensitivity or increase the ID Filter or both on top of the current iMask setting. iMask acts as a pre-filter giving an extra level of control to help deal with extremely bad ground conditions. Finally, Disc1 is a less aggressive mode than Disc2, so using Disc1 offers even another level of possible options when dealing with bad ground in the discrimination modes. The Backlight setting is independent for the discrimination modes, as is the Factory Default/Save Settings function. I think it goes without saying that there has never been a high frequency metal detector ever produced with this level of options and control. There are a lot of variables to play with here, and I would not be truthful at all if I said I have this machine all figured out. In fact, I think part of the fun with the Makro Gold Racer is we are entering uncharted territory. Until the final version of the machine is released, and until quite a few people get their hands on it and experiment, it is very difficult to say just what applications creative detectorists may find for the Gold Racer. It is a very powerful VLF gold prospecting detector, I can vouch for that. Applications also may be found for jewelry detecting and relic hunting in particular, and even coin detecting, due to the unique combination of features the Makro Gold Racer offers. OK, finally – some notes on real world use! Again, this is all based on prototype models and so I can only speak in generalities for this report. However, there is no doubt in my mind that even the prototype detectors rival anything currently available in a VLF detector for finding tiny gold nuggets. I can easily locate flakes of gold weighing under one tenth grain with the Gold Racer and the stock 10” x 5.5” DD coil. In fact, the machine is so hot with the stock coil I thought using a smaller coil offered minimal if any benefit, mostly because of lost ground coverage and possibly lost depth on larger nuggets. I would only use the smaller coil myself for nooks and crannies where the stock coil can’t fit, but otherwise the stock coil really is the way to go in my opinion. Keep in mind I did say grain not gram. There are 480 grains per Troy ounce and in my opinion I can find flakes all day long with the Gold Racer that weigh less than 1/10th grain, or less than 1/4800th ounce. Smallest nugget unweighable, largest 2.4 grams In trashy locations I generally preferred running in all metal and just checking the meter for ferrous targets, which tend to lock in hard at 21 or 22 on the numbers. In theory anything under 40 is ferrous, but to be safe I might investigate items as low as 35 or even 30 depending on the situation and amount of trash. However, as I noted most ferrous locks in hard around 20 leaving no doubt what the target is. In All Metal mode very tiny or very deep targets beyond discrimination range give no target id at all, automatically meaning they need investigation. The main reason I prefer to always hunt in All metal is the extra depth and sensitivity it affords, and checking targets visually is very quick and more efficient than toggling back and forth to a Disc mode under normal circumstances. For areas with too much trash where meter watching might get to be a bit too much, I normally use one of the disc modes set for two tone ferrous/non-ferrous. Iron targets just burp away, while non-ferrous target pop out with a beep. If even that got to be too much for some people, increasing the ID Filter to eliminate most ferrous responses completely can make for a quieter experience in really trashy locations. As always, I must include the warning that the more discrimination applied, the more risk of missing a good target. Use no more discrimination than needed to preserve your sanity! I used the Gold Racer to hunt a couple trashy areas where I just could not go with my big dollar all metal machine, and easily located nuggets in the midst of trash. For me personally the Makro Gold Racer fills in two areas where the high price big gun detectors come up short. The ability to find the tiniest, most dispersed gold possible, both in flake form or enclosed in specimen rock. And the ability to deal with really trashy areas where good discrimination is needed. Perhaps the biggest surprise for me was when I decided to give the 15.5” x 13” DD coil a try. Honestly, I did not expect much from it. You normally do not see a coil this large for high frequency machines because the ground feedback usually overwhelms them, negating any gains that can be had regarding depth. Instead, the Gold Racer seemed to be even better behaved with the larger coil than with the smaller coils. I hunted some cobble piles with it and it ran smooth as can be at higher sensitivity levels. I then wandered into some moderately hot ground with it, still with no problems, and was actually surprised when I came up with a couple small gold nuggets with it. The first was only 0.8 grams which I thought was pretty fantastic. So I put a little more effort into it, and found a 0.3 gram nugget. With a 15.5” x 13” DD coil on a VLF? That is really kind of unheard of, and I was thoroughly impressed. I am not sure what is going on there but I do know the Makro detectors can sense what coil is on the detector. Something different going on with that big coil? I don’t know, but the results and performance surprised me. Also surprising was that for such a large coil it actually was not bad swinging it for half a day. That could be from my using large, heavy detectors all summer however. Still, it was an eye opener all around and changed how I think my Gold Racer might get used in the future. It looks to have more use for covering very large areas blue sky prospecting than I would have imagined. The 15" x 13" DD coil is unique for detectors running in this frequency range I would be remiss if I did not include at least a note on the versatility possible with the Gold Racer. I recently took it to a local park. Now, my ground in Reno is screaming hot, full of magnetite. The mineral percentage graph on the Gold Racer and similar machines all come up one bar short of maxed, and ground balance numbers run around 88-90. A magnet dropped in this stuff comes up with a lump of magnetite. As a result getting accurate target id numbers with even the best coin detectors past 5” is a chore. I know that sounds crazy but it is the truth. I ran the 5” DD coil and even then had to back the sensitivity down to 69 to prevent overloads in the worst areas. One thing about the Racer detectors that I have heard people complain about, and that is that they tend to up average target numbers in bad soil. For me this is a good thing. Many detectors will see target id number average lower in bad ground, and so fringe targets are more likely to get identified as ferrous when they are in reality non-ferrous. This is obviously not a good thing for nugget detecting. The Racer and the Gold Racer both tend to up average, and so targets like lead sinkers or aluminum that you would expect to give lower numbers often give coin like responses with the Racers. It is odd to see in practice. I got a good high signal reading near 80 at about 5” that when dug up turned out to be a common round lead fishing sinker. Out of the hole the target id promptly dropped to about 45. This effect whether by design or by accident is common with European detectors. I think it is by design because first and foremost these machines are made to pull non-ferrous targets out of ferrous trash. Improperly identifying a non-ferrous item as ferrous is the worst possible result, and so up averaging helps insure that non-ferrous items will not be missed. However, it also means these types of detectors are not as efficient at cherry picking coins as common coin detectors are. You get the coins for sure, but you dig more trash doing it. Still, I experimented a few hours and if you are content to live with the limitation I just described you can actually make some good finds with the Gold Racer under almost any conditions. The ID Filter works very well, and by just running it all the way to 79 it was easy for me to cherry pick a few coins though larger aluminum items like screw caps or big pull tabs often came up in the 80s also. I do think this is a result dependent on ground conditions to some degree, but really the Gold Racer is best suited for people like me who want to recover all non-ferrous targets. I prefer to hunt jewelry rather than coins myself, as one gold ring makes up for a pile of coins. And to hunt jewelry you have to dig aluminum, no two ways about that. The Gold Racer will suit me well hunting jewelry, especially micro jewelry like ear rings and fine chains. This report is very long, and yet I really am just skimming over the features and possibilities inherent in the Makro Gold Racer. I will close by once again noting that while everything regarding the Gold Racer is pretty much set in stone at this point, last second changes are possible. Look for more soon when the factory production models hit the street. I also get frustrated when people want information on new units, but then turn right around and characterize reports trying to provide that information as hype or a sales pitch. I have tried my best here to just present what facts I can without leading anyone to think that the Gold Racer is anything other than what it is. And that, in my opinion, is a very interesting, unique, and capable metal detector. I look forward to hearing for myself in the future what people think about it and the applications and tricks they come up with, because you pretty much need to toss anything you think you know out the door when approaching this machine. Many thanks to the folks at Makro and in particular Dilek Gonulay for providing me with the opportunity to be one of the first to use the Gold Racer. I admit that VLF detectors were beginning to bore me, and the Gold Racer has reignited my interest in seeing what they can do for me. ~ Steve Herschbach Copyright © 2015 Herschbach Enterprises3 points