-
Posts
43 -
Joined
-
Last visited
Content Type
Forums
Detector Prospector Home
Detector Database
Downloads
Everything posted by M1dn1ghtN1nj4
-
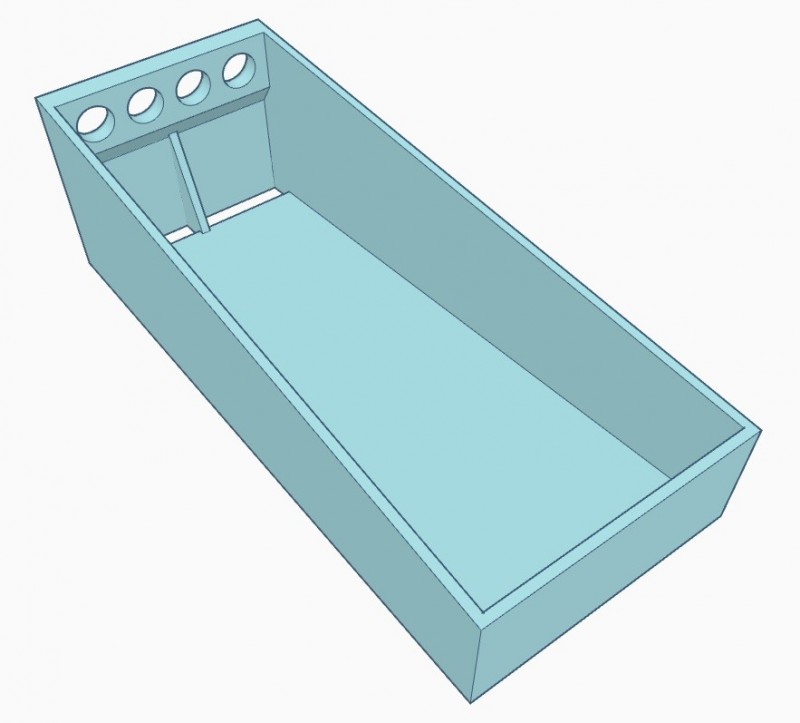
OK, so I added a feed hopper that takes 4x 16mm ID (19mm OD) hoses running off of a couple of 12V submersible pumps. You don't have to use all the feed holes in the hopper, but you can if you want. I'm headed back to my other house tonight to get my big 3D printer. These won't print on my smaller one that I have here. Once I get them printed, I will set up a video, and test out water flow. Should be self contained with a 5 gallon bucket, so it's recirculating. If any of you have any ideas, suggestions, or possible changes/additions to the modules, let me know. If you'd like to design one to fit the system, I'll forward you an STL of one of the pieces so you have something to work with.
-
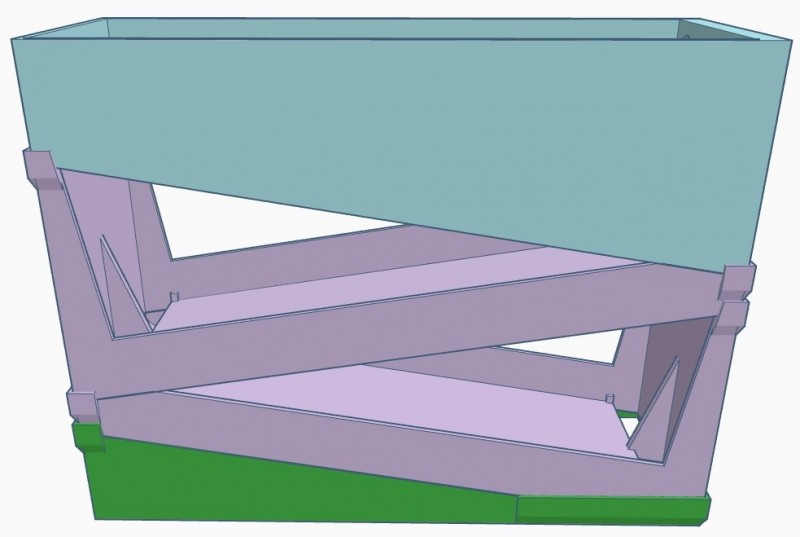
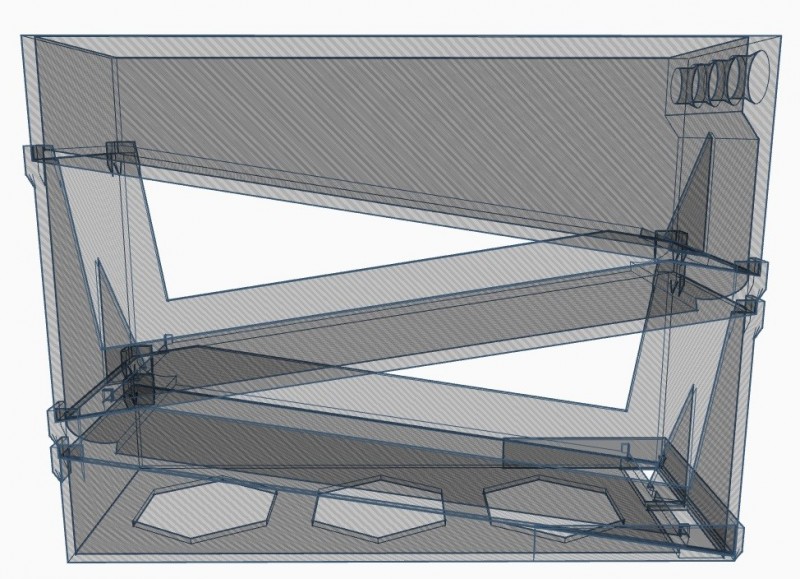
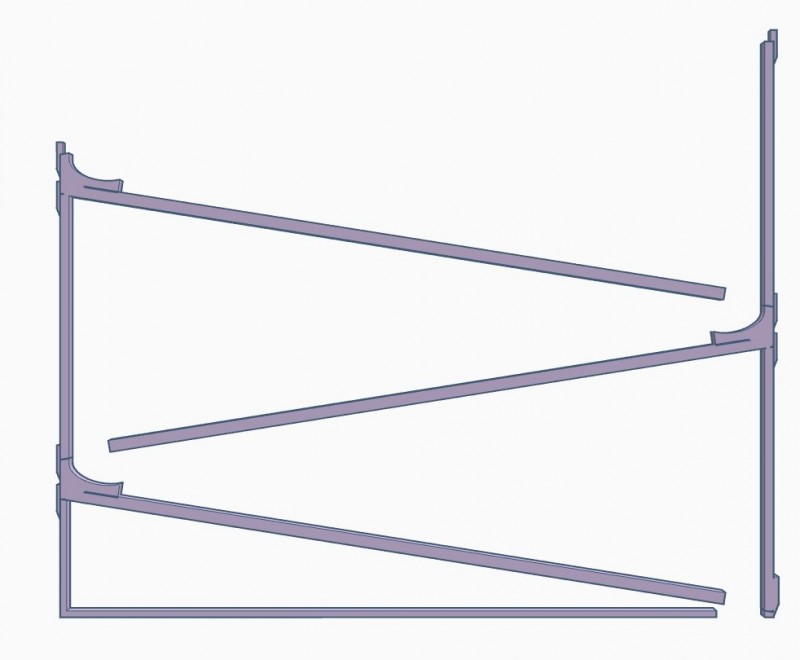
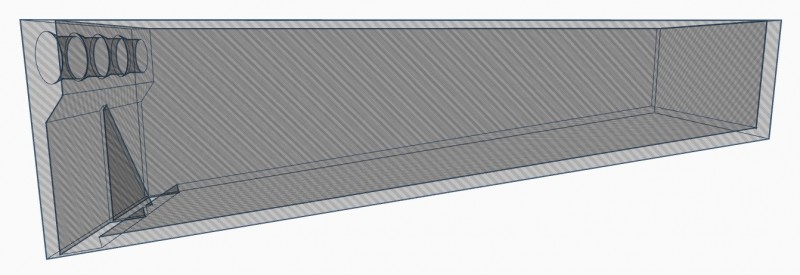
OK, so this time around, I have made things a LOT easier to work with, and expandability is key here. Sure, it's not huge, but for a portable system, this should work great. The key thing here is that I wanted a system that could be printed with little to no waste material, and yet have the structure and strength to hold up for a long time. This is what I have come up with so far. This will likely be my last design for this version. I'm only tweaking a few dimensions here, as well as making new modules that can be added to it. Features: Modules are 276mm long by 104mm wide, max height of 106mm (virtually) unlimited stackability Use modules in any order you want Use whatever sluice mat you want (to a point) Best used with a 5 gallon bucket (self-recirculating water system) Current Modules: Feed hopper Mat tray Bottom Support Key note here is that those modules, even with the tilt, print FLAT on a printer, and unless something drastic changes, will require NO supports. That means nothing to clean up after the print is done. Pull it off the printer, and use it right away! The cutaway view shows you how it currently operates. I did away with the "G-Force" drop whatever that the Gold Cube has. I wanted better flow, and didn't think that part was completely necessary. Some of those angles might change by the time the final version rolls around. I am still waiting on my four 200GPH water pumps so I can physically test flow rates. I know this is still very small compared to a lot of the others that you can shovel hundreds of pounds a day into, but this is meant more for fine cleanup or to run pre-classified material through, although this should be able to do a bit of classifying on it's own. Also, as I design more modules, I might include a couple modules that will spray wash and classify before sending down the smaller material to be run over the mats. I would also like to design a sort of trommel as one of the modules. Would have to be geared to run off of some water pressure, so I don't have to include a motor and all the electronics and extra building parts that come with it. This is one part that would have to be made from metal, as anything printed would get destroyed very quickly, so I'm still contemplating this one. Remember, this system isn't meant to drop boulders into. I'd say you can safely feed in no larger than 8-mesh material. Depending on water flow, you might get away with 4-mesh, but I wouldn't count on it. More info coming as I get more work done, and get a chance to print some physical models.
-
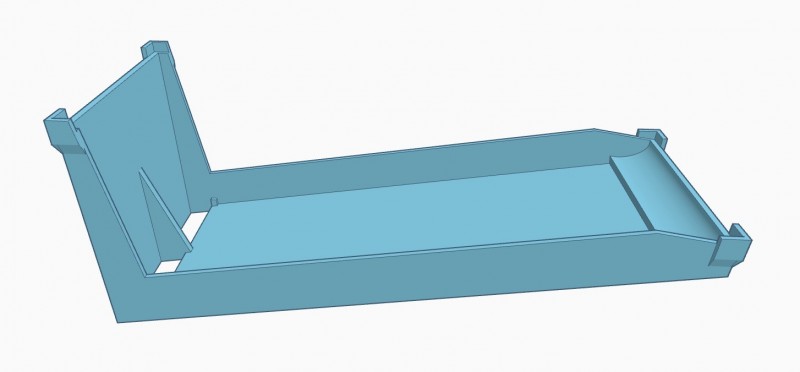
I've actually started redesigning this last week. Much easier printing, fewer parts, more robust, unlimited stackability, interchangeable modules, and uses whatever mat you want to put in it. Similar style to the Gold Cube. Each module (layer) is 100mm wide, 220mm long, 70mm tall, 9° bed tilt. Existing "modules": Wash trough Linear classifier Manual trommel (powered eventually) Regular riffle slope
-
I have a 500GPH pump on it's way. 3/4" ID hose. For those curious and don't want to decipher the screenshot and do math, the total height for one top tray (slick plate) and 2 mat trays total 165mm tall (or 6.5"). Plates are 9 degrees. How do these numbers sound? It's certainly smaller and shorter than a Gold Cube. I have not obviously tested this yet as I don't have the pump. I'm a bit tentative about printing the trays yet, as they take 30 hours a piece to make. If I were to sell these, I'd have a working design, then find a place that make them from injection molded plastic.
-
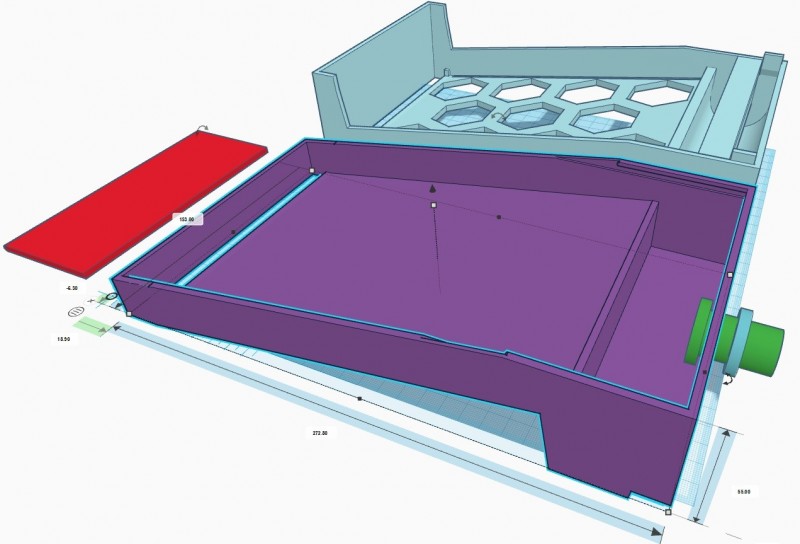
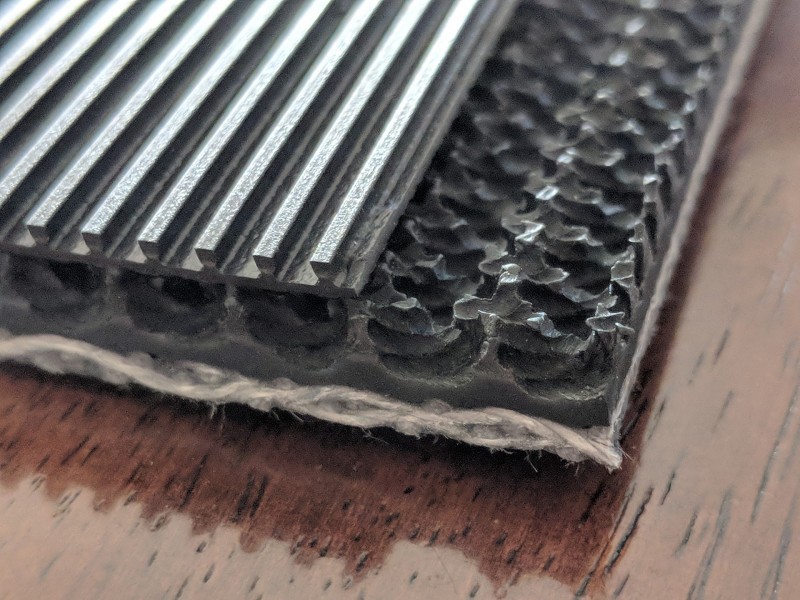
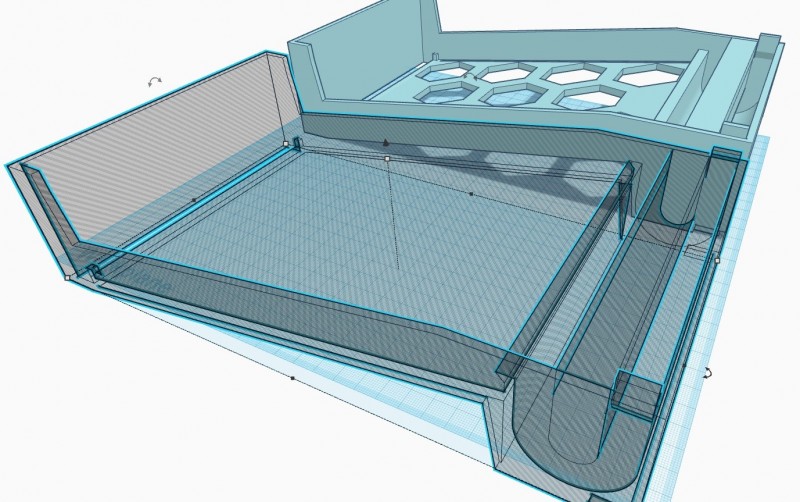
So, after playing around with a few ideas, I figure it's time to go ahead and make a larger scale sluice. No tiny 95GPH flow, this is going to be 500GPH. That's just over 5 times as powerful as my previous "pocket sluice". This is basically a small Gold Cube. Half the width, and scaled down in some areas. This one is designed to take real gold sluice rubber matting. I bought two types, one is generic "High-Low" matting that's 2.3mm tall. The other is "Vortex" matting, and it's 7mm tall. The trays I have are designed to print with minimal supports and material, hence the honeycomb grid. There is a little angular lip at the top of the matting area that keeps the top of the mat in place, and places the water and material flow completely onto the mat. The little pegs at the bottom keep the mat from sliding down, and and small enough to not impede water flow in any meaningful capacity. The underflow section at the top is actually the exact same dimensionally as the Gold Cube, so that the water flow works correctly. Under the foot where the underflow is, is a cutout that fits into the raised pegs at the top of the bottom end, so they can stack neatly. There is only 0.3mm of play between the parts, so that it's a nice, tight fit. The top tray, or "slick plate" is the same general idea, and has a 9 degree angle, just like the matting tray. The red lid slides into the slot around the top, and creates a tight sealed box that directs the water flow. It has only 0.3mm of clearance. The back of it will end up having a threaded tube, 3/4" to allow a bilge pump to be hooked up to it. What's not pictured here is an additional piece that directs water flow down to prevent excess splashing and uneven output.
-
So my next project is nearly complete already. I've designed a "mini gold cube". Same general idea and layout, but each "tray" is only 11" long, and 6" wide. About half the width of the real Gold Cube. The underflow loop is exactly the same dimensions as the Gold Cube as well, to make calculations easier. I've read that the Gold Cube is set to run on 1100GPH. Since mine is half that width, I would assume that 500GPH would be fine. Also, my trays are set at 9 degrees (just how it worked out). Is that an appropriate flow rate?
-

Practical 3d Printed Sluice
M1dn1ghtN1nj4 replied to Creekboy's topic in Gold Panning, Sluicing, Dredging, Drywashing, Etc
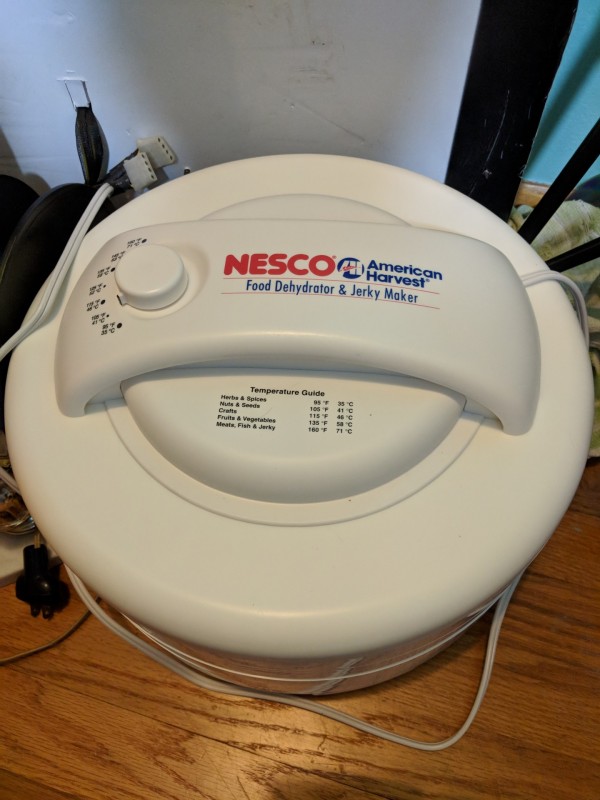
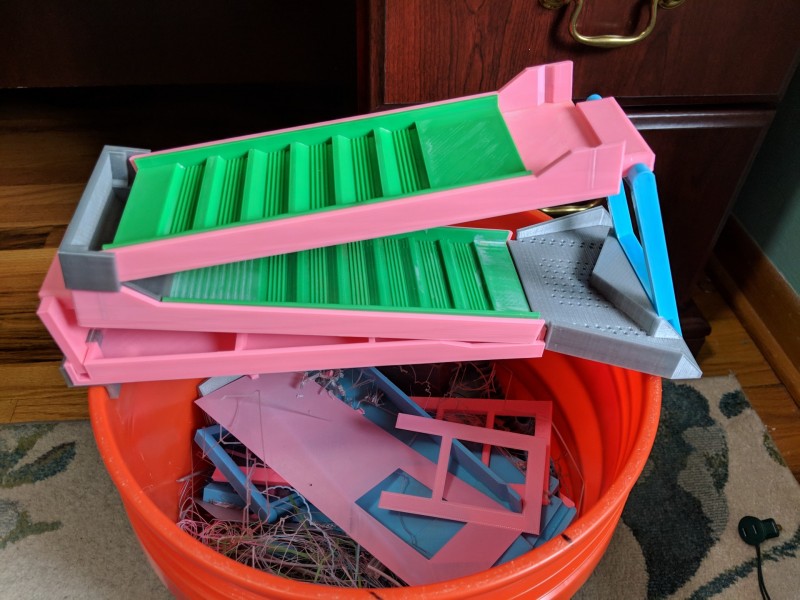
And I use this food dehydrator to dry my filament, which then either gets used immediately, or goes into the bucket for long term storage. -

Practical 3d Printed Sluice
M1dn1ghtN1nj4 replied to Creekboy's topic in Gold Panning, Sluicing, Dredging, Drywashing, Etc
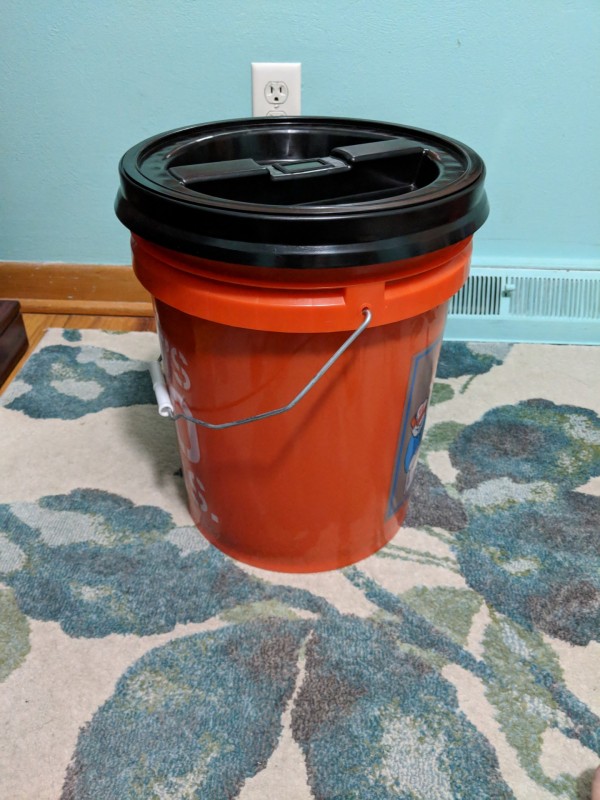
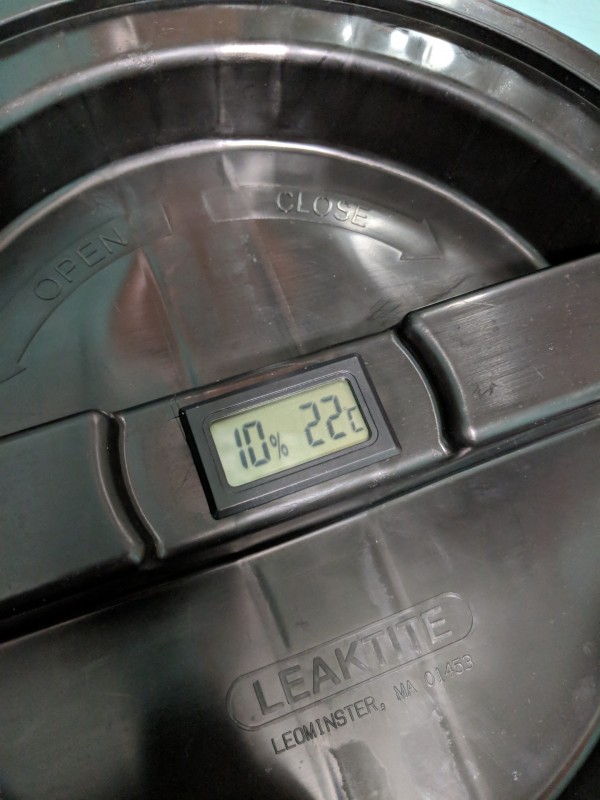
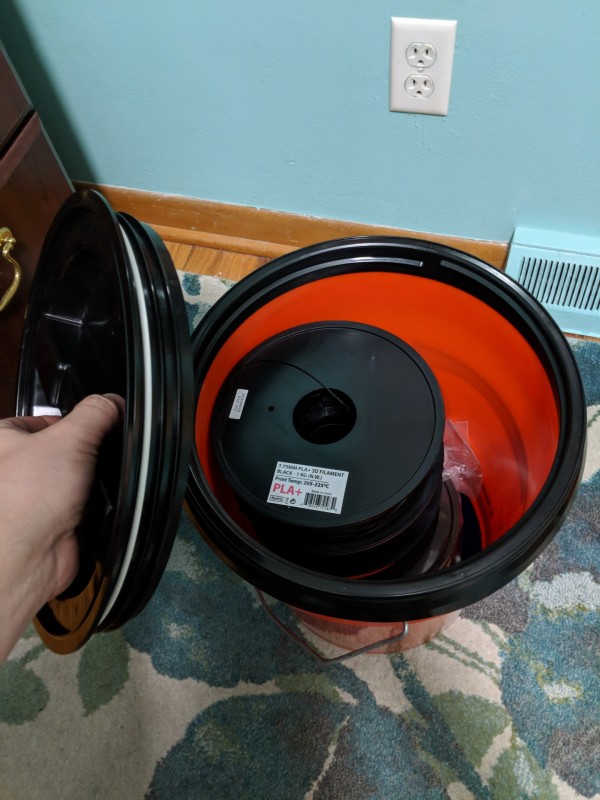
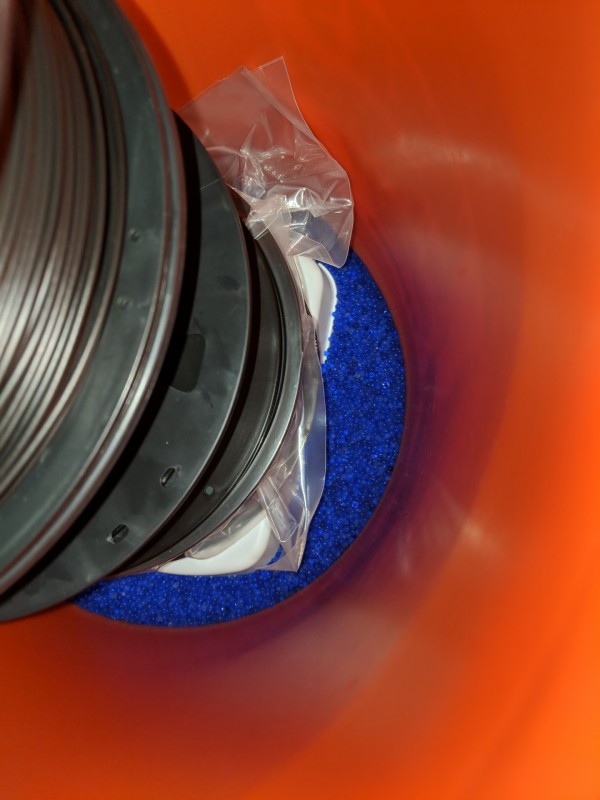
I use a 5 gallon bucket filled with desiccant. Turns pink when it's fully absorbed moisture. Has a screw top lid, with a digital humidity level and temperature sensor. Holds 4 spools of filament. Total of maybe $40, possibly less. -

Practical 3d Printed Sluice
M1dn1ghtN1nj4 replied to Creekboy's topic in Gold Panning, Sluicing, Dredging, Drywashing, Etc
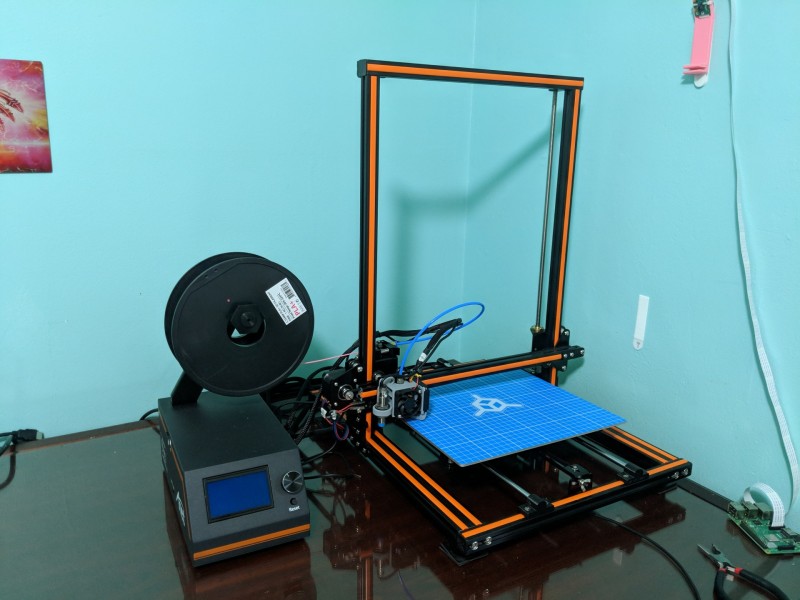
I've tried PLA on painters tape, and it ends up stuck to the bottom of the print, so I have to sand it to get it clean again, and even that's not enough. I currently use purple Elmers Glue Sticks on my TH3D build mat, and print on it like that. Pops right off, and cleanup is just a rag with water. Zero residue, and comes 100% clean. -
Thanks! I'm headed to Michigans upper peninsula Saturday. Will be there just over a week. I'm taking all my gold sluicing stuff with me. Highly doubt I'll find anything, but it'll be interesting to give my stuff a live test in the wild. If all goes well, I'll post the version that goes on the 5 gallon bucket on eBay. Not sure on price yet. But I want to be sure it's functional. If like to make a much larger version, with a stronger pump, and much larger throughput capacity, but time and money aren't on my side right now.
-

Practical 3d Printed Sluice
M1dn1ghtN1nj4 replied to Creekboy's topic in Gold Panning, Sluicing, Dredging, Drywashing, Etc
I've never printed in anything other than PLA. Need to find out what the requirements are for PETG. If I'm going to make this for sale, I need it to be cost effective. -

Practical 3d Printed Sluice
M1dn1ghtN1nj4 replied to Creekboy's topic in Gold Panning, Sluicing, Dredging, Drywashing, Etc
In all honesty, I've found my PLA prints to be very durable. Of course, you shouldn't be leaving it in a hot car anyway. Depending on size, you can store your prints in a 5 gallon bucket (light color). Or even just cover it with a blanket (out of the sun). I've used several brands of PLA. By FAR, I've found 3D-Fuels Workday PLA to be the absolute best as far as strength. https://www.3dfuel.com/materials/workday-pla/ I would also recommend that you coat your part in XTC-3D. It will seriously make your part better, and with gold, easier to clean. https://www.smooth-on.com/product-line/xtc-3d/ The green riffle drop-ins in my sluice setup are made from the 3D-Fuel PLA (because of its durability) -
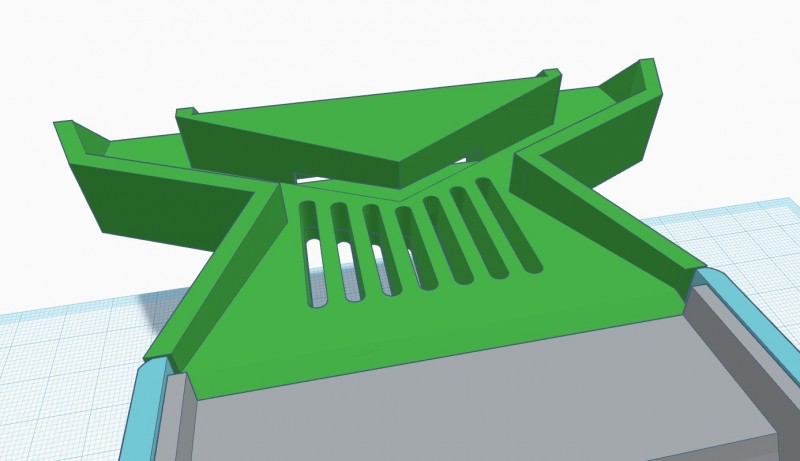
OK, so I had to redesign it. The surface tension of water was too much to allow hardly any water to drop down through the holes, it just ran right over them and out the end. This new design increases the width of the slots to 3mm, puts them in line with the water, and makes baffles to force water and material to the slots. Under that triangular piece in the middle is a drop off. Anything over 3mm gets pushed to the sides, and anything less slips under and drops into the bucket, along with the water. So yes, you will still lose water out the sides, but not nearly as much. I am printing this right now. Roughly 3.5 hours. Don't have time to design another yet, so this one will have to do me on my trip to Michigan starting Saturday. I have tested this whole thing, and it fits perfectly on a bucket! ? FIRST TIME!
-
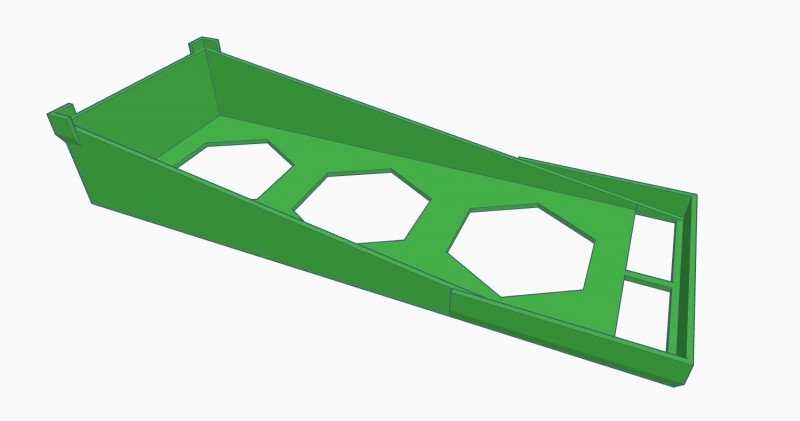
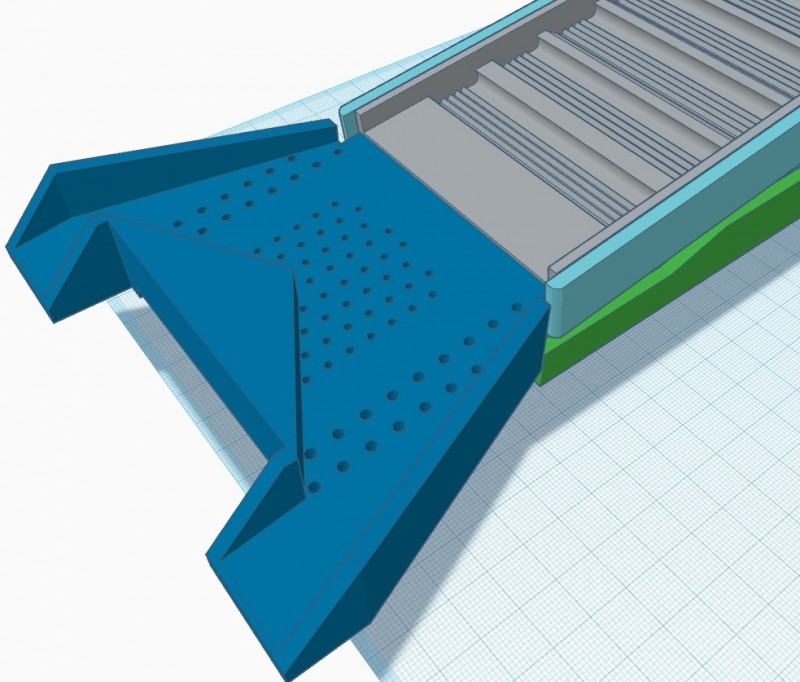
Just finished creating another addon. This one unfortuantely won't fit in the smaller box, but that's ok, because it's designed to be used with the 5 gallon bucket system above. This takes the larger stuff that comes off the end of the last tray and classify it. The middle holes are all 2mm wide, so your black sand and fine gold drop down into the bucket through those holes. Anything larger passes by, to either side toward the exit. The outer holes are 2.5mm, and any slightly larger gold should get caught by those. After that, anything larger should head out the exits on either side, and end up OUTSIDE the bucket. This way, only the "cons" stay in the bucket, allowing you to process much more material, with far less cleaning, and more time being productive. Also, the riffle trays can be dunked in the bucket as well, and emptied out, if you want to keep it clean, as all that material should end up in the bucket anyway. If I need to change the size of the holes, let me know. I'm literally just doing this by eye with my calipers, and deciding using educated guesses and the gold I've found so far, to determine what I think would work. I'm sure it could use improvement, so chime in!
-

Practical 3d Printed Sluice
M1dn1ghtN1nj4 replied to Creekboy's topic in Gold Panning, Sluicing, Dredging, Drywashing, Etc
We need a place to discuss things privately. Should team up on a design. ? -

Diy Blue (black) Bowl
M1dn1ghtN1nj4 replied to Creekboy's topic in Gold Panning, Sluicing, Dredging, Drywashing, Etc
Well, he's successfully checked off another thing on his "bucket list". ? -
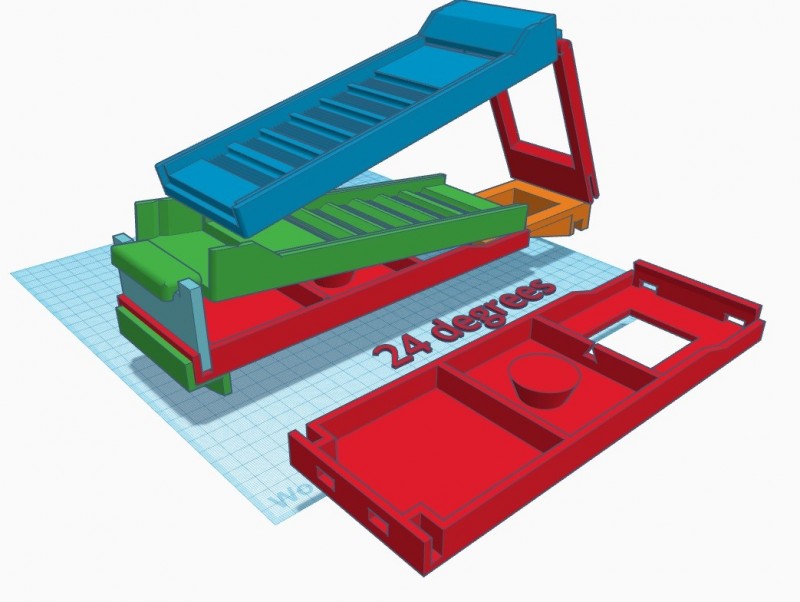
This is the next version. More or less. Have yet to test print it, but it SHOULD work as is. Feet at either end sit on the lip of a 5 gallon bucket. I reused both the short tray prop on the left, and the tall one with the hole in it on the right. Uses the same trays from the self-contained box in the OP, as well as the same printed riffle mats. Also, uses the same pumps, hoses, and battery box. Round peg in the center is to wrap excess wire around to prevent it from getting wet, or going in the water. Hole in the bottom tray is where the pumps drop in, and hang in the water. Battery box goes on the left with the switch facing up so you can reach it. Battery tray is sealed to prevent water splashing from underneath, and same with the cable wrap peg. MIGHT have to make drain holes for those. Will find out in testing. Everything comes apart, and fits into the same small box that the self-contained sluice box does. Measured there to be enough room.
-
Working on an adapter that will make use of the existing trays, and allow the system to sit on top of a 5 gallon bucket. MUCH more material can be passed through, and cleanup is much easier. The adapter will still fit in with all the other stuff in the main box from the self contained version. Yeah, I'm cramming even MORE into this thing!


