Search the Community
Showing results for tags 'digging tools'.
-
This is a demonstration of the Gold SPOT™ being used as a portable gold pan. It's extremely effective. Don't worry about the first few minutes where I am out of frame. Leo Aranza, my buddy, takes over and the rest of the video is well framed. -Doc
-
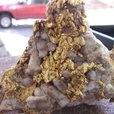
Some posters on other forums rightly questioned whether the Gold SPOT™ Treasure Scoop was really any better than a regular treasure scoop. Well I already knew the answer to that question. You see for a year I have been working on the Gold SPOT™ design. I played with it I re-designed it, I proto-typed it 5 times. I wanted a design that would speed up nugget recovery and make it easier to keep the nugget in the scoop and not lose it. Remember, I'm the guy who had a catastrophic failure with the SAGA swing arm, and within days of release I recalled them all from the field. They just did not perform as they were supposed to. I went back to the drawing board and sunk thousands more dollars into re-designing and perfecting the SAGA™. I won't sell something unless I know it is a significant improvement over anything on the market. But just to show you what I already know, I decided to do a little impromptu video, an experiment. The video is unedited, except for the very end where I panned across an invoice with a customer's address on it that was sitting on the shipping table, I clipped that out. Watch the Gold SPOT™ in action and see what you think. Not to over-hype the Gold SPOT™ but one of the unique features of this scoop is that you can "HEAR" the gold. I know that sounds like an outrageous claim, but let me explain. When you get down to a small amount of dirt in a regular scoop along with a nugget and you agitate the scoop back and forth, the nugget does nothing but slide back and forth on the smooth bottom of the scoop. When you get down to a small amount of dirt in the Gold SPOT™ along with the nugget and you agitate the scoop the nugget rattles back and forth in the trough or channel clicking against the sides of the channel. Cool, right? I know we are getting quite a few Gold SPOTs™ out in the field and I would like to hear some feedback. Although if you are like me you are probably staying in out of the heat. -Doc
-
 With the Impulse AQ opening a new chapter on depth on Heavy and light gold ring, i am wondering which sand scoop or digging tools tester will use . I know for a fact that Le Jag(Denis) is using a beast of a scoop 3mm thick with an unbreakable shaft. I myself broke many,but with my deep holes experience i am wondering if i am adding 20% depth and 50% extra positive ID(which will make you believe it is defo Gold),which tool will be needed.........and maybe ask Zeus to give us the stamina of 2 Hercules. I am expecting to see a lot of broken tools . RR
 -
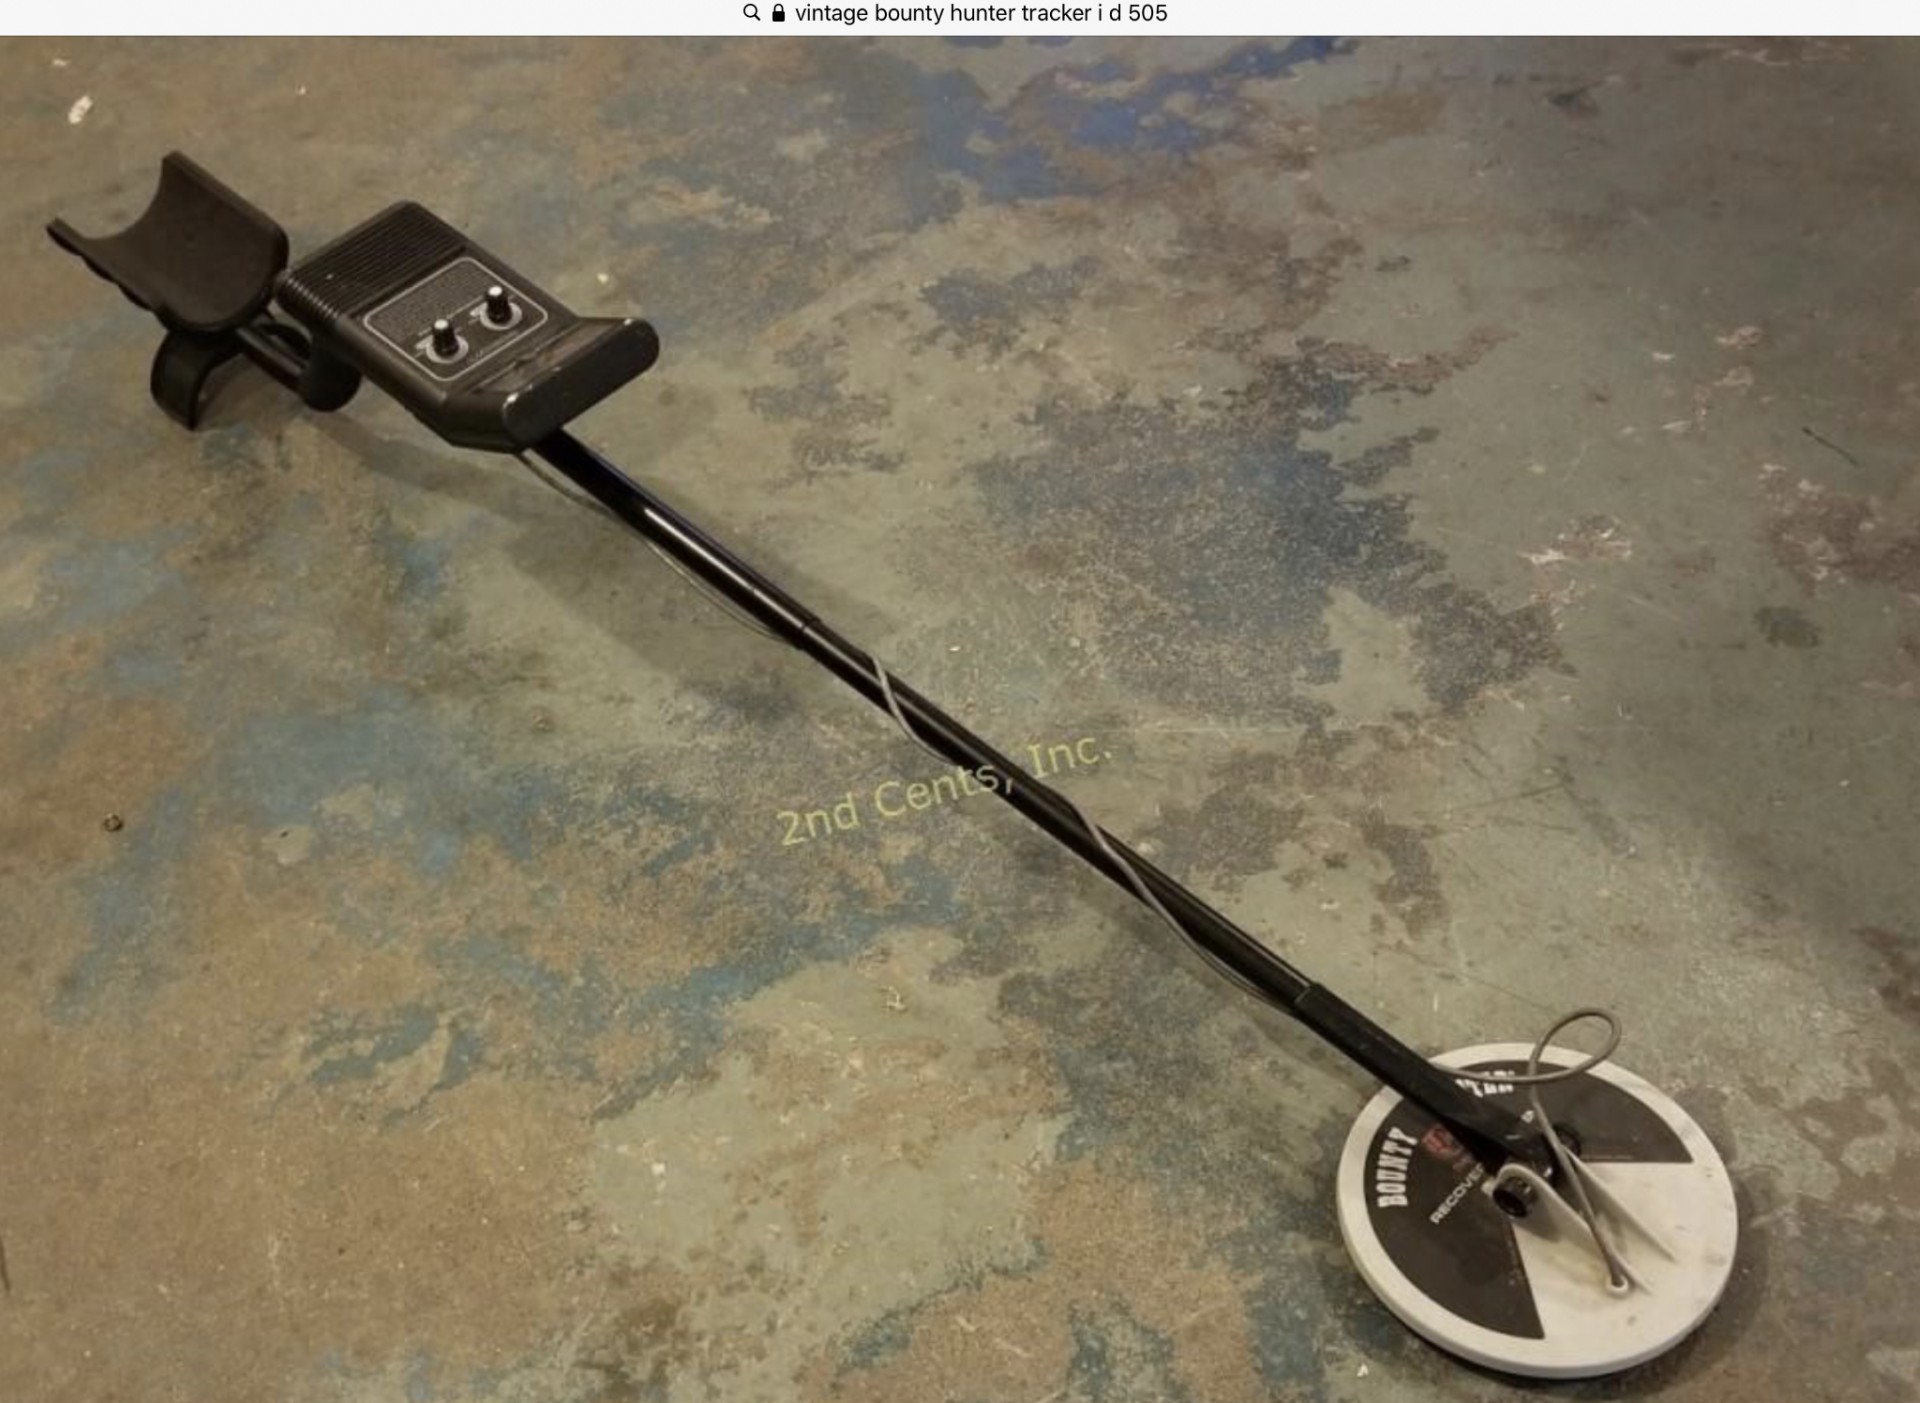
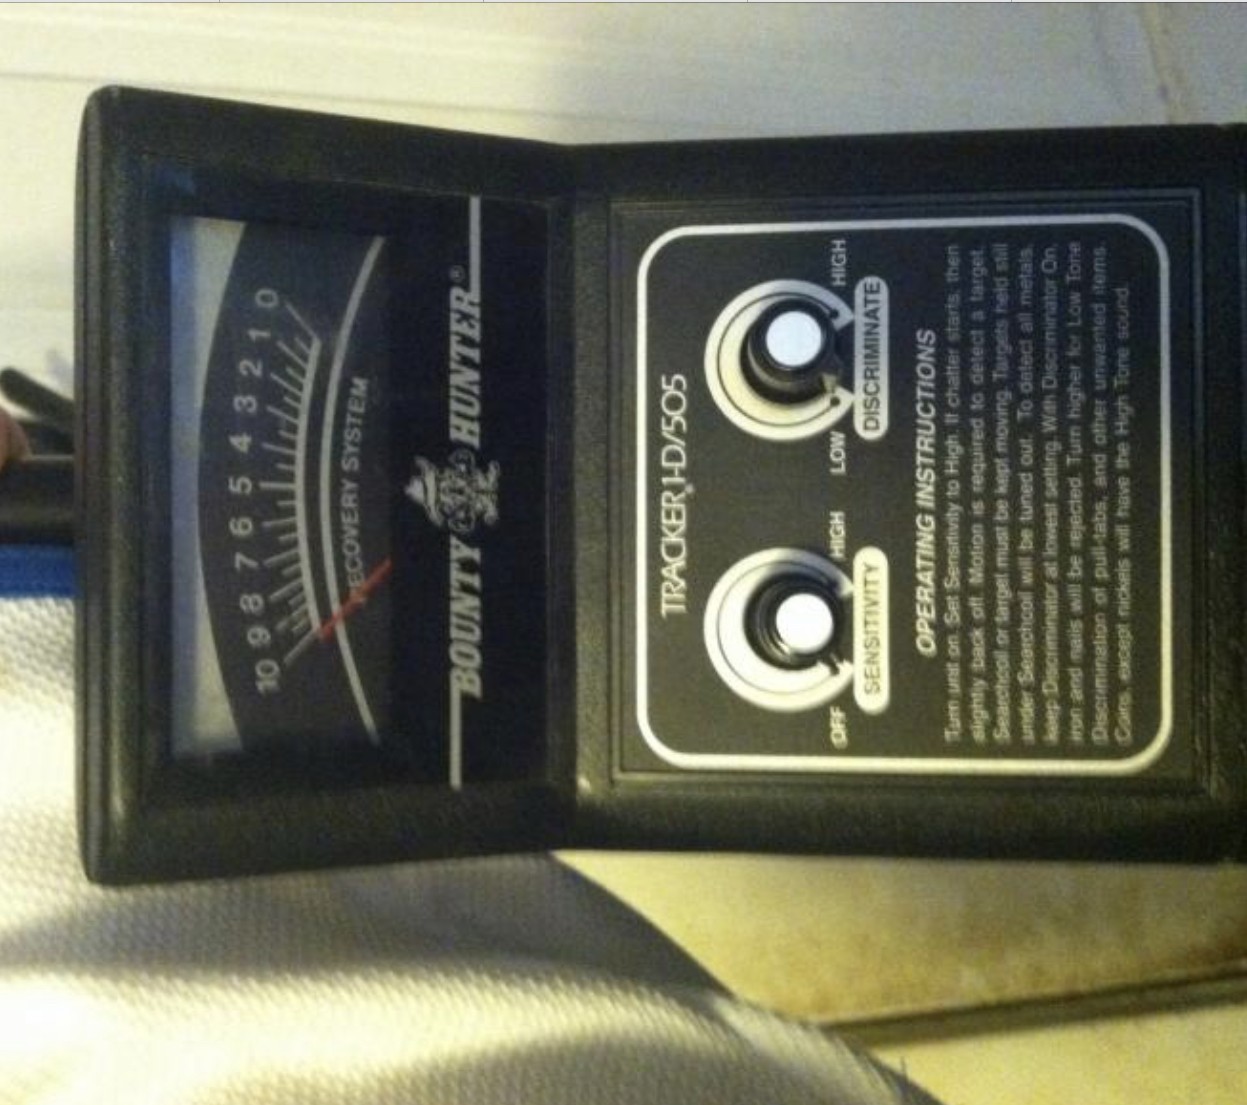
 I got the 1945 us army shovel from my great grandmother’s third husband. It was given to my dad, and then he gave it to me. the older bounty hunter tracker I-d 505 detected is from my neighbor, who gave it to me for free. It works great, but I know it isn’t modern or efficient. I don’t have a pinpointer, but I make it work I have a us army web belt to hold my shovel and my finds. this is not exactly My stuff just pictures off google. let me know what I should improve. Should it upgrade? what do you use?
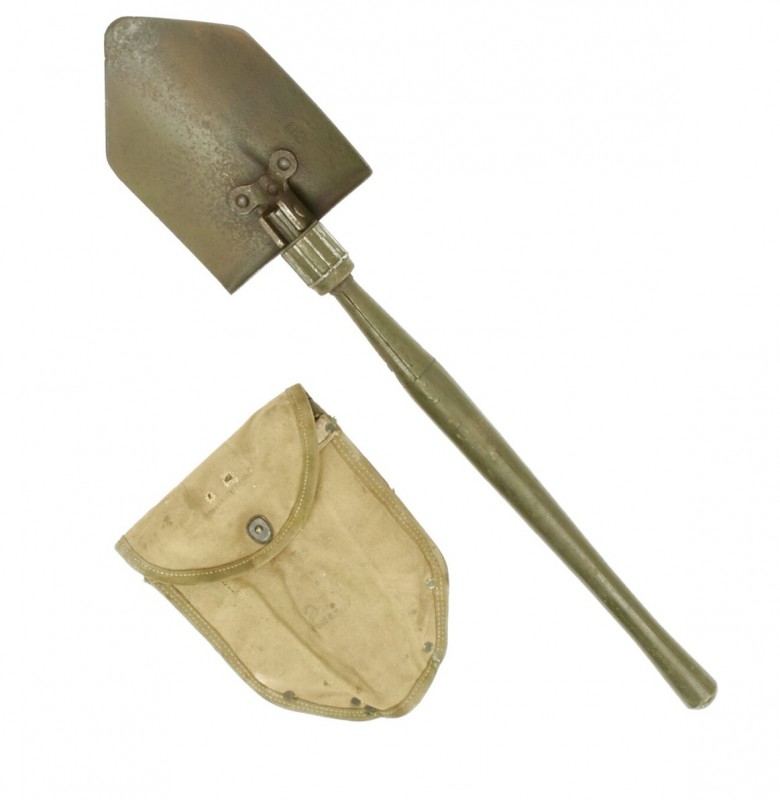


-
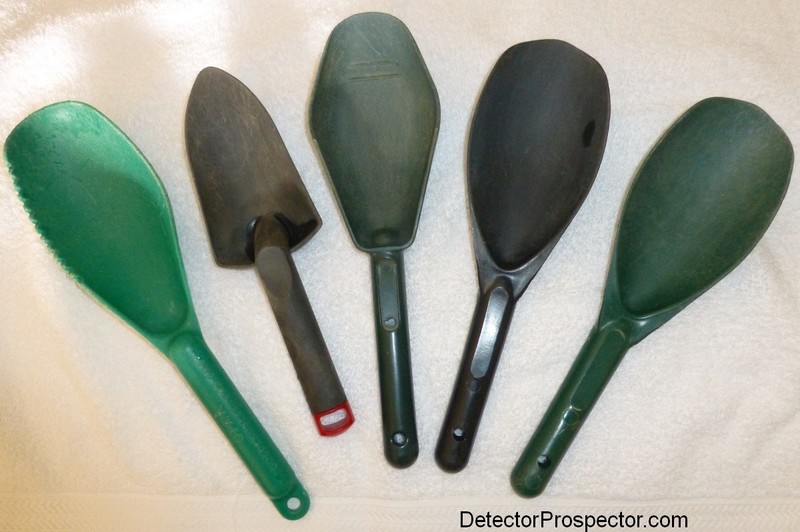
 The new Gold SPOT™ Treasure Scoop portable gold pan. (So have the SAGA Swing Assist Guide Arms, but I am waiting for some nylon nuts and bolts to arrive.) This unique tool is designed to increase your recovery speed of detected nuggets. When you give the scoop a little shake and agitation gravity causes the heavy gold to be channeled into the recessed bowl in the bottom of the scoop; the "Gold SPOT." When you start dumping dirt into your hand to isolate the nugget, the trough of the recessed bowl ramps up and channels any gold towards the riffles. The riffles hold the nugget, as the lighter material spills over the tops of the riffles into your hand. Ever cleaned out a crack in bedrock and the material in your scoop is setting off your detector but you're having a difficult time locating that little speck of gold? Add a little water to the material and you have the fastest most convenient portable gold sniping pan ever. I was prompted to redesign the standard conventional scoop that has been around for over 30 years because with the popularity of the Minelab Gold Monster 1000, smaller gold is really hard to isolate with a standard scoop. Included with every Gold SPOT™ is a plastic lanyard and EZ on/off security clip. How many scoops have you lost? Well not this one. The security clip is designed to allow you to always keep your scoop "at the ready" and be able to remove it and replace it in seconds using only one hand. See the video. The G SPOT comes in Green and we have a limited number of Yellow. I'm pretty sure you are going to love the unique features of some of the innovations I have incorporated into this scoop. Looking forward to your comments. The G Spot Scoop: Retail Price $17, discounted price, $14.95 or 2 for $27 plus s&h. Thanks! Message me with questions. Or email docsdetecting@gmail.com Doc This is the load I had waiting for me after it cleared customs.
-
Hello all. I'm pretty new to this forum. Great stuff posted by many. My question is: What type of sand scoop do you folks prefer for beach hunting, both ocean and/or river. I saw a guy a while back, on a northern California beach, with a long handled scoop which was driven into the sand like a shovel (by foot). The entire head also pivoted. It appeared to be made of aluminum or stainless steel. Any pictures and or links would be appreciated. Thanks, Mike
-
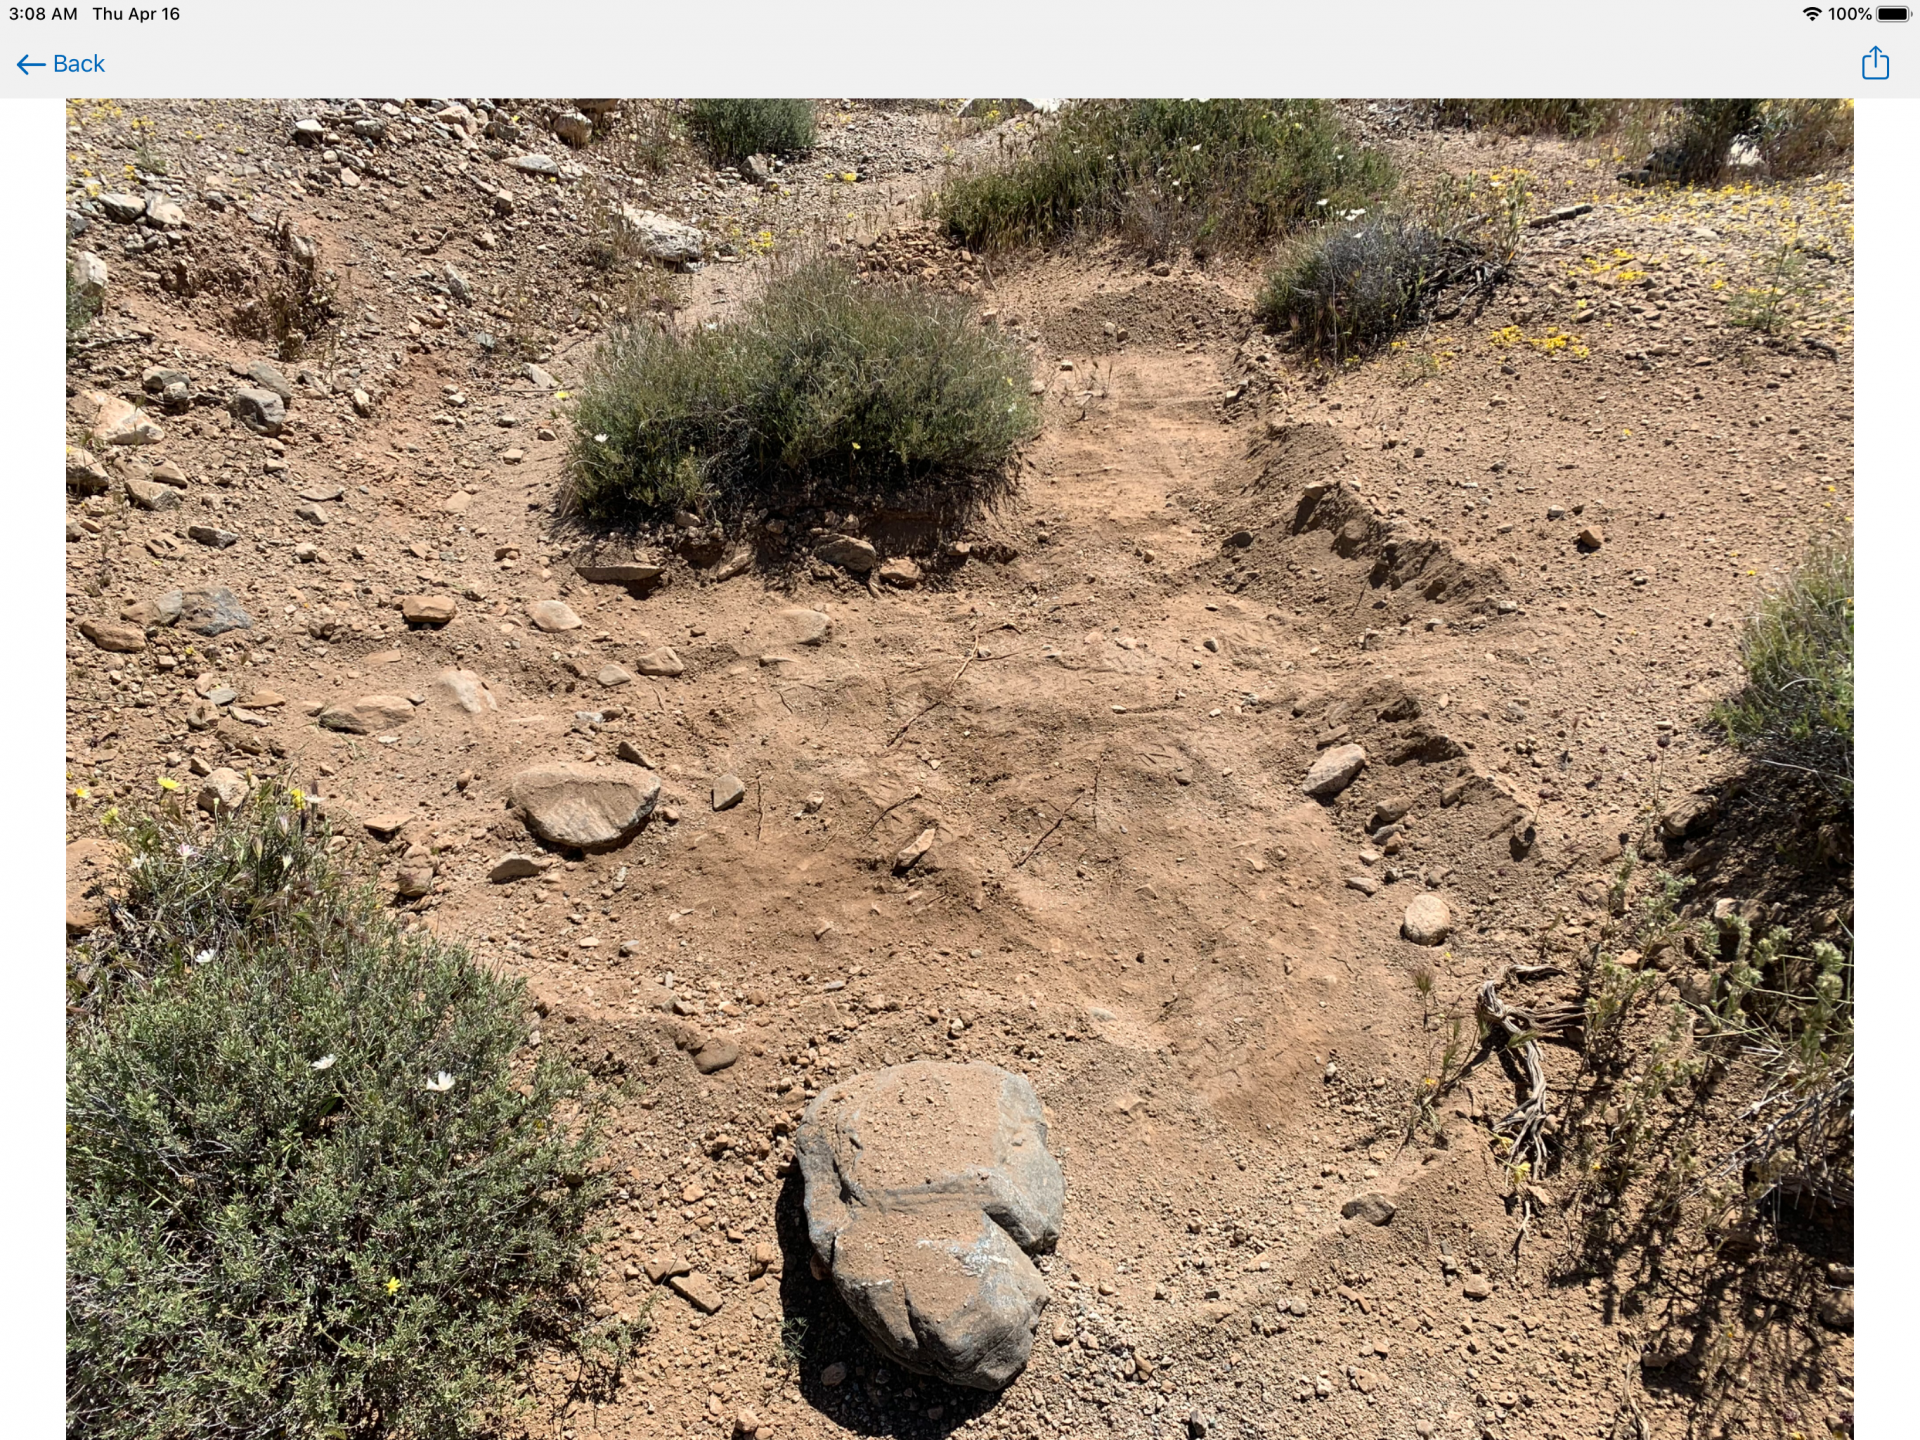
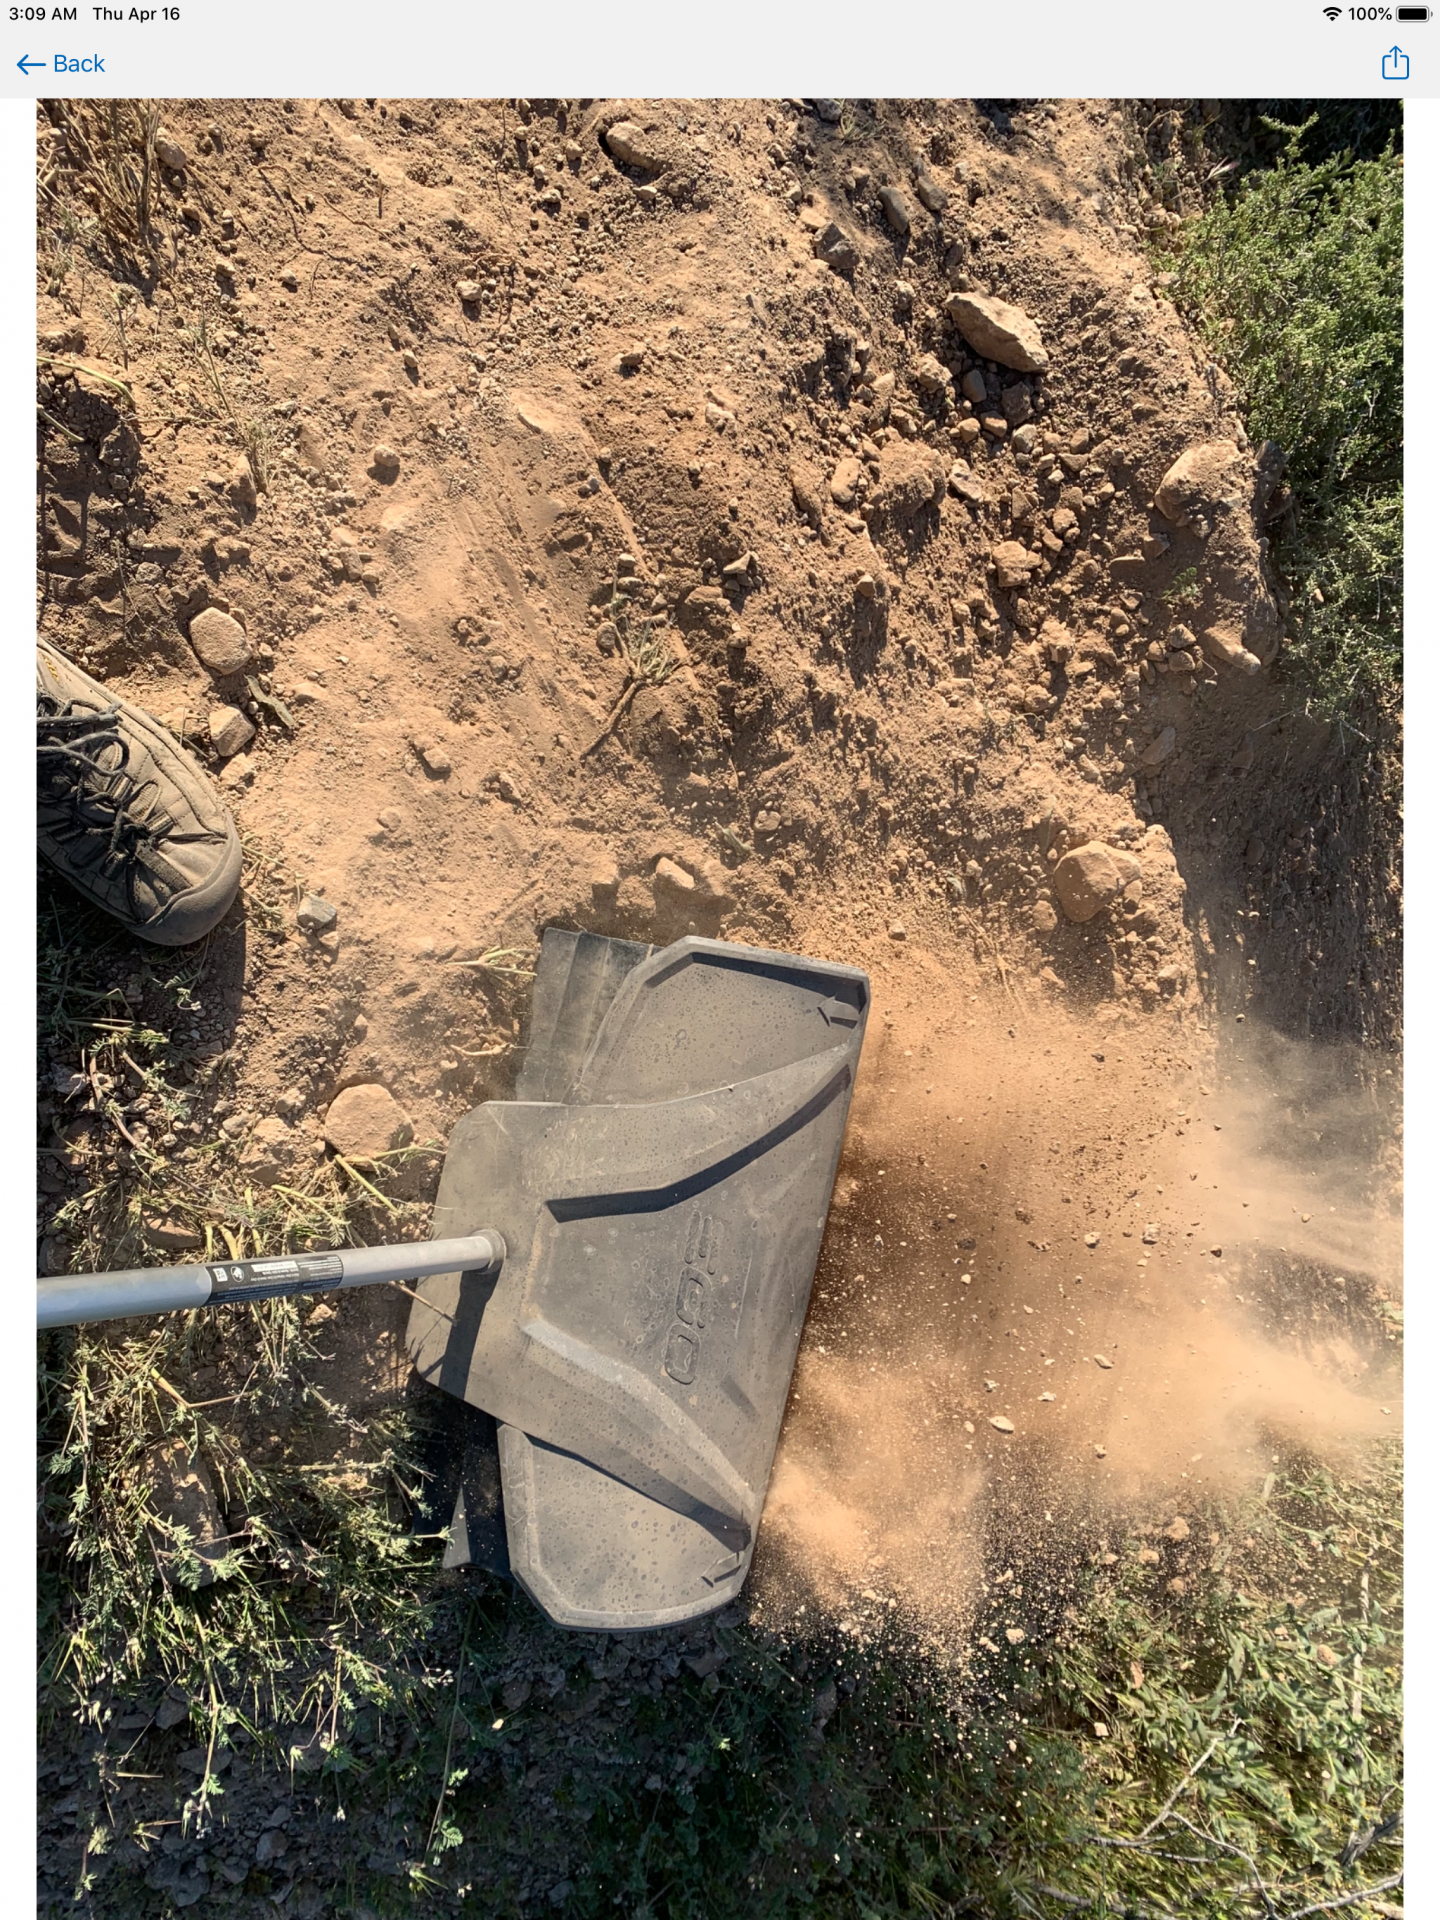
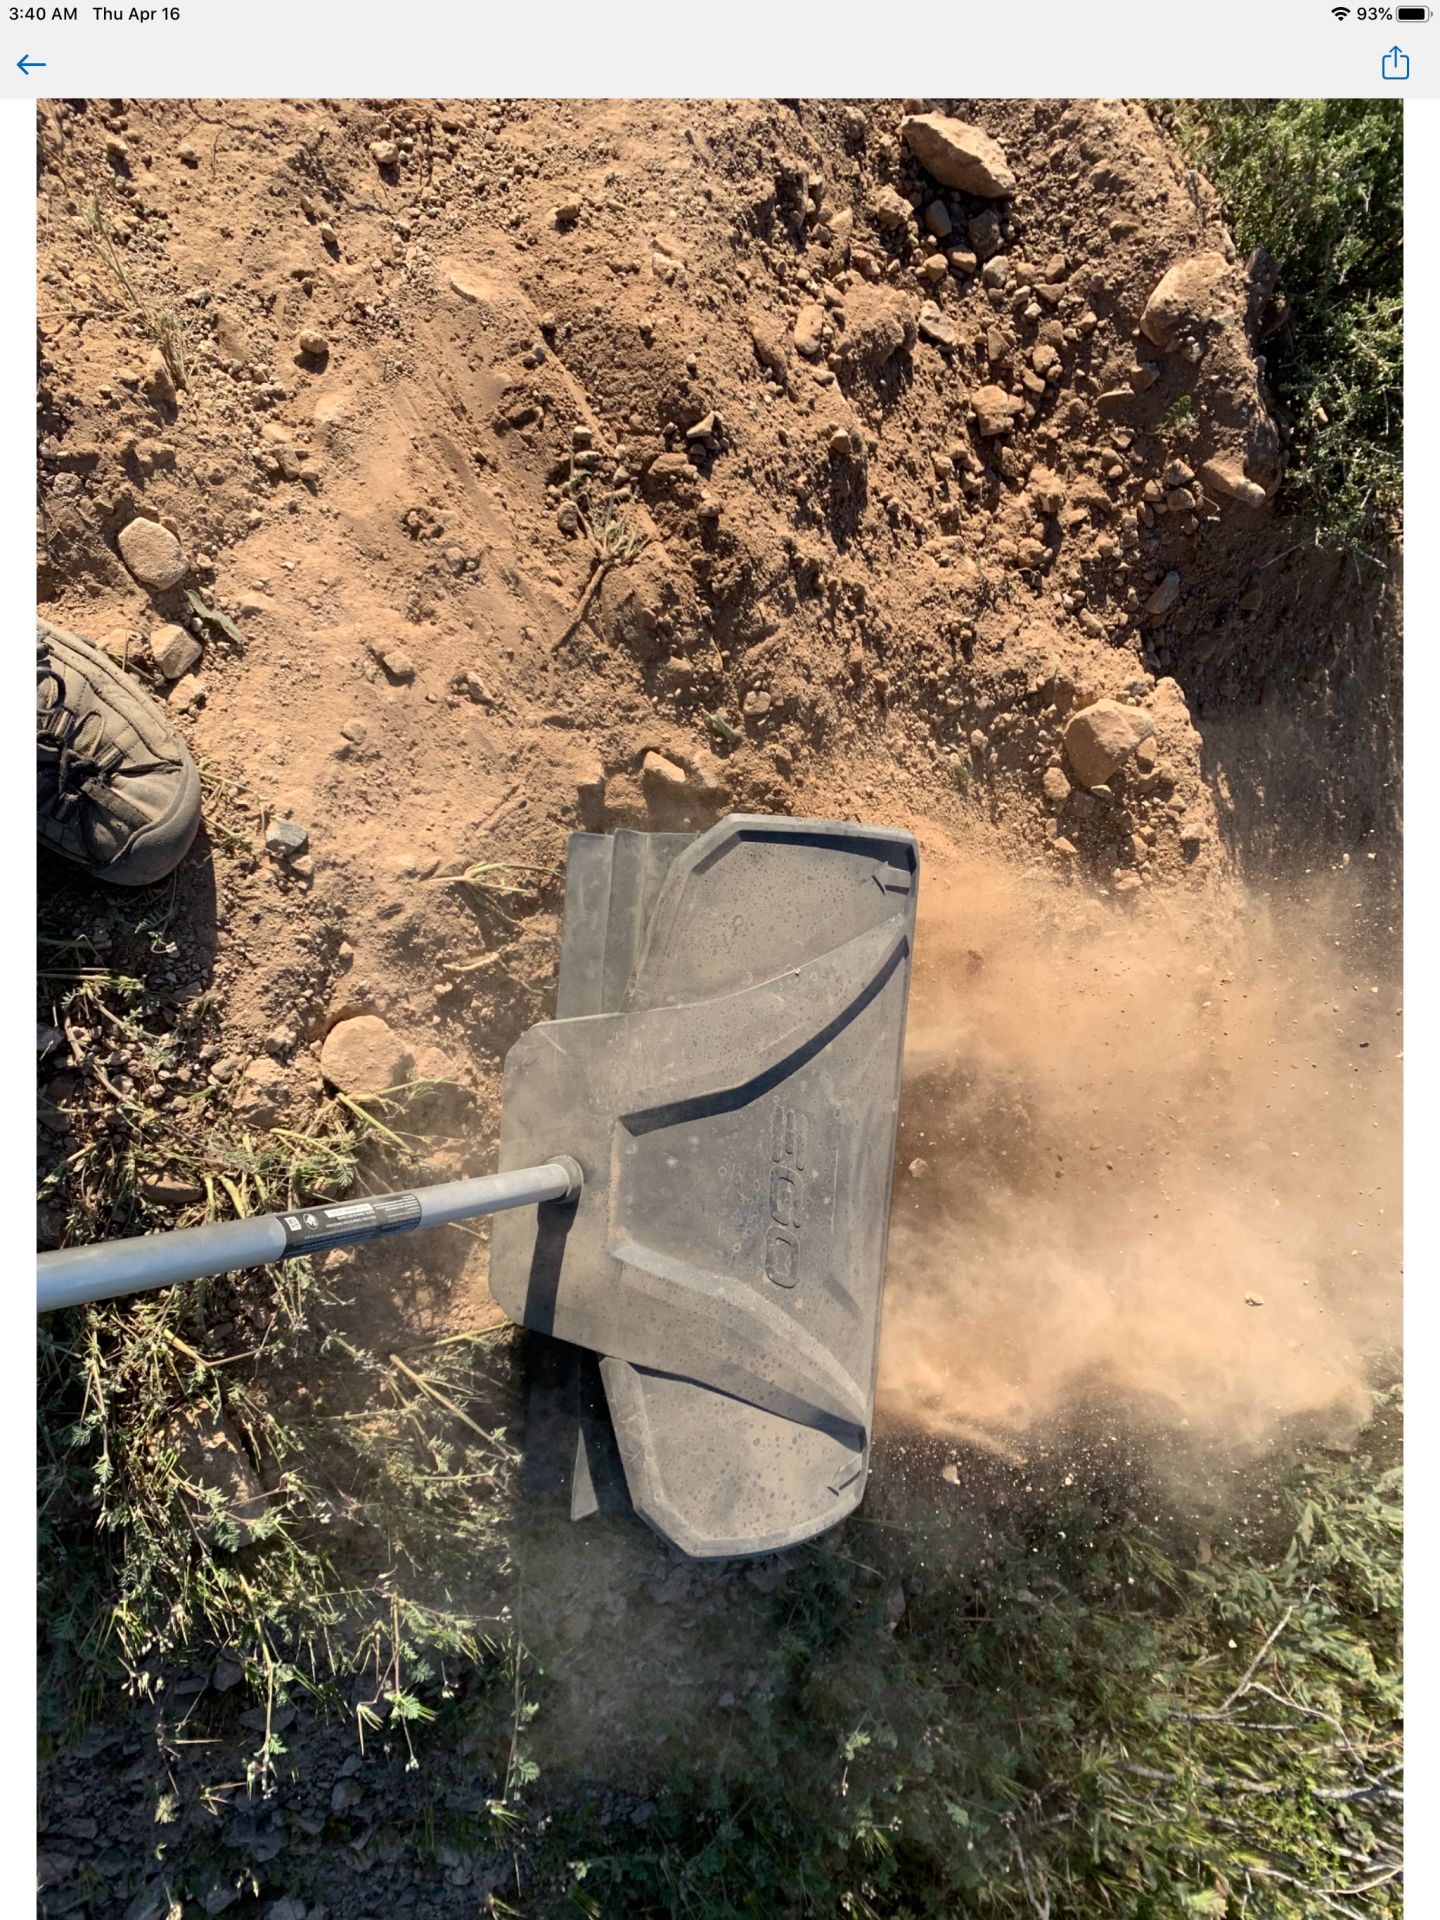
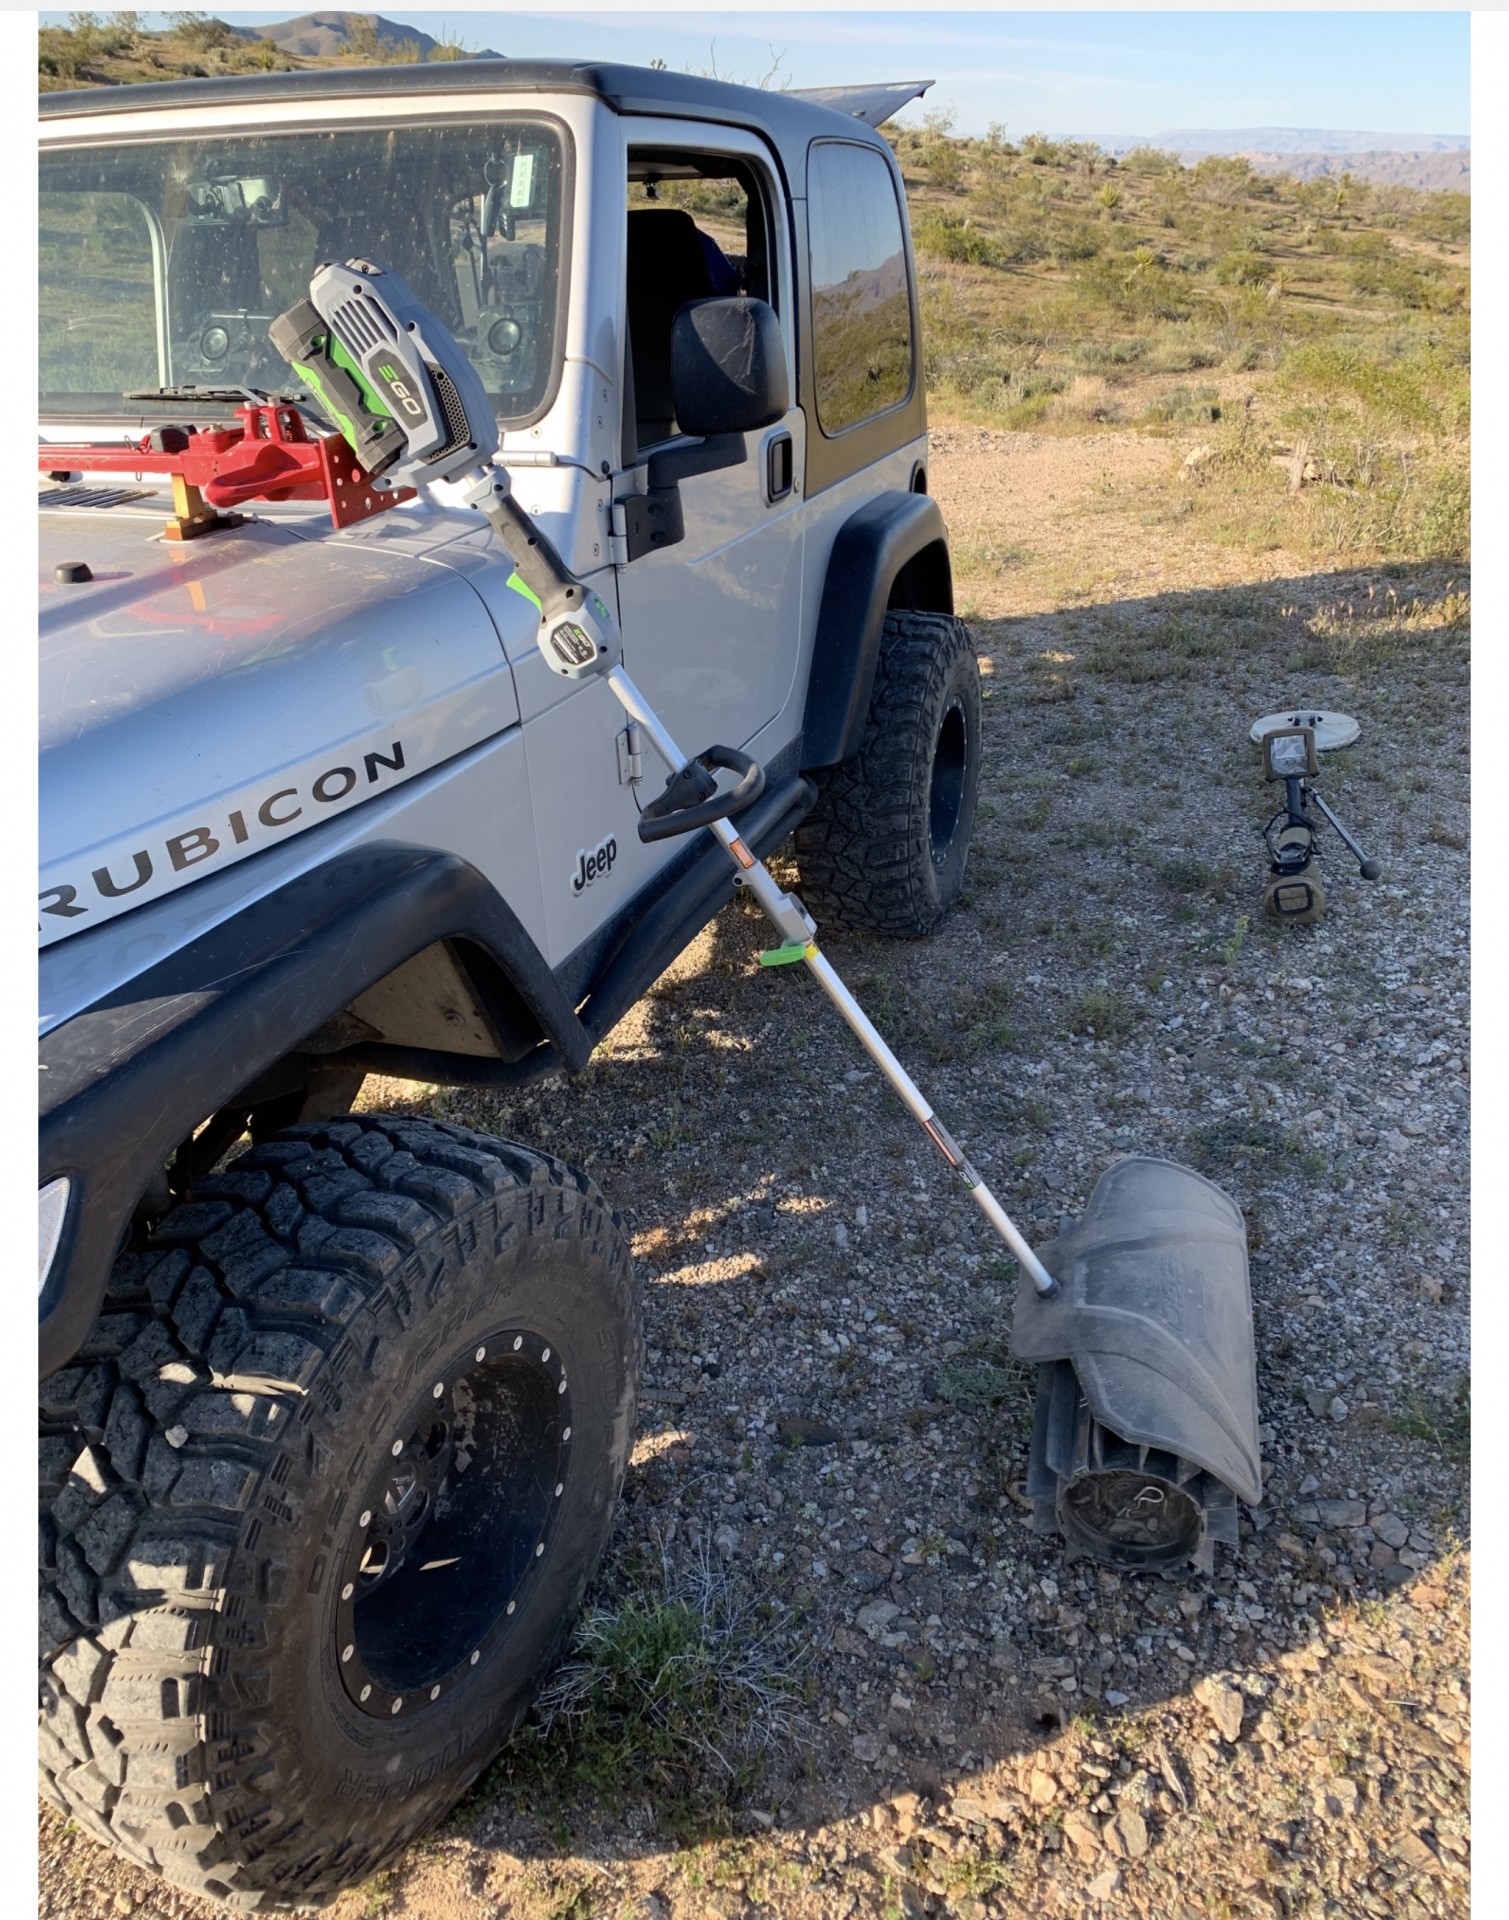
I ordered a battery operated sweeper attachment for my EGO power head this is a rotary bristle brush one of a number of different attachments available for this device, the supplier instead sent me the rubber brush instead with paddle like bristles intended to sweep soil, gravel and rocks. Although not the one I wanted, I figured it might be useful out in the gold fields so threw it into the Jeep for a quick run. This line of garden equipment is really powerful but sweeping gravel off the lawn is one thing moving dirt looking for gold much more demanding so while a fun experiment I didn’t expect the results I’d get out at gold basin to be promising or practical. To my surprise this little sweeper managed to perform much better than I expected. In a wash it easily moved 5” or so of dirt from a small area in just 5 or 10 minutes, in the other picture I used it to knock down a small tailings pile from a dozer push, although a little challenging to control because it wants to dig straight down if it had a bicycle wheel attached behind the spinning broom you could easily sweep 1” inch layers off in 21” wide strips and go down in larger areas more evenly. The brush attachment runs $250 and the power head $150 bare bones without battery or charger, it managed to survive the day without breaking and might have use patch cleaning but I’m really unsure about it holding up out there with regular use?


-
 Some of the new metal detectors claim to work wonders in iron infested sites. There is one site that I wish to go back to and try and see if those claims are valid. I don't have any high hopes though at this particular site because of the amount of iron on the surface and below. This site was at the end of the railroad track for a period of about six months while the construction of new track was being laid. During those six months the site was a temporary camp and staging area for the railroad, stage and freighting companies to a booming mining town thirty miles away. According to history accounts this site had a "floating population" of several thousand. One can imagine the amount of chaos that went on and amount of coins and relics that were lost. As you will see in the photographs there is not much revealing as to where the site is. At first look other than the old railroad grade, there are no visible signs as to where was. As you begin to wander around the site you become amazed of the amount of iron, wire, tin cans etc. that covers the entire ground. The amount of oyster cans lying on top of the ground is incredible. Many years ago at this site we used a "roofers magnet" and had some success finding coins and relics. In one small area of 10ft x 10ft we raked and used the roofers magnet before searching the area with a detector. Even after using a rake and roofers magnet there was some iron targets remaining below the surface. The outcome of all that work we were rewarded with a 1853 Half Dime. The site: Using the roofers magnet: Our reward:
.thumb.jpg.f9c44f736f3c20f832f8a82619a6ab48.jpg)
.thumb.jpg.98cbdf322c7303e7340a344141d13472.jpg)
.thumb.jpg.52325514ff9dee63008f2fde68bda496.jpg)
.thumb.jpg.cced001aefff1b62f3e7a6799445ecdd.jpg)
.thumb.jpg.66d9a08545ed7629fae79d8995186cbd.jpg)
.thumb.jpg.159099abc3a8c517a263979150bef37b.jpg)
-
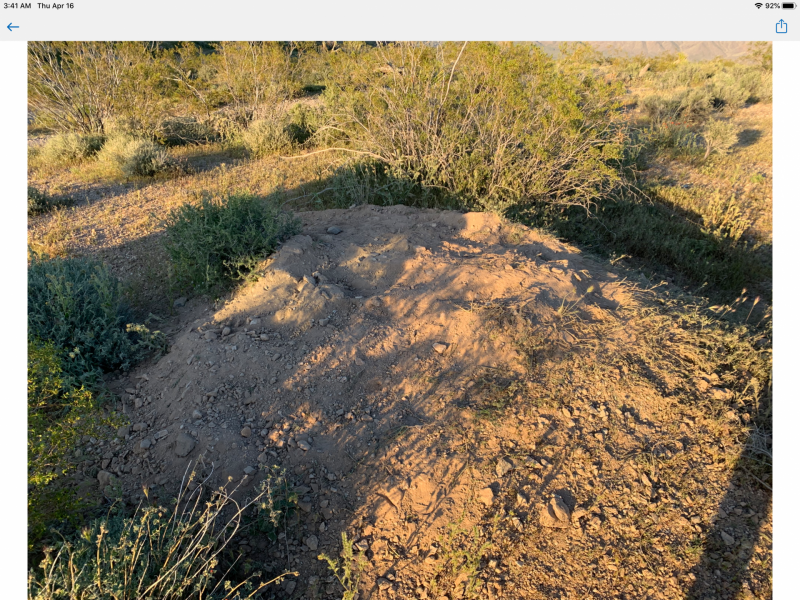
when moving lots of material, or breaking down an old drywasher tailing. I like to break the crust and knock them down by six inches or more. Smooth it out, let it dry for a few minutes, and your coil just glides. I added magnets sheathed in stainless steel to help clean up the trash.
-
 I'm completely new to this sport. Boy that Simplex + was sure tempting. Question, looking to buy a Grave Digger shovel what size should I get 27 or 36 inches. Size don't matter right? Hehe They're sure pretty. Thanks in advance for your input. Joe from Chicago.
 -
I'm new to the forum but would like to know what you all are using for a metal detecting prospecting pick. I prefer a lightweight pick with a wood handle and I curious if you all like the ones with a magnet. Finally, if you have a model name, a price, and where you purchased it, I would be grateful... Thanks
-
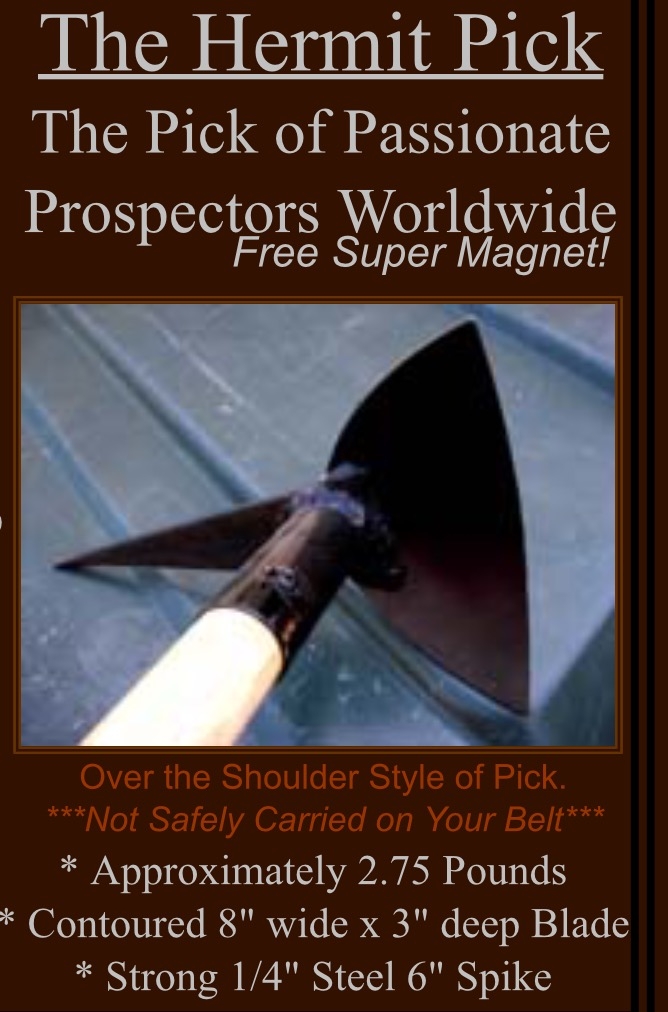
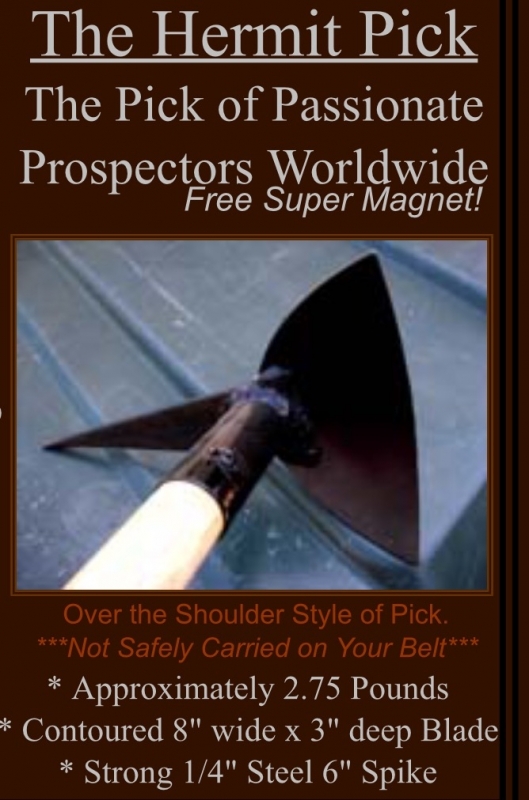
I need a pick and have been looking at Bunks Hermit Pick this thing looks like a beast and heavy does anyone have any experience with the hermit pick the good the bad or the ugly.
-
First part's about building the scoop. The second part is where it gets good.
-
Looking to add a shovel to my arsenal. Want a small footprint and at this point don't need anything to heavy duty as I'm not really searching anywhere with much roots. Just need something bigger and a little tougher than my trowel. Oh, and it also needs to be reasonably priced. Thanks
-
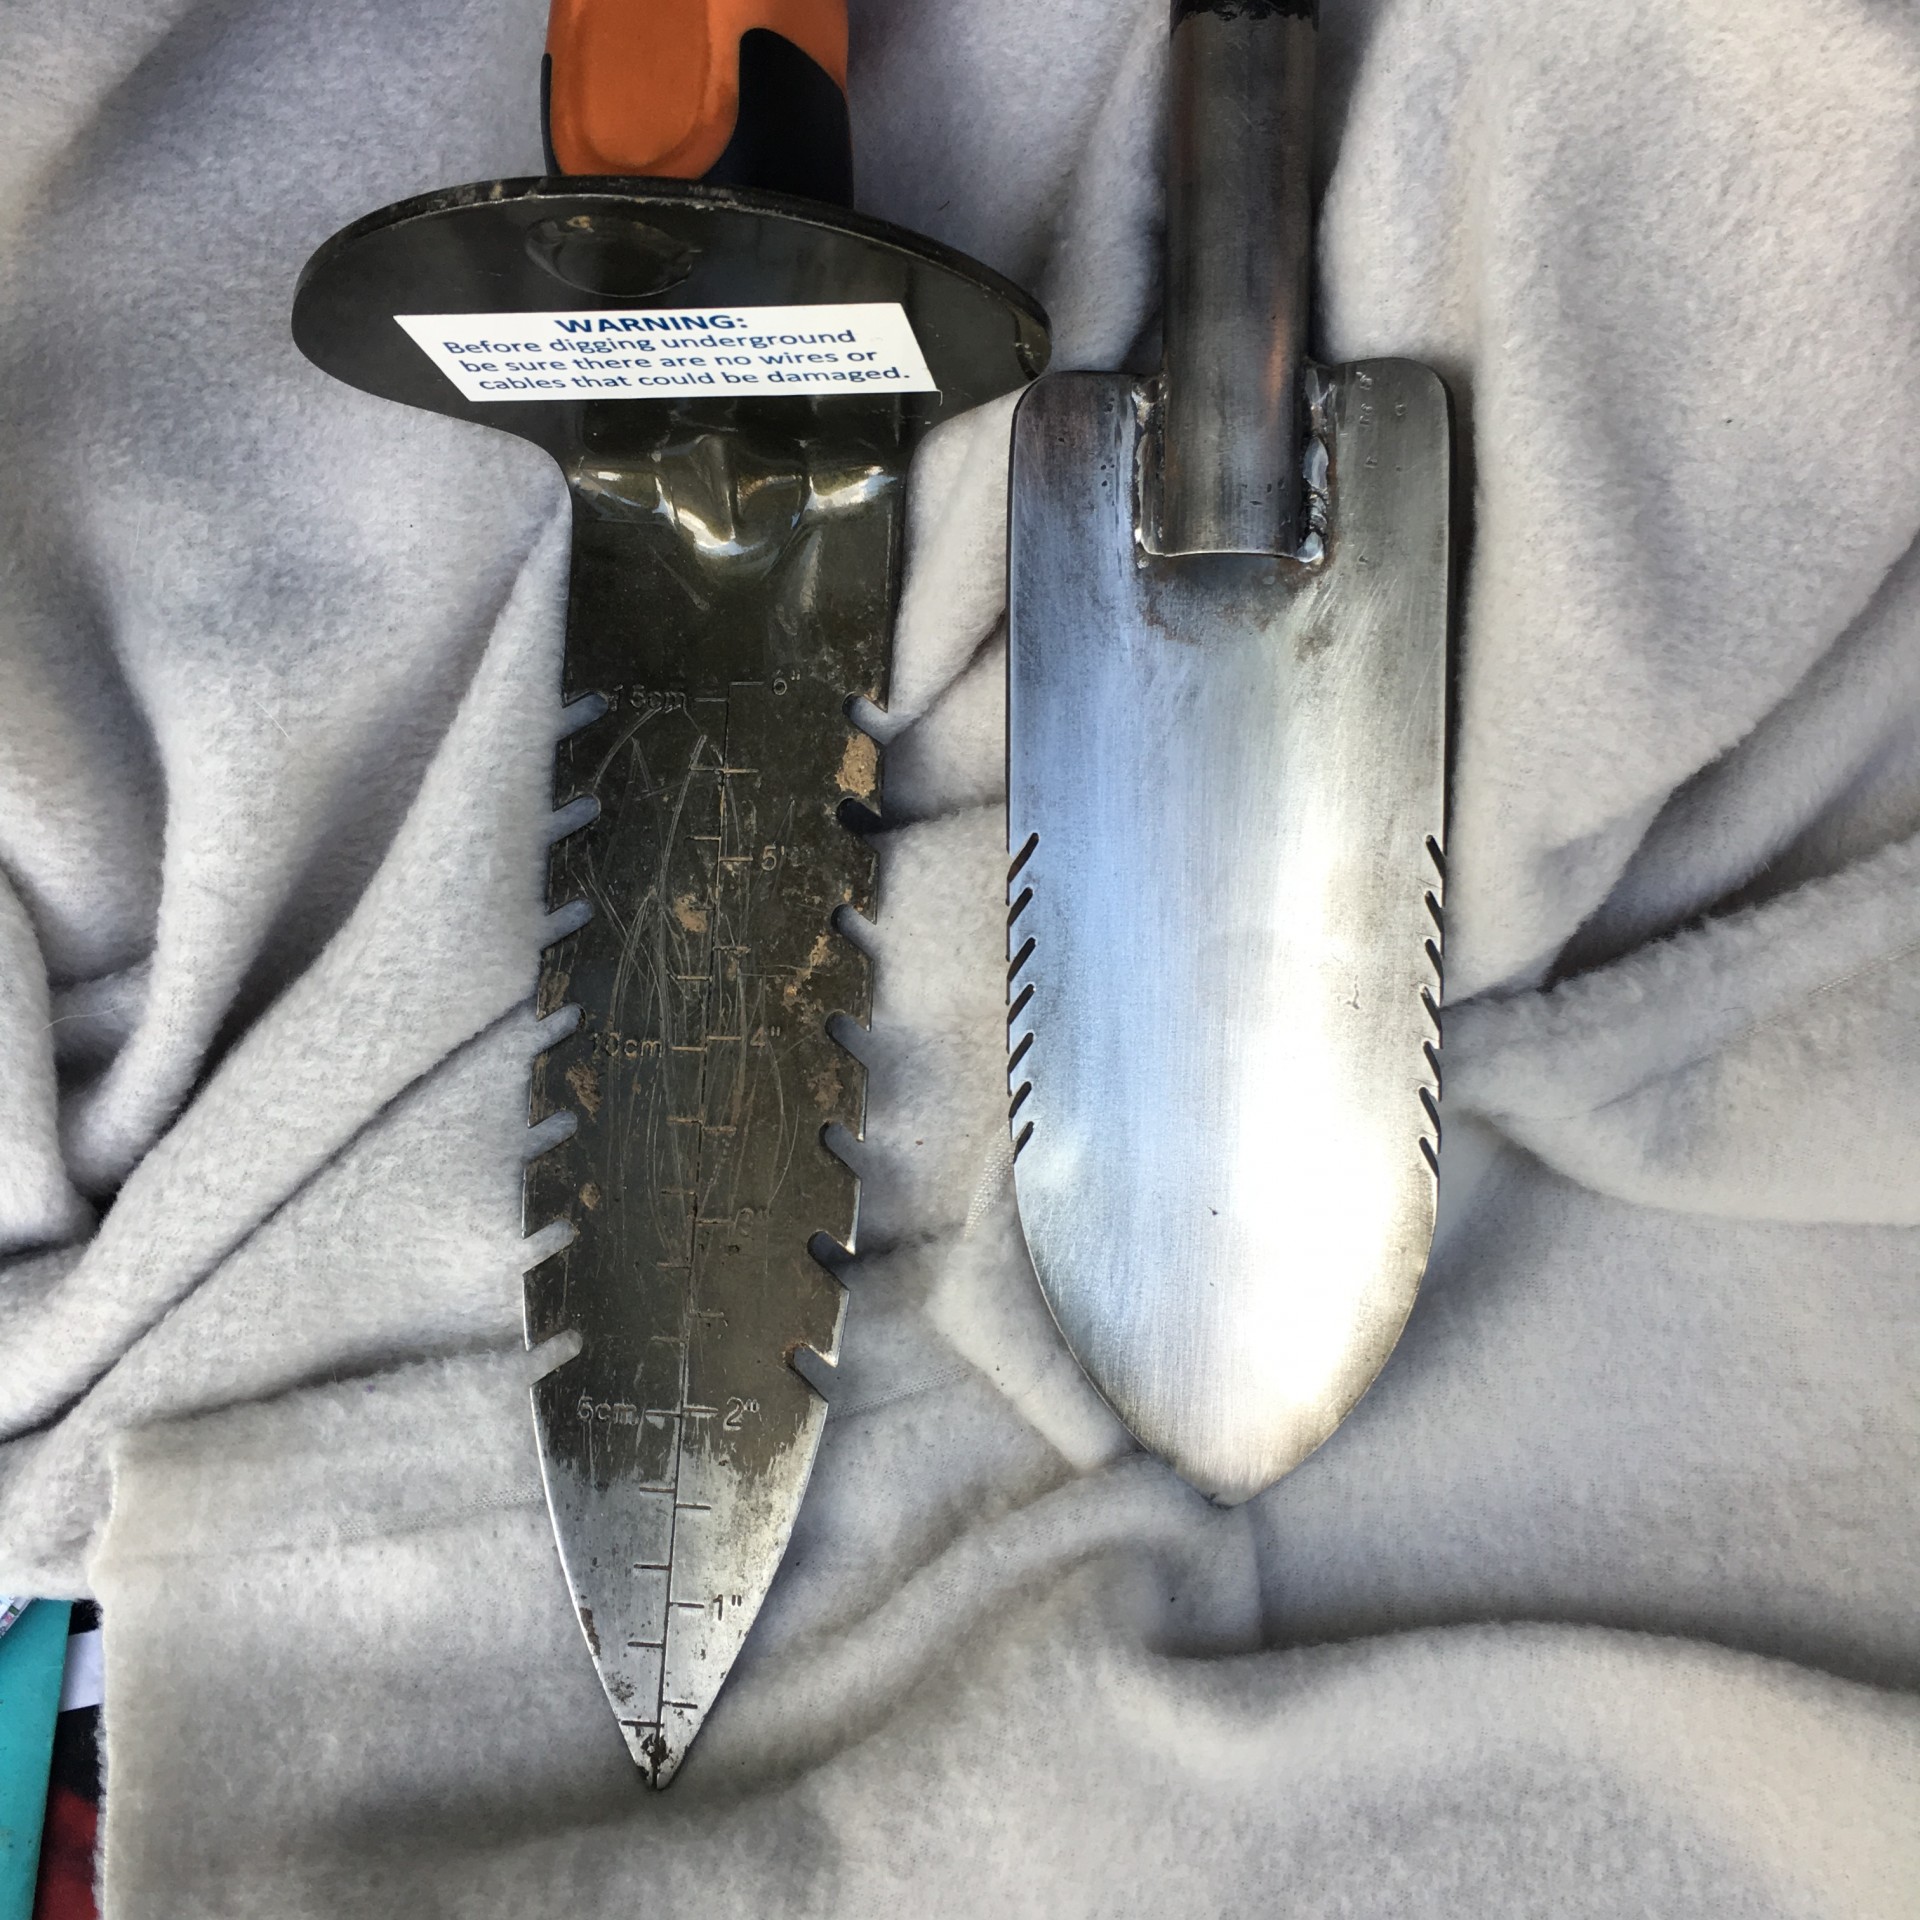
 Kac ( Ken) was asking if anyone on the forum would like to give his new digger the Devil’s Tongue a try . The Devil has you will see comes with a different handle than most diggers you see . I don’t know how many others said they would give it a try but I had one within a week of my request. It was mine to keep no matter how my review of it went . I had planned on having my testing complete over a month ago . But due that my wife had too have a complete right shoulder replacement sooner than we plan cause the testing being put on the back burner. This digger cutting blade is somewhat like others you see but the first thing I like was the teeth were smaller. I know you’re saying so what. I’ve had trouble when the teeth and space between them is bigger. I found that roots will get hung up in the larger ones and then you have trouble freeing it. On the second picture you will find that the Devil Digger has a handle that you won’t find on others . That’s the one thing that makes this digger unique plus it’s set at a angle. This has to be a first I’ve ever seen. Looking over the Devil Digger I could see it was well made and you didn’t have to worry about it coming apart on you. I’ve done lots of welding over the years so I know great welding when I see it . I’ve now been out several times this month putting this digger to the test . The main ground I’ve been detecting in has about the first three inches of black dirt but below that is more like pack gravel. The two city lots had some carpet grass and that gave the Devil Digger adding testing with its cutting teeth. Being the handle was different I had to have my own one person class on using it . You can see this on my third picture posted. I made a point to use only this digger to be fair to it . I found it to do great cutting a plug in the grass covered area and plowing through that hard black dirt . The only trouble I had was when I hit that pack gravel below the dirt . I can’t say that digger was at fault because I have weak wrists. I do think it would help me if the tip was like the other digger on the first picture. One thing I don’t want to leave off and the Devil Digger is the lightest digger I’ve ever used . I don’t see where you can go wrong buying the Devil Digger. It’s a lot like a new detector you have to get to know it and you will find it will work for you. Chuck
-
I got this pick from Rob, excellent customer service by the way!!!! Rob was able to send the pick to me in time for me to give it a run before the season ends. My thoughts on the pick are a little mixed. I would say it is a good buy. There is a few things I would say should be changed or looked at. First, the blade side has the wrong grind angle, much like an axe vs a pick. This makes the chisel edge too thin and subject to bending marring or even breaking chips off when using it in a desert setting. Second, the handle has a taper to it. At first, I thought this would be great. As a lot of picks these days have to thick a handle. Done in order to give it more strength; but creates a bulky handle as a result. In that setting, a taper would be nice. The other thing that we run into, is to small a handle next to the head of the pick, resulting in a weak handle that breaks. In the case of the NS22 pick. We have the perfect size handle at the pick head going into the metal sleeve. The taper results in making it to thin in the middle of the handle. Now the handle does return to the normal size at the end of the pick handle. Again, at first this seemed like a great feature; in reality, it makes the part of the handle you would normaly use one handed to thin for a comfortable and solid grip. Therefore creating hand/grip strain. When using it two handed, It makes for an odd feel trying to grasp either end of the handle to get the normal grip during two handed operations. It would be better for the handle to remain the original size all the way down. It is hard to find a pick with just the right size handle. I think this pick has that perfect size with out taper. Just my thoughts. Third, comes the point of the pick. This pick has a wedge like tip. Some might like this type design. I personally do not, after trying it out with the NS22 pick. What I found was durning one handed operations it would make the pick deflect to one side or the other. Also, it didn't have the same penetration as a spike version would have. I do a lot of detecting in the Rye patch type area. In our dirt, it helps to have the spike to get a good depth per swing. With this wedge design it slows the pick down to fast to get that nice pick depth per swing. I plan to plasma cut my pick to the point style. I tried it in more gravel type dirt to be fair, thinking it might work better in that environment. It did not. Same result. Fourth, the wedge width is perfect for scrapping the top or clearing out the hole. The wings work great for that little extra piling effect when pulling the dirt from the hole. Except for the grind angle the blade side of this pick is great. I have already had the grind edge deforming. It has a bend from hitting a small gravel patch at Rye patch. The metal thickness is just about right. Changing the grind would be perfect. Fifth, the overall length of this pick is great, not to long or to short. You can use it one handed or switch to two handed for those bigger Zed holes when needed. Last, I did notice that my pick had a grind dig on the point side, top. It is a little deep, perhaps a 16th of an inch. This would be a quality control issue not a design issue. The paint comes off from use as expected, in case someone wanted to know about that fact. It does have a proper size pin holding the handle in place. Not one of those small pins you some times see. Overall, I would say that this pick is worth buying. I was going to special order picks like this from Australia from the original designer. But this pick came up and is close enough to satisfy my needs. Our Australia members will Recognize the overall design. However, for us in the USA this has design has been lacking in our market. The NS22 fills that void. Is it perfect no, is it a good pick probably. I plan to keep using it myself.
-
What do ya thin?
-
Hi All, I'm new to detecting and this group. Have only been out a few times myself looking for coins/relics/jewellery etc. I'm a bit of a shed tinkerer and decided to knock up some picks from old leaf springs from a LandCruiser. Made two different sizes. One for my older son and one for my girl. Thought I would share them with you guys. I was pretty stocked with them! Cheers PS. They do not look like this anymore... I didn't want to get them dirty at first. They were almost mounted on the wall! hahaha

-
Any suggestions on a good pick? My last one snapped the blade in half when digging in hard ground. (It was previously broken and welded so didn't expect it to last forever - got it for free from the next door neighbor) I got suckered into buying a medium sized pick 4 years ago, with the salesman saying the larger ones were for people that felt inadequate in certain areas. But I think a bigger pick would be better for digging bigger holes. What do the Aussie guys here use? I still have the medium sized pick but the tip seems to be too rounded and doesn't cut into the ground as well as my broken one that had a sharp pointy end did. I plan on digging plenty of 3 foot plus holes shortly, it would be great if the handle of the pick could incorporate a mini crowbar head on the end. (never seen that anywhere, just saying it would be good.) Once you get down a bit it gets tough swinging in a confined space. Cant be carrying a crowbar a mile from the car.
-

Smart Digger- Digging Tool With Built In Pinpointer
Guest posted a topic in Metal Detector Advice & Comparisons
-
 Forum- can the coin pros recommend the "1" to buy or what seems the overall standard" best brand" and digging tool for Grassy areas? Best Shovel Length and single edge or dual edge? Left or Right side Lesche? Whats Best? Thanks Ig
 -
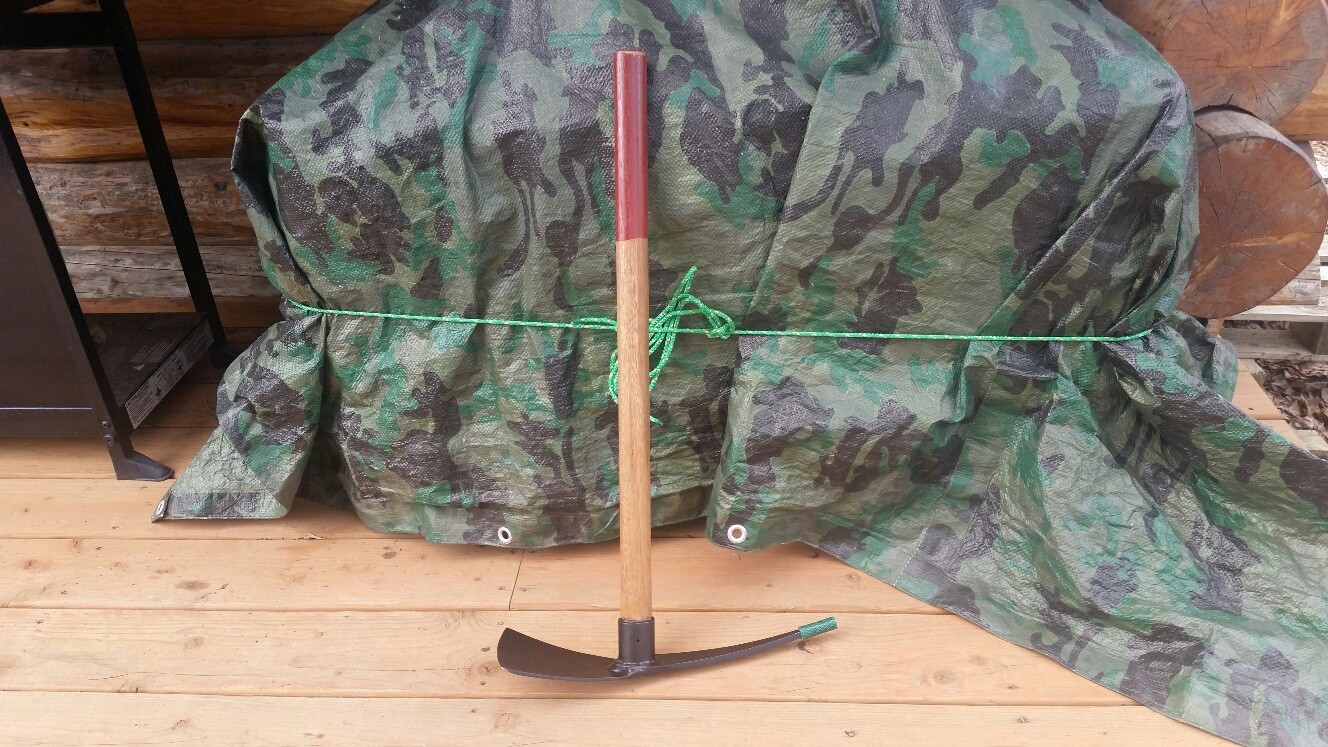
Just a shout out & Thank You to Davsgold, pick arrived today !!! Also a Thank You to Phrunt & a few others that mentioned he was on this site. Been wanting one of Dave's picks for awhile. Now ground just has to thaw !! Haha !!! Can't wait to put it to work !!!!!!! I'm sure this pick will Dig It !!!!!!!!!!!!!!


-
Do you use a plastic scoop or cup to separate gold nuggets from that pile of dirt while metal detecting? Good use of a plastic scoop is critical as these tiny nuggets can be very hard to find. I use the "divide and conquer" method. Scoop up the material that has the nugget in it. Give the scoop a good shake to get the nugget into the bottom of the scoop. If you have a couple inches of dirt in the scoop and the nugget is on top, you may not be able to detect it when you run the scoop over the coil. I prefer to do this with the bottom of the coil turned upright so I can get the scoop right over that hot spot in the middle of the coil. If I confirm the nugget is in the scoop, I dump half in my hand and check again. If it is still in the scoop, I place the material in my hand on the ground where I can check it again later. If the scoop no longer beeps, the nugget is in my hand, in which case I discard the material in the scoop. I just split and check until I'm down to a bit of material, which in the case of these little mud covered nuggets sometimes is just a few little pieces of dirt which have to be check one at a time to find which one has gold in it. Once you get good at this it goes real fast, but care must be taken to not get a nugget in the scoop only to discard it. That is why you put all the dirt in a place where you can check it again when you are done. Sometimes you can get more than one nugget in the scoop at once. Another option is to simply put all targets in a pan and pan it all later. But since I'm following the gold I want to know just where each nugget came from so I prefer to locate them as I find them.
-
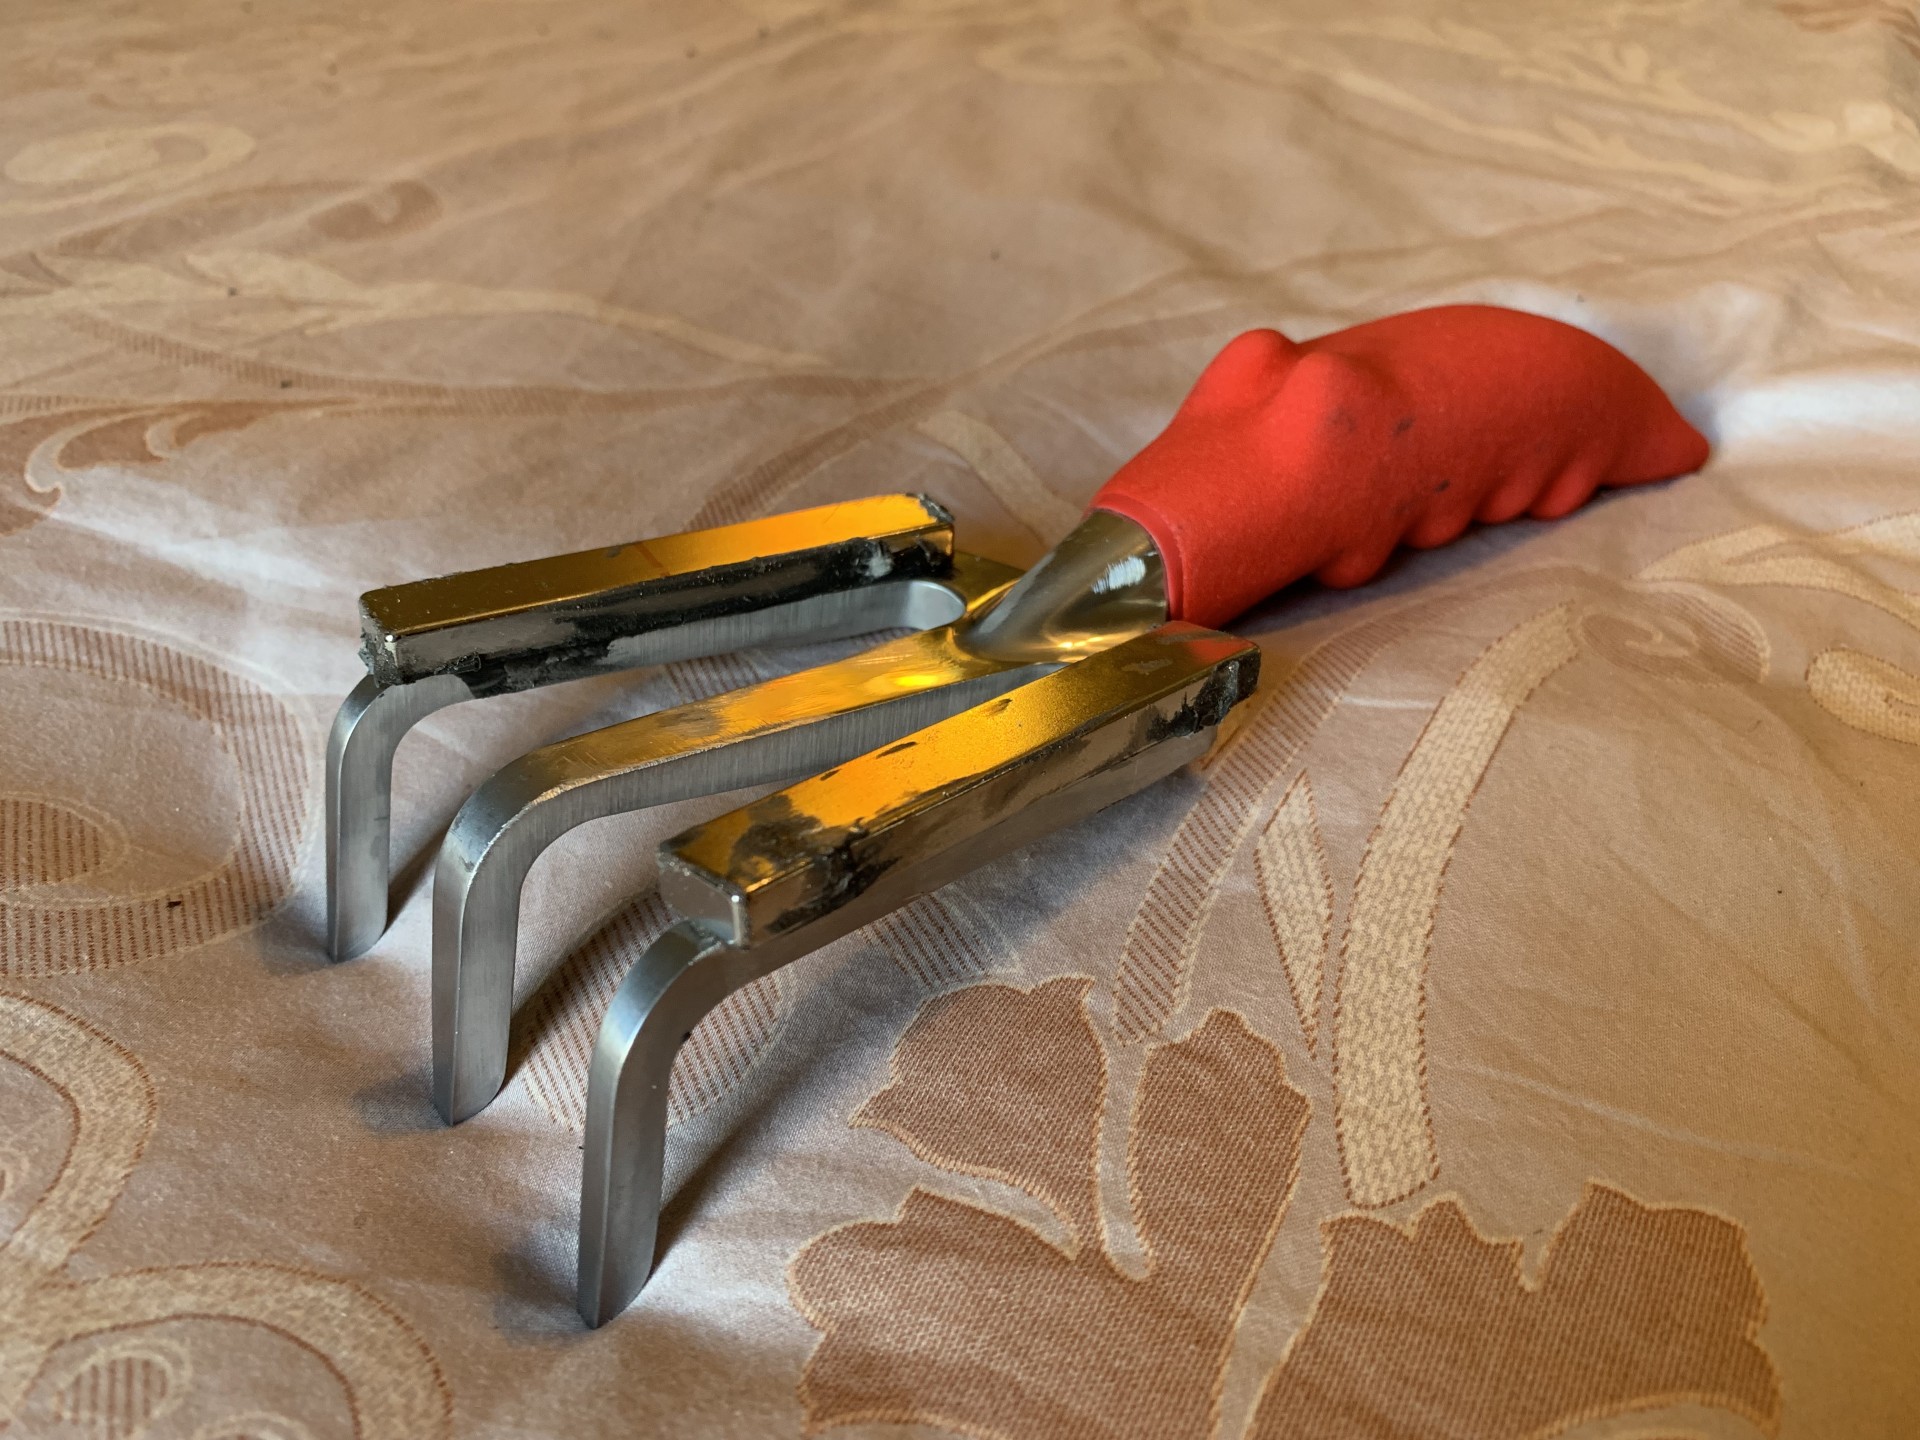
I was wandering Ace hardware the other day and spotted this sexy little heavy duty claw digging tool hanging on the rack priced for around $15 if I remember right. Made of aluminum and really solid with a comfortable handle I JB welded two neodymium bar magnets for searching iron infested signals on the top hopefully out of the way enough to stay in place.


.jpg.b81d13f002691db18bd7c6edfb2a5624.jpg)
.jpg.5e4e5d4302bd4d648ceedd82aebb3db9.jpg)
.jpg.6f78836d5649e4b88426bb318a4d328c.jpg)
.jpg.9de14537b6a663e15ef38e33baefe839.jpg)
.jpg.582e4e472d3e65782d718425751b74f2.jpg)
.jpg.9a7c4d0a9c00b88fa6592ad13d66276f.jpg)