Search the Community
Showing results for tags 'rods shafts hardware'.
-
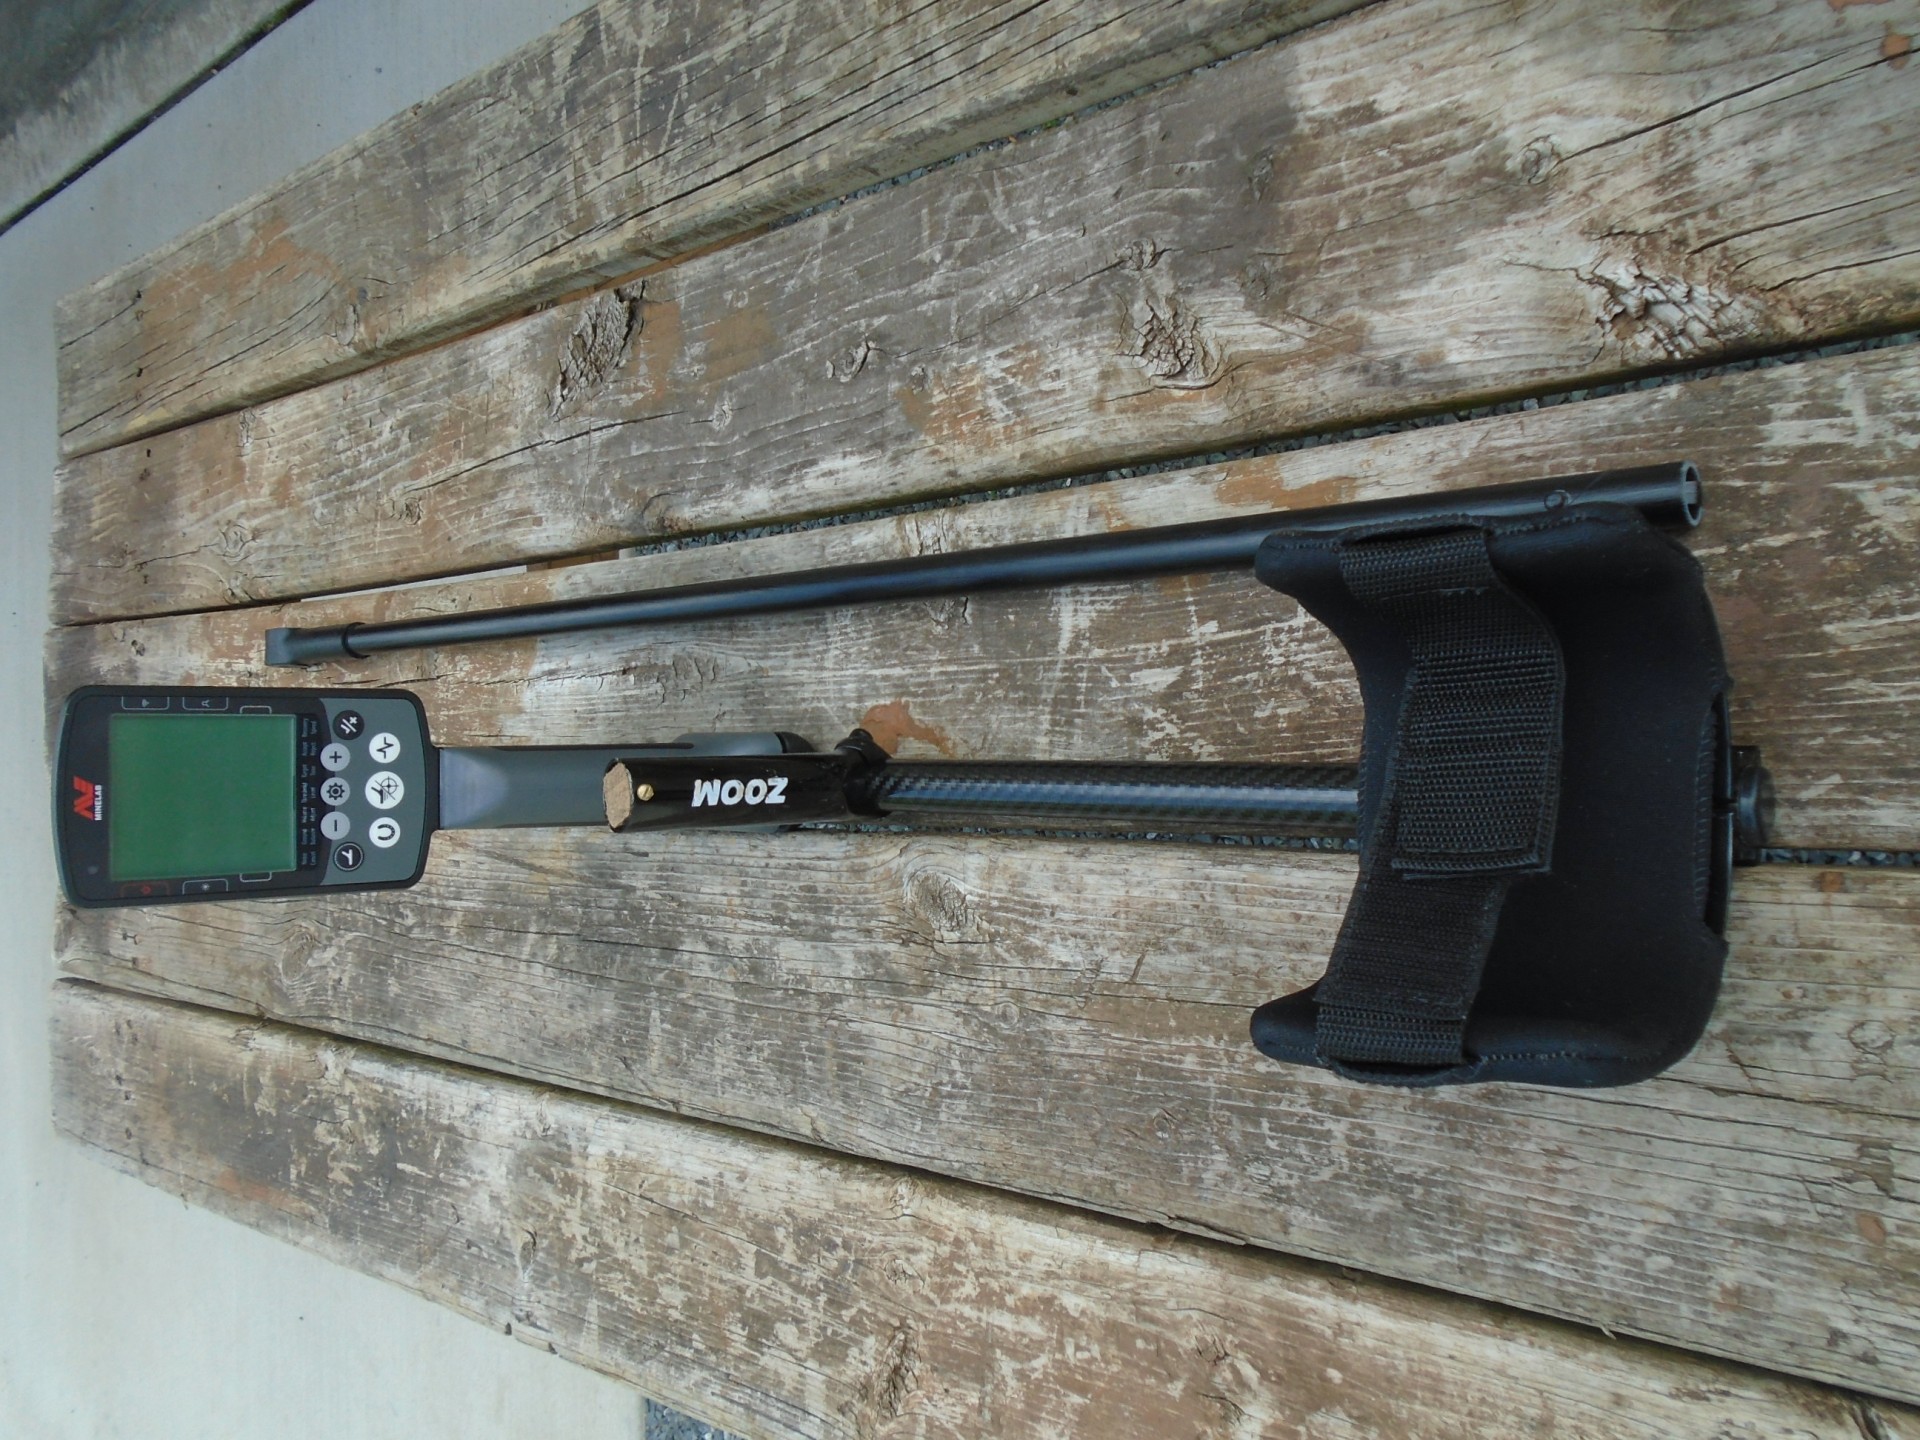
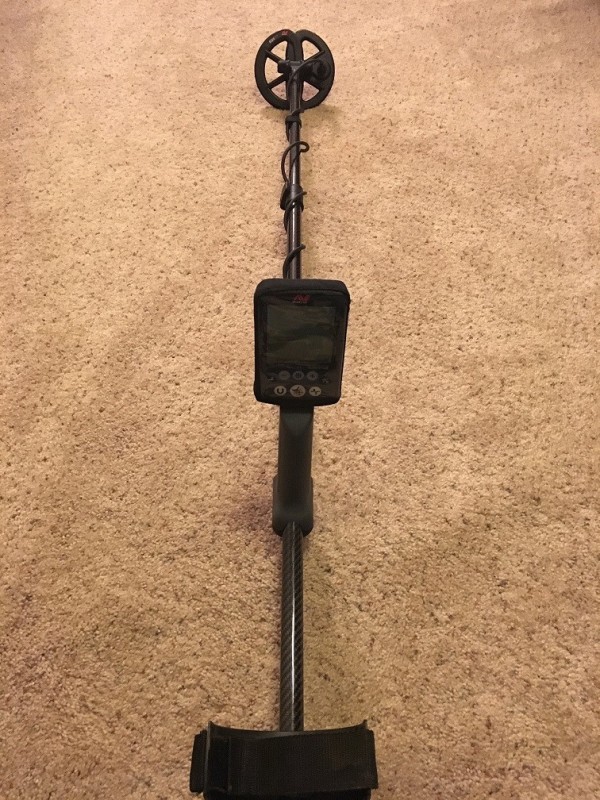
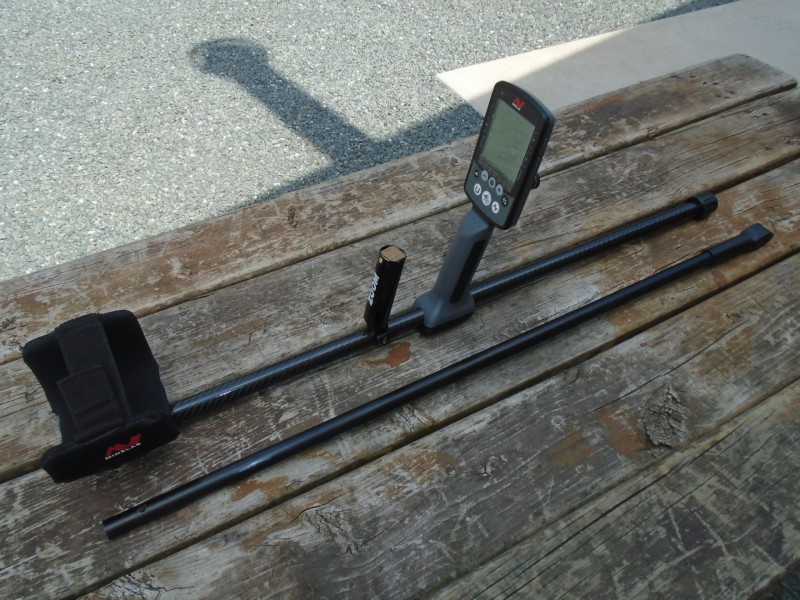
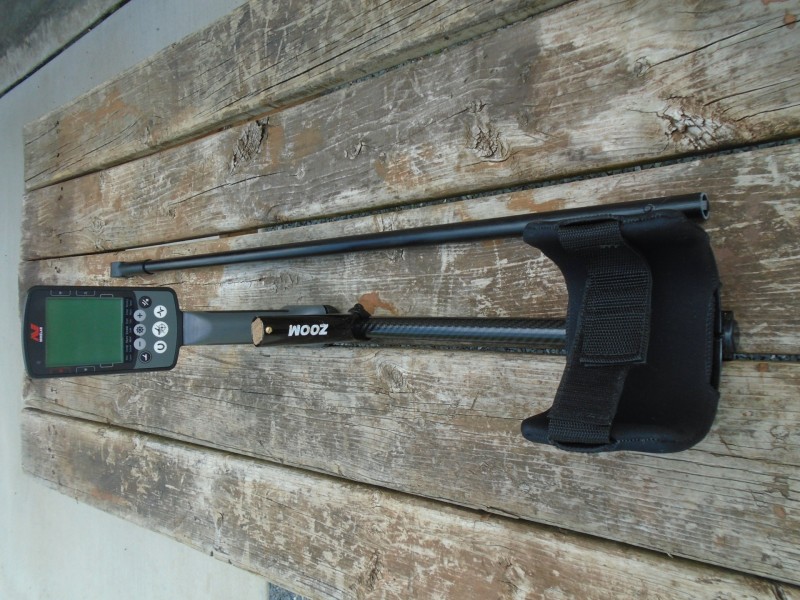
 Took my new set up to the beach for a few hours for their first trial run as a “team.” Steve’s Detector Rod. This two piece shaft was the best I’ve ever used...bar none. It was solid as a rock, as in no wobble whatsoever, and light as anything I’ve ever used. With the counter balance weight, it was better than swinging my old Deus with a 9” coil. Steve weighted mine using 16 oz of lead shot in a 4.5” long cylinder. He set it up that way so swinging the 11” coil would emulate swinging his 7 oz shaft with a 6” coil installed! It works exactly as intended and designed. Bottom line, I couldn’t be more pleased. This will be my shaft of choice for the very very long term. You can read my original review of Steve’s work at the link below: Quest APTX-LL Wireless Headphones Initial thoughts: My order only took two days to arrive from Hong Kong! Extremely comfortable over the ear design. External build quality looks good. They paired up with my EQX exactly like the Minelab wireless even to the point of using the same tones as the Minelab. Low latency capability is certainly there. I ran them in my test garden using good targets surrounded by iron and they performed extremely well. Nice and clear crisp sound with sufficient volume. Haven’t yet had to use the volume control. Haven’t been able to test battery life yet so that’s TBD. So far, I’m favorably impressed. I’ll take them to the beach on Monday and report back. Additional points: ~ These headphones are easily adjusted for proper fit and the top head piece is extremely well padded and comfortable. ~ They are water/rain resistant. Not designed for diving...and resistance to water damage is all I really wanted. No blue tooth wireless headphones can be used when submerged...at least none that I know of. Fast forward to their first beach run. We finally have a set of Aptx low latency water resistant headphones made specifically for the Equinox! These headphones again linked right up with no issue. They were indeed low latency and I was able to pin point with ease. The sound was clear and crisp as I stated above and their over the ear design served to block out much of the ambient beach noise. They proved very comfortable after 3+ hours of detecting and simply worked flawlessly. I love being “untethered” and confident that when one of our Florida showers come up, I won’t have to worry about these getting wet. Again, they are water resistant not water proof. They are advertised as having a 24 hour battery life so I’ll not be able to comment on that since my hunts are never that long! One thing I took note of was, as is true with most or all wireless set ups, every now and then I would hear just a hint of static interference but it was barely noticeable and very rare. I attributed this to EMI since we were very close to Patrick Air Force Base and its Officer’s Club Beach. I’ve experienced such EMI there before. Bottom Line: I like these headphones very much and you can find them at the link shown below. https://www.questmetaldetectors.com/product-page/aptx-low-latency-bluetooth-wireless-headphones-for-minelab-equinox I now have what I believe is the best set up for my style of beach hunting. The Equinox, Steve’s rod and Quest wireless Hps. Soldier on...
 -
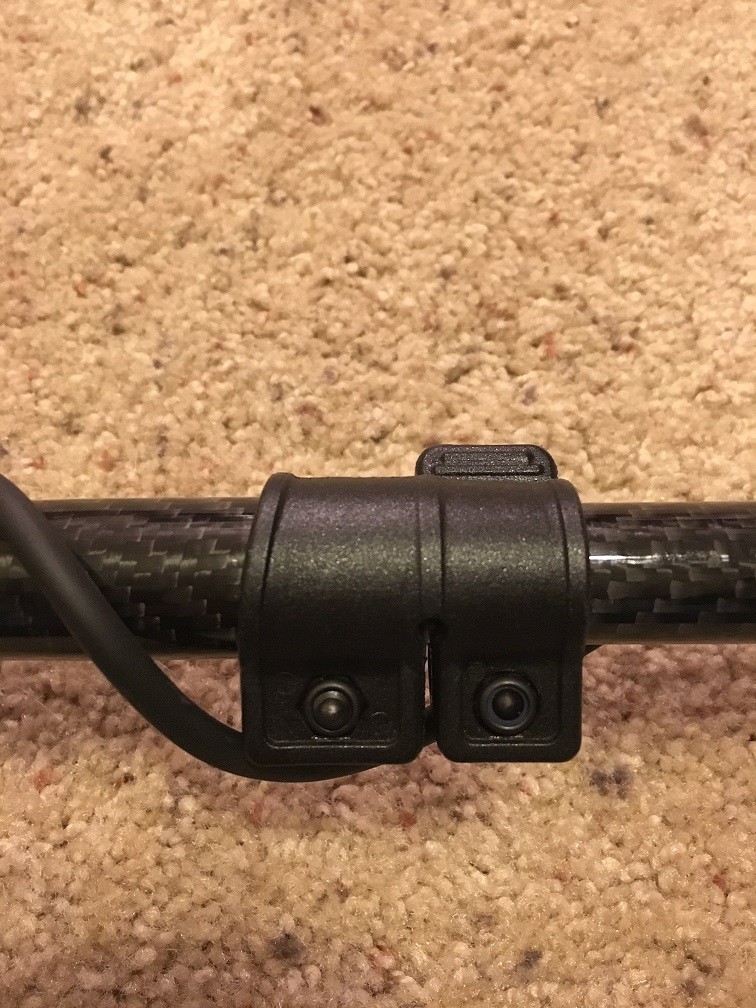
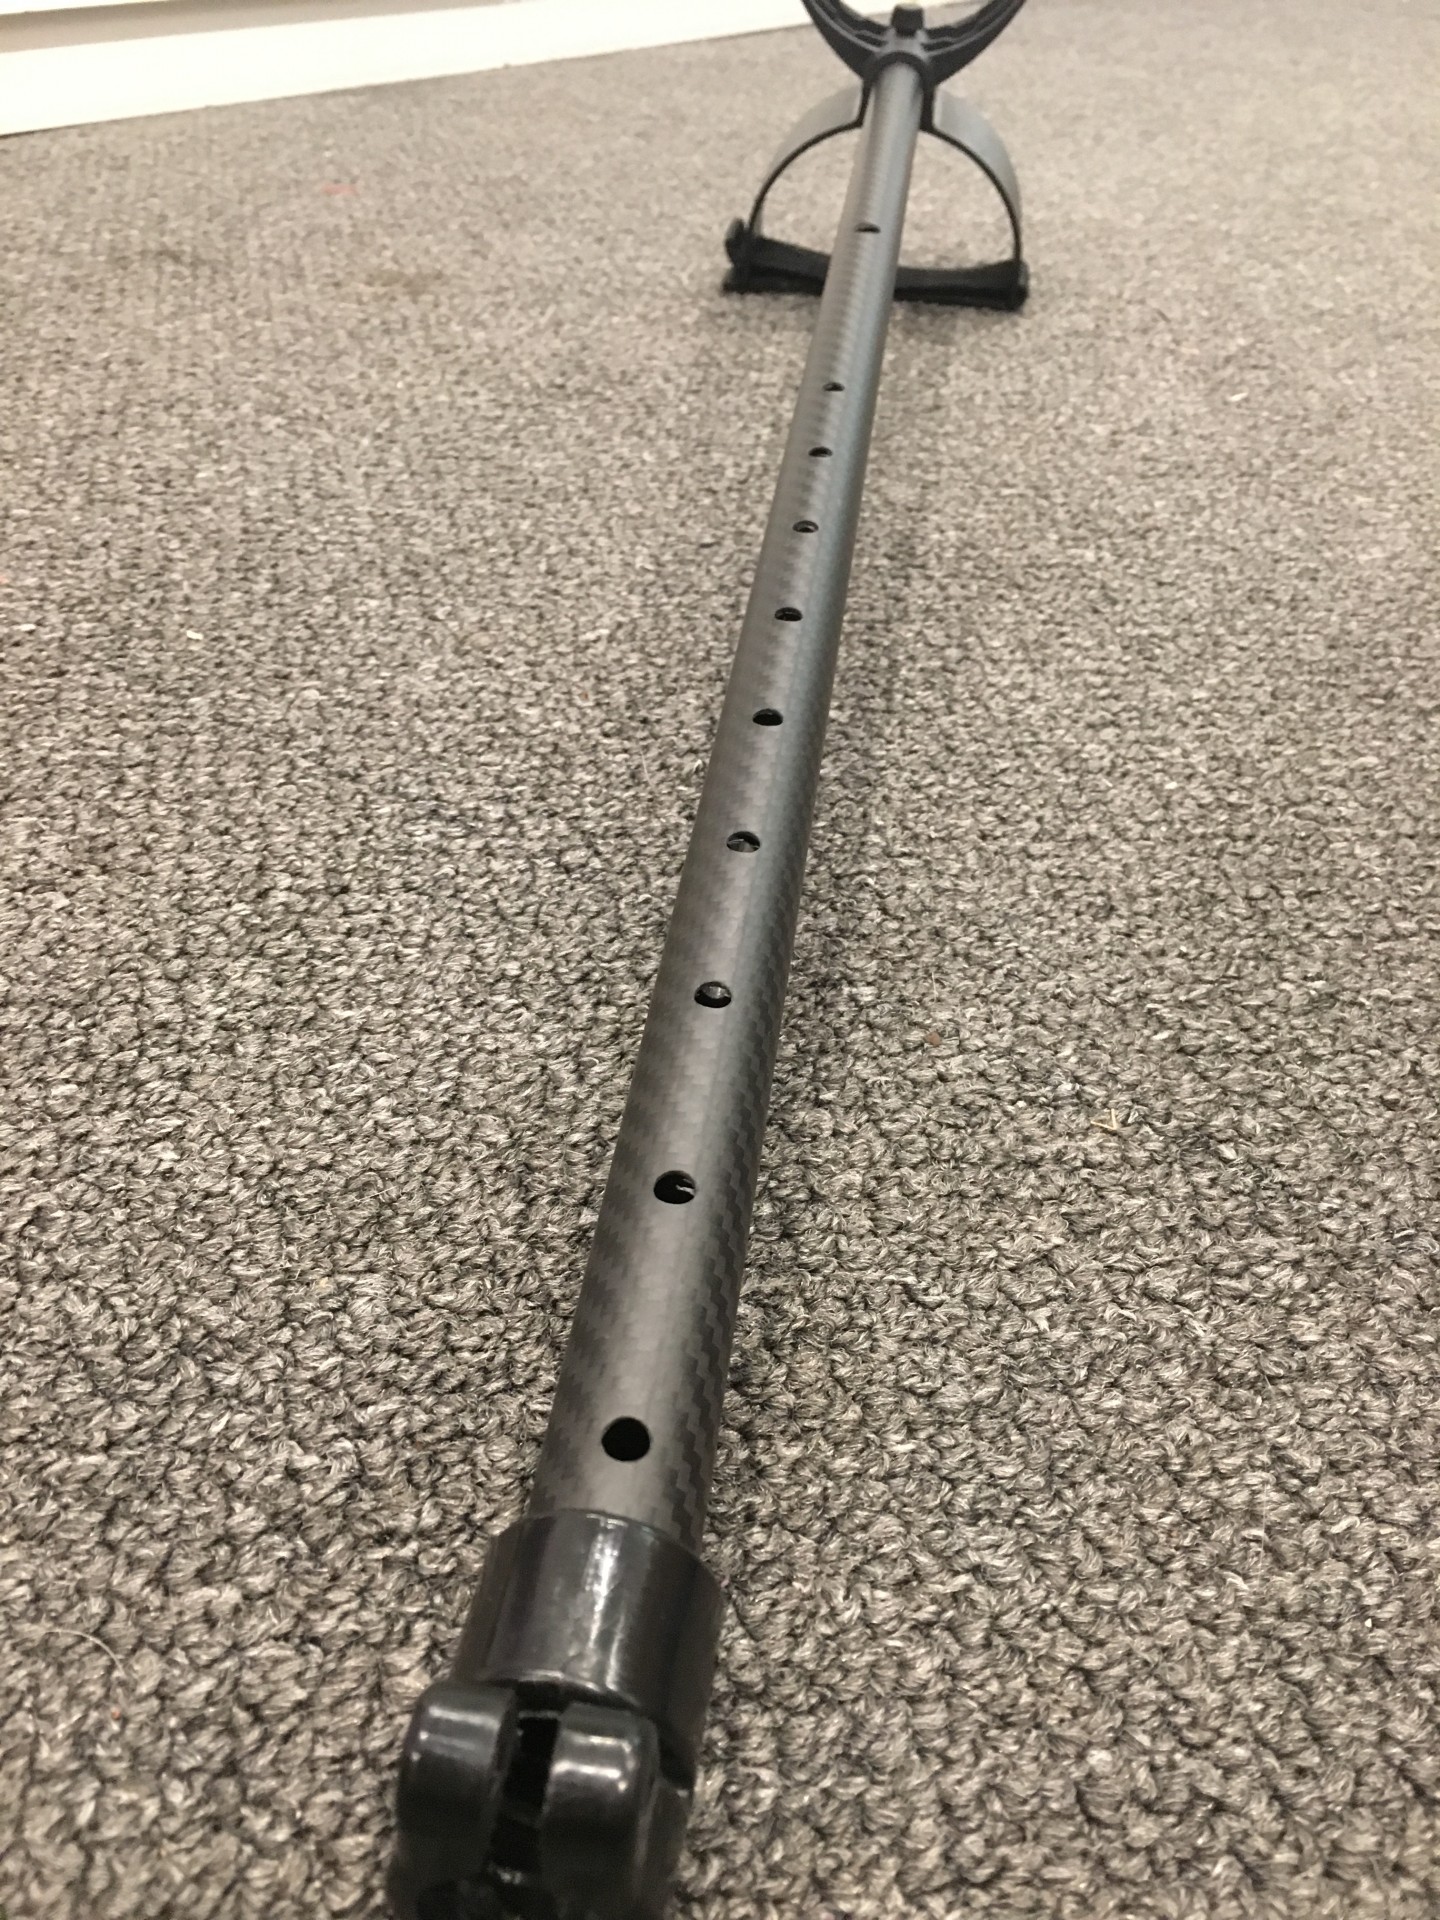
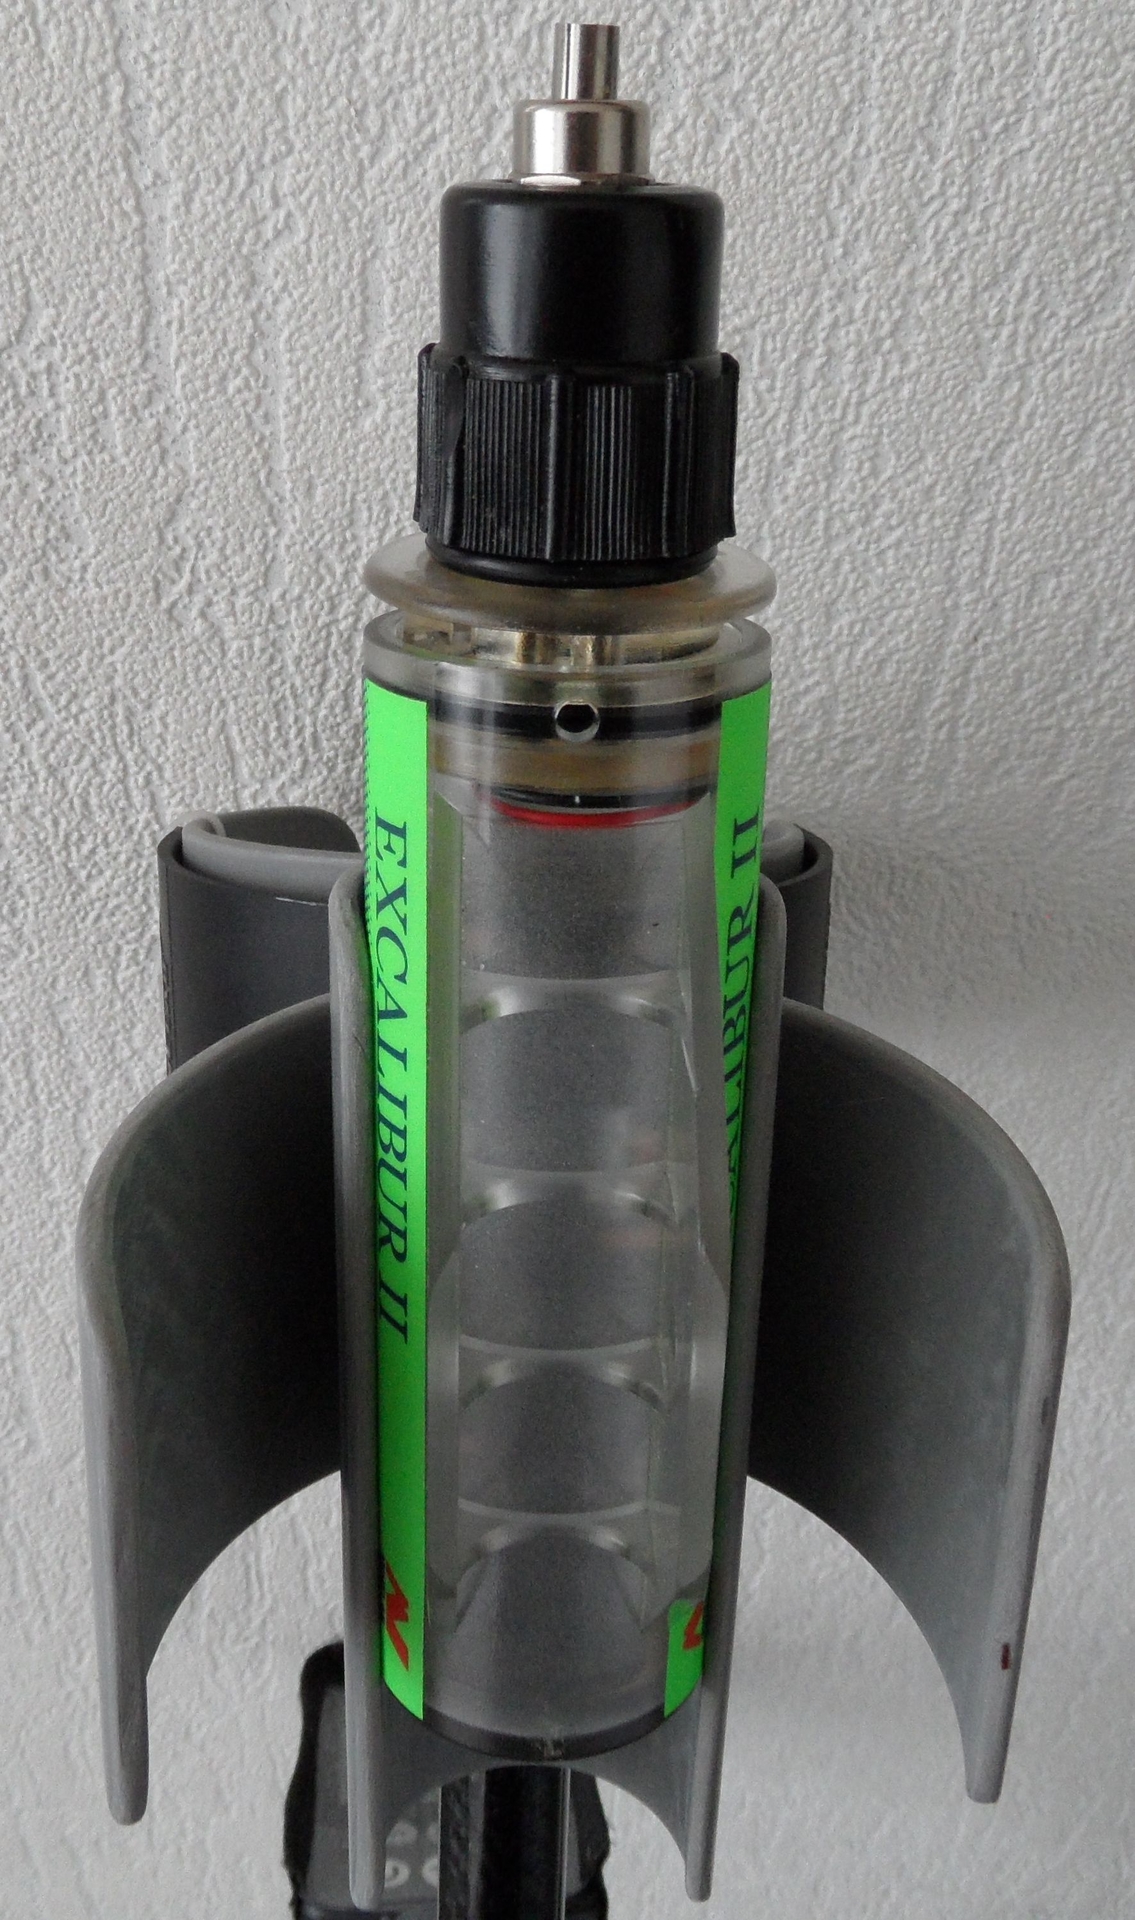
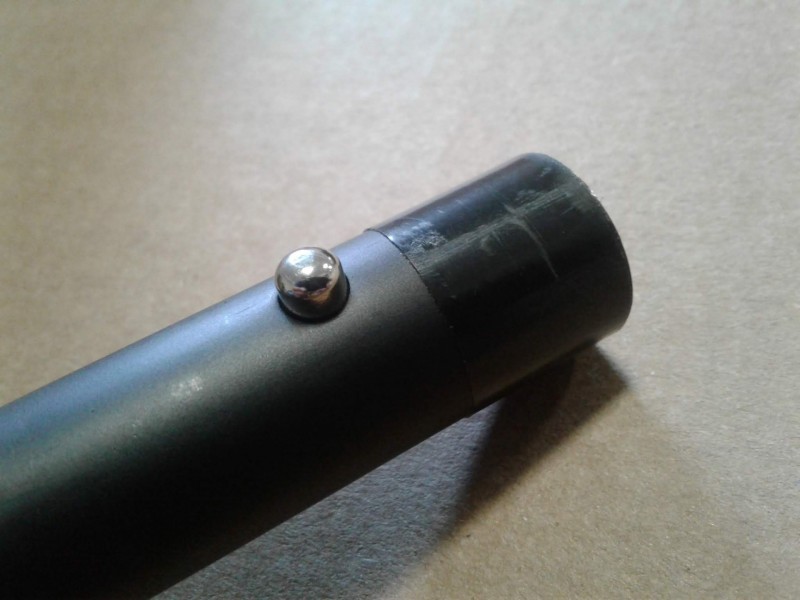
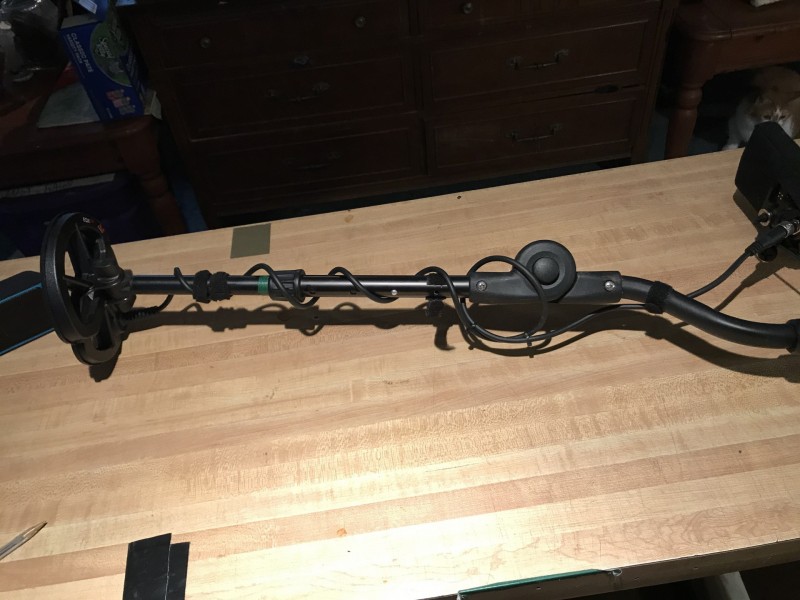
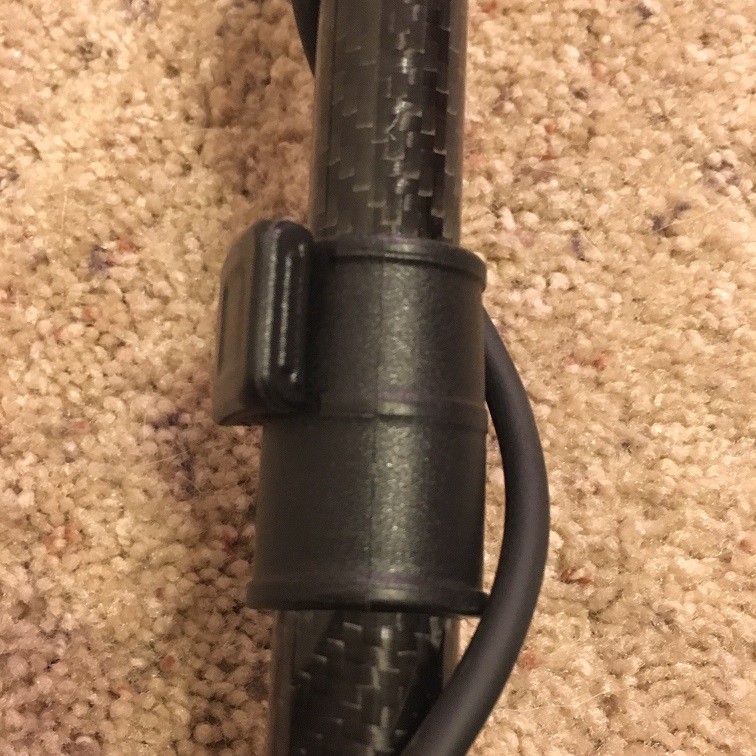
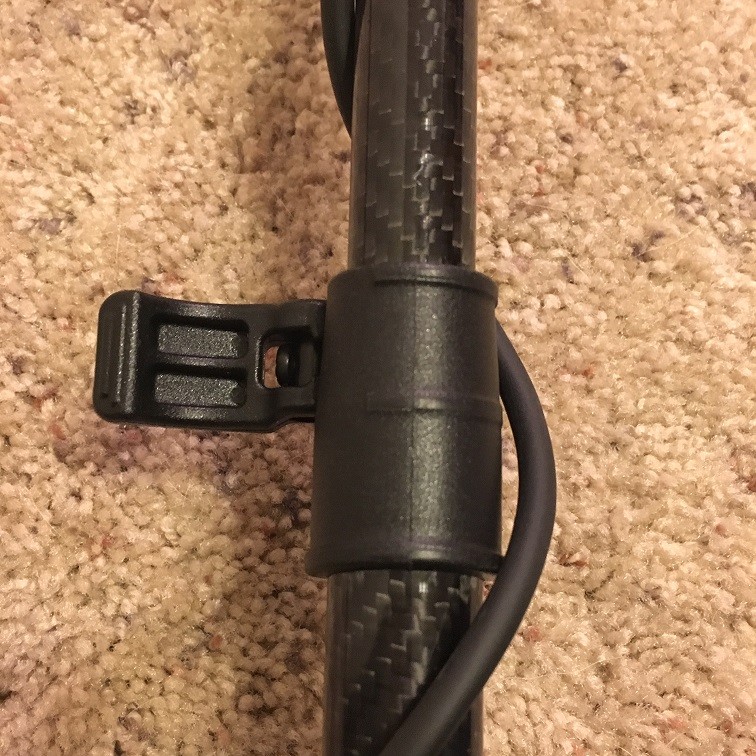
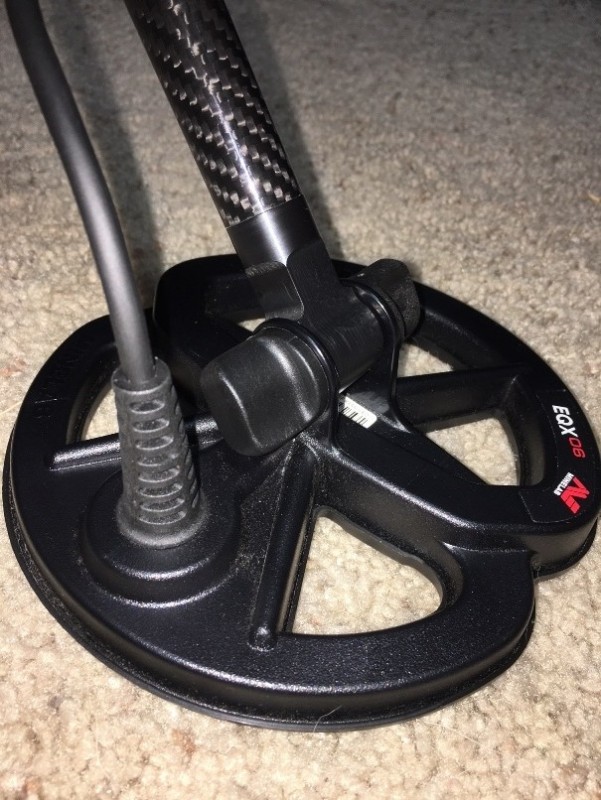
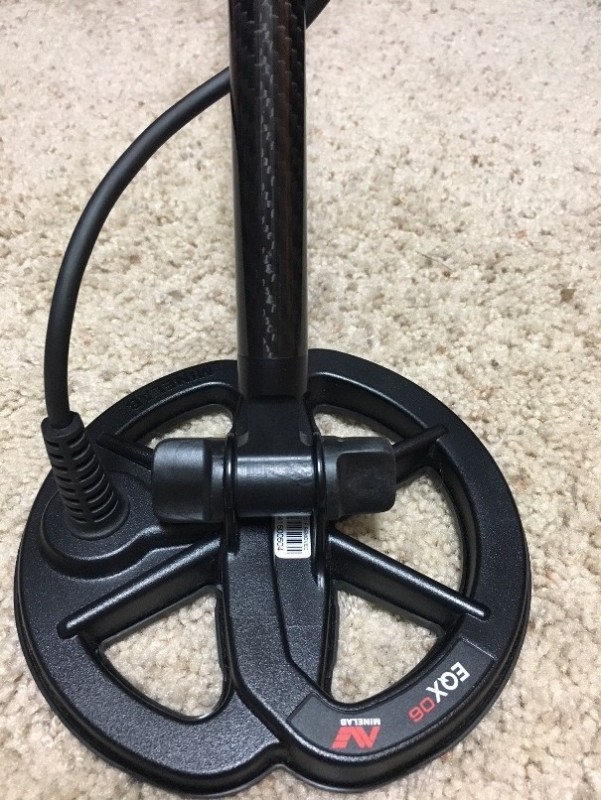
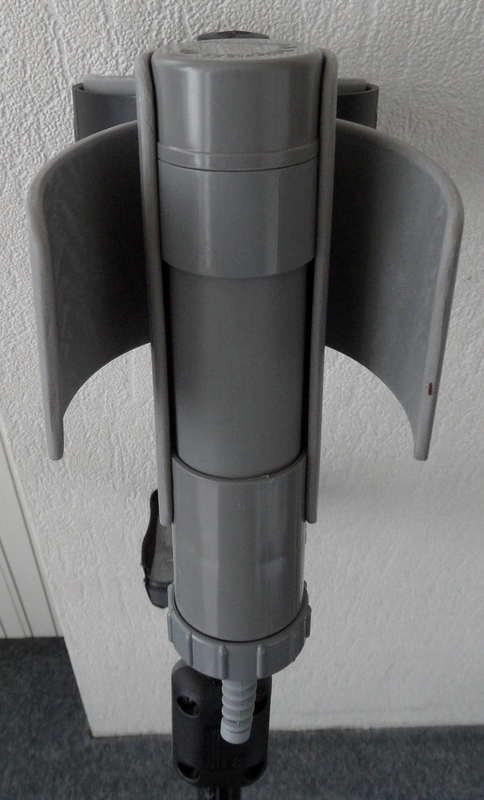
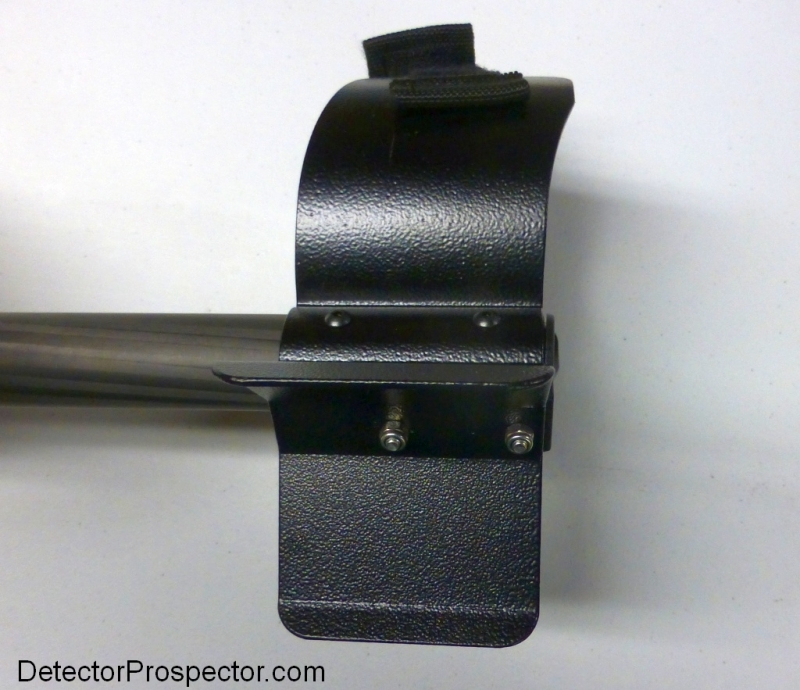
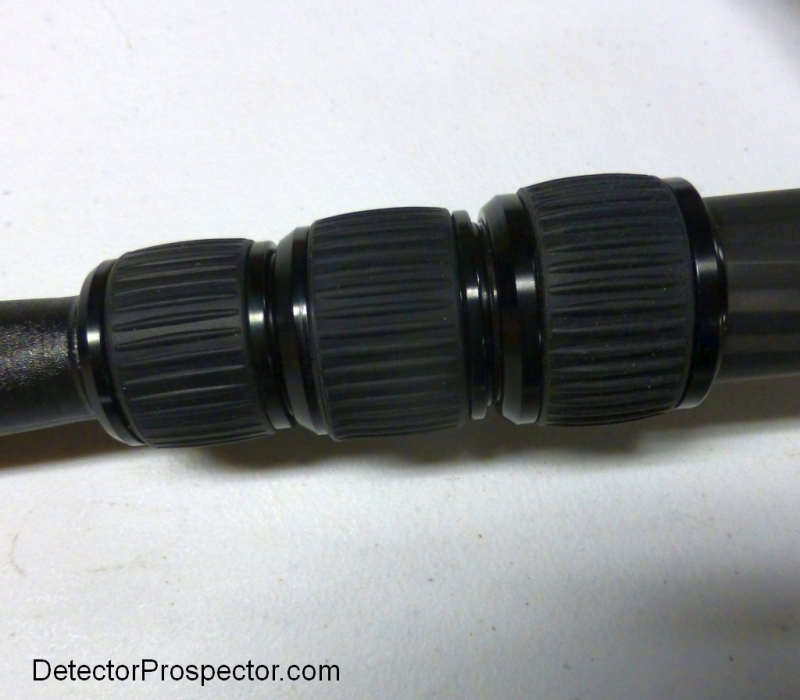
Here is a easy way to fix your shaft wobble, even if only temporarily. The male end of the middle shaft just needs a single layer of electrical tape. The tolerances on the Minelab shaft are actually pretty tight. If it was any closer you might not be able to get it apart again. Anybody who has swung a Tesoro Knows those twist-locks only work for first assembly, lol I've done this before with other machines except I used aluminum tape, time will tell how long the electrical tape will hold out. The tape in the picture has about 15 hours on it, so far it's OK. Besides, it's easy to replace. Coincidentally when I took the machine apart for a cleaning and to take this picture, I noticed that Minelab made a similar raised surface on the lower fiberglass rod. The lower rod is so long that a little play really wouldn't translate into as much slop as the upper connection does.
-
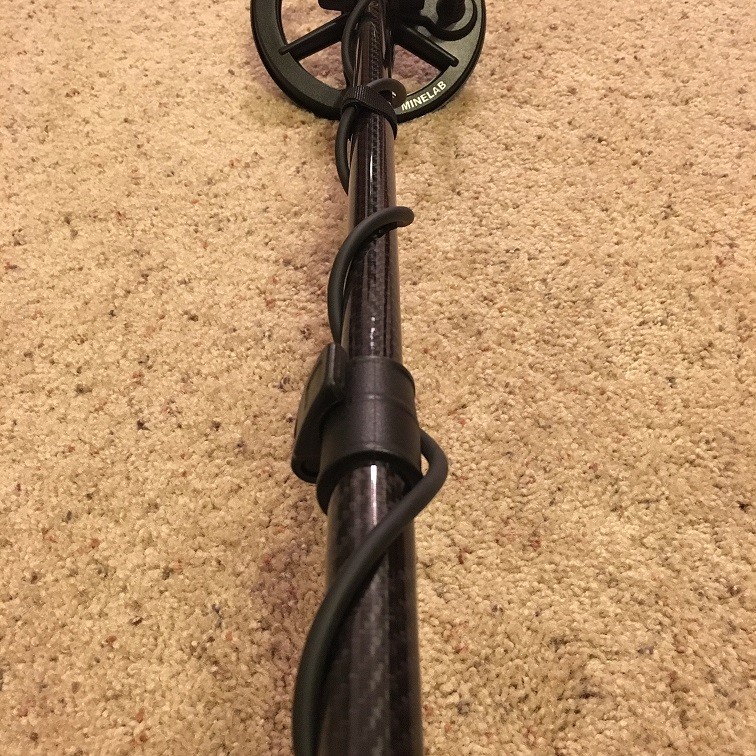
I recently installed one of Steve’s Detector Rods on my Equinox and wanted to share a few observations. When I’m particularly impressed with a product, I like to let the maker and others know my thoughts...good or bad. The first impression out of the box was very positive. The build quality of this two piece system, both material and workmanship, is absolutely excellent. The cuttings are smooth and the fittings precise. You can immediately tell Steve uses only the best materials in the overall construction. Being a scientist, his penchant for precision is obvious in everything he does. Another very important fact about Steve—he’s a one-man-shop small businessman and an avid detectorist who knows what we need from personal detecting experience. Now for a few specifics. The locking mechanism is extremely sturdy and I really appreciate his use of an adjustment knob instead of having to hunt down or carry a screw driver in order to adjust the locking tab tension. I quickly noticed another user friendly design feature on Steve’s part. He uses easily found round washers on the lower rod where it connects to the coil ears! I don’t know about you, but I was amazed at how expensive those tear drop washers are when or if they ever need replaced. Thank you Steve! Another unique offering of Steve’s rods is the available counterbalance weight. As many have commented on these forums, the Equinox is inherently nose heavy...particularly with the 15 inch coil. Although his shafts are extremely light in their own right, a mere 7.86 ounces of combined weight of the two shafts, the counterbalance weight makes a huge difference in the perceived weight. When you first look at this counterbalance weight you may think that it only serves to add more total weight to the Equinox...and you’re right. However, when I installed that weight on the back end of the shaft, the balance was markedly improved...balance being a key factor of perceived weight. The designed fulcrum effect makes the detector simply feel lighter and makes it much easier to manipulate. I’m sure I could swing this Equinox for hours, even without the use of a harness, and my arm would be just fine. The stability of this set up is incomparable...and I’ve used many shafts on many detectors over many decades of metal detecting. One design aspect that may go unnoticed is that Steve’s lower shaft is 1.75” longer than the factory shaft—and he can make them longer upon request. This simple idea allows more of the lower rod to remain in the upper shaft giving it added stability even at extended lengths—not one wit of wobble with this one! An aspect I also appreciate is the elimination of the restrictive spring button adjustment system. The button only allows you to adjust the shaft to a factory predetermined series of lengths. Steve’s approach allows you to adjust the shaft to any length with which you feel comfortable. This guy has really thought the design through and focused his efforts on all those “little things” that make a big difference. Steve offers his shafts in an array of colors. Black, Red, Blue, Green and Silver. He can also provide custom work on his shafts if that’s what you need! Who else offers that? I’m obviously impressed with this young man and his workmanship and I like to let folks know when I find an outstanding product from an outstanding producer. One last but very important comment. I have no personal or financial interest in Steve’s Detector Rods. I never met the young man and since he lives in Norman OK, probably never will since OK is a mite far from my Florida beaches! Specifications: Upper Shaft Length: 34 7/8 in. Upper Shaft Weight: 4.81 oz. (136 g) Lower Rod Length: 26 in. (custom lengths available upon request) Lower Rod Weight: 3.06 oz. (87g) Material: Carbon-fiber (3K, twill pattern, glossy finish) Cam Lock material: Injection-molded Plastic (nylon) Threaded End Cap material: Delrin Threaded Butt-End Insert material: Delrin
-
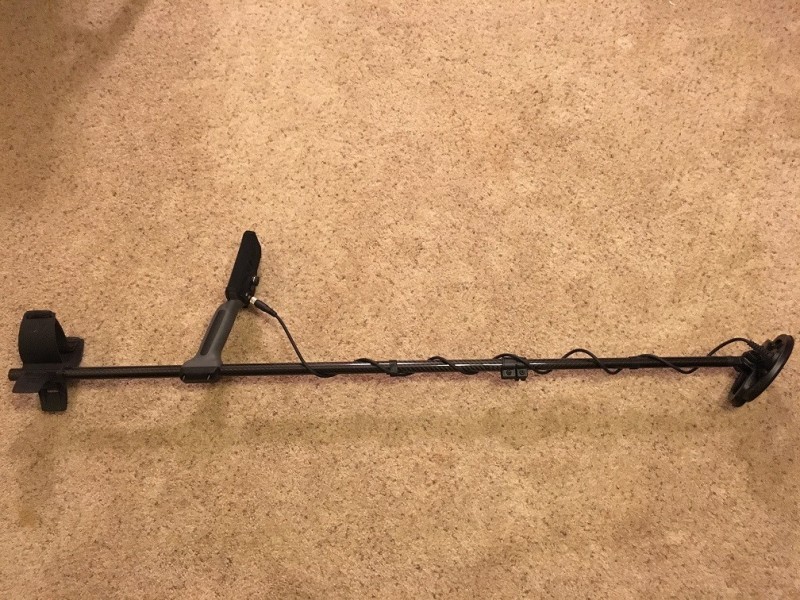
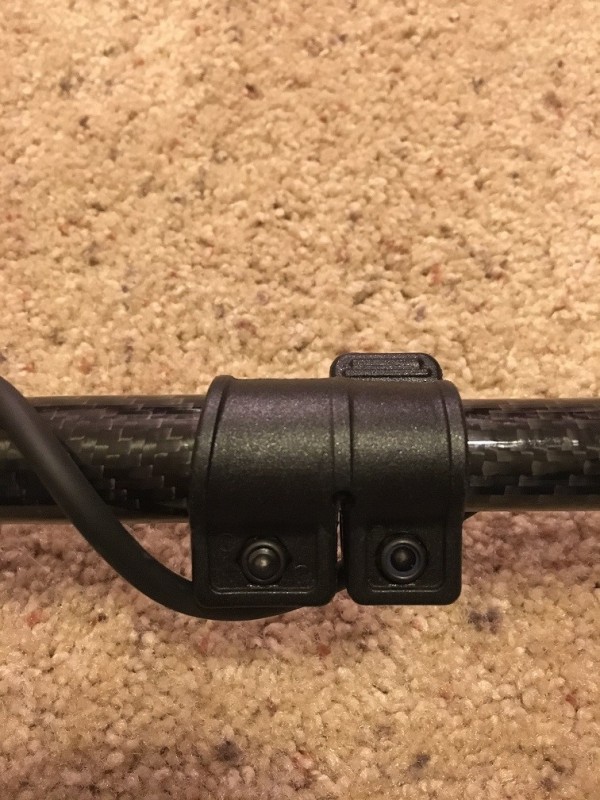
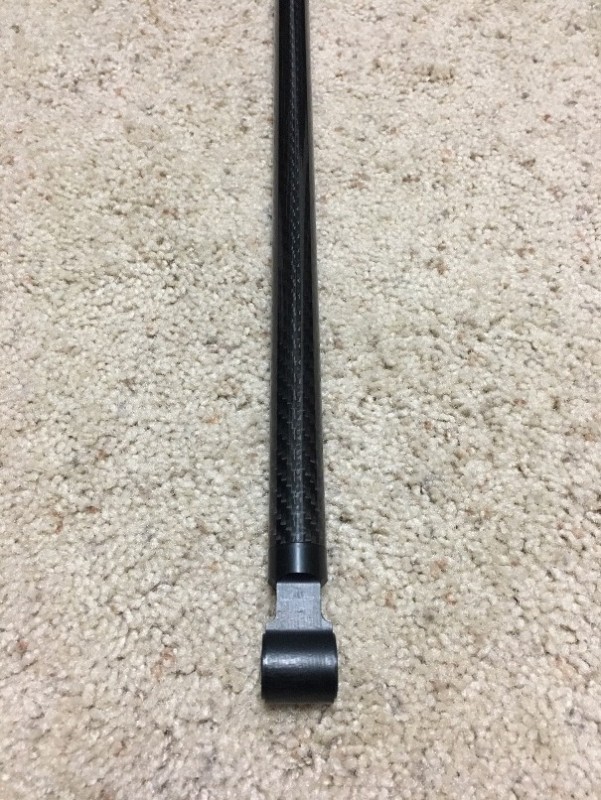
Just by coincidence, this 25mm * 23mm carbon fiber tube fits both models, so it's a "win win". I needed a 1" * 7/8" tubing clamp to make the conversion complete. I didn't want to drill a bunch of holes and not have them line up, so I used the "GM 1000 clamp on" cuff. As you can see, I trimmed off about 4" of the mid EQX section. I wrapped sand paper around the cf tube and slowly increased the clearance in the handle/clamp combo, until I was happy with the fit. Total un-extended length is 25", and could be less if you remove the coil. As for the counter-balance weights, it's just another happy coincidence. The washers fit like a glove (.90"), and by adding an over-sized washer, I can move the weight in or out of the shaft. That 1.5" bolt with 14 washers weighs about 4 ounces, and is infinitely adjustable with regards to length, weight, and positioning. https://www.amazon.com/Carbon-Fiber-Tube-Wrapped-Surface/dp/B07DH8WYQQ/ref=sr_1_1_sspa?keywords=carbon+fiber+tube&qid=1554147132&s=gateway&sr=8-1-spons&psc=1 https://www.ebay.com/i/123165031900?rt=nc&var=423574663558&_trkparms=aid%3D222007%26algo%3DSIM.MBE%26ao%3D2%26asc%3D20160908110712%26meid%3Dae995979ba42462ea30ceb0bda2fd5d5%26pid%3D100677%26rk%3D2%26rkt%3D9%26sd%3D122309026322%26itm%3D423574663558 Happy swinging. Brett
-
 Hi all. Now that I have the prototype shafts built, I've been able to work some more on the counterweight design, and I have moved very close to finalizing the design. I have discovered through this extensive testing/design that the amount of weight needed to achieve proper counterbalance is a bit more than I was originally thinking, after the preliminary, "rough" proof-of-concept testing. I would like to present the findings, and get some opinions -- from anyone who has been potentially interested in the counterbalance system -- as to whether these changes are acceptable, or if this would change your desire to possibly purchase the counterweights. 1. The weight needed to counterbalance the 12" x 15" coil, (based on an "average" lower rod extension length), is roughly 28 oz. This is a fairly substantial amount of weight -- BUT -- I must note that when the weight is applied, the machine swings BEAUTIFULLY. It FEELS lighter, even though the "absolute weight" -- i.e. according to measurement as provided by a scale -- is obviously greater. With my forearm in the arm in the arm cuff, swinging the machine normally, I was literally able to hold the handle of the machine with only my thumb and index finger -- and swing the machine effortlessly! The sensation is that the machine FLOATS across the ground! (For the 11" coil, the amount of counterweight needed is of course slightly less -- roughly 25 oz.) 2. To include this amount of weight in the tube extensions, and yet not have the extensions excessively long, I must use larger-diameter carbon-fiber tube than I planned -- I've decided on 31mm outside diameter tubes. I had intended to use the same diameter of tubing as used on the upper shaft (22.15mm outside diameter), but the extension length required was far too long. 3. Using the 31mm outside diameter tube for the counterweights, I calculate that length of the tube extending beyond the end of the shaft will be 7 1/2" for the 12" x 15" coil, and 6 1/2" for the 11" coil. 4. There would be no changes to the shaft design needed; anyone wanting the counterweight system in the future would still purchase a shaft with the same threaded female fitting installed in the butt end of the shaft, and the same threaded end cap that screws into the butt end. The only changes would be to the counterweights themselves (as comparted to what I had originally planned) -- i.e. larger diameter carbon-fiber tubing, and thus a larger end cap for the ends of the counterweights themselves. SO, my questions are, with the counterweight lengths needed now a pretty-well "known quantity" -- i.e. 6 1/2" and 7 1/2" long (11" coil and 12" x 15" coil, respectively), and the weights to achieve balance being also a pretty-well "known quantity" -- i.e. 25 oz. and 28 oz., respectively, would those interested in the weights find these specs acceptable? Please offer your comments. Preliminary/rough pricing info would be as follows. One counterweight, $22.50 plus shipping ($30 total). If an EQX user only wanted to order one weight, I would suggest the 6 1/2" long, 25 oz. weight, designed for the 11" coil; this amount of counterweight still achieves a degree of balance that feels GREAT with the 12" x 15" coil. I am of the opinion that no counterweight is needed, for the 6" coil. Two counterweights, one for the 11" coil and one for the 12" x 15" coil, $42.50 plus shipping ($50 total). Thoughts? Steve
 -
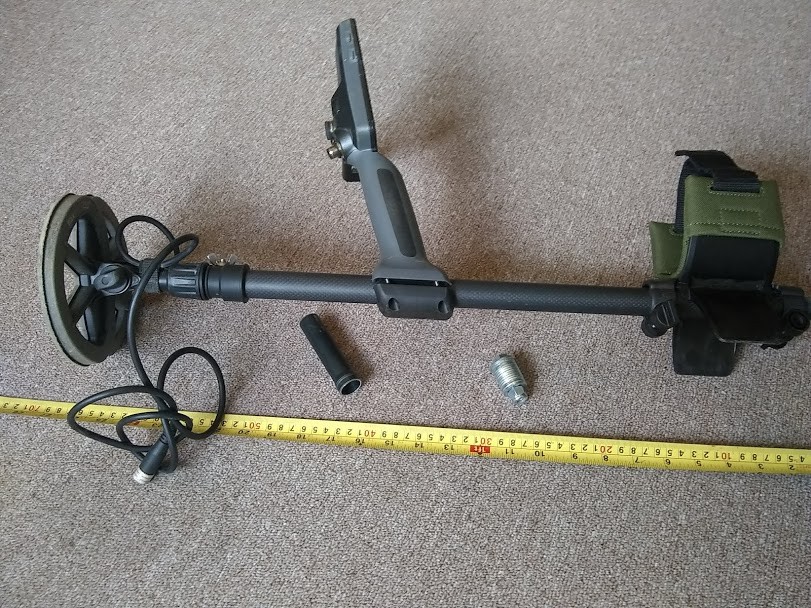
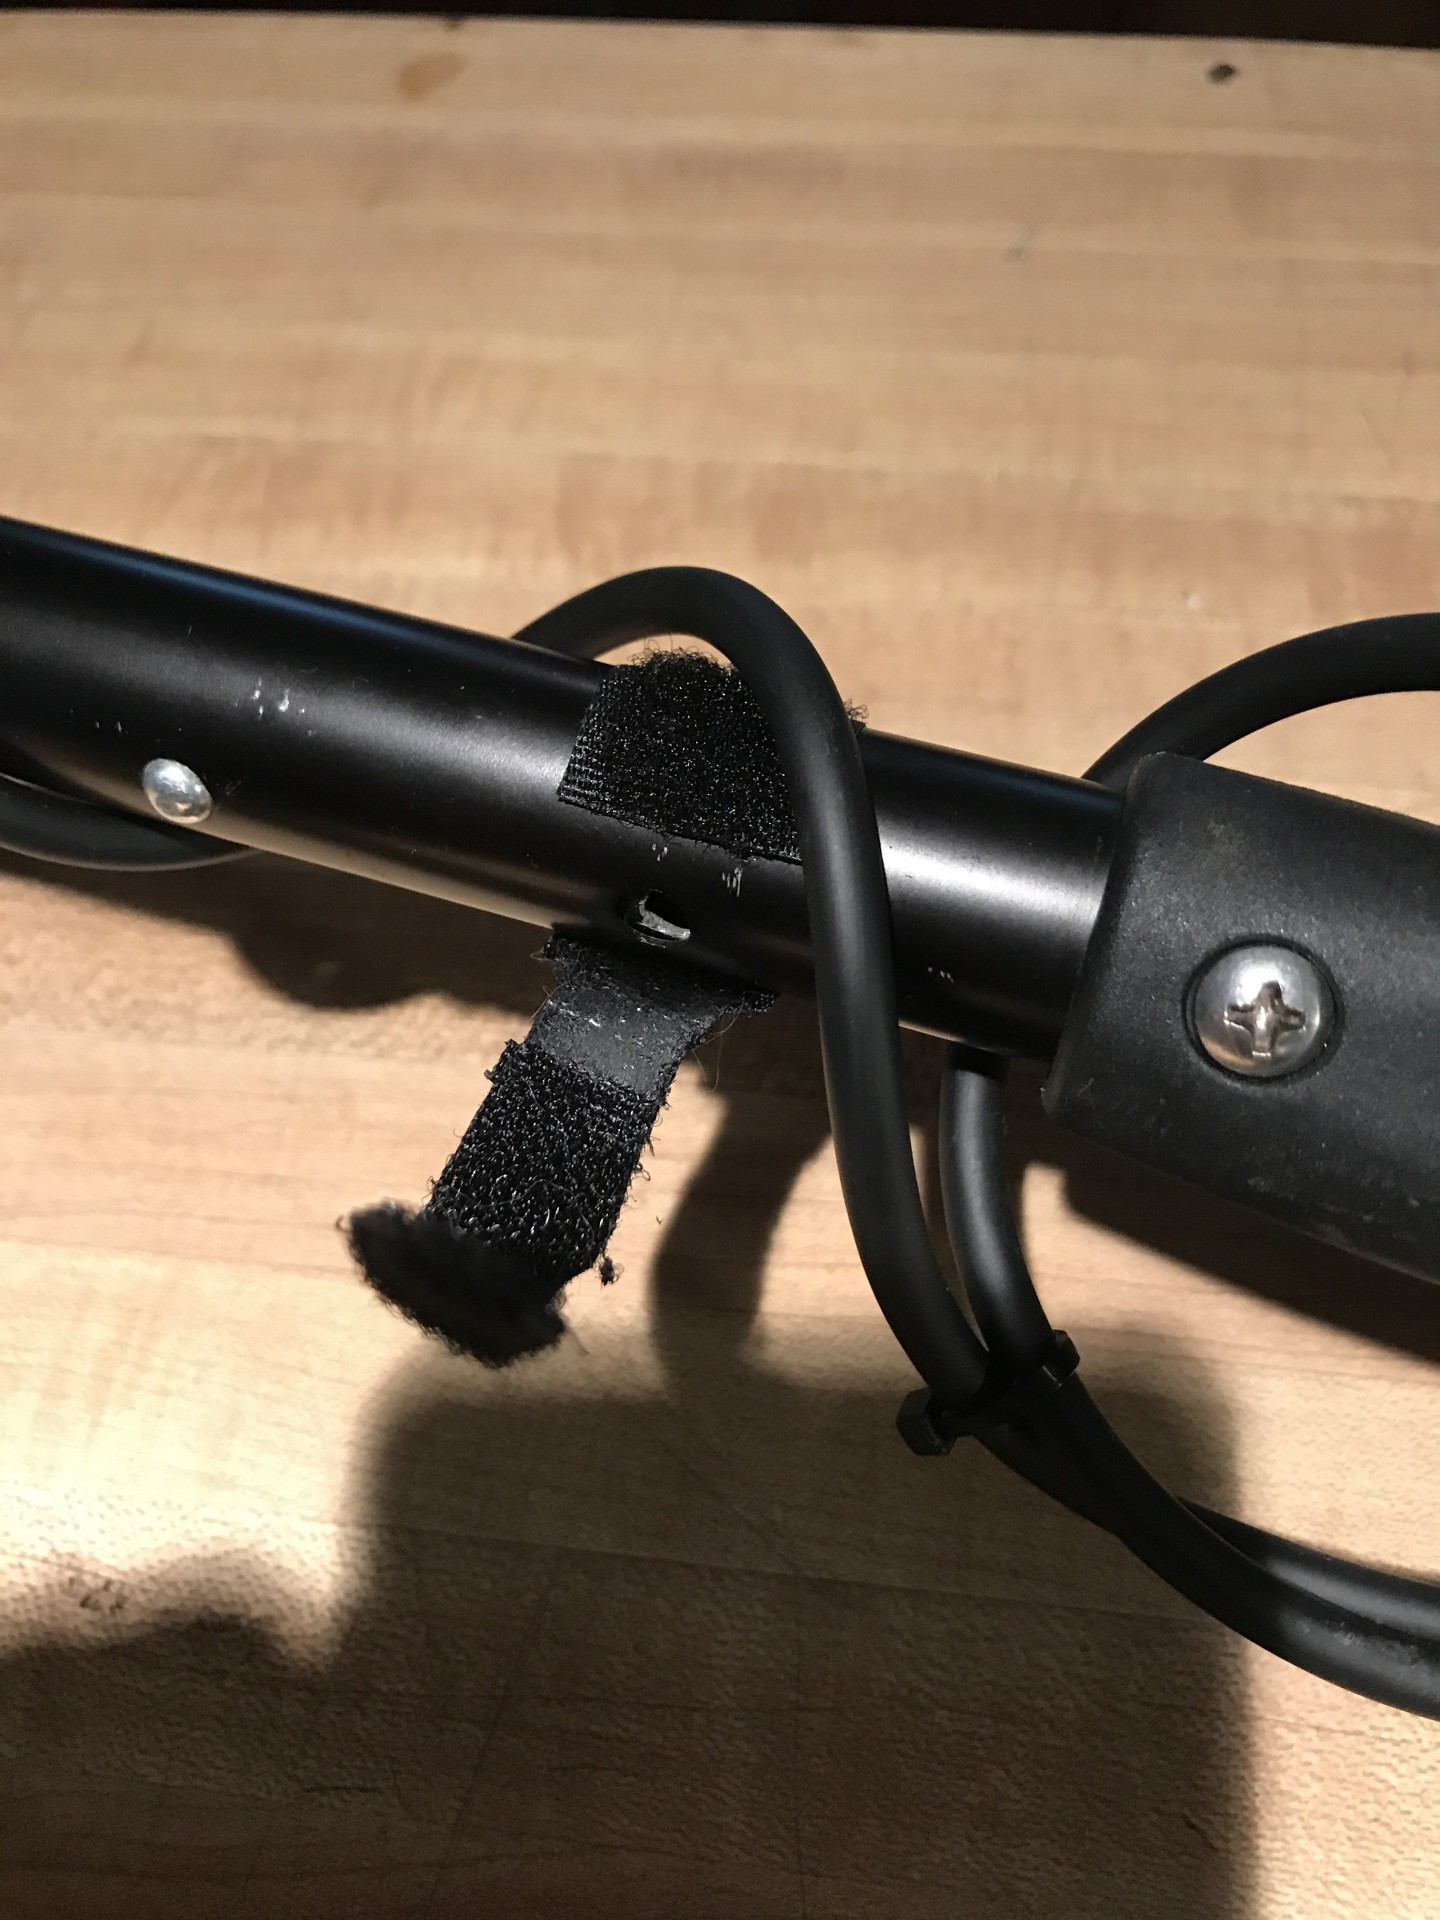
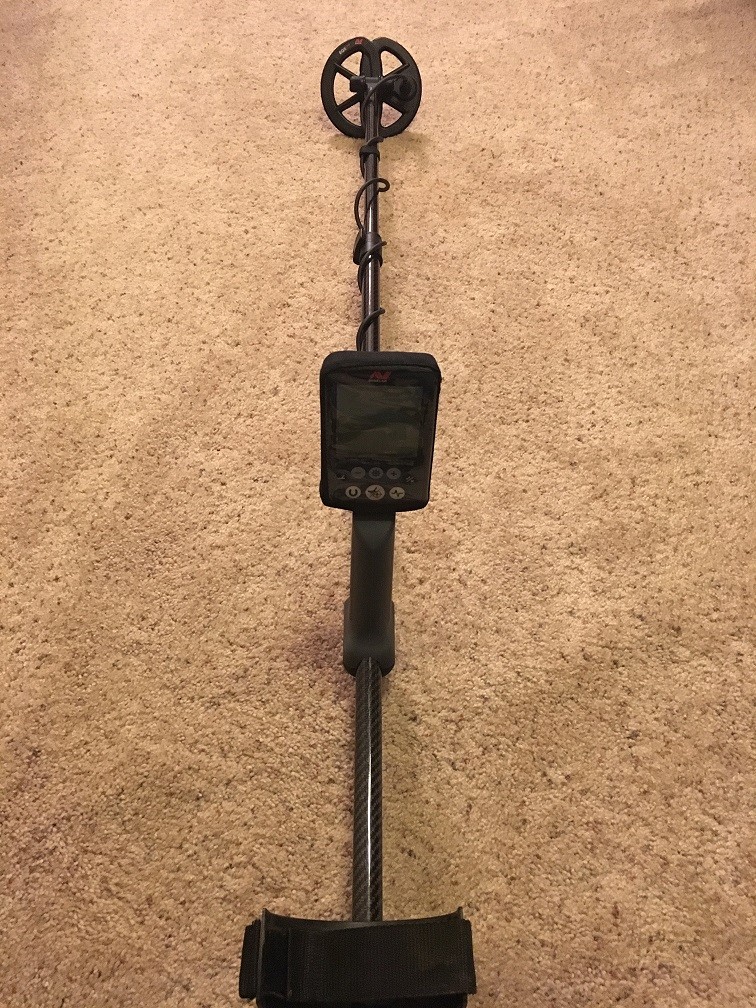
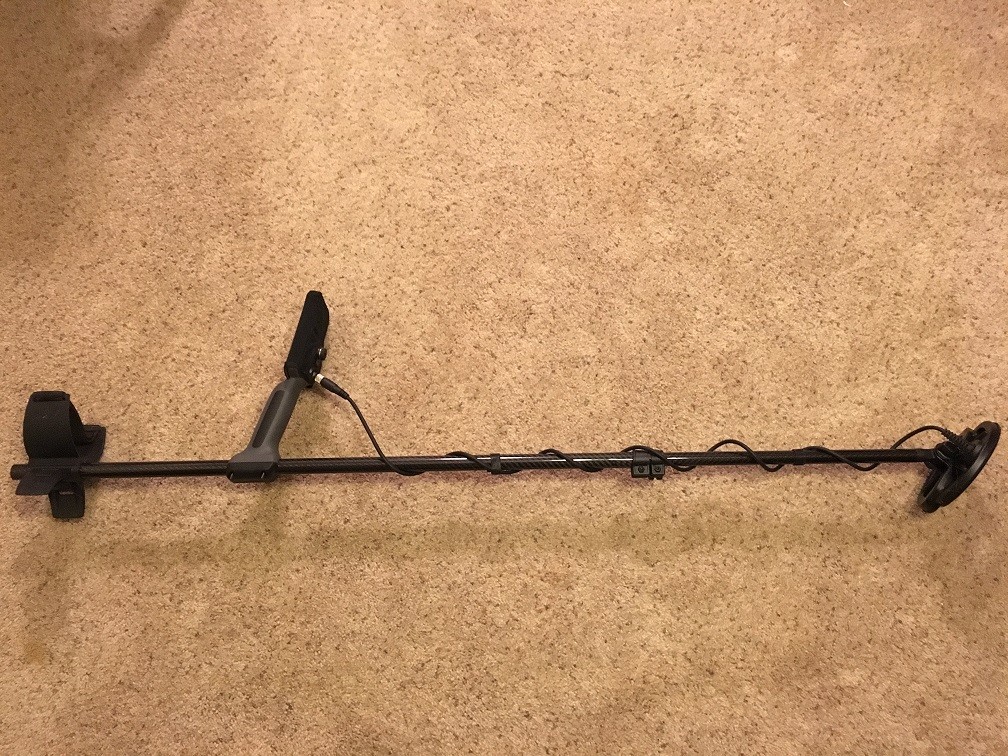
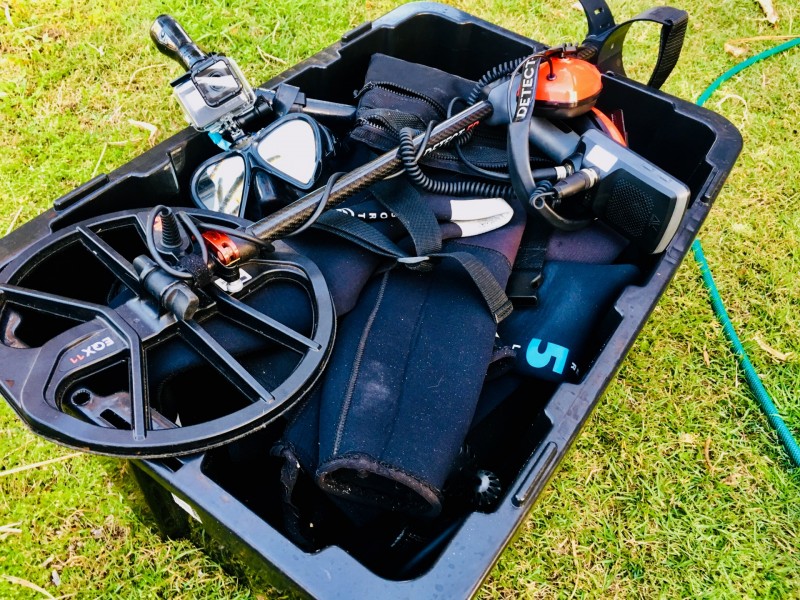
I just got my 6” coil, and a dedicated lower rod is on the way. To make on-site coil changes fast and easy I came up with the following system. Each lower rod and coil have the cord fastened near the bottom with just enough slack to flip the coil flat for my carry bag. Then I made the straps shown with adhesive backed Velcro from the $ store. The soft part goes around the middle rod by it’s adhesive backing. But then it extends 2” and the hard part of the Velcro goes on the sticky side of it so one side is hook Velcro and the other side is loop Velcro and then it is trimmed narrower with scissors. I have one of these on either side of the folding mechanism I installed on my box shaft. What saves time in the field is that these straps stay on during coil change and securely fasten the coil wire. Also, in my case with the folding shaft I used zip ties to make a loop in each coils cord to go where the folding mechanism is where the cord never interferes with the folding or unfolding of the shaft. I will keep the other coil in my detector bag so I can change the coil during a detecting outing it the situation warrants it. No big deal but easy enough that others may consider doing this method of strapping. A

-
Anyone bought the carbon fiber rods for a GPX? Wondering if its worth it and how fragile they are.
-
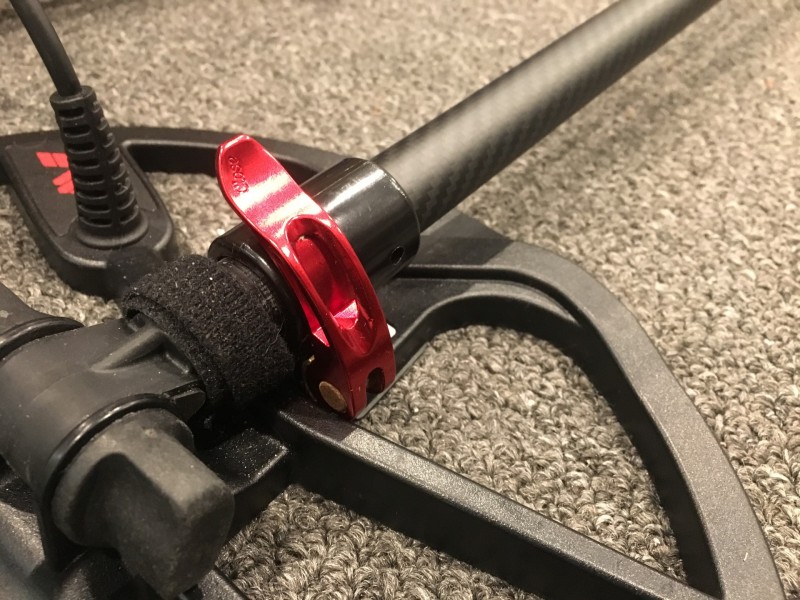
Hi all! I've been talking about this for so long, that I figure some of you may have wondered if it was ever actually going to happen, BUT... I am happy to announce that parts for one of the two prototype Equinox complete shafts arrived today, and I finished assembly. I am VERY pleased with the quality of the parts -- especially the clamping cam lock, which was a large portion of the focus for the design. I have done a small amount of testing/evaluation, and I am happy to say at this point that the strength/security of the clamp is impressive, and meets the design intent. Overall, I see nothing about the shaft that needs to be changed/tweaked at this point. I plan to build the second prototype when parts arrive for it on Tuesday, and then will do more testing and evaluation of both shafts. Soon thereafter, I expect to place a "first order" for parts, so that I can begin offering them for sale. Here are a few pictures... Thanks! Steve

-
Complete Carbon-fiber Shaft System For The Equinox...
steveg posted a topic in Minelab Equinox Forum
Hi all; Just wanted to give a heads-up that while lower rod sales continue at a brisk pace, I'm also nearing completion on the design of the complete carbon-fiber shaft system (that I've hinted about before). I will have two prototypes (using two similar, but slightly different clamping cam-lock systems) built in about 2 weeks (parts are in production now), and then, after some final testing, I'll be ready to ramp up to production mode. I think these will be really nice shafts; my main focus over the past couple of months has been the cam lock system -- specifically the strength/security/stability of the cam lock. The goals are two-fold -- 1.) to eliminate ALL wobble issues experienced by some users with the factory shaft, and 2.) to HOPEFULLY eliminate the spring button/button hole design. While I will continue to offer my lower shafts WITH the spring button (so that my lower rods will remain compatible with Minelab's middle shaft), my expectation is that the clamping cam locks on my shaft will meet the design spec for strength/stability -- which would mean NO BUTTON HOLES REQUIRED in the shaft. The intent of the design has been with an eye toward the final result being somewhat akin to the CTX 3030 type of shaft -- i.e. a secure cam lock, permitting "universal" adjustment lengths for the lower rod. Anyway, I expect to have these shafts ready soon; shortly thereafter, I expect to have a rather unique counter-balancing system available as an optional add-on accessary, to achieve perfect balance for the machine (through the availability of several different weights, each one appropriate for each of the different coils, and for different lower rod adjustment lengths). Finally, a custom arm cuff may also be an optional add-on accessory in the not-too-distant future. I'll offer more information later -- and I also have a more detailed post up on my Facebook page at https://www.facebook.com/stevesdetectorrods if anyone wants more information. Thanks! Steve -
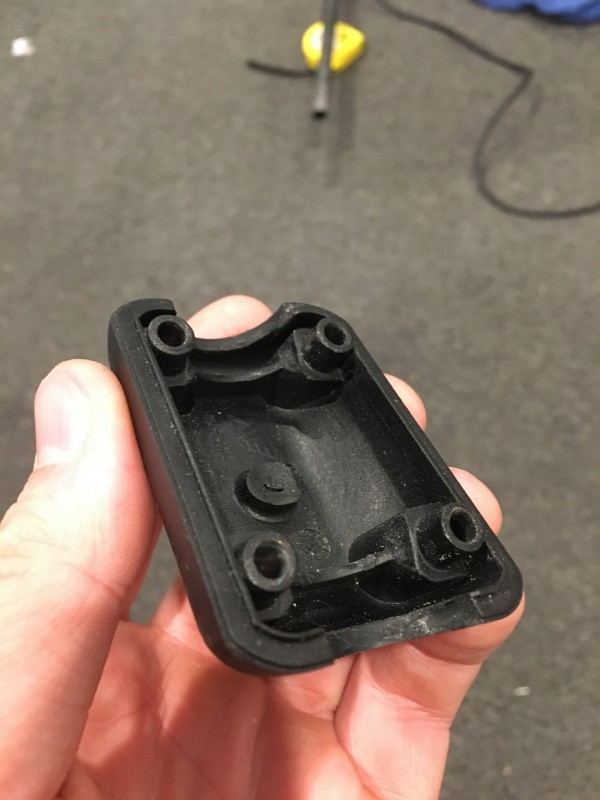
Well i wondered when this would happen. Ive got at least 700 hours on my Nox ... but this morning in shallow water she let me down. Top part of the cuff broke off. The cuffs are really to far apart and with the torques we put on them back and forth you may consider a metal one a better choice if you water hunt. Kind of bad, i wanted to hunt with a couple of people from a few hours away who came for a few day and hadnt been able to because of the less that great weather. So about an hour into it........ ugh. But i kept pushing it along...... in the wet sand. At least i got a 1.4 gram 18K (750) necklace charm for all that work lol. Got home and called Jamie at ML........ new one coming Monday. How bout that for FAST? Thanks ML. At least there were finally some trash to at least chase around so ...... road trip again tomorrow. Like most of us ive got a few cuffs laying around.

- 19 replies
-
- 6
-

-

-
- minelab equinox
- problems
- (and 1 more)
-
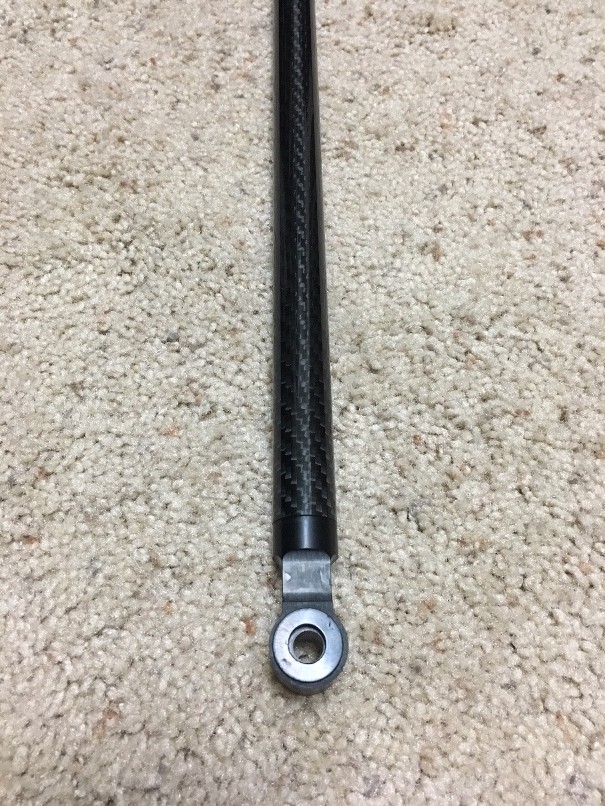
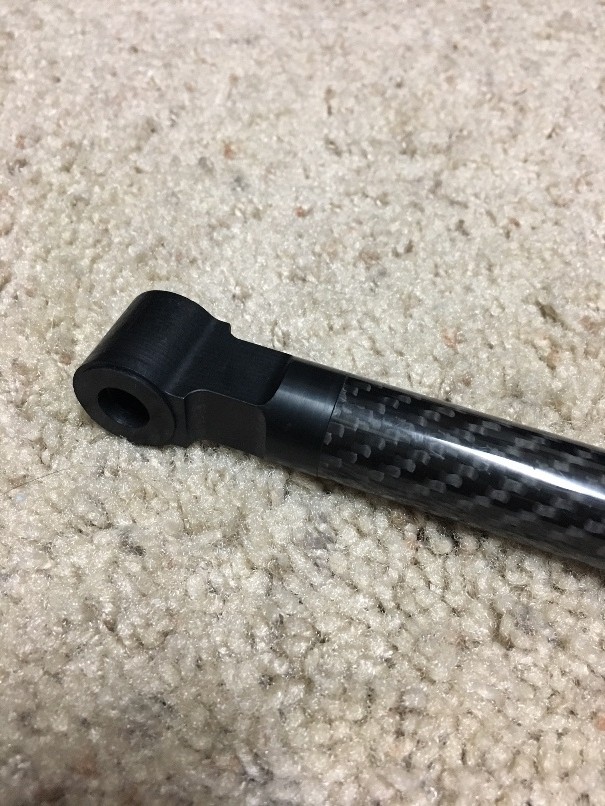
Hi all; As some of you may know, I've been producing lower rods for the CTX 3030 for about 8 months now, selling them through the forums and my website (www.stevesdetectorrods.com) to a number of satisfied customers. Along the way, I've had several inquiries regarding whether I could build Equinox rods. My answer was always "no," as a major stumbling block was that piece that fits onto the "coil end" of the rod, i.e. the piece to which the coil attaches -- the "yoke," or "clevis," as I call it. Well, with requests for me to build Equinox lower rods so frequent that eventually I couldn't ignore it any longer, I set my mind on working on a design for that clevis/yoke piece. Once I came up with a working design idea, I submitted engineering drawings of my design to the machining/fabrication company that supplies my CTX rod parts, and asked if they could build me a prototype. Meanwhile, I ordered a carbon-fiber tube from my tube supplier, in the precise diameter to fit inside the Minelab Equinox middle rod, and also some washers specific to my yoke/clevis design. The tube and washers arrived recently, and just today, the yoke/clevis was delivered. I'm pleased to say that it turned out perfectly! All the dimensions are correct/exacting, and I "test fit" the parts with success -- please see the pictures below. The only parts I'm still waiting on are the push-button "spring clip" for the upper end of the rod, and a specialized drill bit for drilling the hole for the spring clip. Those will be here soon -- and at that point my "proof-of-concept" prototype rod will be ready for me to use! MEANWHILE, given the successful prototype, I am ordering parts tomorrow to make a first batch of 20 Equinox lower rods. As I said above, these rods are designed to fit seamlessly into the Minelab EQX middle rod -- exactly as the Minelab stock lower rod does. I plan to build them the same length as the Minelab lower rod as "standard practice," but can also build them to whatever length desired. I expect to have the first batch of rods available for sale in roughly 4 weeks. Tentatively, I expect pricing to be roughly $60 plus shipping -- but will know for sure once I place that first "bulk" order of carbon fiber tubes and yoke/clevis pieces. If you have any interest one of these lower rods, please let me know, and I'll be sure to have one available for you. THANKS! Steve


-
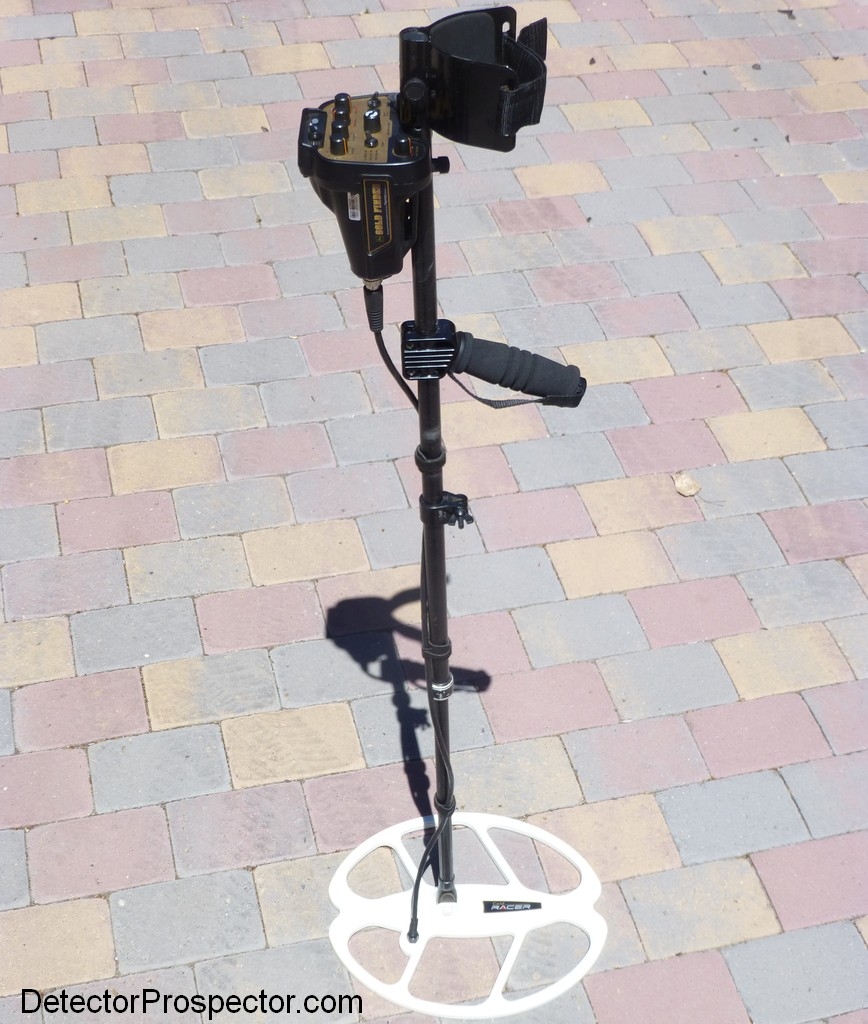
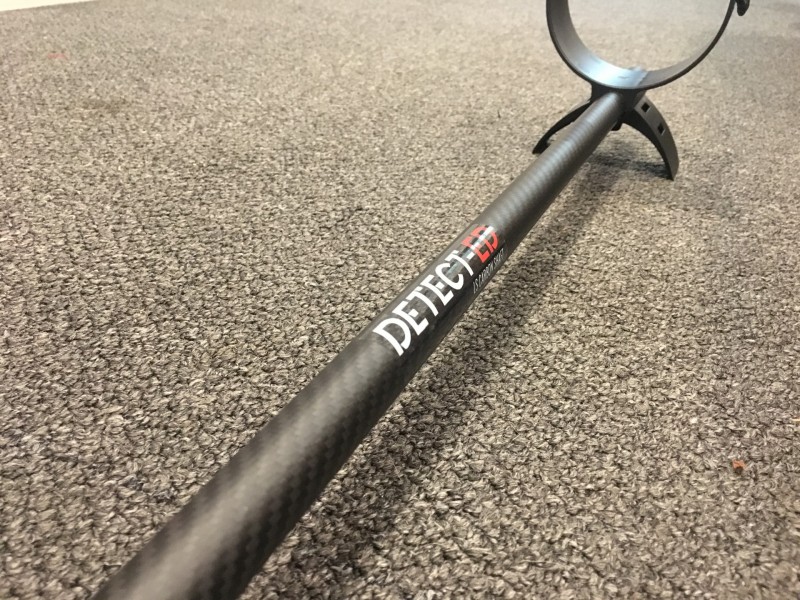
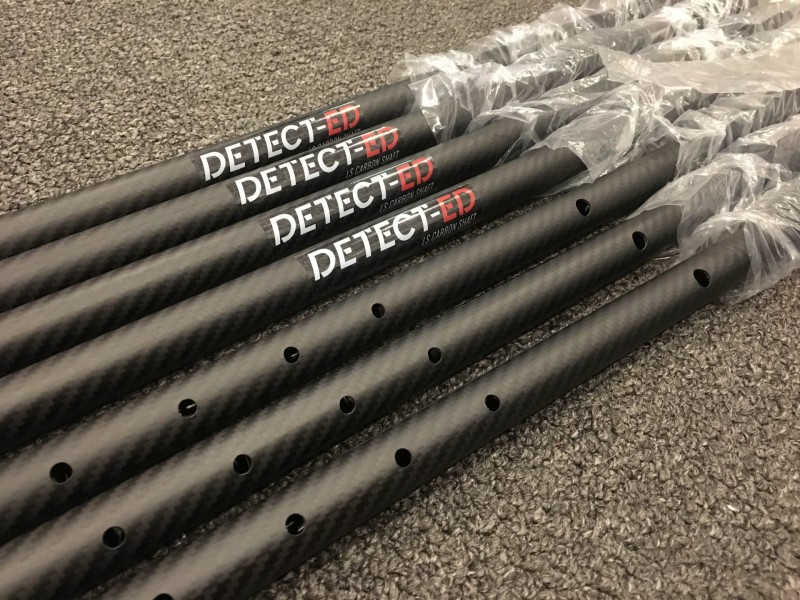
What do you guys think about these? I made them initially because it’s what I need but... I’ve got a small batch of Carbon shafts for the Minelab Equinox that are perfect for shortening your detector right up for transport or water type detecting, for a fully collapsed detector you’ll have shave down or melt the small plastic locating pin on the handle clamp to let the inner shaft come in and get the last 100mm of retraction. They look superb, have no wobble or slop and are a lot lighter than the stock shaft (110g vs 186g) Even when fully collapsed and the aluminium clamp Is within the coils proximity it has no effect on detection depth, sensitivity or ID surprisingly. Taking PRE-ORDERS for a discounted price of AUD$75.00 ~USD$54.00 They are very limited so definitely be quick as most are already gone! http://www.detect-Ed.com All comments welcome ? Cheers! Ed

-

Gold Monster / Golden Mask Rod Adaptation
Steve Herschbach posted a topic in Minelab Metal Detectors
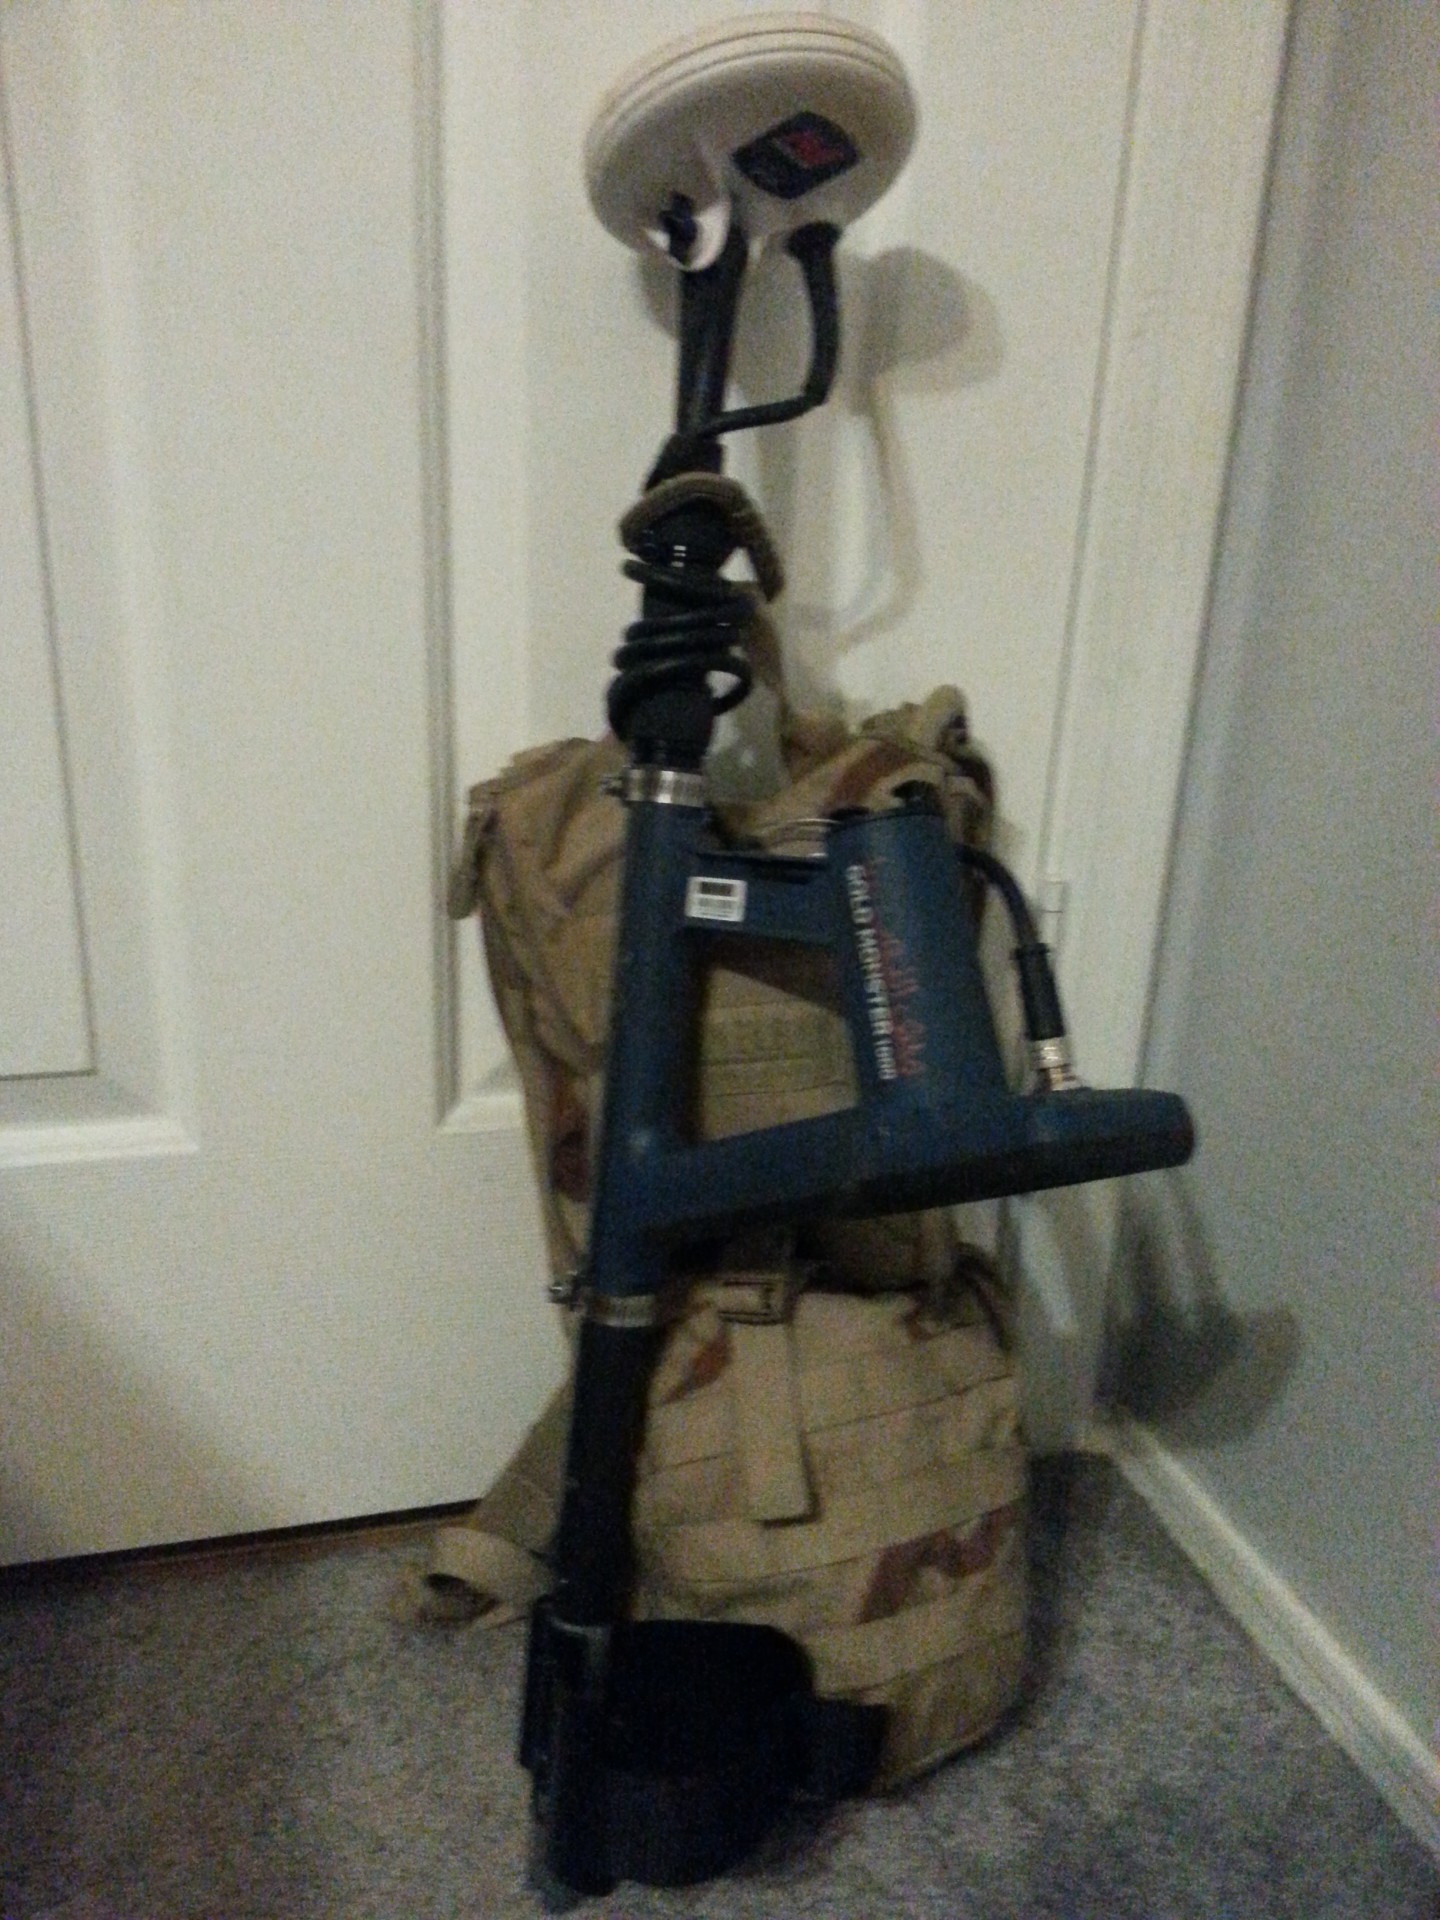
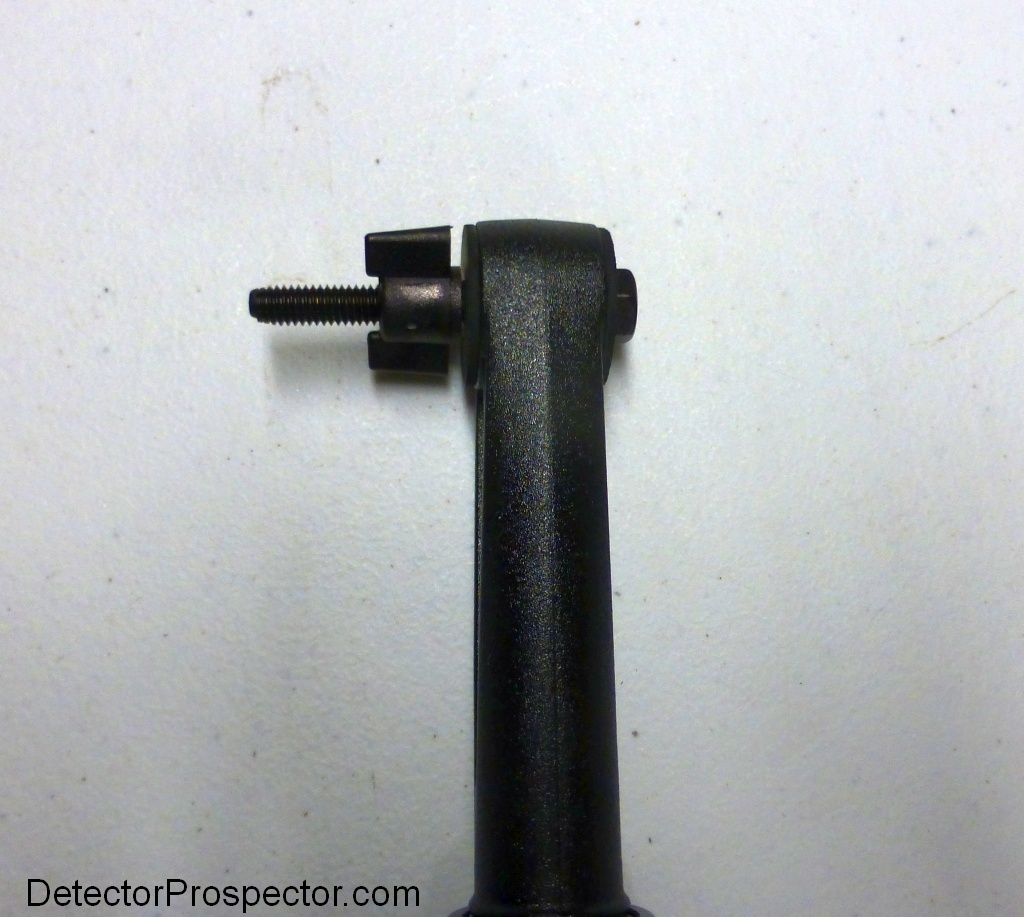
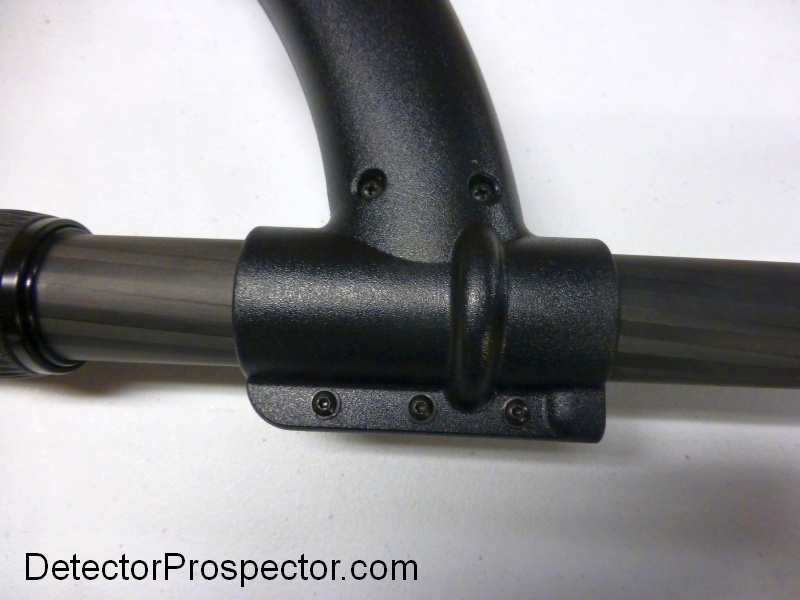
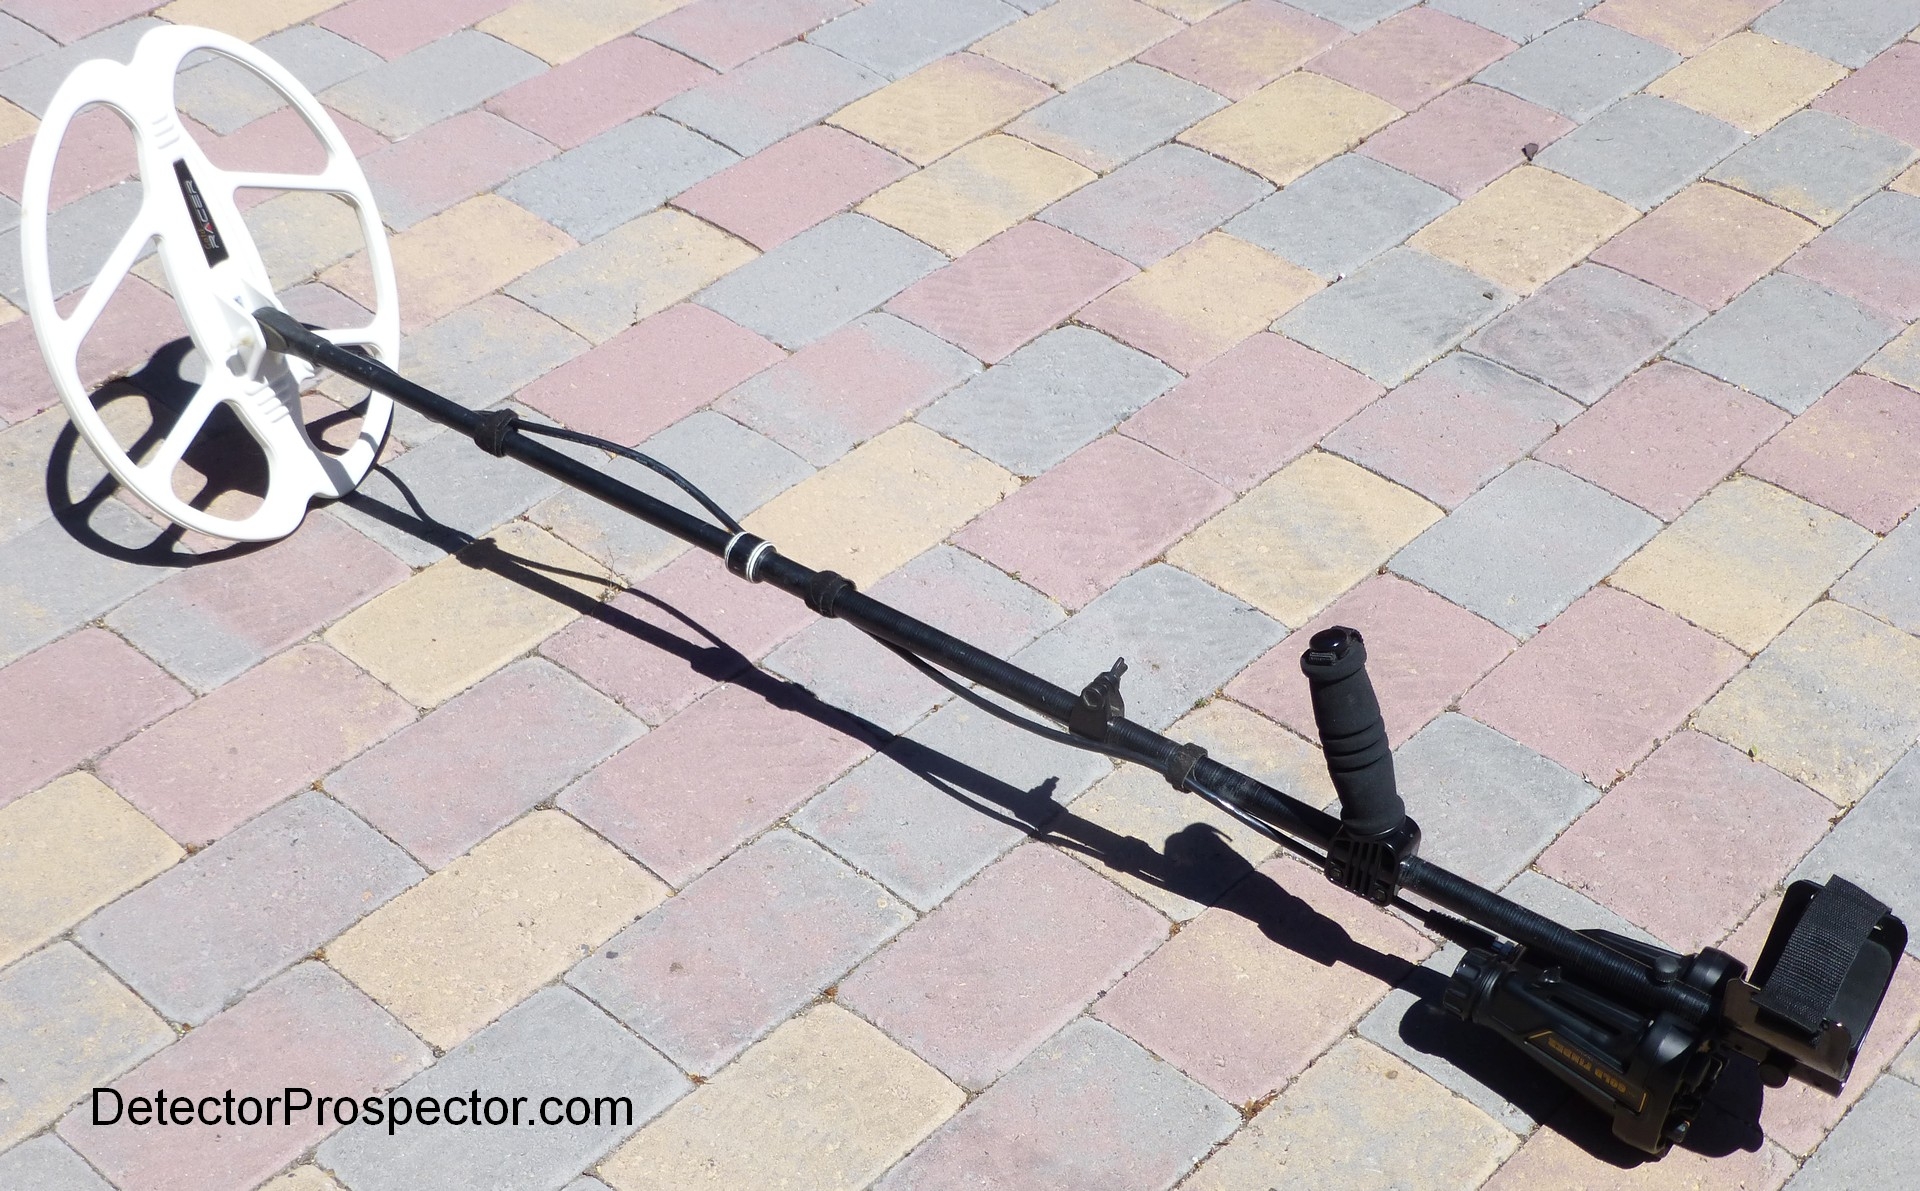
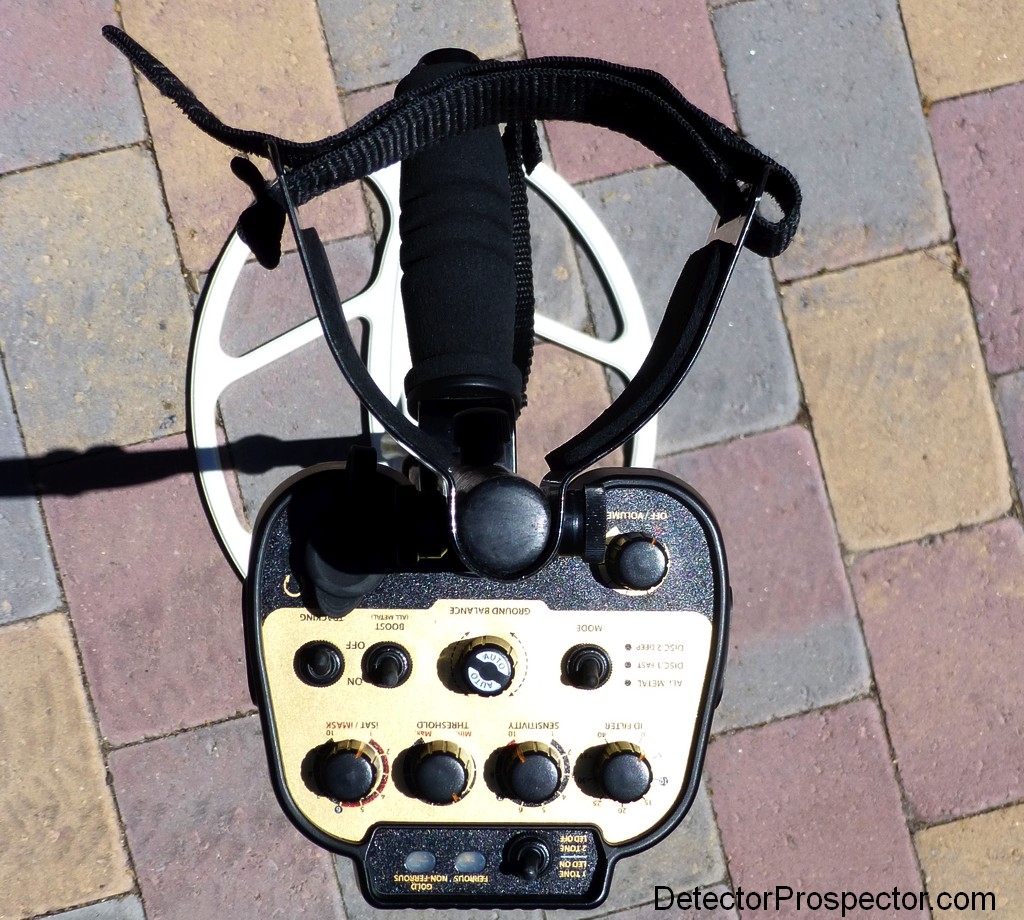
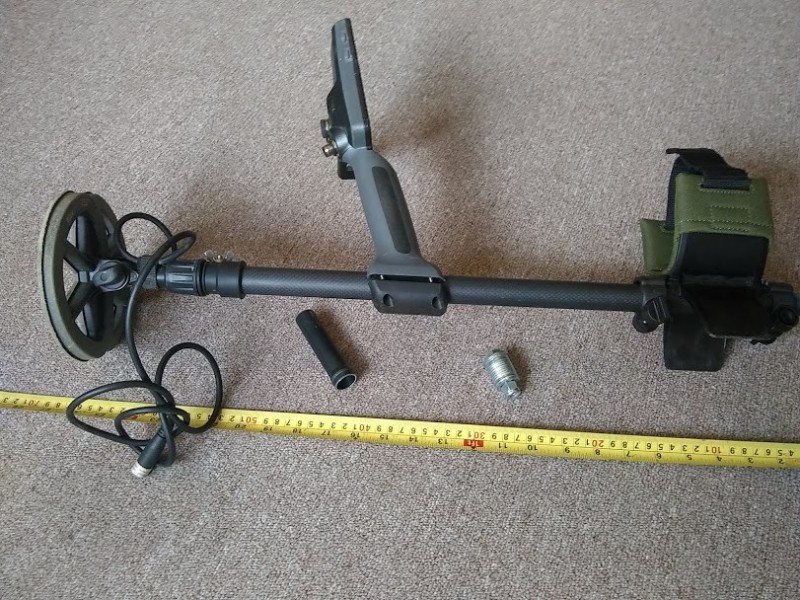
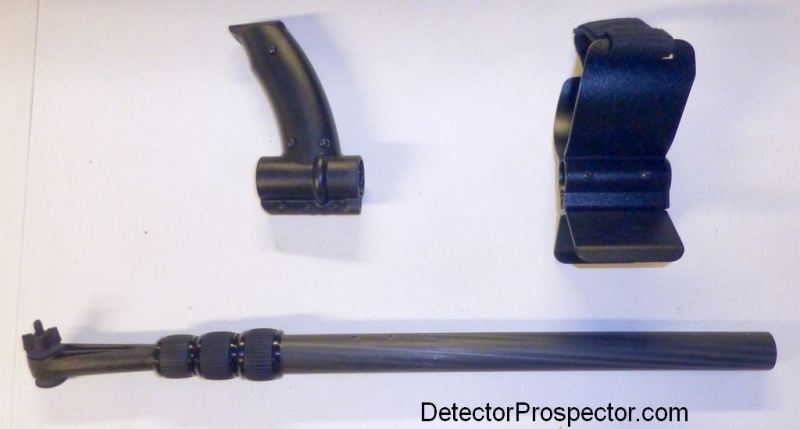
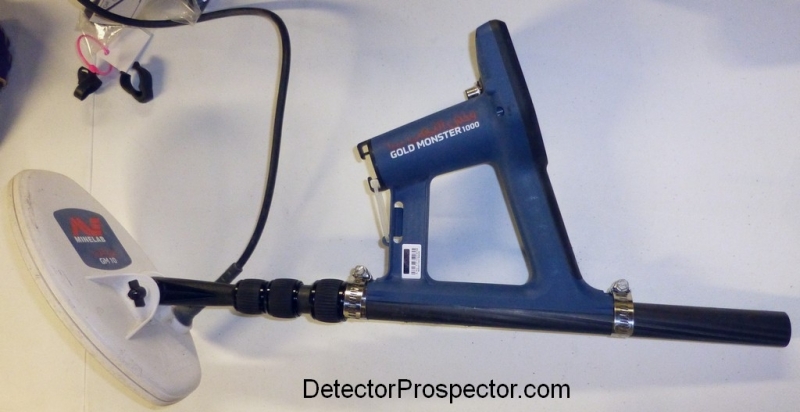
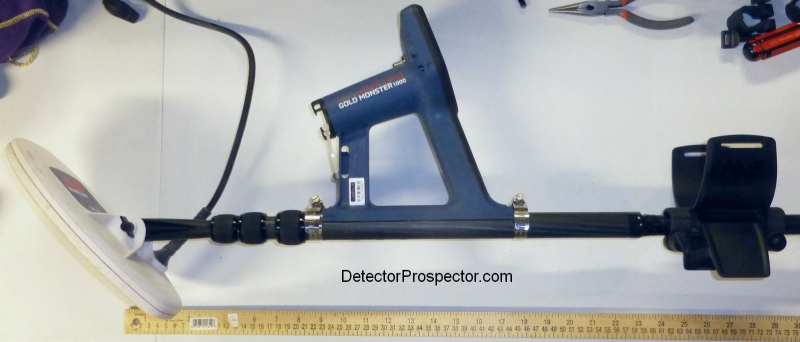
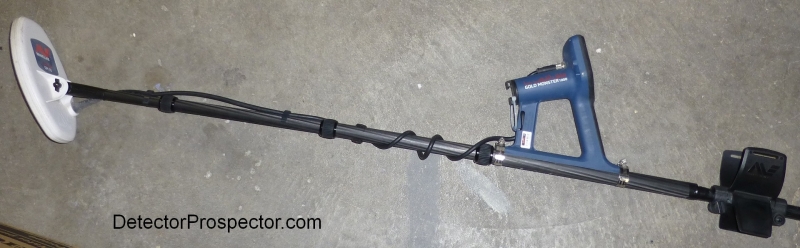
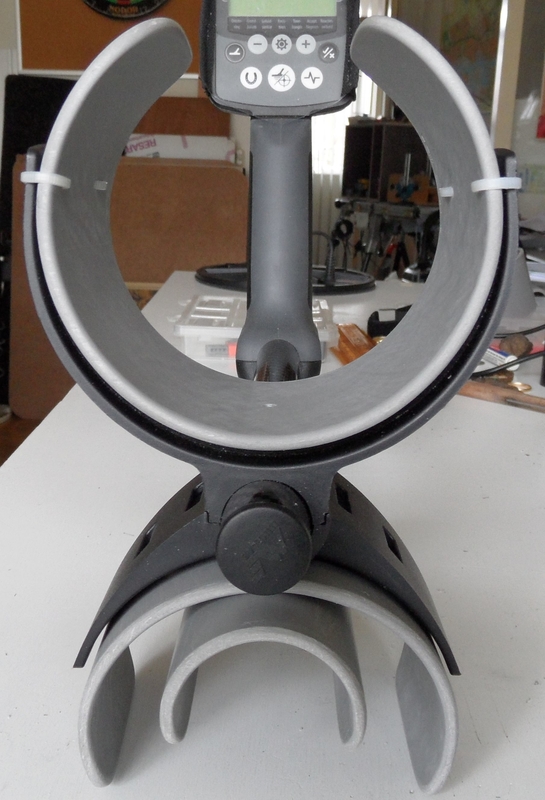
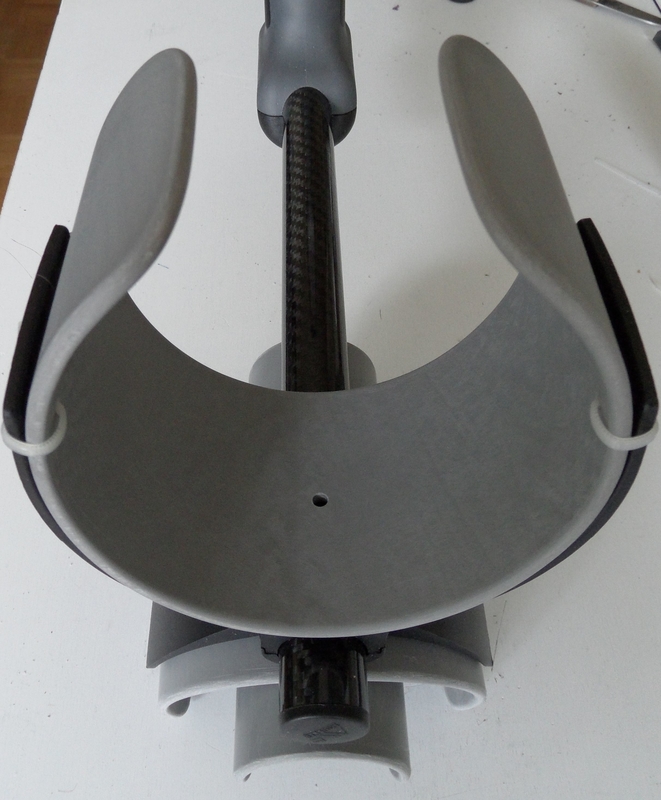
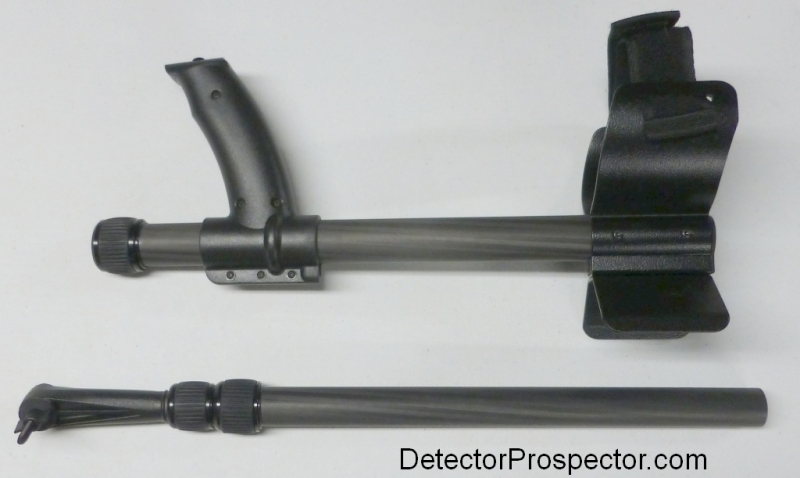
I purchased a Golden Mask telescoping rod with the intent of using it for my Deus HF elliptical coil. XP placing the battery in the trapezoidal lower rod section however made an adaptation more trouble than it is worth for something I am not sure I will keep anyway. I decided to repurpose it instead to the Minelab Gold Monster 1000 in an attempt to make it as easy as possible to collapse down and put in a rucksack. The arm cup removal is easy. Just remove the bolts. The grip/handle however is both screwed together and glued. Have to give them credit - beautifully made rod assembly. Some heat from a hair dryer and careful prying got the grip assembly off the rod. The upper rod is thicker than the standard rod diameter and so the neat little clamps Minelab includes with the GM1000 will not work. Instead standard hose clamps will serve until I get some that fit better. The upper rod is not quite long enough to get the proper spacing for the armrest, so this is a mockup until I find a short piece of rod the correct diameter to install in the upper rod for a little extra length. Roughly 30" long when collapsed. The coil needed to be shimmed with an extra rubber washer. I used the skinny little Golden Mask plastic bolt but will drill the isolator rod out to accommodate the Minelab bolt later. Near final product, with way more length fully extended than I need at my height of 5'11" but that is good for working overhead cut banks and poking around in the brush. Click all photos for larger versions. Once I get the rough edges finished this will be a sweet little backpacker unit.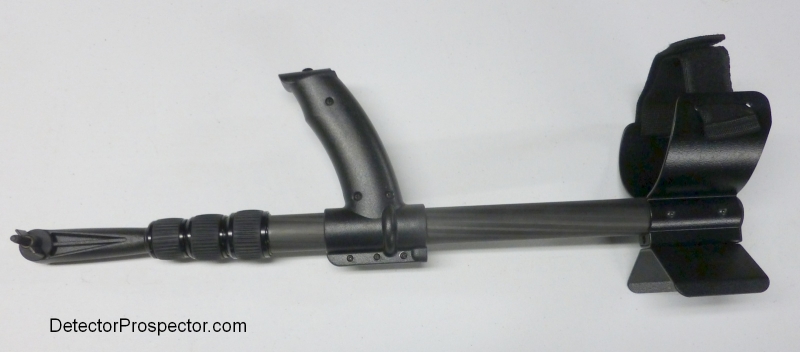
-
 Dear Valued Members, We got requests from customers for longer shafts for our devices. Please note that we are now adding a longer middle shaft to our accessories line up that will be compatible with the Fors / Racer and Kruzer series. The length of the shaft is 4 inches longer than the standard one included in the packages. We hope this will satisfy the need of taller customers who have been asking for this. The part number and pricing will be sent out to dealers tomorrow. We apologize that it took us long to take action on this. As a matter of fact, all your requests / demands that we believe we can accomodate always stay in my notes but as you can understand, some things take priority over others as the resources are not unlimited for any company. Thank you! New longer middle rod for Makro Racer, Kruzer, and Nokta FORS metal detectors
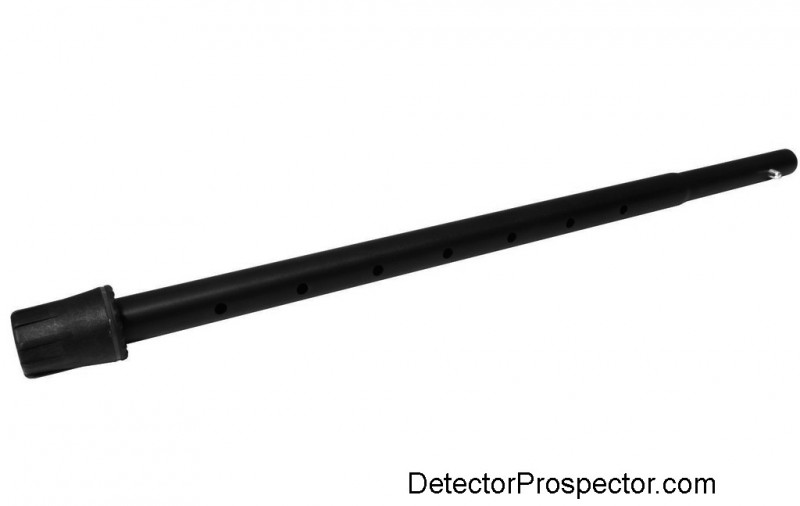
-
- 1
-
-
- makro racer
- rods shafts hardware
- (and 1 more)
-
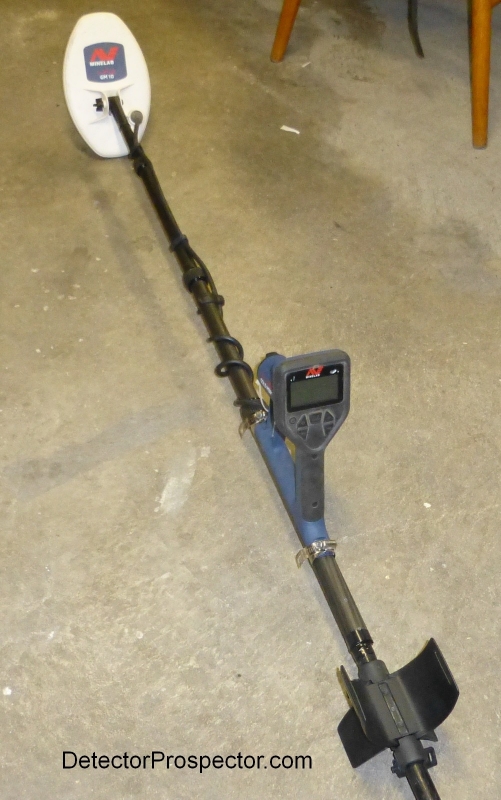
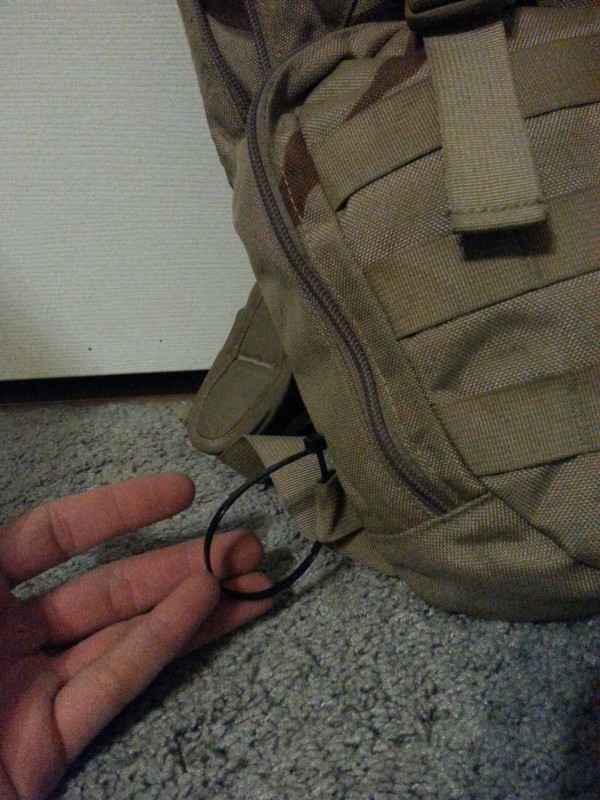
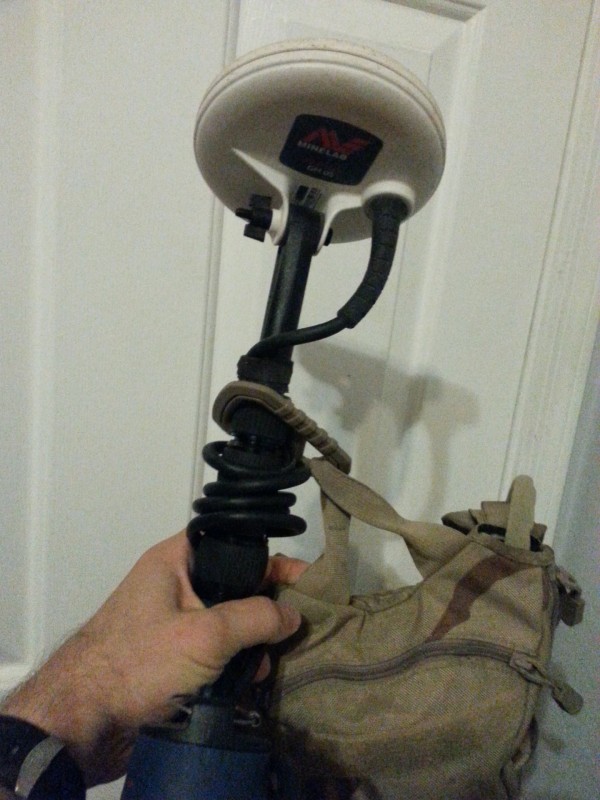
All - I thought I would share an idea on carrying your gold monster. This is more for those of you that hike very far before you are ready to detect, or maybe you already have your hands full with another detector like a GPX or GPZ. It is not an original idea but one I saw recently for carry spare fishing poles. I recently tried it on a night hunt and really liked how it handled. It allowed me to use my GPZ and then switch to my GM1000 when I hit the bedrock. A major caveat is that I have converted my GPZ to telescoping rods, but I think the idea might still be useful for some people. For starters, this is for people who have made their own stand with PVC pipe fittings. you simply remove the elbow at the end of the stand so that you have a straight piece at the end. This is key, because the first contact point is low on your Camelpak (or other backpack). For this low contact point, you need a zip tie or similar method to make a loop. This is where you put the pole end of the GM1000, then you swing it over your shoulder and hook it to a caribiner that is latched to a high point of the backpack, typically the carrying handle. I used a caribiner but you could sew a velcro loop on there with back pack clips. There are many ways of doing this. Whichever way you choose, don't forget to bring the stand with you. ?

-
I dont know if this has been posted before - I just found a minelab sub-website, which lists some service parts and their numbers for various minelab machines including the equinox: http://parts.minelab.com/default.asp Equinox 800: http://parts.minelab.com/category-s/256.htm
-
A friend of mine got the Anderson shaft for his Nox, put it together, and when he has the coil on the ground and turns his wrist left and right, while holding the handle, the upper rod twist with his hand movements while the coil stays flat on the ground. Is this normal? Or, should the coil be lifted a bit depending on which way his wrist is turning? I hope I'm explaining this well enough to be understood. Thanks for any info you may have.
-
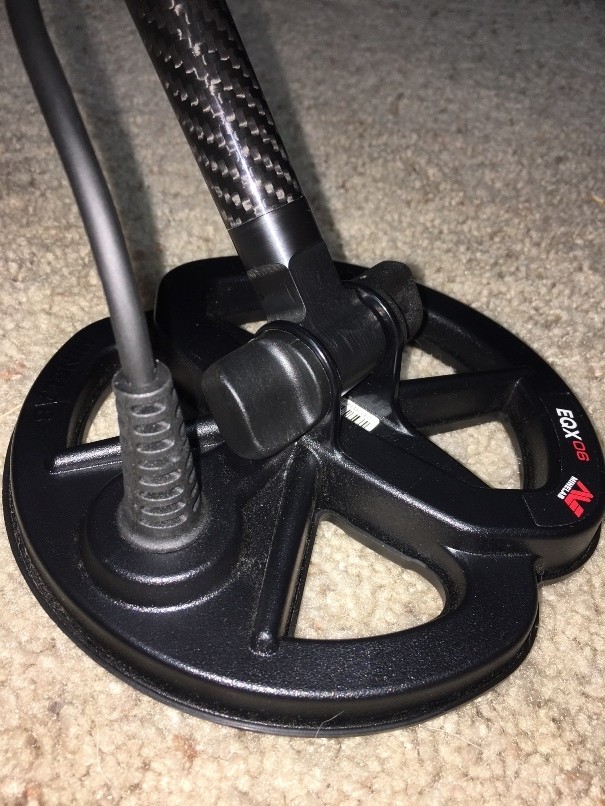
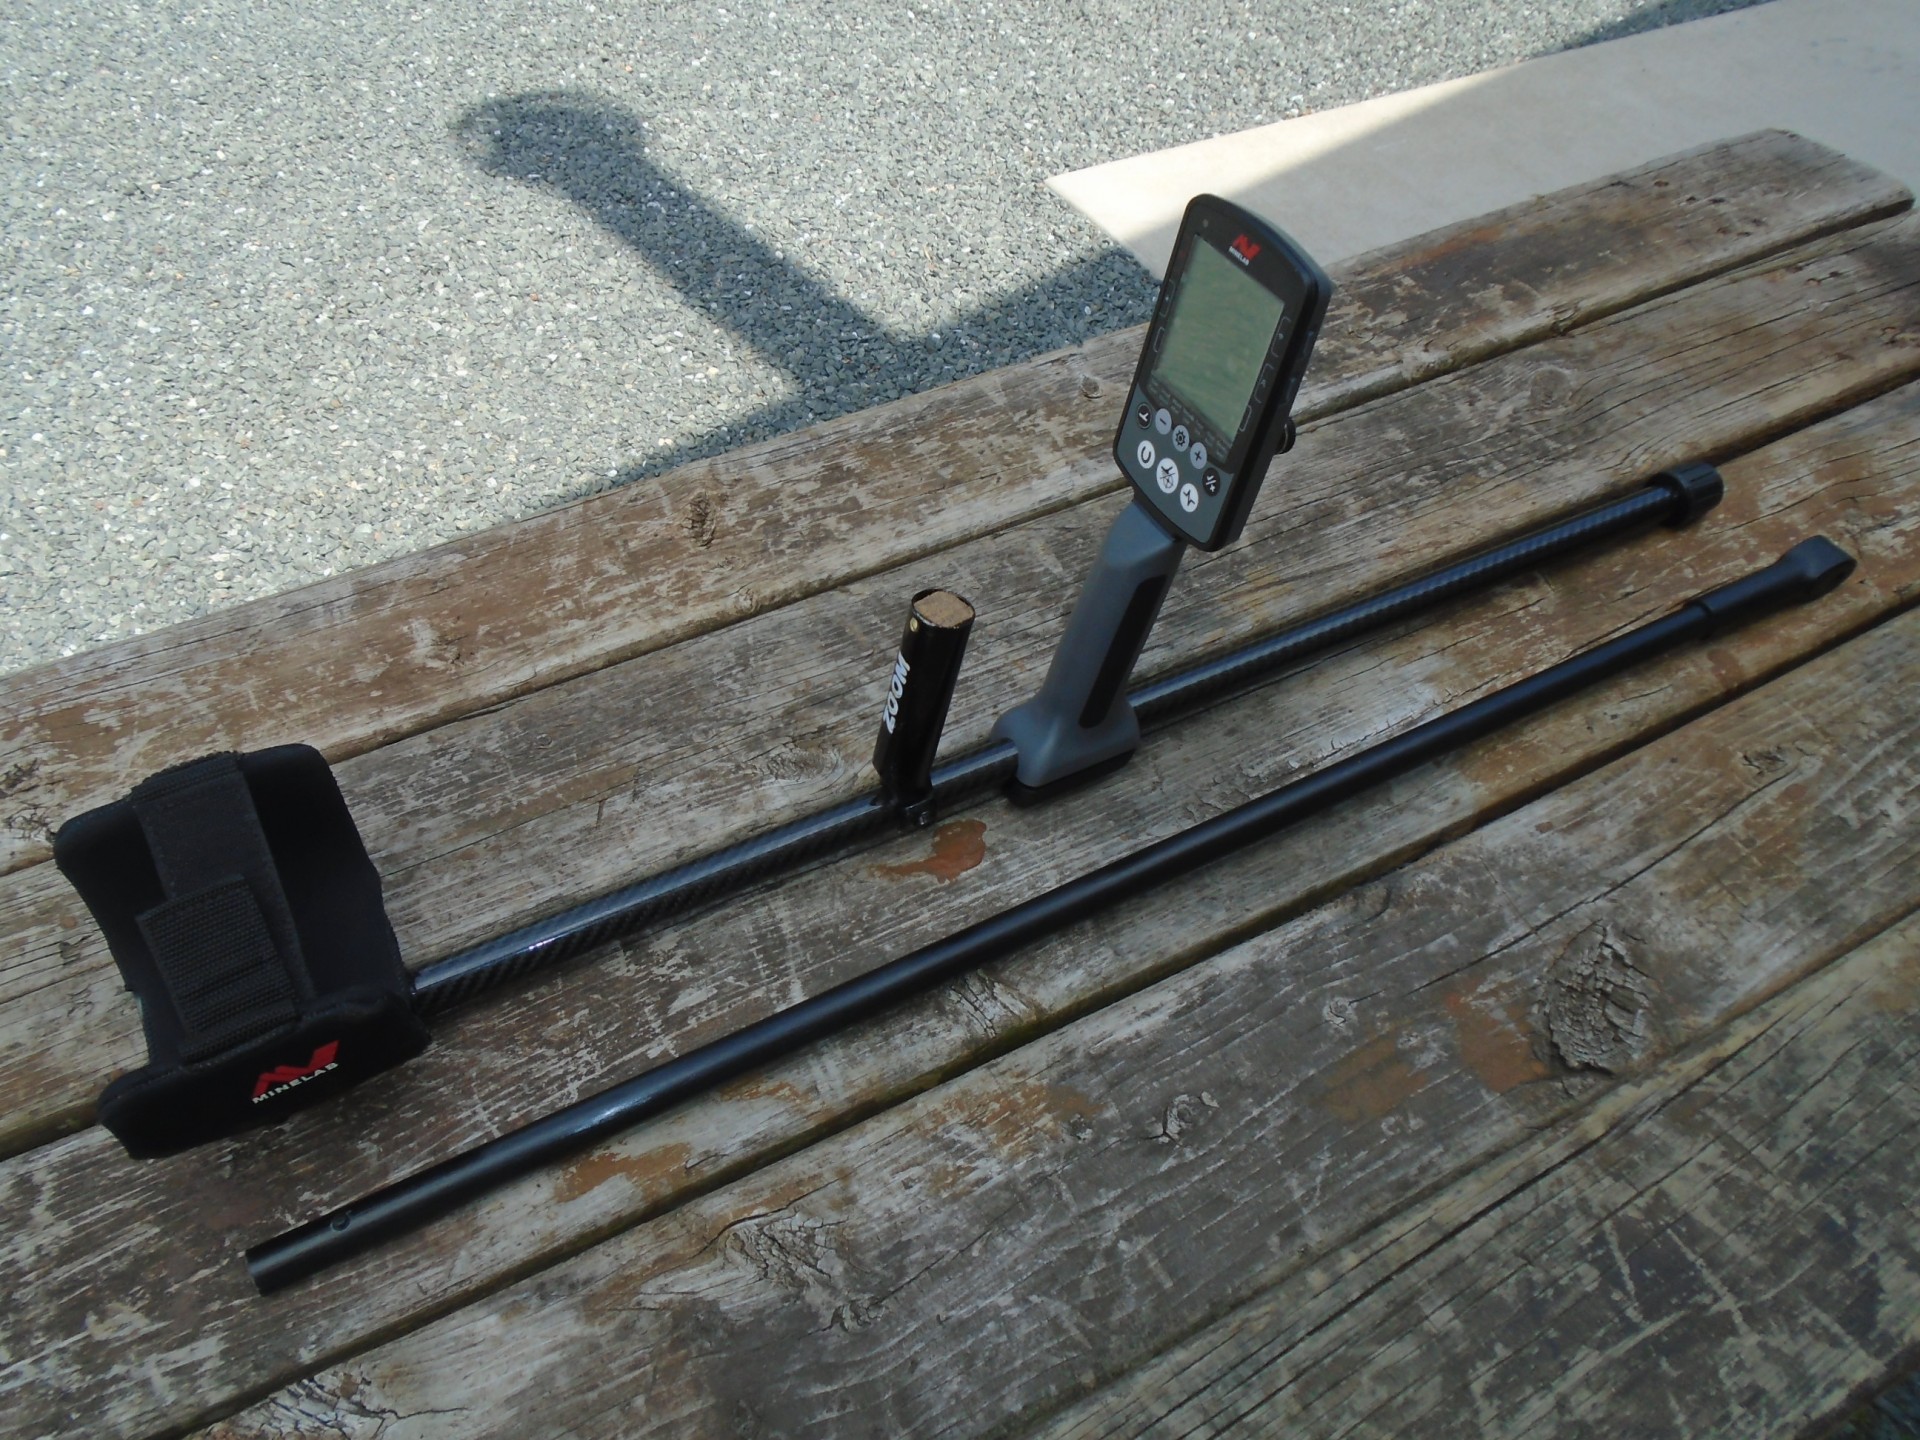
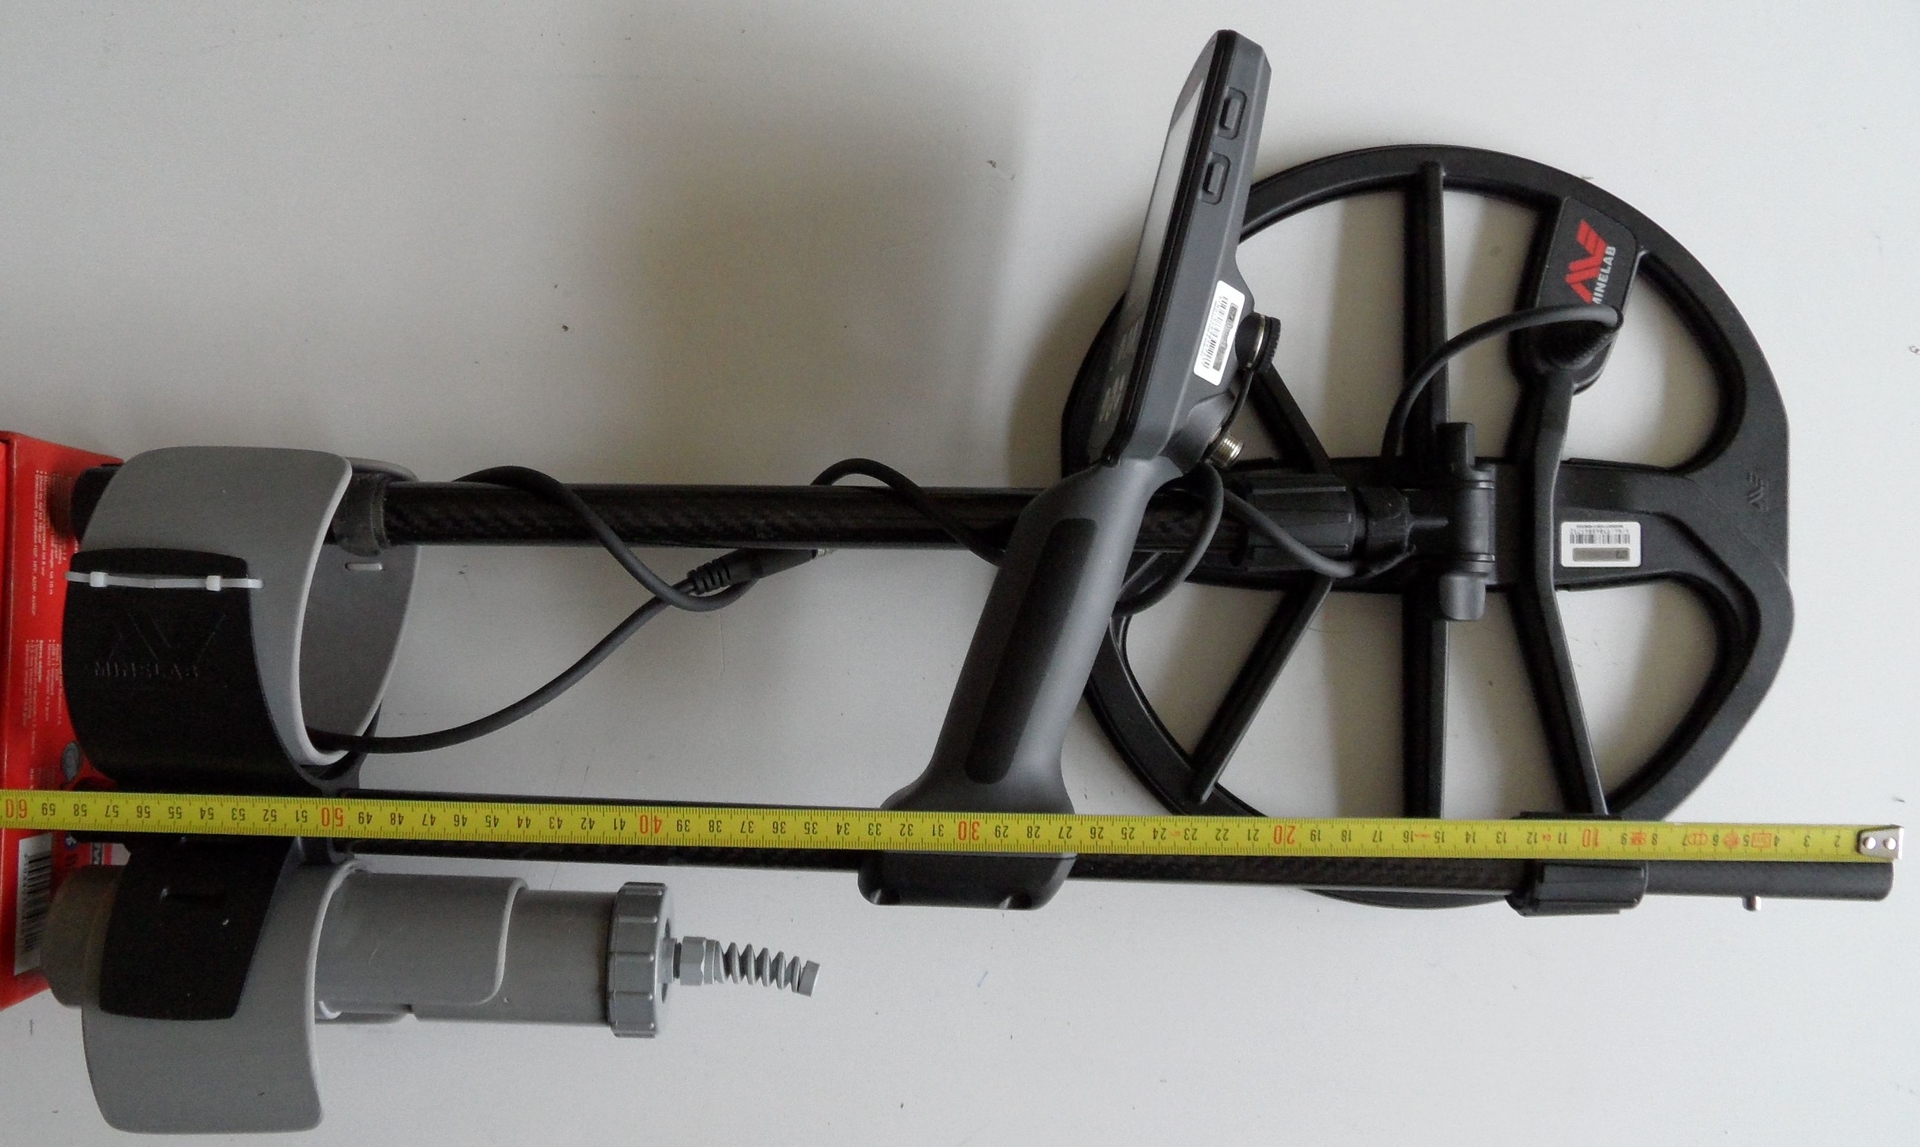
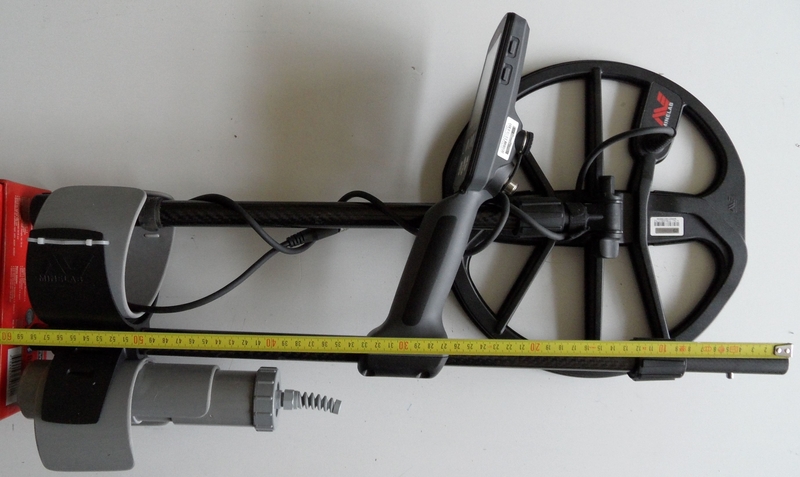
I was looking for an option to do away with the 3 piece Minelab system. I came across the rods Doc makes for the gold hunters. I might be the first one shipped to use on the Nox. I like the stuff gold guys have, they swing big coils and are in tough conditions. This is a good price point on this 2 piece system. Also great for tall persons. I am splitting with someone but for $230 we received two fiberglass lowers and a carbon fiber upper each for a unit cost of $115. Be aware this is for the rods only. I have added pictures and in the pictures you can see I have added my own Minelab two piece alum. cuff with neoprene covering [i think one of the best cuffs made]. I have also added a separate hand hold and will not use the detector itself to swing the rod. There are no holes for the Nox arm cuff or control unit you will need to drill for these. Dave
-
Decided to mod the 800 rod by switching out the straight middle rod to the White's S rod. I know a lot of folks like a straight rod but by switching it out, it eliminates the detector's handgrip from wanting to twist at the end of each swing. In a side by side comparison, both myself and a buddy with an 800 both like the feel of the modified version. The mod requires the middle rod from a White's DFX, or MXT. The rod needs to be drilled on the upper top end for the spring plunger and again adjustment holes need to be drilled on the bottom for length adjustment. The Lower rod from a Makro Racer or Kruzer is used as the lower rod from the Nox is larger in diameter. The top of the S rod also needs to be shimmed about .040" in diameter to fit snug into the Nox upper rod. Now it swings about as close to an F75 as you can get.
-
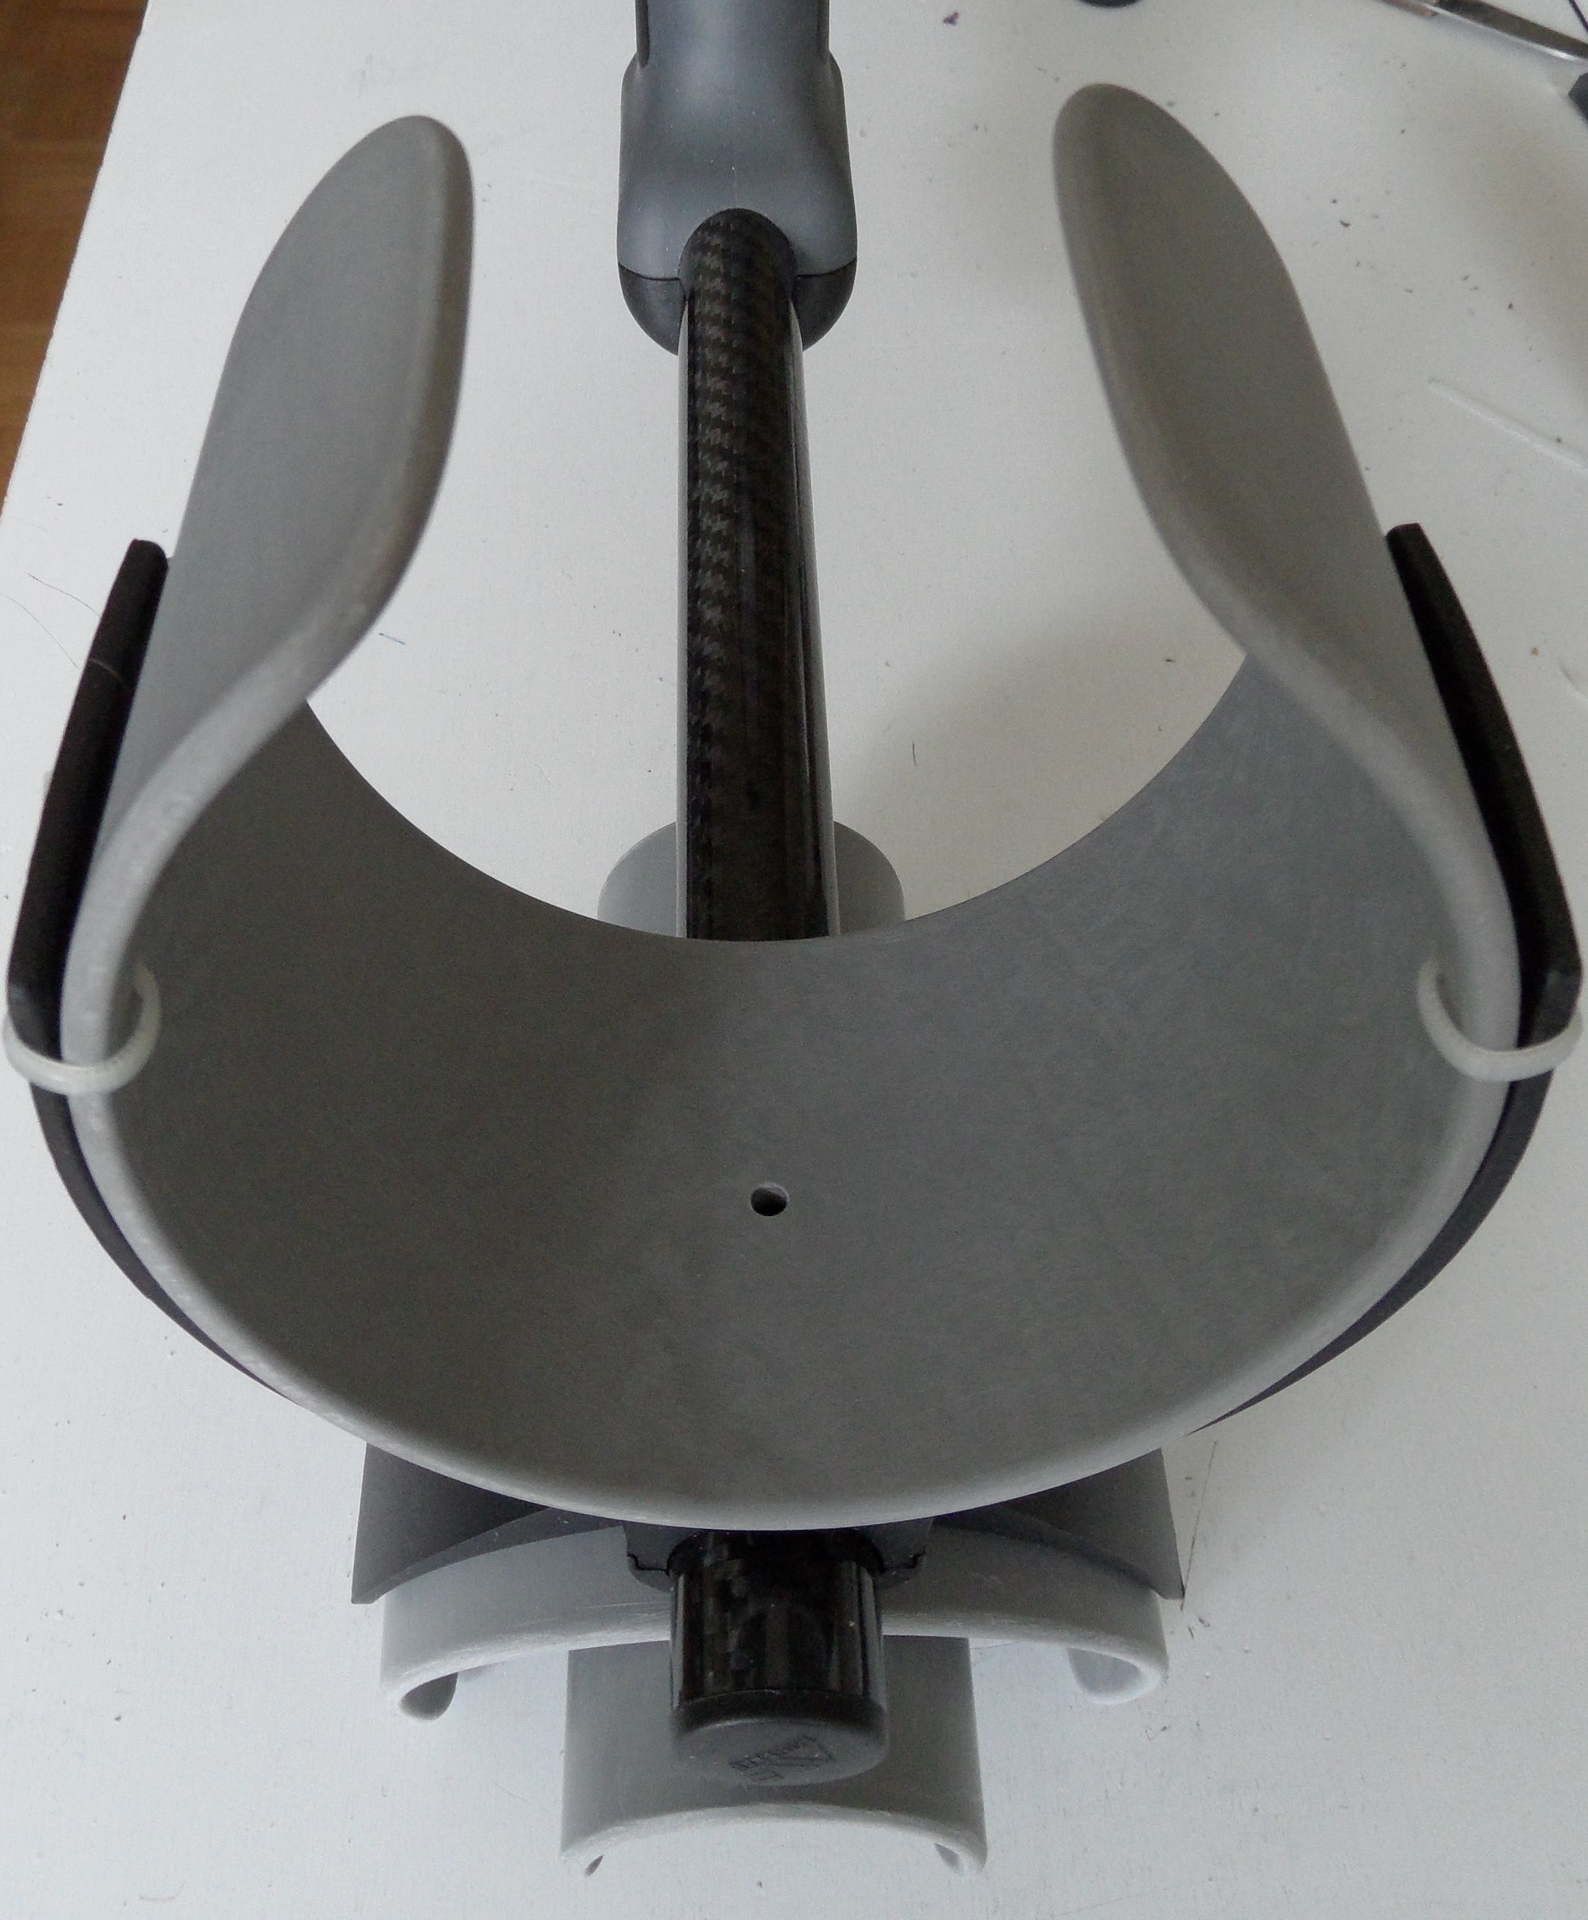
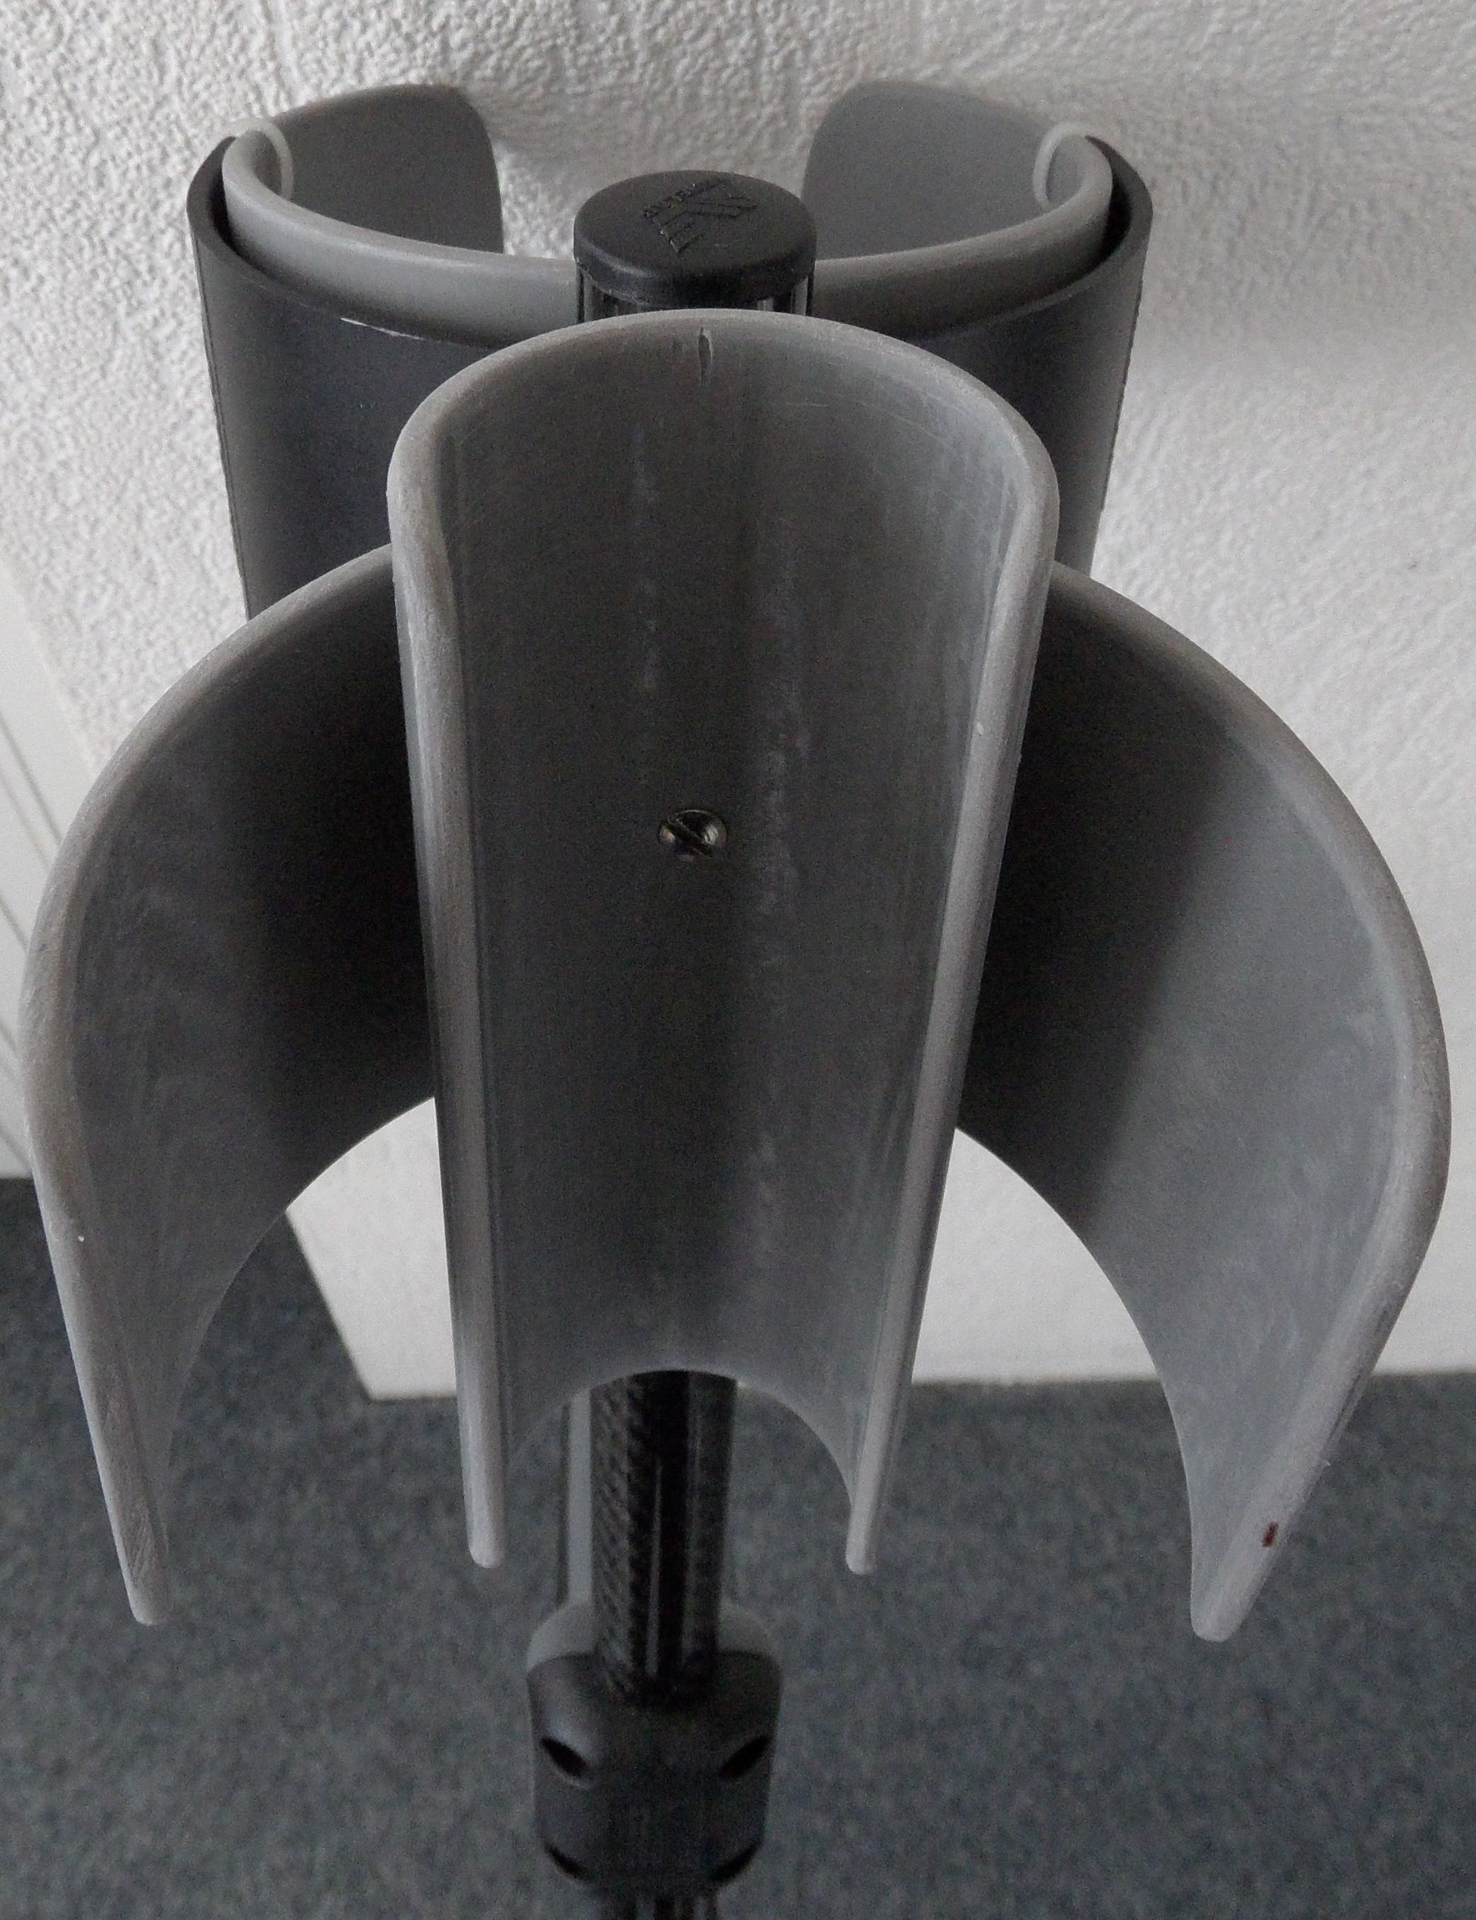
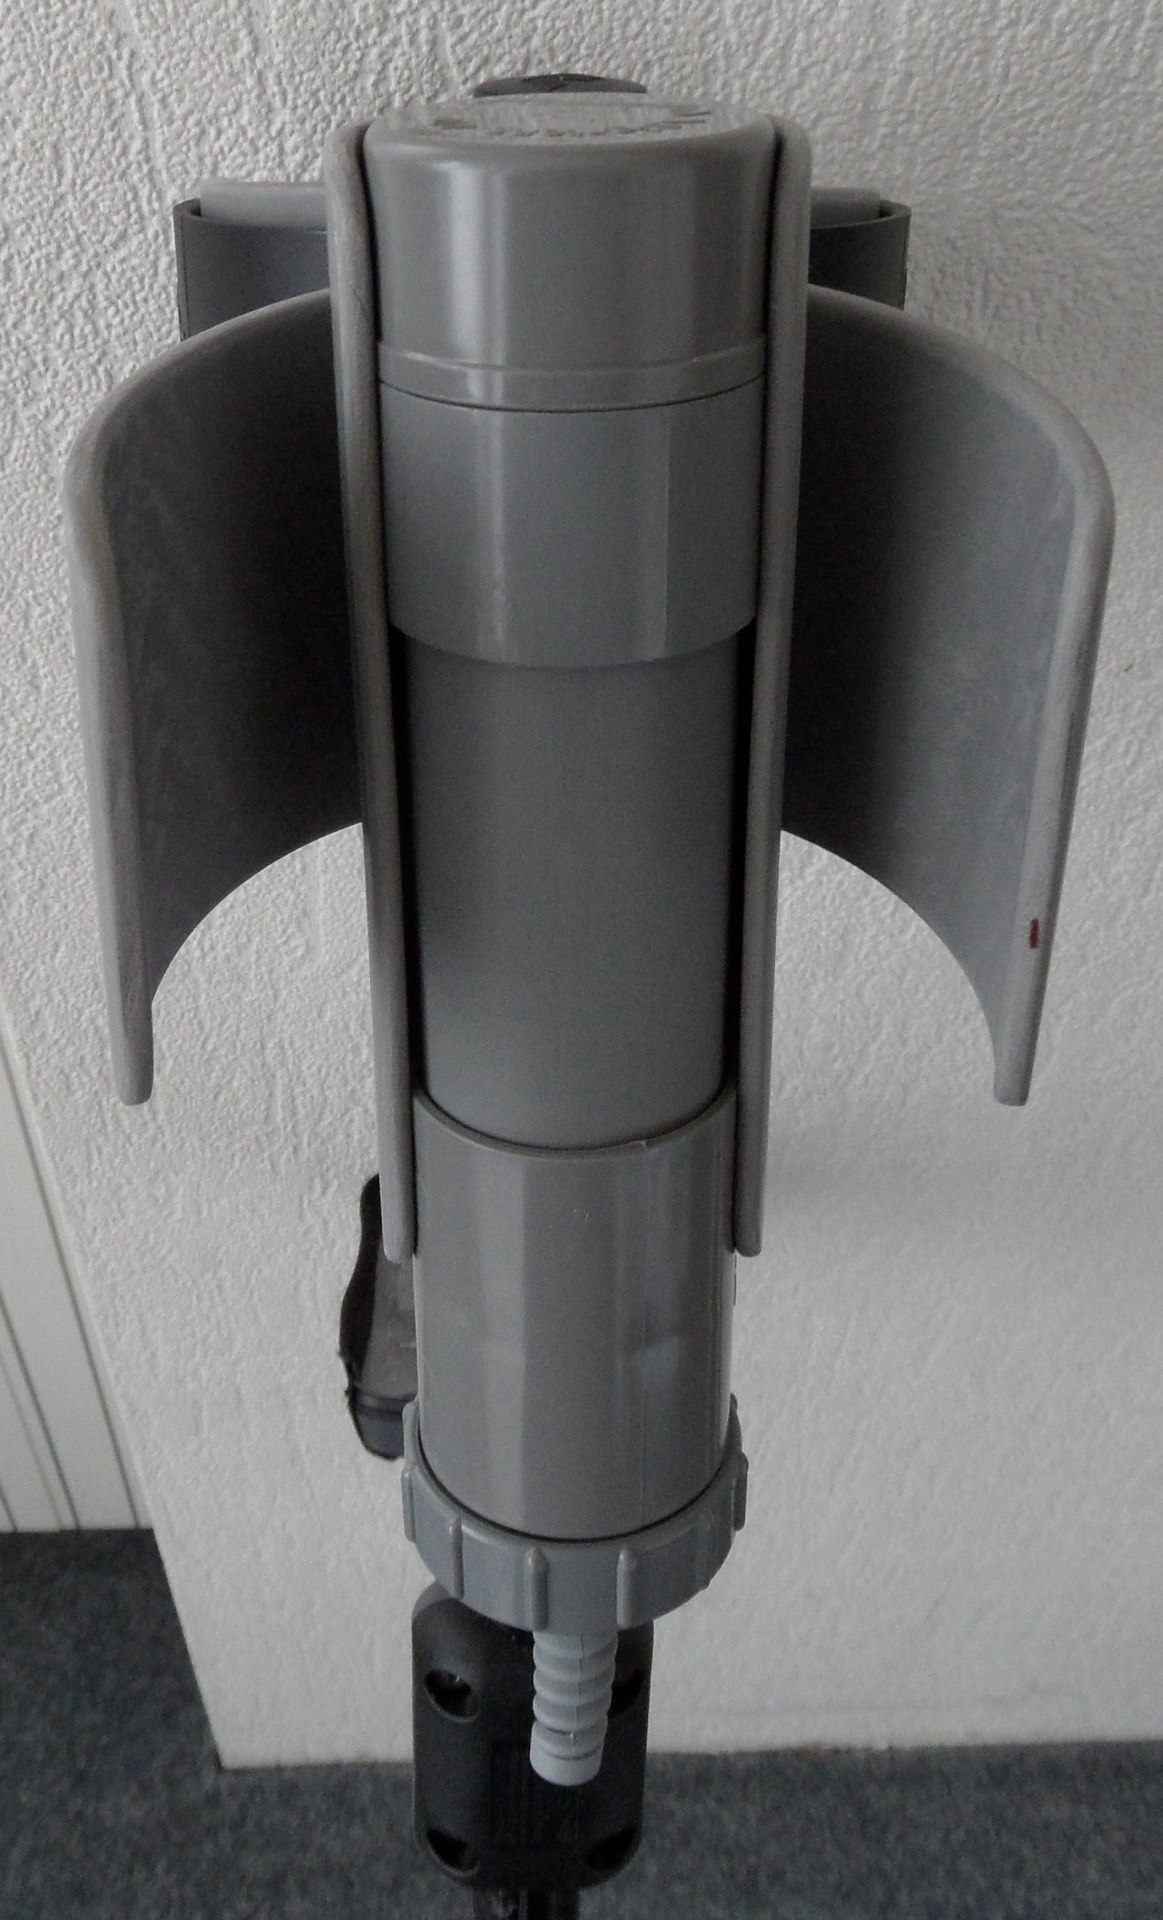
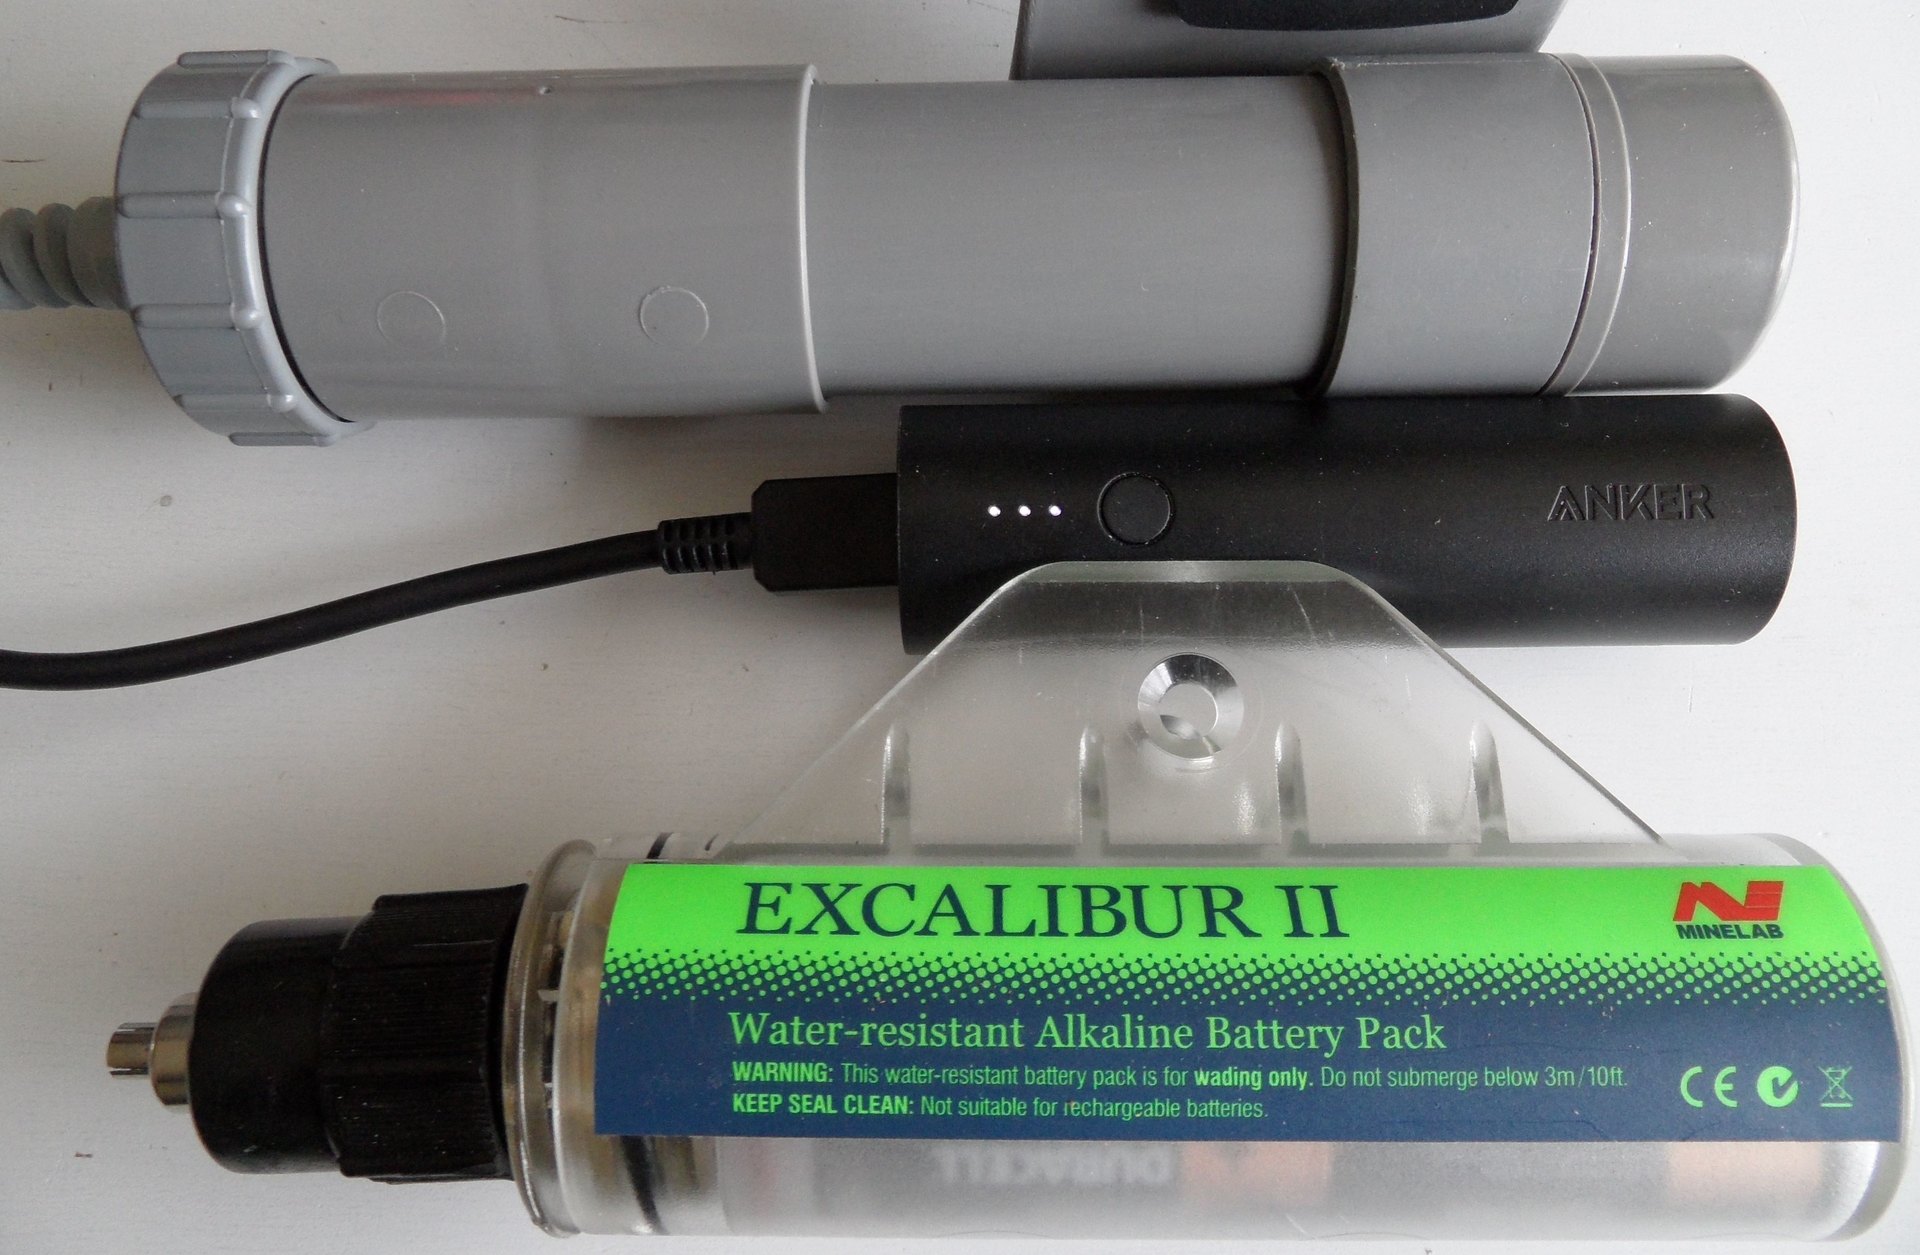
Easy to make and easy to use. Click your power bank under the armrest. Armrest is reverseble. The power bank automatic starts when you connect the connector to the Equinox. The power bank =5000 Mah of Anker. The detector is in two parts is 60 cm long x35 cm x12cm. Carbon tube of Ali 50 cm long, 1x 22 mm x20 mm and 1x 20 mm x17 mm and 3x tube clip AT pro. Nakky


-
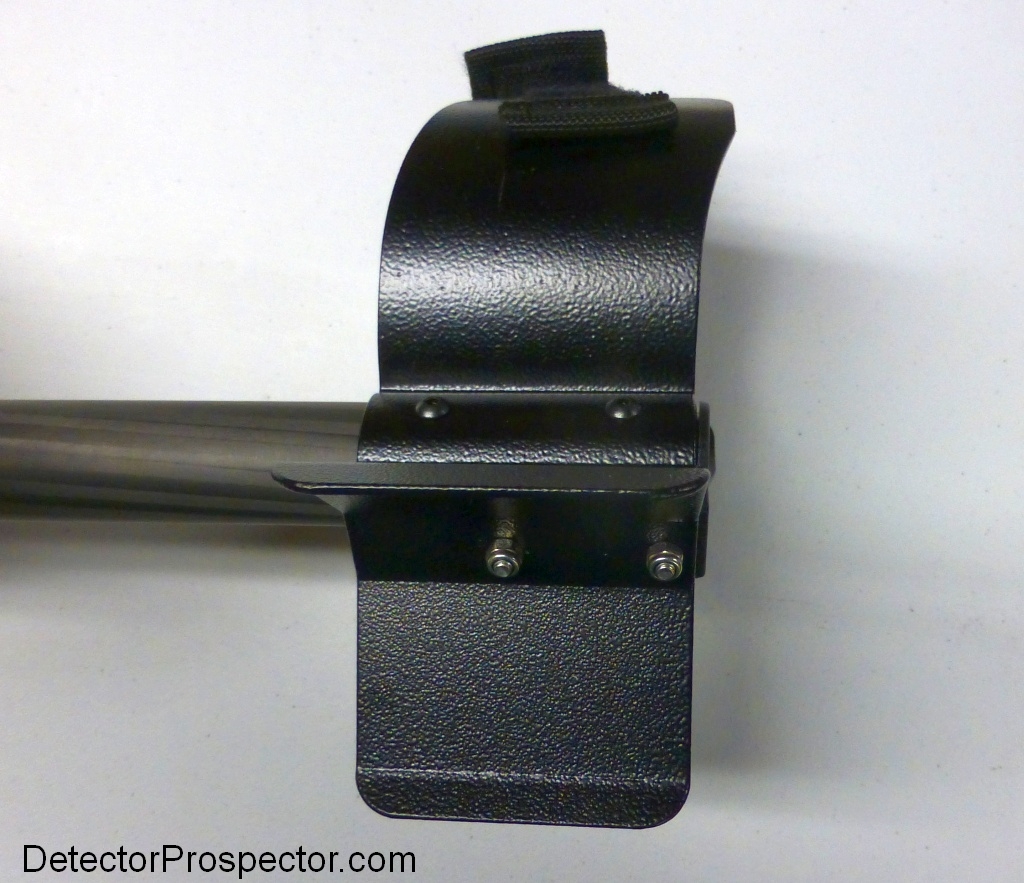
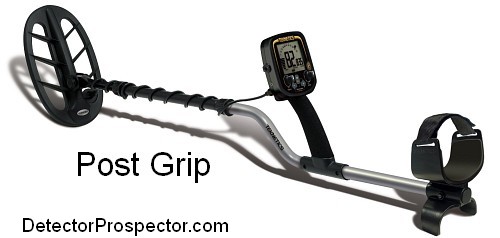
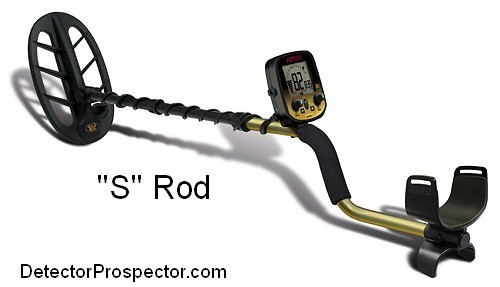
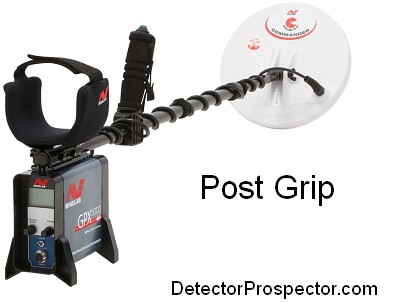
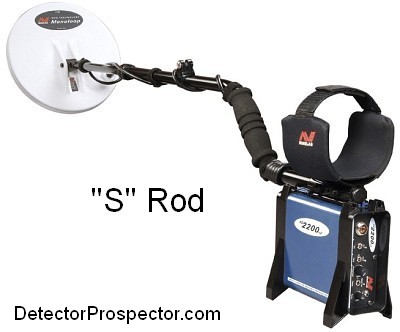
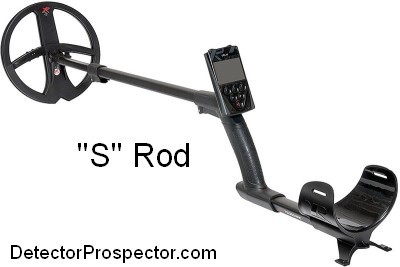
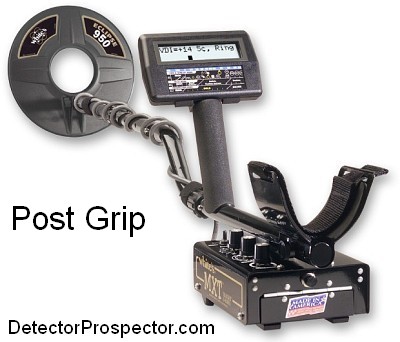
Subject came up elsewhere so I thought I would run a little poll. The poll only gives you two choices but if you want to post about what you think your number one most comfortable detector model has ever been that would be great. It could be a lousy detector in every other way, all I am looking for it what detectors feel best on your arm when held for long hours. There are no right or wrong answers - this is a personal preference thing, determined in large part by hand and forearm size. The "S" rod grip is where the grip is just part of the rod itself, not a separate element. The Post grip is a separate post attached to the rod. Lots of people call this a pistol grip, but that really is more about the shape of the grip. I have seen good pistol grips in an S rod design. There are also Post grips on S rods so it is not the S that makes for the S rod grip but the fact it is integrated into the S. The photos here make it more obvious. There is a difference simply between curved shafts and straight shafts but that is actually a separate subject so I will make a separate poll on it.
-
 Anyone have any info on what may work as a replacement shaft in carbon fiber? Upper and lower rods?I’m not a big fan of the shaft on the EQ, especially the fibrous lower one. I see that as becoming stuck real easy if I get lazy.
 -
One of these days I am anticipating getting the V4 update for the XP Deus and along with that the new 4.7" x 9.5" DD coil. This should be a great coil not only for better "see through" capability is thick trash but a very good prospecting coil. The V4 update is supposed to include the ability to use 15, 30, and 45 kHz but only with new coils designed to operate at those frequencies. The 4.7" x 9.5" coil is the first of the coils designed to work at the higher frequencies. The Deus running at 40 kHz with this new coil should be a formidable gold prospecting device for trashy locations in particular. I did not want to have to swap my 11" coil around with the new coil and XP rod assemblies are a bit pricey. The full rod assembly is $264 and just the lower rod is $57.00 I had heard about the Golden Mask Universal Rod Assembly for sale at on eBay for about US$120 plus US$30 shipping from Bulgaria so ordered one on May 31 and it arrived today just over two weeks later. There was no issue buying the item and the seller answered questions promptly. That seller is gone now so here is a link to the manufacturer website. The bottom line is the rod is much higher quality than I imagined it would be. The tubes are carbon fiber. The armrest assembly looks like cheap plastic in the photos but is powder coated metal. The rod locking rings have rubber grip surfaces and are some of the best I have ever felt. The unit collapses to 21" and expands to 55" with a weight of 1 lb 1.8 oz without the included armrest strap compared to XP rod assembly at 1 lb 0.4 oz also without arm strap. Slightly more weight but also more compact when collapsed. The end is 5/8" diameter and same bolt as the XP. The rod is just a tiny bit loose in the XP coil ears but will work. It is a hair tight on White's coils but also will work. It would be loose on most other brand coils and bolt too small. However, many lower rods will swap out with the lower rod on this unit so should be easy to mate up with most anything. I am very pleased with this purchase.


-
I stand about 6 feet but the GM 1000 shaft is just too long. So this is what I done to make it right for me only. I first put the shaft together then put the large coil on. Then I slip the control head on and found if I put it just past the end shaft where the middle starts is just right for me. I then slip the arm rest where I wanted but this leaves the shaft hitting me when I swing my detector. I took it and cut off 5 1/2 inches. this still leaves 2 inches behind the arm rest. You can now unscrew the end shaft with arm rest from the other. You now have the control head with the coil on two parts of the shaft and the other with the arm rest. When you screw them back together you may have to adjust the arm rest a little. You will find the longest part with the head and coil is 36 inches. I buy gun cases for my metal detectors and most are 38" if not longer with three big pockets on one side. The cost runs about 79.but can get them on sale for 49-59. Be sure this will work for you before you make a cut. Chuck PS The end shaft is aluminum and you can knock the plastic plug out after you cut the shaft to put it in the other.
-
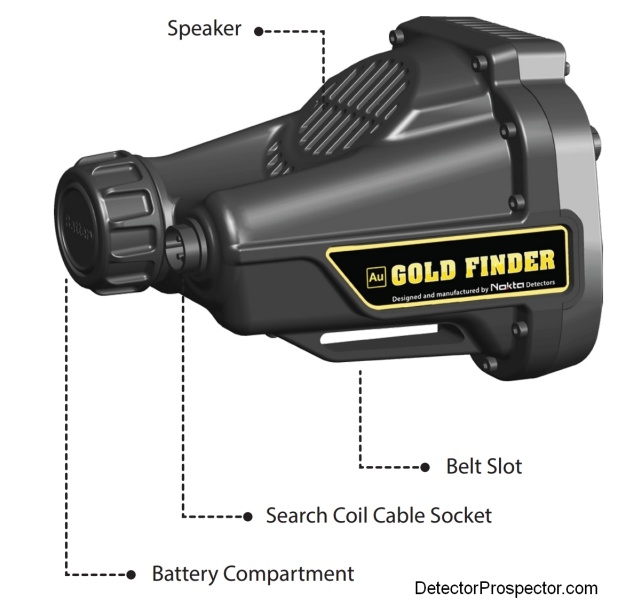
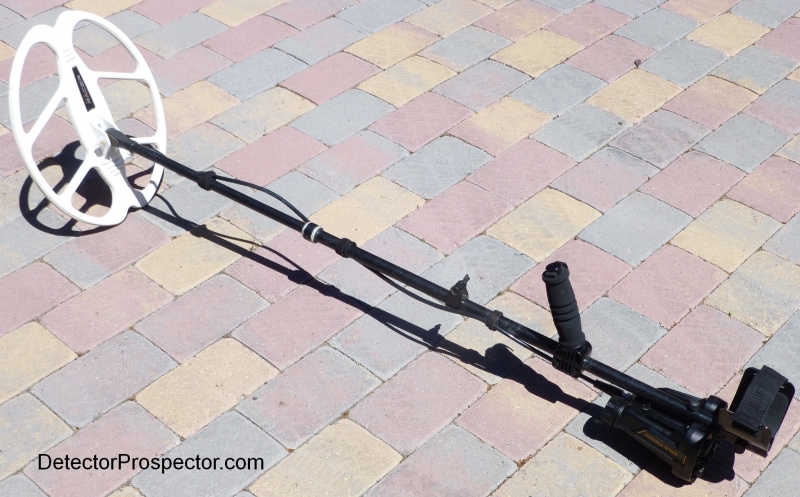
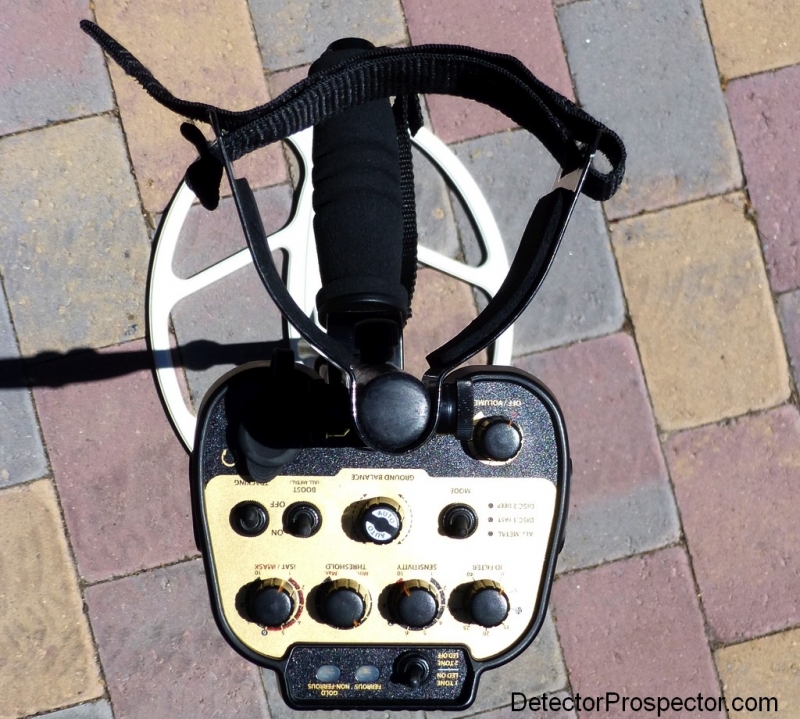
I have had a Nokta AU Gold Finder sitting around for some time. The Gold Finder is the same 56 kHz detector as the Makro Gold Racer, but stuck in an old school knobs and switches waterproof housing. As such it lacks a LCD display and therefore the ability to display target id information. In exchange you get a unit where the battereis are in the control box, so it can be hip or chest mounted. Or in this case, put onto an alternative shaft assembly. I have an old Otto fiberglass shaft for the Minelab PI detectors I kept when I sold off my last Minelab GPX. I was planning on using it for my Garrett ATX modification but I ended up using a White's "S" rod for that project. I also have a 15" x 13.5" DD coil for my Gold Racer that I really liked. The problem there is even though it is a very light 15" coil, it still makes the Gold Racer more nose heavy than I prefer. So Gold Finder sitting around and rod assembly sitting around - Bingo - it's mod time! Easiest job ever. Since the AU Gold Finder is already set up to hip mount, all I had to do is drill the Otto rod to mount the Gold Finder control box. I wanted to mount the control box under elbow for better balance. The controls look upside down when you do this but in reality when you are using the detector and go to make adjustments it works better that way looking down from topside. The AU Gold Finder box almost seems intended to be set up like this as it has a shelf over the LED lights that makes a nice footrest when the control box is flipped over. Since the box is waterproof no need to worry about speaker etc. getting wet or dirty - just hose it off. Came out very nice, only 4 pounds 2.1 ounces with batteries or 4.13 pounds, and way better balanced than the Gold Racer would be running the same coil. I can use a bungee if need be but at 4.13 pounds this weighs no more than many coils running smaller coils. Nice, I am keeping it permanently set up like this. Click on images for larger versions.