GoodAmount
-
Posts
68 -
Joined
-
Last visited
GoodAmount's Achievements
")
Contributor (2/6)
158
Reputation
-
Marvelous Manticore [ Thread Replacement ]
GoodAmount replied to Hunterjunk's topic in Minelab Manticore Forum
Well done Hunterjunk, I think this is brilliant! You might just be creating a subculture of timber-shaft enthusiasts. How is it for stiffness? -
For those who have access to a 3D printer and are interested in testing a non-conductive lower shaft on their Manticore as a temporary measure before sourcing one from steveg, I've uploaded stl files to the downloads section of the forum. I don't own a Manticore, so I went to a friendly dealer to measure up the Manticore's lower shaft and designed the parts. I haven't been able to test how the machine performs with it since though, so I'd be interested to hear from anyone who can. I know my 900's operation has noticeably improved since using it's new lower-shaft extension. I hope this helps!

-

Version 1.0.0
4 downloads
The Manticore 3D Printed Non Conductive Shaft Extension was designed to alleviate issues caused by having a conductive carbon fibre lower shaft bolted directly to the coil. This is particularly important for gold prospectors who experience knock sensitivity when laying the shaft flat against the coil during target recovery, but it may also have benefits during the target search, especially when working tight rocky terrain where the coil is constantly being knocked and/or rotated relative to the shaft. The product has been designed in three parts so that the layers can be 3D printed in line-of-force to increase strength and prevent delamination during use. You will need to buy 2x 40mm M8 nylon hex bolts and nuts - I sourced mine from here. For each assembly, you will need to 3D print 1x shaft extension, 1x clamp, 1x clevis and 2x thumbwheels. To assemble, glue the clevis to the front of the shaft extension (preferably with epoxy) - it’s been designed to only fit to the front to avoid mix-ups. Glue the clamp to the rear of the shaft extension, making sure that it’s oriented in the same direction as the clevis mount (facing upwards). Seat the M8 nuts into the clevis and clamp rebates and the two 40mm bolts into the thumbwheels. It's helpful to epoxy the bolts and nuts in place, but be careful not to get glue in the threads. Snap the shaft-extension assembly to the Manticore’s lower shaft, thread its stock bolt through the clevis and tighten in place. Thread one 40mm bolt/thumbwheel through the rear clamp and tighten (avoid over tightening) and the other to mount your favourite coil to the 3D printed clevis. Happy hunting! Creative Commons licence - CC BY-NC-SA -
Conductive Carbon Fiber Lower Rods
GoodAmount replied to Steve Herschbach's topic in Detector Prospector Forum
I wonder if the CF lower rod might also be responsible for Nox 900s occasionally behaving erratically. Mine's done it a few times now for no apparent reason. Could the shaft be sending the detector into a feedback loop? -
Conductive Carbon Fiber Lower Rods
GoodAmount replied to Steve Herschbach's topic in Detector Prospector Forum
I can relate to your experiences with low quality 3D prints. The industry has come a long way in the last few years though, with some automotive manufacturers even using it for production parts. Yes, it does rely on the correct plastic being used, but also on the printing process (FDM, SLS, SLA, etc) and quality of the 3D printer to get high quality parts. Not all 3D printers are created equal and not all people using them know how to get the best out of them. The product also needs to be designed appropriate for the printing process and oriented correctly in the machine to make best use of layer adhesion (which is why I've designed this in multiple parts to get the grains running in the right directions appropriate to force). It is worth using a reliable 3D printing service if you don't have your own machine and you have to pay retail prices, but the big advantage for people with 3D printers is that if a part breaks you just print another one. But yes, you definitely want to design parts for best longevity in the first place. In cases like this though it allows us to innovate quickly, testing functionality without investment risk and finding alternatives in an open, distributed and collective way. I'd be keen to see others riff on the design and improve it over time. But at the very least, it's a good way to test whether a non-conductive lower shaft will meet your prospecting requirements - especially if you have your own 3D printer at home. It's free (except for material cost, which is around $2-5)! -
Conductive Carbon Fiber Lower Rods
GoodAmount replied to Steve Herschbach's topic in Detector Prospector Forum
Just letting everyone know I've uploaded the 3D printed Nox900 lower-shaft extender I designed to the downloads page. I know everyone is super keen for Steveg's Kevlar lower shaft, but this might suffice for now for some people. I've been using it for a few days and it's proving to be quite robust and pleasant to use, particularly when swapping coils. I'd be interested to hear other's thoughts about it, so let me know how it works out if you make one. I'm thinking I'll make a Manticore version too. I don't own one, but I'll pay a visit to Miners Den and get a lower shaft for reference. Anyway, I hope this helps a few folks out. 🙂


-

Version 1.0.0
4 downloads
The Nox 900 shaft extension was designed to alleviate issues caused by having a conductive carbon fibre lower shaft bolted directly to the coil. This is particularly important for gold prospectors who are experiencing knock sensitivity when laying the shaft flat against the coil during target recovery, but it may also have benefits during the target search, especially when working tight rocky terrain where the coil is constantly rotated relative to the shaft. You will need to buy a 40mm and 60mm M8 nylon hex bolt and 2 nuts - I would suggest just buying two 60mm bolts and cutting them down to size. These are the ones I sourced - https://www.aliexpress.com/item/1005003554528145.html?spm=a2g0o.productlist.main.1.138c674cdkh3Wv&algo_pvid=949ce8d2-8033-47ba-8524-5b8b03a83770&algo_exp_id=949ce8d2-8033-47ba-8524-5b8b03a83770-0&pdp_npi=4%40dis!AUD!24.72!12.12!!!16.16!7.92!%402103011017185920473694307e26fe!12000026266634715!sea!AU!136322599!&curPageLogUid=mOIvLzytoqPb&utparam-url=scene%3Asearch|query_from%3A For each assembly, you will need to 3D print 1x shaft extension, 1x shaft extension clamp, 1x clevis nut seat and 3x bolt thumbwheels. To assemble, glue the clamp to the rear of the extender (preferably with epoxy), making sure that the area that mates with the stock shaft clevis is in the right orientation facing upwards. Seat the 60mm M8 bolt into the clevis nut seat and the 40mm bolt into one of the thumbwheels. Seat an M8 nut into the other two thumbwheels. It's helpful to epoxy the bolts and nuts in place, but being carful not to get glue in the threads. Remove the rubber inserts from the stock carbon-fibre-lower-shaft clevis and place them in the 3D printed clevis. Insert the clevis-nut-seat/bolt into the stock carbon-fibre-lower-shaft clevis and use one of the thumbwheel/nut assemblies to tighten in place. Snap the shaft-extension assembly to the stock lower shaft and thread the 40mm bolt through the clamp and tighten with the other thumbwheel/nut assembly. Attach your favourite coil. Happy hunting! Edit: Creative Commons licence - CC BY-NC-SA -
Official Steve H Conductive Rod Test
GoodAmount replied to Steve Herschbach's topic in Detector Prospector Forum
Maybe they’ve got salt discrimination built in across all modes? -
Conductive Carbon Fiber Lower Rods
GoodAmount replied to Steve Herschbach's topic in Detector Prospector Forum
Me too! Having a whole new lower shaft for every coil is so unnecessary, but undoing the bolt to release the coil from the clevis then finicking around to get the next coil mounted is such a pain in the rear end. After I upload version 1.0 to downloads, I’ll design the next version to be hot-swappable. -
Conductive Carbon Fiber Lower Rods
GoodAmount replied to Steve Herschbach's topic in Detector Prospector Forum
I’m fascinated by this thread - it’s a great example of innovation happening in real time. While it’s anxiety inducing for people who build a livelihood from doing these kinds of things things, it may actually open new approaches that raise the bar on detector construction. Innovation is driven forward by overcoming both functional and user experience problems. Given most problems are wicked problems, where one solution creates new and unforeseen different problems, there’s an endless cycle of design and redesign that keeps the commercial world turning and industrial designers like me busy and happy. For me, everything only becomes clear when I try things out for myself in the real world, testing and evaluating different options to get the best fit. As far as this conundrum is concerned, I can see myself buying one of Steveg’s Kevlar lower shafts, but in the meantime I’ve prototyped an attachment that does the same thing functionally to see how much of a difference separating the carbon fiber shaft from the coil actually makes on my Nox 900. It’s basically just a 3D printed extension that bolts onto the existing shaft. I took it out for an hour or so yesterday to see how it performs. I was mostly hoping it would alleviate coil knock, as that’s been my main problem with the 900, but would have been happy if it just helped with the target-recovery issue gold prospectors like me have been talking about. The test wasn’t scientifically undertaken - I’ll do it more rigorously when time permits - but it did feel like it made a slight difference to coil knock. I’m not sure if it was just placebo, but I was also able to raise my sensitivity in the area I’ve been hunting by two increments from 18 to 20 which was promising. But the key thing was, it seemed to eliminate the knock issue during target recovery so it was a definite win from that perspective. Again, I haven’t rigorously compared and contrasted it with the stock setup under controlled conditions, so it might all just be wishful thinking, but I think it actually helps. I don’t want to step on any toes, but I’m happy to upload the file to the 3D print downloads section on this forum for others to print and use (I just need to update a couple of things before I do). I don’t have a Manticore, so it’s just for the 900. Just a warning to those who’d like to give it a go, it’s much more flexible than a carbon shaft and adds extra weight to the setup. It will also probably snap if you accidentally step on it, but at least it will give you an indication if it’s worth investing in a kevlar lower shaft when they become available. I’m thinking I’ll design another version that’s a clip that allows you to snap-fit a cutoff bottom section of an existing fiberglass or plastic lower shaft. This would help maintain overall stiffness and strength in a way that a 3D printed ABS tip can’t. Long term I’d actually be interested in seeing hybrid shafts developed - one-third fiberglass, two-thirds carbon - that keep both weight and cost down. Anyway, I love this kind of stuff. Looking forward to continuing the conversation.


-
Have Detector Companies Hit A Wall
GoodAmount replied to RONS DETECTORS MINELAB's topic in Detector Prospector Forum
I’d put my bets on VLF-like multi frequency/6000-Geosense approach, but with multiple concurrent ZVT timings plus Algo-like discrimination. You can be guaranteed Minelab will have developed highly complex algorithms to match the capacity of current chipsets to get the most out of the machine in deep, hot, variable ground. I wouldn’t even mind if it was heavier than the Algo or 6000. I’d be surprised (and disappointed) if the 8000 doesn’t reinvigorate old patches and open new ground like the Equinox 800 did for relics, coins and small-gold hunting. -
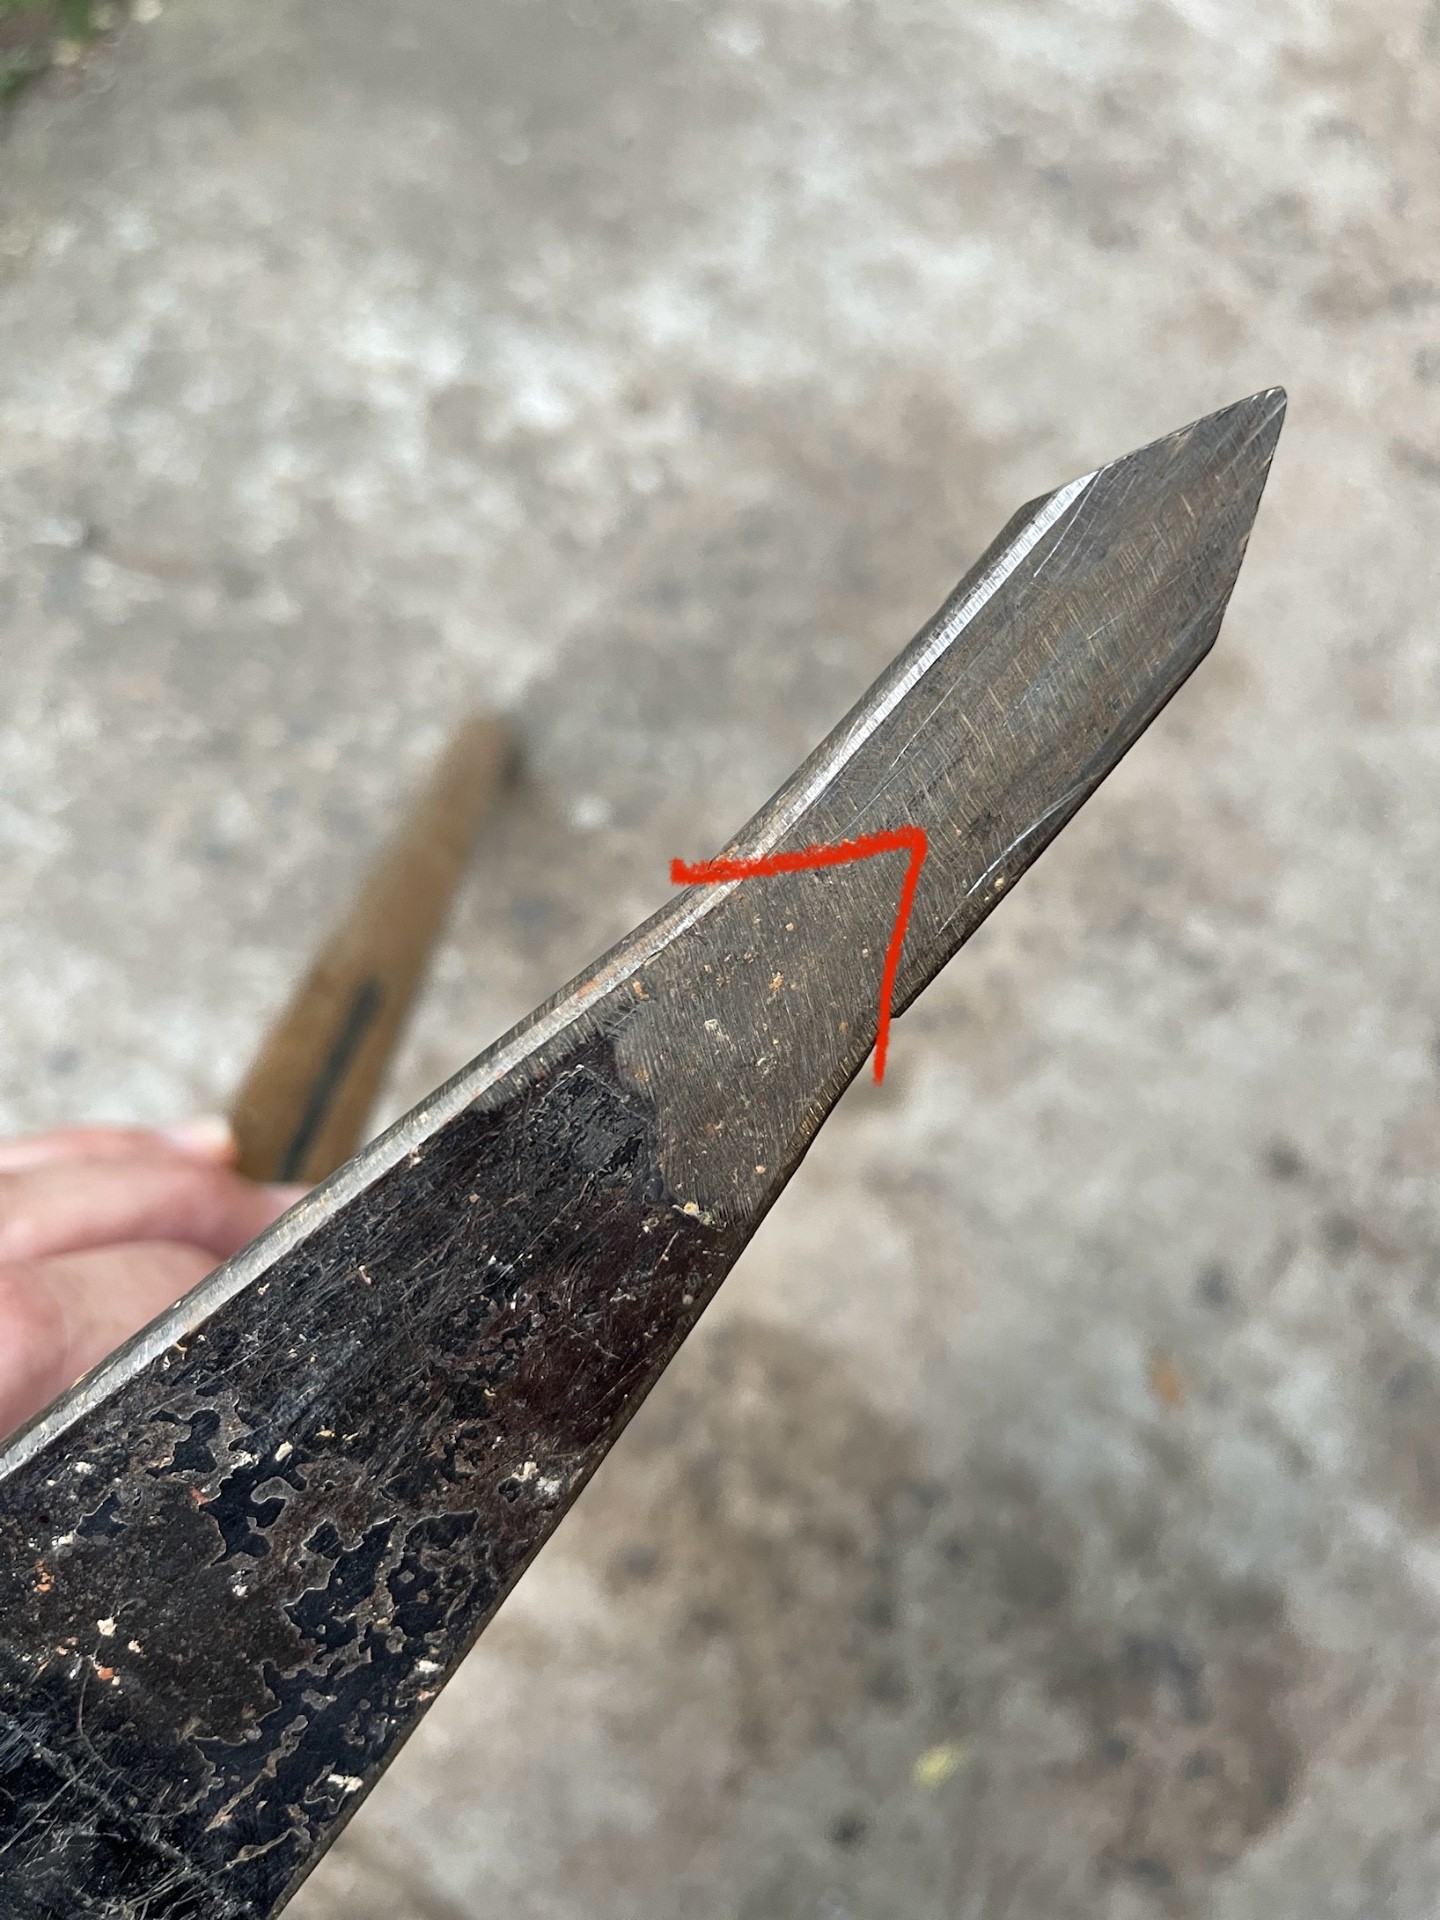
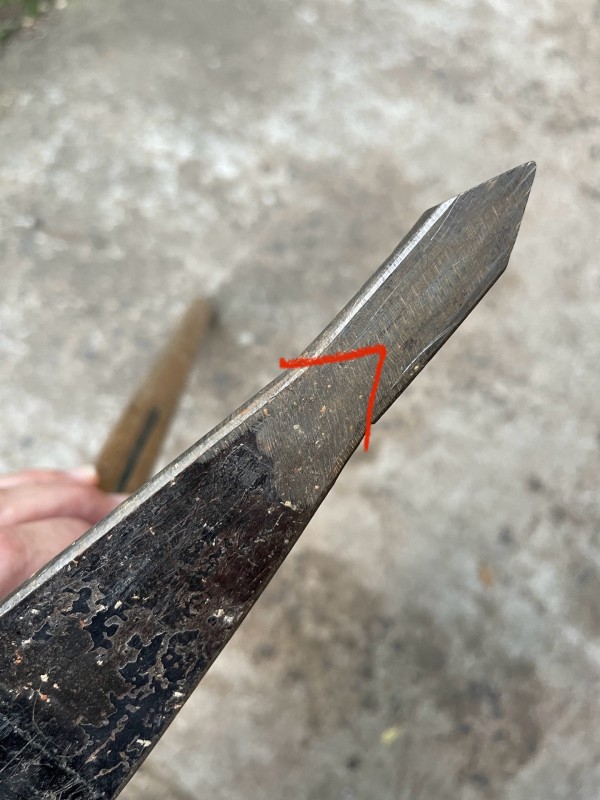
Yep, you’re right. I didn’t weld it straight across though (see previous post). If I was doing repairs as a business for customers, I’d be sure to go through a rigorous process, but given my pick is a big DIY experiment anyway, I’m happy to leave the result in the lap of the gods. Plus, I’ll just make another one if it breaks. I’ll be surprised if it does though - it feels pretty robust.
-
The tip of my pick was already a bit of a stub so I ground it down to a V profile and matched the back end of the new tip to suit. I figure by adding more surface area to the join perpendicular to the sheer line it’ll give it a bit more strength. There was no gap between parts, but I beveled the edges to give the weld some bite. So far so good - I’ve been out with it a few times since and the tip is holding up super well and keeping its edge.
-
I didn’t quench or temper the one shown in the picture. The source of the welding heat was away from the tip, so I didn’t worry about it. I’m happy to just see how it goes and if I’m having difficulty keeping a keen edge I’ll just weld on another tip and spend some time hardening and tempering it.
-
Gold Digger picks are awesome. Those Supersede picks are awesome too - I love that the parts bolt on and are replaceable (I’ve done the same thing with my DIY-build pick an it’s worked out super well). I’d recommend welding on a new tip if you’re only replacing the sharp end of the tooth, given bolting it on will interfere with its travel into the ground. Bolting an entire new tooth at the handle collar will work great, but you’ll be throwing away good steel in the process.