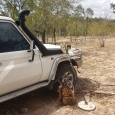
Lesgold Posted March 10 Share Posted March 10 Hi Folks, It’s Sunday afternoon here and I’m trying to get ready for a few days detecting over the next couple of weeks. I’ve been working some gully areas with a mate but he’s gone away on a prospecting trip for a month and it looks like I’ll be working solo during that time. We put out a YouTube clip last week and it was so easy with two on the job. When we detected a target, one person would film as the other person dug out the buried metallic object. It saved a lot of time as normally tripods etc need to be set up and this often becomes a frustration that can take the edge off a trip. I decided that I’d mount my GoPro on the shaft of the 6000 to make life a bit easier for some of the footage that I plan to take on the next outing. When I looked through the various assortment of mounts that I had for the camera, there was nothing suitable for the job so I decided to make one. It is a simple task that can be achieved with some PVC pipe, some basic hand tools and a hot air gun. A piece of 50mm pipe was cut to 30mm in length and a slit was cut down one side. A spacer block and two cramping blocks were then cut from some scrap timber. You can see on the left hand side of the photo that the lower shaft of the 6000 was ready to be used as a mandrel to shape the PVC. The hot air gun was then used to heat the pipe until it became soft and pliable. This only took about 10 seconds. The PVC was then shaped around the shaft and the blocks were positioned in place. A G cramp held the moulded plastic in place until it was cured. I had to repeat the process a couple of times until I was satisfied with the shape of the mount. It was a simple matter of reheating the PVC to soften it before reshaping it again. The mount took a couple of minutes to cool before being trimmed, shaped and drilled to fit the GoPro. An off-cut of 3.5mm acrylic was shaped as a spacer to fit between the camera legs. Stainless washers could have been used for this component. The mount was attached to the detector and secured with the standard locking screw and a 5mm wing nut. Using scrap PVC is a cheap way of moulding all sorts of mounts for prospecting gear. I’ve just finished making a bathyscope from some 100mm sewer pipe. You may be able to see the light fittings at the bottom. They were all made using a similar method to the mount shown above. I noticed a local prospector was using a bathyscope when he was detecting in water. I thought it was a good idea as it can be time consuming trying to recover gold from submerged crevices without one. Have a look at Bedrock Gold’s channel if you get the chance. It really does speed things up. 8 Link to comment Share on other sites More sharing options...
Valens Legacy Posted March 10 Share Posted March 10 As I have always said "if there is a will there is a way" grandfather told me that and I truly believe it. Thanks for sharing. Link to comment Share on other sites More sharing options...


.thumb.JPG.b46839319dc8de4aefe1f42407094dbd.JPG)
Recommended Posts
Create an account or sign in to comment
You need to be a member in order to leave a comment
Create an account
Sign up for a new account in our community. It's easy!
Register a new accountSign in
Already have an account? Sign in here.
Sign In Now