Search the Community
Showing results for tags 'jewelry detecting'.
-
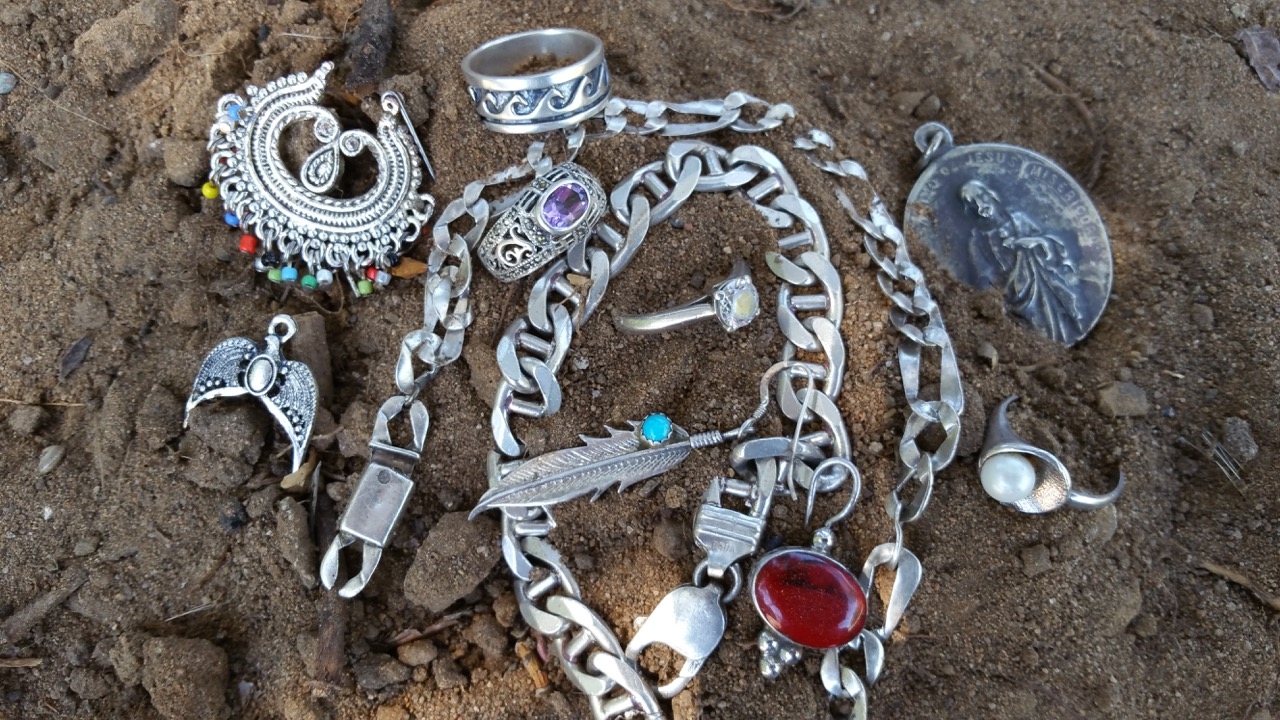
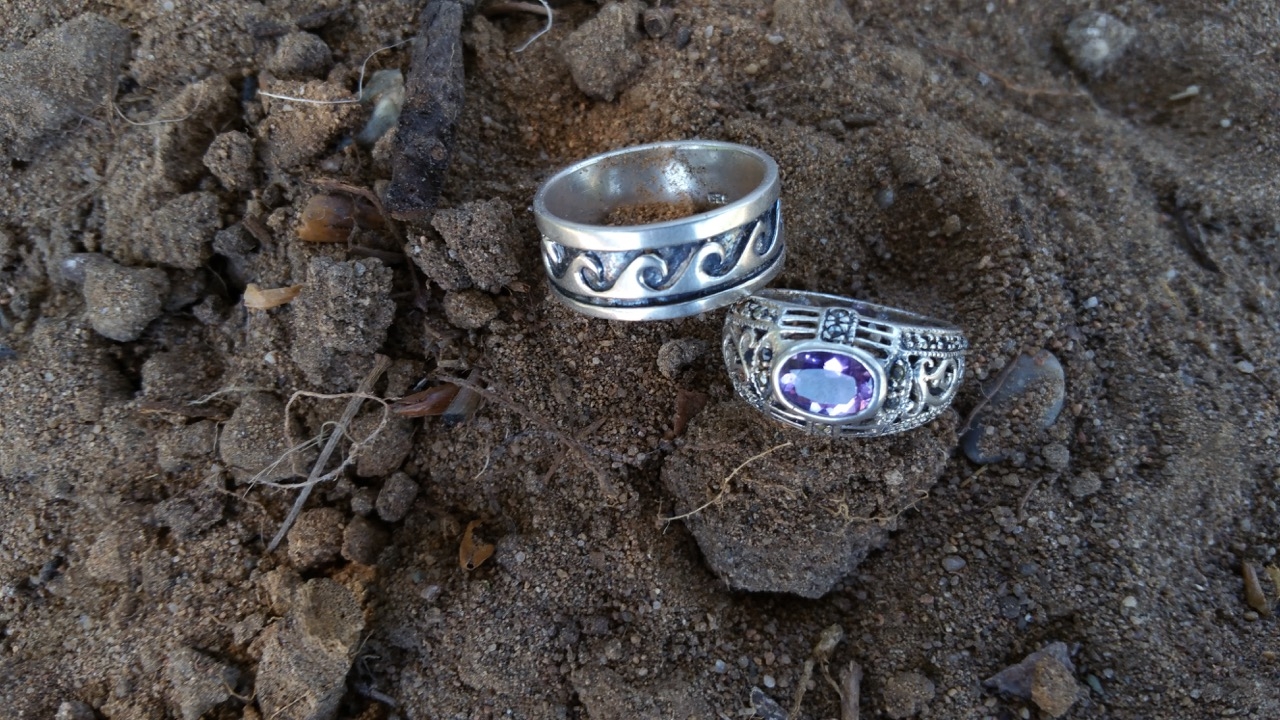
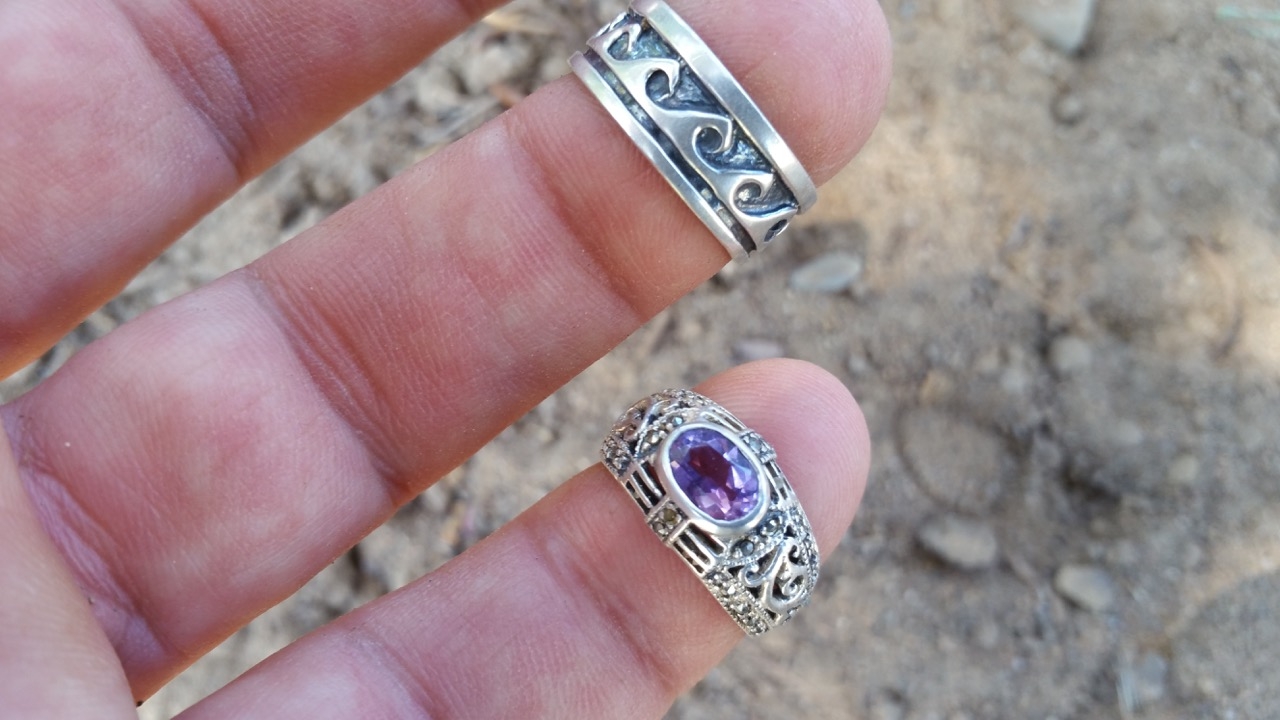
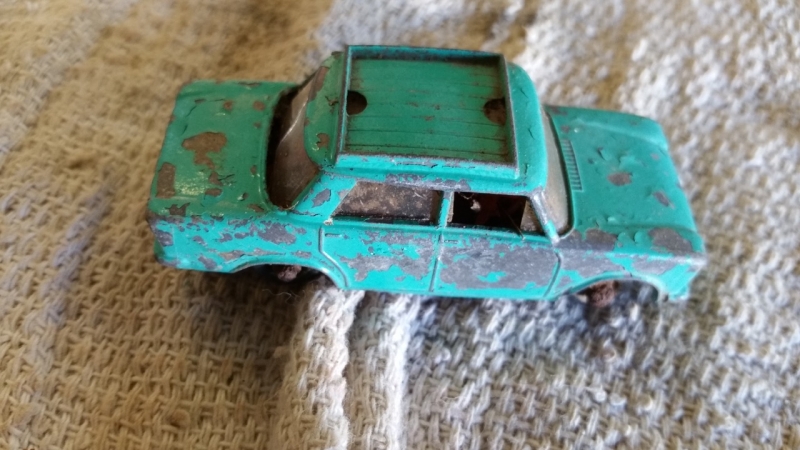
Costume Jewelry Find...." Sterling Shank "
Mike Hillis posted a topic in Metal Detecting For Jewelry
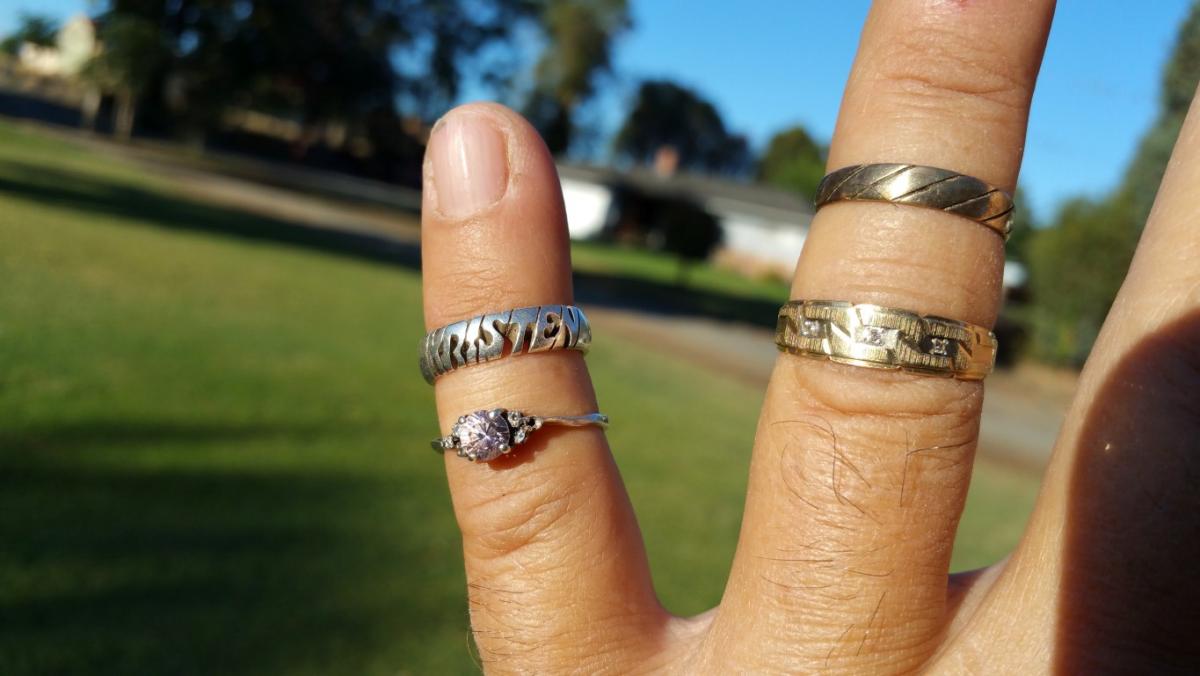
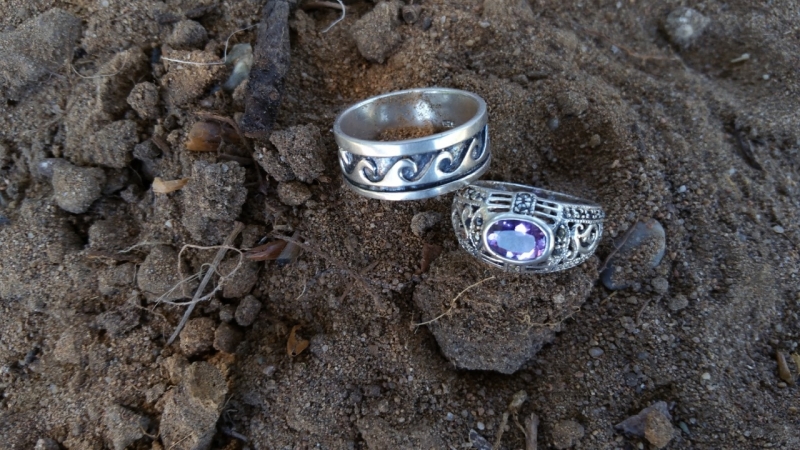
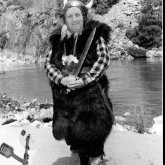
I was out and about with my F75 LTD Sunday morning and found this ring. I thought at first it was junk but closer inspection revealed that it is marked " Sterling Shank" with a jeweler's mark. I had never found a ring mark Sterling Shank before so I had to research it. The band is silver and the stone mounting is silver plated. Its not a continuous band either. Its cut out at the top and the stone mounting is dropped in the notch and soldered in place. That would explain the zinc VDI reading it gave me. Researching the jeweler's mark, This ring has the ,the 1947 Vargas mark on it. Somebody lost one of grandma's rings. Link to a site where you can research jeweler marks. http://illusionjewels.com/costumejewelrymarksv.html I'm calling it treasure. HH Mike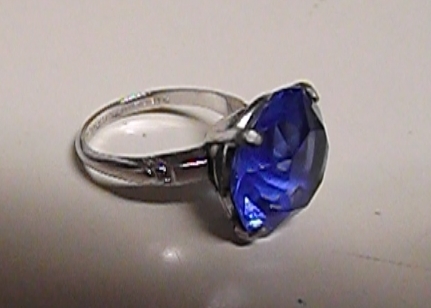
-
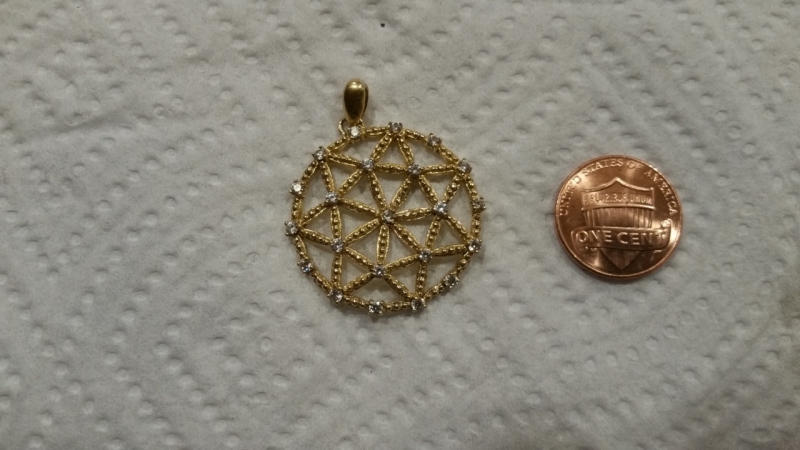
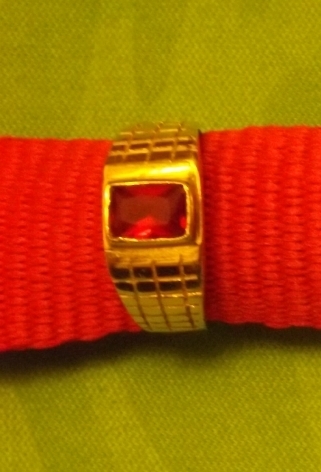
There are so many good targets that will sound and VID as in the Zinc penny range. This pretty pendant is marked 925 sterling but is plated with 10K gold. It is in such good condition that I could not redily tell the difference between it and 14k......While I would rather it had been 14K..... I am still happy with the find. 12-35 on the CTX. It's your choice...dig or not to dig? strick
-
Working for a living is getting in the way of fun. I'm in a gold ring slump. Last one was the day before Christmas. We managed to get to the desert finally after nearly two years of trying. Most stuff is from locally. A friend has three ranches he lets me hunt on. The gold is hard to find....I'm just happy just to get away for the day and try and find anything to be honest. The parks are good to me sometimes. Looking forward to beaches and tops of the Sierras this Summer.. And hooking up with some of you! Happy hunting fellas.. strick


-
Jewelry section needs more posts. I can do that. Nothing spectacular, but he coolest thing about this post is that the lead panned out for once. I was reading some vendor reviews for an event that recently took place, an arts and crafts show, when a participant mentioned sudden high winds and a storm caused some damage. Bemoaning their's and a few other's losses got me to thinking about checking it out. So after a bit of planning I set out to search over the area and see what was left behind . It was pretty clean ground, and after three different two hour nights with occasional clad and foil, I hit onto this 7 foot area with scattered jewelry. A watch, then earring, then ring. By the third score I was so excited! Surface finds right at the base of the grass for easy picking. Whoo hooo! Cha-ching! I went home on air. Was a hell of a good time. After cleaning them up in my early Father's day gift that my boys couldn't wait to tell me about , an ultrasonic cleaner.... every one is junk. Here is my face as that progressed. The gold drought continues... thanks for nothing you cheap, starving artists! I was so bummed I took almost 5 days off from detecting instead working around the house and just cleaning past finds I don't want to tumble as I sorted them out of the buckets. Put me in a detecting funk, but we're out now. New quarter has begun! The time is near... I can smell that gold! Come to papa! Stay motivated and keep swinging.
-
My first quarter 2017 result are zero, ziltch, nada for gold jewelry. Never been like this before once I got some stuff figured out. I got used to finding a piece every time out, or at least every other time out. This quarter has resulted in no gold at all. My most productive sites have dried up. And its not due to competition from other hunters as i still find plenty of coins and gold range trash. Just no gold. It is not being worn by the normal patrons at these sites like before. The high price of gold has changed everything. First, people sold off due to the price. Second, they changed their buying habits due to the price. Third, the economy is depressed resulting in a further reduction in buying habits. The game has changed and I am having to learn to change with it. What were once regular patches for me have dried completely up. I'm having to do a complete reset. I know what to do though. Re focus like a laser on the critical number one key process input: People. HH Mike
-
I am trying to focus on ring hunting in some of the parks around here, and I'm curious what recovery methods you all use. One of the older guys I hunt with only uses a screwdriver, another an old knife... I usually bring a hand digger and cut 3-sided plugs. Probes don't seem to be too popular, but when detecting nicely manicured parks what method do you use? Probe and pop? Cut a plug? I'm hoping to some across some other technique that might not be as common, but is equally effective and doesn't mess up the grass too much.
-
 Hi Steve, in your posts you mentioned several times that you are using the Makro Gold Racer as a go-to detector for the jewelry detecting in parks, which surprised me quite a bit since I originally bought it as a micro-jewelry detector based on advice from Tom Dankowski. could you please share a few tips on how to best utilize the gold racer for that purpose? e.g. are you greatly reducing the sensitivity to ignore the smaller (aluminum) junk, what exactly you are looking for in the signal, do you ignore the no-number-just-audio signals, etc? I also have a CTX 3030 and was wondering how you'd compare the two for this particular purpose with the goal of digging the least amount of junk and using the screwdriver method of recovery. and last question - do you ever record yourself in process of detecting/recovering? It would be super helpful to see how its being done by someone like you - there is a Russian proverb that says "its better to see one time than to hear a hundred times". thanks in advance for your time, Sergey
 -
 A Park Selection Primer for the aspiring Jewelry Detectorist – My Method Image: Urban prospecting for refined gold The jewelry detectorist is a different breed. They tend to like a challenge, a challenge to both their selves and their skills. The jewelry detectorist may also be creative, a bit stubborn, and generally think outside the box due to the elusive nature of their quarry. Certainly they have little fear of work. Compared to the average butterfly, the jewelry detectorist accepts more digging and more trash as part of the game and they often enjoy it. When a choice patch is discovered they will happily work the same park for many years by working smartly in layers. Some patches might even merit a more serious approach; dig it all to get it all – nails and up get it all! Nobody except avid historic relic hunters tend to get so extreme on a site. There is no doubt many other detectorists find jewelry, but to the jewelry detectorist that targets gold jewelry those other detectorist’s recoveries are quite often incidental in their searches and they tend to fall mostly into the large and/or high conductive range. One can verify this by (assuming the reports are truthful) looking at hundreds of annual “Best finds of the year” and “Wrap-up Annual Totals” type forum posts on any metal detecting forum – heavy on the silver; light on gold. An avid gold jewelry detectorist often targets only the low to upper middle conductivity and will find gold items regularly and lesser valued “trash” jewelry almost every trip to a patch in working progress. This primer is meant to address jewelry hunting in general and gold jewelry hunting specifically and how I’ve discovered to locate patches time and again. The intent is to help any detectorist find more gold jewelry by placing them into a “patch”. I liken it to one more piece to the Au puzzle. (Credit to Mr. Mike Hillis for inspiring me to write something hobby related and introducing to me through his writing, the term ‘patch’, which I’m adopting. Thank you.) Image 1: 14K designer wedding band recovered from a city park. Let’s get to it then. Assumption one – Generally the more quantity of jewelry a site holds the more gold that site also tends to hold. Assumption two – Gold can be found anywhere but it tends to be found more frequently in certain locations and conditions. Just like people gold is predictable, and just like people gold can surprise you. Assumption three – Adults lose the most and most valuable gold. Follow where they play, entertain, socialize. Follow the money. I also use a simple 5 stars or 5 point rating system on parks. Each factor that positively applies to a park equals one point. At 3 points a half point scheme kicks in and allows some wiggle room when filtering the best from the best. A half point is generally reserved for multiple features, special features, community events, etc. This rating system is meant to assist in field time management. In selecting a site in search of gold jewelry there are several factors that contribute to specific sites being better prospects for gold than others. These “better” parks possess several of the factors and features that positively contribute to increased loss thus increased productivity. The scope of this work will be limited in the main to those contributing factors that make one park better than another. Features within a park will be considered outside the scope of this work except when related. The four primary factors in summary: U.T.H.H. 1. Usage – All the various kinds of use currently allowed and permitted in a given park. 2. Topography – All the facts about the park’s property- size, type, elevation, grade, vegetation, layout, etc. 3. Habitat – The physical surroundings immediately adjacent to the park. This can include the perimeter of a park property. 4. History – all the past details of a park prior to establishment to present. This builds a park profile to assist in detection strategy. Usage - The current usage and allowed activities in any park is the primary consideration. The more opportunities a park has for strenuous physical exercise and/or athletic contact between groups of people the better. Parks that support large open fields favored for athletics often double as community event locations. Pay attention to your local event calendars to increase the chances of finding a prime site. A new use of parks I’m seeing more communities adopt is the summer outdoor viewing of a featured “Movie in the park” on Friday or Saturday nights complete with vendors. These events are perfect for losing stuff in the dark. Another common event in parks in my area are those community fundraising “After Five” events with live bands, alcohol, and lots of people overdressed and milling about. Often they are so packed people stand shoulder to shoulder rubbing and bumping even when not dancing. The more varied uses a park sees the better the prospects for gold. Topography -The type of terrain in a park is important. For turf hunting at least, gold tends to be found in the flats more than the hills. The land’s grade is important. Nobody is playing team sports in the hills. Large groups of people do not usually congregate in the hills either, and have less incentive to do so in the woods. Focus primarily on flat open terrain. One exception to this: hilly parks with trees and disc golf courses - gold could literally be anywhere on a disc golf course. Also, don’t get too hung up on total park size. While a large park is great for accommodating large crowds for events, many smaller parks are often better prospects when they contain a greater percentage of level open surface areas. In discussing city parks I consider small parks to be 10 acres or less. Parks around 60+ acres I consider large. Habitat – If a park were a living organism then the surrounding community is the natural habitat. In locations with few public parks the surrounding habitat becomes a more important aspect of site selection. There are certain surrounding features that positively impact a park. Any school or church that shares a property boundary with a park is notable. Any apartments, condos, or townhomes sharing a boundary with a park is notable. Single family homes sharing a property boundary are more common and are less notable than the other types of surrounding habitat except for county parks and rest-stop parks. Don’t discount the remote county parks completely though. Keep in mind the first two factors when evaluating them as a potential prospect. Other things we want to consider in our evaluation of surrounding habitat include adjacent streets, off-street parking, ease of pedestrian access, demographics, population density, and proximity of other parks, or park density. Find a park that rates highly in these aspects and one might more easily forgive a deficiency in factor one or two. History - It’s important to know as much history on a park as possible. The age, past use, past detecting pressure, current use, current detecting pressure and any historic images and maps all interest us in evaluating a park’s best potential to hold gold. Some history must be inferred, such as detecting pressure, but these days many county governments and city Park and Recreation departments list all the other facts online. In my area select parks are even provided good historical information with images and descriptions of past use. Don’t put too much weight on age of a park. The reason being is that it is possible when a park has the best of the first three factors that a 10, or even 5 year old park in the suburbs will produce more gold than a 60, or even a 100 year old park elsewhere. You gold-a think outside the box! Example Search: I have visited St. Louis for events but never been detecting there. I’ve never visited a park in St. Louis other than the Zoo. I randomly chose a city to illustrate a typical search and actually located a very promising park for anyone in the area. I’d be working it regularly if I lived within 5 miles and it was not prohibited. Image 2: Tilles Park, St. Louis potential area of interest Using Google maps I examine the city first with the map view for likely prospects. A typical search would be entered into the map search bar as: St. Louis school, or St. Louis church. These are not the only parks under consideration, but the locations of these indicators hold a promise of greater success. I generally start from the Downtown area and work outwards in pie segments looking for green shaded parks. Nearby large bodies of water always interest me so I’ll give those areas extra attention. Continuing outwards working in pie segments we note park density, park sizes, and adjacent streets and structures as the initial focus. Major roads that run along a park boundary are notable. Once a promising prospect is located I’ll switch to satellite view and zoom in, examining first images of the park itself looking for clues to the current use, and then the surrounding habitat, structures, and streets afterwards. Just this simple browsing of parks in Google Maps is a huge asset in quickly locating the best potential sites if you use a formula. With this single tool one can quickly cut out a lot of lesser quality parks with occasional random drops and hone in on the likely patches with regular or frequent drops. Image 3: Tilles Park, St. Louis aerial showing a two park comparison. Quickly my eye was drawn by the moderate size of the park, a major road, the dense single family homes, and preliminary usage estimates I infer from experience. I liked the size and especially the two larger streets adjoining the park, Hampton Ave. and Fyler Ave. The nearest park seems to be around a mile away which is close but not too close considering the density of housing. There is a lot of single-family homes between them. Zooming in a bit closer, the positive surrounding features I immediately notice (in addition to the housing densely packed on 3 sides) - two residential streets terminating at the park boundary. That’s a history flag! At this point I strongly suspect this park has some age and the land was used for something else in the relatively recent past. This park warrants a closer inspection and historical research but at this point I wouldn’t rate it any higher than a 3 at best. It has good potential but further research is needed. Image 4: Tilles Park, St. Louis showing an arieal in map view. The Parks department’s website gives an overview. Ordinance Year: 1957 Size: 29.00 Acres. It also lists basketball courts, racquetball Courts, tennis courts, 3 softball fields, one baseball field, a soccer field, a pavilion, a playground, and a skate hockey rink. Outstanding! Features in multiples and a few unique features earn one more point! We’re now a 4 star prospect and I’ve never been there. Image 5: Tilles Park, St. Louis topography map showing elevation Another site like Historic Aerials will assist with confirmation on topography ID and possible past uses. Unfortunately it only goes back to 1958 in St. Louis, but we still can glean information that can inform our actual hunting strategy. Image 6a and 6b: Tilles Park, St. Louis aerial showing park feature history A couple out buildings have been lost near the main structure prior to 1971 (red), and the pavilion had been established by 1958 (green).The park’s vegetation looks stark in 1958. Cycling through the available years trees don’t show up with any size until around the mid-1990. That’s about 40 years of wide-open park land, which means the whole park has good potential to be a nice patch. The walking paths have not been altered. Another important note is the streets have not been widened as of 1996, so plan to extend your coil all the way to the parking. So far I’d have to rate this particular park a solid 4 at this time. If further research reveals regular community events, and/or positive demographics in the surrounding habitat, and/or some historical significance then it might turn this particular park from a 4 into a 4+ and possibly a 5. Tilles Park is one public park I’d spend some serious time getting to know if I lived in St. Louis. It was good fortune in locating such a promising prospect so easily. It doesn’t always go that way. Some locations take hours and others have so few parks there are not any real options. You may have to settle for 2 and 3 star parks in your area, in which case my 3 star becomes your 5 star. Don’t let me box you in - think outside of it! I estimate thousands of parks have very nice undiscovered gold patches and 10,000 more will have at least one gold item lost in them. Locate those patches and you’ll regularly locate the gold. This information comes from my own personal experience and observations gained through thousands of hour’s field time. My methods are fluid and something I’ve developed along the way while working towards my own personal challenge to master this game. Please feel free to critique, make suggestions, add to, question, and challenge what I’ve presented here. This is the first time I’ve put it down in writing…and if you made it this far, thank you for your time. Best of hunting to you!
 -
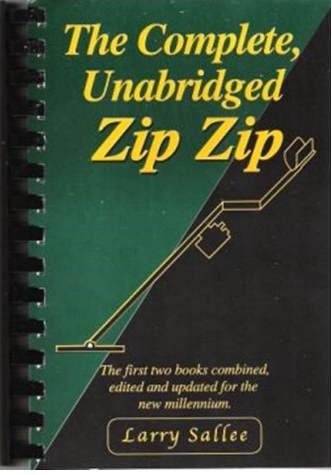
I’ve been getting my mind ready for 2017 by re-reading my jewelry hunting textbooks: ‘DFX Gold Methods, Site Reading for Gold and Silver, and the newest one - The Gold Jewelry Hunter’s Handbook. All three of these are written by Clive James Clynick and I personally consider them to be required reading for the dedicated jewelry hunter. So much so that I try to read each of them at least a couple times a year, every year. They contain information for both land and beach hunting but of course I focus on the land hunting part. Of course some of the information is redundant among the three books but there are little gems here and there that make them each worth owning. The information contained in anyone of these three books will guarantee gold in your pouch. I combined the information on page 8 with information on page 18 of the DFX Gold Methods and found this 10K gold ring the first minute on location. When I get into a slump simply re-reading anyone one of them motivate me and put gold back in my pouch. I also periodically re-read Bob Brockett’s, “Taking a Closer Look At Metal Detector Discrimination to help remind me what I’m doing with my discrimination and notch settings. He goes into great detail with pictures and descriptions about what type of objects fall inside discrimination ranges. A great help for making intelligent discrimination decisions. There is one more that I read at least once a year or so, Larry Sallee’s, “The Complete Unabridged Zip Zip”. Most likely not everyone has ground minerals like mine and can probably get along without this one in their library, but my ground signal can mask a small gold response if I set my sensitivity settings too high. Larry reminds me to tune my detectors to get the best audio response possible on my desired target and on how important coil control is on maintaining that best audio response. On some sites I will put a BB on the ground to tune my detector after l discovered that too high a gain setting on my detectors will actually cause the BB signal to break up or disappear. You would be surprised at how much is masked by the ground signal when your sensitivity is set too high in high mineral ground. HH Mike


-
Your very own jewelry store. What is cool about this gold ring is not that I found it with a lowly entry level metal detector. What is really cool about THIS gold ring is that I found it where I expected to find it. It is my second gold ring find from this exact location and is my third ring find from the general area. My first ring find at this site was found with a Tesoro Golden uMax while I was proving and validating a ‘loss characteristic’. I had found a ring at a park and had identified it with a particular ‘loss characteristic’ or in other words, “the reason I found it where I found it”. I had subsequently verified this particular ‘loss characteristic’ by looking for and hunting another location that mimicked the first site. The second site produced a nice ladies silver ring. So with this knowledge twice validated under my belt I put my Aerial Map CD in my computer and started making a list of other locations that looked like they could provide the opportunities for this particular ‘loss characteristic’. One of those sites I had identified from my aerial map investigation was this particular site. My first ring find with the Golden uMax at this site thrice validated this particular “reason I found what I found where I found it” , i.e. a loss characteristic, and not just a lost characteristic, but a VALIDATED loss characteristic. At another site I had identified from my map review for this particular ‘loss characteristic’ produced this nice gold ring. Unfortunately I didn’t have the presence of mind to look for the stone I knocked out with my screwdriver when recovering it. The take away: A "validated loss characteristic" is like owning your very own jewelry store. HH Mike
-
It has been said that the Gold Racer is probably not your best choice for hunting sites with lots of iron trash, Probably true, especially when hunting cellar holes and such, but detectors that do better give up sensitivity to small gold like micro jewelry which is what I like to hunt these days. I have begun a concentrated learning process on the idea of target masking and applying it to the use of the Makro Gold Racer. The idea is to read what can be found, then apply, then read some more, rinse and repeat. So far, these techniques have proven useful. Gleaned from posts here and other places, they are fundamental ideas that come up a lot wherever the topic is discussed. Use a smaller coil. For this the 4X7 elliptical was purchased Increase recovery speed. Using iSAT of 9 seems to work best here Decrease Gain. I have been doing this with good result, but still keep it pushed as high as the specific site will allow. More iron=less Gain thinking. Slow sweep speed. Though the owner's manual recommends a faster sweep, slightly above a crawl is working well. Hunt in All Metal Mode Dig iffy signals The idea of working on this particular idea was originally started simply as a way to work some really trashy sites visited recently, but the idea has much greater application, as was found today. The study of target masking shows why loud and clear. The presence of junk influences the sound and TID of good targets if they can be heard at all. All Metal Mode sees everything and lets you sort out the iffy yourself, which can be very tedious and slow, but it will work. More good targets can be recovered even from relatively clean sites. Plus you will get a lot of exercise. So this is the idea in mind, and the current set of techniques to make use of it, and this morning was applied to a volleyball court hunted before with stock coil and normal sweep speed. Three stud earrings were recovered, all iffy signals. One garnet, two cubic zirconias. I do not think any of them were even real gold, which may contribute to the iffiness, but these were targets of the size and shape I want and would not have been dug before. It appears useful to not be overly reliant on the screen id, and pay more attention to the tone. Having issues with this small coil now again too, a large number of false overload signals were found today. Removing the coil cover and replacing it did not help this time, lowering the gain did, though I pushed it back up whenever I got the chance. No metal at all could be found in these various hot spots. The ground is saturated from recent rains, but the phenomena did not seem to correlate with low spots and the ground has had a couple days to dry out.. This replacement coil does seem to relieve the constant overload problem I had with the first one, and usually does not do this, but I am kind of wishing I had gotten the small round dd. Who knows. Any who have suggestions and ideas concerning target masking as a concept or technique to get around it, please chime in. Learning to unmask with a Gold Racer could be a great tool. What I know so far for what is worth.
-
It would be a great title to a hand book on hunting urban parks. Feel free to use it you authors out there. The CTX 3030 is a very powerful gold machine (heard that before?) Extreme depth is not required ... Just dig those low tones but like hunting nuggets you will dig lots of trash. Two sterling silver rings and two gold...one 10K and the other 14k with small diamonds this weekend just a few hours at two local parks. Good hunting to you all. Hoping to hit the real gold fields soon but until then I'll take what I can get. strick

-
Hello Prospectors, Some of you may have seen my rants of late and the general direction of interest, hunting small gold jewelry. Compared to other forms of metal detecting in general, and gold hunting in particular, there is less written about this but some as you no doubt know. A very small niche and not a lot of enthusiasts, no doubt due to the amount of foil one would encounter and the low value of some of the targets. Nonetheless, pressing ahead I am looking for your advice on what might make a good value in detectors for this. It occurs to me that with the advent of the Makro Gold Racer and others that there might be some real bargains in used gold detectors where people are upgrading to the newer top of the line models. Your thoughts? SLG
-
A topic spoken of at length here and other places, please forgive me bringing it up yet again. I am looking for bang for the buck in Super Hot VLF as described in Steve's nugget detector picks. From that list the ones that look to fill out my range of metal detectors are those operating above 20kHz. Specifically, White's GMZ and GMT, Fisher GoldBug 2, and the new Makro Gold Racer. Any of these will surely work for what I want. I wondered if other options exist that might not have come to mind or what my least cost option might be to just try this idea well enough to make it worth a more substantial investment. I have been scouring the internet looking for information on this type of detector, but there is so much marketing that the number of pages to wade through just to find good opinions has been quite a chore and the people hunting the very small things away from goldfield are not numerous. So many worry over the question of depth that sensitivity to small is less of a concern, but for me the reverse it true. That makes it swimming upstream and I could use some advice. From what I can find, I do not see a better option than the Makro Gold Racer. Even used nugget machines on eBay are not really beating the price of a new Gold Racer. As a thing to try, I do not want to spend that much money right now. Is there a low cost option to just try the concept?
-
I never had much like for the Tesoro Golden Umax until I saw this video tonite. Looks like this user has almost achieved the Holy Grail of ring hunting and aluminum discrimination. Maybe older is better? Can any of the recent detector offerings pull off these miracles?
-
In a few days, so very much information, thank you all for responses and for all else written that is so very valuable. Aside from being thick headed, the challenge is that very little known and done so far applies in quite the same way. Like doing the opposite on opposite day, hunting tiny gold jewelry one aims directly at what one would usually try to reject. And so it is more like prospecting than jewelry hunting, a thing I know virtually nothing about. Thank you in advance for patience needed at the moronic things an old water hunter might say not knowing better and confused at becoming an instant newb. To change your mind is to change your life. The old tried and true way is simply not producing now, so it is time to change. The big easy stuff is gone, so little hard stuff seems the way to go to keep producing. Suggestions made go from top of the line gold detectors to the humble Tesoro Compadre and lots of compromises between. Starting at the bottom, the Compadre is in hand to swing today if the rain holds off, and a gold detector will come soon. The likely first one will be a GoldBug if a used one can be found used at a reasonable cost. If it shows promise, a Makro Gold to follow that. Incremental, keeping the entry cost down till the value is seen. Also looking at the AT Gold to hunt water, but do not know if the return on that one would be worth it over the CTX 3030. I would so value any further comments or suggestions you might have. SL
-
 http://westerndigs.org/ring-tab-beer-cans-are-now-officially-historic-artifacts/
 -
 Ninety percent of my detecting is 'gold jewelry' hunting on dry sand beaches in florida. Is there an advantage/disadvantage in choosing a 'vlf' detector in the 17-20 khz range as opposed to other frequencies to accomplish the above? I realize most detectors will find gold jewelry but i'm wondering if specific frequencies have an advantage. I'm only interested in digging a maximum of 7".
 -
Headed out with the trusty CTX Sat evening for a couple hours to a near by park. Found this under a nice shady tree on the side of a grassy knoll. Still have some cleaning to do but the rocks are low quality. Last time under this tree I found a 45 slug lol strick

-
Jewelry find! Got 46 cents and my first ever RING!!!! Pictures to follow...
-
You have to check this out. Dale, in New Zealand, has been on a roll beach hunting with his Garrett ATX this last year, and managed to hit his goal of 100 gold rings in a year. Really great and a testament to patience and hard work paying off. Well worth a peek at Link deleted since Findmall Forum update broke all old links
-
I do a lot of inland jewelry hunting in parks, playgrounds, school yards, and athletic fields. You might be surprised to learn that hunting processed gold (aka: gold jewelry) is a lot like hunting raw gold. I have found the adage; "Gold is where you find it," is just as true for gold jewelry as it is for raw gold. I prospect for locations that might hold gold jewelry, and once I find a piece of gold at a certain location, then I look to see if it might become a “patch”, A “patch” for me is a location that produces another piece of gold over time. A good patch might produce 6 or 7 nice pieces over the course of a year. I “lay claim” to a good patch by hunting it often and regularly. Hunting one of my claims is like hunting barren ground as I clean it out over time, so that each successive hunt can be faster and more efficient. The goal of course is to work the existing claims, while also making time for prospecting for other patches that might warrant a claim. Of course some claims are more productive than others, and sometimes a claim may dry up for a period of time. A good set of claims can put a piece of gold in your hand nearly every trip out, which is the ultimate goal. Another thing that prospectors and jewelry hunters have in common is the equipment set up, at least in my mineralized dirt. Just as for nugget hunting, you set up your detector to give you the cleanest sound possible on a nugget, so to do I, often using a test object to find the best settings (or detector). I normally use a BB just like a nugget hunter would use a test nugget. My ground can easily mask or break up a BB at too high a Gain setting, and then adding in Disc and Ground settings or combinations thereof can make it more important to setup for the cleanest response. Large targets take care of themselves but the small signals, and a lot of lost jewelry is small, takes a proper setup to find. Then there is the detector choice. While nuggets and jewelry can be found by any metal detector there are some that are better suited for the job than others. Just as some detectors work better at nugget hunting, there are metal detectors with features that work better for jewelry hunting. I’ll follow up with some of my favorites later. Hope this doesn’t bore anyone. HH Mike
-
 Well, back home safe and sound after a couple weeks in Hawaii with my wife. We visited the island of Kauai for the umpteenth time. We like the laid back vibe, made even more so by being familiar with everything. We do what we both like - she relaxes in the sun and I go metal detecting. And lots of walks and dinners together. I am glad I waited to post this as I have calmed down some now. A post a week ago would have been a bit much and made the Garrett ATX sound like God's gift to metal detecting. Now I can be more even handed about it. I will do up much more of a story for Steve's Mining Journal soon. This is just a post about how the Garrett ATX did for me in Hawaii. The back story is told at Steve's Mining Journal about prior trips made to the same location over the years. Hawaii has always been a pet project of mine as it is the most difficult environment I have even encountered for a metal detector. There is of course the salt water. There is also literally military grade electromagnetic interference (EMI) from military installations plus missile and satellite tracking stations. Finally, there is a mix of non-magnetic coral sands and volcanic basalt derived sands and cobbles. If you stick to the tan to nearly white sands you can get decent performance from many detectors. But when the basalt gets involved is where things get fun. Most prospectors are familiar with basalt rocks and the challenge they present in gold prospecting. Well, just take the same hot rocks and douse them in really salty water and heavy duty EMI and you have Hawaii. Multi frequency VLF detectors like the Fisher CZ or Minelab Excalibur do ok in in the stuff but lack any real punch. They do best in the whiter sands, but the basalt sands and cobbles really leave them feeling gutless. I went to PI detectors early on, and overall probably had my best results with the various White's Surf PI models. Again, however, they worked best in homogenous materials. Places where the white sands and basalt cobbles mixed gave the Surf PI fits as it hit on the basalt cobbles. In darker sand beaches it was near impossible to keep the machine steady over the bottom in the surf, leading to lots of false signaling. I tried several Garrett Infinium detectors in Hawaii and got tantalizingly close to the detector I wanted. The Infinium as a ground balancing PI could tune out the black sands and hot rocks and eliminate many of the false signals. But it introduced just as many if not more by an inability to play well with salt water and EMI. The interference in particular made the Infinium almost unusable at times. I really wanted a stable Infinium, and confirmed this idea by using the White's TDI in Hawaii. It seemed to solve the issues I was having with the Infinium and so I waited for White's to make a waterproof TDI. And waited. And waited. I waited so long that Garrett had time to take what they learned from the Infinium and another model, the Recon, and build a next generation PI, the Garrett ATX. I was cautiously hopeful that all the noise I had made over the years had been heard, but frankly, I was not getting my hopes up too much. On top of that, the good old days are gone. I used to spend a couple weeks in Hawaii years ago and never see anyone with a detector. This trip I saw people every day! Ok, often the same guy but also more different people detecting than probably all my previous trips combined. The competition has gotten fierce by comparison to the old days. And yet I just had my most successful trip to Hawaii ever. I recovered over a couple dozen rings with the ATX and half of those were gold or platinum. Some silver rings, a nice 14K bracelet, and a pile of coins and there inevitable PI junk. You will have to wait for the full story for details and more photos but here is a teaser of many of the good finds taken a few days before I wrapped up. Eight Gold and Two Platinum Rings Found by Steve Herschbach with Garrett ATX in Hawaii (Click on photo for larger version) You can probably see why a post earlier might have been a bit overly excited! This despite bad weather early on and all the extra detecting competition. The Garrett ATX is the best PI detector I have ever used for difficult water hunting. Hands down, no comparison. I have to qualify that by saying that what makes it shine is the severity of the conditions. A person buying it and using it on clean white sands in Florida would probably have a less enthusiastic reaction. There is a lot of confusion regarding ground balancing PI (GBPI) detectors like the Garrett Infinium or White's TDI. They do not air test well against good VLF detectors and indeed do not really perform all that well against them in mild ground. People never really understand what detectors like these are all about until they get into difficult ground. The kind of ground where the best VLF detectors lose half their depth, the GBPI detector just keeps plugging along, and all the sudden now have a big depth advantage. Not because they go so deep to start with, just that VLF detector fare so poorly in really bad ground. GBPI detectors only really shine in the worst conditions. Let that sink in because it is very important. Anyone reading this should not get the idea these detectors are the be all or end all for all circumstances. But when the going gets tough, when other detectors fall on their face, a GBPI detector like the Garrett ATX can be the answer. Tuning a detector like the Garrett ATX can really bother some people. There is this resistance to doing anything that reduces the theoretical max depth of the detector. As soon as you start getting into reducing settings the feeling is that "well, yeah, but now it does not go as deep". The reality is that any machine that can be run maxed out in bad conditions has left some performance on the table. You may be able to max settings in benign ground, but you should have to back off of max settings in really bad conditions. That is why the controls exist - to compensate for bad conditions. The goal is to be set as high as possible while getting stable performance. The ATX is a powerful detector, and so it should be expected the machine has to be dialed back in severe conditions. The ATX has three adjustments that affect the depth. The Gain control is the simplest. You decrease the sensitivity of the detector to help compensate for conditions that are introducing too much noise. Just like the Gain or Sensitivity control on a VLF detector. This control was lacking on the Infinium and is a major reason why the ATX is superior. There is the pulse delay, which Garrett labels as a discrimination control. It is, sort of. Without getting all technical on you it is also a sort of sensitivity control, in that increasing the delay or discrimination also eliminates signals from weak conductor targets like foil, hot rocks, or salt water. This is really the only control you have on the Infinium to deal with false signals and it serves a similar function on the ATX. Finally, you have the ground balance. The ground balance is basically another type of discrimination circuit or filter. The signal produced by the ground is determined and then eliminated. However, this comes at a cost. Items that read the same as the ground signal are also eliminated, and items near to the ground signal will exhibit reduced signals. The White's TDI makes it easy to demonstrate this. You can turn the ground balance completely off, and when you do so the machine air tests far better than it does when you turn the ground balance on. This is because of the subtractive nature of the ground balance circuit on the TDI. Also, because it has a manual ground balance, you can see the effect of tuning the ground balance control closer to and farther from a particular target response. Instead of tuning out the ground the control can be manipulated to tune out other items instead. It is just a basic discrimination circuit. Different ground balance methods can affect items to greater and lesser degrees so the example shown by the TDI should not be taken as being the same with all detectors. But the effect is real and does exist to some degree on all ground balancing detectors, both VLF and PI. So why use ground balance? That should be obvious - to tune out ground responses. If there is no detectable component in the ground you would be better off without the ground balance circuit. Such conditions rarely exist, but they do exist. Absolute pure white coral based sands are one of them. The ATX at its hottest will detect salt water however, and new to the ATX is the ability to ground balance out the salt signal instead of the ground signal, but you are trading some sensitivity for stability doing it. Long round about way to explain that when the Garrett ATX is turned on with factory default settings the ground balance setting is at a minimum. The ATX should be tried first with the factory default setting and on many beaches you will not want to ground balance it. Just leave the discrimination (pulse delay) at zero, set the gain as high as possible while still allowing the machine to be stable, do a frequency scan, and go. In Hawaii at my location however I could not do this. I could on clean sand but not in the cobbles I wanted to hunt. But first, a total surprise. My ATX was almost totally immune to the EMI that I had previously experienced on Kauai without even doing a frequency scan. The frequency scan was basically redundant. That one thing made the ATX a huge advantage for me before I did anything else. I would not have believed it had I not had a White's Surf PI along for backup and sure enough, when I fired it up, the EMI was there. It was discernible in the ATX non-motion mode but even then nothing to worry about. I. Do not know what Garrett did or if I have a magic ATX but this one thing alone really floored me. It absolutely eliminated my number one problem with the Infinium. Basalt cobbles in sand on Kauai A detector with all controls set to max is in theory getting the best depth. But if it is not stable you cannot work with it, so you have to adjust back to find the best balance. The ATX is a very powerful detector and so I found a combination of settings that worked for me to get quiet, stable performance. This is in no way being advertised as a setting to for you to use! It is what I did for this location and other locations will take different settings. In general, the more powerful all your settings can be the better while still being able to have a stable running detector. So the ATX with factory default (minimum) ground balance, zero discrimination (pulse delay), and max gain would be at its most powerful. The worse the conditions, the more you may need to dial the settings back. The problem is with all the settings maxed out the ATX is very sensitive to small gold, but that also means it picks up salt water and hot rocks. I played with the gain control and the pulse delay (disc) control looking for a balance that left the detector running quiet. A discrimination setting of three and a gain of seven made the ATX submerged in salt water run like a VLF. I periodically reduced the disc setting or bumped the gain higher and noise was introduced, so settled on the 3 and 7 setting for my Kauai beach. Then I found a fat basalt rock buried in the sandy bottom and ground balanced over it, eliminating the signal. I would be the first to admit these settings were probably aggressive and of course costing me some depth in theory, but I got what I have always wanted in Hawaii. A PI detector running quiet as a VLF and by that I mean just purring along with a threshold sound, and when it made a noise, it was because I had a target under the coil. Here is another way to look at it. A very hot detector will detect salt water. It will detect hot rocks. And it will detect things you want. EMI can also be an issue. The trick is to reduce the signals from the things you do not want to hear as much as possible while enhancing the good signals as much as possible. It may be letting unwanted signals through will also increase depth on desired targets a bit. It may also be true that too many signals from undesired targets will inhibit success. You have to decide for yourself where the balance lies. If maximum depth is the goal then digging more undesired targets may indeed pay off. In my case I had plenty of targets, so the goal was quiet, efficient operation. I would not hunt clean white sand set like this. I would have the settings maxed out. I had a strategy in mind here, and my goal was to detect in the basalt cobbles. I was not tuning the machine for maximum performance in the easy stuff, but for maximum performance in the worst stuff. I wanted to detect the places where targets were more likely to have been missed by other detectors. Finally, after one go with the stock coil, I switched to the 8" mono coil. A few reasons. First, it is easier to handle underwater and fits in depressions better. It can be pushed through sand ridges and is less likely to move on the shaft. And I could find items edge on with it easier than with the stock coil. By that I mean turn the coil on edge and drag it in the sand and it acts like a pinpointer on small surface targets. The edge of a mono coil is very sensitive. A smaller coil is easier to pinpoint with to start with anyway. And honestly, I used the 8" mono because I was worried about sand getting in the twist locks and giving me problems, possibly even seizing up the rod assembly. The 8" mono and shaft assembly was my sacrificial lamb. If it got totally screwed up my stock coil would still be fine. Garrett ATX with 8" mono coil (goodie bag attached to arm strap, waterproof watch on handle) I may as well relate now that I did have issues with sand in the twist locks but not as bad as anticipated. The lower two twist locks seemed just loose enough that at the end of every outing I just worked them back and forth and the rod in and out and they cleared. But the upper one gave me problems. It got sand inside that refused to come out, even after taking it off and working on it under running water for a half hour. For some reason that upper most twist lock was just a bit tighter to start with and the sand would not clear out. Yet it never quit 100%. I lost most of the ability to twist the lock but it still twisted just enough to hold the rod in place. I am asking Garrett for advice on where to drill a couple holes or maybe slots to see if we can get these things clearing sand a bit better. Overall I actually am ok with them but they need improvement. In other types of sand it could be a big problem. I am going to see if I can get my upper lock to loosen up similar to the lower two and will report back later. The rod assembly got scored up quite a bit from being extended and collapsed with sand in the assembly. I will post photos later. Nothing that bothered me but some might hate seeing their expensive detector getting ground up like this. I have to say at the end of the day the physical design and the rod assembly in the water were nothing short of brilliant. I have given the ATX low marks for prospecting as being a duck out of water. The waterproof design adds weight, complexity, and expense not required for most dry land prospectors. But in the water the ATX felt really, really good on my arm. It is slightly negative so will settle on bottom if released. But not much; it is essentially weightless on your arm underwater. The rod assembly was a dream. I was working in heavy surf with 40 lbs of lead weight on. I steadied myself many times by leaning on the ATX with absolutely no fear it would break, and the rod never slipped. I could get in the shallows on my knees and shorten the rod down as short as I liked. And just right, no fumbling for the right holes, just loosen a twist lock or two and put it right how I wanted it. Better yet, due to the three piece design, I could also extend the ATX to be longer than any detector I have used underwater. I was in 6 foot of water with just my snorkel in the air, and easily detecting around me. I do a lot of breath hold recovery in deeper water and the ATX was just so easy to adjust for whatever depth I was working at. So easy and so solid and tough that I 100% forgive any little work needed to sort out the twist lock situation. This is one really great handling detector underwater in rough surf conditions that would leave other detectors in serious danger of breaking. The 8" mono was perfect for me. It stayed where I put it and I pushed it around a lot. I learned quickly if I wanted to adjust the coil position to be flatter all I had to do is turn the detector over and push down on the nose of the coil. Maybe not as easy as pushing down on the heel of a coil with a rod mounted in the center instead of the rear but no big deal, mainly because the coil stayed put. After two weeks of heavy use I never had to adjust the coil tension and it showed no signs of having any issue with all the sand it ran through. I had no scuff cover, and the coil shows no sign of cracking, just your normal scuffing from use. The epoxy appears much improved from the old Infinium days. A weak point - that tiny spring loaded rod lock, the one you flip to disengage the rod and coil assembly. The tiny spring popped out on me once. I took it apart, made the spring end ninety degrees again, and it worked for most of trip, but slipped out again last day. Not a big deal but needs beefing up. Be sure when twisting the rod and cams while cleaning to not hold the detector body. You will be twisting against that little lever. Hold onto the rods themselves and twist the cams. We need to find out what the part number is for the coil and headphones connector covers. Everyone should have a couple extra. Better yet, a couple spare caps like are fixed to the back of the ATX to cover the male headphone connection when not in use. One of these to put over the male coil attachment point inside the housing would be very helpful when rinsing and cleaning the ATX. Take the coil off, put the cap on, and now no worries while cleaning. I will find out the part numbers and pricing for those and get some and suggest ATX owners do also. OK Steve, quit delaying! What about the rings? I saw no point on beach hunting with all the competition. One guy in particular walked the beach a couple times every day with a Surf PI. I saw a couple Surf PI detectors at work, a Minelab Excalibur, and a Tesoro Sand Shark or Piranha. They all walked the beach and only the Excalibur guy ventured into the trough when it was calmer once. I spent all my time in the surf or deeper water with a weight belt and mask and snorkel. I recover targets by fanning or digging. And I went looking for mixed coral/basalt harder bottoms instead of deep sand. I played on the beach a bit and hit deeper sand underwater but basically all my finds came off of more solid bases. I am not going to say the ATX was some kind of super depth monster. That would be misleading and really missing the entire point. I have no doubt it was getting as good as depth as could be wrung out of the conditions. I was easily getting nickels down to ten inches in the basalt, maybe a tad deeper but honestly it is hard to tell recovering targets underwater while holding my breath in the surf. The real thing I am trying to relay here is the ATX was rock solid, just like using a good VLF above water, but in the worst detecting conditions I have ever encountered. It allowed me to just get on with the business of detecting targets and recovering them. If I was lacking for targets maybe fighting for another inch would be the name of the game but I never ran out of targets. The rings just banged! Nickels hit hard. By virtue of the ground balance system large junk goes low tone and I ignored many low tone targets. That cost me some dimes, copper pennies, and quarters but that is ok. Nickels, zinc pennies, and rings go high tone. As do sinkers, bottle caps, hair pins, and aluminum. Still, being able to ignore low tone targets upped my odds some. Though I dug a lot of low tones also just to learn more and frankly, because I have a hard time passing targets. You just never know for sure until you dig them and I was there to dig targets. Still, this photo shows my target mix skewed to high tone targets. With the exception of a few large items discarded at the trash can this is every item I dug over the two week period and about 50 hours of detecting time in the water. Steve's Finds in Hawaii with Garrett ATX (Click on photo for larger version) Another benefit with the ATX is the adjustable target volume and threshold, a real boon in an underwater detector. I had brought Gray Ghost Amphibian phones with me that started out loud enough but then got too quiet to hear, so I had to FedEx a set of Garrett phones in quick. I like the sound of the Ghosts better but not if I can't hear them. I surmise the sound chamber was filling with water and so will return them to get checked out. First time DetectorPro phones ever let me down. The Garrett phones have a lower tone but worked just fine. The volume and threshold control on the ATX makes them much nicer to use since they can be set comfortably for both above and below water use even though they have no volume control themselves. You can even set the volume on the fly easily while underwater. This is a very nice thing that most underwater detectors lack. I have read a few posts by people very concerned about the placement of the headphone connector. Total non-issue for me. It is under my right elbow and was never a concern at any time. Icing on the cake? The ATX retains all settings when turned off. Once I found my magic settings I was so happy with how the ATX was running I was afraid to change anything and did not have to. Just turn it off, turn it on, and ready to go. Everything is just the way you left it. This is very important with the ground balance setting. It is the one setting you have no idea where it is set. I wish and am suggesting that when the detector is manually ground balanced the LED indications reflect the entire range and show you where you end up at for future reference. Right now the LEDs simply follow to audio and reduce to nothing when the unit is ground balanced. But where am I and can I get back there? You have no idea and neither did I. All I knew was my ATX was running great and recovering targets at what I thought was good depth so I left it be. I used rechargeables exclusively. I kept rough track of detecting time and charged up about every ten hours. Again, it was nice being able to pull batteries out, charge, reinstall, and when the detector was turned on again no tuning was required due to the retained settings. I carefully looked for water in the battery compartments each time but never saw a drop. I have total faith in the waterproof integrity of the ATX after what I put it through. I just got back and blasted this report out but will probably edit it a bit to smooth it up over the next couple days. I will also post a more story like version with more details and photos on my journal in the next couple days. I am cleaning up a few of the rings. There is one very old class ring I thought was junk but is encased in sand and lime I am dissolving away and I have a couple silver rings to clean up. Once again the big diamond eluded me but no complaints here, it was my best haul ever for a beach hunting trip. In no small part due to the Garrett ATX but I will take some credit also for really hitting the water hard. Again though, do not take this as some kind of crazy ATX testimonial. Pay attention to my caveats. Beach hunters in clean white sand with tons of hair pins have less to be excited about here. But if you have black sand beaches or worse, the ATX is a machine to at least be aware of. I just can't help it though, I really like a detector that puts gold and platinum in my pocket! Things I most wanted? An indication of what the ground balance setting is and an ATX version of the 14" Infinium mono coil. Thing I liked most? The way the ATX handled in the water and the way it adjusted up to handle the conditions. My last detecting nut cracked - thanks Garrett and especially Brent Weaver for obviously listening to my suggestions all these years! I would like to learn more about this detector as there is much it is capable of. How exactly does it compare with factory default minimum ground balance mode versus PI detectors that have no ground balance at all? I tried the no-motion mode a bit but saw no real value for what I was doing - there has to be more to it that is of value in other situations. Most importantly, what combination of pulse delay, gain, and ground balance is optimum for various locations and targets? I found some that worked for me but I am not swearing they were the best settings possible. I admit to focusing more on detecting than fiddling and so it is hard to get me to stop and do comparative tests when detecting time is at a premium. I look forward to seeing what works for others and will add what I can as I learn more about the ATX myself. Steve Herschbach This post has been promoted to an article