Search the Community
Showing results for tags 'rods shafts hardware'.
-
Hey gang, How many of you have old or extra lower rod to an SD/GP/GPX Excalibur, Sovereign laying around? The reason I ask is because I am getting a lot of interest in the SAGA™ from overseas, especially AUSTRALIA. however, the big bug-a-boo, is the cost of shipping. Because the package is over 24 inches long the postal service charges an enormous surcharge. Shipping for one SAGA rod is literally $66. I about choked. Now it just so happens, I was thinking ahead on this issue, and I made the SAGA so it would also use a spare fiberglass rod from an SD/GP/GPX Excalibur Sovereign etc. It fits perfectly. If an international customer could supply their own rod, I could just send a parts bag including a 1 ounce tube of Silicone sealant to glue the handle on and shipping would only be $32. USD. And get this, if a customer ordered two parts packages, the shipping would still only be $32 shipping for two packages. So if you had a mate that wanted a SAGA, you could share the cost of shipping. The only thing the customer would have to do is cut off the head of the rod they have where it attaches to the coil. The other end has the adjustment button which on most if not all Minelab lower rods is metal. That's not good because that adjustment button end is the part that goes into the SAGA pivot joint close to the coil. However, I would just include a plastic button to replace the Minelab metal button. So bottom line is I wonder how many people have those extra lower rods laying around or how readily available they are and if offering that option of the parts bag would be more attractive for an international customers than paying $66 for shipping? I know I wouldn't pay $66 USD for shipping. Actually the same goes for U.S. it cuts shipping from around $12 on a package going to New York to about $6, by eliminating the rod. It only makes sense if you have an extra rod laying around, if you have to buy a rod especially for that reason Minelab charges $42 for a lower fiberglass rod. Really interested in hearing from forum members in Australia. Doc
-
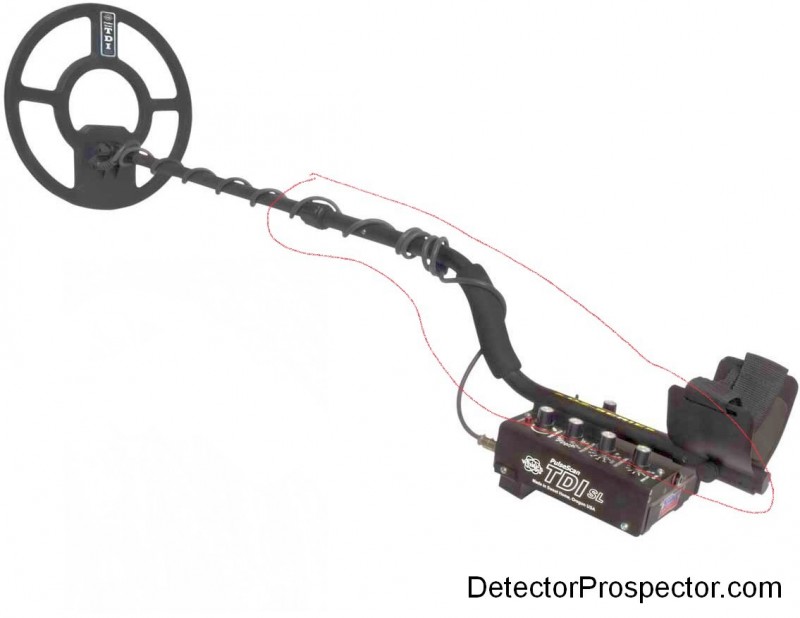
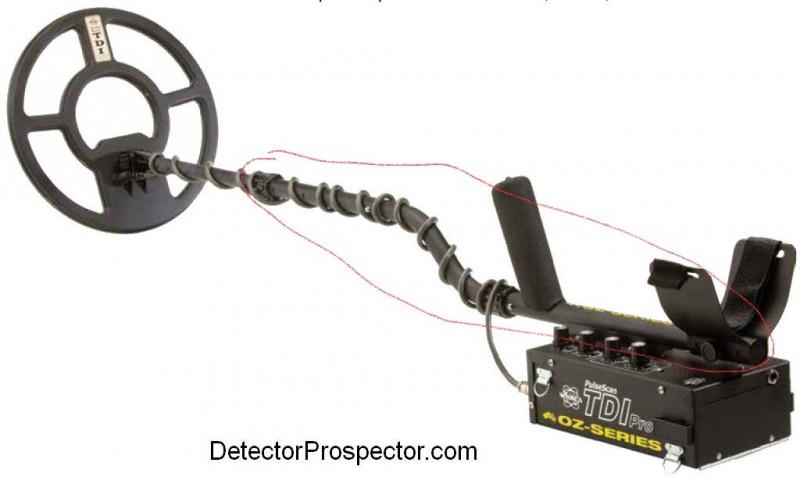
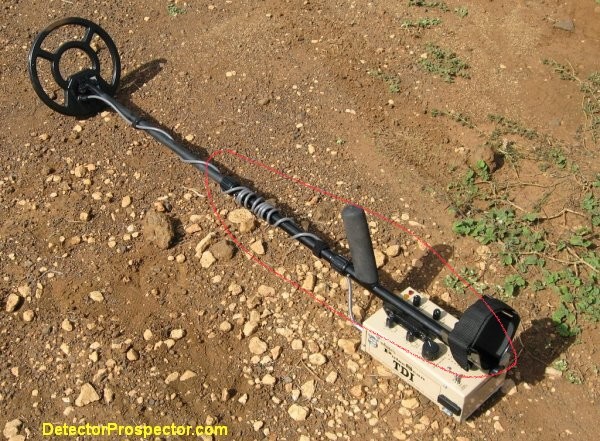
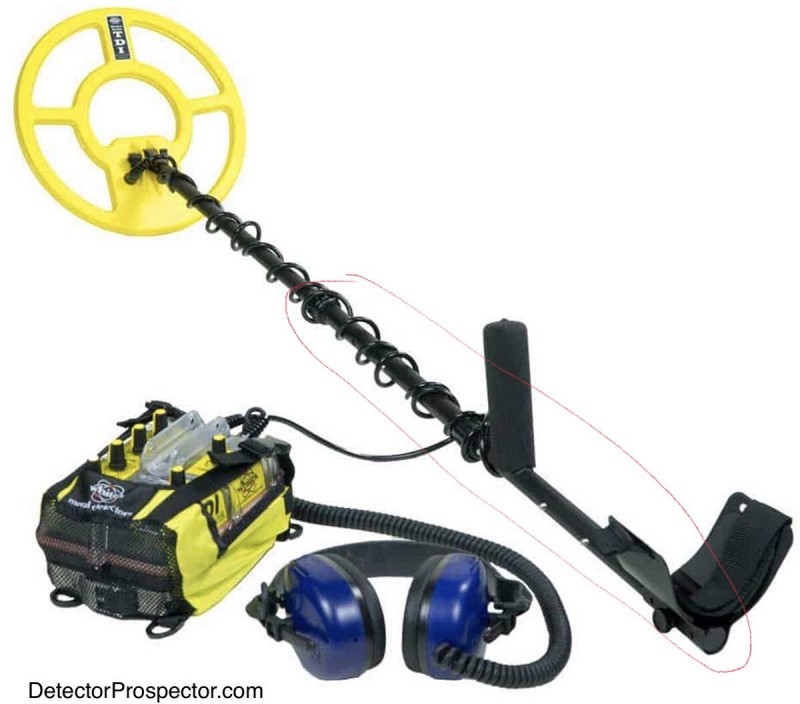
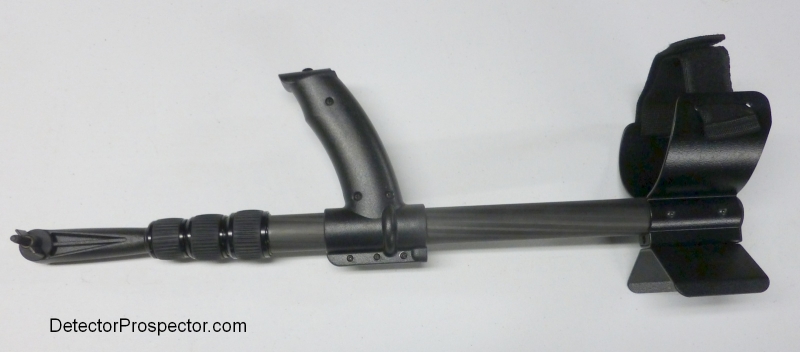
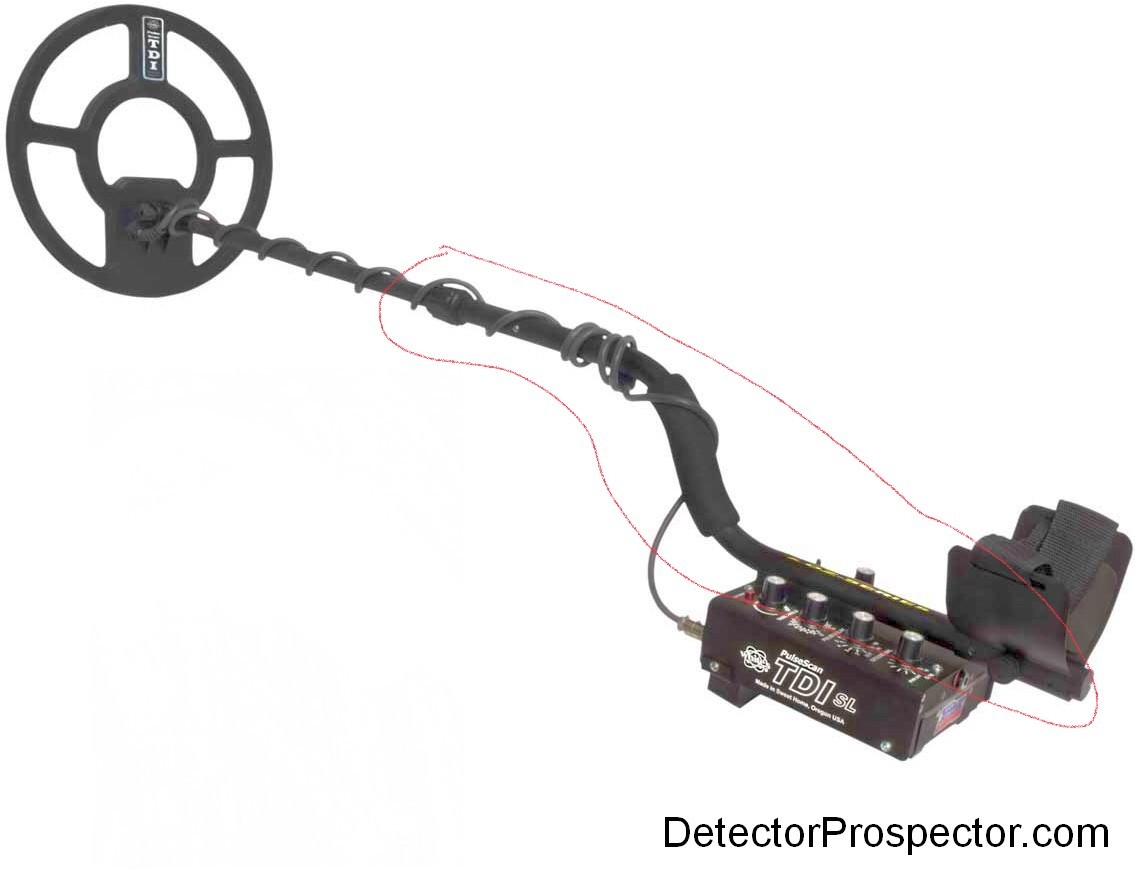
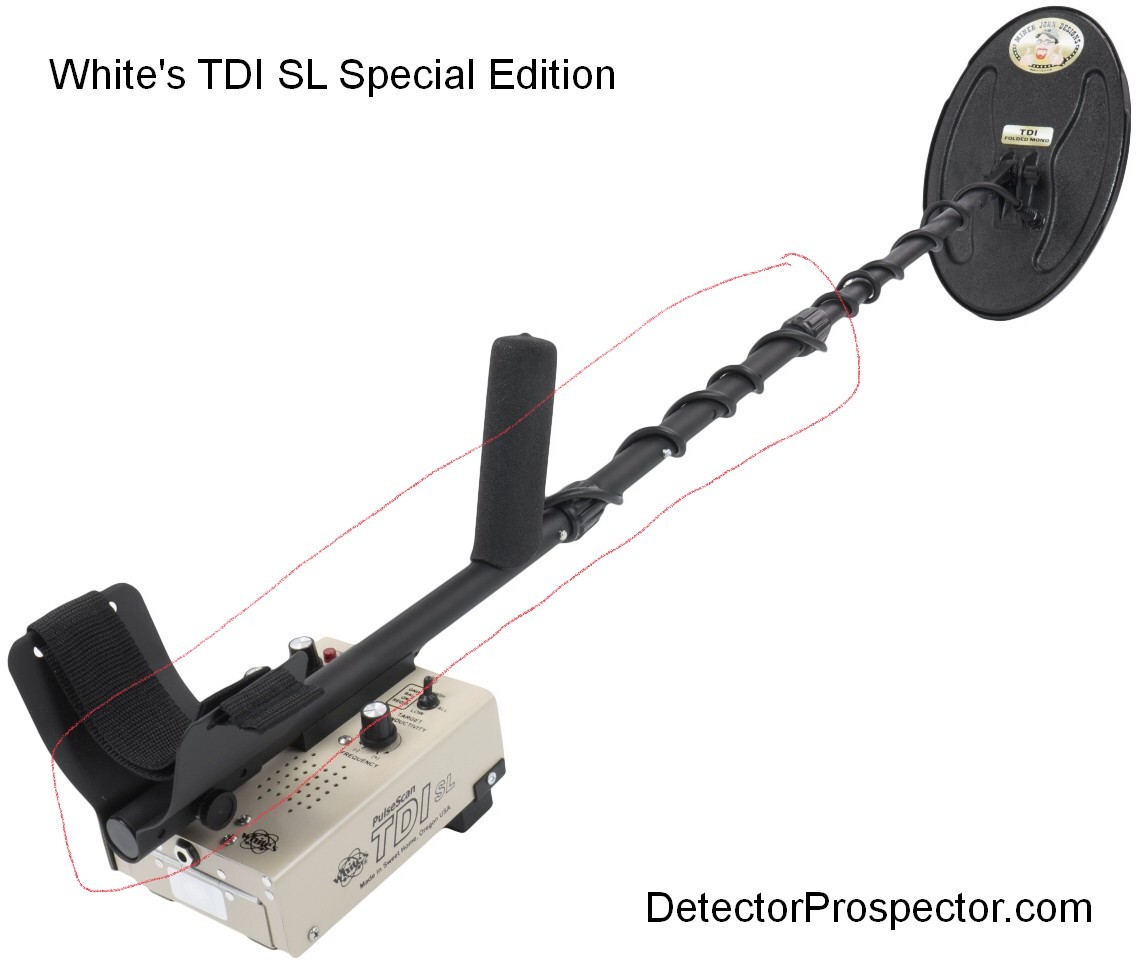
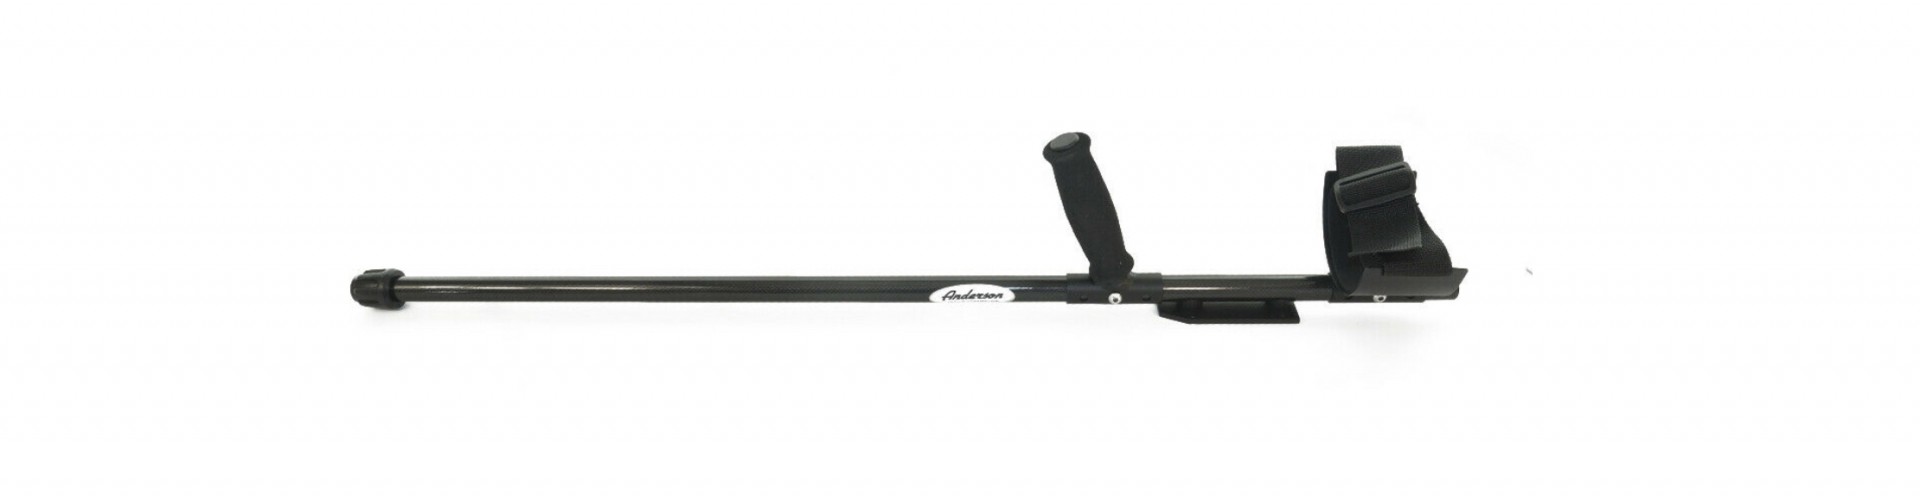
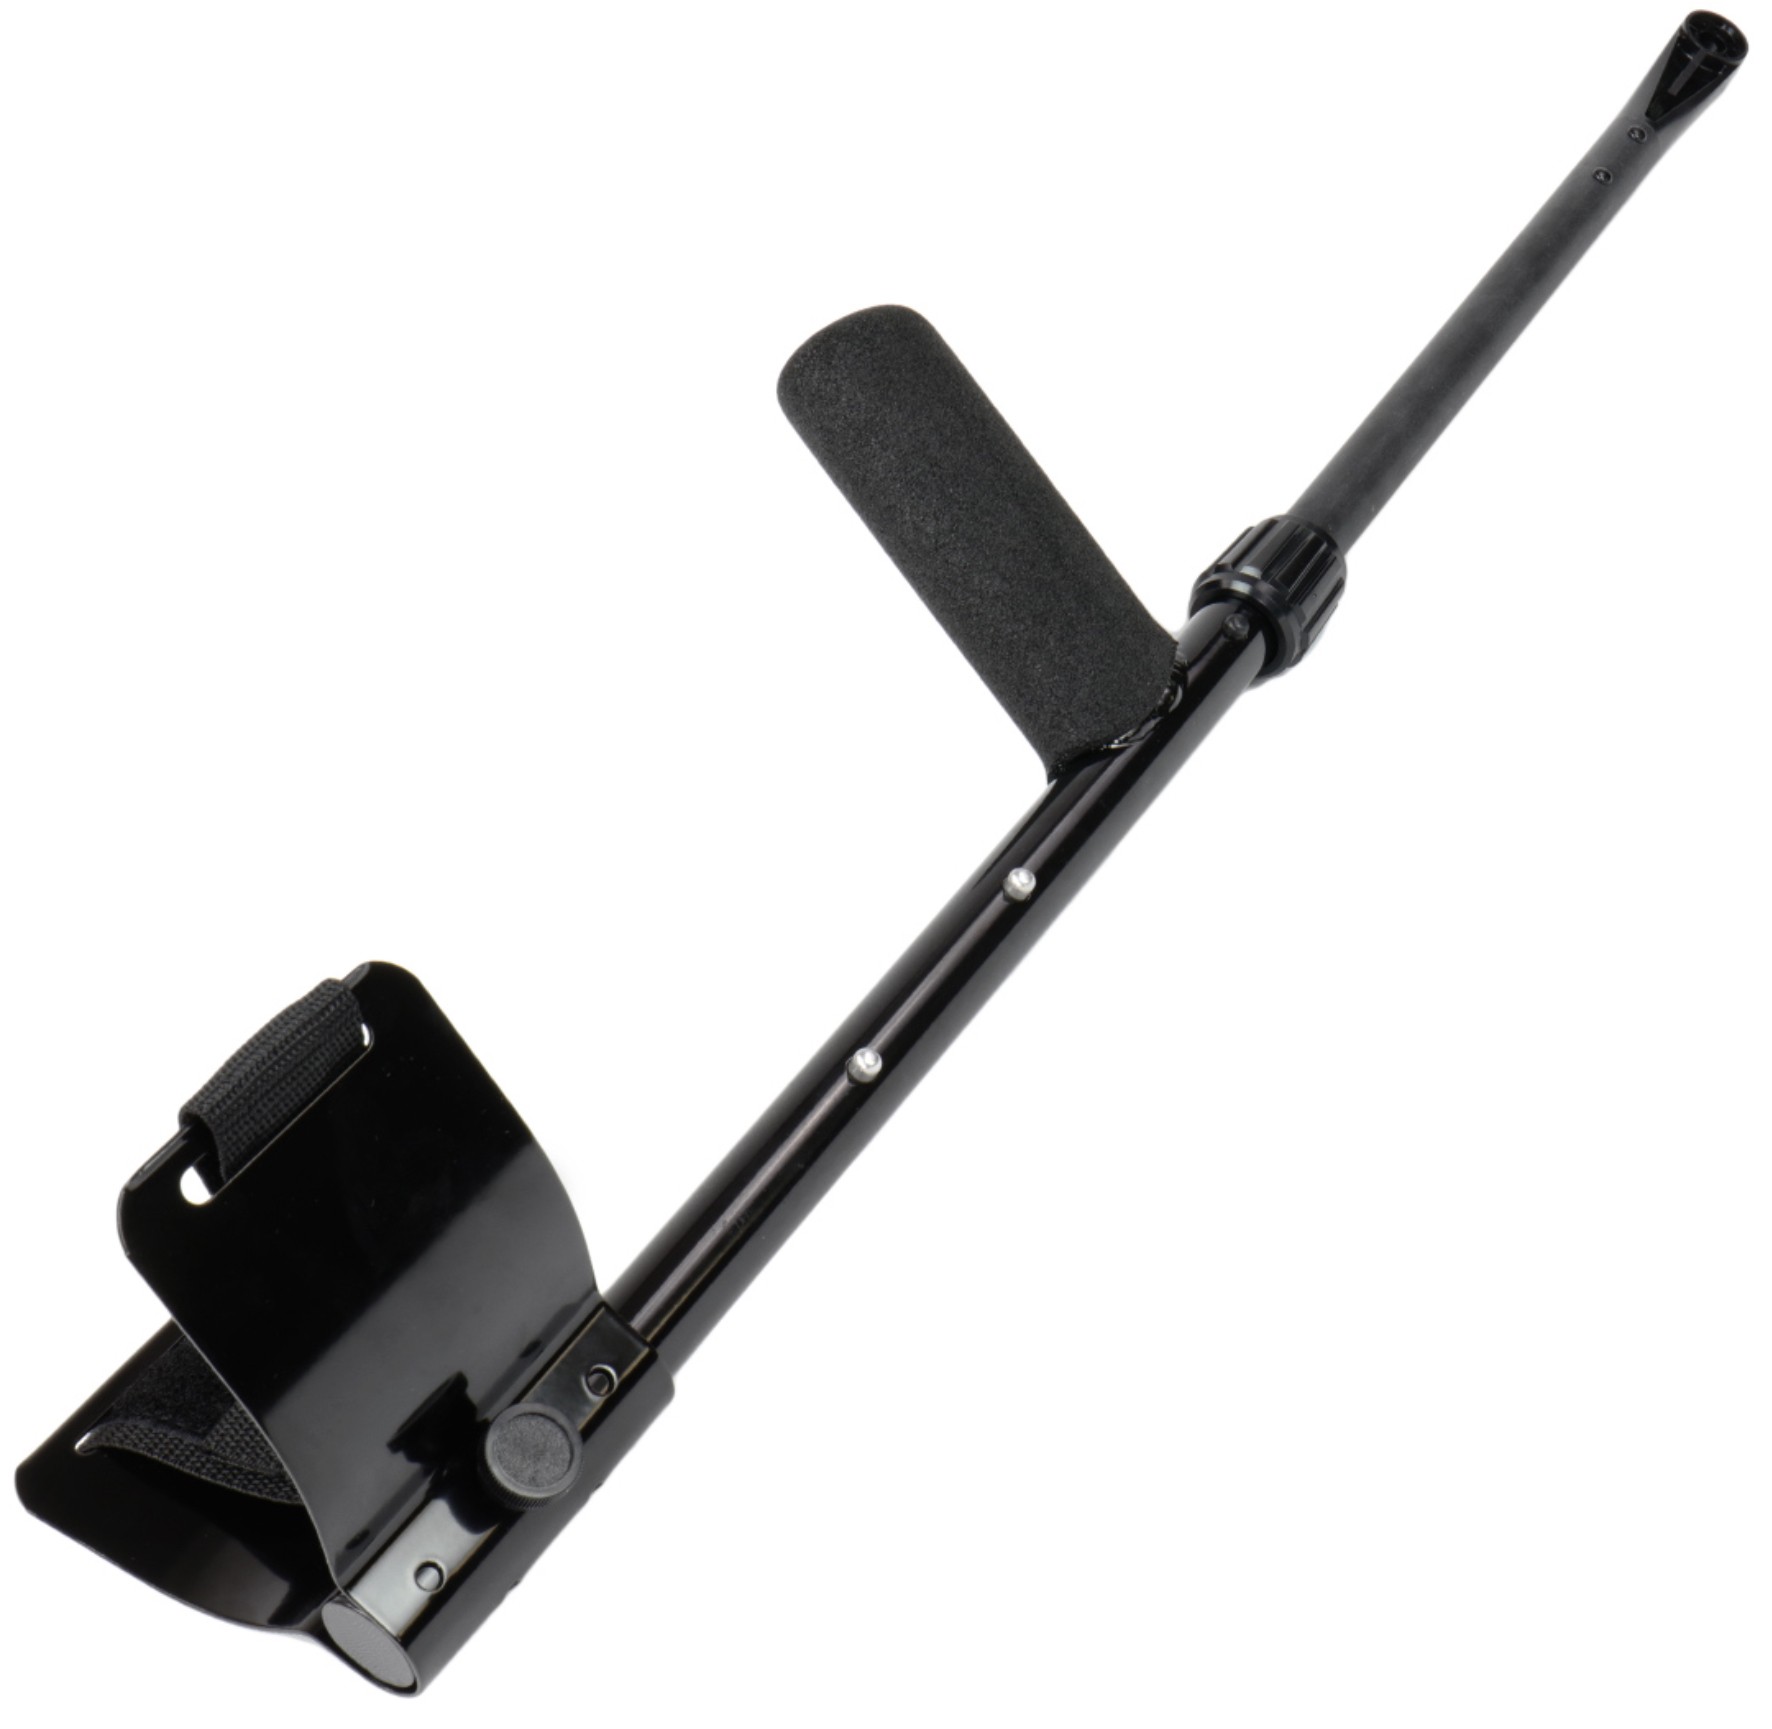
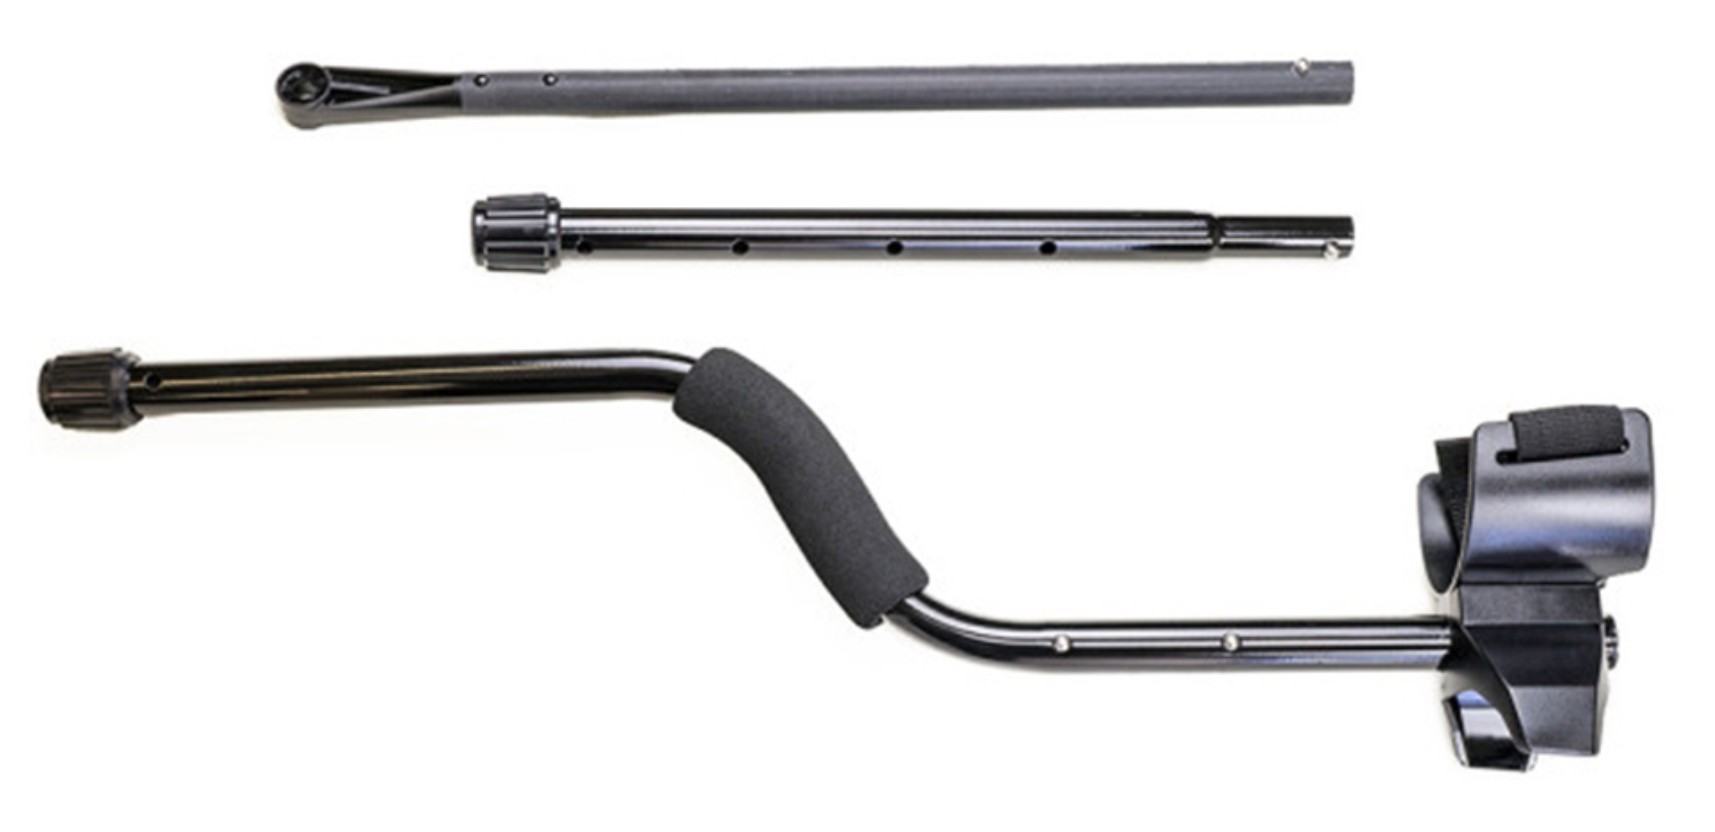
On the TDI Pro the upper handle was a bolt on assembly with separate part numbers The prototype models has a straight shaft, and the production models an S shaft. In either case you could remove the handle via four bolts to hip or chest mount the control box. Since the production models went S shaft, there were aftermarket straight shafts. Here is the Anderson aftermarket straight shaft for the TDI Pro: https://www.seriousdetecting.com/product/anderson-whites-tdi-metal-detector-black-carbon-fiber-shaft/ Does anyone have any part numbers for the original TDI upper handle? The SL models the handle does not normally separate (attaches from inside the control box) and so only White’s or White’s dealers would have access to the part number for the upper straight shaft or S shaft. The straight middle shaft 500-0288-1 or S shaft 802-5213 is standard on many whites detectors, and there is a “tall man” version 500-0240-1 of the S shaft. Does anyone know or have access to part numbers for the handle on the TDI SL, either straight or S shaft? The TDI Beachunter uses a removable shaft that can probably be retrofitted to the SL models with some drilling. This appears to be the White’s Diver Rod Kit, part # 802-5195-1, with straight middle shaft 500-0288-1 added, and may retrofit to the SL with some drilling. White’s Diver Rod Kit One of the best deals going in a rod assembly for years has been the Whites Space Saver Rod Kit for Classics and Early Goldmaster models, part number 802-5236. This may also retrofit the the SL and is in any case a good way to get some Whites Rod parts cheap. While they last. White’s Space Saver Rod Kit If anyone has any information they can add about any TDI model rod or shaft parts, now would be a great time to archive it while it’s still halfway easy to track down.


-
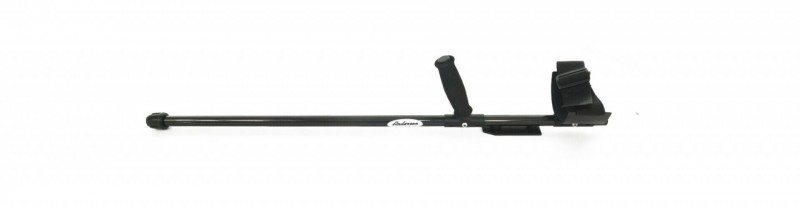
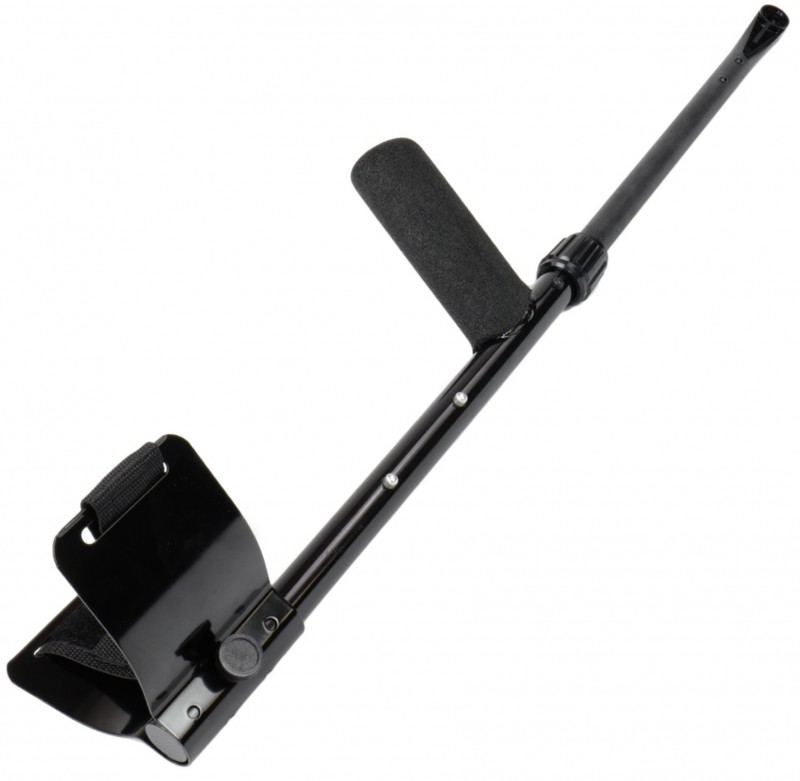
If you think the SAGA™ is just a Swing Arm, it's not. It's a steering wheel for your detector. Start at the 3-minute mark on the video, and watch what the unique design of the SAGA can make your detector do. If you know of any device on the market that gives you this kind of control please let me know, because I know of nothing that even comes close. If what you see intrigues you then watch the entire video. You're going to find that the SAGA will make detecting much easier and less stressful on your body and give you control over your detector you have never had before. - Doc
-
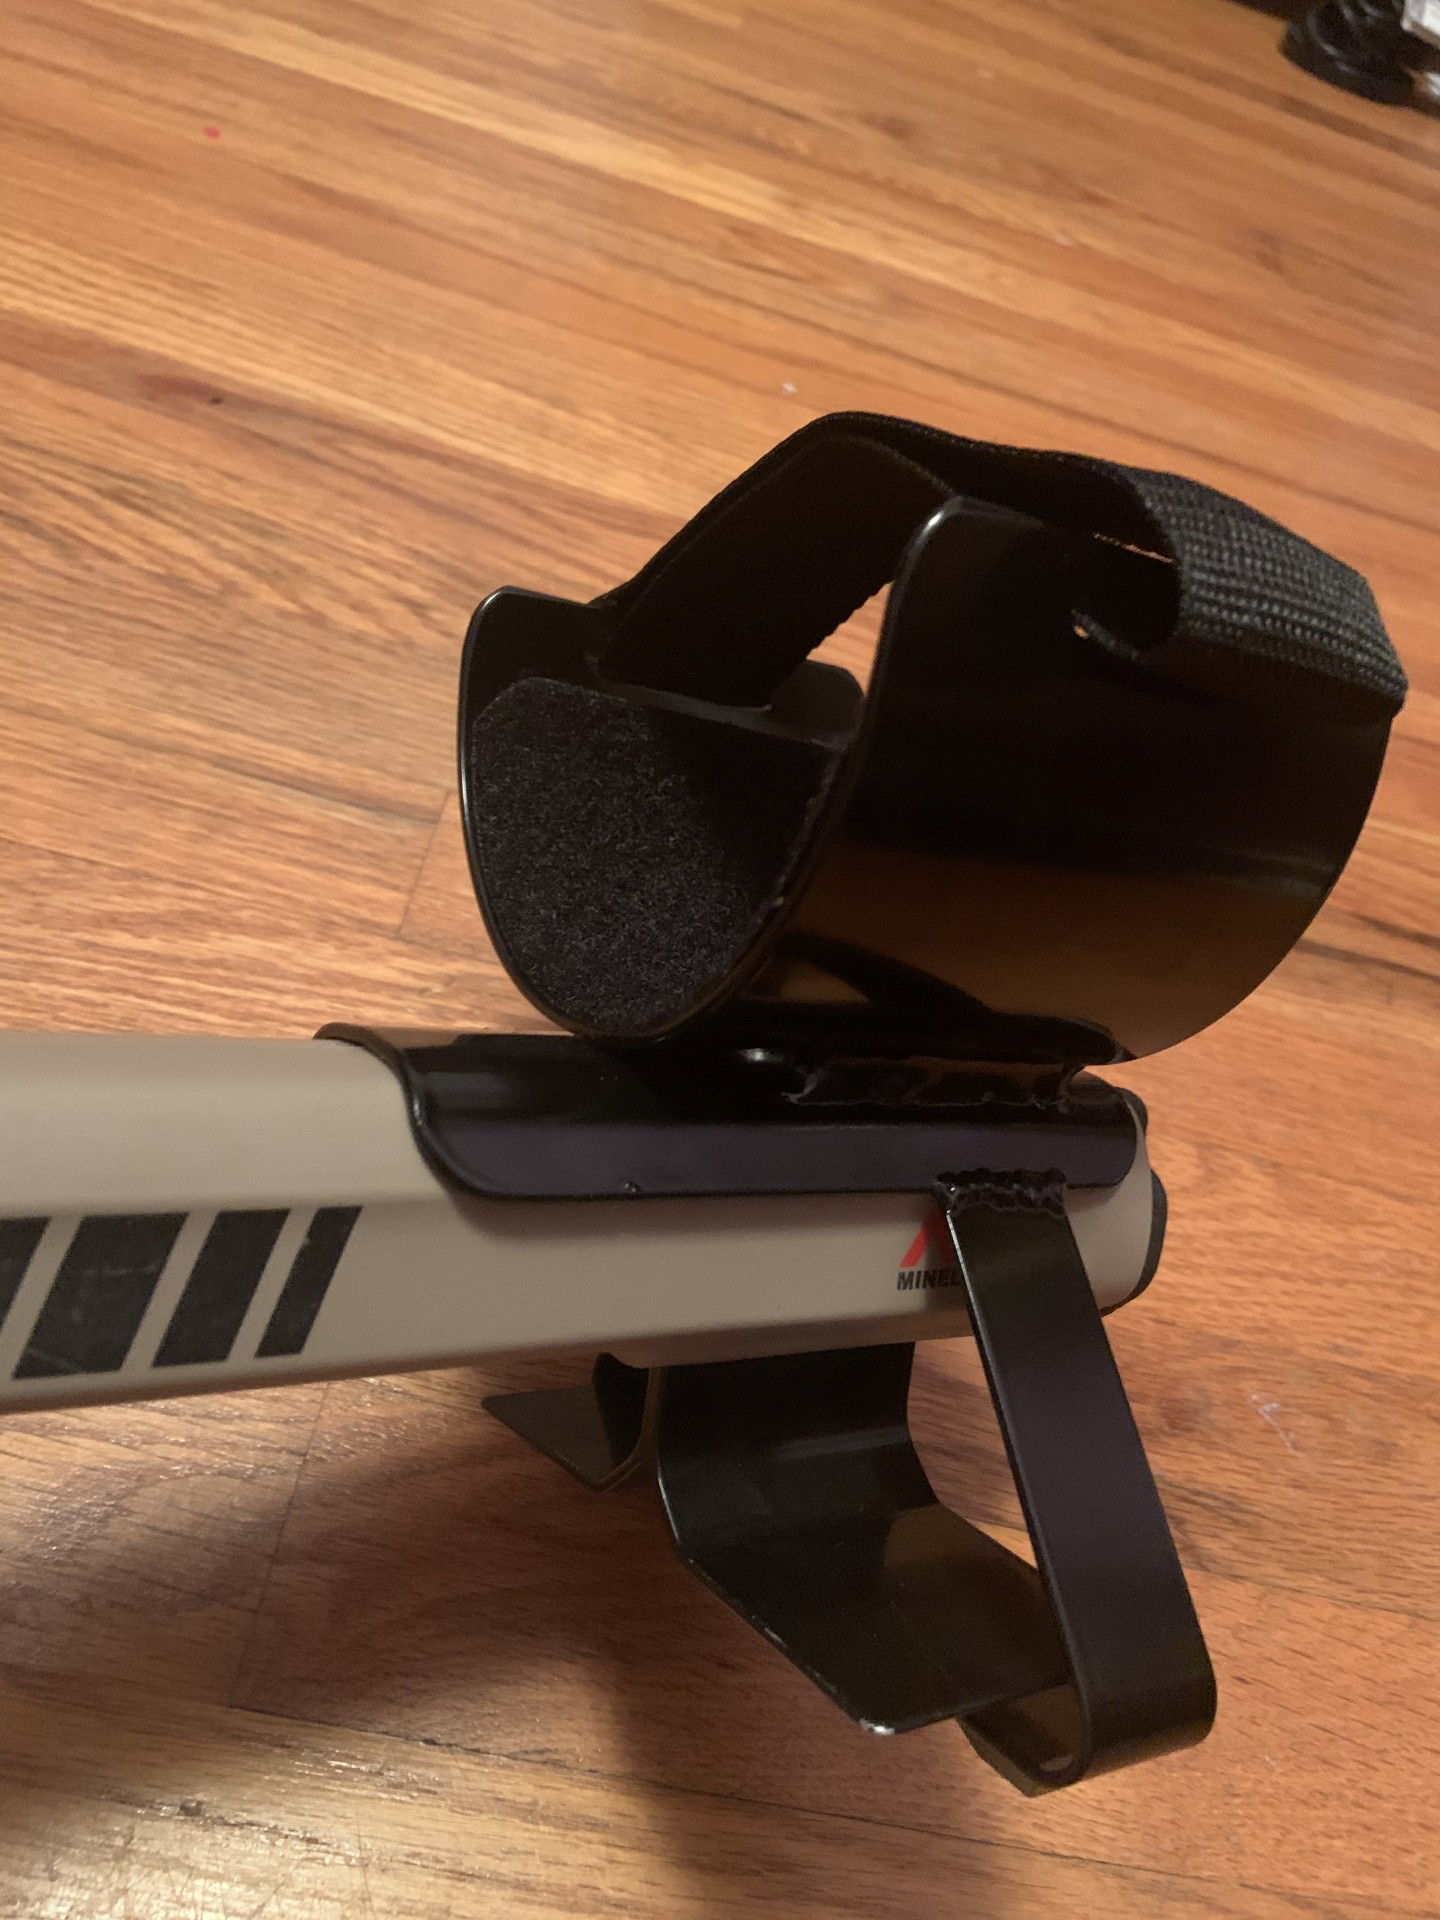
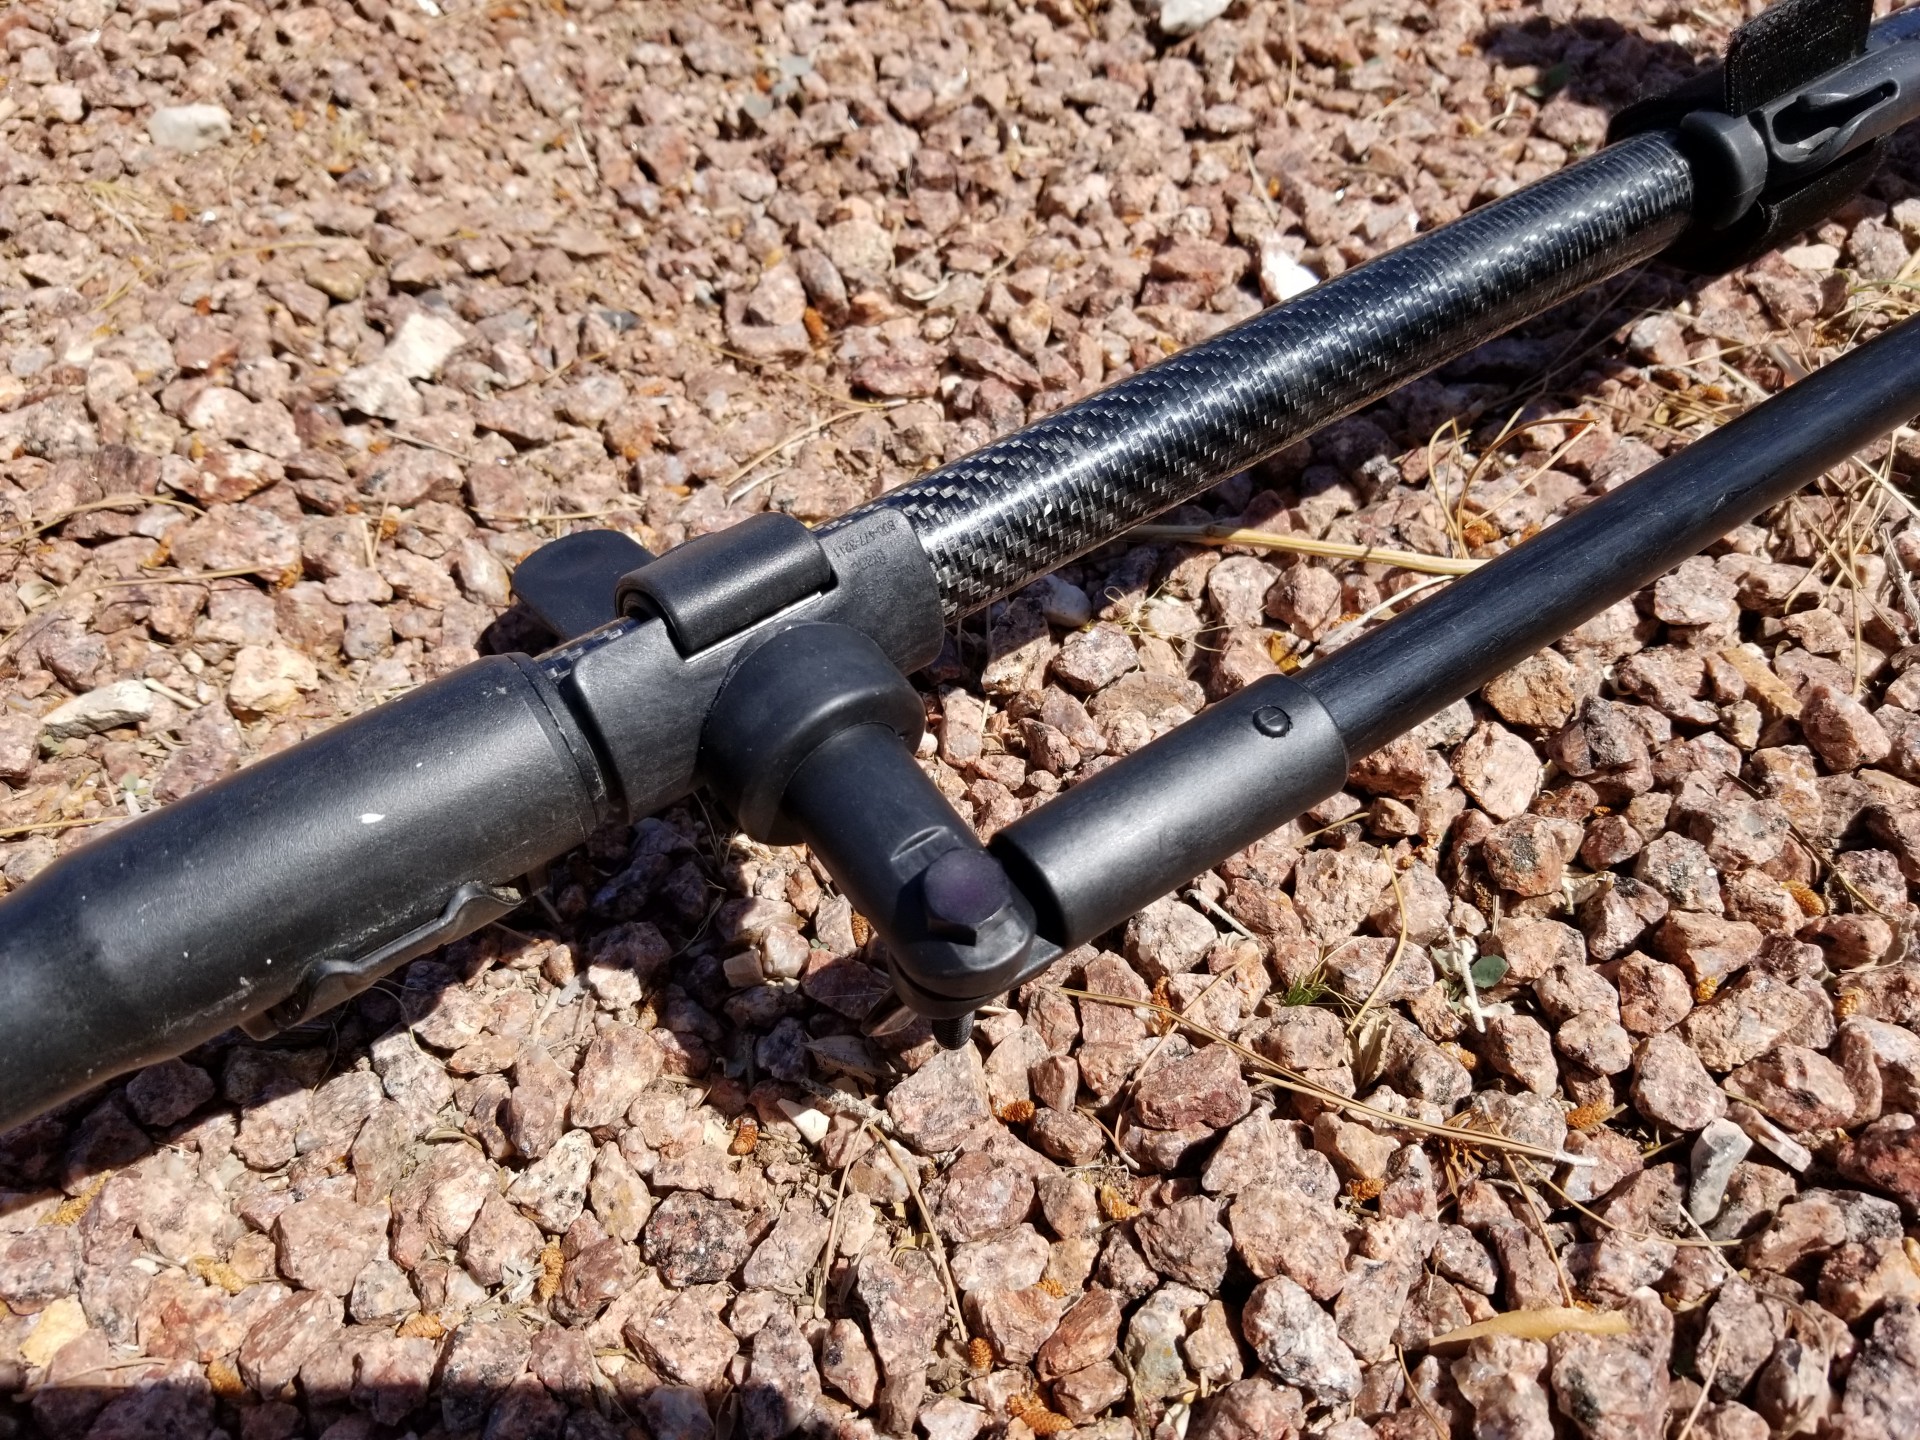
 I'm not going to bore you with the details of the first attempt. Valuable exercise because the New SAGA™ really is exceptional, if I don't say so myself. If you currently use a Swing Arm, you will throw it away when you use this one. • No more breakage at the pivot point where Swing Arms attach to the detector. The SAGA™ is designed with a pivot point that allows for the typical movement that allows you to swing the arm out and away from the detector, but it also is designed with a rotating Pivot Joint that allows for up and down movement of the arm. This eliminates breakage, but it also gives you better control over the coil on your detector. (Watch the 2nd video start at 6:30 minutes) • No more wishing there was a Swing Arm that would fit your detector with it's weird shaped rod (SDC2300). Nothing could be more weird than the upper part of a GPZ7000, yet look at the picture to see how well it fits even that weird shape. The unique design of the attachment base, allows you to easily attach it to regular round rods, or irregular shaped large rods, depending on how you thread the UV resistant rubber straps. • No more trying to store the arm, if you need your hand to do something else. The SAGA™ has a proper storage clip. • Feel like detecting without the Swing Arm for a while? No worries! Push a button remove the rod and handle from your detector and stow it away until you decide to use it again. • You're a tall person and you like the rod long, or you're a short person and like the rod short? Got you covered. You can easily trim the rod to the perfect length then glue the handle on with the included 1 ounce tube of silicone sealant. If you have never used a Swing Arm, well, you are spending a lot of energy swinging one handed and you are unnecessarily stressing one side of your body, your arm, neck, and shoulders. When you take a walk, do you use both legs or do you hop on one? If you are hopping around all day, that one leg is getting mighty tired. That's why using your muscles bi-laterally helps fight fatigue and strain. Not only that, but you will never have so much control over your detector. You will execute perfectly level controlled swings effortlessly, when you are using both hands. Watch the videos to better understand the unique design of the Swing Assist Guide Arm. It's the last Swing Arm you will ever need, or want! Retail $74.94 Discounted Introductory price $59.95 plus s&h Watch the videos below. On the second video go to around 6:30 minutes mark to see the kind of control the SAGA™ gives you over your detector. Call your favorite dealer today! Thank you for your patience and all of your suggestions. Doc
 -
I know Jeff’s been making these for long time but I just had to mention how impressed I am w his work. I don’t know why I never got one of these for the Explorer or Etrac but sure glad I got it for the Safari! I really like the stand too, it’s a lot wider, keeps the machine from falling over and puts it a little higher too. I’ll probably take the factory stand off,,, eventually.

-
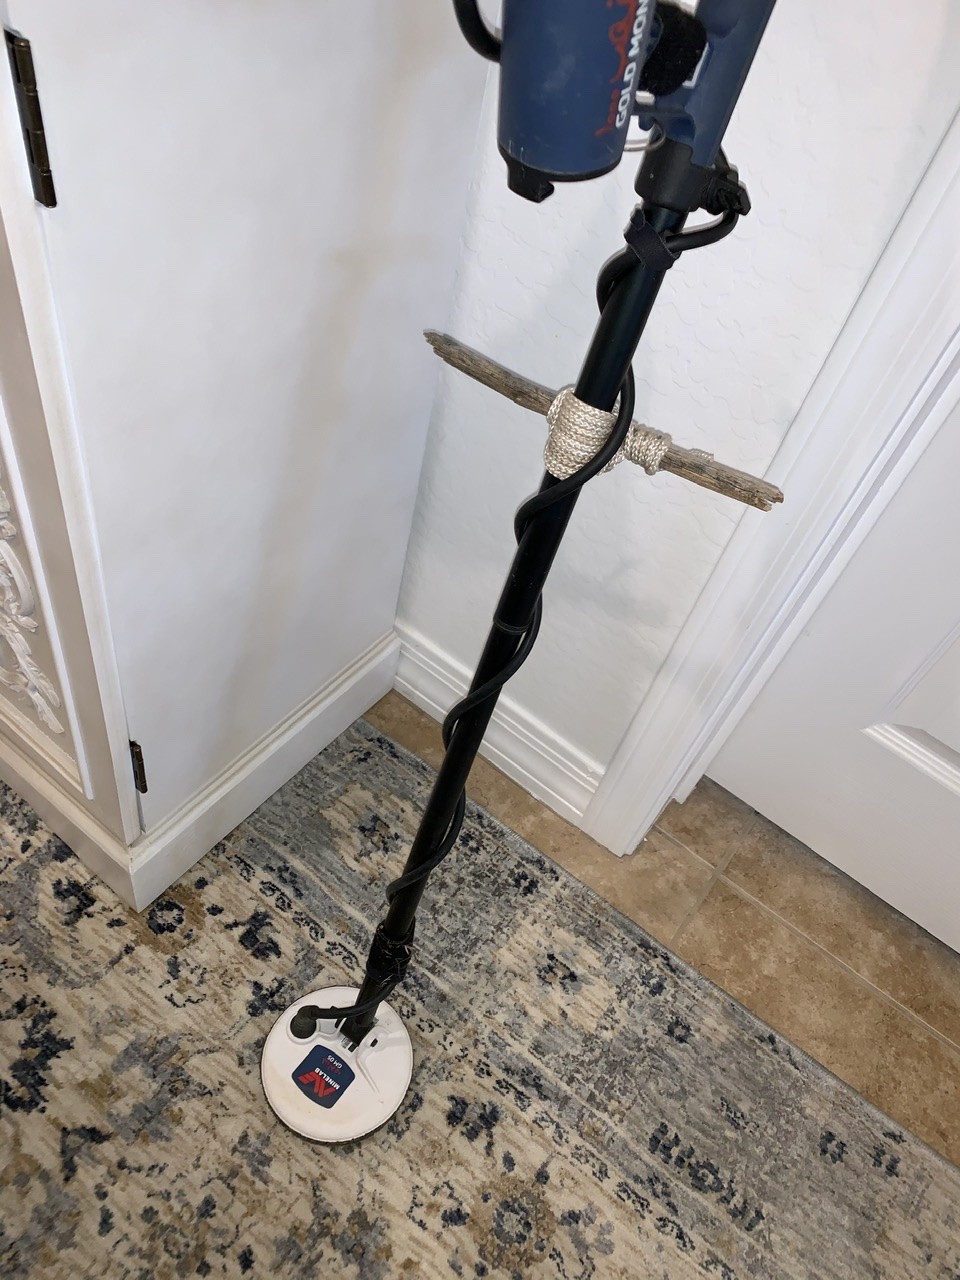
It was the last straw for a detector that tips over on any and every bit uneven ground. It actually worked not so bad. If anybody needs to just get through the day, you could give this a try. Fifty cents of nylon braided rope, a juniper branch, and some good, old-fashioned Boy Scout lashing. Just make sure the frapping is good and snug. It might work even slightly better to carve a groove for the shaft into the stick. If it loosens a little, just re-frap and you’re good to go. Yes, there are more elegant manufactured versions available, but isn’t the saying “frustration is the mother of invention”?

-
I think I'm going to need to invest in the tall man lower shaft for this E trac, I'm 6' 4" and I have the lower shaft extended as far as it can go and its wobbly now ....
-
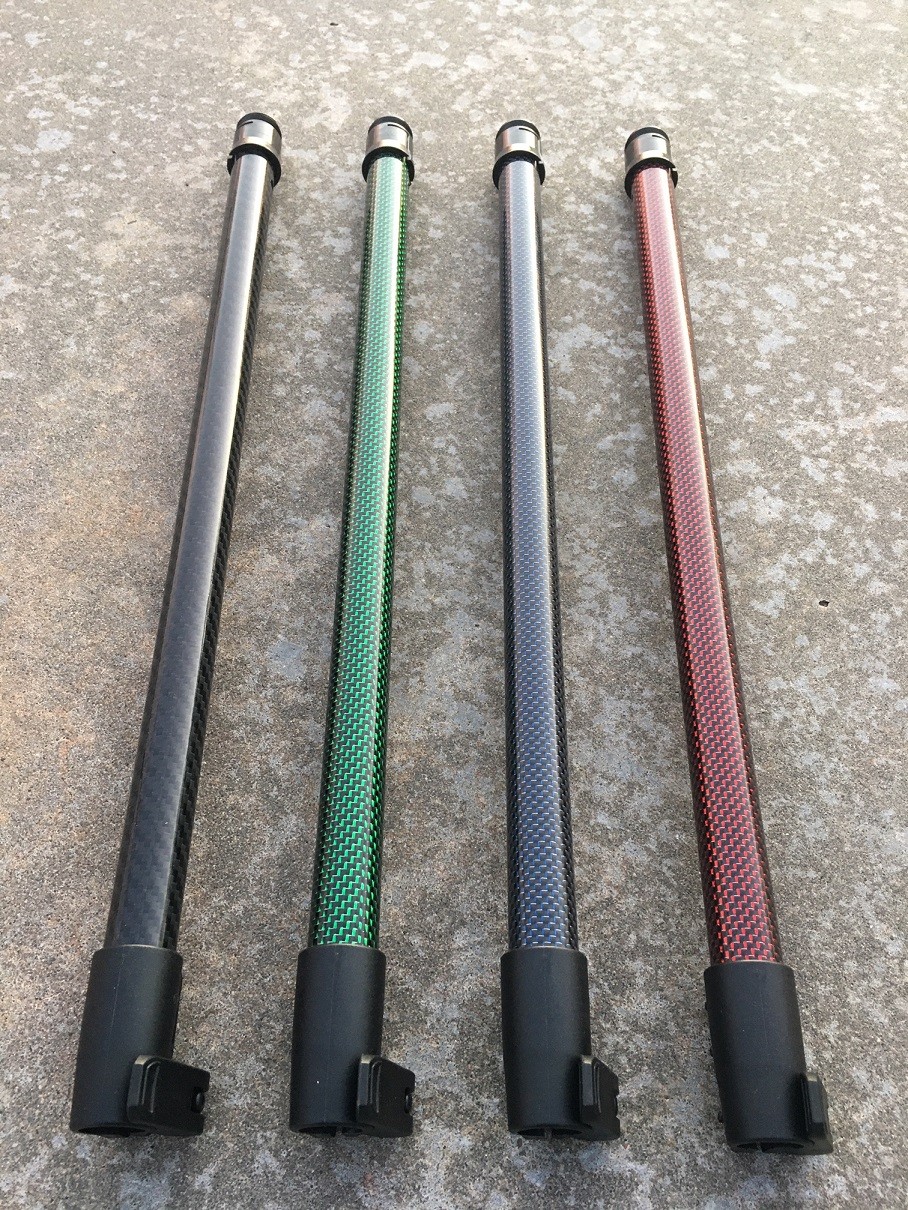
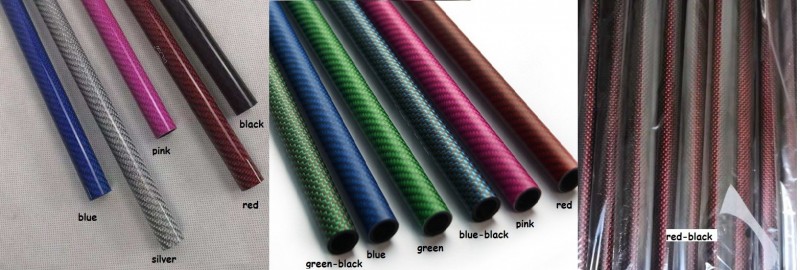
Hi all!I wanted to mention several things that may be of interest.First of all, as some know, I've been working on making colored shafts available regularly, as a "special order" item. I recently ordered a "test batch" of colored tubes, and all of the colored shafts produced from these tubes have been sold, except one -- it's in the "red/black" color, and I will post a picture of it a bit later.Second, I have several customers requesting colored shafts, so I'm looking to put together a new order for colored tubes from my supplier, in the next week to 10 days or so. I would like to get as many customers as are interested, to let me know, as my supplier would like as a large of an order as possible. So, IF YOU ARE INTERESTED IN A COLORED SHAFT, please let me know. Here is a picture of the available colors...Finally, I just received parts that will allow me to re-stock inventory on the standard (black) Equinox complete shafts; I also have CTX 3030 lower rods, and Equinox lower rods, available as well. Please let me know if you are interested -- sending me an email is the best way to get in touch, at steve@stevesdetectorrods.com.THANKS!Steve
-
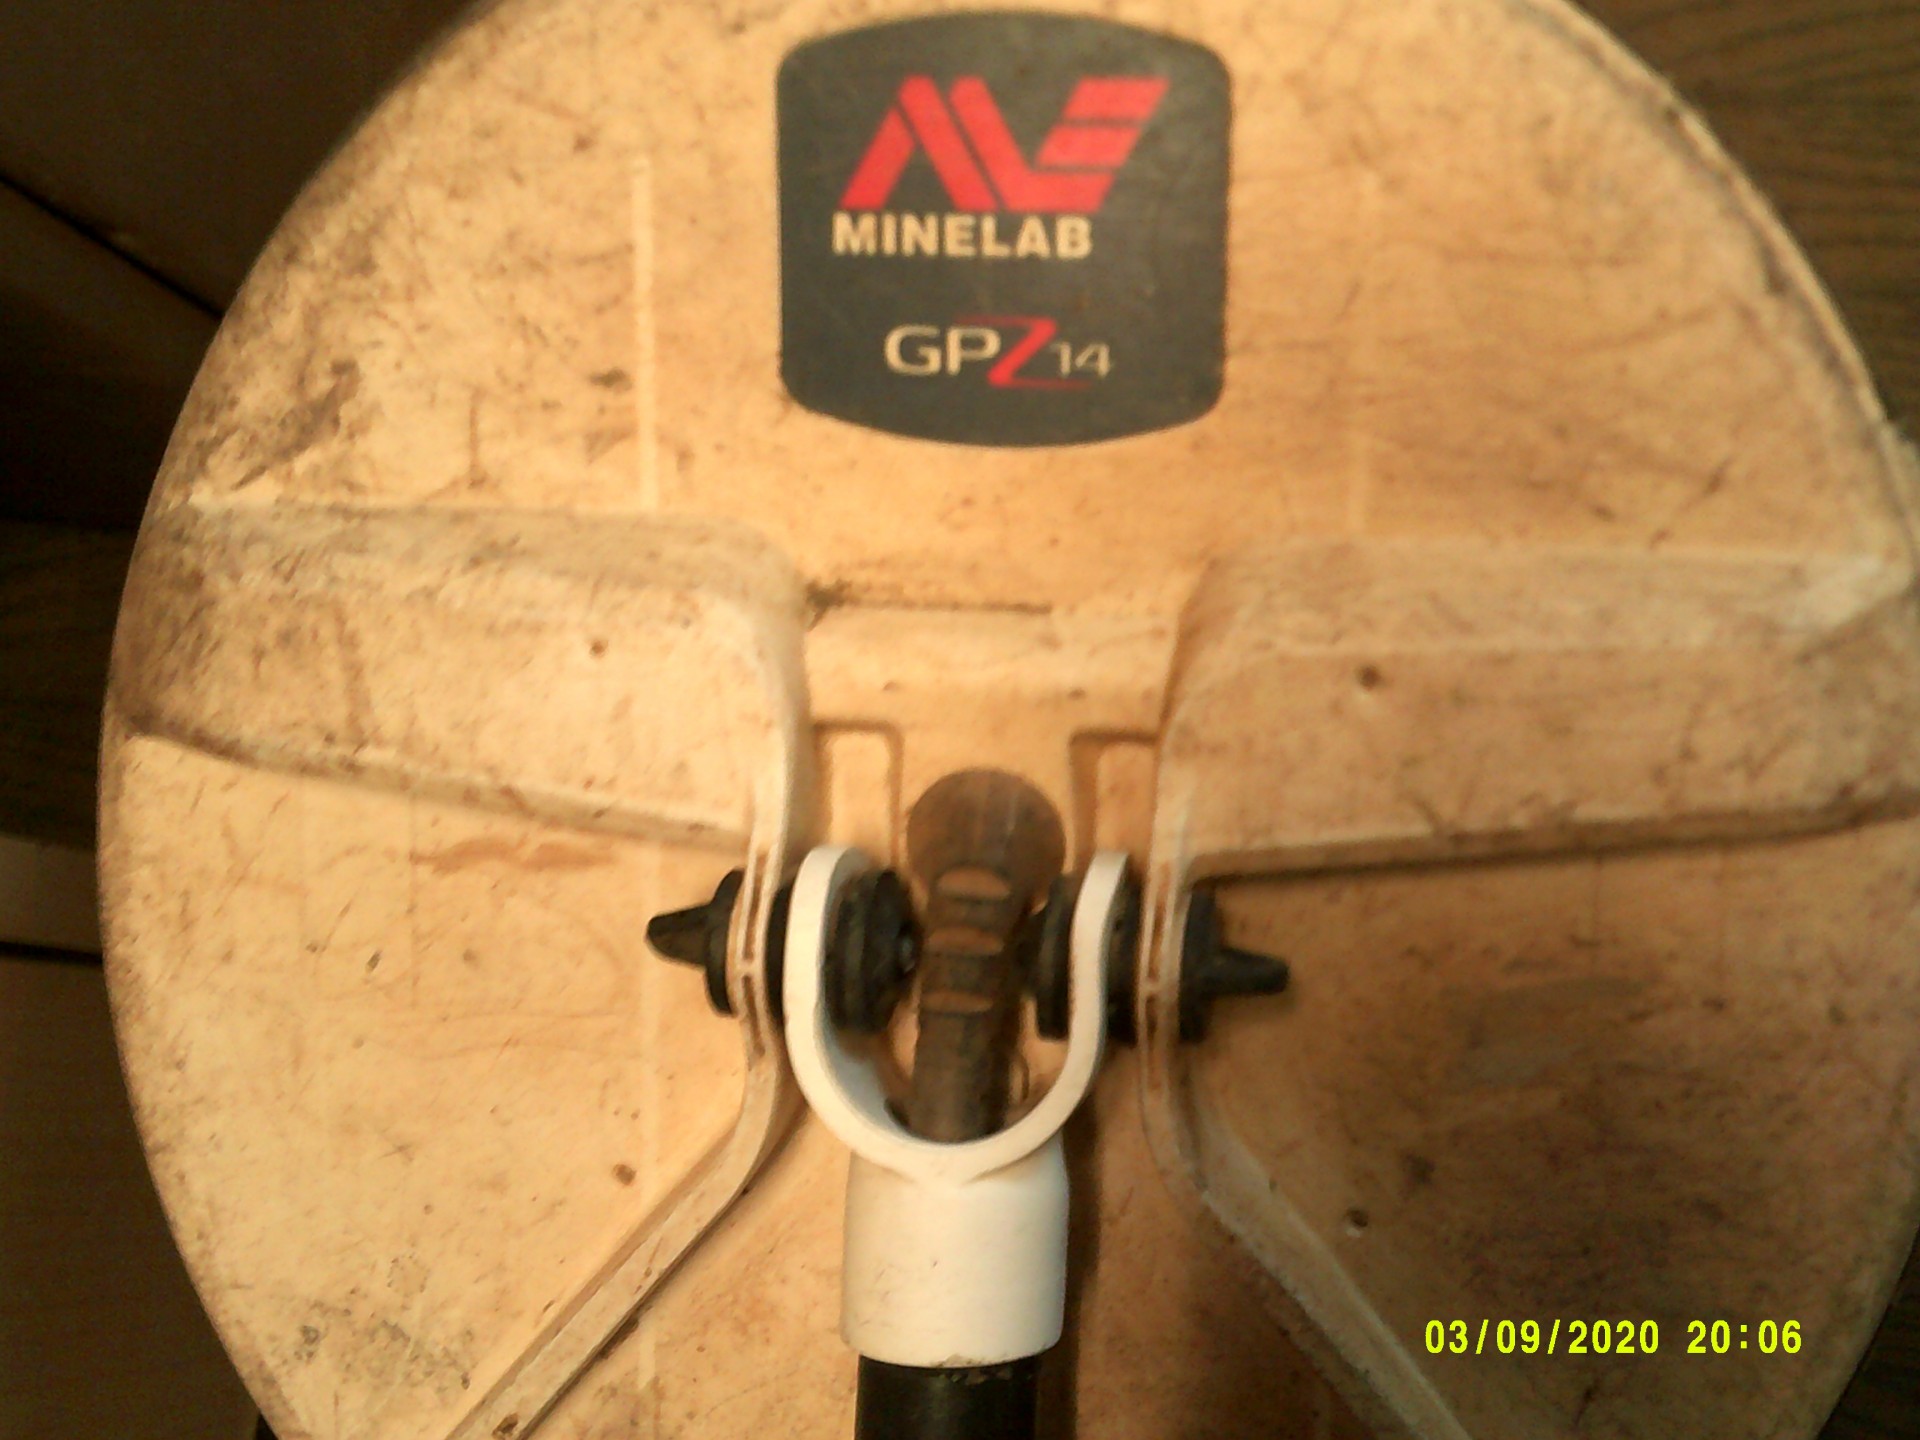
I'm not shy about it. Yup. I have big clumsy feet. The good news is it gives me stabilizing ballast should sobriety forsake me. The bad news is it's hell on GPZ 7000 lower shafts. I have broken several. To make matters worse, the lines of communication between my big feet and my small command and control center often get disrupted somewhere between my gullet and my gizzard which allows my big feet to proceed on a different heading than the rest of me. Oops, there goes another GPZ 7000 lower shaft. But I don't take full responsibility for all of these broken lower shafts. I don't recall ever breaking the good ol' GPX lower shaft and they fit at least 10 different detectors and cost less than half of a GPZ lower shaft. So I lay most of the blame at the feet of Minelab and not because of the feet of Klunker. The shaft is just plain flimsy. Being a "tight wad" by nature I have tried numerous times to repair a broken lower shaft using glues, epoxies, tape, splints and every flavor of bubble gum you can imagine. Nothing worked. I finally came up with the idea of totally replacing the lower end of the shaft and it work splendidly. This was made from an inch and a quarter by 1 inch pvc plastic pipe tee, a fine toothed saw, a drill, a round file, a sander, a heat gun and a bit of good epoxy. This repair has held up for a couple of dozen trips and survived the icy conditions of early spring detecting, which is when my big feet are at their worst. If anyone is interested I will post instructions

-
Have been looking at this on Ebay and decided to order one today to try out! We will see how it functions! I currently don't have a proper shop, or else i would probably make one myself, out of an old nylon cutting board! If it works out, i may make a few for my other detectors! But for now, I'll just purchase!👍

-
Hi, all! I just wanted to mention that in the spirit of the Holidays, Steve's Detector Rods will be giving away one carbon-fiber complete Equinox shaft (upper shaft and lower rod), AND one carbon-fiber Equinox lower rod, to two lucky U.S. winners. Two separate drawings will be held on Dec. 18, one for the complete shaft, and a second for the lower rod. Entry into the drawings is completely free, with no purchase required -- and the entry period is open from now, through 11:59 PM on Sunday, Dec. 15. Additionally, ALL entrants into either drawing will qualify to receive 10% off of any item purchased through Steve's, for the entire month of December. For additional information, including details and eligibility, please visit Steve's Facebook page, at https://www.facebook.com/stevesdetectorrods Thanks! Steve
-
 Hi all! I just wanted to let everyone know that I have finally been able to kick into shaft production mode, after the last of the long-awaited parts shipment arrived last Wednesday. Shaft building has been underway since, and I'm happy to say that I've managed to start shipping a first handful of shafts to customers on the wait list. Everyone who has contacted me in the past, and had their name added to the wait list requesting a shaft from the "first batch," has been contacted; each of these customers' shafts are compete -- and are now in the midst of a few days worth of epoxy-cure time. I expect all customers on the wait list, who requested a shaft from the first batch and have been contacted within the past week, will have their shafts ready to ship by Wendesday or Thursday. MEANWHILE, I have more than enough parts to build a couple of dozen shafts beyond those allocated to customers currently on my wait list. So, if you are interested in purchasing a shaft, please contact me, or be on the lookout for a "for sale" ad in the classified forum later this week. Finally, I have typed up a couple of detailed documents as well -- one providing lots of information on the counterweights (including assistance/advice on how to choose the "right" length/weight for your personal needs), and then a second document discussing the "spring button hole" option that is being offered, for those who feel they may wish to still utilize the spring button in the lower shaft. Please contact me if you would like to receive either or both of these two documents, or if you have any other questions regarding the new, complete carbon-fiber shafts now available for your Minelab Equinox! THANKS! Steve www.stevesdetectorrods.com (see the "what's new" section for complete shaft information) www.facebook.com/stevesdetectorrods
 -
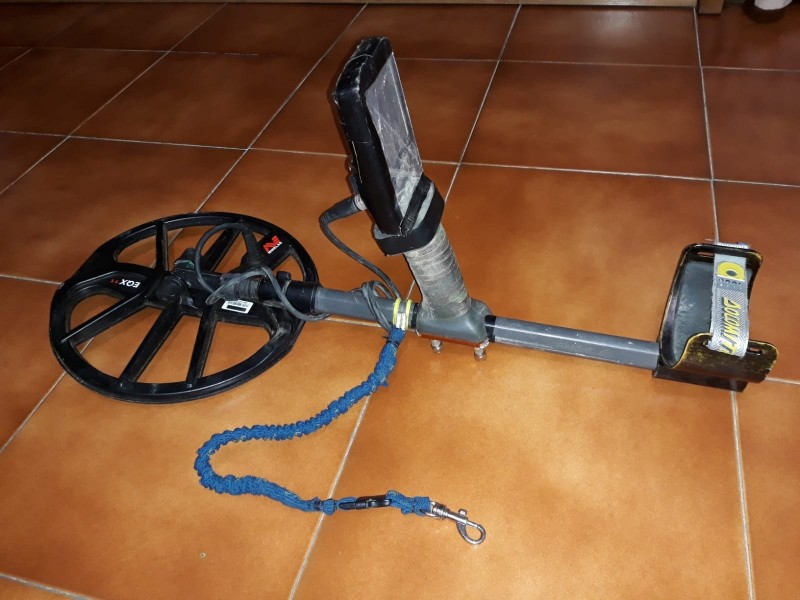
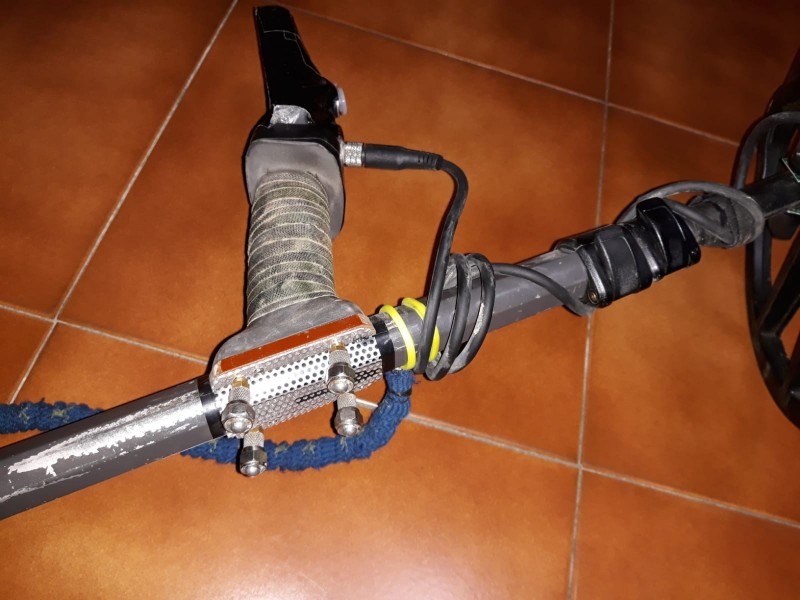
After using equinox for a year and a half on the beach, I thought it was time to use it also in the mountains, if on the beach the original rod can be fine, in the mountains it is very uncomfortable, I thought of finding a way to reduce it, I had a photographic manfrotto with almost triangular rod, the upper part of the equinox electronics could adapt to the rod but the lower part did not, I looked for something at home that could replace the lower part, an easily foldable aluminum sheet and four knob screws obtained from connectors F for TV and brass screws, in order to easily detach it, the coil attachment and the shaft are of an ace250, the result can be seen in the photos, 570 mm long, easily transportable, it could have been done better but I don't have a 3d printer . Now I have two Nox800s, one for the beach and one for the mountain.
-
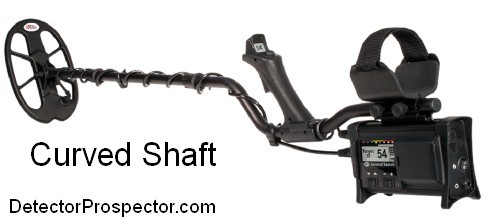
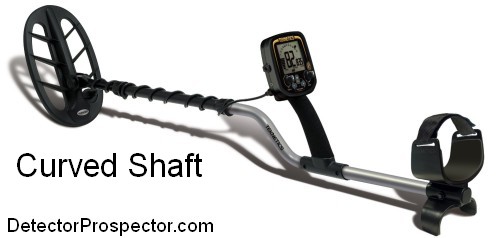
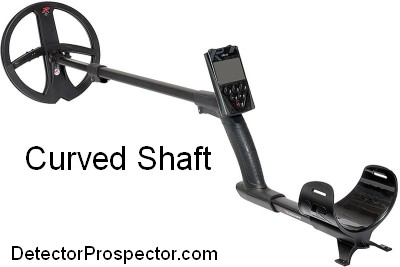
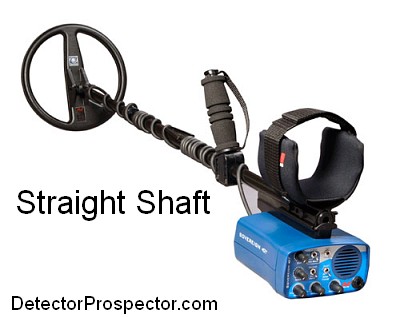
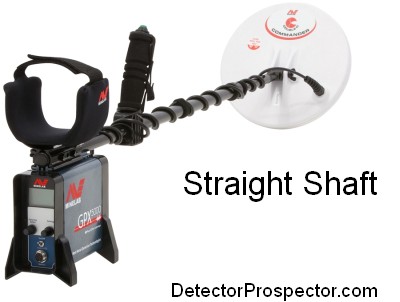
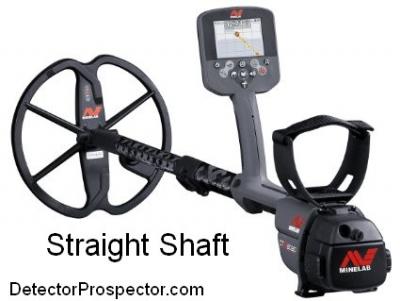
 This is pretty simple. Straight shaft, or some kind of curved shaft? The most common curved shaft is the S rod but there are others. Please vote in the poll so it tallies results but if you want to add commentary/particulars that is great.
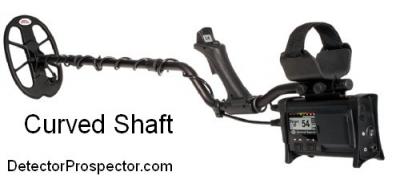

-
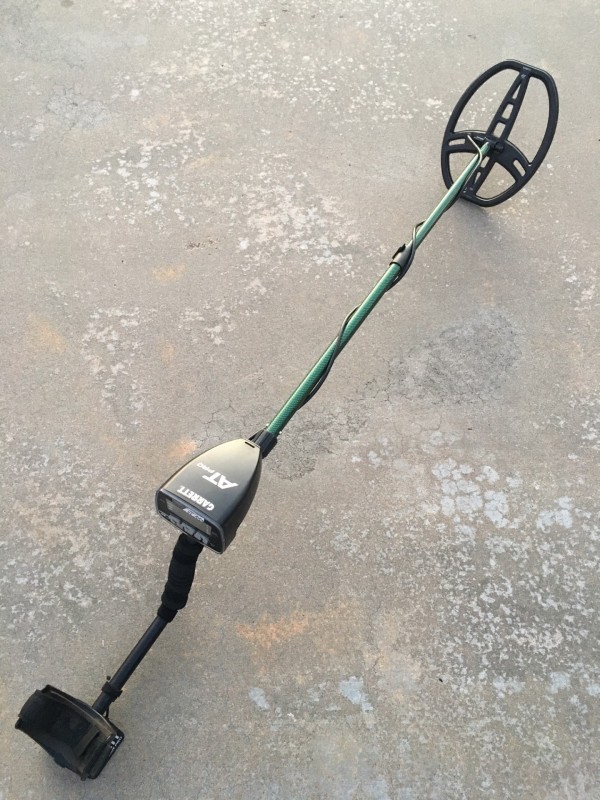
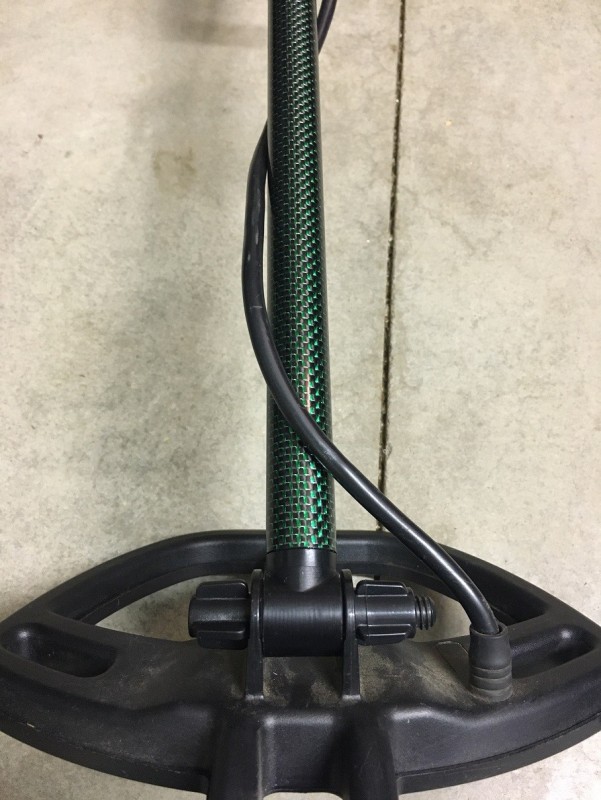
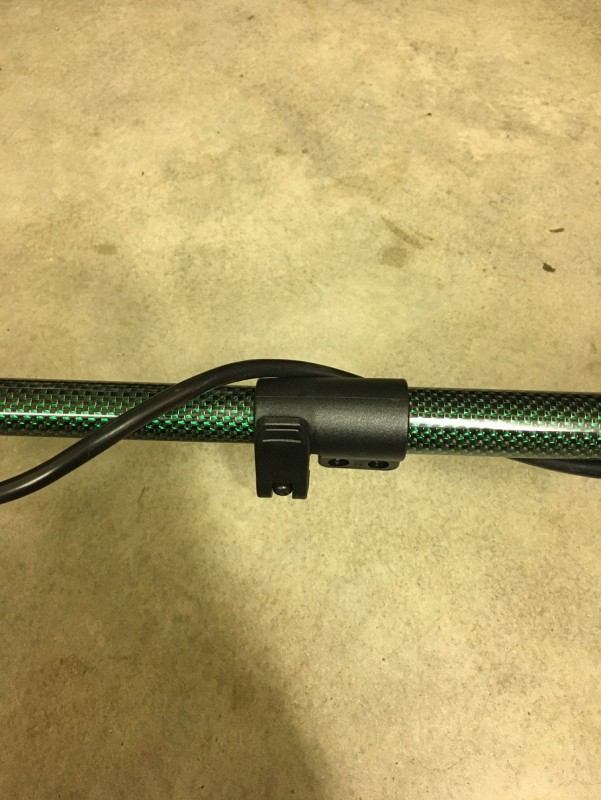
Hi all!I wanted to give an update on the GARRETT shafts (middle and lower sections) that I've been working on, at Steve's Detector Rods. The first batch of 10 prototypes are complete (I made them in four different colors -- black, green/black, red/black and blue/black), and I am VERY pleased with the result -- I think they have turned out great! The two shaft sections are connected by one of my heavy-duty clamp-type cam locks (as used on my Equinox shafts), which eliminates the twist-lock and the spring button/button-hole design that is used for attachment of these two shaft sections, on the Garrett shaft.AS A RESULT, my shaft offers four benefits over the stock middle and lower shaft sections... LIGHTER WEIGHT. My carbon-fiber middle and lower shaft sections offer a 20% weight reduction over the stock Garrett middle and lower sections. (My two-piece shaft weighs 5 ounces +/- .1 oz or so, whereas Garrett's two sections weigh 6.1 ounces +/- .1 oz or so). FASTER/EASIER INSTALLATION AND SHAFT LENGTH ADJUSTMENT. With no twist lock and no spring button/button holes to fumble with, attachment of the lower shaft to the middle shaft is quick and easy; simply flip open the clamping lever on the cam lock, insert the lower rod section into the middle shaft section, and lock the clamping lever closed! UNLIMITED ADJUSTMENT LENGTH OF THE LOWER ROD SECTION. Again, with no spring button/button holes on the shaft, you can quickly and easily adjust the lower rod to ANY desired length, as opposed to having your lower rod adjustment length confined to pre-determined button-hole locations. IMPROVED AESTHETICS/VISUAL APPEARANCE. The high-quality, attractive look of carbon fiber offers an upgrade the look of your Garrett machine. And, you can add even more visual appeal -- making your AT- or Ace-series machine really "stand out" from the crowd -- by choosing one of a number of custom colors for your carbon-fiber shaft. A green/black prototype shaft is pictured, below! If you have any interest in upgrading to a carbon-fiber shaft for your AT- or Ace-series machine from Garrett, contact me via PM, by email at steve@stevesdetectorrods.com, or via Facebook message (www.facebook.com/stevesdetectorrods).THANKS!Steve

-
I often hike the woods to get to old home sites, so I carry my detector and gear in a backpack. Rather than disassembling and reassembling every time it’s much better to have something that allows you to collapse or fold the detector so that it will fit in the backpack, and also take less time to get ready to use or pack up. Of the two types-telescoping shafts, and folding shafts, I think the folding is better. First, it costs less, about $50 for the part. Second, it takes one motion while depressing a button to get ready for use whereas both ends of the telescoping have to be unlocked positioned and locked again. Also with folded, the height is always maintained- not so with telescoping. The folding unit adds about 5 oz of weight to the lower mid section, but is not significant. As for strength, I’ve not noticed any slack or wobble at all. I only bring this up for those who want a collapsing detector to show there is an option other than the telescoping ones advertised. And also to say I think the folding style is in my opinion better. What do you think?
-
Can someone post the lengths of the upper and lower rod to the GP5000, thanks.
-
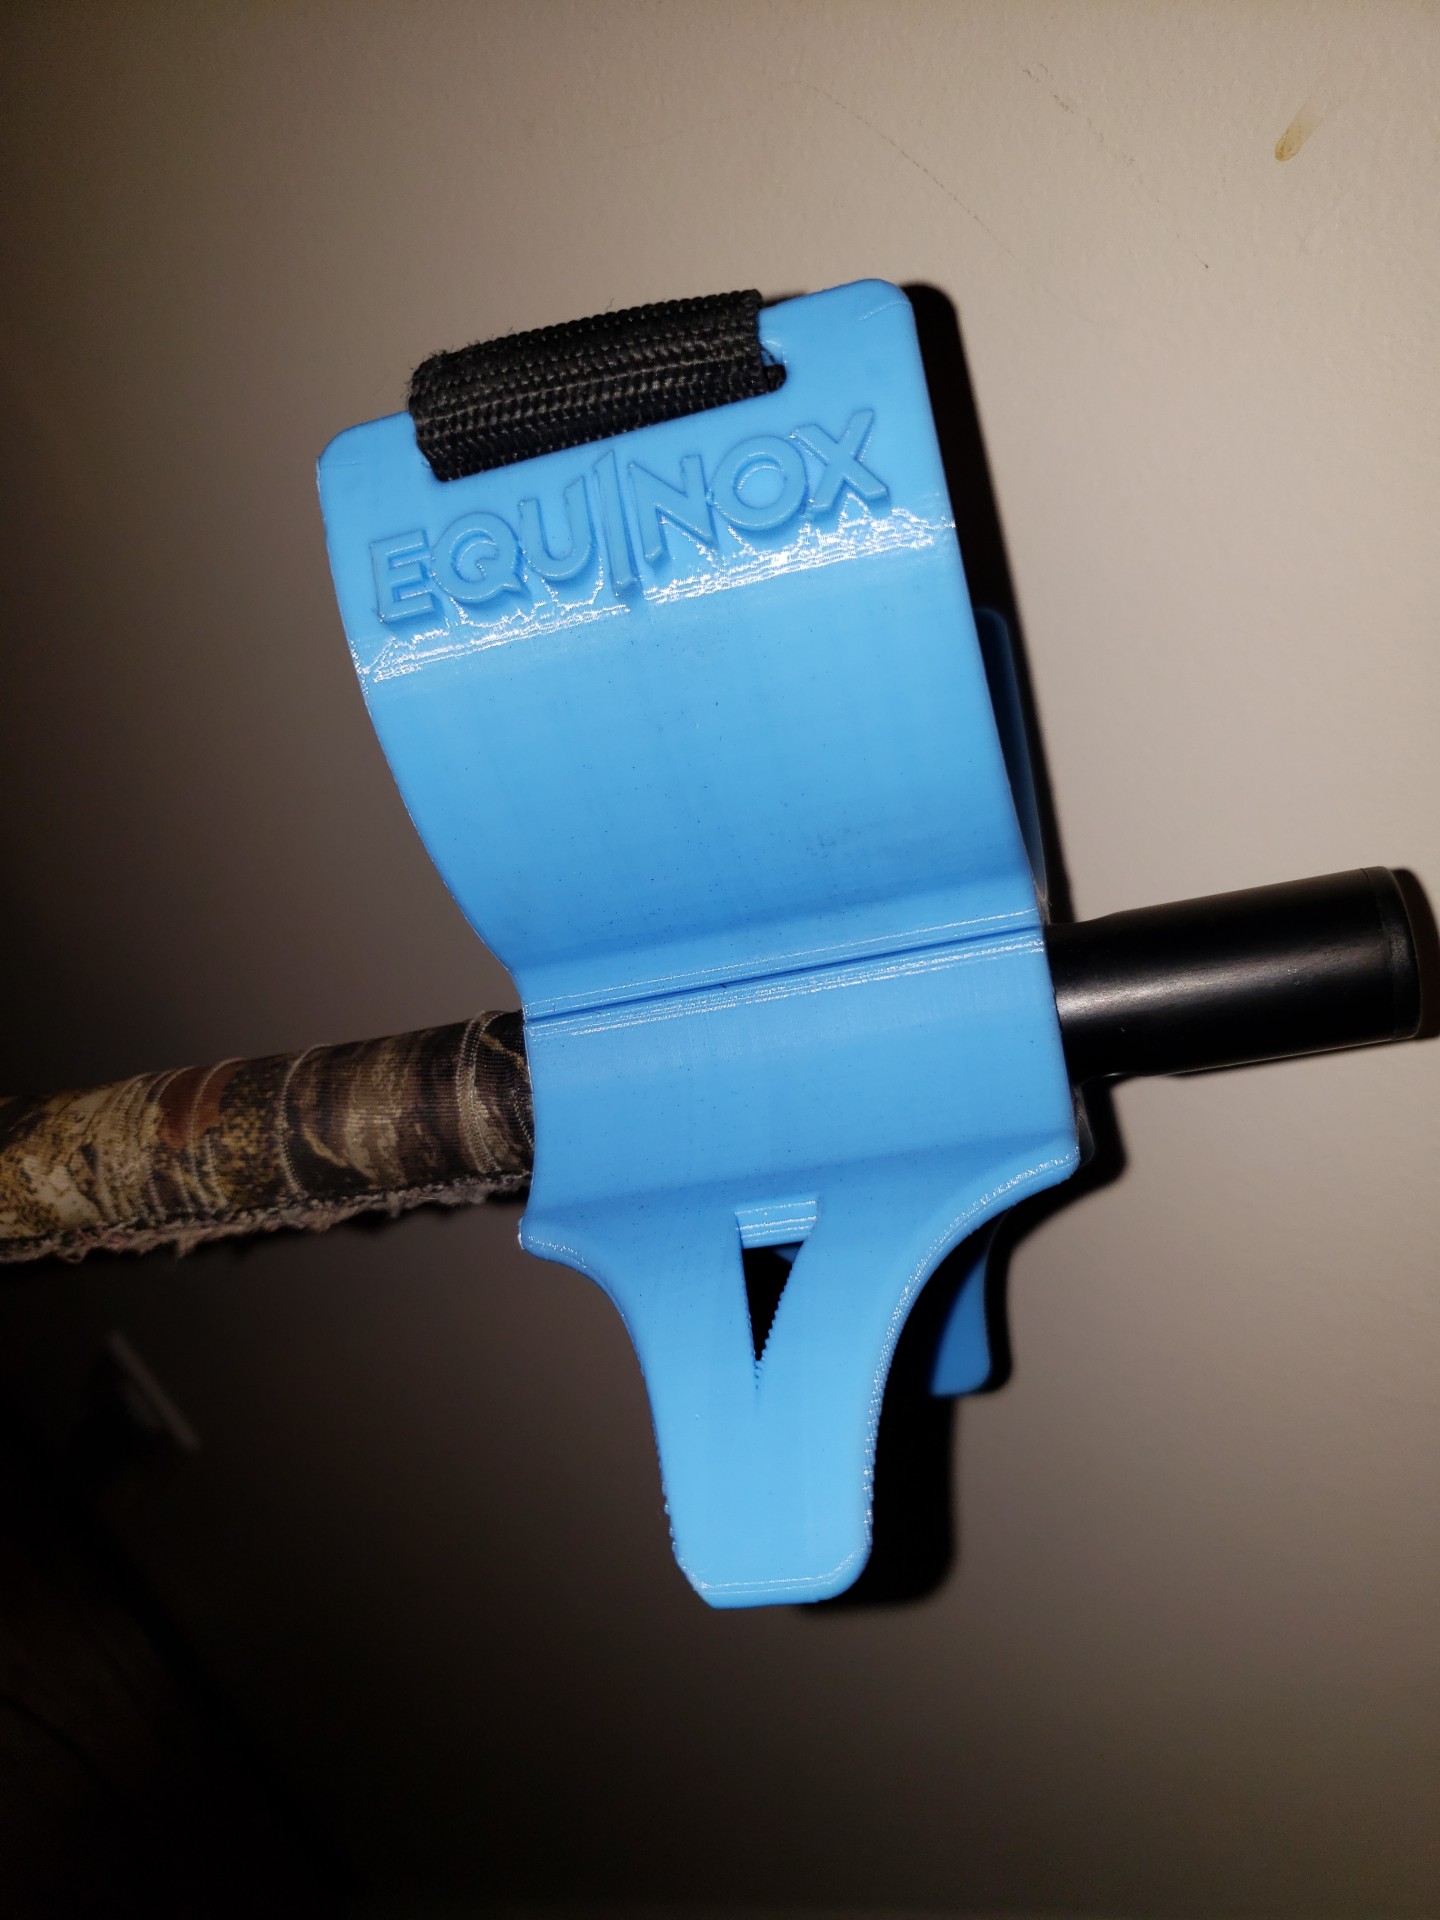
My son printed this up for me. Hopefully it will last longer then factory ones.

-
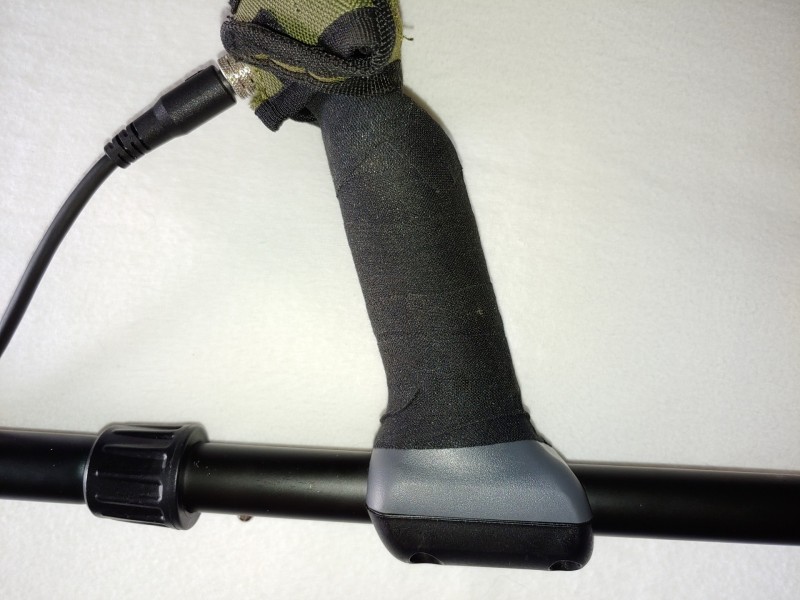
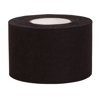
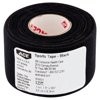
I don’t really like the smooth handle on my Equinox so I wanted to add something to give it a little more cushion and grip. I first thought of handle bar tape like they used on ten speed racer bikes back in the day but nobody seems to carry it, except maybe a bike shop. Besides, I thought it might have been too thick. I settled on cloth Athletic Tape that I found at Walmart. It’s super thin, 1.5” wide, has a sticky back and only cost $2.97. If it gets torn or dirty, I can just change it like a bandage. I figure I can get about 15 applications out of the 30’ roll!
-
Has anyone ever made a homemade shaft for a metal detector with PVC pipe ? I think im gonna try it ill keep you informed on how it goes
-
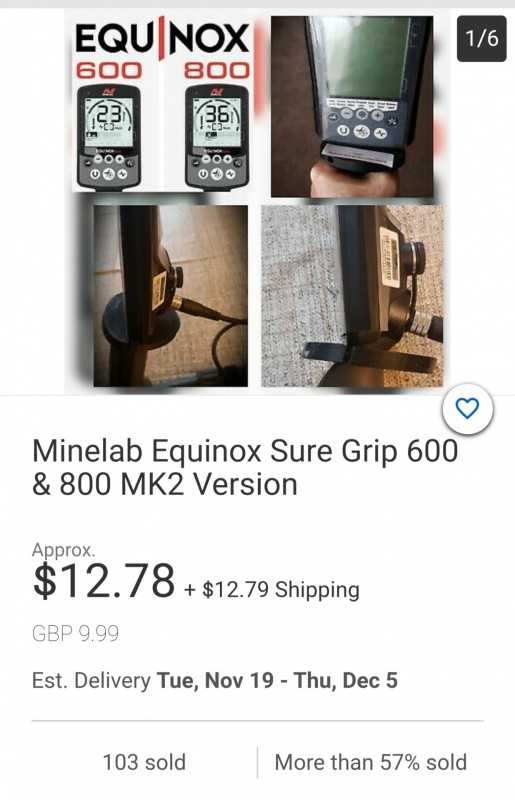
Curious if anyone has tried one of these variations on the telescopic rod for the EQX? Says the mount for control pod is from a mold rather the 3-d printed. There are 2 listings, one in UK and the other from a seller in Georgia. https://rover.ebay.com/rover/0/0/0?mpre=https%3A%2F%2Fwww.ebay.com%2Fulk%2Fitm%2F293119857629
-
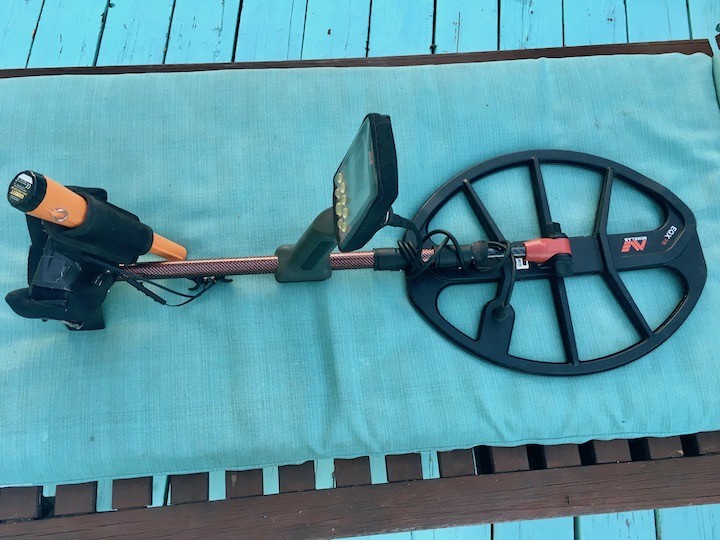
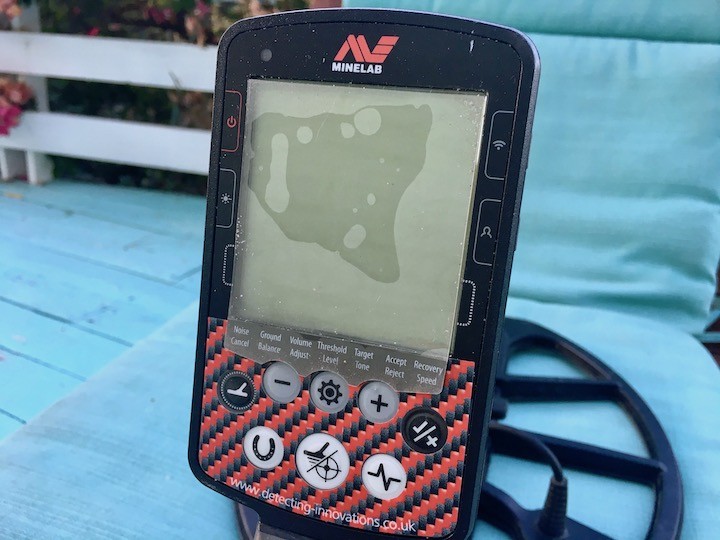
Since people are chatting up new stems, I would like to recommend a three piece telescoping replacement for the stock Equinox stem. I received it today and love it. It is super lightweight, simple to assemble (I did it so it's simple), it obviously has had a lot of thought put into it. I don't make a habit of putting up ad's for equipment unless I am pretty sure they are first rate and I believe this shaft meets that standard. I took a couple of quick shots of it after I closed it up to it's shortest length. They also included a nice cover for the Eq. control box which I also have shown. Take a look at their website and see what you think https://www.detecting-innovations.co.uk/TELE-KNOX_Detecting-Innovations_Telescopic_Stem/p6292256_19741720.aspx

-
Hello everybody, can I use the Golden Mask Shaft (converted for the Equinox) in salt water? Are there metallic parts that will be corroded / oxidized by being submerged in ocean/sea ? Thanks Editor's Note - this thread was split from an older existing thread about the Golden Mask aftermarket rod


.jpg.66aed4274f096572c8582b1d010edf13.jpg)