
Steve Herschbach
-
Posts
19,724 -
Joined
-
Days Won
1,568
Content Type
Forums
Detector Prospector Home
Detector Database
Downloads
Everything posted by Steve Herschbach
-
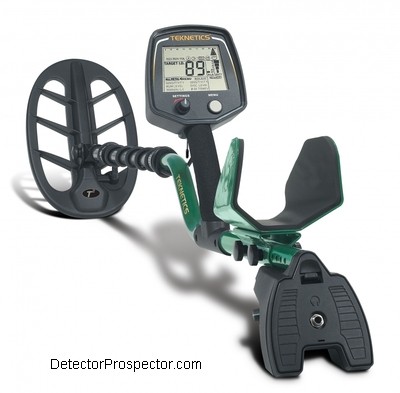 The Teknetics T2 was introduced in 2006 and is still in production. It was the first major project released by First Texas (parent company of Teknetics) that involved famed engineer Dave Johnson after he joined the company. Dave had a hand in many top gold prospecting detectors at many companies, including the Fisher Gold Bug 2, Tesoro Lobo, and White's GMT. The Teknetics T2 was one of the earliest metal detectors to gain a following in the Africa Gold Rush of the late 20th century. Although technically not a nugget detector per se, the Teknetics T2 has a very powerful threshold based all metal mode. This, combined with its 13 kHz operating frequency, makes it suitable for basic gold nugget detecting. Nobody seems to know the real story but apparently a local prospector in Africa chose to use a Teknetics T2 detector to search for gold nuggets. It is conjectured that this prospector found a lot of gold, leading to others using the same detector. Word of mouth advertising as produced by actual results rules all other forms of advertising in Africa, and it was not long before the t2 developed a reputation as being the machine to have if you wanted to find gold nuggets. Huge numbers were shipped to Africa. So many, that counterfeiting soon became a problem. The original T2 was therefore replaced by other models with extra features that also helped keep the counterfeiters off balance. The T2 is made by Teknetics, a company owned by First Texas. First Texas also owns the Fisher and Bounty Hunter brand names. A T2 offshoot called the F75 was marketed under the Fisher brand name. The T2 was designed specifically to run DD search coils so a main goal in the Fisher F75 design was to add the ability to also use concentric coils. The two detectors are very similar, with the main difference being that the T2 is geared more towards simple recovery of non-ferrous targets in the midst of ferrous trash. To this end it has an expanded ferrous target id as compared to the F75. The F75 is geared more towards U.S. coin hunters, and so features a target id range geared more to that task. The F75 also includes features like a meter backlight and the ability to save settings when powered off that the T2 lacks. Teknetics T2 metal detector for relics, gold, and more The T2 and F75 saw several similar model variants including a "Limited Edition" LE model with camouflage color scheme and an all black "Special Edition" SE model. These models featured extra settings and dual coil packages. There were unfortunately both hardware and software bugs that saw sub-variants produced of each model. The was another version in 2014, a "Limited Edition 2" or Ltd2 model with digital filtering designed to reduce electrical interference issues along with other extra features. The T2 has been reissued as the T2 Classic with the original green color scheme for a reduced price of only $499 in 2016. Finally, Teknetics released the T2 Ltd as a single coil package with a pinpointer in 2018 and called it the T2+. The ergonomics of the T2 are superb. It is a perfectly balanced 3.5 lbs. People do not understand how important balance is but a balanced 3.5 lb. detector creates less arm strain than a nose heavy 2.5 lb. detector. The T2 only sips at the four AA batteries, getting a week of long days on a set of good alkalines and nearly two solid weeks of detecting in a set of premium lithium batteries. ~ Steve Herschbach Copyright © 2016 Herschbach Enterprises Official Teknetics T2 Page Teknetics T2 Instruction Manual T2 Classic Color Brochure Forum Threads Tagged "teknetics detector" Teknetics Metal Detector Forum T2 Tone Break Tip Teknetics T2 Technical Specifications* Internet Price $499.00 (Classic) $549 (T2+) $699 (T2 Ltd) Technology Induction Balance (IB) Transmit Frequency 13 kHz Autotune Mode(s) Pre-Set Via Different Modes or "Processes" Ground Rejection Ground Grab and Manual Soil Adjust No Discrimination Variable with Visual ID, Tone ID, Notch ID Volume Control Yes Threshold Control Yes Tone Adjust Yes Audio Boost No Frequency Offset Yes Pinpoint Mode Yes Audio Output 1/4" Headphone Socket & Speaker Hip Mount Shaft Mount Only Standard Coil(s) 11" Elliptical DD Optional Search Coils Over 7 accessory coils available Battery Four AA Operating Time 40 - 50 hours Weight 3.5 lbs. Additional Technology Notes *Notes on Technical Specifications - Detailed notes about the specifications listed in this chart.
 -

Metal Detecting for Gold Nuggets at Ganes Creek, Alaska
Steve Herschbach posted a article in Gold Prospecting
Doug Clark of Clark-Wiltz Mining opened the Ganes Creek property near McGrath, Alaska to recreational miners in 2002. The pay-to-mine operation ended in 2012. This page is being left up for historical purposes. Ganes Creek is famous for the large nuggets found there in years past, and it was conjectured that people would pay for an opportunity to search for large nuggets lost in the tailing piles by past mining operations. The operation was a resounding success and was in operation for a decade. Visitors in that time have found over 1700 ounce of gold and added a great deal of revenue to the mine above and beyond the mining operations. Approximately 12 people per week were allowed to visit Ganes Creek at a cost of $3000.00 per person. They got room and board and access to the old mining operations. Why they pay to visit Ganes Creek - 33.85 oz Nugget found by a visitor! 33.85 Ounce "Heart of Gold" Found June 16, 2004 at Ganes Creek near McGrath, Alaska by Steve Burris of Idaho with a Fisher Gold Bug 2. The nugget was found in an area where many others had detected, but all the previous detectorists had missed the nugget. Transportation to the mine was not included. The majority of visitors came from the Lower 48, with airline tickets running anywhere from $600.00 to $800.00 per person. Nearly all the visitors flew from Anchorage to McGrath via Peninsula Air at a round trip cost of about $420.00. The next leg of the journey is from McGrath to Ganes Creek via Tanana Air of McGrath at a cost of approximately $200.00 per person. I was fortunate to have been at Ganes Creek many times over the years. You can tag along on some of those visits by looking over the Ganes Creek articles at Steve's Mining Journal. Here is just one story to get you started - Memorial Day at Ganes Creek, Alaska - 5/25/02 Steve Herschbach shows off gold found at Ganes Creek over Memorial Day weekend 2002 -
State Specific Information on Gold & Other Minerals
Steve Herschbach posted a article in Gold Prospecting
Here is some state specific information to get you started on your search for gold and other valuable minerals. A lot of the basic information is drawn from Principal Gold-Producing Districts of the United States by A. H. Koschmann and M. H. Bergendahl, 1968 USGS Professional Paper 610 and then updated where possible. For a list of publicly available locations see Public Mining Sites, Parks, Tours and Other Attractions Most of the principal gold-producing districts are in the mountainous areas of the United States, where folding, faulting, and igneous intrusions have deformed the rocks. In contrast, many large base-metal deposits are found in the large relatively un-deformed areas of the Central and Eastern States, but gold is not even a byproduct of these ores. Large parts of the Western States, such as the Colorado Plateau, the Columbia Plateau, and much of Wyoming, have not been subjected to violent tectonic forces and consequently contain very few gold deposits. Most of the gold deposits in the United States are associated with and are perhaps genetically related to small batholiths, stocks, and satellitic intrusive bodies of quartz monzonitic composition that range in age from Jurassic to Tertiary. Some deposits, such as those in the Southeastern States, may be genetically related to granitic bodies that were intruded at the close of Paleozoic time, and a few deposits, as at Jerome, Ariz., are Precambrian in age. Alabama Gold was discovered in Alabama in the early 1830s. Recorded production to 1939 was about 49,000 troy ounces of gold; however, probably an equal amount has been mined but not reported. Gold has been produced from seven districts in the Alabama Piedmont Province. More than 100 prospects and mines are known in these seven districts. Gold mining ceased in Alabama, except on an individual basis, during the late 1930s. Exploration of gold deposits in Alabama has been carried out intermittently during the past several years in the historic gold districts. In 2008, gold prices exceeded $1,000 per troy ounce, increasing interest in the historic gold districts of the state. Minerals in the Economy of Alabama, 2007 Alaska Alaska has yielded over 40,416,575 ounces from the first discovery in 1848 through 2010. A large portion of this total was mined from placers in the Yukon region and the Seward Peninsula. The important lode-mining area in the past was Southeastern Alaska, where mines in the Juneau and Chichagof districts produced more than 7 million ounces of gold through 1959. More recently large lode mines in Interior Alaska such as Ft. Knox and Pogo have replaced Southeastern Alaska as the main sources of lode gold. Gold Prospecting Research Material for Alaska Arizona Arizona’s cumulative gold production exceeds 16 million ounces contributed from 219 metallic mineral districts. Twenty-six of those districts have produced more than 100,000 ounces and 46 have produced more than 10,000 ounces. Much of the past gold production has been a by-product of large scale copper mining. Arizona hosts a number of deposits with known potential to produce a few hundred thousand ounces or more. Arizona Gold Prospecting California California has produced more gold than any other State - more than 106 million ounces from 1848 through 1965. The well-known discovery in El Dorado County in 1848 sparked a series of gold rushes that indirectly led to colonization of the entire mountain West. The rich gold placers of California yielded phenomenal wealth in the early years, and as the placers were depleted, prospectors searched for and found the source of the placer gold - the high-grade gold-quartz veins of the Mother Lode and Grass Valley. Others explored the forbidding mountain ranges of southern California and found productive lodes in the Cove, Rand, and Stedman districts. Placer mining was rejuvenated in the early 1900's with the introduction of large bucket dredges. From the late 1930's onward, dredging operations were responsible for a major part of California's gold output. Prospecting Research Material for California Colorado Colorado ranks second among the gold-producing States; its gold output through 1965 was about 40,776,000 ounces. The first publicized discovery of gold in Colorado was in 1858. The immediate rush to the Denver area resulted in important placer finds near Idaho Springs and Central City. Prospectors ranging far up the Arkansas River valley found gold placers near Leadville as early as 1859. Many rich gold lodes were quickly discovered, and Colorado soon became a major mining area. In the 1870's, important ore discoveries were made in the San Juan Mountains, the Sawatch Mountains, and in the Leadville-Breckenridge area. Gold ore was found in the important Cripple Creek district in 1891. USGS Professional Paper 610 Georgia Georgia is credited with a total historical production of 871,000 ounces of gold from 1830 through 1959. Although a historically important gold producer, the state does not presently produce anything more than minor amounts of gold. Idaho Idaho, which ranks ninth among the gold-producing States, is credited with producing 8,323,000 ounces of gold from 1863 through 1965. The earliest recorded discovery in Idaho was of placer gold along the Pend Oreille River in 1852. Rich placers were found soon afterward at Pierce City, Elk City, Orofino, Boise Basin, Florence, and Warren, and a brief period of feverish activity followed. By 1870, many of the richer placers were exhausted, and an intensive search for lode deposits resulted. Large-scale dredging rejuvenated the placers, though after 1900, most of Idaho's gold was produced from lode mines. USGS Professional Paper 610 Maryland Placer gold was discovered at Great Falls in 1861. A number of mines were opened on gold-bearing quartz veins in Montgomery County. No gold production has been reported since 1951. Total production was about 6,000 ounces. Michigan In Michigan the only significant gold output has come from the Ropes mine in Marquette County near Ishpeming. Total production was about 29,000 ounces. USGS Professional Paper 610 Montana Montana, which yielded a total of 17,752,000 ounces of gold from 1862 through 1965, is seventh among the gold-producing States. Gold was first discovered in 1852 in placers in Powell County, but the influx of prospectors did not begin until the discovery of rich placers in the Bannack district in 1862. Numerous placers were found in rapid succession, among them those of Alder Gulch, which were to become the most productive placers in the State. Placers, which contributed almost half of Montana's total gold, had their greatest output before 1870; nevertheless, dredging and hydraulic placer mining were conducted on a large scale until World War II. Development of lodes, hindered by lack of railroads in the early days, progressed rapidly in the 1880's and was accelerated greatly with the expansion of operations at Butte in the early 1900's. USGS Professional Paper 610 Nevada Though Nevada is primarily a silver-mining State, it produced a total of about 27,475,000 ounces of gold from 1859 through 1965 and ranks fifth among the gold-producing States. Mining began in the early 1850's and the period 1859-79 was the boom era of the Comstock Lode and Reese River districts. After a period of decline from 1880 to 1900, the discoveries at Tonopah and Goldfield rejuvenated mining in the State until World War I. Lead, zinc, and copper mining, which yield gold as a byproduct, dominated Nevada's mining industry from the end of World War I through 1959, although for short periods large gold operations in the Potosi, Round Mountain, and Bullion districts have been significant. Discovery of the Carlin gold deposit in 1962 has revived interest in the gold potential of the State. USGS Professional Paper 610 New Mexico New Mexico produced about 2,267,000 ounces of gold from 1848 through 1965. Though gold lodes were worked on a small scale as early as 1833, prospectors showed little interest in the territory until the 1860's and 1870's. In rapid succession, lode and placer gold and rich silver and silver-lead discoveries were made, and mining flourished. By 1900, however, the oxidized ores were depleted, and interest turned to developing the primary base-metal ores from which gold is produced as a byproduct. This trend continued, in general, through 1959. The major gold districts are Elizabeth-town-Baldy, Mogollon, and Lordsburg. USGS Professional Paper 610 North Carolina North Carolina was the site of the first gold rush in the United States, following the discovery of a 17 pound gold nugget by 12-year old Conrad Reed in a creek at his father’s farm in 1799. North Carolina produced about 50,000 ounces of gold from lode and placer deposits. Oregon Oregon, the tenth most important gold-mining State, produced 5,797,000 ounces of gold from 1852 through 1965. Gold placers were worked as early as 1852, but the great rush to Oregon did not take place until 1861, after the placer discovery at Griffin Gulch in Baker County. After an initial period of high placer output, gold lodes were found and developed at a less frenzied rate. By the early 1900's, gold mining began a decline that lasted until 1934 when it was rejuvenated by the increase in the price of gold. A few districts, notably the Sumpter, were then reactivated, and gold mining was revived through the late 1930's and early 1940's until the demands of World War II diverted mining to commodities other than gold. Gold mining in Oregon in the post-World War II period has been in a steady decline. USGS Professional Paper 610 Pennsylvania Most of Pennsylvania's gold has been produced from the Cornwall iron mine in Lebanon County.* Where to Find Gold in Pennsylvania and Gold in Pennsylvania. USGS Professional Paper 610 South Carolina Total gold production of South Carolina through 1959 was 318,801 ounces. High gold prices are leading to increased interest in South Carolina gold. Gold mining may commence soon at the historic Haile mine. South Dakota South Dakota, third among the gold-producing States, produced a total of about 31,208,000 ounces of gold through 1965, mostly from the Homestake mine. The gold districts are in the Black Hills in the northwestern part of the State. Most gold has been produced from lode deposits, but placers have also been mined. USGS Professional Paper 610 Tennessee Gold in Tennessee is a byproduct of the copper ores of the Ducktown district in Polk County; small amounts have been mined from placers on Coker Creek in Monroe County. Both areas are in the southeastern part of the State. Total production is over 14,000 ounces. USGS Professional Paper 610 Utah Utah, whose total gold output through 1965 was 17,765,000 ounces, ranks sixth among the gold-producing States. The first major ore discovery in the State was in 1863, when lead ore was found in Bingham Canyon. Gold placers were found nearby the following year. Silver-lead ore discoveries in the Cottonwood, Park City, and Tintic districts in the late 1860's and 1870's generated feverish activity which lasted until 1893 when the financial recession caused a sharp drop in the price of silver. In the early 1900's, large-scale mining of the low-grade copper ores of the Bingham district began. Gold has been an important byproduct of these ores. In 1965, the Bingham district, in addition to being one of the major copper producers of the world, was the second largest gold producer in the United States. The Tintic, Park City, and Camp Floyd districts also have yielded substantial amounts of gold. USGS Professional Paper 610 Virginia About 100,000 troy ounces of gold were produced in Virginia from 1804 through 1947, when gold was last produced in the State. Gold in Virginia, 2007 Washington Washington, whose total gold output from 1860 through 1965 was about 3,671,000 ounces, is one of the few States in which gold production has increased in recent years, mainly because of the output of the Knob Hill mine in the Republic district and the Gold King mine in the Wenatchee district. Gold was first discovered in the State in 1853 in the Yakima River valley. Placers were worked along most of the major streams of the State through the 1880's, but most of them were depleted by the early 1900's. Lode deposits were found in the 1870's and eventually supplanted placers as the chief source of gold. Of the 15 major gold districts of Washington, the most productive have been Republic, Wenatchee, and Chelan Lake. USGS Professional Paper 610 Wyoming Wyoming is a minor gold-producing State; its total output through 1965 was over 180,000 ounces. Only two districts - the Douglas Creek and the Atlantic City-South Pass - have been significant. USGS Professional Paper 610 Australia Nobody knows what the production figures are but there is little doubt hundreds of thousands of ounces of gold have been found in Australia by prospectors with metal detectors in the last 40 years. Gold in Australia -
Links to other websites related to metal detecting for coins, jewelry, relics, and more. Also prospecting for gold and other valuable minerals. See the link trade list at bottom of the page. If you notice a broken link, want to add a site, or think one should be removed, send an email. Forums, Blogs, etc. Find's Treasure Forums - Diverse metal detecting forums with many sub-forums. Friendly Forums - All types of metal detecting subjects. Gold Detecting & Prospecting - Australian prospecting forums. Nuggethunting.com Forums - Prospecting for gold with metal detectors. Nuggetshooter Forums - Prospecting, metal detecting, meteorite hunting. Prospecting Australia - Metal detecting "down under"! Stout's Standards - Blog for long time detectorist and author Dick Stout. TreasureNet Forums - Huge list of sub-forums - metal detecting, prospecting, and more. Tom Dankowski Forum - Lots of posts on technical aspects of metal detecting. Informational Sites Dictionary of Mining, Mineral and Related Terms - Reading an old geologic report and don't know what that word means? Geotech - Technology for metal detecting. Land Matters - Fantastic land mapping website for anyone with an interest in property access issues. Free interactive maps, books, tutorials, and more. Metal Detecting World - In depth articles and tutorials on metal detecting. MDHTALK - Metal Detecting Hobby Talk - metal detecting resources. mindat.org - THE mineral and locality database. Manufacturers DetectorPro - Metal detectors and high quality headphones. Fisher Research Labs - The F75+, F19, Gold Bug Pro and other metal detectors. Garrett Metal Detectors - The ATX, AT Pro, AT Max and other metal detectors. Keene Engineering - Suction dredges, power sluices, sluice boxes, and more. Minelab - The X-Terra 705, Equinox, and GPX and GPZ series of prospecting detectors. Nokta/Makro Detectors - Featuring the Nokta Simplex+ Proline Mining Equipment - Suction dredges, power sluices, sluice boxes, and more. Teknetics - The Teknetics T2+ and G2+ metal detectors. White's Electronics - Redirects to garrett.com since White's was sold to Garrett XP Metal Detectors - U.S. home of the XP DEUS. Magazines Gold Prospectors Magazine - Official magazine of the Gold Prospectors Association of America (GPAA). ICMJ's Prospecting and Mining Journal - Formerly known as the California Mining Journal. Western & Eastern Treasures Magazine - Features an annual Gold & Silver issue. Clubs & Organizations Gold Prospectors Association of America (GPAA) - The Gold Prospectors Association (GPAA) was founded in 1968 to preserve and promote the great heritage of the North American Prospector. The GPAA was also dedicated to providing a platform for the exchange of information, presenting an organized voice for recreational and professional prospectors and helping it's members find more gold. GPAA of Northern Nevada - Prospecting club based in Reno, NV. Metal Detecting Club List - Over 100 metal detecting clubs listed by state. The New 49'ers - The purpose of The New 49'ers is to assist our members to find increased enjoyment and more profitable yields while helping to create more and more successful gold prospectors in our field. Each year we are proving that a large number of successful gold prospectors, associated together in a responsible way, have a chance to provide greater gold prospecting opportunities for all of us to enjoy. N.W. Montana Gold Prospectors - We are a non-profit organization for the person interested in the minerals of the earth - be it gold or garnets. Join us and learn to pan or run a dredge. Reno Prospecting & Detecting Club - Metal detecting and prospecting club based in Reno, NV. RoadRunner Prospectors' Club - RRPC was founded in 1982 as a non-profit, volunteer-staffed, family orientated club dedicated to gold mining in the state of Arizona. Members enjoy access to hundreds of acres of gold producing claims located throughout the state and are free to keep all the gold they find. Prospector's Club of Southern California - The Prospector's Club of Southern Calif. holds title to several gold claims in California. The Club has also made agreements with other organizations to to allow their members and ours, to make mutual use of each other's gold claims. With these arrangements, our members have access to quite a large number of sites where they can get their share of the gold in our state. Sacramento Valley Detecting Buffs - metal detecting club based in the Central Valley of California. United Prospectors - A family-oriented small miner's corporation dedicated to the enjoyable, relaxing, and potentially profitable activities of rock hounding, metal detecting, gold prospecting and mineral hunting. Link Trades If you have a related site and would like a link here all you have to do is the same in return and link to this website. Send your link along with the location on your website where you have linked to us via email. Visitors please note - a listing below does not constitute an endorsement of a website or business - we’ve merely traded links. Please let me know if any link listed below should not be included here. We will not trade links with totally unrelated websites. Alaska Mining & Diving Supply - Prospecting, metal detecting, ATVs, boats, snowmobiles, and more. Arizona Outback - Multi-brand detector dealer specializing in Minelab related products. Detectors Direct - Multi-brand metal detector dealer Down Under! Gerry's Detectors - Multi-line detector dealer specializing in customer care and training. GoldRushNuggets.com - Beautiful gold nuggets for sale from Alaska, California, Australia, Arizona and more. Gold Nugget Sales - Natural Gold Nuggets for sale. We specialize in rare gold nuggets and specimens. Metal Detector Universe - various articles about metal detecting. Natural Gold Trader - Beautiful website with gorgeous gold for sale. Nevada Outback Gems - Gemstones for sale and lots of prospecting information. Nugget Shooter - Minelab metal detector and accessories dealer. Rob's Detector Sales - Minelab detectors and related product, based in Arizona. SmarterHobby.com - New hobby blog with a section devoted to metal detecting. Undercoil.com - Articles and reviews of all brands of metal detectors
-
If does help to have a bulldozer and jackhammer also! Published on Oct 6, 2014 - Yes, over his 35+ year prospecting career Matt has found more than his body weight in gold nuggets. Garrett ATX Information Page
-
Published on Jul 29, 2012 - How to find gold with the Whites GMT. Gerry shows the settings and techniques for finding even the smallest nuggets.
-
The Petersville Recreational Mining Area has been set aside by the state of Alaska so people can experience some of the thrill of prospecting for gold. The site generally has smaller gold but some dredgers have done well at finding larger pieces. A nugget weighing just under 1/2 ounce was reported by a suction dredger in 2003. Bedrock around the bridge is a good place for the casual panner to find a little gold by scraping out pockets and crevices. The bedrock has streaks of iron mineral and there are graphite slate hot rocks here that make metal detecting a major challenge. Petersville Recreational Mining Area The state legislature designated a corridor of public land along the Peters Creek, near the Petersville Road (southwest of Denali State Park) for recreational mining and other general public recreation in 1997 (AS 41.23.630(b)) to give Alaskans and visitors a place where they can gain first-hand experience in recreational mining, help celebrate the Gold Rush Centennial, and maybe take home a few gold nuggets. To prevent conflict between the public and mining claim owners, the Petersville Recreational Mining Area is closed to staking of new mining claims. How do I get to the new Petersville Recreational Mining Area? The Petersville Recreational Mining Area is located along the Peters Creek, within the Seward Meridian in Township 28N, Range 9W Section 1 and Township 28N, Range 8W Sections 6-8. Access is provided to the Petersville Recreational Mining Area by Petersville Road. Petersville Road leaves the Parks Highway at Trapper Creek, about 115 miles north of Anchorage and 243 miles south of Fairbanks. Many areas along the road have outstanding viewpoints of Mount McKinley. The first 9.4 miles are paved. The next 8.9 miles goes to the site where the Forks Roadhouse once stood (which is the junction of Collinsville Rd. and Petersville Rd.) The Collinsville Road is only maintained to the Peters Creek bridge and becomes a 4 wheeler trail soon after. Beyond this junction, for the next 14.9 miles the Petersville becomes a primitive road all the way to the Recreational Mining Area. It is recommended that this next section be traveled using a 4-wheel drive vehicle or a vehicle with high clearance. Petersville Road is closed to thru traffic during the winter months. Additional access is provided to the area by the Willow Creek Trail (RST 512), which ultimately connects with the Youngstown-Home Lake Trail (RST 1608) and leads into the Denali State Park. The bridge at Peters Creek (mile 32) has weight restrictions so oversize vehicles must use the ford to reach the upper end of the Recreational Mining Area. This ford and the second ford in the same area have been approved by the Alaska Department of Fish & Game as a vehicle crossing. What facilities are there now? There are no developed campsites, sanitation facilities, drinking-water supplies, or trash cans at present. Visitors should be prepared for self-sufficient, low-impact camping. Petersville Recreational Mining Area Map - click image for larger version How will the Petersville Recreational Mining Area be developed?State law requires the Department of Natural Resources (DNR) to prepare a plan for the management, use, and development of the area, including the mining methods that can be used while still protecting important habitat such as for salmon in Peters Creek. The Department of Fish and Game and the Department of Transportation will participate in the management plan, with full public input. In the meantime, the area is open to use. What kind of mining can I do? Recreational gold panning, mineral prospecting, or mining using light portable field equipment, such as pick and shovel, pan, earth auger are allowed and do not require permitting. ADF&G does not authorize the use of backpack power drills or augers through their over-the-counter mining permits, therefore this type of equipment cannot be used. The use of mechanized equipment such as a suction dredge or a water pump requires a permit from the Alaska Department of Fish & Game (ADF&G) and the Department of Environmental Conservation (DEC). Refer to the Fact Sheet for Generally Allowed Uses for information about the types of uses allowed on Alaska public land. How can I get a Fish and Game permit for suction dredging? Visit your local ADF&G, Division of Habitat office in Anchorage, Soldotna, Palmer, or Fairbanks. Permit application forms and contact information for ADF&G offices are available online at http://www.habitat.adfg.alaska.gov. Permits are free. Please call the ADF&G Division of Habitat Palmer office at 907-861-3200. Suction Dredging in the Petersville Recreational Mining Area is allowed May 15 through July 15; closing at midnight on July 15 to protect the salmon habitat. The Department of Environmental Conservation requires a General Permit for suction dredging activities. The application can be found on their website. The fees vary according to projected suction dredging use. Note: Suction Dredges will only be authorized by ADF&G and DEC if they are 6” or less and must be 18 hp or less. Power Sluicing (High-banking) will only be authorized if they are 18 hp or less. Are there any mining claims already in the area? There are no mining claims within the Petersville Recreational Mining Area, there are claims located outside the boundary. The Department of Natural Resources clearly marked the upstream and downstream ends of the area during the summer of 1997, and is looking for a way to show the side boundaries too. In the meantime, you can avoid any conflict by doing your prospecting and mining only on the Peters Creek valley floor, not up Cottonwood Creek or on the higher ground where there are likely to be mining claims. Any minerals within the boundaries of these claims are the property of the claim owner. Please respect the mining locators’ rights under the laws of the State of Alaska. Of course, you are free to walk across these mining claims or use them for camping, hunting, fishing, four-wheeling, and other recreation, but you can’t mine on them without the claimant’s permission. More information including detailed land status maps can be found at the Alaska DNR Case Abstract. What else can I do in the area? The Petersville Recreational Mining Area and surrounding public lands are highly popular for hunting, fishing, hiking, four-wheeling, snowmachining, cross-country skiing, and dog mushing. What about camping in the area? From http://dnr.alaska.gov/mlw/factsht/gen_allow_use.pdf Generally allowed: Setting up and using a camp for personal, noncommercial recreational purposes, or for any non-recreational purpose (such as a support camp during mineral exploration), for no more than 14 days at one site, using a tent platform or other temporary structure that can readily be dismantled and removed, or a floathouse that can readily be moved. Moving the entire camp at least two miles starts a new 14-day period. Cabins or other permanent improvements are not allowed, even if they are on skids or another non-permanent foundation. The camp must be removed immediately if the department determines that it interferes with public access or other public uses or interests. Where can I get detailed maps? You can purchase topographical maps that show more detail on the area. Ask for USGS Topographical map Talkeetna C2. If you like, you can research status plats showing the location of existing mining claims weekdays between the hours of 10:00 a.m. to 5:00 p.m. at a DNR Public Information Center (see below). For answers to questions not covered in the Fact Sheet please contact a Public Information Center: Anchorage Public Information Center Department of Natural Resources Public Information Center 550 West 7thAve., Suite 1260 Anchorage, Alaska 99501-3557 Monday thru Friday / 10:00 AM to 5:00 PM (907) 269-8400 TDD: (907) 269-8411 Fairbanks Public Information Center Department of Natural Resources Public Information Center 3700 Airport Way, Fairbanks Alaska 99709-4699 Monday thru Friday / 10:00 AM to 5:00 PM (907) 451-2705 TDD (907) 451-2770 Source: Modified with additions from the Alaska Division of Mining, Land, & Water Fact Sheet May 2014.
-
Jack Wade Creek runs along the Taylor Highway a few miles north of Chicken, Alaska. It has a long mining history. Jack Wade Creek is open to recreational gold panning from one-quarter mile (0.4 km) upstream of the Walker Fork Campground to the mining claims near Milepost 85. No permits are required. Panning is not allowed on adjacent mining claims. What's Allowed: gold pans, picks, pry bars, shovels, metal detectors, manually fed rocker boxes and sluice boxes. What's Not Allowed: Motorized equipment, including suction dredges, pumps, and earthmoving equipment; disturbing the Taylor Highway roadbed or shoulders. Jack Wade Creek is in the Fortymile Wild and Scenic River Corridor and so is subject to special rules and restrictions. Camping is prohibited between Walker Fork Campground (milepost 82) and Warner Creek (milepost 92). Camping for more than nine days at other locations may require a permit. See the BLM River Corridor Rules for details. Walker Fork Campground is a BLM fee campground with eighteen sites, outhouses, and a picnic area. Gold nuggets found by Steve Herschbach on Jack Wade Creek with a metal detector Note from Steve Herschbach: I spent a lot of time on Jack Wade Creek in 2013 and 2014 and found a lot of gold there metal detecting. I have stayed both in Chicken and commuted to Jack Wade to look for gold. I have also stayed at the very nice Walker Fork Campground. The campground saves a 40 mile round trip drive each day, but staying in Chicken can get you access to Wi-Fi for communications (no cell phones towers here). These trips were posted online at Steve's 2013 Alaska Gold Adventure and Steve's 2014 Alaska Gold Adventure. There are many photos and tips there that will be very helpful for anyone considering a trip to Chicken, Alaska and Jack Wade Creek. Jack Wade Creek Public Gold Panning Area Rules Jack Wade Creek Public Gold Panning Area Location Map
-
In 1986, the Alaska State Legislature created the Hatcher Pass Public Use Area, located approximately fifteen miles north of Palmer on the Little Susitna River. The area is open to a variety of recreational activities, including recreational mining. This fact sheet concentrates on recreational mining within the Hatcher Pass Public Use Area. The Department of Natural Resources, Division of Parks and Outdoor Recreation is the primary manager of the Hatcher Pass Public Use Area. The Divisions of Land and Mining also have land and resource management responsibilities, and the Alaska Department of Fish and Game is responsible for the management of the fish and game resources within the Hatcher Pass Area. Where is the Hatcher Pass Public Use Area located? Approximately two miles north of Palmer, on the Glenn Highway; follow the signs showing a left turn to the Independence Mine Historical Park and Hatcher Pass. After turning off the Glenn Highway onto the Palmer Fishhook Road the public use area begins at approximately mile 7.8 of the Palmer Fishhook Road. Hatcher Pass Public Use Area - click on image for larger version More information including detailed land status maps can be found at the Alaska DNR Case Abstract. Where can I mine recreationally within the Hatcher Pass Public Use Area? You can mine recreationally anywhere within the boundaries of the Public Use Area except for several valid (active) mining claims. There are many vehicle pull-offs along the road next to the Little Susitna River for easy river access to recreationally mine. We recommend using the Gold Mint Trail, which runs north, along the Little Susitna River from the gravel parking lot at the Gold Mint Trailhead. The trail continues north along the Little Susitna River for approximately eight miles. You may also pan for gold in the Independence Mine State Historical Park. Before panning please obtain an Independence Mine brochure and speak with the park staff at the mine visitors center. What methods of recreational mining are allowed in the Public Use Area? Recreational gold panning using light portable field equipment, such as a hand operated pick, shovel, and pan. You may also use a suction dredge with a nozzle intake of six inches or less, powered by an engine of 18 horsepower. Do I need a permit? You may. The Little Susitna River has been specified as important for the spawning, rearing, or migration of anadromous fish. You must have a dredging permit from the DNR Office of Habitat Management & Permitting (OHMP) if you wish to use a suction dredge in the Little Susitna River. If you wish to use equipment other than that specified above, you will need a permit from the Division of Mining and/or the Division of Parks and Outdoor Recreation. What facilities are available in or near the Public Use Area? Except for the Independence Mine Visitor Center, the Hatcher Pass Public Use Area is relatively undeveloped. Privately owned facilities offering food and lodging are within walking distance of the Gold Mint Trailhead. Outhouses are available at the Gold Mint trailhead parking lot and at the Independence Mine Visitor Center. What other activities are allowed within the Public Use Area? Recreational activities such as hiking, picnicking, photography, berry picking, camping, skiing, snow machining, and snow boarding are allowed within the Hatcher Pass Public Use Area. Other activities such as fishing, grazing, hunting, and trapping are also allowed. What about camping in the area? From http://dnr.alaska.gov/mlw/factsht/gen_allow_use.pdf Generally allowed: Setting up and using a camp for personal, noncommercial recreational purposes, or for any non-recreational purpose (such as a support camp during mineral exploration), for no more than 14 days at one site, using a tent platform or other temporary structure that can readily be dismantled and removed, or a floathouse that can readily be moved. Moving the entire camp at least two miles starts a new 14-day period. Cabins or other permanent improvements are not allowed, even if they are on skids or another non-permanent foundation. The camp must be removed immediately if the department determines that it interferes with public access or other public uses or interests. For additional information on dredging permits for anadromous steams, contact the DF&G Division of Habitat at the following address: Department of Fish & Game Division of Habitat 1800 Glenn Highway, Suite 6 Palmer, AK 9964506736 Phone: 907-861-3200 Fax: 907-861-3232 For additional information on Hatcher Pass Public Use Area contact: Department of Natural Resources Public Information Center 555 West 7th, Suite 1260 Anchorage, AK 99501-3557 Phone: 907-269-8400 TDD: 907-269-8411 Division of Parks and Outdoor Recreation Mat-Su/Copper Basin Area Office Finger Lake State Recreation Area HC 32 Box 6706 Wasilla, AK 99687 Phone: 907-745-2827 Source: Modified with additions from the Alaska Division of Mining, Land, & Water Fact Sheet February 2012. The Alaska Division of Parks has a site about the Independence Mine State Historical Park.
-
Crow Creek Mine, less than an hour drive south of Anchorage on the Seward Highway, is possibly the most popular recreational mining location in Alaska. Thousands of visitors to the mine try their luck each summer at finding those elusive gold nuggets. Crow Creek is Southcentral Alaska's richest gold mine, having produced over 45,000 ounces of gold, and it is far from mined out. The Bureau of Mines estimated Crow Creek has as much as one million yards of un-mined material left. It is likely that more gold remains than has been found so far. Many of the visitors are tourists, but Crow Creek is also a favorite with local miners. These miners have found Crow Creek to be a reliable producer of gold, and with nuggets larger than are normally found in many of the local creeks. Nuggets 1/4" in diameter are common, with nuggets up to a quarter ounce found regularly. Occasional nuggets of up to an ounce or more are found by some lucky miners. Some of the "regulars" find as much as an ounce or more of gold each day with suction dredges. The creek has probably also produced more nuggets with metal detectors than any other in Alaska. Old mining camp at entrance to Crow Creek Mine Crow Creek is a family owned pay-per-visit operation, and you keep all you find. You can pan for gold, run a sluice box, use a suction dredge or highbanker, and even metal detect for gold nuggets. Visit their website at http://www.crowcreekmine.com for the latest information and rates. The location is so scenic many weddings and company events are held there. The weather has been fairly good at Crow Creek the last few years, but this area is much wetter than Anchorage, and it is not unusual for it to be sunny in Anchorage and rainy at Crow Creek. Dress warmly and have rain gear available. Areas near the creek can be nearly pest free on sunny days, but wetter/cooler weather can bring out lots of mosquitoes, so have insect repellent at hand. Sodas are available for purchase, but you must bring any food you wish with you. Finally, bring your camera! Crow Creek is set in a very beautiful location, and the mine is a popular site for weddings and company events. The buildings and facilities are available for rent for special occasions. Crow Creek is on the Register of National Historic Places, and the old mining camp buildings are the oldest in the Municipality of Anchorage. Many interesting mining relics have been collected from around the mine for viewing. 1 ounce gold nugget found by Steve Herschbach at Crow Creek Mine Crow Creek is located only three miles from the popular resort town of Girdwood, Alaska. Girdwood is a good base of operations for a visit to Anchorage's playground, the Kenai Peninsula. Easy access to world class fishing, fantastic scenery, winter sports, and of course, Crow Creek Mine. Detectorprospector.com owner Steve Herschbach has visited Crow Creek many times over the last 40 years. He has many stories with photographs at Steve's Mining Journal about Crow Creek so if you have any doubts at all that gold can be found at Crow Creek Mine visit the Journal and read Steve's stories.
-
The mention of Alaska has always conjured up visions of gold. Early gold-seekers traveled to Alaska by every means imaginable and endured endless hardships. They stayed to build communities in the wilderness. Present-day travelers, still lured by gold, come to Alaska to try their hand at panning or sluicing on the streams of the last frontier. They search for elusive gold nuggets or other semi-precious minerals. The Dalton Highway Built in 1974 to transport materials to oilfields on the North Slope, the Dalton Highway slices through northern Alaska, paralleling the Trans-Alaska Pipeline from Livengood to Prudhoe Bay. The BLM manages public land on both sides of the highway from the Yukon River to Mile 301. The state manages the land from there to Prudhoe Bay. The Dalton Highway is a gravel road that can be very rough, dusty or slippery, depending on weather. If stopping, pull as far to the right as you safely can. Do not block the gates on pipeline access roads. Off-highway vehicle use is prohibited within five miles of the highway. Carry emergency equipment, such as a CB radio, blankets or sleeping bags, spare tires, standard tools and first-aid equipment. Gas, restaurant food, lodging, phone, tire repair, and emergency towing are available at Yukon Crossing (summer only) Coldfoot, and Deadhorse. No other public services are available along the Dalton Highway. Recreational Mineral Collection Some BLM-managed public lands along the Dalton Highway south of Atigun Pass are open to recreational mineral collection. The BLM has inventoried and rated these streams for their mineral potential. The ratings are listed on the map below. Areas closed to recreational mineral collection include the pipeline right-of-way (27 feet on either side of the pipeline) and land legally claimed for mining or other purposes. You should stay at least 100 feet away from the pipeline to ensure you don't encroach on the right-of-way. To collect minerals on a private mining claim, you must obtain permission from the claimant. Check with the BLM's Public Information Center in Fairbanks (474-2251) to determine the claimant's name and address. The removal of placer gold on navigable waterways is regulated by the State of Alaska. For further information, contact the Department of Natural Resources at (907) 451-2705. Equipment You can use a pick, shovel, rocker and sluice box, and metal detector. Motorized equipment is not allowed. Suction dredging is prohibited within the Utility Corridor (the BLM-managed public lands surrounding the Dalton Highway) without prior authorization. Authorization can only be given for suction dredging on existing federal mining claims. Historic and Prehistoric Sites The 1906 Antiquities Act prohibits the removal, excavation or destruction of any historic or prehistoric ruin or monument, or any object of historic value located on federal land. Please notify the BLM if you find any items protected by the Antiquities Act. Maps For accurate locations obtain the following inch-to-the-mile maps from U.S. Geological Survey. 1:63,360 quads: Bettles C-2, D-1, D-2 Wiseman A-1, B-1 Chandalar B-6, C-6 Dalton Highway Gold Panning Sites - Click image for larger version The use of any motorized vehicle off the highway is prohibited within 5 miles on either side of the Dalton Highway without prior written authorization. This prohibition does not apply to off-road vehicles necessary for oil and gas exploration, development, production, or transportation or to a person who holds a mining claim in the vicinity of the highway, and who must use land within five miles of the right-of-way of the highway to gain access to their mining claim. Camping Marion Creek Campground, approximately five miles north of Coldfoot, is the only developed public campground along the Dalton Highway. It has both pull-through and tent sites, as well as outhouses and a water well. Each site has a picnic table and either a grill or a fire ring. This BLM federal fee site is open June through mid-September. Golden Age and Golden Access Passport holders pay half price. Campground hosts live on site. Travelers may also camp on gravel bars along rivers and in some pull-off areas left from old pipeline camps. Arctic soils and vegetation are easily damaged and take a long time to heal, so please practice “leave no trace” camping. Recreational camping is limited to 14 days at any one spot. Here is a list of parking areas, access points, and facilities. In general, be aware that facilities are few and far between on the Dalton Highway. Bring everything with you that you may need, including tools and spare tires. See the BLM Dalton Highway Visitor Guide 2017 for more information. Mile Agency Location Description 105.8 AF&G Kanuti River Small parking area and concrete boat launch to Kanuti River on east side of road. 115 BLM Arctic Circle Wayside Site is complete with a wayside, picnic tables, grills, restroom facilities, interpretive displays, and a campground. 132 BLM Gobblers Knob Wayside-Parking, toilet and scenic view. 135 DOT(P) Prospect Creek Day use campground area with restroom facilities and a boat launch area. Interpretation is planned. 136 BLM Jim River Parking and river access. 150 DOT(P) Grayling Lake A small turnout was identified as a potential site for interpretation of the archeology of the area. 156 BLM South Fork Koyukuk River Parking, unimproved boat launch at river crossing within highway ROW. 161 DOT(P) Chapman Lake Views of Brooks Range. Identified for improvements including a picnic area, restrooms, parking, and trails. 175-180 BLM Coldfoot/ Marion Creek Campground Amenities include a visitor center, restrooms, parking, campgrounds, and trailheads. Plans exist for interpretation. 186 DOT(P) Scenic Overlook Offers views of community of Wiseman and Koyukuk River. Interpretation about community and mining history possible. 188.5 DOT(P) Middle Fork Koyukuk Bridge #1 Bridge No.1 with turnout. Dolly Varden, grayling, whitefish. 197 DOT(P) Gold Creek Trailhead Established trails exist in area, parking and trailhead development at this site would improve access to the back country. 204-207 BLM Sukapak Mountain Overlook Small pull off could be expanded. The BLM has identified two potential sites for photo and interpretive opportunities. 207 DOT(P) Dietrich River Bridge Turnout to west at south end; burbot, grayling, whitefish and Dolly Varden. 211 DOT(P) Disaster Creek Served as a checkpoint during the development of the pipeline, interpretive opportunities exist, no scenic views. 235 DOT(P) Last Tree This site has been identified by the BLM as an interpretive site. Parking exists close by. For more information contact: U. S. Department of the Interior Bureau of Land Management Northern Field Office 1150 University Avenue Fairbanks, Alaska 99709-3844 (907) 474-2200 Related BLM publications: Birds along the Dalton Highway Dalton Highway Visitors Guide Bear Facts Current road conditions: Department of Transportation Recording: (907) 456-7623 Traveler's Advisory Radio: 1610 AM (originating at Fox, Alaska) Visitor information is available at: • Yukon Crossing Visitor Contact Station, Mile 56. Open Memorial Day to August 31 from 9 a.m. to 6 p.m., no phone. • Arctic Interagency Visitor Center, Mile 175. Open Memorial Day to Labor Day, 10 a.m. to 10 p.m., phone (907) 678-5209, fax (907) 678-2005. BLM Dalton Highway Visitor Guide 2017 BLM Dalton Highway Website Dalton Highway Corridor Management Area Source: The above is derived from the BLM brochure Dalton Highway - Areas Open to Recreational Mineral Collection.
-
Caribou Creek Recreational Mining Area, Alaska
Steve Herschbach posted a article in Gold Prospecting
In 1991, the Alaska State legislature created the Caribou Creek Recreational Mining Area (CCRM Area). The CCRM Area, which is located near the confluence of Caribou Creek and the Matanuska River, was established to provide a permanent recreational mining experience for the general public. The Department of Natural Resources (DNR), Division of Mining, Land & Water, is responsible for the management, use and development of the CCRM Area. The Department of Fish and Game is responsible for the management of the fish and game resources within the CCRM Area. How do I get to the Caribou Creek Recreational Mining Area and what facilities are available? The CCRM Area is located at approximately mile 104 of the Glenn Highway next to the Lion’s Head rock formation. You will see a sign at the turnoff. The CCRM Area is relatively undeveloped. A steep trail leads down to the creek from the gravel parking lot. Only pedestrian traffic is permitted on the trail (sorry, no all terrain vehicles—ATV’s). Physical fitness, health, and age should be considered due to the steepness of the trail. Private facilities offering gas, food and lodging are within 10 miles of the CCRM Area. Are other activities available within the Area? Yes. Hiking, picnicking, photography, wild flower viewing and other activities are permitted within the area, as long as they do not detract from the recreational mining experience. Dall sheep, black and grizzly bears, and gray wolves have been viewed in this area. Can I mine anywhere within the Area? No. First, you should be aware that the area only includes land and water within the active floodplain area of the creeks and rivers within the CCRM Area. Public recreational mining is allowed only within the CCRM area. Please refer to the map below for details. More information including detailed land status maps can be found at the Alaska DNR Case Abstract. Can I stake a mining claim in the Caribou Creek Recreational Mining Area? No. The CCRM Area is available to recreational mining only. No mining claims are allowed. What methods of recreational mining are allowed in the Caribou Creek Recreational Mining Area? Caribou Creek has been specified by the Alaska Department of Fish & Game as being important for the spawning, rearing, or migration of anadromous fish. Therefore, allowable methods vary depending on the time period. Gold pans and hand shovels are allowed in the recreational area year round. Between May 15th and July 15th each year, the following equipment may be used: Metal detector Small sluice box less than 16” wide and 6’ long fed by a hand shovel with 1” pump limit (*) High banker/rocker box fed by a hand shovel with 1” pump limit (*) Suction dredge with 6” nozzle or less powered by an engine of 18 horsepower or less (ADF&G permit required) (**) NOTE: ADF&G does NOT issue permits for the use of backpack power drills or augers therefore they cannot be used. (*) If a sluice box, high banker or rocker box is used it must be set back far enough from the creek to assure that no water with sediment discharge flows into the creek. Additionally ADF&G requires a permit for the operation of a water pump for sluice box operation. ADF&G does not have a pump intake restriction on the water pump used for highbanking/power sluicing. (**)Contact Department of Fish & Game for more specific permit information. The required permit is free. What about camping in the area? From http://dnr.alaska.gov/mlw/factsht/land_fs/gen_allow_use.pdf: Generally allowed: Setting up and using a camp for personal, noncommercial recreational purposes, or for any non-recreational purpose (such as a support camp during mineral exploration), for no more than 14 days at one site, using a tent platform or other temporary structure that can readily be dismantled and removed, or a floathouse that can readily be moved. Moving the entire camp at least two miles starts a new 14-day period. Cabins or other permanent improvements are not allowed, even if they are on skids or another non-permanent foundation. The camp must be removed immediately if the department determines that it interferes with public access or other public uses or interests. For additional information on dredging permits, contact: Department of Fish & Game Division of Habitat 1800 Glenn Highway, Suite 6 Palmer, AK 99645-6736 Phone: 907-861-3200 Fax: 907-861-3232 http://www.habitat.adfg.alaska.gov/recsuctiondredge.php For additional information on the Caribou Creek Recreational Mining Area contact: Department of Natural Resources Public Information Center 550 West 7th Ave., Suite 1260 Anchorage, AK 99501-3557 Phone: 907-269-8400 Fax: 907-269-8901 TDD: 907-269-8411 Department of Natural Resources Public Information Center 3700 Airport Way Fairbanks, AK 99709-4699 Phone: 907-451-2705 Fax: 907-451-2706 TDD: 907-451-2770 Source: Modified with additions from the Alaska Division of Mining, Land, & Water Fact Sheet February 2012. -
Thank you Mike, and all the other forum members also. I am shifting the website focus from prospecting to all types of detecting. Whether that will catch hold or not only time will tell.
-
 The Nokta Impact was introduced in 2017 and is still in production. It features the ability to switch from 5 kHz to 14 kHz or 20 kHz by merely changing a control setting. The coils work with all three frequencies equally well. The Nokta Impact has a full array of search modes designed to cover almost any metal detecting situation. In general the 5 kHz modes will be most efficient for searching for high conductive targets like coins and large items at depth. The 20 kHz frequency excels on small and low conductive targets like gold jewelry or gold nuggets. The 14 kHz setting is a good compromise setting for all around detecting. The Nokta Impact features built in wireless headphone capability (headphones optional). The Impact can download the latest firmware updates over the internet to be installed from a PC, keeping the detector up-to-date. The coil cables are enclosed inside the rod assembly for a clean, snag-free appearance. One thing we need to settle however. Nokta went against industry convention and advertise the Impact as being a multifrequency detector. Historically that has meant detectors that receive and compare two of more frequency results simultaneously. The Nokta Impact can run one of three frequencies, but only one of them at a time. This would be better described as switchable or selectable frequency. Read my article on Selectable Frequency And Multiple Frequency I am however extremely impressed by what Nokta has accomplished. In 2014 I posted a review of a detector by a company almost nobody here had ever heard of - the Nokta FORS Gold. If you look at that review of the Nokta FORS Gold you will see I had made several comments about things I think needed improving on the machine. What amazed me is Nokta fixed every one of them, and in record time - I made a special note in the review about it later. It made a serious impression on me. What then followed was a quick succession of machines by Nokta and Makro, the sister company. Nothing earth shattering per se but top flight performance at aggressive prices and a willingness to try new ideas and listen to feedback. Frankly, it came on so quickly it actually turned some people off, and I saw complaints about too many machines too fast! Nokta Impact selectable frequency metal detector The entire time that we are seeing this rapid succession of machines most of us are waiting on this or that manufacturer to deliver just one new machine. October 2014 to now, and I am looking at a machine in the Nokta Impact that frankly has no exact equivalent from many of the old school top tier manufacturers. Maybe you guys see no merit in being able to select frequencies but I am highly focused on replacing all my various VLF machines with just one detector, and it is most likely going to be a selectable frequency model that wins that competition. If Nok/Mak can get from FORS CoRe to Impact in three years the "Big 5" manufacturers had better get serious and quick about picking up the pace. The listen and bend over backwards to please attitude alone is getting a lot of fans willing to forgive in other areas. Next up we will no doubt be seeing PI models and multi frequency.... and who knows what else. People can and will argue the relative merits of the Impact versus the other top-of-the-line models, but just the fact the Impact is getting compared to the very best anyone else can make says something about how far this company has come. The Nokta Impact has some very interesting all metal modes, the Gen(D) and Sta(D) modes that appear to be running both all metal and disc modes in parallel. The speculation about these modes garnered attention and we have now been provided this explanation directly from Nokta Software Team Leader Alper Tozan regarding these 2 modes: ''I read a lot of comments about Gen (D) and STA (D) modes in some forums and firstly, I want to thank you about all your positive thoughts. On the other hand, I want to clarify one thing. In some forum discussions, these modes are defined as ‘’mix modes’’. These modes are not mix modes as mix modes typically result from at least two different software algorithms or hardware circuits working at the same time for decision making to discriminate and detect metals. These mix modes also show characteristics of two or more different modes at the same time including handicaps of each signal processing. Gen (D) mode, on the other hand, is a true threshold based all metal mode with motion that can discriminate metal without needing any other hardware or higher order software process level. So it always behaves like a classical true threshold based all metal mode but with iron tone and tone break.'' These all metal modes seemed to me to be the perfect fit for a large search coil and extra deep VLF detecting. The Nokta Impact favors this with its exceptional balance and multiple operating frequencies. In general I think I can speak for most people when I say we all like lighter weight detectors. However, one area where lighter is not better is when you use large coils. Balance is every bit as important as weight as it determines the amount of torque applied to your wrist as you swing the detector. A large coil on a very light detector creates a very nose heavy detector, one that will put more strain on you when you detect than a heavier but better balanced detector. It just so happens that the Impact with the rear mounted battery power/speaker module is a good design for a large coil from an ergonomics standpoint. This is especially true when in my experience Nokta has designed large coils that are quite light for their size. I was probably one of the first people that really zeroed in on the new IM40 15" x 14" DD coil when it was proposed for the Impact by Nokta. I got on an early wait list for the coil, and just received mine. Nokta Impact IM40 15.5" x 13.75" coil with scuff cover The IM40 DD coil measures 15.5" x 13.75" and comes with a fitted skid plate/scuff cover. The coil weighs 1 lb 13.0 oz or 822 grams as pictured with skid plate and cable and weighed on my postal scales. Yes, I had to say that as some people exclude cable weights from coils! For comparison the stock 11" x 7" IMP29 coil weighs 15.7 oz or 446 grams. I like the flat blunted ends on the IM40, which does help the Impact stay upright as the trailing edge of the coil acts as a flat bearing surface when the detector is at rest on the ground. I am not usually a fan of larger coils and in fact tend to lean to smaller coils for a lot of my urban metal detecting. Large coils "see" more area which can work against them in highly mineralized ground or in areas with lots of closely spaced trash. However, large coils even if they do not get more depth in highly mineralized ground can cover more area faster, and often ground coverage is every bit as important if not more so than depth. In medium to lower mineral ground a large coil can also offer that magic thing all detectorists crave - more depth! The Nokta Impact has another trick up its sleeve that favors large coils; the ability to change operating frequency on the fly. High frequencies offer more sensitivity to small items and quicker separation in dense trash as well as extended battery operating time. The main issue with higher frequencies is they also "light up" highly mineralized ground and hot rocks more so than lower frequencies. This can work against machines that are locked into higher frequencies when attempting to employ large coils in highly mineralized ground. Lower frequencies give up some of the high frequency "hots" on small targets but also are less sensitive to ground issues, including salt mineralization. The ability of the Nokta Impact to run at 20 kHz, 14 kHz, or even 5 kHz makes it very well suited for running very large coils. This is accentuated by the plethora of all metal modes available on the Nokta Impact which can deliver extreme performance when coupled with a large coil. The bottom line is I think the Nokta Impact and IM40 coil may be one of the very best options available for a person wanting to run a large coil on a VLF detector, with depths in all metal modes and milder ground that will challenge many PI detectors. ads by Amazon... For a lot of what I personally do, like gold prospecting or beach detecting, I will first attempt high frequency, high gain operation and then back off as ground or EMI conditions require. One thing it is important to know when running the Impact with large coils is how the Gain control works. If the Impact is running at Gain levels that are too high, the OVERLOAD message will appear on the screen. Note: You can increase or decrease the overload volume with the on/off button. When the volume of the device is at maximum, the overload volume will be low. As the volume of the device is lowered, the overload volume will increase. The electronic Gain has at least three distinct levels. There are distinct boosts between settings of 39 and 40 plus again between 69 and 70. Setting over 90 are a sort of hyper-Gain region only obtainable in low mineral/low EMI environments. Therefore I may attempt to start out in 20 kHz and a very high Gain. If overloading occurs I will lower the Gain for smooth operation, paying particular attention when I get down to 69. From there on down I need more field time, but at some point it will be better to drop to a lower frequency than to continue to lower the Gain setting. So in theory if at a setting of Gain 39 I still have issues at 20 kHz, it is time to go to 14 khz and run the Gain back up high. If conditions are still not amenable to running at 14 kHz and high Gain settings, I would then drop to 5 kHz and again attempt to run higher Gain levels. Note: people hunting larger, higher conductive items like silver coins and brass relics may very well just start out at 5 kHz. My focus is usually on lower conductive, smaller items i.e. gold. I so far have only done a small amount of detecting in a local park. I first tried Di3 and while it was working well enough the trash density was high and interpreting signals with a large DD coil can be challenging, especially when the coil generates multiple signals on very shallow items. I finally went to the unique GEN(D) mode and it was night and day. The GEN(D) all metal mode combined with the VCO effect makes sizing targets and identifying shallow targets a breeze, even in a trashy park situation. Shallow ferrous is easily identified also using GEN(D). There are several all metal modes a person can employ on the Impact as well as the extended range ground balance available in the COG (COnductive Ground). While the Impact performs ground balance in the range of 20-90 automatically in the other discrimination modes, it ground balances in the range of 0-90 in the COG mode. This enables easier ground balancing on conductive grounds where normally ground balance cannot be performed at all or performed with difficulty, such as salt water beaches. Remember that ground balancing to salt conditions always comes at the cost of reduced sensitivity to small gold items. Large coil VLF hunting is not for everyone and is not a magic bullet in any case, but it does offer possibilities for the more adventurous detectorist. Here is a picture of my Nokta Impact with new IM40 coil. The detector with this coil is only slightly nose heavy (keep the rod as short as possible) and weighs with batteries 5 lbs 2.0 oz (5.13 lbs) or 2322 grams. Nokta Impact with IM40 15.5" x 13.75" coil mounted The Nokta Impact is quite unique in that not only does it operate at different frequencies, but it has two different target id scales in use depending on the mode employed. Here are Nokta Impact Gold Coin Target ID Responses* in GEN, GEN (D), STA, STA (D), DEEP, VLX1 and VLX2 modes (0-40 ferrous, 41-99 non-ferrous) Seen notes below on alternate target ID scales. .................. NORMALIZED....... 5-Khz.....14-Khz...20-Khz $1.00 Gold Coin....... 51............ 47...........52..........54 $2.50 Gold Coin....... 62............ 51...........62..........70 $5.00 Gold Coin....... 72............ 55...........72..........80 $10.00 Gold Coin...... 82............ 65...........82..........83 $20.00 Gold Coin...... 84............ 75...........84..........85 The normalized setting equalizes responses in all frequencies to be the same as the 14 kHz response. At start up, the Nokta Impact will utilize the ''Normalized'' ID scale and not the Standard ID scale. In other words, the IDs will not change upon frequency change and the device will generate the 14kHz IDs in each frequency. However, based on ground conditions IDs may vary for certain metals. If you prefer to see the different IDs produced by each frequency, you need use the ''Standard'' ID scale. To switch to the standard IDs, pull the trigger and push the (+) button at the same time. Letters ''Sd'' will appear on the screen. If you wish to revert back to the normalized IDs, repeat the same process and letters ''no'' will appear on the screen. In General, low frequencies spread out coin responses but compress low conductive responses. High frequencies spread out low conductive responses but move coin responses closer together. See the target table below for reference. Therefore, running in in the 5 kHz "Standard" or un-normalized mode will provide better target ID separation while coin detecting. Running in 20 kHz Standard mode will provide more definition between U.S. nickels, gold jewelry, and various aluminum items. However, target ID number changes between modes may be confusing for some people and make the Impact harder to learn. In need this case using the Normalized setting is recommended. The Nokta Impact is somewhat unique in that depending on the mode there are two possible target ID scales in use. In DI2, DI3, DI4, DI99 and COG "coin and jewelry" modes, the ferrous range is 00-15 at factory defaults. This provides the most target definition in the non-ferrous range for people only interested in non-ferrous targets. In GEN, GEN (D), STA, STA (D), DEEP, VLX1 and VLX2 "gold and relic" modes, the ferrous range is 00-40. This provides the most target definition in the ferrous to non-ferrous range for people who hunt for items where these ranges overlap. It may then be seen that by picking a combination of both the mode used and a Standard operating frequency the Nokta Impact can customize target ID responses to a degree quite rare in metal detectors offered today. For instance, most coin hunters may want to use the DI2, DI3, DI4, DI99 modes in Standard 5 kHz frequency mode for the best target definition on silver coin range targets. *The gold coin responses are from the Tom Dankowski post at this location. Nokta Impact target id responses in different modes My focus being gold prospecting I can say that while the Nokta Impact is a very capable machine for gold prospecting it will not match the Makro Gold Racer for sensitivity to smaller gold. It is closer to the Nokta Fors Gold+ in that regard. Performance on gram plus gold is on par with other machines in the 13 - 20 kHz class, though the ability to drop to 5 kHz may provide some benefits in the worst ground on large nuggets, much like is seen with the 6.4 kHz mode on the Minelab Eureka Gold. Nokta Impact (with optional 7" x 4" DD coil) next to Makro Gold Racer The Nokta Impact is a very intriguing metal detector, much like owning several different machines in one. The 99 tone mode has a VCO response more like one might expect of the DEUS than other full tone models, like my DFX. The Gen mode is quite unique being a threshold based all metal mode with a dual tone disc mode layered over it, what is referred to as a mixed mode. Wireless headphone capability (2.4 Ghz lag free) is built-in but headphones will be optional. Physically the unit is a well balanced 4.26 pounds with a straight shaft, molded post style grip. The cable is enclosed in the rod assembly for snag free operation and a clean look. The 7" x 4" DD coil is a real sweet option for trashy locations. To sum up I have only scratched the surface of the capability contained in this incredible detector. It has been getting rave reviews from users working the small elliptical coil in extremely trashy locations. With so many frequencies, modes, and a great coil selection the Nokta Impact can serve well for almost any metal detecting task. ~ Steve Herschbach Copyright © 2017 Herschbach Enterprises Official Nokta Impact Page Nokta Impact Instruction Manual Nokta Impact Introduction Thread (many closeup photos) Forum Threads Tagged "nokta impact" Nokta Metal Detector Forum Nokta Impact Technical Specifications* Internet Price $509 Technology Induction Balance (IB) Frequency 5, 14 or 20 kHz Autotune Mode(s) iSAT Intelligent Self Adjusting Threshold Ground Rejection Ground Grab, Manual, Tracking Soil Adjust Normal and Salt (Beach) Modes Discrimination Variable with Visual ID, Tone ID (2, 3, 4, 99), Notch ID, Variable Tone Breaks, Iron Volume Volume Control Yes Threshold Control Yes Tone Adjust Yes Audio Boost Yes Frequency Offset Yes Pinpoint Mode Yes Audio Output 1/4" headphone socket & speaker Hip Mount Shaft Mount Only Standard Coil(s) 11" x 7" DD Optional Search Coils 7.5" x 4" DD, 9.5" x 5" DD, 15.5" x 13.5" DD, 7" Round Concentric Battery Four AA Operating Time 8 - 15 hours Weight 4.26 pounds Additional Technology Wireless headphone capability built in (headphones optional) Notes Cable enclosed inside rod assembly *Notes on Technical Specifications - Detailed notes about the specifications listed in this chart.
 -
 The Nokta FORS Gold was introduced in 2014 and discontinued in 2016, replaced by the Nokta FORS Gold+. Nokta Detectors is a new name to most people in the United States. Nokta Engineering is a company based in Istanbul, Turkey since 2001. I had an opportunity to acquire a FORS Gold and discovered it was a well built detector offering a lot of features and performance for the price. In the process I discovered the most spectacular gold/quartz specimen I have ever found! The Nokta FORS Gold key features: 1. The FORS Gold runs in pure all metal mode while displaying target id number in the handle mounted LCD window. This allows for best performance with an eye towards dig it all detecting, yet allows obvious junks targets to be verified and ignored if desired. The key is no mode switching is needed, and time waster and ultimately something that wears out controls. 2. You have all ground balancing options possible. There is the easy push button and bob, or "grab" type ground balancing. There is pure manual adjust up and down ground balancing. And there is full automatic ground tracking. 3. There is an efficient dual tone based discrimination mode, called Boost Mode (DI2 on the CoRe model), that can be used to easily sort out ferrous trash and most hot rocks by either tones or outright discrimination of these undesired targets. Yet detection of gold nuggets is only minimally affected. 4. There is a three tone mode aimed more at coin detecting that makes the FORS Gold suitable for almost all detecting tasks, whether coin, relic, or jewelry detecting. The only area to expect only moderate performance would be on saltwater beaches, where all single frequency detectors suffer. The FORS CoRe has an additional mode to help it deal with conductive salt water conditions that the FORS Gold lacks. Nokta FORS Gold prospecting metal detector Here are some details on the three modes offered on the FORS Gold. There is a true threshold based all metal mode that has no discrimination control. There is no variable discrimination in this mode but the on screen target id does kick in for targets in discrimination range. Because all metal reaches deeper than discrimination modes the deeper targets will give an audio signal but no on screen target id number. This is how you locate deep targets beyond what a discrimination mode can detect. Then you have preset tone modes, either two tones or three tones. In two tone mode it is low tone ferrous and medium tone non-ferrous. Three tone mode adds a high tone for targets zinc penny and higher. These discrimination modes are "silent search" with no threshold sound. In both the disc modes you have a variable control called ID Mask. It is just like the control on a single knob disc machine, up and down with anything below the setting rejected. This is on top of and in addition to the tones. However, ID Mask is not like on most detectors where it starts at iron and goes up from there. The control starts all the way down in the ground range and goes up from there. This is important because many detectors cannot be set for a true "zero disc" mode but always have a little iron discrimination built in even at minimal settings. The FORS are like other Euro machines that let you fine tune the ferrous responses for extracting targets out of thick ferrous trash. This combined with the small coil makes it deadly in ferrous trash. ALL modes always have an active on screen visual target id number: Nokta FORS target id number chart If you want you can run ID Mask very high to eliminate foil or aluminum or whatever on the high end, but like other machines you will lose nickels if you go too high. There is no notch function. The best way to proceed there is use three tone mode. Run ID Mask up to just below nickel range. Now you get no signal on targets that fall below nickel, nickel to just below zinc penny medium tone, and zinc penny on up high tone. My FORS reads 56 on a nickel. If I turn the ID Mask up to 56 it still accepts the nickel. If I turn it to 57 nickel breaks up badly. At 58 nickel is gone. There is no threshold in the disc modes so no threshold nulling. The rejected targets are simply gone, and nothing pops up on screen for a target id. So on screen target id is not 100% independent of settings. If I turn the ID Mask up to 99 nothing goes beep so the control operates over the entire discrimination range unlike many detectors that do not allow the control to run into the coin range. The ID Mask control has exceptional range all the way from ground on one end up to silver coins and above on the other end. I like the out-of-box thinking Nokta is displaying in the design of their detectors. The FORS Gold has a small LED flashlight built into the handle to illuminate the work area in low light conditions or to just use as a flashlight when you get back to your vehicle in the dark. And in a nugget detecting first, there is an adjustable vibration mode built into the handle that operates in conjunction with or independently of the audio. This feature alone can be a real benefit to people with hearing loss and in theory will allow somebody who is totally deaf to go metal detecting effectively! Now that is some real cool out of box thinking and the reason we need more companies like Nokta in the business. Even people with good hearing can benefit as most of us have run into high wind or other situations where hearing the detector is difficult at best. Anyone who has ever used the new pinpointers already knows how this works. Spectacular 1.83 ounce gold specimen found by Steve with Nokta FORS Gold I used the FORS Gold and did a very in-depth review on the forum. Rather than duplicate it here see Detailed Review of Nokta FORS Gold Metal Detector. Also my story Nokta FORS Gold Scores Spectacular Gold Specimen! I found the Nokta FORS Gold to be very easy to operate on one hand, yet it has features to please a demanding detectorist like myself. The FORS Gold is an extremely capable prospecting VLF detector with excellent ground handling capability. I was able to become proficient with it in very short order and recover several very nice gold nuggets with it. Nokta is a name to pay attention to in the future as I believe this company is going places. The Nokta FORS CoRe and the Nokta FORS Gold are the almost the same detector with the FORS CoRe offering a salt water beach mode for the same price and for that reason I think most people would be better served by purchasing a FORS CoRe. The FORS Gold instead has an alternate mono tone DI2 offering that the FORS CoRe lacks but overall I think the Salt mode on the CoRe may be more useful even for prospectors who may encounter salt or alkali conditions. Other than that everything on this page would apply just as much to both models. For those interested in using these detectors hunting around old cabins and campsites here is a Review of the FORS CoRe by Keith Southern. Again, the Nokta FORS Gold has been discontinued and replaced by the Nokta FORS Gold+. However, the machines are nearly identical so almost everything here still applies. The main changes were a boost in the frequency from 15 khz to 19 kHz and the FORS Gold+ comes with the elliptical 5.5" x 10" coil instead of the 7" x 11" coil. ~ Steve Herschbach Copyright © 2015 Herschbach Enterprises Nokta FORS Gold Color Brochure Nokta FORS Gold Instruction Manual Difference Between Nokta FORS Gold And FORS Core Nokta FORS CoRe Instruction Manual Forum Threads Tagged "nokta fors" Nokta Metal Detector Forum Nokta FORS Gold Technical Specifications* Internet Price $699.00 Discontinued, replaced by FORS Gold+ Technology Induction Balance (IB) Frequency 15 kHz Autotune Mode(s) Pre-Set Slow Motion Ground Rejection Grab, Manual, & Tracking Soil Adjust Gold - No, CoRe - Yes (COG Mode) Discrimination Variable with Visual ID & Tone ID Volume Control Yes Threshold Control Yes Tone Adjust Yes Audio Boost No Frequency Offset Yes Pinpoint Mode Yes Audio Output 1/4" headphone socket & speaker Hip Mount Shaft Mount Only Standard Coil(s) 7" x 11.2" DD Optional Search Coils 4.7" x 5.2" DD and 13.3" x 15.5" DD Battery Four AA Operating Time 25 - 30 hours Weight 4.3 pounds Additional Technology Handle Mounted LED Flashlight, Vibration Mode Incorporated Into Handle Notes Discontinued in 2016 *Notes on Technical Specifications - Detailed notes about the specifications listed in this chart.
 -
 The Minelab GP 3000 detector was released in April 2003 and it was discontinued in 2005, replaced by the Minelab GP 3500. I got one the same year and that detector sure did find gold for me! See GP 3000 & MXT Get Fortymile Gold and Minelab GP 3000 at Moore Creek, Alaska plus Moore Creek Permits & Gold at Steve's Mining Journal. The Minelab series of pulse induction (PI) metal detectors starting with the SD 2000 are widely acknowledged as being the most powerful gold nugget prospecting detectors currently available. The GP 3000 is a variant in the series. See Steve's Guide to Differences of Minelab SD, GP, & GPX for details. The GP 3000 was an improvement on the earlier SD 2200D and GP Extreme models, both of which I also owned. Minelab set the bar rather low with the introduction of the GP 3000. All that was touted was "NEW Low-Noise circuitry, NEW battery harness, and a NEW "Smart Point" diagnostic port". OK, new harness, nice, but no big deal. A diagnostic port? Nice for the service department but does nothing for my detecting. There is so little difference between the GP Extreme and the GP 3000 that if you download the GP 3000 Instruction Manual below you will see it is just a modified GP Extreme manual. It even refers to the unit as a GP Extreme in a couple places! One oddity about the Minelab detectors that bears mentioning is that the Minelab coils are only water resistant. They should not be submerged. There are fully waterproof aftermarket coils available along with external speakers for those who do not want to use headphones. For me the only real improvement was in the stability of the threshold tone, presumably from the low noise circuitry. The earlier Minelabs had a distinct "warble" in the threshold tone. A smooth threshold sound is critical to allow very faint signals from very small of very deep gold nuggets to be easily discerned. The uneven threshold in the earlier models could cause faint signals to be missed. This small but very important improvement was more than enough to make me happy I had upgraded to the GP 3000. The detector paid for itself many times over. Minelab GP 3000 pulse induction metal detector for gold prospecting The Minelab GP 3000 was a very solid performer as was the GP 3500 that followed. These two models were the last of the analog based Minelab PI models, with the switch made to a digital control interface with the Minelab GPX 4000. The GP series however are very capable, and a used model GP 3000 or 3500 would serve a person very well. The main problem is Minelab only services detectors for up to seven years after they are discontinued, so there is a little risk buying these used. If you suffer a major failure it may be difficult or impossible to find somebody that can perform a proper repair. Still, I would not let that dissuade me personally were I looking for one of these machines used, as long as the detector has been well kept. The main item that bear serious thought is the battery. The GP series used sealed lead acid batteries, and they have a limited lifetime. It would be best to assume any batteries for these older units are no longer going to hold much of a charge. That is fine, since you can still buy batteries for these detectors.new for $128, but do factor that into a purchase of a used detector unless you are positive the battery is fine. The other item to be aware of on these older models is the power cable to the battery. This item flexes a lot and is a common failure item. Always have a spare, and if a used detector only has one, I highly recommend buying another one new for backup. Official Minelab GP 3000 Page Minelab GP 3000 Instruction Manual Forum Threads Tagged "minelab gp" Minelab Metal Detector Forum Minelab GP 3000 Technical Specifications* Internet Price No longer available new - was MSRP $3495 later increased to $3650 Technology Ground Balancing Pulse Induction (GBPI) Frequency 1100-4500 PPS? Autotune Mode(s) Slow Motion Ground Rejection Tracking and Fixed Soil Adjust (Sensitive/Normal/Salt) Three position switch Discrimination (All Metal/Iron Disc) Two position switch Volume Control One turn control Threshold Control One turn control Tone Adjust One turn control Audio Boost (Shallow/Normal/Deep) Three position switch Frequency Offset Automatic Tune push switch Pinpoint Mode No Audio Output 1/4" headphone socket (No speaker) Headphones supplied Hip Mount Shaft Mount Only Standard Coil(s) 11" round DD and 18" round DD Optional Search Coils Over 100 accessory coils available Battery Rechargeable 6VDC 12A/hr sealed lead acid Operating Time 14 - 15 hours Weight 5.3 pounds (w/11" coil, excluding battery) Additional Technology Multi Period Sensing (MPS) Dual Voltage Technology (DVT) Level Adjust - one turn control Signal Pitch - one turn control Coil (Double D/Mono/Cancel) - 3 pos. switch Notes The GP 3000 employs an external battery carried on a backpack harness and connected to the control box via a power cord. The detector is normally suspended from the harness with a bungee cord, allowing for nearly weightless operation in level ground. *Notes on Technical Specifications - Detailed notes about the specifications listed in this chart. Minelab GP 3000 Front Control Panel (from owner's manual)
 -
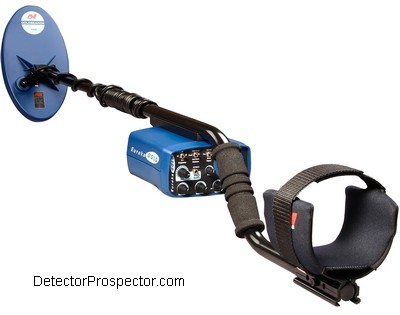 The Minelab Eureka Gold was introduced in 1998 and was discontinued in 2017 after a 20 year run. The Eureka Gold has been replaced by the new Minelab Gold Monster 1000. The Minelab Eureka Gold for a long time was the only nugget detector that allowed you to change frequencies with the flick of a switch; 6.4, 20, and 60 kHz, all using the same coil, unlike the Minelab X-Terra units. This made the Eureka Gold one of the most versatile VLF gold prospecting detectors available for handling different ground conditions. The Eureka Gold 20 kHz mode is used for most detecting for great all-around performance. The 60 kHz mode is used in low mineral soil looking for extra small nuggets. The 6.4 kHz mode is used in extreme mineralized soil that would overwhelm most VLF detectors. The Eureka Gold is a good choice for someone hunting areas with widely varying mineral conditions. Weight including rechargeable battery pack 5.3 lbs. The control box may be chest or hip mounted removing most of that weight from the operators arm. It comes stock with a 5" x 10" elliptical DD coil. Four accessory coils are available for the Eureka (Minelab and Coiltek). The Eureka Gold with its three selectable frequencies will handle a wider range of ground conditions than most other VLF detectors. For a 60 kHz detector, it lacks the edge of the Gold Bug 2 or GMT when it comes to the smallest nuggets. This is because the 60 kHz mode is not the native operating frequency of the Eureka Gold but a harmonic offset of the main frequency. The Gold Bug 2 and GMT are dedicated single frequency units designed specifically around their respective operating frequencies. The best setting on the Eureka Gold appears to me to be the 20 kHz mode, as the detector seems optimized for this frequency. You will generally lose depth in the 60 kHz mode and so this mode should only be used for small shallow gold. The 6.4 kHz mode on the other hand is more of a fallback frequency only for situations where the 20 khz mode is proving ineffective due to hot rocks of ground interference. 6.4 kHz is simply too low a frequency to be effective on small gold nuggets but can help penetrate highly mineralized ground to find larger gold nuggets. Minelab Eureka Gold prospecting metal detector I used the Minelab Eureka Gold and it's predecessors, the XT 18000 and XT 17000 as well as the American Gold Striker. My favorite of the three was the XT 17000 which ran at 6.4 kHz and 32 khz. The 32 khz may seem quite high for the time, but it is a low gain 32 khz and so ran quite well in mineralized ground. I was in Alaska at the time however and low mineral ground and small gold is the norm. Neither the XT 18000 nor the Eureka Gold impressed me much as their 60 kHz frequency was no match for the 71 kHz Fisher Gold Bug 2 or even the 50 khz White's Goldmasters of the time. Those detectors did better for me in the areas south of Anchorage, Alaska that were my stomping grounds for many years. The ferrous discrimination on the Eureka also seemed less reliable than that available on those detectors. The bottom line is that while I used them enough to get familiar with them and find a little gold, they did not suit my particular ground and gold as well as some other detectors. Still, I always recognized that and acknowledged that the Minelabs were a better choice for highly mineralized ground, especially variable ground where its ground tracking shines. The Minelab Eureka Gold played a part in gold rush history. Around the turn of the century new gold rushes were igniting in several third world countries, driven by the discovery of goldfields amenable to metal detecting in those countries. Certain models would be seized on by the locals as being the only thing that would work. The Minelab Eureka Gold enjoyed this status for some time in Mongolia, with all available units worldwide being sought out and shipped to Mongolia, often at exorbitant prices. The rush eventually subsided but probably had something to do with the Eureka Gold being on the market for as long as it was. The Eureka is a good detector, but lighter and less expensive detectors will do just as well for most people. The weight and high price made the Eureka hard to recommend in later years. Now that it has been discontinued Minelab will continue to service existing units for at least seven more years (until 2023-2024). Steve with Minelab XT 17000 in early 1990's Regarding used models. The XT 17000 and XT 18000 both came with rechargeable battery packs before the battery technology was really up to it. Those old battery packs had very limited lives and any still in existence are probably bad. A strange little adapter was available to convert the XT 17000 and XT 18000 to AA battery use, but those were rare and hard to find. If you ever shop a used Minelab XT 17000 or XT 18000 be sure to investigate the battery situation. The Eureka Gold also came with a rechargeable battery pack, but a AA battery holder option was widely available. Again, the older rechargeable battery packs are not likely to have much life in them, so rounding up the AA battery holder is important if looking for a used Eureka Gold. ~ Steve Herschbach Copyright © 2018 Herschbach Enterprises Official Minelab Eureka Gold Page Minelab Eureka Gold Instruction Manual Note On Differences Between Early Minelab VLFs Minelab Metal Detector Forum Minelab Eureka Gold Technical Specifications* Internet Price $1049.00 (Last price before discontinued in 2017) Technology Induction Balance (IB) Frequency 6.4, 20, & 60 kHz Autotune Mode(s) Preset Slow Autotune Ground Rejection Fixed, Fast & Slow Automatic Ground Tracking Soil Adjust No Discrimination Variable Iron Reject Level Volume Control Yes Threshold Control Yes Tone Adjust Yes Audio Boost Yes Frequency Offset No (Except for three main frequencies) Pinpoint Mode No Audio Output 1/4" headphone socket & speaker Hip Mount Yes Standard Coil(s) 10" x 5" DD Optional Search Coils Several accessory coils available Battery Rechargeable Operating Time Up to 20 hours Weight 5.3 pounds Additional Technology Change frequency with the flip of a switch! Comes with hip mount bag. Notes Discontinued in 2017 *Notes on Technical Specifications - Detailed notes about the specifications listed in this chart.
 -
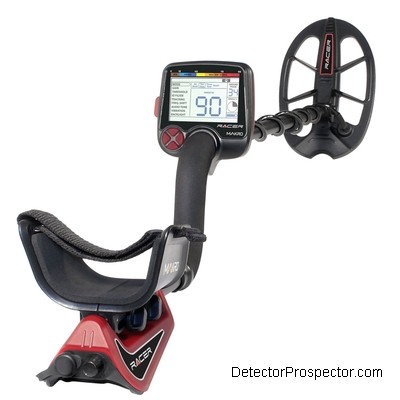 The Makro Racer metal detector was introduced in 2015 and discontinued in 2017, replaced by the Makro Racer 2. The Manufacturer Suggested Retail Price (MSRP) of $499 for the Racer was very aggressive for a detector that offers both manual ground balance and automatic ground tracking. The ergonomic three pound package drew attention, as did the Racer's ability to pull non-ferrous targets out of heavy trash. The Makro Racer came standard with an 11" x 7" DD coil and had optional 5.5" x 4.7", 10" x 5.5", and 15.5" x 13.25" DD coils available. The Makro Racer models do not share coils with the Nokta FORS models. For those that are not aware of it, Makro and Nokta are under the same ownership and so there is considerable technology sharing between the two brands. The Makro Racer is a 14 kHz single frequency detector while the FORS models are 15 kHz and even though that is close, I have tested the coils and they are model specific. The Makro Racer shares an almost identical feature set with the Nokta FORS CoRe metal detector and the Racer is basically a FORS CoRe in a lighter weight package and a forward facing display. The Makro Racer includes innovative features like a handle incorporated vibration mode for use in very noisy areas. This feature can even be used to allow a deaf person to metal detect more efficiently and safely without having to constantly stare at the meter. There is a small LED flashlight built into the pod that illuminates the coil area in low light conditions. Makro Racer metal detector The Makro Racer has a full set of accessory items available, including optional environmental cover set, a Bluetooth module and headphones, and coils including the new 10" x 5.5" DD coil. This coil will be the stock coil on the Gold Racer model. The Makro Racer comes with an 11" x 7" DD coil but a popular option will be the 10" x 5.5" DD coil. This is a superior coil for nugget detecting due to the narrower profile and solid design, which prevents it from snagging on brush or sharp edged rocks. Other coil options include the 5.2" x 4.7" DD coil and 15.5" x 13.25" coil. The small coil is great for hunting in really trashy locations and for finding the smallest targets. The large coil is mainly for covering more ground quickly but also adds extra depth on large items. The Racer is a very high gain detector susceptible to overload signals. From Makro: "The electronic gain of the RACER consists of 3 levels to eliminate the internal electromagnetic noise and to adjust the saturation level. The electronic gain change points correspond to levels 39 and 69 on the Gain setting. In case of saturation (overload), you may raise your search coil a bit or adjust the Gain to the lower electronic gain level. For example, in the All Metal and Two Tone modes, if the Gain is set to 70 or above and if saturation occurs, adjusting the Gain to 69 or 39 will minimize or eliminate the saturation. Similarly, if you experience saturation in the Three Tone mode, adjusting the Gain to 39 will be sufficient. Reducing the gain will not cause a dramatic decrease in depth." The target id chart below is based on statements by company representatives that the Racer is very similar to the Nokta FORS CoRe in capability combined with the target id reference label published in early photos. You can see below that the target id values on the reference label and those published in the FORS CoRe owners manual match almost perfectly. Makro Racer Target ID Chart Makro is fast gaining attention as a company that listens to its customers. The new Makro Racer models are offering performance on par with detectors selling for quite a bit more money. They are simpler detectors focused on the task at hand - making good finds. I had the experience of reading other reviews of the Makro Racer on the internet before using one myself. It highlighted for me that how I look at detectors and how they work for me is often remarkably different than what others experience. Depth tests in particular from back east have nearly no connection to what is see in the soil I hunt in. And air tests as usual show one thing and the ground another. I have to preface this by noting that when I did this review in 2015 I was really waiting for the Makro Gold Racer. The Gold Racer has since been released but some of the commentary here is from before it came out. The Racer offers the physical aspects I am looking for but the Gold Racer is tweaked specifically for gold, and gold is my thing! Some of what follows is just speculation on my part based on both models being Racer models and so therefore likely to share the same basic physical design. Whether the color will be the same, what the frequency will be, and even if they can share coils I do not know at this time. Still, here is a picture of what the Gold Racer will probably look like, except possibly the color. Makro Racer with Optional 5.5" x 10" DD Coil The bottom line I am pleased with the Makro Racer. I think people are just getting a little crazy with all the expectations it is supposed to replace detectors costing up to twice as much. This is a feature packed 14 kHz single frequency metal detector for $649 (later reduced to $499), nothing more and nothing less. It offers good performance for that price range and a feature set unmatched at that price. What I am looking at is a detector hot on gold with ground grab, manual ground balance, automatic ground tracking, good coil selection, at 3 lbs for $649. Unfortunately the machine caught me at a bad time between two business trips and so I have only been able to give it a spin hunting a sandy tot lot and some general park detecting, both in highly mineralized ground. The ground runs 7/8 on the cool Makro pie chart which would be 5 bars on the Fisher F75. I rigged the Racer up with the optional 5.5" x 10" DD coil just to get a total unit weight with batteries as seen in the picture above. Three pounds, 1.5 ounces. Very nice! The coil is not an epoxy filled coil making for a much better weight and balance than for instance the Fisher Gold Bug Pro with similar size coil. The Fisher coil is epoxy filled and weighs in at 1 lb 2.6 oz whereas the Makro coil weighs 12.8 ounces. That is a fairly significant weight difference out there on the end of the rod. ads by Amazon... Still, I really like the little 4.2" x 5.5" DD coil and with that coil the Racer only weighs 2 lbs 15.7 ounces. The rod assembly is very tight and stout feeling. The hand grip, despite what others reported, works just fine for me. The angle changes if held high to give my thumb instant access to the four way control buttons. I am happy with the grip showing how it is very much a personal preference area. The Racer suits me because I have always imagined this as the "small coil" detector and the sister company Nokta FORS Gold as the "big coil" detector due to weight and balance design differences. I found the depth and sensitivity of the 14 kHz Racer to be nearly identical to the 15 kHz FORS Gold, which is exactly what I was hoping for. I am talking about real world in highly mineralized ground. The perceived difference between the DI2 and DI3 modes all but disappears in bad ground. Makro Racer with Optional Bluetooth Module Installed and Wireless Headphones I ran the wireless Bluetooth headphones and any lag or delay there is so minimal as to be almost unnoticeable to me. I certainly had no problem with it at all and quickly liked the wireless headphones from an operational standpoint. My only issue there is the audio quality compared to my Sun Ray Pro Golds is lacking. The Phillips phones have a muffled sound, the Sun Ray a much sharper, brighter tone. Not surprising given the relative price difference. Since we are talking Bluetooth I would like to haul the Racer to an audio store and try different headphones to find something of higher audio quality and with individual volume controls. I am a bit deaf in my right ear, another reason I like my Sun Rays with their dual volume controls. Bottom line is I found the lag issue to not be an issue for me personally but the audio quality is not what I am looking for in a headphone. The Makro Racer is a very high gain detector, with important jumps in the gain occurring at two different locations on the sensitivity control. This note from Makro: "The electronic gain of the RACER consists of 3 levels to eliminate the internal electromagnetic noise and to adjust the saturation level. The electronic gain change points correspond to levels 39 and 69 on the Gain setting. In case of saturation (overload), you may raise your search coil a bit or adjust the Gain to the lower electronic gain level. For example, in the All Metal and Two Tone modes, if the Gain is set to 70 or above and if saturation occurs, adjusting the Gain to 69 or 39 will minimize or eliminate the saturation. Similarly, if you experience saturation in the Three Tone mode, adjusting the Gain to 39 will be sufficient. Reducing the gain will not cause a dramatic decrease in depth." Makro Racer with 4.5" x 5" coil and wireless headphones Close up of Makro racer optional 5.5" x 10" DD coil Close up of Makro Racer LCD display and controls Close up of Makro Racer under arm battery compartment with protective cover, power/volume knob My favorite feature? Quick mode switching. I was able to set up separate sensitivity levels for all metal, DI2, and DI3 modes and hunt with any one and switch rapidly between modes with the touch of a button. I only played with this a bit but immediately liked it. I found switching to all metal made for a better pinpoint mode than the pinpoint mode. Or I could hunt in all metal, then switch to two-tone ferrous mode to check the target. Switching between DI2 and DI3 is instant and effortless. I like the big display, easy menu setup - bottom line I just like the detector. Just a great little machine, well thought out and with good performance at a good price. It fits me and my hunting style but again, it really is just a preview and a stepping stone to the Gold Racer. Chances are the Racer will be the model for those seeking slightly more versatility by way of the saltwater beach mode. The Gold Racer is likely to be too hot to play well with wet salt sand but that remains to be seen. So far so good though, I'm happy with where we are heading. ~ Steve Herschbach Copyright © 2015 Herschbach Enterprises June 2018 Note: The Makro Racer is now a part of history, but may still be found for sale used. Note that early models had a lot of issues with both coil ears and coil bolts breaking easily. The coils have been beefed up a lot since, but do look out for this if considering a used detector. Makro was great about taking care of that stuff under warranty, but these units are now out of warranty and you may have to take care of any such issues encountered with a used model on your own. Makro Racer Instruction Manual Makro Racer Product Brochure Forum Threads Tagged "makro racer" Makro Metal Detector Forum Makro Gold Racer Technical Specifications* Internet Price $499 Technology Induction Balance (IB) Frequency 14 kHz Autotune Mode(s) Pre-Set Slow Motion Ground Rejection Grab, Manual, & Tracking Soil Adjust No Discrimination Variable with Visual ID & Tone ID Volume Control Yes Threshold Control Yes Tone Adjust Yes Audio Boost No Frequency Offset Yes Pinpoint Mode Yes Audio Output 1/4" Headphone Socket & Speaker Hip Mount Shaft Mount Only Standard Coil(s) 11" x 7" DD Optional Search Coils 4.7" x 5.2" DD, 5.5" x 10" DD, 13.25" x 15.5" DD Battery Four AA Operating Time 25 - 30 hours Weight 3 lbs. Additional Technology Built in handle vibration target feedback, backlit screen, optional Bluetooth headphones Notes Discontinued in 2017 *Notes on Technical Specifications - Detailed notes about the specifications listed in this chart.
 -
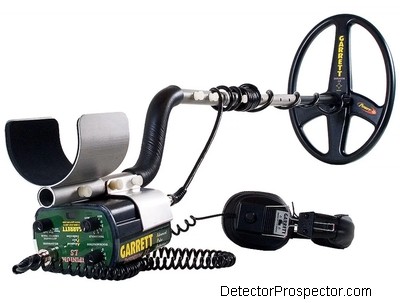 The Garrett Infinium LS (Land & Sea) was introduced in 2002 and was discontinued in 2015, replaced by the Garrett ATX. I have a particular interest in the Infinium. I am a metal detecting fanatic and one thing I want to see is better technology. I believe the best way to get that is through good old competition. Although Minelab makes fantastic ground balancing pulse induction metal detectors (the SG/GP series) I was frustrated by the fact that the U.S. manufacturers were bringing nothing to the table to compete. It seemed to me they had totally ceded that portion of the market to Minelab. I was therefore very happy when I was contacted by Garrett Electronics Engineer Brent Weaver about testing a new metal detector prototype in Alaska. The prototype was the soon to be Garrett Infinium LS. Brent wanted to know where we could go where there was really bad ground mineralization so that he could test the unit. We took the unit to the Petersville district north of Anchorage, where there is both highly mineralized bedrock and some very nasty graphitic slate hot rocks. The Infinium handled both with ease. I was impressed and was an early adopter of the unit. It unfortunately was over-hyped prior to release and faced some backlash from those expecting a "Minelab killer". Eventually the hubbub subsided and the Infinium has now found a niche as a very versatile ground balancing pulse induction detector with good performance at a very reasonable price. What makes the machine remarkable is that it is waterproof to 200 feet if you get the optional submersible headphones. Rare also in underwater units is that the Infinium has interchangeable search coils by way of a watertight connector. Most underwater units are hardwired with a single coil, limiting their versatility. Obviously the Infinium can be employed in environments far more adverse than most nugget detectors. Garrett Infinium LS waterproof pulse induction metal detector I had a lot of success using the Garrett Infinium gold nugget and jewelry detecting and have several stories about the unit at Steve's Mining Journal. See Garrett Infinium in Hawaii, Garrett Infinium at Moore Creek, and Coin Detecting with the Garrett Infinium. I also published a lot of tips on operating the unit that are detailed below the specification chart. The Garrett Infinium was discontinued in 2015, replaced by the newer Garrett ATX. Garrett Infinium LS Instruction Manual Forum Threads Tagged "garrett infinium" Garrett Metal Detector Forum Garrett Infinium LS Technical Specifications* Internet Price $1062.00 (now discontinued) Technology Ground Balancing Pulse Induction (GBPI) Transmit Frequency 730 Pulses Per Second Autotune Mode(s) Slow Motion Ground Rejection Tracking (Slow or Fast) and Fixed Soil Adjust No Discrimination Dual tones plus Adjustable Pulse Delay Volume Control Supplied headphones have volume controls Threshold Control One turn control Tone Adjust No Audio Boost No Frequency Offset One turn control Pinpoint Mode No Audio Output Proprietary headphone socket (No speaker) Headphones supplied Hip Mount Yes, holster provided Standard Coil(s) 14" x 10" DD Optional Search Coils Three accessory coils available Battery 8 AA rechargeable and disposables supplied Operating Time 10 - 15 hours Weight 5.6 pounds Additional Technology Waterproof to 200 feet (requires optional submersible headphones). Notes Discontinued in 2015 *Notes on Technical Specifications - Detailed notes about the specifications listed in this chart. The Garrett Infinium is a very simple detector to operate, but here are a few tips to help give you a head start. These are unofficial tips based on my own personal use of the Infinium for detecting gold nuggets, jewelry, coins, and relics. First, here is a suggested starting procedure. Make sure the headphones are just slightly above the minimum setting. The Infinium puts out a very strong audio. Set the Discriminate control at “0”. Set the Threshold about “4”. Turn the Power on and set to the Slow ground tracking position. The machine should beep 4 times indicating fully charged batteries, three times if less charge, two times if low, once, you’d better replace right now. A continuous tone indicates the batteries are below operating condition. No sound? Check your stereo/mono switch and volume controls on your headphones. Wave the coil over a target and adjust the headphones for a comfortable sound on the loudest targets. Then tweak the threshold for a barely discernable tone. Pulse Induction (PI) detectors have extremely sensitive receiver circuits. This means that they are much more prone to picking up outside electrical interference than standard metal detectors. This interference can be from power lines, substations, radio transmitter, lightning, and other metal detectors, to name a few. In populated areas some kind of faint sounds and intermittent signals are inevitable. Some areas can be virtually unsearchable due to interference. Garrett Infinium Controls There are several solutions to the problem. First and most important is the Frequency Adjust control. Rotate the Threshold control as far to the right as it will go. Then turn the Discriminate control to far left. Now listen to the detector. The Discriminate control is now actually a Frequency Adjust control. It has 32 separate positions. Unfortunately, the 32 positions are not marked! So turn the knob a tiny amount to the right and wait a couple seconds. The machine interference may be reduced, may increase, or may stay the same. Then advance again a tiny amount, and listen a couple seconds. The idea is to slowly advance through the different settings looking for the quietest. Once you find the quietest setting, turn the Threshold control back to about “4”. This will lock in the Frequency setting, and it will remain set until you adjust it to something else. Be sure and rotate the Discrimination control back to “0” and you are set to detect. One thing that helps a lot is to keep the coil flat on the ground. In town the coil is like an antenna, and lifting it at an angle off the ground can massively increase the interference. So making the above adjustment with the coil flat on the ground will usually be the way to go. In populated areas, you will still be likely to receive faint noises and spurious false signals. Like most false signals, the key is repeatability. Real signals repeat over a certain spot, false signals come out of nowhere and then are gone. I tend to run my VLF detectors on the ragged edge of performance, with the gain set high. In doing so I get lots of false blips and tiny signals. So I've long since learned to ignore this kind of noise. But for beginners it can be difficult to deal with. Remember - repeatable signals are the real ones. DD coils are less prone to interference than mono coils, and smaller coils are less prone than larger coils. So a change of coils may help. Finally, as most of these false signals are fainter than most genuine targets, reducing the threshold slightly lower than normal can eliminate most of them while still getting all but the faintest real signals. I have been able to operate in town near power lines with quite a bit of background noise. I set my headphones very quiet and listen more to the tone of the signals than the volume. Genuine signals simply sound different than the noise produced by the electrical interference. But if the noise gets bad enough, it can be a real obstacle to pleasant detecting and some areas will simply be off-limits to the Infinium. But please do not take this explanation to mean this is a major issue. It is something all PI detectors face to varying degrees in areas where there are many electrical sources. In unpopulated areas the Infinium is very quiet with a very smooth threshold, except rare blips that may come from distant lightning. As far as the Power/Tracking settings go, I’ve been able to discern little difference between the settings. I generally just set my Infinium on “Slow” and forget about it. In theory, you may be able to hit slightly smaller or deeper targets by switching to “Fixed” after the machine tracks into the ground for a couple minutes, but I have noted no real improvement myself. The “Fast” setting is supposed to help with the worst ground conditions, but again, I have not seen a situation where I felt it made a difference. So “Slow” it is for me. All found by Steve with Garrett Infinium except small gold ring on pinky finger My view of the Discriminate control does not agree at all with what it is billed as. I’ve played with it a lot, and as far as I am concerned it acts just like a sensitivity or gain control. At “0” you have max sensitivity to small items, and max depth. As you advance the control, you lose overall sensitivity. Low conductive targets are affected the most. So the "Reverse Discrimination" theory is that if you advance the control all the way and still get a signal, it is junk. If it disappears, you are supposed to dig it. Well, it does not work that I can see. All that happens in reality is the weakest signals are eliminated and strong signals remain. Big junk at the edge of detection depth has a weak signal, and so this “Reverse Discrimination” method calls it good since the Discrimination control causes it to disappear. Conversely, a 2 ounce gold nugget an inch down responds no matter what. So it should not be dug? Nope, forget all that. The discrimination control can be thought of as a sensitivity control, just like that on a VLF detector. Reducing the sensitivity by advancing the control above “0” can reduce ground noise, particularly in salt water environments. If you are getting lots of ground signals or hot rocks that will not track out, try advancing the Discriminate control to eliminate them. If you are having a problem with tiny trash items, advancing the Discriminate control can eliminate some of them. But the more you advance the control, the less overall depth you will get on most targets. But just like lowering sensitivity or gain on a VLF detector can result in smoother operation and actually better performance, so advancing the Discriminate control on the Infinium to reduce unwanted signals can result in better overall performance. ads by Amazon... Finally, the best is last. The dual tone discrimination on the Infinium really does work, and work well. The catch is it might not work like you think it should! A hi-lo tone means aluminum, gold, nickels, zinc pennies, and various wire-like items. Like small, thin nails, bobby pins, and actual wire. Some thin, flat, flaky rusted steel reads hi-lo. If nugget detecting or beach detecting, hi-lo tones are the ones to go after to get the gold nuggets and gold jewelry. Silver, copper, and clad coins read lo-hi. As does larger steel junk or relics. Want old silver deeper than any VLF detector will detect? Dig lo-hi tones. You will come up with larger, heavily rusted items of all sorts but you will be amazed by the depth you pull up coins with an Infinium. The worse the ground mineralization, the more advantage the Infinium will have over VLF detectors. Try digging lo-hi tones only, and you will find deep coins others are missing. See Coin Detecting with the Garrett Infinium for details. You can use the discriminate control in conjunction with the dual tones to get a bit more information about the target. I have found in actual practice, however, that I rely strictly on the tones for making my digging decisions. Gold - always dig hi-lo tones. Silver coins - always dig lo-hi tones. In very trashy locations it pays again to keep headphone volume low so as not to be overwhelmed by the signals. I have a favorite freshwater beach I hunt. It is hunted to death, and VLF detectors can barely find any targets. My Infinium made the beach seem like it had never been detected. There are signals everywhere. Sure, I’m digging iron junk, and lots of aluminum. But I’m pulling up old coins passed over by thousands of detectors. The biggest catch is you need a location where digging large deep holes is ok… and backfill them! A good pinpointer like the DetectorPro Uniprobe is a major help also. You will also find that on shallow or very large targets the audio will "stick" or drag on for a longer than normal time. In other words, a deep coin will give a nice little tone similar to what a VLF might. But the same coin an inch below the surface will exhibit this "dragging tone" effect. Bury a quarter at 8" and one at 1" and note the difference. This effect can be used to determine the size and depth of targets. Be careful in trashy areas, as closely spaced targets can be "masked" by the effect. A dragging tone from a shallow junk item can cause an adjacent deep good item to be missed. Moving very slow in trashy sites helps considerably. Gold nuggets found at Ganes Creek, Alaska by Steve with Garrett Infinium Nugget detecting with the Infinium is pretty much a no-brainer. Most mining areas will have no interference issues, except perhaps other detectors. I prefer to hip mount the Infinium for long hours of detecting. I keep it on the rear of my hip so that I do not stress the coil wire when bending over. Make sure and get a coil cover for nugget detecting as rocks and gravel are rough on coils. The stock 14" x 10" DD coil is probably best for most nugget detecting applications, but it is nose-heavy when the control box is hip mounted. If ground conditions allow the 14"x10" mono is lighter and will get slightly better depth in mild ground. I like the 10" x 5" DD for hip mounting applications, as the wand/coil combo is very light and works well is steep terrain or thick brush. If you do get into heavy iron junk, oversize iron reads lo-hi, while nearly all gold nuggets read hi-lo. But when possible dig it all! Tidbits... The 14" x 10" mono coil is much easier to pinpoint with than the DD version and gets a bit more depth dead center. But it is nosier in areas with electrical interference and if used nugget detecting will hit hot rocks more than the DD coil. Still, it is my favorite coil. The 8" round mono coil is very popular with lots of people. Mono coils are more sensitive around the edges than in the center, so tiny surface targets will signal at each edge, giving a double blip. It also makes pinpointing these tiny items hard - try dragging one edge along the ground. The little 7" x 3" DD is the most sensitive to small items and is fantastic for working trashy sites, but like most small coils does not cover ground well and gives up overall depth. I prefer it for wading at I can pinpoint and scoop so well with it, and it is great for nugget detecting deep nooks and crannies. To pinpoint excavated items in a pile of dirt with the elliptical coils, try dragging the coil pointed end down in the dirt. The target will signal directly off the nose of the coil. For those so inclined, I cut my Garrett headphones off a few inches above the waterproof connector. I wired a 1/4" female receptacle onto the end creating a "dongle" into which I can plug any headphones. You can put a 1/4" male jack onto the Garrett phones so as not to waste them. One thing to look out for are large elongated steel items. Like a steel strap a foot long or a long spike. These can signal well off one end or the other. Again, a powerful pinpointer can help with un-centered targets. I hope these notes help. The main thing to remember is that this is a radically different detector than any VLF machine. In some ways it is like the early, cruder VLF detectors. Weird operating methods, poor discrimination… but genuine raw power is the reward. Be patient and dig it all for awhile, and I promise you will make finds with the Infinium that would not be possible with a VLF detector. Parting word - keep the coil low, and swing it slow! PI detectors do not like air space between the coil and ground, and are slower to respond than VLF detectors. ~ Steve Herschbach Copyright © 2004 Herschbach Enterprises
 -
The Garrett ATX was introduced by Garrett Electronics in 2013 and is still in production. This page lists options and accessories for the detector and supplements the main Garrett ATX Information Page. The ATX comes standard with the items shown below - detector, instruction manual, soft carry bag, dry land headphones (waterproof headphones optional), support sling, 8 each AA batteries in two holders (in detector in photo), 8 each NiMH batteries in two holders, and smart charger with 110V and 12V adapters. The Garrett ATX normally comes standard with a 12" x 10" DD search coil. Other package options include the Deepseeker Package, which includes the 15" x 20" mono coil and a large hard case. Optional 8" round and 20" x 15" mono coils with integrated lower rods are available. Garrett also introduced two more new 11" x 13" enclosed coil designs in 2016, in both DD and mono configurations. New packages that include these new coils as the stock coil are now available. Garrett ATX Search Coil Options How To Disassemble and Clean the ATX Coil Shaft & Camlocks I have issues with the weight of the ATX and the stock coil for certain nugget hunting tasks, like gully hunting as in my Gold Nugget Detecting with the Garrett ATX story. I had visions of hip mounting the ATX with a smaller DD coil. If you look at the third photo in my Infinium beach hunting story you will see where I got the idea. An inquiry with Garrett about the possibility of running Garrett Infinium coils on the ATX received this answer: "The ATX can be operated with Infinium DD coils. Performance with Infinium DD coils should be normal but is not guaranteed. The ATX cannot be operated with Infinium mono coils or any other Garrett coil other than ATX coils and Infinium DD coils. Recon Pro coils will not work on the ATX. The Recon Pro is not the same machine electronically, even though it looks similar. Use of any coil other than ATX coils and Infinium DD coils, including the use of 3rd party coils, will void the warranty." Well ok then! I purchased two Infinium DD accessory coils, the 3" x 7" DD, part number 2216600 and 5" x 10" DD, part number 2216700. The DD coils work fine. I suspect the ATX has been optimized to run with DD coils and that the mono coils therefore had to be tweaked to work with it. The Infinium mono coils therefore will not work. The Infinium DD coils however are good to go but as the note above say there are no promises about how they will perform. Mine was stable with good sensitivity to small gold nuggets. The ATX with lower rod and coil assembly plus arm cup removed only weighs 3 lbs 5 oz, basically half the weight of the entire detector. I envisioned slinging it either under my arm or on my back, with only the coil and rod assembly on my arm. An Infinium rod assembly could be purchased as separate part numbers, but I already had a couple White's Space Saver Rod Kits for use with other detectors. These can be ordered as one part number, P/N 802-5236 and are only $39.95, far cheaper than other rod assemblies I have priced out. The White's bolt fit the Infinium coils but was a tad short, and I had to add an extra rubber washer to snug up the narrow White's rod end, but it actually works just fine. Steve's Garrett ATX Hip Mount Kit The 5" x 10" DD coil bench tests great. It is hot down the middle like one expects of a DD coil, and slightly more sensitive than the inner coil ring area of the stock DD coil. The advantage is it elongates the hot small gold area to nearly the full 10" length of the coil and eliminates the extraneous less sensitive outer coil area of the stock coil. This is the coil for hunting in tight locations like in bedrock pockets and crevices and in brush. There are no gaps to get caught and hang up, and the coil appears impervious to false signals when knocked about. Home run! The 3" x 7" coil is no more sensitive to small gold than the 5" x 10" and gives up some depth, so the only reason to use it is for extremely tight areas. Pulse induction detectors do not get more sensitive to small gold past a certain point, unlike VLF detectors, so ultra small coils like the 3" x 7" get no extra boost in sensitivity. But for extreme crevice work or even for use as a pinpointer the little coil has my interest. The Infinium mono coils should be avoided. I am not sure what might happen but you do not want to void your warranty! Anyway, here is a picture to give you the idea. I started an official question and answer thread on this experiment on the Garrett Forum here. Check it out for some more great ATX modifications. Garrett ATX Makeshift Rod Kit in Progress I have experimented with a backpack design for this setup at at Garrett ATX Backpack Modification. Chest or hip mount options are also possible. The Garrett ATX does have a built in waterproof speaker and so does not require headphones. It does come with dry land headphones that use a waterproof connector Garrett uses on the Infinium and AT Pro/AT Gold models. The same waterproof headphones available for those models work on the ATX and are required if it is desired to put the headphones underwater. The included headphones have a waterproof cable that can be submerged but the headphones themselves must be kept dry. A short adapter dongle is also available to convert the ATX waterproof headphone connector to the standard 1/4" female receptacle so standard metal detector headphones may be used. Garrett ATX Optional Underwater Headphones and Headphone Adapter Dongle Garrett ATX Optional Submersible Headphones PN: 2202100. This is the same set used on the Garrett Infinium, Sea Hunter, AT Pro, and AT Gold models. 1/4" Headphone Adapter PN: 1626000. Allows land-use headphones with a 1/4” male jack to be used with the Garrett ATX, AT Gold, AT Pro, Infinium and Sea Hunter models. (Not intended for submerged use.) OPERATION NOTES: Inserting the headphone plug into the connector will provide sound from the headphones only and will automatically disable the detector's speaker. This automatic speaker-disable feature requires the input impedance of the headphones to be 10,000 ohms or less. Note that some non-Garrett headphones may not meet this requirement and will require the addition of a 10,000 ohm termination resistor inside the connector to disable the speaker. Another headphone option is available from DetectorPro - the DetectorPro Gray Ghost Amphibian headphone. DetectorPro Gray Ghost Amphibian Headphone The nice thing about the Amphibian headphone is like the name implies, it can be used both above and below water. It is unique in underwater headphones in having a volume control making it easy to increase volume when entering the water and decrease volume when leaving the water. This also eliminates having to switch out headphone sets. The fewer times the o-ring connection has to be broken and reset, the better. The DetectorPro Gray Ghost Amphibian headphones can stay permanently attached to the ATX both above and below water. These work on the ATX, Infinium, AT Pro, AT Gold and Sea Hunter detectors. Check them out at the DetectorPro website. Finally, the ATX runs off eight standard AA batteries, eliminating any shipping or airline issues that can be a problem with some PI detectors. The detector comes complete with both alkaline and NiMH rechargeable batteries plus a 110V and 12V smart charger system. The detector runs approximately 10-12 hours on a charge when using headphones, less if running off the speaker. The best method is to use the rechargeable batteries and carry the alkaline set as backup. Official Garrett ATX Accessory Page
-
What Detector Would You Get?
Steve Herschbach replied to Ruthless79's topic in Metal Detector Advice & Comparisons
Carefully consider your possible uses. The SDC 2300 is a pulse induction "dig every signal" detector. There is an excellent buy on a SDC 2300 right now in the forum classifieds. -
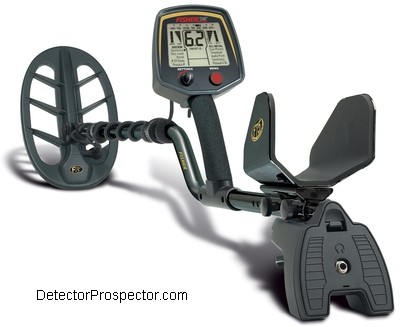 The Fisher F75 LTD2 is the latest in the F75 series that was originally released in 2007 and is still in production. The lead engineer was the person responsible for many of the great VLF prospecting detectors of all time, Dave Johnson. During Dave's first stint at Fisher Research of Los Banos, California Dave had a major role in the development of the Fisher Gold Bug and Gold Bug 2 detectors. He then developed the Lobo SuperTRAQ while at Tesoro. Dave's last project before the F75 was the GMT and MXT for White's, and so after he was hired by First Texas I was very excited to see what his next offering would be from the new Fisher based in El Paso, Texas. The F75 originated as the Teknetics T2. Both Fisher and Teknetics brands are owned by the First Texas company and share engineering and manufacturing resources. The T2 was produced first with the F75 developed later as an offshoot model. Details can be found at the Teknetics T2 page. I have to admit to being initially disappointed. The first Fisher F75 that I ran in Anchorage, Alaska was troubled very much by the electrical interference common in that town. It was an immediate turn off, and I sold the detector to a friend. Then the friend started telling me how great the F75 was that I sold him. Then another friend got one, and yet another, and they all raved about the machine. Finally I was forced to admit I had rushed to judgment with my first unit, and acquired another F75 version called the Special Edition. Once I got it away from electrical interference things clicked, and it became one of my favorite detectors. I have had numerous adventures with the machine - Fisher F75 SE & Gold Nugget Detecting, Metal Detecting Ancient Coins at Colchester, UK and Fisher F75 Strikes Gold in Alaska! Fisher F75 metal detector available also as F75 SE, F75 Ltd, F75 Ltd2, and F75+ The original F75 was followed quickly by the F75 LTD (Limited Edition) and F75 SE (Special Edition). The first Limited Edition was just that, a model with extra modes and special camouflage paint scheme available for a limited time only. It is also referred to as the F75 Camo. The Special Edition is the same model in an all black paint scheme but also gets referred to also as the Limited Edition, so much so that it is now the official designation. Standard base unit F75 models can be distinguished by the rod assembly having a black and gold color scheme. The 2014 versions of the basic F75 and the Limited Edition have a new feature called Digital Shielding Technology (DST) which basically is just filtering applied to reduce the perception of electrical interference. Because of concerns that it might come at a performance cost, the feature can be disengaged if desired. The new models also feature a new FA search mode that enables faster target recovery times, allowing two adjacent items to be better discerned as separate targets. Finally, numerous audio options were added, most important being the ability to adjust the volume of the ferrous tone response. This is desirable in areas thick with ferrous trash where the constant barrage of sound can be tiring. The ferrous tone volume can be reduced to minimum independent of the non-ferrous response, which stays loud and clear. The version of the F75 Ltd with DST is referred to as the F75 Ltd2. Fisher introduced yet another new configuration in 2018 - the F75+. This is a Fisher F75 Ltd2 sold with a pinpointer instead of the 5" accessory coil and at a lower price. The F75 remains one of my favorite detectors for several reasons. First, I very much like to hunt in the powerful Boost Process All Metal mode while having the meter run independently in target id mode, a form of mixed mode operation. The audio is 98% of what is going on with maximum depth and ground coverage in all metal. Once alerted to a target, I then analyze it with the meter to make a decision whether to dig or not. All metal reaches deeper than discrimination modes and so some surface material may have to be removed to get a reliable target id on screen. Every one of these deep targets that requires material to be removed to get an identification number on screen would be missed entirely if running in a discrimination mode. 2.37 ounce gold specimen from Jack Wade Creek, Alaska found by Steve with Fisher F75 I think the ergonomics of the F75 are superb. It is a perfectly balanced 3.5 lbs. People do not understand how important balance is but a balanced 3.5 lb. detector creates less arm strain than a nose heavy 2.5 lb. detector. The machine retains settings when turned off, which means in most cases I just turn mine on, do a ground balance, and go detecting. Finally, the F75 only sips at the four AA batteries, getting a week of long days on a set of good alkalines and nearly two solid weeks of detecting in a set of premium lithium batteries. This is the most important tip I can offer on the F75 series. The F75 has a two tone ferrous / non-ferrous mode, the 2F mode. Ferrous goes low tone, non-ferrous high tone. Check your F75 manual and you will see it considers target id numbers 1 - 15 as ferrous. 2F mode gives a low tone on target id number 15 and lower, and higher tone on 16 and higher. Use 2F and you will dig very little ferrous stuff. The problem is that 2F is set at the high end of the ferrous/non-ferrous range overlap area. It has been found that the F75 will actually read borderline non-ferrous targets all the way down to about target id number 6, and so the target id 6 - 15 area is the overlap range. You have to avoid 2F and use single tone mode and manually set your disc to about 5 or 6 if you do not want to reject low reading non-ferrous targets. The alternative is to run in boost all metal mode and just investigate any target that pops 6 or higher on the screen on any pass of the coil. In other words, even a single pass of the coil can't be trusted, since the numbers jump around. I work the target and if it even jumps up once above my desired cutoff point it is worth checking out. Look for a reason to dig, instead of a reason to not dig. Running in 2F will cause many borderline non-ferrous targets in the 6 - 15 target range to be missed. ads by Amazon... In summary I consider the Fisher F75 series to be on of the handful of true classic metal detector designs. It sets the benchmark for ergonomics and pushes single frequency VLF about as far as it can go. The F75 is a solid performer and even with newer models coming out is still competitive due to new aggressively lower pricing. Note added 1/8/2019 by Steve Herschbach: The F75 has had a long history of model changes and revisions. The are several major releases, and minor software version differences within some of the major release models. The major models are: Basic Fisher F75 - initial release, black & gold colors. Fisher F75 Limited Edition (Ltd) Camo - added camo paint scheme and extra features. Fisher F75 Special Edition (SE or Ltd) Black - same as camo version but in solid black. There is confusion as this model is called the Special Edition or F75SE in documentation but nearly all vendors just sell it as a black F75 Ltd. They are indeed the same model except for the color scheme. Fisher F75 DST - basic black & gold model with Digital Shielding Technology (DST) for reduction of electrical interference. Fisher F75 Ltd DST - F75 Limited / Special Edition with Digital Shielding Technology (DST) for reduction of electrical interference. Solid black color scheme. Fisher F75+ - The F75 Ltd comes with two coils. The F75+ is a rebranding that includes a pinpointer instead of a second coil. Other than that it is the same as the F75 Ltd DST. Black & gold color scheme. See the user guide downloads below for details on the differences between models. Finally, if shopping used be aware that Fisher had an upgrade program for upgrading most any F75 model to a newer software version. This means older units may exist used that have more up-to-date-software than they were initially sold with. ~ Steve Herschbach Copyright © 2013 Herschbach Enterprises Official Fisher F75 Page Fisher F75 User Guide Fisher F75 Ltd Camo User Guide Fisher F75 Ltd Black User Guide Fisher F75 DST User Guide Fisher F75 Ltd DST / F75+ User Guide Fisher F75+ For 2018 Color Flyer Forum Threads Tagged "fisher f75" First Texas (Fisher) Metal Detector Forum Fisher F75 Tone Break Tip Fisher F75 Ltd2 Technical Specifications* Internet Price F75+ $649.00 & F75 LTD2 (Two Coils) $699.00 Technology Induction Balance (IB) Frequency 13 kHz Autotune Mode(s) Pre-Set Via Different Modes or "Processes" Ground Rejection Ground Grab and Manual Soil Adjust No Discrimination Variable with Visual ID, Tone ID, Notch ID Volume Control Yes Threshold Control Yes Tone Adjust Yes Audio Boost No Frequency Offset Yes Pinpoint Mode Yes Audio Output 1/4" Headphone Socket & Speaker Hip Mount Shaft Mount Only Standard Coil(s) 11" Elliptical DD Optional Search Coils Many accessory coils available Battery Four AA Operating Time 40 - 50 hours Weight 3.5 pounds Additional Technology Notes New "Enhanced" models from 2014 on feature improved resistance to electrical interference (DST), fast target separation mode, and new audio features *Notes on Technical Specifications - Detailed notes about the specifications listed in this chart.
 -
What Detector Would You Get?
Steve Herschbach replied to Ruthless79's topic in Metal Detector Advice & Comparisons
You can find descriptions off all your likely options including Gold Bug 2 and Goldmaster 24K at: Steve's Guide To Gold Nugget Detectors The Equinox 800 and XP Deus are general purpose detector designed for coins, jewelry, relics.... and also gold nuggets. The Gold Kruzer is more of a nugget hunter that can also be used for jewelry, relics, and coins. The Gold Monster is pretty much for nugget detecting only. -
A Discussion About Aptx Low Latency And The Equinox Equinox 800 Wireless Phones Made By Miccus? My Mpow Headphones Are In The USA And Heading My Way Mpow H4 Headphones Will Only Pair Standard Aptx. Update Page 3! Has Anyone Tried Non Minelab Bluetooth Earphones Yet Apt-x All headphone and audio threads
-
White's Goldmaster 24K - New For 2018
Steve Herschbach replied to Steve Herschbach's topic in White's Metal Detectors
If this thing runs like it should it will be a great New Zealand detector - extremely hot and will excel in mild ground especially with the concentric coil. Far more adjustability than the Gold Monster - and it has a threshold!