
Steve Herschbach
-
Posts
19,773 -
Joined
Content Type
Forums
Detector Prospector Home
Detector Database
Downloads
Everything posted by Steve Herschbach
-
*Notes on specifications: This page is a footnote link in all "Steve's Reviews" - metal detector and gold prospecting equipment reviews by Steve Herschbach. Two basic technologies are described here; Induction Balance (IB) and Pulse Induction (PI). Induction balance is often referred to as VLF, or very low frequency. This is a misnomer, as some gold nugget detectors and some coin detectors are not very low frequency units as normally defined. VF = Voice Frequency = 300 Hz - 3 kHz, VLF = Very Low Frequency = 3 - 30 kHz, LF = Low Frequency = 30 - 300 kHz. Most IB gold detectors operate in the Low Frequency Range and quite a few coin detectors operate as low as the Voice Frequency range. Pulse Induction (PI) detectors operate over hundreds of frequencies employing a totally different technology than IB detectors but can be best imagined from an operational standpoint as Low Frequency detectors Internet Price - Manufacturer's often publish manufacturer suggested retail prices (MSRP) intended to set the full value of an item. In the United States they also will often set a minimum advertised price (MAP) that determines the lowest price that can be used for advertising purposes. Note that this is not the lowest price an item can be sold for but instead is what you will normally see in print ads or online as the lowest advertised (sale) prices. The Internet Price in the chart is the normal advertised sale price as commonly found on the internet as of the date listed. Dealers will often try and sweeten the deal by including "free" items in the advertised prices. You can often negotiate a lower price by contacting the dealer requesting a lowest price for the item without all the "free" package items. Technology - The basic operating technology a detector uses has a huge impact on how it behaves. Early consumer 1960's model detectors commonly employed a method referred to as Beat Frequency Oscillator (BFO). This simple design can be built by a school child with a handful of components. The search coil or loop was literally a coil or loop of wire. They are noted for making a distinctive "putt-putt-putt" continuous beat. The beat increases as a target is detected and the BFO responds to both conductive metals and magnetic minerals. The early 1970's saw the appearance of the Induction Balance (IB) detector. The IB detector employs two coils, a transmit and a receive coil, that are kept in electronic balance. They were therefore also commonly referred to as Transmitter/Receiver (TR) and that term saw more popular use. The TR produces a steady tone that increases in volume and the early TR models, like the BFO, responded to both conductive metals and magnetic minerals. The BFO and TR were both very limited because their ability to detect magnetic minerals interfered with their ability to detect conductive metals. An IB or TR variant was developed that allowed the detectors to not only eliminate the signal from ground minerals but to discriminate between various metals. These detectors ran at lower frequencies than the TR models and referred to as Very Low Frequency (VLF) detectors. Dual mode models existed, the VLF/TR, but the TR modes were so limited they were eventually dropped in favor of pure VLF operating modes. Almost all such detectors are referred to as VLF detectors today, but VLF is actually a misnomer. In electronics, VLF refers to the 3 kHz - 30 kHz frequency spectrum. There are detectors operating at under 3 kHz, and so technically they are Voice Frequency (VF) detectors. There are also many models operating over 30 kHz which are technically Low Frequency (LF) detectors, although because they are operating at higher than VLF frequencies many people refer to the as "high frequency" detectors. Therefore on this website the more technically correct term Induction Balance (IB) will be used. This is important because IB detectors are dramatically different than the other major technology employed at this time, the Pulse Induction, or PI detector. The IB detector requires two coils or loops that continuously transmit and receive in electronic balance. The PI detector requires only one coil but may use two. Rather than transmit and receive continuously, the PI detector transmits, pauses, then receives, which can be done with a single coil. The PI detector is able to ignore salt water and mineralized ground that an IB has difficulty with. This makes PI detectors particularly well suited for salt water diving applications, and that is where most consumer models have been aimed over the years. Simple PI detectors are often advertised as having "automatic ground rejection" but that is not strictly true. A normal PI will ignore common ground conditions, but they still are affected by highly mineralized ground and hot rocks, and so are not suitable for most prospecting applications. A company in Australia recognized the potential however, and developed PI detectors aimed specifically at the prospecting market. These detectors do actually ground balance, or tune out the effects of highly mineralized ground and hot rocks, and so along with other models now on the market represent a subset of the PI detectors, the Ground Balancing Pulse Induction (GBPI) detector. Frequency - Induction Balance (IB) detectors as radio devices normally operate on one of more frequencies that govern certain operating characteristics. The transmit frequencies are often quoted but what is most important is the frequencies the detector receives and actually processes. Most detectors receive and process a single frequency but a few detectors receive and compare the results of two or more frequencies. The focus on frequency has lead some marketing people to advertise multiple transmit frequencies in ways that are a bit misleading because people assume more is better. The reality is single frequency detectors excel at some tasks and multi-frequency detectors at others. Single frequency detectors can be better honed for specific tasks, such as nugget detecting. Multiple frequency detectors are better able to handle salt water environments and generally excel at target discrimination. In general, the higher the frequency, the more sensitive the unit is to small gold, but also more affected by mineralized ground and rocks. Lower frequencies penetrate mineralized ground better but are less sensitive to small nuggets. Multiple frequency detectors have historically acted like lower frequency detectors but newer models are so sensitive as to be practical for gold nugget detecting. Frequency article Pulse Induction (PI) detectors are sometimes advertised as using huge numbers of frequencies, which is technically true, but again is the marketing people going to work. Operating frequencies on IB detectors do not really equate with PI detectors which operate on a different principle. The closest specification in a PI detector that has some bearing on the operating characteristics is the Pulse Frequency which is the number of times the transmitter pulse is repeated every second. It is usually quoted at Pulses Per Second (PPS). The pulse frequency affects the response time (slower PPS call for slower sweep speed), power consumption (higher PPS uses more power) and interference rejection (adjustable PPS helps adjust out electromagnetic interference). Pulse Induction (PI) detectors again are a special case, and the sensitivity to small items and ground minerals is more affected by the Pulse Delay than the Pulse Frequency. The Pulse Delay is the wait time between the transmit mode and receive mode. The shorter the delay, the more sensitive the detector is to small items and hot rocks. In theory a PI can be just as sensitive as an IB detector by operating at extremely short delay times, but then it would suffer the same problems as an IB detector. PI detectors designed to hunt gold often have a pulse delay of about 10uS (microseconds). Salt water however signals at 10uS so salt water PI detectors often run about 15uS. Some PI detectors can have an adjustable pulse delay that commonly runs from 10uS to 25uS. Autotune Modes - Almost all modern detectors require the search coil to be in motion over the target to get a response. Nugget detectors employ automatic threshold tuning, which acts to help keep the threshold tone even in variable ground. The circuit seeks to return the threshold to a level preset by the threshold control. The retune rate can vary from slow to fast and in some cases can be adjusted by the operator. Holding the coil stationary over the target causes the target to disappear as the autotune circuitry brings the threshold back to the preset level. Detailed article Ground Rejection - Ground rejection or ground balance can be set at the factory (Pre-Set), manually set by the user (Manual) or automatically track ground conditions (Tracking). Fixed refers to units that lock in whatever setting the automatic system has at any moment but which cannot be manually adjusted. Manual adjustment allows a unit to be purposefully adjusted to specific conditions that cannot normally be attained through manual or fixed settings. The preferred option is to have both tracking and manual ground balance systems. A compromise between manual ground balance and ground tracking is an automatic "Grab" function. This allows the unit to be ground balanced by pressing a button. The ground balance setting is obtained instantly or with a few pumps of the coil over the ground. Soil Adjust - This refers to a control that allows the operator to adjust the unit for basic ground conditions. Common settings are Normal, High Mineral, Low Mineral (Sensitive), Salt (for salt water beaches or salt flats) or a variable setting. The technology employed may vary. The unit will compensate for difficult conditions by basically lowering the overall sensitivity of the detector in various ways so as to not detect the item or items causing problems. The sensitivity to desired items almost always suffers as a result. Discrimination (Disc) - Most detectors offer all metal detection, all metal with ferrous (man made iron or steel) rejection, possibly adjustable, and fully adjustable discrimination that can actually identify different non-ferrous targets one form the other. The method may be audio only, via a visual display, or both. A control that allows for only ferrous items to be rejected to a varying degree is commonly referred to as "Iron Mask". Volume Control - Detectors with volume controls usually have a built in speaker and this way you can adjust the speaker output. Detectors without volume controls operate at full volume at all times. Be sure and purchase headphones that have an adjustable volume for these detectors or the headphones will be too loud to use. Tone Adjust - This allows for a change of tone in the speaker output, to the sound that best suits the user's ears. Some people hear high tones better and some people better hear low tones. Audio Boost - Boosts the audio volume on small, faint targets, making them easier to hear. It may also boost ground and hot rock signals in some areas and so is usually offered as an option. Frequency Offset - Two detectors operating on the same frequency close together will "cross-talk" or cause some kind of false signals in both nearby detectors. A frequency offset or adjust allows for a small change in frequency so detectors are less prone to interfere with each other. The control may also alleviate interference from outside sources like power lines or cell phone towers, referred to as EMI (Electro-Magnetic Interference). Pinpoint Mode - Common in coin detectors, rare in gold nugget detectors. The pinpoint mode is usually a variation on the all metal non-motion mode (see Search Modes above) that allows the detector to be held steady over a target as an aid to locating the exact position of the target. This may be of some benefit in some "silent search" that lack a threshold tone and which only make a sound when passing over a target. The mode is usually activated via a momentary push button or trigger switch. Audio Output - Nearly all detectors have a built in speaker and a 1/4" headphone jack. Others vary from the norm and are so noted. Also, be aware that some detectors have a mono output and some have stereo output. This is noted when known but it is best always to have headphones that can operate in either mode. Headphone notes Hip Mount - Some models allow the control box to be put on a belt or chest harness. A very desirable feature, as even a lighter detector can cause arm soreness, or even injury, if used for long periods of time. New detectors are so light this is now a rare feature more often seen on older models. An exception are the Minelab SD/GP detectors in that they are heavy, but through the use of an ingenious harness and bungee system they actually impose less arm strain in level ground than most detectors. Similar harness/bungee systems can be obtained for use on most detectors from aftermarket sources. Chest mounts however are still a valuable option for those thinking of using their detector in deep water. Standard Search Coil(s) - The search coil or coils that come that come with the detector. Also referred to as loops. IB detectors have concentric or double D (DD) options. PI detectors have mono or double D (DD) options. Concentric or mono coils are usually more sensitive but more affected by ground mineralization. Double D coils handle ground mineralization better but at some loss of maximum depth in low mineral conditions. Concentric or mono coils have an inverted cone detection pattern with maximum depth dead center that fades off in all directions. DD coils have an elongated inverted canoe pattern that covers the ground more thoroughly but lacks the maximum depth dead center that concentric or mono coils offer. Large coils get more depth and cover more ground than small coils, but lack sensitivity to small targets. Small coils lack overall depth but enhance sensitivity to small targets and have better target separation by not "seeing" two targets under the coil at once. Large coils are more affected by the overall ground mineralization, small coils are more affected by hot rocks. Suffice it to say that the more coil options one has, the better. Coil compatibility Optional Search Coils - See the note above. The more, the better. Battery - Options are usually disposable batteries, rechargeable systems, or both. Common battery types are AA batteries and 9V batteries. Disposable batteries tend to fade away slowly as they lose power. Rechargeable batteries maintain a more even power output then go dead very rapidly. Rechargeable are preferred by heavy users and a backup battery is a necessity. Operating Time - Normal battery life in operation with standard battery. Note that the use of headphones will significantly extend operating times. Weight - Weight of unit on arm with a few noted exceptions. Additional Technology - Features offered by this detector not normally seen on other models. Notes - Anything else of interest about the model in question.
-
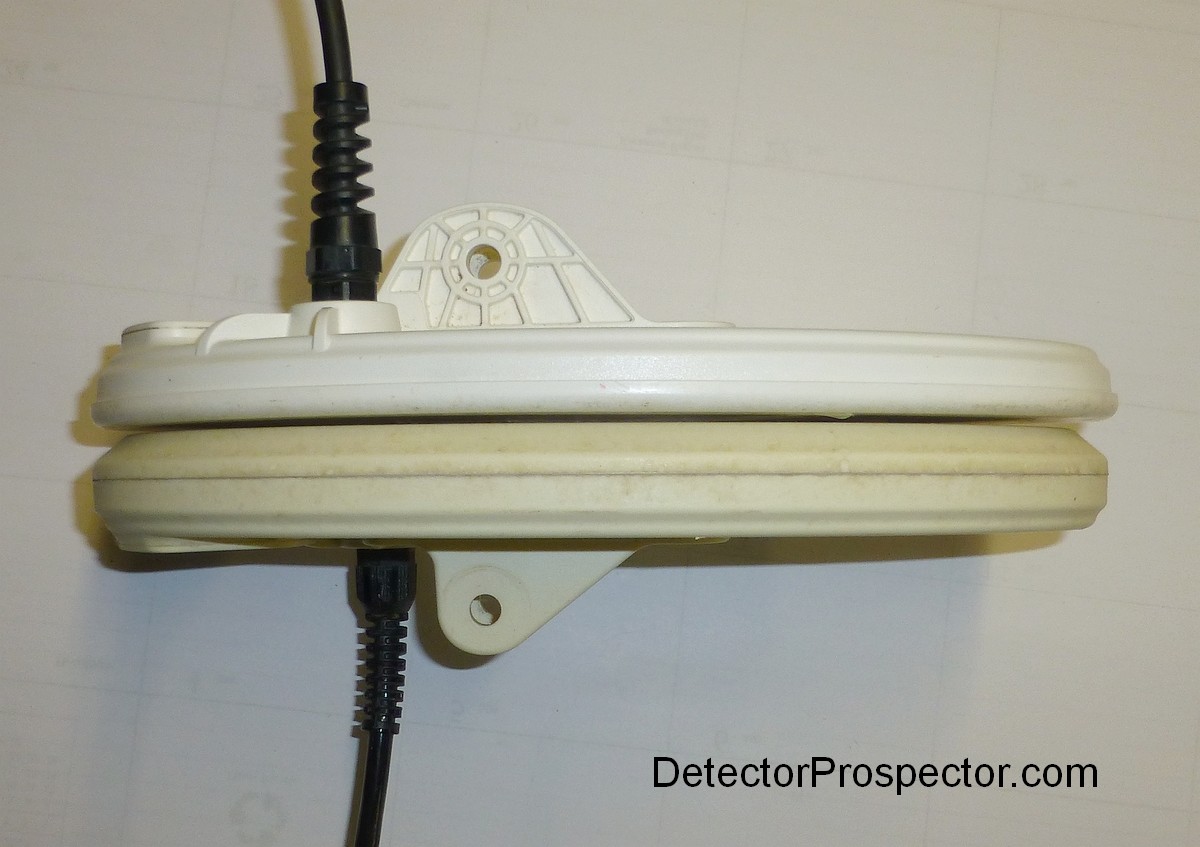
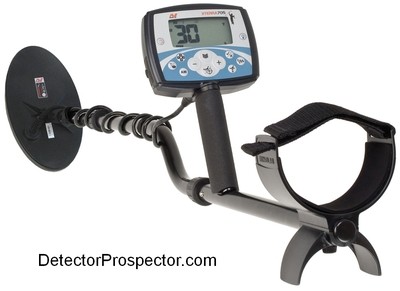 The Minelab X-Terra 705 was released in 2009 and is still in production. It is a feature packed detector available for under $500 and weighing less than 3 pounds. Quite a remarkable detector for the price, the X-Terra 705 can run at any one of three separate frequencies by changing to various custom tuned "smart" coils. Unlike some detectors that select between frequencies while using a single coil, the X-Terra 705 insures optimum performance by using coils specifically tuned for each operating frequency. The coils contain a chip that tells the detector what frequency it is designed to run at, and the detector automatically switches to match the coil. You can choose between 3 kHz, 7.5 kHz, and 18.75 kHz. The original X-Terra 705 comes stock with the 9" round concentric coil, which is great for general purpose detecting. The X-Terra 705 Gold comes with the 10" x 5" 18.75 kHz DD coil deemed best as an all around prospecting coil. The X-Terra 705 has a full complement of ground balancing options - a simple "Ground Grab" automatic push button option, full adjustable manual ground balance, and automatic ground tracking, making it one of the few prospecting detectors that offer all three methods. There are several tone id options to choose from, all the way from a simple mono tone to a full multi tone mode. The X-Terra 705 features full programmable notch discrimination with memory to save all your settings when turned off. Minelab X-Terra 705 Gold multipurpose metal detector Most importantly, the X-Terra 705 Gold has a very powerful threshold based all metal mode, one of the best available. The all metal mode "Prospect Mode" has an adjustable "iron mask" which allows shallow ferrous trash to be identified and rejected even while in the all metal Prospect Mode. The Beach setting along with the optional alternate frequency coils makes the Minelab X-Terra 705 a worthy contender for those seeking a single powerful "do-it-all" detector in an affordable and lightweight package. At one time this was a $700 detector and it was a good value then - at $499 it is a true bargain. Official Minelab X-Terra Gold Page Minelab X-Terra 705 Instruction Manual Minelab X-Terra 705 Gold Start Guide Understanding Your X-Terra by Randy Horton Minelab X-Terra Coil Brochure X-Terra 70 & 705 On Gold Nuggets Forum Threads Tagged "minelab x-terra" Minelab Metal Detectors Forum Minelab X-Terra 705 Gold Technical Specifications* Internet Price $499.00 Technology Induction Balance (IB) Frequency 18.75 kHz (X-Terra Gold model) Autotune Mode(s) Preset Slow Autotune Ground Rejection Ground Grab, Manual, Tracking Soil Adjust Normal and Salt (Beach) Modes Discrimination Variable with Visual ID, Tone ID, Notch ID Volume Control Yes Threshold Control Yes Tone Adjust No Audio Boost No Frequency Offset Yes Pinpoint Mode Yes Audio Output 1/4" headphone socket & speaker Hip Mount Shaft Mount Only Standard Coil(s) 10" x 5" DD (X-Terra Gold model) Optional Search Coils Nine or more accessory coils available Battery Four AA Operating Time 20 - 30 hours Weight 2.9 pounds Additional Technology Can change frequency by changing coils to 3 kHz or 7.5 kHz from 18.75 kHz, has ground tracking offset feature Notes The 10" x 5" coil is not rated as waterproof *Notes on Technical Specifications - Detailed notes about the specifications listed in this chart.
 -

Best Detecting And Prospecting Forum On The Internet
Steve Herschbach replied to Norm S's topic in Meet & Greet
You are too kind Norm - thank you. Not the best but in a few years who knows. The website lets me combine several interests under one roof and is a passion project for sure. You guys are not seeing but 1% of what has been going on behind the scenes the last couple months. For those with an interest in such things here is what’s going on. This started as your basic html website with the forum tacked on in a subfolder. No worries but then Invision started dramatically adding to the forum software capability, with the intent that it drive an entire website. The problem was my installing the forum software in a subfolder. That was common at the time just to run a forum, but for it to drive the whole website efficiently I needed to move it to the root or home folder. That turned into a huge undertaking due to the sheer size and number of files involved. After one aborted attempt I finally got that part accomplished. The last few weeks I have been copying all those old html files into the forum side of things. I am about half done with that part of the project, should get wrapped over the next week or two. Why all this effort? If you look at this page you are on, it is driven by the forum software. It automatically adjusts to any device and any screen size - it’s “mobile friendly”. Now here is an old html page. It does ok but when you go to a phone screen all that happens is everything gets really small. Not mobile friendly, and any change I make tends to break it. Right now the mobile renditions are not “locking on” properly due to a change I made some time ago. I started trying to fix it, then realized I was wasting effort better put to eliminating the html pages entirely. Once I get all the old pages copied over, the whole website will be mobile friendly, and that will boost the Google results. The next step is the whole site will be upgraded and converted to https secure communications protocol. It’s not really needed per se but Google now insists any site that has log in and password structure run off https or get downgraded search results. Since everything will eventually be in the forum database, the search function will be more efficient at finding things. Currently I was jumping through hoops trying to get the html pages to appear in searches done using the forum search function. With those steps in place, I can then do a couple things to boost website performance for faster page and image delivery, snappier performance overall. Then, once all that gets done, I can actually forge ahead adding more information and capabilities to the website! Right now it’s more about shuffling everything around to get more efficiency going forward. Suffice it to say I would not be going to all this effort if I did not have plans for the future. Not the best site now perhaps but if I get my way someday that will be an undisputed fact. Thank you everyone for your interest and participation! New Steve's Reviews Index (work in progress) New Website Home Page New Meet & Greet Forum New Updated Steve's Mining Journal Index New Updated Steve's Guides Index -
 The secret to the Minelab GPX series is thoroughly understanding the timings and when to use each one. Timings are variations of the basic pulse induction technology at work in the GPX series that gives you far more flexibility than exists in other pulse induction detectors. Unfortunately this extra flexibility also adds complexity, and so it is not unusual that some people may not be using the optimum settings in many cases. It is very important when investing in a Minelab GPX detector to take the time to read the manuals and study until you fully understand what the settings do and how to adjust the detector for the best performance. Otherwise you will not be getting all the potential out of your investment. The chart below shows the timings and what GPX models they are available on along with a general description. The descriptions are from the owners manuals that are available by download at the bottom of the page. In general you should always use timings as near the top of the chart as possible, with the exception of the Salt settings. Those are for alkali flat and salt water beach areas only. Using timings designed for more mineralization than is actually required may result in less depth on desired targets. Imagine the timings as another sort of ground balance setting. Low mineral settings are more powerful than high mineral settings and should be used whenever possible. Some confusion is the result of the timing names. Some people assume the Fine Gold timing is best for fine gold. This does make a sort of sense, but the fact is Fine Gold is just better than other high mineralization timings on smaller gold. In milder ground Sensitive Extra will obtain better results on small shallow gold. It is also very important to know that some timings work better with one coil type or the other. Minelab GPX Timings Chart Little or No Mineralization Coin/Relic (GPX 4800, 5000 ONLY) Coin/Relic is for use in lightly mineralized soils including many beaches and loamy soils. It offers maximum detection depth on a range of target sizes, significantly greater than any other timings. However, if the ground is any more than lightly mineralized, the detector may not ground balance properly. On ocean beaches containing significant quantities of black sand, better results may be had by using Normal or Salt settings. Mild Mineralization Sharp (GPX 4500, 4800, 5000) Sharp is similar to Normal but creates a more powerful detection field. It is capable of an improvement in depth, but is more susceptible to interference and will increase the severity of false signals in difficult grounds. This timing is best used in quiet conditions and can work well in combination with Deep Search Mode with a reduced Rx Gain setting. Sharp is an excellent tool for pinpointing faint signals due to the very "sharp" signal response. Sharp will work best with DD coils in most gold field locations. Medium Low Mineralization Sensitive Extra (GPX 4000, 4500, 4800, 5000) This timing may increase the signal from certain hot rocks near the surface, but can actually help smooth out the Threshold in certain ground types, particularly with Double-D coils. In mild ground conditions Sensitive Extra will provide the best signal response on a small, deep target. Medium Mineralization Normal (GPX 4000, 4500, 4800, 5000) Normal gives you the best performance on a wide range of soil conditions, and it will provide the best depth on a wide variety of target sizes. It works particularly well with the supplied 11" DD search coil for general detecting. You should always use Normal in new areas where you are unsure of the soil mineralization and the depth of targets. Medium High Mineralization Salt Coarse (GPX 4000, 4500, 4800) The effect of alkaline salt mineralization is vastly different to the effect of ironstone and mineralized clays. Normal should be tried first in these areas, but if the Threshold is too unstable then better performance will be obtained in Salt-Coarse. Using the Salt-Coarse timing may result in a loss in signal response to smaller targets. However, the response on larger items remains relatively unaffected and ground noise is usually minimized. Medium High Mineralization Salt/Gold (GPX 5000 ONLY) Provides the best signal response on small to large gold in salt saturated and mineralized ground conditions. It should work well on dry inland salt lakes, high salt concentrated goldfields, and mineralized saltwater beaches. Extremely salt saturated soils may still need to be searched with the coil switch in Cancel (using a Double D coil). High Mineralization Fine Gold (GPX 5000 ONLY) Fine Gold is sensitive to smaller targets in highly mineralized ground. It provides a sharper signal on small gold compared to Enhance, and improves the detectability of rough/flaky gold and specimens, while ignoring most hot rock signals and false ground noises. Shallow, highly mineralized ground where gold has been found previously should be re-examined with Fine Gold, and best results will be had by using the optional 8” and 11” Commander Monoloop coils. Note: Sensitive Extra will provide superior results on small gold in milder ground. Very High Mineralization Enhance (GPX 4500, 4800, Improved in GPX 5000) Runs quietly in most heavily mineralized, variable and "hot rock" infested grounds using a monoloop coil. It is more sensitive and detects deeper than Sensitive Smooth but can be slightly more affected by severe ground mineralization. Severe Mineralization Sensitive Smooth (GPX 4000, 4500, 5000) Sensitive Smooth is optimized for an improved response on smaller, shallow nuggets in severe soils. There is a loss of depth on bigger targets; so you should not use this setting when seeking out large, deep nuggets. Sensitive Smooth is best suited for use with monoloop coils in difficult soils. It eliminates most false signals from hot rocks, and ground mineralization, whilst retaining excellent sensitivity to small targets. The example below shows three common timings and where they should be used. It also highlights why using the wrong timing for the conditions can result in missed targets. Minelab Mineralization and Timing Example The following chart illustrates the procedure for finding the correct timing for each situation. In general, always start with the Normal timing. If the detector is stable and quiet, try timings on the left - Sensitive Extra, Sharp, or in rare cases, Coin/Relic. If ground noise or hot rocks present problems in Normal, then try timings on the right - Fine Gold, Enhance, or Sensitive Smooth. Salt settings should generally only be used on alkali ground (salt flats) or salt water beaches, but may have applications in other ground. The goal is always to find the most powerful setting that allows for stable operation. Each timing can be adjusted within certain parameters, primarily through the use of the Gain and Stabilizer settings. Adjusting for a lower Gain, for example, may be preferable to going to a less powerful timing. Minelab GPX Timing Selection Chart - Click on image for larger version Finally, each timing may work best with a certain type of coil (DD or Mono) and the timings have varying level of resistance to Electro Magnetic Interference (EMI). The matrix below attempts to show which timings offers which benefits and strengths/weaknesses. Minelab Timing Coil EMI Matrix - Click on image for larger version The simple chart below can be printed out and taped or glued on your detector shaft as a reminder in the field as to which timing may be best. Click on the image to download a large version. Minelab Timing Decal - Click on image for larger version Minelab GPX 4800/5000 Instruction Manual Download Here Minelab GPX Series Quick Start Guide Download Here Beginner's Guide to Tuning the Minelab GPX 5000 Minelab GPX 4800/5000 Product Brochure Download Here Minelab Commander Coil Brochure Download Here Minelab GPX 4500 Instruction Manual Download Here Minelab GPX 4000 Instruction Manual Download Here ~ Steve Herschbach Copyright © 2011 Herschbach Enterprises
 -
Waterproof Headphones Ukraine
Steve Herschbach replied to Treasure_Adventure's topic in Minelab Equinox Forum
Check out tsnamiscotts post just a few posts before yours. -
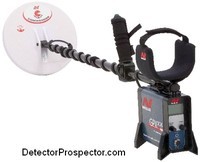
 I've been a longtime fan of the White's Goldmaster series, but I was really annoyed when White's put the machine into the XLT packaging. I like to keep weight off my arm, but more importantly I work some very steep hills where putting a machine down can be a problem. The unit will simply roll to the bottom of the hill. I also work in muddy conditions a lot and so I do not want to set my detector down in the soup. A little history. Prior to 1990 the White's Goldmaster was a simple T/R detector housed in a blue aluminum box. Those old obsolete models should be avoided by all but collectors because they could not ground balance. Around 1990 White's introduced the Goldmaster II, which featured a new black paint scheme. These black box models since 1990 are all quite capable 50 kHz nugget hunting detectors. The Goldmaster II used a S rod design that allowed the control box to be mounted in several locations on the rod, plus removed completely and either chest or hip mounted. This design was popular with prospectors. I still remember clearly the huge fuss when White's introduced the Goldmaster 4/B around 1998 and put it in the same one piece control box as was used in White's coin detecting models. This was no doubt partly a cost saving measure but also to accommodate a much larger circuit board as the Goldmaster series made the move from analog to digital. The Goldmaster 4/B was an hybrid analog/digital design that preceded the microprocessor based White's Goldmaster GMT. The dealer network raised a fuss and Jimmy Sierra in particular was incensed by the design change. He prevailed on White's to make a run of "chest mount only" models that basically took the handle and pod assembly and stuck it in the middle of the control box. A cumbersome design if there ever was one. It was also basically kept secret from anyone but Jimmy's dealers and so the chest mount only model is a rare Goldmaster indeed. This move coincided with Fisher introducing the Gold Bug 2, which at 71 kHz was hotter than the 50 kHz Goldmasters, plus had the hip and chest mount options with an even more compact design than the Goldmasters. Goldmaster sales plummeted and the Gold Bug 2 took over. The very unpopular Goldmaster 4/B was replaced by the 48 kHz GMT, a totally new microprocessor design. White's Goldmaster 3 (GM3) - last analog model, last with removeable control box Starting about 1990 the sequence was: White's Goldmaster II (1990) - new 50 kHz model, on S rod with removeable control box. White's Goldmaster V/SAT (1994) - added Variable Self Adjusting Threshold (V/SAT) control, on S rod with removeable control box. White's Goldmaster 3 (1996) - Added frequency offset, boost options, three piece rod standard (optional in previous two piece models), on S rod with removeable control box. New DD coil replaces concentric coil used on previous models. Widely considered the best analog Goldmaster. White's Goldmaster 4/B (1998) - Added meter on a pod for iron discrimination, non-removable coin detecting type box design. White's GMT (2000) - Completely new 48 kHz microprocessor model, non-removable coin detecting type box design. White's Goldmaster 4/B with the new "coin detecting" control box design I really wanted a new White's GMT. The automatic ground balance and LCD iron readout are very good. So I thought about what I might do to get what I wanted. A GMT to chest or hip mount. White's makes a chest mount version, but it has the darn handle/pod sticking out the front where it blocks vision and is prone to getting hit while digging. And for hip mounting it bumps into things. White's Jimmy Sierra GMT chest mount I went ahead and bought the chest mount version, but the following conversion can be applied to the standard model as well. I went with the Jimmy Sierra special chest mount model as a starting place since the rod assembly is already a separate item. 2011 Update: White's does not make their chest mount version any longer. First step... take it apart! Here is the unit in parts, with a close up of the main board: White's GMT components disassembled White's GMT circuit board White's GMT pod contents The main board is clearly marked with what plugs where. Nice for reassembly. I took the pod apart, and ground the touchpad mounting down to just the pad itself as it was glued on too well to pry off. The LCD plugs into a mini circuit board in the pod, along with the trigger switch. Then a long cable runs through the handle and to a plug in the center of the main board. I wanted to chest mount the unit with the coil cable and headphones running out the right side. This meant the LCD would have to be mounted on one side. That particular side does not have enough room to flush mount the LCD into the case, so I decided to cut a hole in that side and mount the LCD on the outside of the case. This meant the mini circuit board would have to be mounted inside the case lid where the speaker resides. I am a headphones guy anyway, so out came the speaker. You could flush mount the LCD on the other side and retain the speaker, but then the coil cable will exit on the left. Good for lefties, however! You might even be able to do it the way I did and keep the speaker, but my fingers are not the most adept, and I figured I could use the extra work room. Mounting the pod circuit board The picture above shows the positioning of the mini circuit board inside the lid. The white ribbon cable runs out to the LCD. The green ribbon cable runs out through a hole I cut in the lid to the touchpad. I glued the touchpad on the outside of the case. More on that in a minute. The wires run to the new trigger switch location. I mounted the board on short spacer posts. Mounting the touchpad and LCD display The picture above shows you where we are heading. The LCD is mounted outside the case. The LCD was mounted using the hardware that originally mounted it to the mini circuit board. A D-Ring has been repositioned to the left. The touchpad is glued down partially covering the speaker holes. The rectangular hole in the case was left after removing the handle. You can see the new trigger switch location. I'm going to replace this switch with one of the rubber capped types. The touchpad covered the battery check/audio boost switch, so it was relocated to a position below the trigger switch. I had to lengthen the wires to do this, the only soldering involved. As I look down at the LCD, I can easily operate the switches and pad with my left hand. The switches are set so I can push down on them to activate the battery check or iron id accumulate mode. Relocated touchpad I cut an aluminum faceplate to cover all the leftover holes and glued it in place. Painted it all black so it would look halfway ok. If I had it to do over again, I would make the faceplate at the same time as I was mounting the touchpad. It was hard to make the faceplate after the fact, and I had to dismount and remount the mini circuit board to drill the bolts mounting it through the faceplate. Better to glue down the faceplate and pad as a unit, THEN drill the holes for mounting the mini circuit board. Relocated LCD display This turned out to be the hardest part. I originally figured I would be able to find some kind of clear plastic box to glue over the LCD to protect it. I cruised aisles in Lowes, Kmart, and Fred Meyer for hours looking for any kind of little box I could cut down and use. Finally I decided to make one. I got a piece of oak trim about 3/8" thick and made a bezel. I found a piece of thin plastic and made a window for it, and glued the window onto the bezel. I cut the original LCD stick-on window (the one that says "% probability of iron") down and glued it in place over my window. Finally, I glued the whole assembly over the LCD. Imagine my surprise when I tested it out after the glue had set up and the LCD was missing half its pixels! I was bummed. I took the case apart and wiggled everything. The unit was working fine, just the LCD was acting funny. Finally I pried my carefully placed cover off and looked the LCD over. No obvious problems. It was still just barely readable, however, so I figured the heck with it, and glued the cover back on. After it set up, I tried it again, and now the LCD was almost totally blank! I was using a glue called E6000 that bonds most anything. I decided that somehow the fumes from the glue had somehow "poisoned" the LCD. So I put a lamp on the unit and blew air in it periodically. And behold, the LCD slowly came back to life! Whew!! I cruised the net looking for info on this weird problem, but never did find anything. GMT conversion chest or hip mount So here is the final product. Actually, as you can see, I took these before I did the trim work. The chest mount is just for show. I need to rig up a full harness. But I'll tell you what... I really liked it. Everything right there where I need it, but well out of harms way. The alternative hip mount setup is better than the original by far, but I liked the chest mount so much I will only use it like this where there is no trash to deal with. I'm still looking for that spot! So there you go. This is not for the faint of heart. It was the first time I had done a mod this extensive, and it was a somewhat scary feeling to be tearing a brand new detector apart. Kiss that warranty goodbye! But now I have a unit I really like that will work well on steep slopes and other odd spots. Not to mention give my arm a break. The GMT is very well balanced, but every ounce counts when you are at it for 10 or 12 hours at a time. A final note. You could leave the pod on the handle and route a longer cable from it up the coil cable and to the control box. But I wanted the pod off the handle entirely, and adding more cables seems like a way to ask for more problems down the road. I know another guy that has now done this mod after seeing mine, and a third is at work on his. Maybe some people going to all this effort will tell White's that their old box design was better. Postscript: After the above post was made I took my new White's GMT chest mount to Ganes Creek, Alaska for a real world nugget hunt. The unit worked as I hoped and then some. Here is a picture of it and the 1.89 ounce gold nugget it found for me! 1.89 Oz nugget found with White's GMT chest mount conversion ~ Steve Herschbach Copyright © 2002 Herschbach Enterprises
 -
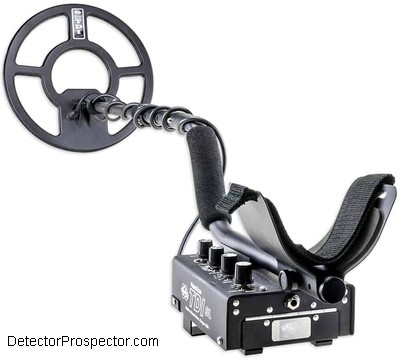 From original forum post 5/27/2008 updated 2/14/2010, 1/13/2013 and 1/3/2014 The White’s PulseScan TDI is a ground balancing pulse induction (GBPI) metal detector and as a rule these detectors are considered “dig-it-all” type detectors. The TDI, however, has a number of manual controls that can be adjusted to allow for a degree of discrimination not normally found in PI units. Most normal pulse induction (PI) detectors have a monotone audio response on targets. In other words, the soft threshold tone simply increases in volume in relation to the target strength. All target sound more or less the same, the only difference being a stringer or weaker audio response. This makes things real simple - you just dig everything. Ground balancing pulse induction, or GBPI detectors, employ a method of ground rejection that in current models has an audio side effect. Tones are produced in relation to the current ground balance setting. In the case of the Garrett and Minelab models, a dual tone is produced by a single target. Either a high-low tone or a low-high tone, depending on the target and how it relates to the current ground balance setting. The White's TDI has a simpler response on a single target, either a high tone, or a low tone. The targets and the tones they produce fall into two broad categories. In general one category has low conductive items, like aluminum, US nickels, most gold, and small ferrous trash. On the TDI these items produce a high tone. The other category has highly conductive items including clad, copper, and silver coins, silver rings, some large gold rings and very large gold nuggets, and large ferrous items. The ground balance varies depending on the ground itself but usually is around the same as zinc pennies, and therefore these may read in either category. Other settings, such as the pulse delay on the TDI, can also cause items to vary. The following photo shows how the two target categories break down digging around school yard playground equipment. Coins found with GBPI detector Left side high tone targets, right side low tone targets As you can see in the photo the vast majority of targets produce a high tone response. What is lacking at this location is large nails. Large nails will give a low tone response and so would end up with the coins on the right. Still, by digging low tones only, the vast majority of trash targets can be passed up and excellent results had on deep copper and silver coins. The following photo shows what might result digging low tones only in a park setting. Coins and nails detected with PI Low tone only targets The icing on the cake with the TDI is the Target Conductivity switch. Normally you would have to listen to all the tones the detector produces, the vast majority of them being high tone, to pick out the much rarer low tones that would possibly indicate a deep coin. The Target Conductivity switch allows one response or the other to be suppressed, and by selecting for high conductive low tones only, the TDI operates very quietly in very trashy environments. This value of this feature cannot be overstated, and it makes the TDI a secret weapon for pulling coins out of extremely mineralized ground where VLF detectors would fail. The TDI can go even farther, because unlike the Garrett and Minelab models it features a manual ground balance. This means that in milder ground conditions the ground balance control can be purposefully misadjusted to directly affect target tone responses. This method was passed on to through comment from Reg Sniff and George Kinsey so credit goes to them for turning me on to this. The method involves purposefully misadjusting certain controls to get results and I’m not saying these are the best settings per se. I would encourage more experimentation to see what you can coax from the Whites TDI as I have not seen a detector so prone to experimentation and yet with relatively few controls. This is not a VLF detector and so lessons learned with VLF detectors often do not apply, and in fact could get in the way of understanding the TDI. Have an open mind and experiment. I highly recommend the use of a PI pinpointer with the Whites TDI. You need some serious pinpointing power. The DetectorPro Uniprobe units are very good, but you may need to switch the TDI off when employing the Uniprobe pinpointer if the TDI interferes with the Uniprobe. Coiltek makes a 1” probe with switch box that can use the TDI itself as the pinpointer as another option, along with the more common self-contained pinpointers like the Garrett Pro-Pointer. With the unit powered off, set the TDI Gain at 12, Pulse Delay at 10uS, Ground Balance knob at 1.5, GEB switch On, Target Conductivity On, and then turn the unit Power On. Set for a faint Threshold. If you are getting any interference (uneven threshold, warbles, and funny noises) slowly run the Frequency knob through its range seeking the quietest setting. Then flip the Target Conductivity switch to High. The threshold should go extremely smooth. If you get spikes or noises breaking through the normally rock solid threshold you may need to reduce the Gain. But usually at this point the threshold will be so smooth and solid you will find you can reduce it so low as to be barely heard. Now try waving various steel items and coins a few inches under the coil and note the responses. You will see that most steel and iron, aluminum, and bottle caps will not signal. Beyond that, there are three basic responses. First, hold a coin 6-8 inches from the coil. Note the soft, sweet tone, woo, woo. Listen to it over and over, as this is your deep coin signal. Now run a coin or larger steel item within 1 inch of the coil. You will get an overload signal, a strong baaaaawo, baaaaawo. This is the shallow item overload signal. If you are trying a steel or iron item, increase the distance from the coil. Note that at a certain distance it abruptly cuts off. Now try a coin and slowly increase the distance from the coil. It will gradually turn into that sweet coin tone. The way you tell shallow coins from shallow junk is to slowly raise the coil. If the target just cuts off – junk. If it slowly mellows out – dig! OK, let’s go detecting. What follows is the results of an outing using these settings. Listen for that sweet, deep coin sound. Those are the oldies and you main goal. In some hunted out parks this may be about the only signal you get as there are no shallow targets to generate to overload tone. Just go dig coins. Walk around each target and insure it gives a good, clean response from all angles. Be sure and use proper digging practices to leave the ground undamaged. Please protect our hobby. In other places you will get lots of overload signals. If all you care about is deep coins, ignore them. If you want, however, just raise the coil while sweeping, and if the signal cuts off, skip it. If it fades to the deep coin tone, use your pinpointer and there should be a coin within an inch or two of the surface you can just pop out. The Target Conductivity switch can be set too All to investigate questionable targets and to size targets. A pipe buried horizontally will have a high tone its entire length but a low tone at each end. When you walk around these in the High setting you will only hear the low tone and think it is a coin, but they tend to fade in one direction as you walk around them. If the target seems iffy, switch to All and see if you are picking up the end of an elongated iron or steel item. This false positive can occur well off the end of the pipe and so if you dig and nothing is there you may be off the end of a pipe or rebar. This is where a top notch pinpointer comes in handy. The Pulse Delay seems to be most critical, and if you set in much higher than 10uS the ability to ignore iron is lost. But when it is working right the iron rejection is amazing. Try walking up to a garbage can or other large steel item. You will get no signal until you get close enough to overload the unit. Not only does the unit ignore iron, but nearly all aluminum and bottle caps. The only ferrous target I found was a very rusted bottle opener buried vertically in the ground. If flat it is rejected but the TDI does pick it up if held vertically. I never did dig a bottle cap. I did get two aluminum screw tops that gave the shallow overload and that then sounded like shallow coin when the coil was raised. I got one older aluminum screw cap that was not deep or shallow so I checked it out. I also got positives on two copper wires, two chunks of broken heavy aluminum, an aluminum grommet, and a copper screw cap. Coins found with White's TDI Oh yeah, I found 39 coins. Including three silver dimes and three wheaties so they were not all recent drops. That is 39 coins to 10 trash targets using a PI detector in a turf setting. That is a four to one ratio, and when hunting the deepest targets no worse than a VLF. Better yet, the targets that fooled me were not exactly bad targets by deep detecting standards. There was a time I would have said this was impossible with a pulse induction metal detector. I really did feel most of the junk was iffy but I wanted to check as I am learning. Coins sound oh so sweet and when I’m 100% sure it is a coin it almost always is. What else to say? The GB control is in effect the discrimination control. It is all about setting the Pulse Delay, the GB control, and the Target Conductivity switch to get the best balance of depth and iron rejection. The iron rejection tends to be best at low GB settings, and in high mineral settings best depth is at high GB control settings. If you have no clue what I’m trying to say, you are not ready for the Whites Pulsescan TDI. In high mineral conditions you are trading max depth for max iron rejection. You have to set the unit for the best balance for your conditions. But if you get it right, hold on. This detector is like no PI you've ever used. I have been able to run the Gain very high. I’m sure not everyone can based on where they are. So experiment, experiment, experiment! What about coils? Things might change depending on the coil you use. To summarize the TDI can find coins using two different methods. The simplest is to just run the detector tuned for best depth and dig low tones only. In high mineral ground this will produce coins VLF detectors have been unable to reach while passing on most common trash. The second method makes the TDI into a very effective coin detector, but the misadjustment of the ground balance ends up giving up the extra depth attained with the first method. Still, it does something no PI has ever been able to do before, and that is to find coins with nearly as much efficiency as a VLF detector. I do not want to give the impression I am pushing the TDI as a coin detector. If you want a detector strictly for coin detecting I suggest you get one to do just that. The real point of this article is to highlight that the TDI is a unique detector prone to experimentation. It is a machine for more serious detectorists willing to think outside the box. For those willing to dig some junk and having locations that favor the method, digging low tone targets will find deep coins missed by the best VLF detectors. The main use for the TDI is still nugget, beach, and relic detecting, make no mistake about that. But if you have a TDI , it can pay to experiment with it as there is really nothing else quite like it on the market. Thanks to Eric Foster and White's Electronics. White's TDI Information Page ~ Steve Herschbach Copyright © 2008 Herschbach Enterprises
 -
Equinox Waterproof Headphones From Hungary
Steve Herschbach replied to Cabo Chris's topic in Minelab Equinox Forum
Well, I am sorry to hear that. The Minelab set is the safe bet but it also sets a benchmark to beat, and when push comes to shove it seems it's hard to find third parties doing any better. -
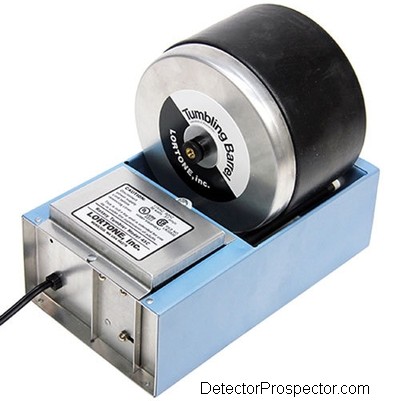 Polishing gives rocks a permanent "wet" look. Choose material that looks good when wetted. Rocks that are unimpressive when previewed wet will not look any better once polished. As they say in the computer world, "garbage-in, garbage-out". Beach or gravel bar stones are good beginners material. These stones are already rounded and usually represent relatively hard rocks. Try to avoid rocks with deep pits or crevices. Rocks with very deep pits and crevices should normally be split along the depression. Extremely rough material can also be pre-shaped on a grinding wheel. Avoid mixing hard and soft stones together. This is very important when tumbling gemstones. Some stones, like obsidian, should be tumbled only with other obsidian. Obsidian also is prone to chipping, and so may need to be cushioned with a filler like plastic pellets or walnut shells. A tumbler should be 2/3 to 3/4 full to get proper tumbling action. Buy a tumbler that will match the amount of material you are likely to have available to tumble, or use filler rock to get to the proper volume. The initial tumbling stage with coarse grit is where the rock is smoothed to its final form. Subsequent steps simply polish the surface of the stone. Keep tumbling stones with coarse grit until they reach the desired degree of smoothness. This may add extra weeks to the tumbling process, particularly when starting with rough, broken material. Harder material will also take extra time. The tumbler should be cleaned of ground waste periodically. Extra coarse grit should be added as it is wore out. Continue this process until the rocks are in the final form you desire. I like to run my stones until they are perfectly smooth. Then proceed to the fine grit and polish stages. Small rock tumbler with accessory items I use two tumblers; a 12 lb. and a 3 lb. unit. The 12-pound tumbler runs exclusively with coarse grit. I periodically clean the barrel and remove stones that have reached my desired goal. I am looking for perfect smoothness with absolutely no pitting. I remove stones that have reached this state and put them in the 3 pound barrel. I add extra rock to the 12-pound unit to make us for loss, and add extra grit as needed. I usually buy my coarse grit in 5 pound containers, and use much more of it than the fine grit or polish. When I get enough perfect stones to fill the 3-pound tumbler 2/3 to 3/4 full, I proceed to the fine grit and polish stages with these stones separately. When proceeding to the polish stage, it is extremely important that every single particle of grit be removed from the material. This is relatively easy with perfectly smoothed stones, but material that has pitting or crevices should be run through repeated short tumble and rinse cycles to dislodge any remaining grit. Clean the barrel carefully for the same reason. Even a few particles of grit making it into your tumbler during the polish stage will prevent a good polish. My 12-pound tumbler will run for many weeks, sometimes months, with stones only removed when they reach the desired state of "perfection". Starting with hammer broken, hard material such as agate can cause this process to be a long one, requiring much patience. Pre-rounding with a grinder can speed the process considerably. The final run with the 3-pound tumbler, however, only takes 1-2 weeks. My final product consists of beautifully polished stones with a glass smooth finish. Have fun! Cleaning Coins With A Rock Tumbler ~ Steve Herschbach Copyright © 2000 Herschbach Enterprises
 -
 The two best-selling professional metal detectors in Alaska over the last twenty years are probably the White’s Electronics GMT and White’s Electronics MXT. This is because a set of local circumstances favored these two detectors. These two machines are based on the same circuitry, but have very different design goals and therefore features which determine which might be the best choice. Since the sole purpose of the GMT is prospecting, it operates at a high 48 kHz for extreme sensitivity to small metal items... hopefully gold nuggets. It is not a "gold-only" machine in that it picks up all metals. The "gold-only" detector has yet to be invented. It does however have a very efficient system for separating ferrous (iron or steel) items from non-ferrous items (gold, copper, silver, lead, aluminum, etc.) In theory the GMT could be used for other types of detecting, but it has a couple serious problems. First is the fact that it is so sensitive to small metal! Any attempt to use it for typical coin detecting would leave a detectorist quickly frustrated. Imagine a foil gum wrapper sucked into a lawn mower, shredded, and spread about. Parks and other areas popular with coin hunters are full of tiny aluminum trash. Every one of these items will sing out loudly on the GMT. Coin detectors are purposely designed not to pick up these tiny non-ferrous items as 99% of the time they are trash. The GMT also is very sensitive to wet salt sand, and so is useless for most beach detecting. It would not be impossible to use the GMT for other detecting tasks, but in general it really should not be considered for anything other than nugget detecting. The MXT was built using the GMT circuitry. An advanced LCD readout discrimination system similar to that on top-of-the-line coin detectors was added. The frequency was lowered to 14.7 kHz to increase the sensitivity to coin type targets and to moderate the problem of being too sensitive to tiny trash. But the frequency is still well above that of standard coin detectors which work around 6 kHz so the MXT retains much of the GMT ability to hit gold targets. The MXT has three distinct modes: Coin & Jewelry, Relic, and Prospecting. Each mode dramatically changes both the sounds and the LCD readouts generated by different targets. The Coin & Jewelry mode is very much like any standard coin detector, but with a better than normal sensitivity to gold coins and gold jewelry. The Relic mode is a rather unique dual tone mode that operates in both all-metal and discriminate modes at the same time. That alone is subject for another article! The Prospecting mode in effect turns the detector into a GMT, but one that runs at a lower frequency and that lacks a manual ground balance. And the MXT has a special Salt setting to allow it to work on those beaches. White's GMT versus White's MXT The GMT is admittedly superior when it comes to picking up small gold. It can hit specks weighing less than 1/10th of a grain (480 grains per Troy ounce) while the MXT will need nuggets weighing 2-3 grains to get a decent signal. But on the flip side, the MXT may very well be the superior unit for large nugget detecting. The lower frequency actually is smoother in mineralized ground, and in particular does not produce as many weak variations in the threshold in mixed cobbles as the GMT. The drawback of higher frequencies is that while small gold produces a sharper response, so do hot rocks. The manual ground balance on the GMT is very helpful for hitting those tiniest specks, but less useful for larger gold. If larger gold nuggets are the goal, then the MXT is every bit equal, if not better than the GMT in overall performance due to the smoother ground handling capability. It’s not that the MXT goes deeper, it just has less issues with hot rocks while still being able to hit those larger nuggets. In milder ground the GMT reigns supreme. For Alaska those wanting to go places like Crow Creek or Mills Creek and have a chance of getting gold, any gold at all, will be best served by the GMT, especially if paired with the little 4” x 6” Shooter coil. It will get the gold in these heavily hunted areas, and will hit gold the MXT will miss. But if versatility is important, or chasing large gold nuggets in tailing piles at Ganes Creek is the goal, the MXT is the way to go in my opinion. It is simply one of the best all-around detectors I have ever used. The White’s MXT Engineering Guide is full of interesting information on the development of the GMT and MXT and provides a rare look at what goes on behind the scenes at a metal detector company. ~ Steve Herschbach Copyright © 2010 Herschbach Enterprises
 -
Beach Hunting And The Overload Symbol
Steve Herschbach replied to cdv's topic in Minelab Equinox Forum
The overload symbol is not about being over large targets per se. It senses when there is too much signal blowback from saltwater or black sand or both. When a detectors "sees" too much salt or too much black sand (or both) it will go totally blind unless the transmit signal is reduced. Going into overload is not reducing depth - it is giving you depth when the machine would otherwise be non-functional. The overload will not go away until the conditions creating it go away. The only time I have seen the overload signal is when crossing areas on a beach obviously loaded with magnetite. The overload symbol comes on and the detector keeps running fine, then the symbol goes away once past the magnetite patch. Contact Minelab Service directly if you think you have a defective detector. They will not respond here even if they see this (at least I doubt it). Difficult Areas – Black SandSome beaches contain black sand, which has high natural iron content and is often magnetic. This causes continuous false ferrous detections, making normal beach detecting impossible. Beach Mode automatically senses black sand and reduces the transmit power to ensure that targets can still be detected without overloading occurring. When black sand is sensed, the Beach Overload Indicator will appear on the LCD. When this icon disappears, full transmit power automatically resumes.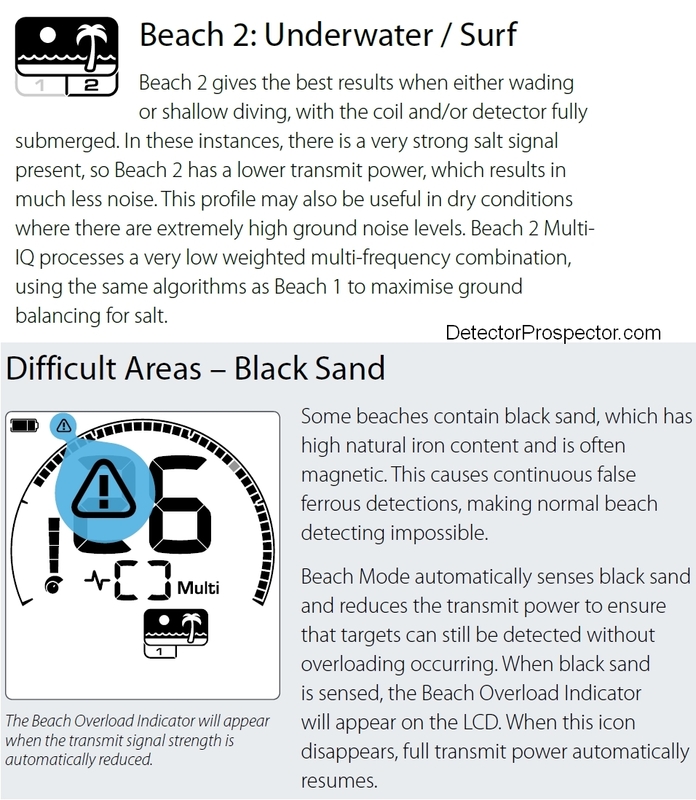
-
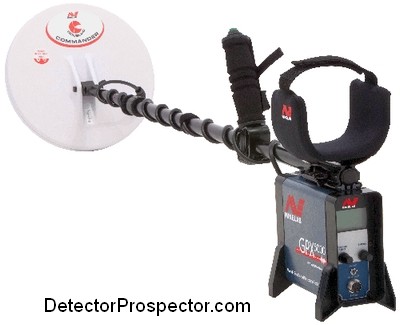 This is not intended to get into every nitty-gritty little detail, but instead is a brief overview for those unfamiliar with the Minelab Pulse Induction (PI) detectors. The units released so far are the SD2000, SD2100 (and V2 variant), SD2200D (and V2 variant), GP Extreme, GP 3000, GP 3500, GPX 4000, GPX 4500, GPX 4800, and GPX 5000. The Minelab SD2000 was the first of the series, a genuine breakthrough in metal detector technology. It is the basis on which all the other models were developed. It was the first true prospecting pulse induction metal detector and it had a major impact in the Australian goldfields for which it was designed. The main drawback was a definite lack of sensitivity to nuggets weighing under a gram or two. The SD2100 and SD2100v2 are fairly simple manual ground balance units that refined the SD2000. The frequency could be manually adjusted to avoid interference from outside sources, such as a nearby detector. The SD2200d and SD2200v2 offer automatic ground balancing or a fixed/locked ground balance. They also introduced an iron disc feature of dubious reliability, audio boost, and automatic frequency offset. The GP Extreme offered enhanced sensitivity to small gold that was lacking in the earlier units. Much of this came about from Minelabs patented dual voltage technology (DVT) which was introduced with the GP Extreme and is featured on all subsequent models. There were quality control issues with the unit however and so performance varied on GP Extreme detectors. The GP 3000 is essentially just a refined GP Extreme and the GP 3000 performance is more consistent between units than was seen in the GP Extreme. Threshold smoothness was improved to be less erratic. The GP 3500 offered manual frequency tuning to help eliminate electrical interference and three tracking speeds for the automatic ground balance system. A button was added to the handle to allow for easy switching between the manual and automatic ground balance modes. The GP 3500 was the last of the analog models in the series. Where it all started - the Minelab SD2000 "Super Detector" The GPX-4000 was a break from the past, going to a digital control system. This allows for more adjustments but also more complexity. The GPX models can attain smooth thresholds on par with the best VLF units. A major advance is in the form of various optional "timings" that allow the detector to be customized for various types of ground mineralization and hot rocks that might be encountered. The earlier SD and GP models used a sealed lead acid battery with a 4 pin battery cable. GPX models feature a Li-Ion battery with 5 pin cable that is not compatible with the earlier models. The GPX-4500 is a basically a refined 4000. A pattern develops by now in that Minelab tends to make a major model revision, then follow up with another model that is just a refinement of the earlier unit. Model releases come about every two years with major changes about every four years. The Minelab GPX 4500 was extremely popular and the next model release was delayed to the point that two models came out. The Minelab 4800 was intended as the next release, but before it hit the market developer Bruce Candy came up with a couple new refinements different enough to warrant yet another model, the GPX 5000. The 4800 therefore became a sort of "non-model" as most dealers and users focused on the GPX 5000 as the new top-of-the line detector. The main change is a wealth of new timings allowing the GPX 5000 to get optimum performance in many varied ground conditions. The new Fine Gold timing in particular offers the ability to pull gold out of ironstone hot rocks that previous models missed. Minelab SD2200v2 pulse induction (PI) metal detector I disagree with those that say you can get more depth on large gold from earlier SD units than from the latest models. Having used all the models the largest improvement I've seen over time is vast improvements in threshold stability and the ability to adjust for more varied circumstances. It may be that in a particular location an SD will do just as well as a GPX. But not where I hunt. My SD units all had the famous Minelab "warble" whereby the threshold constantly wavered. This meant that small nuggets or very deep larger nuggets had to give enough of a signal to break through the waver. A far cry from listening to a rock solid threshold for the faintest whisper or "break" in the threshold. You can get just such a rock solid threshold with the GPX units. It is not that the GPX goes deeper, it is that you can hear nuggets you would miss with an SD as they could not be discerned as clear signals. More important on my ground was that my SD units could not tune out the intense magnetic basalt cobbles we have to contend with. The cobbles give a faint gold hit. So you either dug them all (impossible) or ignored the faint signals. But some of them were small nuggets or very deep larger nuggets. When the GPX arrived at my property I saw so many more small nuggets and deeper large nuggets come out of areas well hunted to the point of being "hunted out" that it was obvious the GPX had a significant edge. I'm not talking a nugget or two - I'm talking pounds of gold. The new GPX timings can allow for a clean solid threshold in areas where that was impossible with earlier units. Those that do not hunt such locations do not see the value in a GPX. Those that do know what I'm talking about. There is no way I'd go back to using an earlier model than the GPX-5000 by choice. Minelab GPX 5000 - pulse induction metal detector technology refined It should be noted is there are quite a few people modifying older SD units to get better performance on par with later units, and I'll admit these modified units are a wild card. Some swear by them and I'm not going to doubt them. But modifying older detectors is beyond where most people want to go so I think there is little doubt these units will only see use by a certain hardcore group of knowledgeable detectorists. The GPX 5000 has refined the platform to the point where realistically it is hard to think of ways the unit can be improved from a detecting standpoint. The only obvious deficiency is the ferrous discrimination system. While it does have its uses the ferrous discrimination on the Minelab PI detectors is notoriously unreliable and only to be used when absolutely necessary. Its use will inevitably cause gold nuggets to be left in the ground, misidentified as iron or steel. This area has been so resistant to improvement, however, that I look more for advances in the physical package as my most desired area for improvement. The general control box and rod design with backpack mounted battery has not changed since the original SD2000. Development of a GPX type detector housed in a package more reminiscent of the new Minelab CTX 3030 would be a major advance in the usefulness of the lineup with no actual change in performance aspects of the electronics. It has been well over two years since the GPX 5000 was released, and so I do not think it will be too long before we see what Minelab has in store next for nugget hunters. ~ Steve Herschbach Copyright © 2013 Herschbach Enterprises P.S. When I wrote this article in 2013 I had no idea that two more years would pass before we saw what Minelab had up next - the Minelab GPZ 7000. It turned out that Minelab also thought the GPX 5000 had taken the pulse induction as far as it could go, so the GPZ 7000 features new ZVT technology. The biggest surprise for me however was that Minelab may have paid attention to my "GPX in CTX housing" comment above. That may or may not make some people happy! And the GPX 5000? Still in production as the top-of-the-line PI from Minelab!
 -
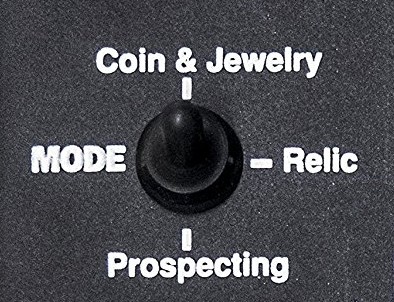 Modern induction balance (VLF) detectors usually can operate in two basic modes. A true detect everything all metal mode or a discrimination mode. Discrimination modes use various filtering methods to help separate desired targets from the trash. The filtering takes away from overall depth and the target identification gets less reliable with depth. In nearly all cases a detector operating in a pure all metal mode will find targets deeper than a unit running in a discrimination mode. It is possible to take a detector running in discrimination mode and set it to accept all targets. You are now running with zero discrimination, and the detector now sounds off on all targets. The problem is that some detector manufacturers are labeling this zero discrimination mode as an "all metal" mode since all metals are being detected. Unfortunately, you have not really turned off the discrimination. A true all metal mode employs no filtering at all, it directly reports a target. In zero discrimination the target is still being filtered, but you are telling the machine to report all filtered targets as good targets. The bad news is you still are losing depth and sensitivity compared to the true all metal modes. Most metal detectors are made for coin detecting, and so most only run in a discrimination mode. You can set them to accept all targets, to run zero discrimination, but these units simply do not have a true all metal mode. All metal detectors designed with serious prospecting in mind have a true all metal mode. The reason is simple. True all metal nearly always hits hard to find targets, either very deep items or very small, better than detectors running in a discrimination mode, even when set to zero discrimination. This is so important to me that I will rarely ever consider purchasing a detector that does not have a true all metal mode. Be careful when buying a new detector that if you want a true all metal mode you do not end up with a detector that really is offering only a zero discrimination mode. One clue is that a detector with a true all metal mode will also have a threshold control to set the audio in the all metal mode to a barely perceptible sound level. Zero discrimination modes are usually what is referred to as "silent search" modes without a threshold sound and therefore no threshold control. It is possible for a detector to run in all metal and discrimination modes at the same time. This is referred to as mixed mode Very cool! I am not sure who first came up with this feature but Nautilus has for a long time offered units that put the all metal signal in one ear of your headphones and the discrimination signal in the other ear. More common are detectors that put the all metal output through the speaker and the discrimination signal on the meter. The White's MXT has the Relic Mode, which is a mixed mode. I wonder how many people use Relic Mode but really do not understand it. Good targets give a high pitched chirp. Junk targets honk depending on where the discrimination knob is set. But there is a third, more subtle audio that indicates a target is there but the detector cannot identify it because it is too deep. This is the all metal signal. The meter will be blank but there will be an audio signal. When nugget detecting, you want to hear these, and dig down until the target id kicks in. I think many people focus so much on the other two audio responses that they ignore the fainter deep all metal signal. It is easy to fall into a habit of just digging only those high pitch targets. Not good. White's V3i Mixed Mode program option The various Fisher F75 and new Gold Bug models have a basic single tone in all metal, but the meter is still active in discrimination mode. So you get the signal, then check the meter. If within range, you will see a target id. If deep, the meter will be blank. It is very similar to the old Compass Gold Scanner Pro, which had a target id meter that functioned while in all metal. The White's V3i has a very powerful programmable stereo mixed mode setting. The DFX also offers mixed mode. The new Garrett AT Gold has a true audio all metal mode while the meter is still working in the discriminate mode. The same thing can be achieved with many detectors by running in all metal mode and then, after a target is acquired, switching over to discriminate mode to check the target. The obvious downside is that this requires lots of switching back and forth, and a mixed mode detector eliminates the switching. The key to mixed mode is simple. Those targets in a good location that are so deep you get no indication on the disc channel are the ones you really want to think about. If the area has produced good finds but is now near to being worked out, these deep signals are the ones anyone running in a normal discrimination mode is going to totally miss. Sure, it could be trash. But really deep targets are often the best, and so digging some of these on occasion can produce some really good finds. I have found from my personal experience that detectors often run smoother and targets are easier to hear in all metal mode. I tend to prefer a detector that has an audio all metal mode coupled with a metered discrimination mode. I just listen for the target, and once I hear it I stop and analyze it with the meter. When in doubt, dig it. Some people prefer to dig only targets that read as probable good targets as they do not like digging junk. I tend to dig anything unless it is almost sure to be junk. In other words, I dig the iffy targets. That means I dig more trash but it also means I make finds others miss. It does depend on how patient I am feeling though, and some days I will just dig those really good targets. Those are getting harder to find these days. The only place mixed mode does not work well is in very trashy locations, especially the units that generate multiple tones. It just gets real noisy. But for many experienced detectorists mixed mode is a sort of secret weapon. Now you know why! ~ Steve Herschbach Copyright © 2010 Herschbach Enterprises
 -
 Here is a question I received via email, with personal references removed. I prefer to answer these on the forum so everyone gets the benefit of the answer plus others can offer their opinions also. "I am new to metal detecting and, your site here has really helped me out. I have a couple questions that maybe you can help me out with. What are some of the geologic indicators that you look for to determining where to prospect for nuggets? I try to study some of the geology maps but I could use some further pinpointing. I have also been looking at the National map of Surficial Mineralogy. Using the aster and minsat7 maps what are some of the indicators that may point you to higher gold bearing ground? Any help would be deeply appreciated. Could you point me to some old places where you have found gold? I'm not asking to be shown active patches. Just areas that you feel are worked out. I just want to see what gold bearing ground looks like. This would help me to start to learn the commonalities and characteristics of gold bearing grounds. Still looking for that first nugget! Thanks again for any info you can provide." My method is much simpler than that. I basically look for gold where gold has been found before. Think of it like fishing. If you want to go catch salmon you have two options. You can go to where people have caught salmon before - pretty good odds here. Or you can go where nobody has ever caught a salmon before. Very poor odds! So call it prospecting using history to determine where gold has been found before, and then getting as close as I can to those places. History and proximity. Finally, I may then employ geology to narrow that search in a given area if it turns out the gold is confined to certain rock types. The first place I normally turn as a rough guide to any new location in the U.S. is: Principal Gold Producing Districts Of The United States USGS Professional Paper 610 by A. H. Koschmann and M. H. Bergendahl - A description of the geology, mining history, and production of the major gold-mining districts in 21 states. This 1968 publication obviously lacks the latest production figures but it still is a great overview to where an individual prospector can look for gold in the United States. It is a 283 page pdf download so be patient. Pay particular attention to the listed references in the extensive bibliography for doing further research. You can download this here and find many more useful free books on this website at the Metal Detecting & Prospecting Library Principal Gold Producing Districts of the United States So just for fun let's say I want to go look for gold in New Mexico. The section on New Mexico starts on page 200 and here is a quick summary of the opening paragraphs: "The gold-producing districts of New Mexico are distributed in a northeastward-trending mineral belt of variable width that extends diagonally across the State, from Hidalgo County in the southwest corner to Colfax County along the north-central border. From 1848 through 1965 New Mexico is credited with a gold production of about 2,267,000 ounces; however, several million dollars worth of placer gold was mined prior to 1848. Mining in New Mexico began long before discoveries were made in any of the other Western States (Lindgren and others, 1910, p. 17-19; Jones, 1904, p. 8-20). The copper deposits at Santa Rita were known and mined late in the 18th century, and placer gold mining began as early as 1828 in the Ortiz Mountains south of Santa Fe. In 1839 placer deposits were discovered farther south along the foot of the San Pedro Mountains. The earliest lode mining, except the work at Santa Rita, dates back to 1833 when a gold-quartz vein was worked in the Ortiz Mountains. In 1865 placers and, soon afterward, quartz lodes were found in the White Mountains in Lincoln County; in 1866 placer deposits were discovered at Elizabethtown in Colfax County, and silver-lead deposits were discovered in the Magdalena Range in Socorro County. In 1877 placers and gold-quartz veins were found at Hillsboro, and in 1878 phenomenally rich silver ore was found at Lake Valley in Sierra County. The mineral belt of New Mexico is in mountainous terrain that lies between the Colorado Plateau on the northwest and the Great Plains on the east. It is a zone of crustal disturbance in which the rocks were folded and faulted and intruded by stocks, dikes, and laccoliths of monzonitic rocks. Deposits of copper, lead, zinc, gold, and silver occur locally throughout this belt. Some deposits of copper and gold are Precambrian in age, but most of the ore deposits are associated with Upper Cretaceous or Tertiary intrusive rocks. The gold placers were probably derived from the weathering of these deposits. In later Tertiary time lavas spread out over wide areas of the State, and fissures within these rocks were later mineralized. These fissure veins are rich in gold and silver, but in most places they are relatively poor in base metals. In New Mexico, 17 districts in 13 counties yielded more than 10,000 ounces of gold each through 1957 (fig.19). Figure 19 is a handy map showing us where you want to look in New Mexico and also where looking is probably a waste of time. Click for larger version. Gold mining districts of New Mexico The map shows what the text said "The mineral belt of New Mexico is in mountainous terrain that lies between the Colorado Plateau on the northwest and the Great Plains on the east." Sticking to this area is going to be your best bet. Based just on this map I see two areas of general interest - the central northern area, and the southwestern corner of the state. The text mentions that placer deposits were discovered at Elizabethtown in Colfax County, and the map shows that as the Elizabethtown-Baldy mining district. Following along in the text we find this: "The placer deposits along Grouse and Humbug Gulches, tributaries of Moreno Creek, each yielded more than $1 million in placer gold and silver. Another $2 million worth of placer gold and silver was recovered from the valleys of Moreno and Willow Creeks (Anderson, 1957, p. 38-39), and some gold also came from the gravels along Ute Creek. Graton (in Lindgren and others, 1910, p. 93) estimated the placer production of the Elizabethtown-Baldy district prior to 1904 at $2.5 million, and C. W. Henderson (in U. S. Bureau of Mines, 1929, pt. 1, p. 7 40) estimated the production through 1929 at about $3 million (145,138 ounces). The total placer production through 1959 was about 146,980 ounces." The reference material from the passage above is in the back of the book and is where we can get real details. Google is our friend. This stuff used to take me lots of visits to libraries! Anderson, E. C., 1957, The metal resources of New Mexico and their economic features through 1954: New Mexico Bur. Mines and Mineral Resources Bull. 39, 183 p. Lindgren, Waldemar, Graton, L. C., and Gordon, C. H., 1910, The ore deposits of New Mexico: U.S. Geol. Survey Prof. Paper 68, 361 p. Henderson, C. W., 1932, Gold, silver, copper, lead, and zinc in New Mexico: U.S. Bur. Mines, Mineral Resources U.S., 1929, pt. 1, p. 729-759. That is more than enough, but let's also Google placer gold new mexico Lots of great links there, but two jump out: Placer Gold Deposits of New Mexico 1972 USGS Bulletin 1348 by Maureen G. Johnson Placer Gold Deposits in New Mexico by Virginia T. McLemore, New Mexico Bureau of Mines and Mineral Resources May 1994 Notice the source of the last one. Most states with much mining have a state agency involved that can be a good source of information and in this case it is the New Mexico Bureau of Mines and Mineral Resources. That last one is a real gem and contains this passage: "All known placer deposits in New Mexico occur in late Tertiary to Recent rocks and occur as alluvial-fan deposits, bench or terrace gravel deposits, river bars, stream deposits (alluvial deposits), or as residual placers formed directly on top of lode deposits typically derived from Proterozoic, Cretaceous, and Tertiary source rocks (eluvial deposits). During fluvial events, large volumes of sediment containing free gold and other particles are transported and deposited in relatively poorly sorted alluvial and stream deposits. The gold is concentrated by gravity in incised stream valleys and alluvial fans in deeply weathered highlands. Most placer gold deposits in New Mexico are found in streams or arroyos that drain gold-bearing lode deposits, typically as quartz veins. The lode deposits range in age from Proterozoic to Laramide to mid-Tertiary (Oligocene-Miocene) (Table 2). There are some alluvial deposits distal from any obvious source terrains (Table 2). Eluvial deposits are common in many districts; some of the larger deposits are in the Jicarilla district." So now we have a lifetime of ideas on where to go and a basic idea of the geology. And an even better map! Click for larger version. Placer gold deposits of New Mexico Let's look for specific site information. 1. Go to http://westernmininghistory.com/mines 2. Click on New Mexico Mines 3. Click on Colfax County Mines 4. Click on Elizabethtown - Baldy District Here you will find basic site information, references, and a zoomable map with alternate satellite view. An alternate site... 1. Go to https://thediggings.com/usa 2. Click on Browse All States 3. Click on New Mexico 4. Click on Browse All Counties 5. Click on Colfax At this point note you can browse mining claim information or deposit information. Researching mining claims, land ownership, etc. is another topic but here is one source of mining claim location information. For now.... 6. Click on Browse All Deposits or Use The Interactive Map 7. Click on Elizabeth - Baldy A little more detail than the previous site, including this note "SOME FAIRLY COARSE NUGGETS IN WILLOW, UTE, SOUTH PONIL CREEKS, GROUSE AND HAMBURG GULCHES, MORENO RIVER" One more... 1. Go to https://www.mindat.org/loc-3366.html 2. Way down at bottom click on New Mexico 3. Way down at bottom click on Colfax County From here you can dig into all kinds of specific site information but the navigation is a real mess. Have fun! Historic claim staking activity can be a clue. You can get the Big Picture by looking at Mine Claim Activity on Federal Lands for the period 1976 through 2010 OK, that really should have answered your question. As far as places I have been, they are nearly all in Alaska and can be found here Now, I did all the above from scratch with no real prior information on New Mexico in about 2 hours. You can do the same for any state. However, finding where the gold is really is the easy part. The hardest part by far is finding out who controls the land and getting proper permission for access. In Alaska everything is covered by thick ground cover, so opportunities for metal detecting are strictly at creek level, and nearly always claimed. The process there is simple - find out who owns the claims and get permission for access. In most of the western U.S. there is far less or no ground cover, and so getting in the vicinity of and searching around or near mining claims without being on them is a far more viable option than in Alaska. Or you can try and get permission to access the properties. You still need to be able to track down property locations and owners however. For private property I subscribe to and use OnXMaps for my PC, Google Earth, iPad, and iPhone. It quickly maps private property and gives you access to tax roll information about the owners. Tracking down mining claims is easy in the big picture and harder in the details. The Diggings referenced before has interactive claims maps. I subscribe to Minecache for their Google Earth overlay. However, the most comprehensive source with the deepest repository of Land Ownership information is Land Matters. They have online claim mapping with direct links to claims owner information. Note that all online sources have a lag time between the actual staking of a claim on the ground and when it reaches the online systems, if ever. I say if ever because some claims exist solely at the county or state levels and there is no good way to find them short of visiting local recorder's offices or eyeballs on the ground. Prior thread on finding claims information. Finally, I am not the last word on this subject by any means. This is just how I go about it - I hope it helps somebody else. This article was promoted from a thread on the forums. Additional details may be found there via follow up questions and posts. ~ Steve Herschbach Copyright © 2017 Herschbach Enterprises
 -
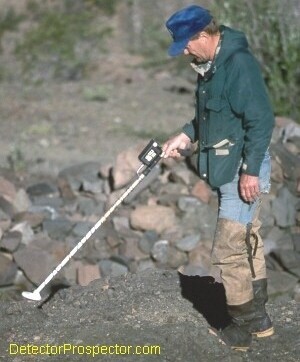 Metal detecting for gold nuggets is perhaps the most difficult type of metal detecting. That is partly because simply having an excellent gold nugget detector does little to insure success. The operator not only needs to be extremely proficient with a capable metal detector, but also needs to have general knowledge about gold prospecting and where gold is likely to be found. This short guide is intended to focus on some of the most important aspects a person should consider when starting out new in the nugget detecting game. Metal detecting for gold nuggets is the gold mining equivalent of big game hunting. Many areas produce fine gold and small flakes, but these areas will not usually prove productive with a metal detector. Only areas with larger gold nuggets will be of interest, and so many locations that are fine for panning and other types of mining will not be worth your time if you plan on going for the big nugget. Researching the area to confirm that large nuggets have been found there in the past will help make your hunt successful. While detecting may limit you to fewer sites and more time between each nugget you find, the fact is that successful detector operators tend to find gold nuggets far larger than the finds of the average recreational miner. Detecting is not nearly as physically demanding as most types of mining, and lends itself well if you enjoy roaming freely rather than working hard at a single site. Steve metal detecting for gold with White's MXT metal detector Here are a few facts and tips to get you started: Today's machines can detect gold weighing under a grain with ease. There are 480 grains per Troy ounce with nuggets under a grain quite literally being pinhead size objects. The depth of detection grows with the size of the target. A one grain nugget may be found at two inches, a match head size nugget at four inches, and a quarter ounce nugget at ten inches. Only the largest nuggets will be found at depths over a foot. Metal detectors will not normally find buried accumulations of fine gold directly. The higher the operating frequency of the detector, the more sensitive it will be to small gold, but with the penalty of also being more sensitive to iron minerals. This can result in more false signaling and difficulty of operation in highly iron mineralized areas. Lower frequency detectors are generally less sensitive to small nuggets, but handle iron ground better. Frequencies on today's nugget detectors range from a low of 3 kHz to a high of 71 kHz. Pulse induction (PI) detectors are a special type of unit that act like they are extremely low frequency detectors. PI detectors main strength is in ignoring the worst ground mineral conditions and finding large gold nuggets at maximum depths though a few models also do well on the smaller gold. Most models feature manual ground balance controls, which allow the machine to be adjusted for the general iron content of the ground. When the ground being searched is relatively homogenous, these controls require minimal adjustments and work well. When the ground being searched has wildly varying iron content or many out of place mineralized stones (referred to as "hot rocks") then these manual controls will have to constantly be adjusted to maintain proper performance. Detectors that feature automatic ground balance will require less adjustment and will have less false ground noise. The best option is to have both manual and automatic ground tuning options in one detector. Nugget detectors find all conductive metals. Most units have the ability to tune out many common iron and steel trash items. Pulse induction detectors are not so good at discriminating out trash items and should generally be considered as "dig-it-all" type detectors.. Any gold located should be treated as an indicator, since rarely will a nugget occur by itself. It is much more likely that more nuggets are nearby, and gold smaller than the detector can locate or beyond its immediate depth of detection is present. Such leads should be followed up with further excavation and sampling with gold pans or other mechanical methods, A metal detectors greatest advantage is that it needs no water, a near-universal requirement for most methods of placer sampling. Use this to your advantage to easily check material that is far from water, such as arid locations or deposits located well uphill from the stream. Large nuggets sing out with a loud signal, but since most targets will be small, train yourself using the smallest detectable nuggets your machine can find. Learn the faint but very distinct sound that small or deeply buried nuggets make. Small aluminum or lead targets can be used as an acceptable substitute for gold. Always use headphones to enhance your ability to hear these faint targets. Coil control is one of the most important aspects of proper metal detector technique. Small items may only be detected at a few inches or fractions of inches. Hovering the coil any appreciable distance over the ground is one of the most common reasons for gold nuggets being missed. The detection field projected underground resembles an inverted cone, with the deepest depth of detection in the center of the coil. At maximum depths only a tiny area is seen by the detector, and so overlapping the sweeps is important when detecting a productive area or "patch". To find gold go where gold is found! Metal detectors can be used to prospect new areas but do not expect to find much gold in areas where gold has never been found. Instead, research and frequent areas with past known production of the kind of gold you want to find. Research is a real key to success. Remember to always obtain permission to detect on mining claims or private property and be aware of any possible restrictions on public lands. Commit yourself to learning your detector. Do not make the investment if you do not plan on spending some time to properly give the method a chance. It will be time profitably spent. The one thing that sets successful detector operators apart from the crowd is their patience and persistence. They enjoy the hunt itself, and consider the day well spent even if no gold is found. Consistent success will only come with practice. I strongly believe there is no one best detector for all conditions. The best detector for each area will depend on how much ground iron is present, how large the gold is, and how much trash is in the area. Operator expertise has by far the greatest effect on success. If you purchase a second detector, having a low frequency model and a high frequency detector will give you more versatility. Identical detectors will also interfere with each other electronically and must be kept far apart, whereas differing models can work side by side. The most important accessory item you can own is a quality set of headphones. A good set will muffle outside noise, enhance the faint sounds most nuggets make, and be comfortable for hours on end. Audio quality is of extreme importance. Insist on trying several headphones with your detector before you buy. The differences can be amazing. Make sure that the headphone has its own volume controls and matches your detector for mono or stereo operation. Several ounces of gold detected at Ganes Creek, Alaska in 2010 by Steve Herschbach Other important accessories include a stout digging tool, such as a stainless steel trowel or a short handle pick. A magnet can easily pick up small steel trash items that may be found and are hard to locate exactly. A plastic scoop or cup is indispensable in helping to separate a small nugget from the soil by scooping and waving the soil over the detector search coil. Snap plastic search coil protectors over the bottom of your search coil to protect it from wear. Carry spare batteries and a plastic bottle for your finds. Check into the possibility of using a belt or chest harness with the detector control box to protect it and remove the extra weight from your arm. Do not overlook accessory search coils. Smaller search coils will be more sensitive to smaller targets while giving up some overall depth. Larger coils will produce more depth of detection on larger targets, but will lose the ability to find some smaller nuggets. Small coils are more popular and will pay off in bedrock areas in particular. They can make a detector of moderate sensitivity perform like a higher frequency detector. Large coils work well for finding oversize nuggets discarded in tailing piles. Coils are not interchangeable between models; only coils made for your machine will work with it. The chart below shows the advantages of using both smaller and larger accessory coils. Coil Size vs Depth Fisher Gold Bug 2 Source - Field Testing the Gold Bug 2 by Gordon Zahara The most important goal is to put yourself on nugget bearing ground. These areas are well documented and can be researched. Check the land ownership and contact claim owners if need be for permission to nugget hunt. If you frequent areas that have not produced coarse gold, do not be surprised at a lack of success. For information and reviews of specific metal detectors see Steve's Guide to Gold Nugget Detectors. A huge resource for questions asked past and present is this website's Metal Detecting & Gold Prospecting Forums. Be responsible! Fill your holes behind you, and remove any small trash you excavate. Proper and responsible practices will keep more areas open to us all. Do not remove gold from mining claims without permission. It is theft and may result in that claim being made off-limits to other nugget hunters. Protect our hobby so we can all continue to enjoy it in the future. Good Luck & Good Hunting! ~ Steve Herschbach Copyright © 2009 Herschbach Enterprises
 -
Makro Gold Kruzer Review
Steve Herschbach replied to Steve Herschbach's topic in Nokta / Makro Metal Detectors
I want to highlight that Makro made a big decision in deciding to go with a concentric coil as a stock coil instead of the DD, although the smaller included coil is a DD design. This goes against the recent trend to DD coils and indicates that Makro understands that concentric coils have advantages when it comes to discerning ferrous from non-ferrous targets. Concentric coils also tend to have simplified responses on small shallow targets which also aids when working with very small surface targets. I still have an early optional concentric coil for my Gold Racer (DD was stock on the Gold Racer). The early coils had issues with coil ears breaking and so I want to try and show here just how much beefier these new coil ears are. My old coil has an off white plastic that makes it obvious in the photo - the new Kruzer coils are closer to pure white. Also, as noted in the review, 1/4 inch has been shaved from the coil thickness, so the new coil is 0.75 inch thick where the old one was 1.0 inch thick. Due to the extra coil ear plastic etc. the coil did not lose a lot of weight, but is a few grams lighter at 384 grams new versus 390 grams for the older coil.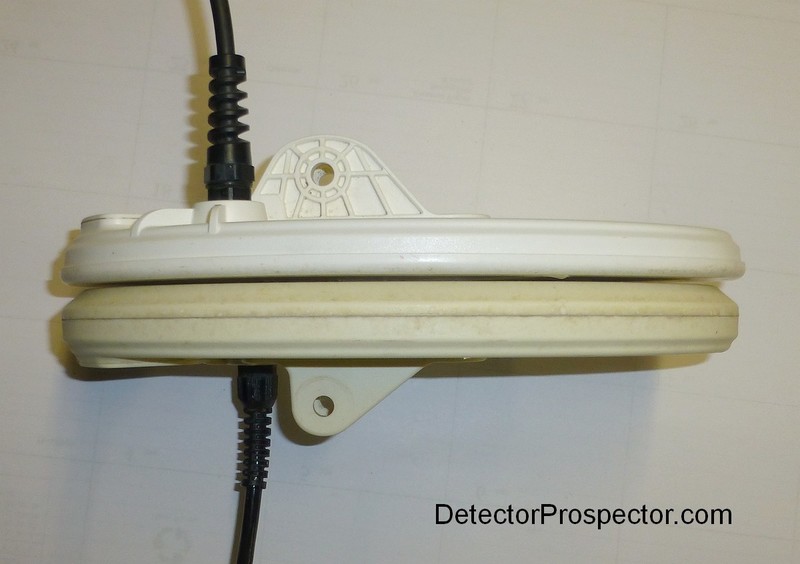
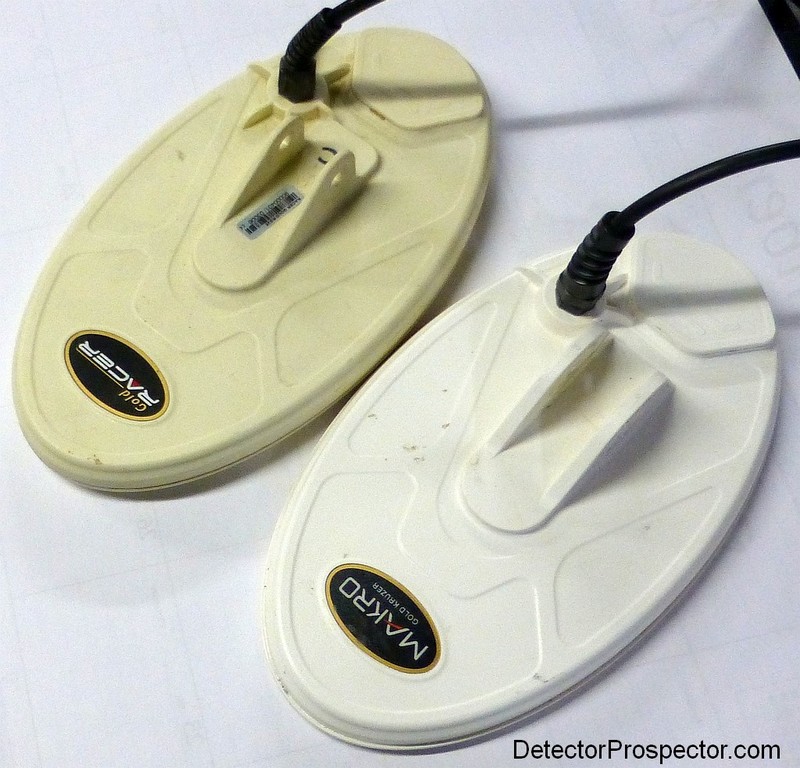
-
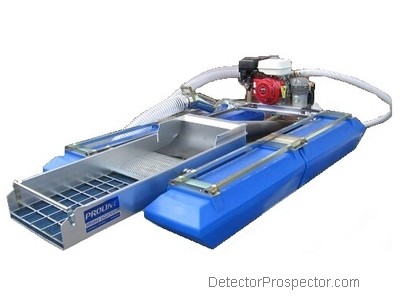 A suction gold dredge is basically an underwater vacuum cleaner. Material is transported from underwater to the surface and run through a sluice box to capture the gold. A sluice box works because gold is 15 times heavier than sand and gravel and so is easily trapped by the riffles and carpet in the sluice box. Dredges almost always need to be mounted on a set of floats. This is because a dredge has just enough power to lift water and gravel to just above the surface of the water. Every inch of vertical lift above the surface of the water robs power/suction from the system. Floats are also needed because there is rarely a nice gravel bar in just the right place to set up a dredge without floats. Manufacturers rate suction dredges by the inside diameter of the main suction hose. So a 5" dredge has a main suction hose with a 5" inside diameter. However, nozzles are used on dredges which restrict the intake to a size smaller than the inside diameter to help prevent clogs. A 5" dredge may have a nozzle opening of 4" for this reason. The volume of material processed is determined by the nozzle opening, not the inside diameter of the hose. Therefore most dredge permits refer to the nozzle size, not the hose size, when imposing rules and restrictions. This is a very important thing to remember when working with permits. What a dredge manufacturer calls a 5" dredge may be a 4" intake nozzle dredge for permitting purposes. Nozzles sizes may be up to 2" smaller than hose sizes. A gold dredge is powered by a motor and pump. A common misperception is that gravel is sucked through the pump. The pump actually pumps only water, which is delivered to a venturi type device (called a power jet or a suction nozzle) which indirectly creates suction in a larger hose. The solves two problems. First, gravel pumps are very expensive, heavy, and high maintenance items. Second, a 2" pump can easily be used with a venturi to create suction in a 4" hose, greatly increasing the volume of material that can be processed. A common suction gold dredge design - 4" surface dredge with air compressor In normal operation a gold dredge is run by an operator at the intake nozzle who directs the nozzle and who captures and discards oversized rocks that would plug the intake hose. A properly set up sluice box does not need tending - all the material sucked up passes over the riffles with no extra attention needed by the operator. The operator can therefore stay at the nozzle and process material until the motor runs out of gas and needs refilling. The sluice box normally need not be cleaned out more than once a day at the end of the day. The riffles and carpet are removed and all material (concentrates) in the box washed into a tub and panned out with a simple gold pan. Larger dredges may employ gold wheels or other devices to aid in the cleanup of the concentrates. The diagram below shows a basic suction dredge flowchart. The foot valve is a one way valve with a screen. Nearly all dredge pumps are not self priming because the mechanism that enable self priming results in a less efficient pump. Simple fire fighting type high pressure, high volume pumps are employed which need to be primed before starting the motor. This explanation from Keene Engineering: "Before starting the engine, the pump must be fully primed. This means the pump must be full of water and all air removed. All jetting pumps provided with our dredges have a mechanical water pump seal. Without the presence of water in the pump, friction could cause a seal to overheat and require replacement. Priming the pump on some of the smaller models is accomplished by thrusting the foot valve back and forth under the surface of the water in a reciprocating motion. This will cause water to become pumped into the foot valve assembly into the pump. A pump is fully primed when water is observed flowing out of the discharge end of the pump. It sometimes may become necessary to hold the discharge hose above the level of the pump to complete the priming operation. The larger dredges that have a rigid foot valve, are easily primed by removing the cap provided on the foot valve and filling, until water overflows. Caution must be exercised to prevent sand from entering the foot valve or intake portion of the pump. Excess amounts of sand could dam age the water pump seal, or pump impeller. It is recommended that the intake portion of the foot valve be placed in a sand free environment underwater." The intake screen prevents large items from entering the pump, but sand can still pass through and cause excessive wear over time. Place the foot valve on rocks, in a bucket underwater, or strap it under the floats to keep it off the bottom and out of sand. Once a system is properly primed the one way valve retains the prime even if the pump is shut off, allowing for easy restarts. If the foot valve is allowed to suck air and the prime is lost, shut off the pump as quickly as possible to prevent damage to the pump seal. It is a good idea to always have a spare pump seal as once one is damaged the dredging operation will be at a standstill until a new one is installed. Water entering the footvalve passes through the pump intake hose and into the pump. It is pumped into the pressure hose and then into the venturi device that creates the suction in the main suction hose. The most common device is the power jet, which is installed in between the sluice box and the main suction hose. A power jet pulls material up and into the sluice box. An alternative is the suction nozzle which installs on the end of the suction hose in place of the suction tip. A suction nozzle pushes material up the suction hose and into the sluice box. Power jets take less hose and are more efficient so therefore very common. However, care must be taken to not suck air into the main suction hose or the system will stop working until all the air is purged from the hose. A suction nozzle keeps water in the system at all times and so is preferred for shallow water use where sucking air into the nozzle is inevitable. Suction nozzles are rarely seen as a stock item except on 1.5" or 2" dredges and must be added as an accessory item on larger dredges. The main suction hose is attached to the intake end of the power jet. It varies from 10 feet long on small dredges to 20 feet or more on larger dredges. A suction tip is fastened into the intake end of the hose which has a reduced opening to help prevent hose clogs. The discharge end of the power jet plugs into a flare. The flare widens the flow of material out to the width of the sluice box, and in doing so slows the speed at which the material enters the sluice box. When the material enters the sluice box it passes over a classifier screen and under a damper. The damper is usually a large sheet of rubber best seen in the photo at the top of this page, that rides on top of the flow of water. It smoothes the water flow and forces any small gold that may be riding on top of the water back into the main flow. The classifier screen also acts to slow the flow of water and create a partial separation of the large rocks from the smaller gold bearing material, which passes through the screen and directly into the first couple riffles. The screen may be a punch plate or a heavy wire mesh with holes varying from 1/4" to 1" in size. The main gold capturing section of the sluice box has riffles over a carpet. The riffles create gold traps which direct the gold into the carpet which captures and holds the gold. Many types of riffle designs exist, the most common being an inverted "L" design referred to as "hungarian riffles". Expanded metal screening of various types are also used in many sluice boxes as a riffle or in conjunction with other riffle types. Carpets employed included black ribbed rubber matting, riffled indoor/outdoor carpeting, and a type of carpeting referred to as "miners moss". Miners moss is a nickname for a type of commonly used in building entryways that looks like pressed spaghetti. The original design is 3M Nomad® but third party alternatives have recently become available. The open weave design that makes it good for trapping dirt from the bottom of shoes also makes it an excellent gold trapping carpet. Hookah Diving Air System An optional component on most suction dredges is an air compressor which is operated off the same motor as the pump via a belt and pulley arrangement. The air compressor is a special breathing air compressor than can deliver air to a diver underwater for as long as the motor is running. The air is delivered to the diver with an airline, reserve tank, and regulator. Surface air supply dive systems are commonly referred to as hookah diving systems. Dredges are normally sold as complete units but most component parts can be obtained separately as replacement parts or to build a custom dredge out of parts. ~ Steve Herschbach Copyright © 2012 Herschbach Enterprises
 -
In celebration of Father’s Day, we (Minelab) have a great competition for all the wonderful Dads out there! To support our Minelab fathers, we want to hear about your family experiences detecting. You could win a USD $500 Minelab voucher and backpack filled with Minelab accessories! Enter here: https://www.minelab.com/father-s-day-competition-2018 This competition will run from June 12th to June 26th. Terms and conditions apply.

-
Great post, can't add anything to that - my thoughts exactly! About User Profile Button
-
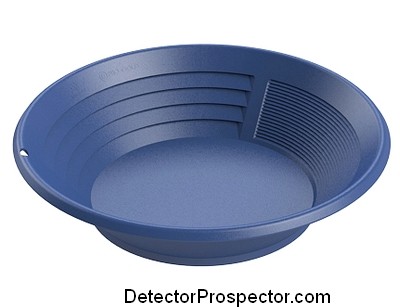 The gold pan is the basic miner's tool. They are used for prospecting and testing of deposits for heavy minerals. The final cleanup of most sluicing and dredging operations is done with a gold pan. For some, gold panning is a mining method in itself. To find gold, a beginner needs nothing more than a gold pan and some basic tools. While many associate steel pans with gold mining, steel pans today are mostly sold to the arts and crafts market and as souvenirs. Plastic pans are molded with riffles that aid panning and are colored to help show the gold. Green is considered the best color as it not only shows gold well but also the blacks sands that one is attempting to separate from the gold. Some pans feature a recessed bottom referred to as a "drop center". This creates a catch trap around the bottom of the pan to hold the gold. Some panners prefer this design while others feel it also holds undesired material so both styles are popular. Plastic pans can be molded with "cheater riffles" that make it easier to pan and still not lose the gold. A 14" gold pan is about the right size for most adults, while most children would probably be better served with a 10" gold pan. The ''standard'' steel gold pan of old was 16'' wide at the top, 10'' wide at the bottom, and 2.5'' deep. When full, and level with the top (a ''struck pan''), it would hold about 336 cubic inches, or 0.0072 cubic yard. In theory, this means that 140 pans equal a yard of material. In reality, packed gravels ''swell'' when removed from the ground. A swell of 20 to 25 percent is average. It can therefore take from 150 to 200 pans to process a yard of material. The figure used most often is 180 pans per yard. Assuming about ten pans per hour, a good panner should be able to pan about a half-yard a day. A very proficient panner working easy material may be able to pan up to a yard a day. Needless to say this would be back-breaking work! In good hands, the pan is one of the most efficient gold recovery devices available. In fact, panning samples that show substantial amounts of extremely fine float gold has misled many a miner. This is gold so small that although it can be recovered with a gold pan, it will wash out of most simple sluice boxes and gold dredges. Anyone wishing to mine for gold needs to become proficient with a gold pan. It is an invaluable tool for testing, and for the cleanup of larger scale equipment, such as sluice boxes. There is some skill involved in gold panning, however, and the big mistake most people make is in not learning how to pan before going out for the first time. Gold pans old and new - classic 16" steel pan (rusted) and square riffled plastic LeTrap pan Find a tub large enough to move the pan around inside the tub. Obtain a few flakes of gold, or lacking gold, use small flattened lead shot. The gold or lead flakes should be about 1/16" in diameter or smaller. Fill the tub with water, and fill the pan level to about 1" short of the top with sand, gravel, and small rocks. Some actual stream gravels are best. Carefully count out a number of lead or gold pieces and push them into the material in the pan. This is the key thing about this process. It is necessary to start with a known number of pieces in order to gauge how well the panning process is going. Ten flakes is a good number to use. There are lots of ways to pan, but all that is important is getting rid of that sand and gravel while keeping those sample pieces. Submerge the pan just below the surface of the water, and allow the water to soak into the material. It may be necessary to stir the material up somewhat to wet all the material in to pan. Pick out any larger rocks at this time. Then shake the pan vigorously side to side and front to rear, all the while keeping it just under the water and basically level. The goal is to get all the material in the pan moving vigorously and very soupy. The gold or lead is much heavier than an equal size piece of sand, and so with all the material moving around the test samples will quickly sink to the bottom of the pan. The next step involves taking the pan of material and tilting it forward, away from the panner, and scooping some water up out of the tub. The goal is to try and make a wave similar to that seen on a beach. Scoop the pan into the water and then lift the pan while tossing the water away. The water should ride up the tilted pan, and then as the water flows back out of the pan it will carry some material out with it. Getting comfortable while panning can be challenging! The secret is in keeping the material in the bottom of the pan stationary and letting the water wash off the top layer in the pan. Do not dump the material out of the pan; wash it out of the pan. Three or four of these washing actions take place. Then the pan goes back to the level/submerged position for another round of vigorous shaking. Then back up, tilt forward, and scoop/wash the material. And that is it, over and over, until only a few spoonfuls of material remain in the pan. Watch the material carefully while washing for a glint of gold or lead. If a piece is seen, stop and shake it back down into the bottom of the pan. If the pieces are seen often, it means the shaking action has not been vigorous enough to sink the samples to the bottom of the pan. More care must be used when washing as the last bit of material remains in the pan. One wrong scoop and everything in the pan will go in the tub! When only a spoonful of material remains, swirling the material around in the bottom of the pan with a small amount of water will reveal the pieces of gold (or lead). A very handy tool at this point is the snuffer bottle. The snuffer bottle is a plastic squeeze bottle with a tube inserted into in such a fashion that small items can be sucked into the bottle but cannot escape. This makes it easy to spot your samples, and then suck them up while getting as little sand as possible. When all the pieces have been captured, dump material still in the pan into the tub. Then take the cap off the snuffer bottle and dump out the captured pieces back into the pan. It should now be very easy to separate the test samples from the tiny amount of sand remaining. Now count them! All the original test pieces should be captured. If not, rinse everything out of the tub into the pan and start all over. The first goal is to get to where the test pieces are reliably recovered every time. When that point is reached, the next goal is to try and pan faster, to speed up the process. Beginning panners take incredible amounts of time on a single pan when they are learning, sometimes 15-20 minutes or more. But with practice it should take no more than a few minutes to work a pan of material. Gold panning championships are measured in seconds, not minutes. If this kind of practice does not take place before going out to do some actual gold panning, the chances for any kind of success are very minimal. The new prospector will have no idea if there was gold in the material they have chosen to pan. When nothing is found, they will have no idea if it is because of poor panning technique or just because there was no gold to start with. It is very important to have confidence so that when a particular spot is sampled with a pan a few times and nothing is found, the decision is then made to try panning somewhere else. Video - Basic Panning Equipment & Panning Techniques One item that can really help the panning process is a screen. Screens are used to remove rocks from material before panning, aiding considerably in the panning process. Screens are designed to fit into or over the pan. Choose a screen size that will eliminate most material while not being so small that gold will not pass through the screen. A screen with a 1/2" hole size is safe for most locations. If all you anticipate is small gold, a 1/4" hole size will eliminate more worthless material quickly. Consider carefully before using a screen any smaller than 1/4". It is good practice to thoroughly wash material through the screen with vigorous shaking, then to quickly flip the screen over and dump it out where you can take a quick look at the discarded material, in case a large nugget has been accidently screened out. The last thing you want to do is toss the screened material out into deep water, and see what you think is a large nugget flying out with the rocks! Other items handy for gold panning are rubber gloves for protection from cold water, rubber boots, a small shovel or large scoop, a small pry bar and of course a snuffer bottle. And a bottle to put the gold in. Do not use glass, as it can be too easily dropped and broken. Next is the question of where to go gold panning. Always attempt to go where gold has already been found, as stumbling on an unknown gold deposit is not likely to happen. Be sure that the area is open to the public, or that permission is obtained from whoever has jurisdiction over the property. For most visitors with limited time it will be best to stick with known public sites. For a list of panning sites in Alaska visit ourPublic Mining Sites page. When panning, it usually will make more sense to spend extra time and effort filling the pan with quality material. For example, splitting bedrock crevices and cleaning them thoroughly can take some time, but the material produced will usually have a better chance of producing a good showing of gold than simply filling the pan with a couple shovels full of bank material. Panning can produce substantial amounts of gold, but the material must be chosen carefully for good results. Good Luck and Good Panning! ~ Steve Herschbach Copyright © 2009 Herschbach Enterprises
 -
New 61 Khz Makro Gold Kruzer
Steve Herschbach replied to Steve Herschbach's topic in Nokta / Makro Metal Detectors
Well, June it is, with the Makro Gold Kruzer now available from at least some U.S. dealers. -
Now that's what I call recovery with style - good on you Skate!!
-
Can’t Access Advanced Tone Break Functions
Steve Herschbach replied to JohnD's topic in Minelab Equinox Forum
Yeah, but on the flip side for many people $250 is not that much to end up not having regrets over something missed or left out. And for people like me who sold a CTX with full accessory coil complement once I got the 800 - well, lots of people are putting cash IN their pocket because they bought an Equinox, not the other way around. I could literally buy two Equinox 800 detectors and still be over $1000 ahead of where I was with the CTX plus 17" coil, 6" coil, 5" x 10" coil, spare lower rod, and underwater headphones. Even with buying discount brand new that's over $3000 worth of detecting gear. Equinox 800 at $899 = cheap date by comparison, even with a full complement of accessory items. Tones like hand grips and rod designs are personal preferences with no right or wrong answers. -
Can’t Access Advanced Tone Break Functions
Steve Herschbach replied to JohnD's topic in Minelab Equinox Forum
It’s funny you mention that Chase. I am the first to tout that in 5 tone mode a person with an 800 can vary all the tones, break points, and tone volumes. Yet in reality I almost always use 50 tone mode where these options are not available. Outside of gold prospecting a 600 will do almost every single thing I have been doing equally well as the 800. I have to admit that is partly out of laziness. I like doing full factory resets regularly and so prefer my setups to be simple. I could create some whiz bang custom 5 tone setup, but it would get wiped on a full reset, and have to be entered all over. I find it easier to just go to 50 tones and get with it, and ultimately I am convinced 50 tones is better for me anyway. To reiterate, if you use 50 tones, half the advanced functions are not accessible even on the 800. I also almost never use the manual Noise Cancel, User Profile, or even mess with the Iron Bias. I don’t use the WM 08 module either. It really just comes down to Gold Mode, and outside of that a 600 really would do me just as well as an 800. -
Can’t Access Advanced Tone Break Functions
Steve Herschbach replied to JohnD's topic in Minelab Equinox Forum
What the other guys said. The 600 does not have many of the “Advanced Functions”. Here is a quickie guide to the differences. Items circled in red are “800 only”. And more details here.