
Search the Community
Showing results for 'Lexan'.
-
CTX 3030 on gold nuggets Hi guys I have had the CTX since it was released. However I did not purchase it for the same reasons as most others bought it for, I bought it primarily to look for larger gold in areas that have a high trash density where non discriminating detectors like the GPX will drive you nuts digging junk. It has the best discrimination and target separation of any detector I have used this far, particularly if the trash is iron. That is why I use it for this job if the trash density is low I just swap back to a gold detector and would never waist my time using it in low trash areas for gold nuggets. To give you an idea of what I am talking about with trash density’s and to establish an understanding I will break them into 4 groups. 1- Very low trash= up to 10 targets in a 5mx5m area. This area I would use a gold detector like the GPX in. 2- Low trash 10 to 25 targets in a 5mx5m area. This area I would still use the gold detector in if it is worthwhile. But if the gold density is low I will start to use the discriminating detector. 3- Med trash= 25 to 50 targets in a 5mx5m area. I am definitely reaching for the discriminating detector now unless there is a high gold density. 4- High trash 50+ targets in a 5mx5m area. Discriminating detector only! any other is a waist of time. Ok now that I have established a base line of trash density’s we can get to the nitty gritty, I will go through the settings that have an effect on gold field performance one by one and explain how I use them, or play them against each other to squeeze the best performance out of the CTX that I can for my given situation. Target trace; I turned it on and would never turn it off as it is very useful in helping to identify a target or multiple targets under the coil and I am yet to find a reason to turn it back off. Why this key feature was not on by default is anyone’s guess. Target trace pinpoint; I turned this on and never turned it off ether, as it greatly assists in pinpointing particularly if there are multiple targets under the coil, by using this feature you can pinpoint only the desired target most times. Threshold Pitch; I run it at 13 but everybody is different all you are after is a threshold pitch that is comfortable for you to listen to all day. Threshold level; set up threshold so that it is soft but clearly audible, the manual covers this in detail. Volume Gain; now this is a important one, I mostly just have it at max=30 but if you are getting spurious noises like those faint blipping noises that you can sometimes get in mineralized ground you can wind this back to cancel them out with less loss of depth than turning back the sensitivity, however it has its limitations in this regard. It is basically an audio amplifier that amplifies the target signal. Sensitivity; Obviously you want to keep this as high as possible, but in the gold fields the ground usually contains various minerals and because the CTX is a multiple frequency detector ‘Auto’ sensitivity is more effective in these conditions, because the processor individually adjusts each of them to their optimum setting. Where as in manual you can only adjust them all to the same setting which means that if one is effected by mineralization or emi and becomes noisy, you have to turn them all down to the level where the noise stops in that frequency and you are effectively choking the rest to quieten the detector. So this is why Auto is the best option on the CTX in gold field areas. I can usually run Auto +3 but I turn it down if I am getting a lot of spurious ground noise and I can’t use any of my other tricks to get rid of the noise. Response; My favored response is ‘Long’ but I also like ‘Normal’ as well. It depends on my anticipated target size and trash density as to which one I’ll use. In a medium to high trash area I prefer Long particularly if the gold size is 3g+ like in tailings oversize piles. I like normal for smaller gold and lower trash density. Recovery Fast; I nearly always have this on as it aids in target separation. And superior target separation is one of my main reasons for using the CTX Recovery Deep; I have this on if the trash density is low or medium particularly when using the smaller coils. Recovery deep improves the ID on deep targets and can improve the signal on deep targets marginally but it can cause spurious noise in some mineralized ground. So if it’s on and you are getting spurious noise recovery deep could be the cause so try turning it off before dropping the volume gain or sensitivity. Target Separation; The 2 best target separation modes for gold nuggets are ‘High Trash’ and ‘Ground Coin’, I use High Trash the most as most areas I target most with the CTX are med to high trash areas and High Trash is good at handling mineralization and still gives you very good target separation. In a area with low trash density that is mineralized I use Ground Coin but it dose not perform well in high a trash density as you will get some blending of targets. In a low to very low mineralization area ‘Ferrous Coin’ performs very good no matter the trash density, but is no good in mineralized areas as you will get blending of the ground and target, which makes the target ID go crazy and blending is a problem. Gold Hunting Discrimination and Audio Patterns. Below I have posted a few example modes that have a good base discrimination pattern and audio pattern to suit the situation that I use them in. 100’s of hours of work went into building each of them. When building your own pattern I recommend that you do what I did which is scan as many nuggets as you can get your hands on of various sizes. When I did this I scanned just over 1000 nuggets ranging from .2g to 32oz and I put the ones that show on the edge of my pattern aside and took them to a few locations and buried them in different mineralization to test and modify my mode’s, then I got my bucket of junk and scanned 1000’s of pieces of junk commonly found in the gold fields. Then I modified my modes again to cancel out most of the junk whilst still keeping most of the nugget area open. They are not perfect by any means but they have been pretty useful for me as a base but if I keep getting one type of junk in a specific area I will modify the discrimination to deal with it and save it as a new mode in my file. You might also notice that in all of my gold specific discrimination patterns that I have the top two lines rejected, this is because in mineralized ground the ground will give you a blipping signal always in these top two lines and rather than sacrificing performance by turning the sensitivity or audio settings down I dealt with this by blanking it out, buy doing it how I did I lost no depth due to having to back off the settings and no good target ever ID’s only in these lines. The audio patterns that are part of the mode also have a few tweaks that I have done for gold nugget specific reasons. If you look at the Audio profile in the exchange software you will notice that I have set the low Ferrous tone line very low down at the 32 ferrous line, I did this because I found that when using the discrimination pattern if the tone was set higher up at say 17 for example I would get some audio blanking or mixing on some good targets in very trashy areas. This is the main reason that most of my Gold nugget modes have ether a ‘2 Ferrous Tone’ or ‘Combined’ ‘Tone ID Profile’. But when set low at 32 ferrous line the separation was very good in a cluttered area. It is not that noticeable on larger 3g+ nuggets but on the smaller ones even on the smaller coils (6in and coiltek elliptical) if I had the ferrous audio line higher it would not separate the nugget from the trash as efficiently. That is why I mostly prefer the discrimination pattern over the open screen also. http://www.detectorprospector.com/forum/files/file/4-gold-hound-ctx-gold-modes/ Coils My preferred coil for the CTX is the standard 11in coil because I mostly chase the bigger gold in the tailings oversize piles and old diggers camps. But in areas with predominantly smaller gold I put on the coiltek 11x5. I also did away with the skid plate on the ML 11in coil as it wears out in a matter of hours in gold field situations and I silicon-ed a piece of 3mm lexan plastic in its place. And after 2 years of heavy use it is still in good condition!
-

New To This Forum From South Carolina
Steve Herschbach replied to Michaeldoc2u's topic in Meet & Greet
Coil covers? Make your own. Or shop eBay etc but since they don’t make them anymore eventually it’s going to be something people have to make. And welcome to the forum! Posts that mention Lexan -
That’s insane. I thought Minelab covers at $50 were overpriced. Good they are available again, but I’d make one before I’d pay that. I can buy a sheet of Lexan for less than $10. That and a little glue, and good to go.
-
"I’ve always wondered why polycarbonate plastic (LEXAN) has not been used in an instance such as this? That stuffs tough !!!" The Eqx coil is moulded from a Polycarbonate ( PC ) & ABS blend. My hunch is they used an inappropriate blend - too much PC , or not enough PC. Plastic failure is not my area of expertise, but I recall stress-cracking to be a characteristic of PC, so if anything, I would speculate using less PC in the blend would be better.
-
I’ve always wondered why polycarbonate plastic (LEXAN) has not been used in an instance such as this? That stuffs tough !!!
-
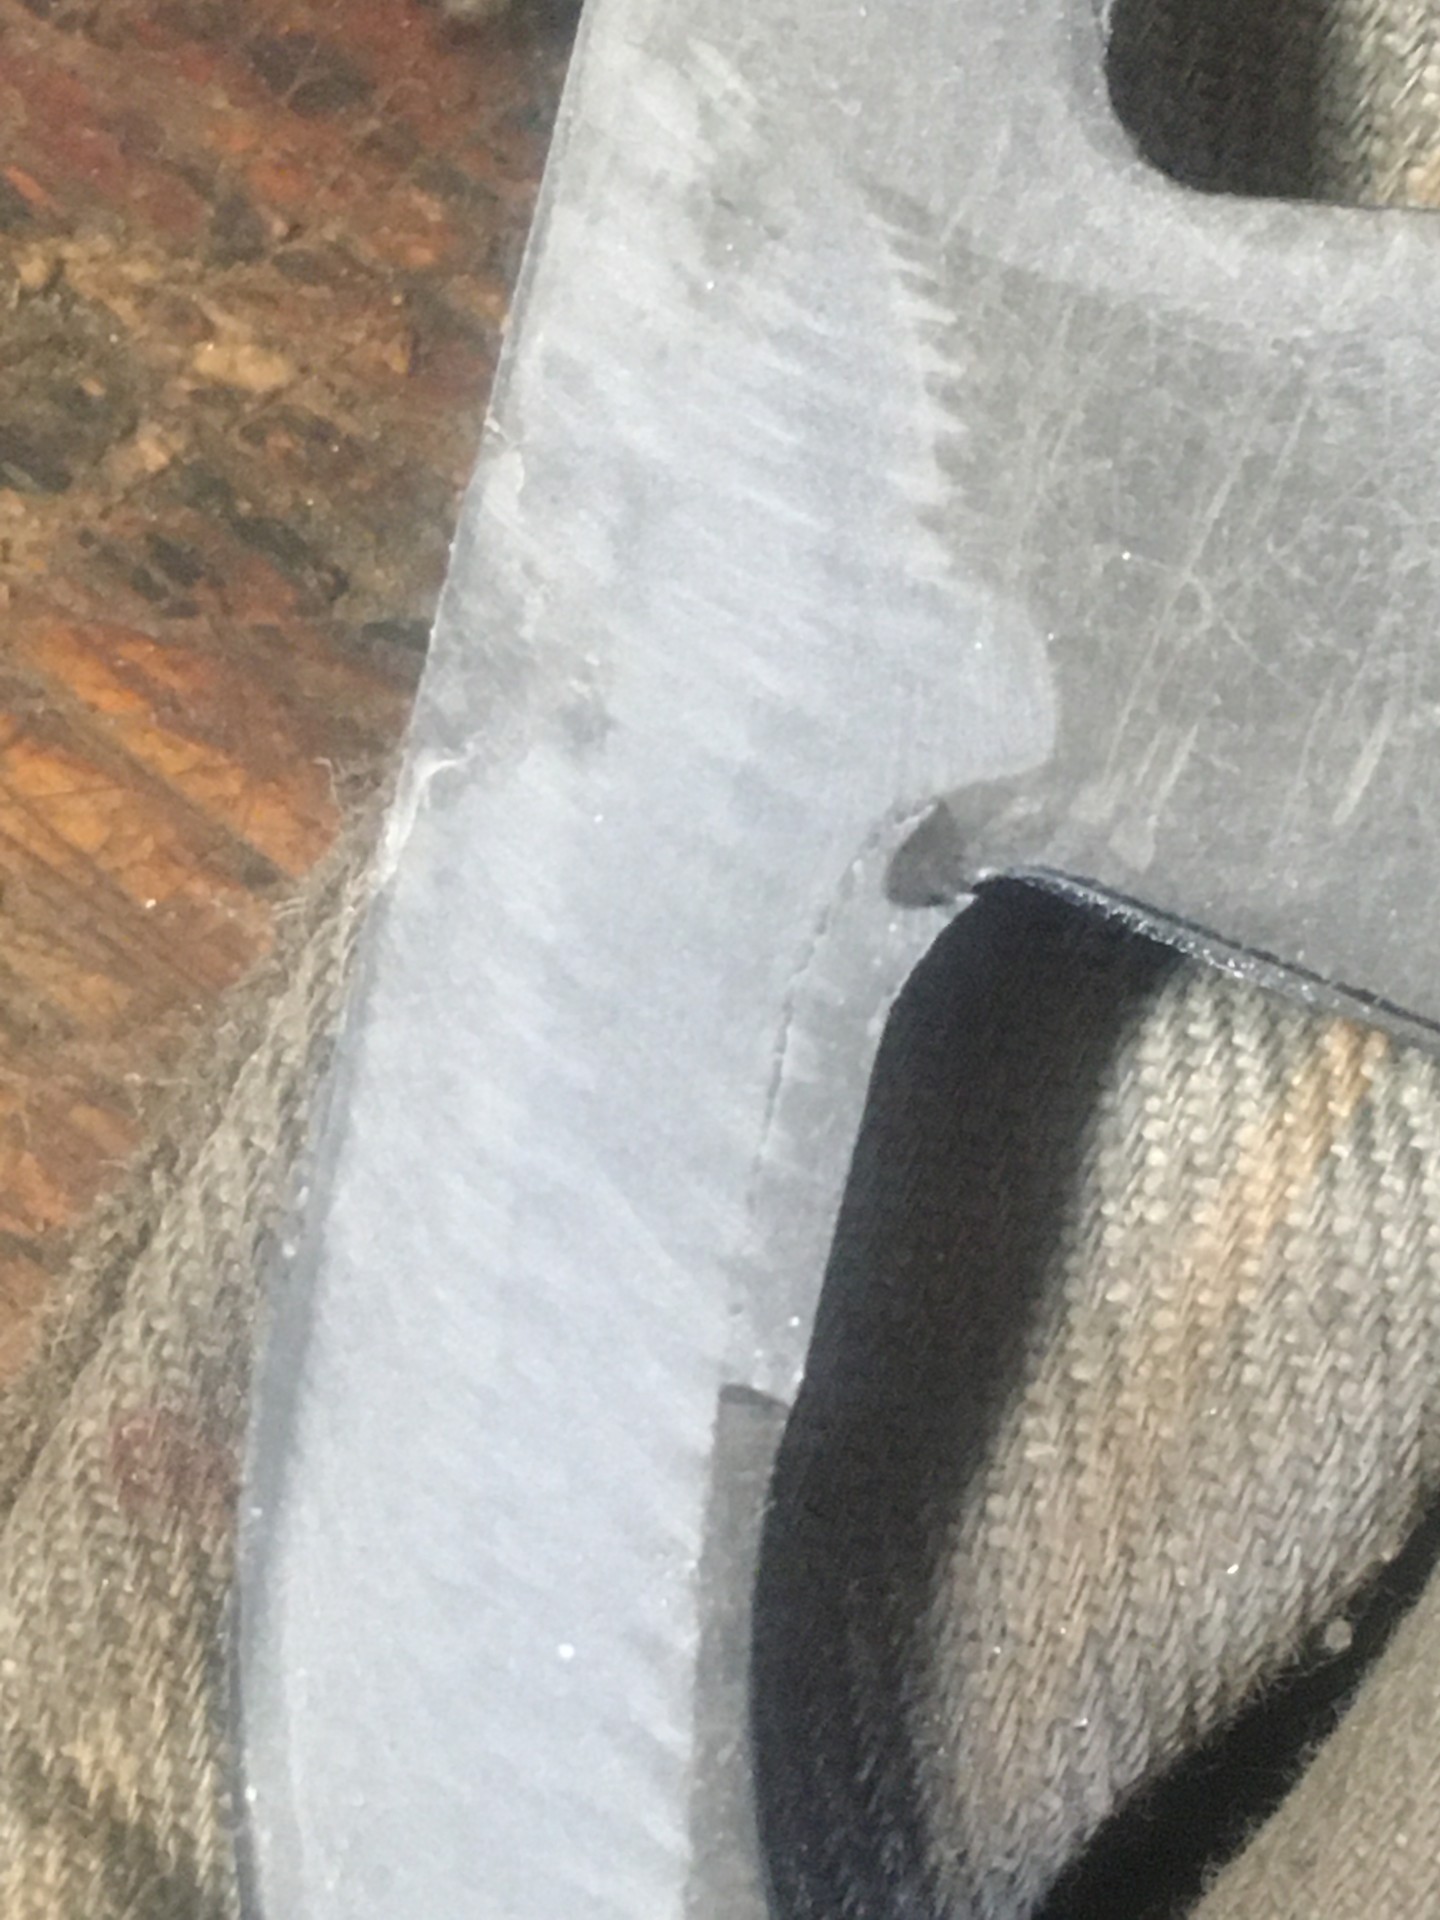
thanks for the idea Norvic, i like it. i got an 11.5 inch x 1/4 inch plexiglass disk from Etsy, sibe-rplasticssupply.com couldn't find lexan precut. i went 1/2 inch over coil size , 1/4 all around, so i could get protection on the sides of the coil. might have been less weight getting the 1/8 inch, but this should last a long time. used silicone so i can change it out later if i want to. also used 16 spring clamps to get a solid, tight fit when curing the silicone. tested it out this morning. i was purposely rough, putting the coil directly on rocky ground and plowing it forward. swinging around bumping rocks. the coil cover that came with it would have had a hole in 5 minutes and never had made it through half of what i did with this today. i did end up with 2 small chips on the edge where the acrylic is squared off. pic 1 before test. pic 2 after test. pic 3 stuff i found today.
.thumb.jpg.3dee65459f6f06f92a13ed0c9a03851b.jpg)
.thumb.jpg.fff71e9869ddb33ca834a8b13683ff8d.jpg)
.thumb.jpg.3b7ab033d81b6ee4002dee3e75c14dd7.jpg)
-
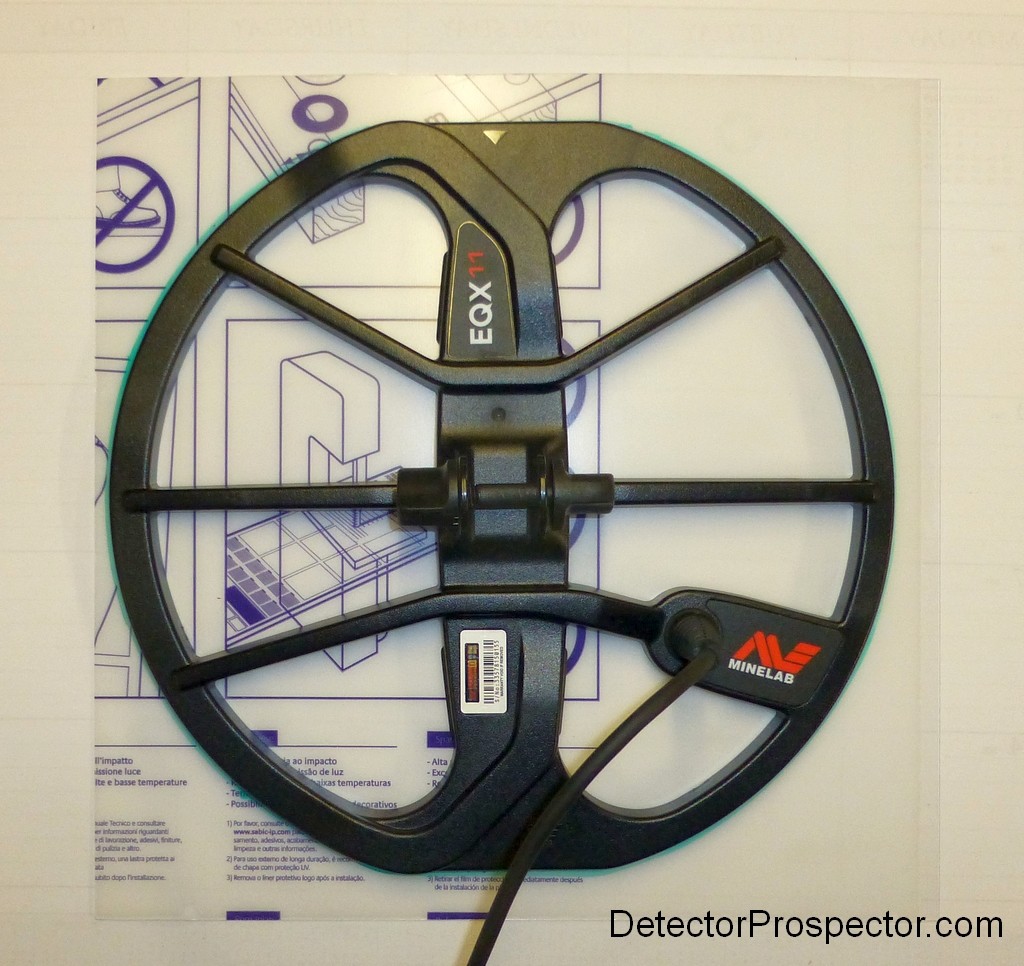
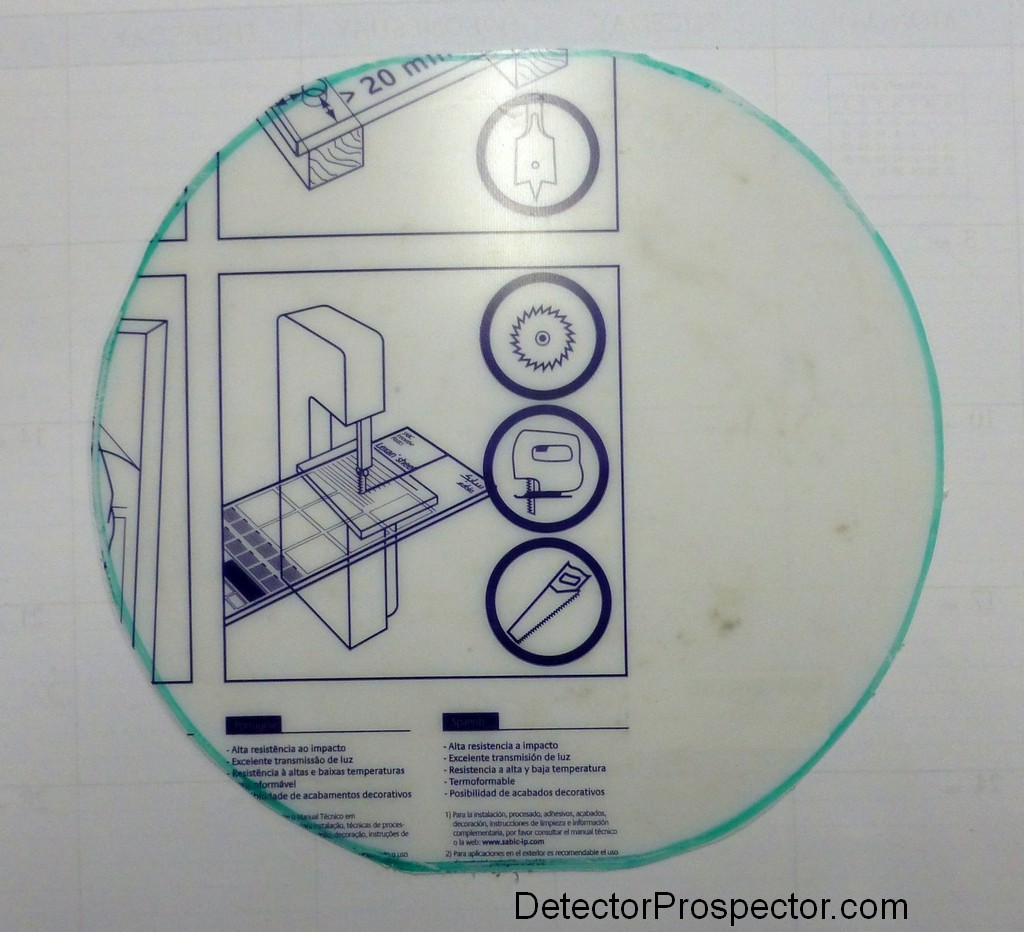
Sorry for the belated response, I throw away the stock skid plate as I use it until it wears out then I stick the 1.5mm lexan directly to the coil the 1.5mm lexan will last the life of the coil or about a year for me. By then the coil will usually go touch sensitive and be replaced. I do this on all of my coils. Just remember to make the skidplate about 5mm wider all the way around as the edges are the new wear point. You will never again wear through the base if you do this.
- 19 replies
-
- 1
-

-
- coils
- nuggetfinder
- (and 1 more)
-
I just silicone on a piece of 1.5mm lexan cut to 5mm larger than the coil size and you wont ever have to replace it. Lexan or pollycarbonate sheet is way harder wearing than any off the shelf skid plates
-

Resurrecting An Old Dredge
Sasquatch replied to Sasquatch's topic in Gold Panning, Sluicing, Dredging, Drywashing, Etc
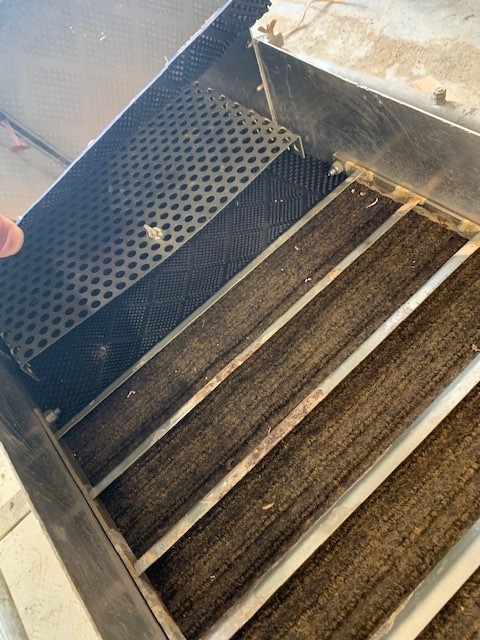
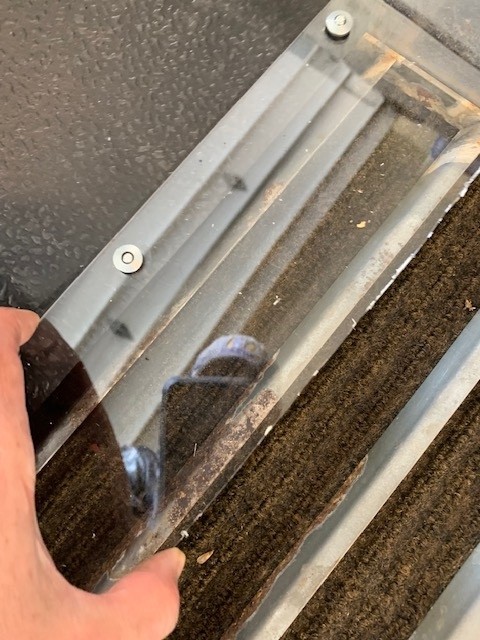
Thanks. Will get some miners moss. Got her started up and looks to be running great. Ran a small amount of rock, gravel and sand through it, and 10 flattened split shot, recovered 7 in the crash box, a couple in the first 2 riffles and one in the 4th riffle. Put some rubber mat under the crash plate, then ribbed carpet under the riffles. Added a rubber flap and tried adding a piece of lexan to the tail end. My thought is it should let me peek at the riffle action, will probably get scratched up in short order but thought it was worth a try. Planning on getting it out this week to try in the field.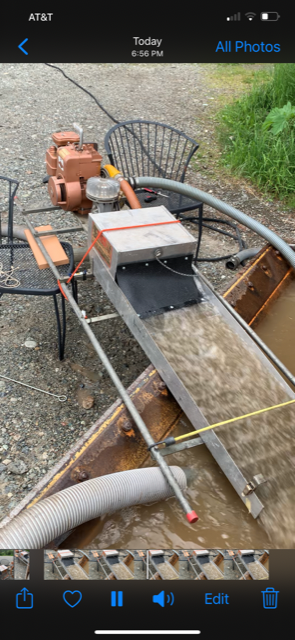
-
I use roof and gutter silicon to stick all of my coil covers on. It is there until the cover wears through. After it wears through I just peel it off and re silicone the new one on. Or I usually replace the standard cover with a pice of 1.5mm to 3mm lexan that is siliconed in place of the standard coil cover. All of my coils end up with the much tougher lexan on them after the standard coil covers wear through. Tape requies constant maintanance or crap, oftern metallic crap gets inbetween your cover and coil and can create unwanted signals or noise.
-
 I think the design is good when the clevis is left hollow. It is the material that it is made of that is the issue I think. It should not be hard plastic but should be more like Lexan or a nylon composite material. The ZPT technology may take more stress off the coil ears and apply it to the lower shaft. The traditional clevis mounts between to coil ears with rubber washers that allow a certain amount of flex laterally where as the ZPT is ridged and has no flex. JMHO. Change the material it is made of. Good luck everybody and those on the east coast, brace yourself for gas lines 😡.
 -
I never buy replacement coil covers. I make them out of 1.5mm lexan, I cut them about 5mm larger than the coil diameter to alow for wear and stick them onto the coil (cover removed) with roof and gutter clear silicone. These skid plates out last the standard covers by many many times. They usually last multiple seasons where as the standard ones I would wear out in a week in some areas!
-
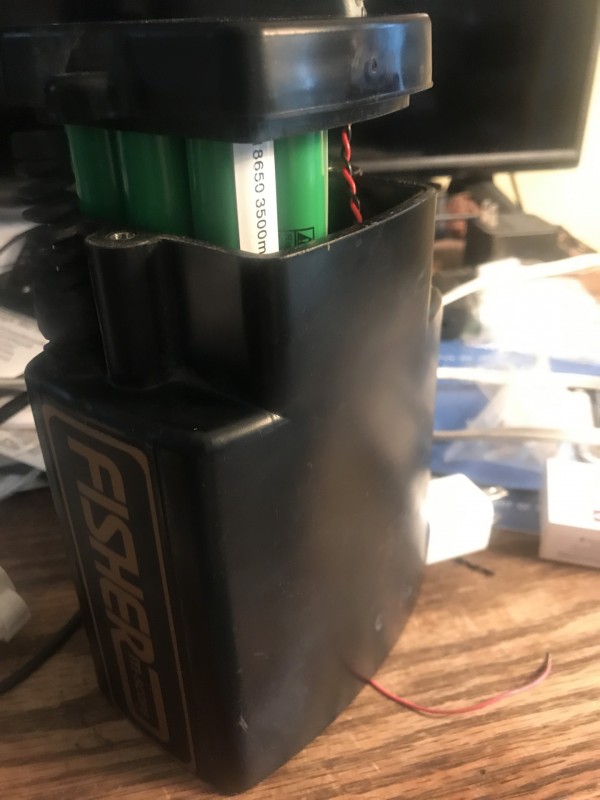
 Being a Fisher Repair center for the South East Back In Los Banos era I met and talked with some very incredible people from Jim L. President of Fisher Research Labs To a few legendary Relic hunters of that time in the south east that needed help Repairs inspiration or a pointer in the right direction...... To this day I still have my Repair manuals and updates some the best electronics ever conceived Mike asked me not to sell or give out the technology .....I have always kept my word. I would have 3D printer or a jig and router and a one inch extension of the battery lid on the 1280x or Cz casing.epoxy or use to battery gaskets......throw in 5 gallon paint pressure tank filled with water and compress tank 90 psi no leaks good to go..... get rid of the connector issue In and out of salt Batteries not included....due to shipping etc each customer would order batteries and charger from battery store online.....this set up 4S2P would give 7 amp hours copper 3m tape and foam 4 series times 2 parallel . built tuff for Navy Seal in You face plate route on lexan paint Black Spartan 300 in Red paint do you have what it takes..... add 15 and 20 micro second to or just change the last values deep salt water values Happy Trails jimpugh aKa old south east Fisher repair before da Cuda Go Long Horns Built like tank good to 100 meters
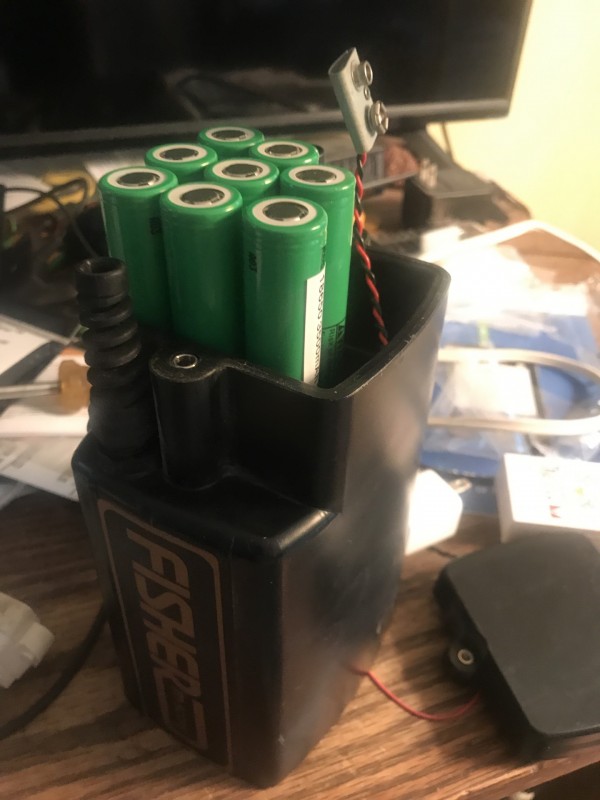
-
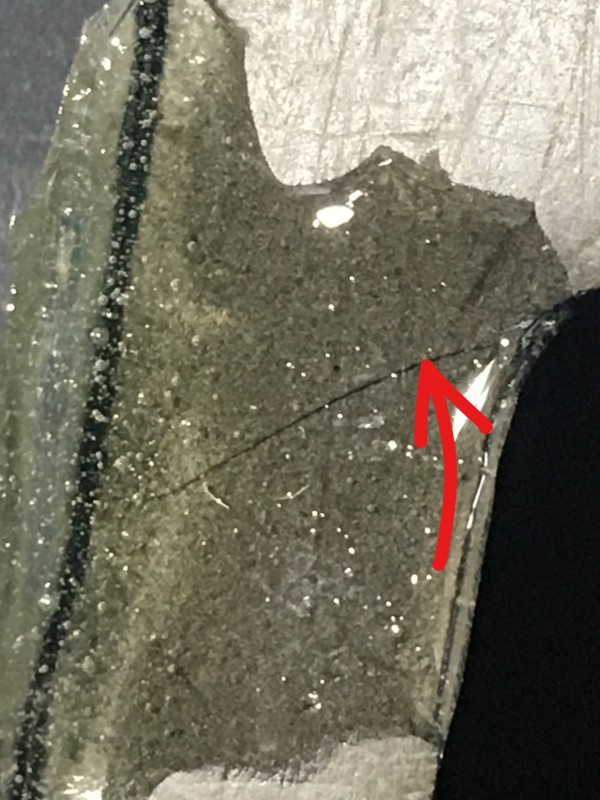
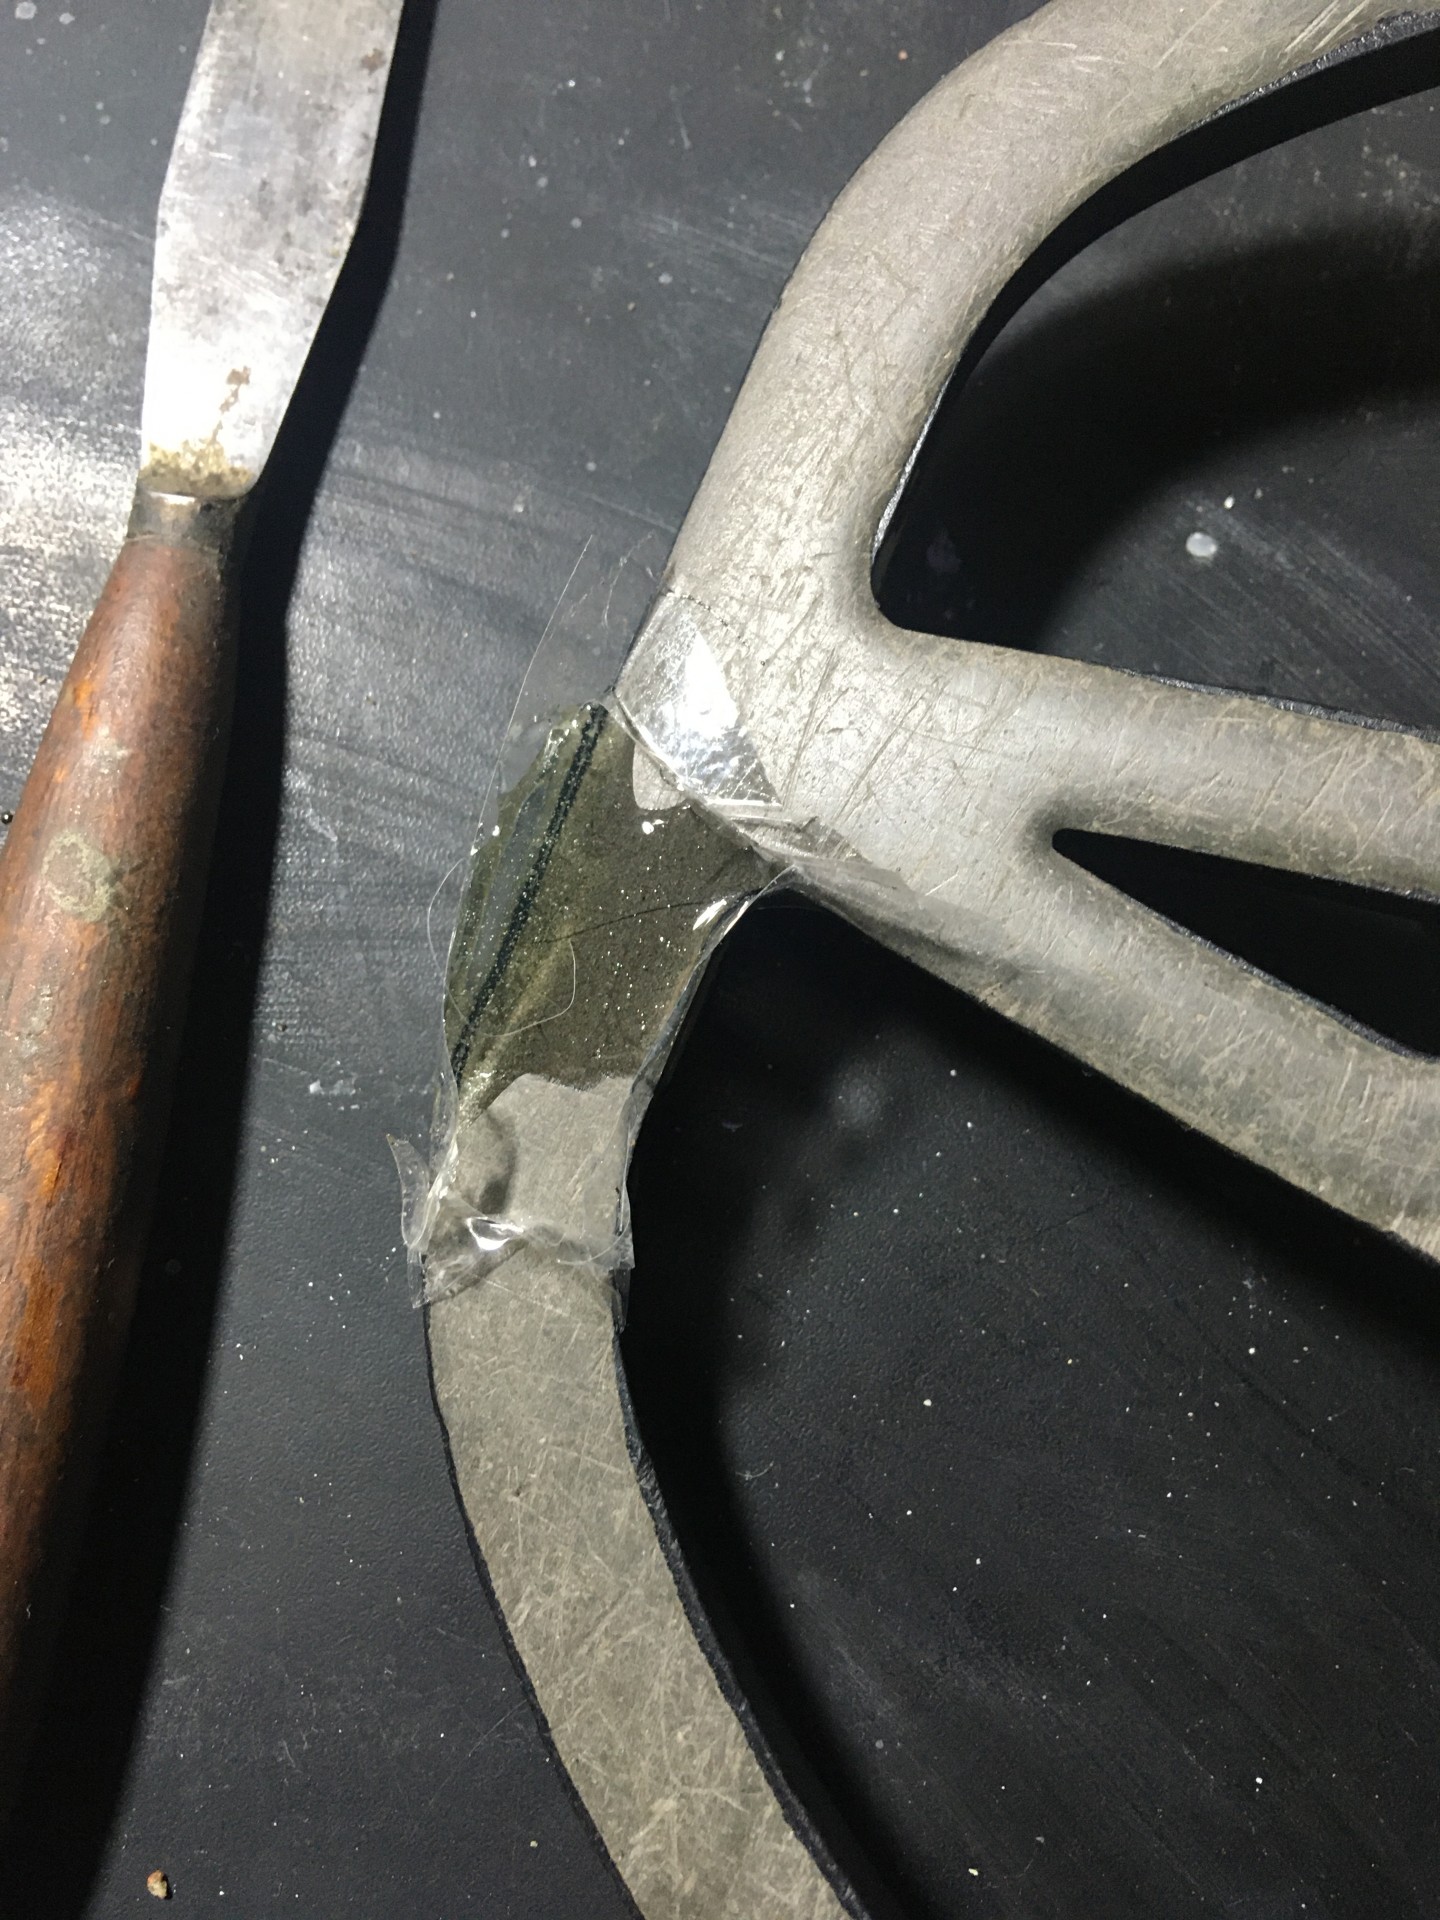
If you're going to crack the lexan then the coil would have cracked anyways. Any kind of impact like that I think would be catastrophic to a coil. Even if you don't see a clean break like I had there would be internal fractures that make it unstable. I am looking at the .040 sheets as I can heat form them and if it works out I'll make a vacuum frame.
-
I had snagged my dd coil on a log and didn't realize I had put a hairline crack in it until I had noticed it was falsing on me and every time I tapped a small branch or brush it would sound off. I had made a small vacuum degassing chamber/pressure chamber for casting resins out of a paint sprayer and luckily my coil just fit inside. First thing I did was use the vacuum chamber to draw out any moisture. Next I built a small barrier out of some tape, filled it with epoxy then used the pressure chamber at 60 psi to force the epoxy into the crack. Not perfect but the coil does gb now. I think there are internal cracks that would be impossible to fill but at least I have it as a backup until my new coil comes in. My next project I think is to give some lexan sheets a go for coil scuffs that cover the bottoms so branches don't get caught up. Friend of mine wants one for his Nox 800 so will see how that goes.

-
In theory lexan is more impact resistant than abrasion resistant. All I know is I went with lexan based on the recommendation of prospectors using it in Australia on the GPZ 7000, and they claim it holds up very well under heavy use. Mine I have not scrubbed on the rocks long enough to know for sure. I have used it mainly in deep desert grass as it glides better than the open spoke. Less about wear then getting hung up in my case. Fact is it is way cheaper than a regular scuff cover anyway so if it wears out I will just replace. In my case I have more than one stock coil so devoted a coil to this and glued the lexan directly to the coil. See my link above for details. I have not regretted it.
-
Steve probably has this answer for you, having used them before! I'm thinking the formulation of lexan is a tad softer than for a standard coil cover, but that shouldn't be an issue! And it wouldn't necessarily be in constant use; only for certain situations!👍👍
-
Coil I broke was the stock Garrett dd. Was 25F out and snagged it up on a log stepping over brush. Not a brand issue just my stupidity. How does the lexan hold up scratch wise? I plan on making a form and heat pressing the shape so it fits like a standard cover without glue. Got a few tricks up my sleeve to make them 🙂
-
Bummer about the damage but great repair job! I made a lexan skid plate for my Equinox and have been happy with it so far.
-
I put some lexan on my coil cover for the 6 and 11 inch...the 6 is fine but the 11 is too heavy. However, I expect to remedy that with a him stick and Doc's bungy....no strain at all with that combo. fred
-
We've got a thread on this somewhere and I'm sure Steve will bring it up or you can search for it but my solution is to take it off. If you don't ground your coil you will be fine. If you want to put it back on take some silicone and put all under the coil and squeeze the cover back on. If you are a guy like Lunk then you take a piece of lexan, cut it to fit and hold it on with some velcrow picture hangers and then all the dirt that wants to stay on top and under the coil will slide off each time you turn it on its side. Mitchel
-
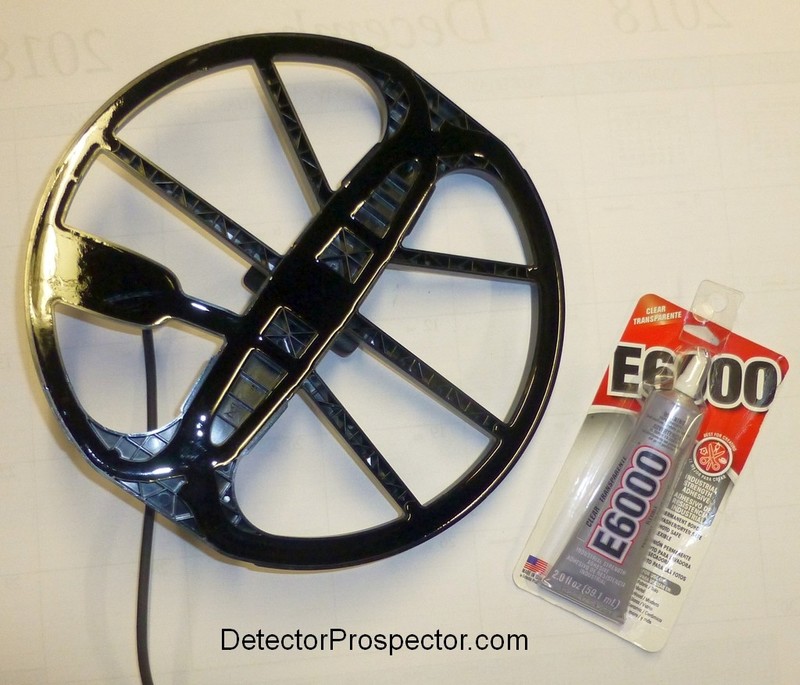
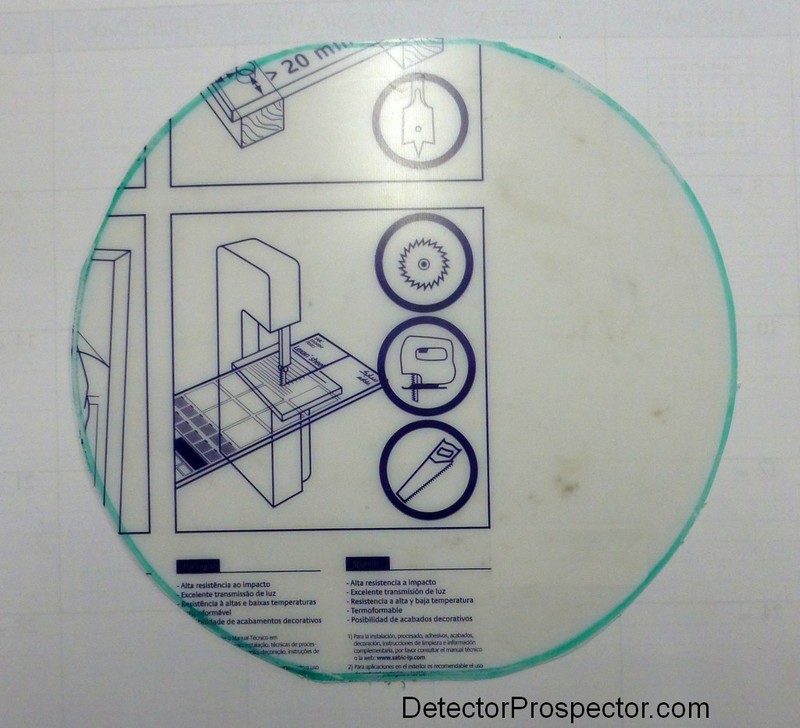
I got a second Equinox and that gave me a coil I could mess with since I now have a backup. I have not done this before and so can't vouch for this per se until I use it some more to see about longer term durability. I started with Lexan Sheet - Polycarbonate - .030" - 1/32" Thick, Clear, 12" x 12" Nominal from Amazon $6.89 delivered. I was quite tempted to use 1/16" instead but Lexan is tough so on this first go I went with the thinner 1/32" to keep the weight down. Outline with marker to create bottom cover slightly larger than coil itself - side protection for coil. Cut out with fine tooth jig saw.... I chose E6000 as a sealant / glue because I have used this in the past for bonding plastics other glues won't bond. Still, I am not sure this is the best choice, but there you go. Scuff up the smooth plastic surface (after removing protective film) then run a bead over all the coil bottom contact areas. I ran an additional bead around the little shelf created by the skip plate being about 1/8" larger around the exterior than the coil. Extra bonding plus a "bump cushion" against side blows from rocks. Here is is after a little use. Smooth running, light - but does collect debris topside. Happy I did it so far.

-
Thanks for the link Steve. That answered my question, I will be using a good grade of silicone to bond the lexan to the coil and forego using the factory coil cover. Tom
-
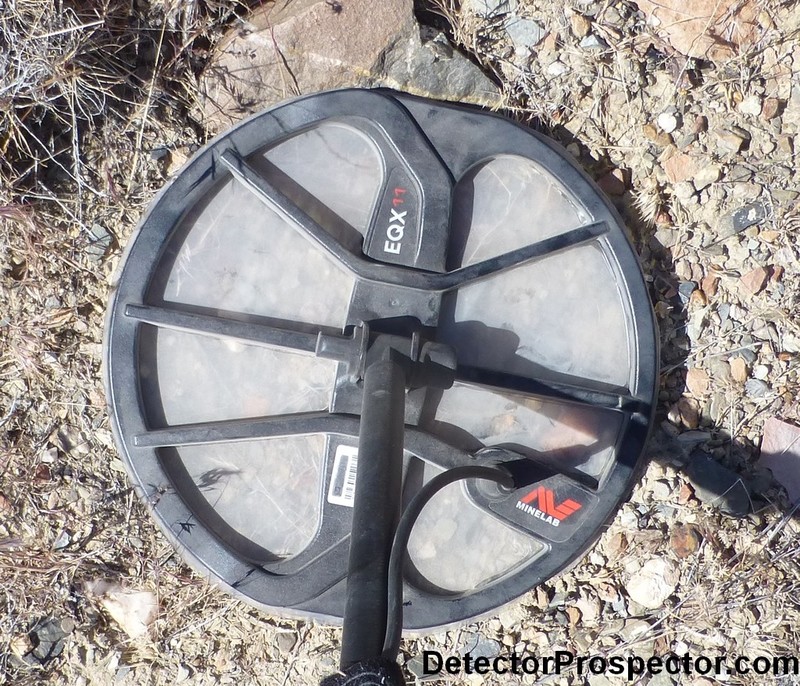
I was cleaning up my gear for the trip to OZ this year when I noticed that there was a ton of beach sand under my coil cover. Took me a while to get it all out. There are depressions in the very center of the coil that are a great place for sand to pile up in. The thick part of the coil that goes from 12 noon to 6 0clock. I think before I hit the beach with it again i will put some clear RTV caulking on it and then put the coil cover on. I also have a couple of 1'x1'x 0.0625 " pieces of Lexan coming to make 2 coil covers. I will glue them right on my coil cover like I did the 19" ZED coil. Doing this so i can scrub the ZEQ in OZ without getting hung up ! Cheers mates.....
-
Yeah, I suspect 0.625" is a typo. I`ve just done a season with 0.8mm PC (Lexan) on the Z coils and I`d reckon they`ll do another at least, light as a feather tough as nails.


.jpg.e856565e1189cfe8c37d12ef908ba802.jpg)
.jpg.7f56b91e1c092e24db69ed8d8518e25d.jpg)
.jpg.fc2f012b46a684b371c43af726e8beab.jpg)


.thumb.jpg.77e4cb5bf39d44bdd2050d2edb7dfdb1.jpg)